
Learn / DaVinci Resolveupdated for DaVinci Resolve 21.0.3 (July 2026)
DaVinci Resolve Glossary of Common Video Editing Terms (2026)
Quick answer
This DaVinci Resolve glossary defines the common video editing terms you'll actually hit inside the app: node, Power Window, conform, ACES, and more, plus general terms like B-roll, J-cut, and codec. Every definition is sourced from Blackmagic's own manual, Wikipedia, or Frame.io, current as of July 2026.
Someone in a tutorial says "add a parallel node under your Power Window before you conform to ACES" and you nod, because that's what you do when four words in one sentence are unfamiliar and the video keeps playing. As of July 2026, running DaVinci Resolve 21.0.3, that sentence is still a genuine wall for a lot of editors, not because the ideas are hard, but because nobody stopped to define the words before using them.
This page is that stop. It's a working glossary of the terms you'll actually run into inside DaVinci Resolve, split into general video editing vocabulary and the app's own specific terms, page by page, from Fusion's compositing language to Fairlight's mixing terms to the words that show up only once you reach the Deliver page. Where a term deserves more than a paragraph, this page links to our own full breakdown instead of repeating it thin.
What is a DaVinci Resolve glossary, and why isn't a general film glossary enough?
A DaVinci Resolve glossary needs to cover two different vocabularies at once: the general video editing terms every NLE shares, and the specific terms Resolve's own interface invented or renamed. Most existing glossaries only do the first half.
StudioBinder's own filmmaking glossary is thorough and well-sourced for general terms like coverage, montage, and match cut, and it's worth bookmarking for that (StudioBinder). No Film School's editor glossary covers the editorial vocabulary of the cutting room well too (No Film School). Neither one explains what a node is, what a Power Window does, or why your Timeline Frame Rate just greyed out, because neither one is written against a specific NLE's interface. That's a real gap, and it's the one this page tries to close.
A glossary that only defines general film terms misses half of what actually confuses a DaVinci Resolve editor: the app's own vocabulary. Node, Power Window, and the Mixed Frame Rate Format sense of "conform" don't show up in a generic filmmaking glossary because they're not generic. They're Resolve-specific, and you won't find them defined anywhere near as precisely as Blackmagic's own manual defines them, which is where every Resolve-specific entry on this page comes from.
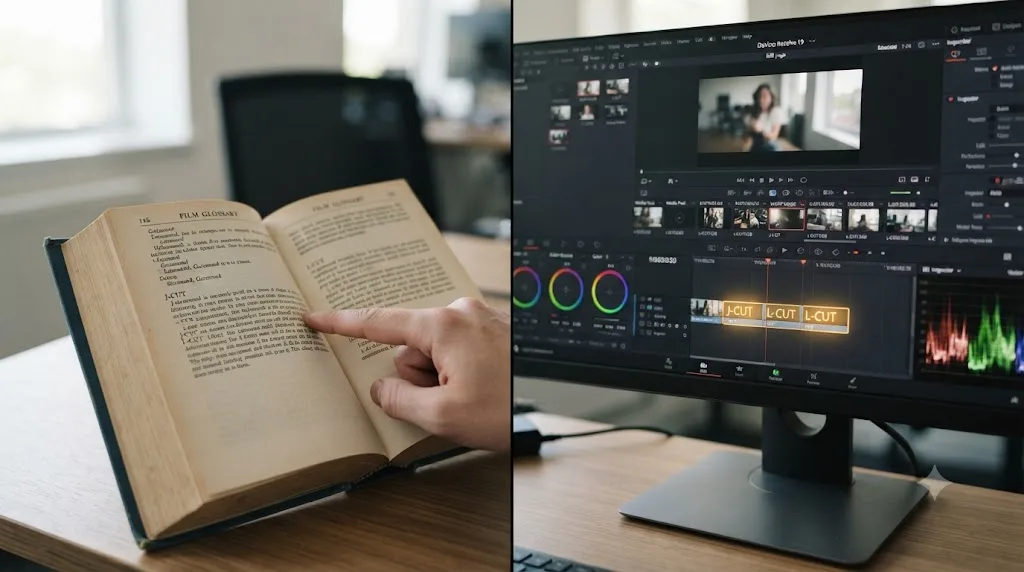
What are the general video editing terms every DaVinci Resolve editor should know?
These terms exist across every editing app, not just Resolve, and you'll hit most of them in your first week of cutting anything.
| Term | What it means |
|---|---|
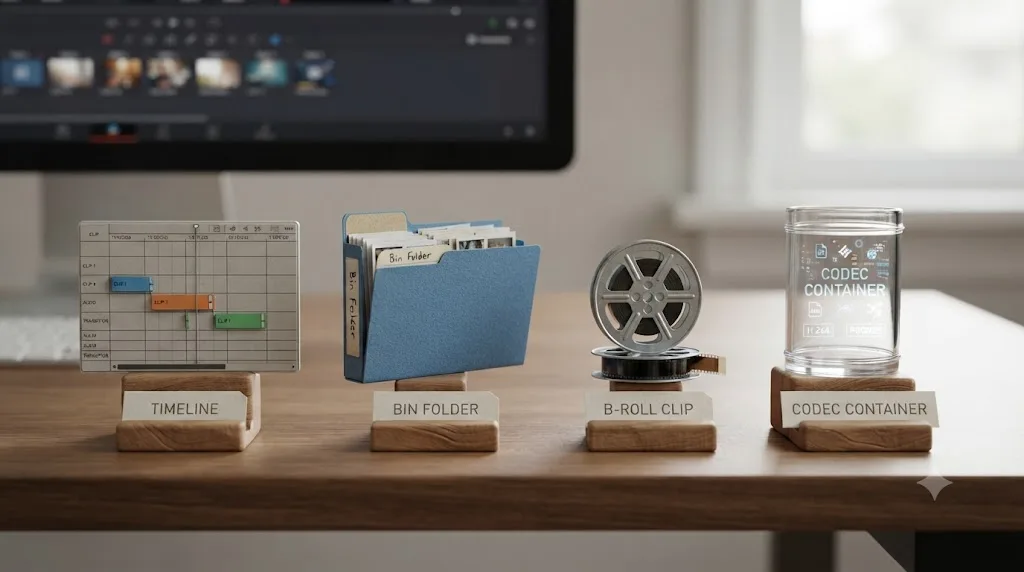
| Timeline | The horizontal sequence of clips, in order, that makes up your edit. Everything you cut lives here. |
| Media Pool / Bin | Resolve's name for the folder structure that holds your imported clips before they land on a timeline. "Bin" is the older, cross-app term; Resolve calls the top-level container the Media Pool. |
| B-roll | Supplementary footage cut over an interview or narration, used to illustrate what's being said instead of showing the person saying it. |
| Rough cut | The first full assembly of a scene, built for story and pacing, with sound and color left unresolved on purpose. |
| Fine cut | A later pass where trims land on the right frame, sound sits where it belongs, and only small polish remains before picture lock. |
| Picture lock | The point after the fine cut where the edit's structure stops changing. Everything left, color, sound mix, titles, is polish, not restructuring. |
| J-cut | The audio from the next shot starts before its picture does, so you hear what's coming before you see it. |
| L-cut | The reverse: picture from the next shot starts while the previous shot's audio keeps playing underneath it. |
| Cutaway | A shot that briefly leaves the main action to show something else, then returns, often used to cover a jump cut or bridge two takes. |
| Jump cut | A cut between two similar shots of the same subject that breaks visual continuity, creating a noticeable jolt instead of a smooth transition. |
| Insert edit vs. Overwrite edit | An insert edit pushes everything after the edit point later to make room for new material; an overwrite edit replaces whatever was already there, frame for frame, without shifting anything. |
| Match frame | Finding the exact same frame of the same source clip somewhere else it's used, so a cut, a duplicate, or an alternate take lines up frame-for-frame. |
| Multicam | Editing footage from several cameras shooting the same event simultaneously, cutting between synced angles instead of one source at a time. |
| Proxy media | A lower-resolution stand-in file that plays back faster than your camera original, swapped out for the full-resolution file later. Covered in full, alongside Resolve's own Optimized Media, later on this page. |
| Codec vs. container | A codec (H.264, ProRes, DNxHR) is the compression method; a container (.mov, .mp4, .mxf) is the file wrapper around it. The same container can hold different codecs, which is why a .mov file won't always play the same way twice. |
| Bitrate | How much data a codec uses per second of video, usually the single biggest factor in a file's size and, past a certain point, its visible quality. |
| Frame rate | How many individual frames play per second: 23.976, 24, 25, 29.97, 30, 50, or 60fps are the common ones, and mixing them on one timeline is what triggers Resolve's frame-rate conform, covered below. |
| Aspect ratio | The width-to-height shape of your frame, most commonly 16:9 for widescreen delivery, 9:16 for vertical social content, and 2.39:1 for anamorphic widescreen. |
| Timecode | A clip's internal clock, usually formatted HH:MM:SS:FF, used to identify an exact frame regardless of where that clip sits on a timeline. |
| Keyframe | A saved value for a parameter (position, opacity, a color adjustment) at a specific point in time, with Resolve interpolating the values between two keyframes automatically. |
| Chroma key / green screen | Removing a solid-color background (usually green or blue) so different footage can replace it, the technique, not the color, is what "chroma key" refers to. |
| Rotoscoping | Manually or semi-automatically tracing a shape around a subject, frame by frame, to isolate it from its background without a green screen. |
| Lower third | A graphic, usually a name and title, placed in the lower portion of the frame over video, common in interviews and news-style content. |
These terms don't need Resolve-specific knowledge to understand, but a couple of them, proxy media especially, mean something more specific once you're inside Resolve's own interface. We come back to that distinction, and to Resolve's own internally generated alternative to it, later in this glossary.
A node in DaVinci Resolve is not a filter. It's a separate, isolated processing step you can reorder, disable, or split apart from every other correction in the chain. That distinction matters enough that it gets its own section next, since it's the single most Resolve-specific term on this whole page.
What does "node" mean in DaVinci Resolve, and why does the app build grades this way?
A node is one independent correction inside a graph of connected corrections on the Color page, and DaVinci Resolve builds every grade out of them instead of a single stack of sliders.
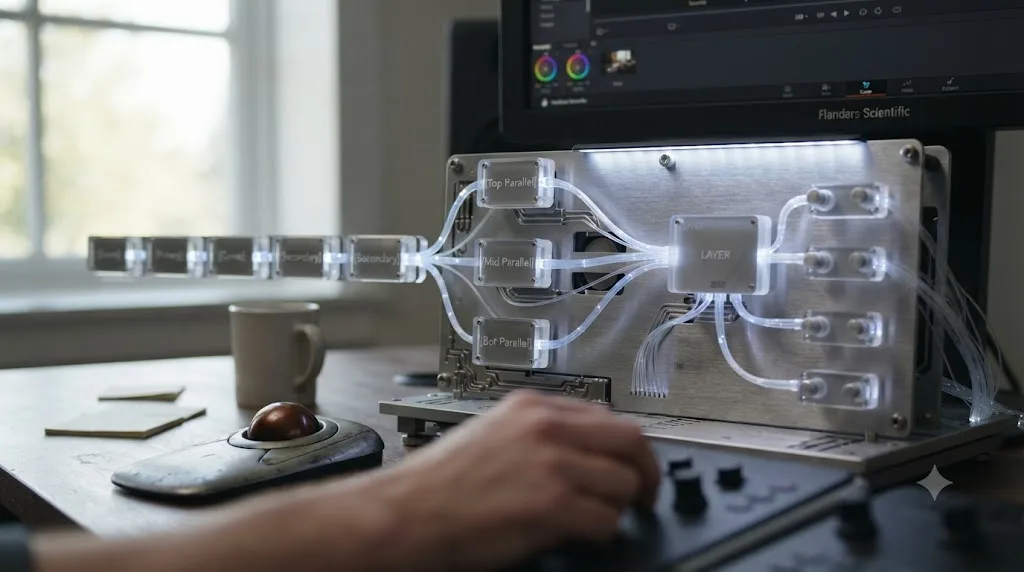
Most colorists start with serial nodes, connected one after another in a straight line, each one building on the correction before it: a base exposure fix in node one, a white balance tweak in node two, a contrast adjustment in node three. Parallel nodes branch off a common input and blend their results back together, useful when two separate corrections need to apply to the same starting image without affecting each other. Layer nodes stack corrections the way layers stack in a compositing app, giving you control over blend order that a simple serial chain doesn't offer.
| Node type | How it processes | Typical use |
|---|---|---|
| Serial | One after another, each node building on the previous node's output | Standard step-by-step correction: exposure, then color, then contrast |
| Parallel | Side by side, blending two or more corrections applied to the same input | Two separate adjustments that shouldn't interfere with each other |
| Layer | Stacked like compositing layers, with explicit control over blend order | Complex grades needing precise control over how corrections combine |
A node in DaVinci Resolve is not a filter. It's a separate, isolated processing step you can reorder, disable, or split apart from every other correction in the chain. That's the entire reason Resolve uses a node graph instead of a linear adjustment stack: you can bypass one correction, insert a new one mid-chain, or copy a single node to another clip, without touching anything else in the grade. Our own keyboard shortcuts guide for colorists covers the actual keys for adding serial and parallel nodes without reaching for the mouse.
What is a Power Window in DaVinci Resolve?
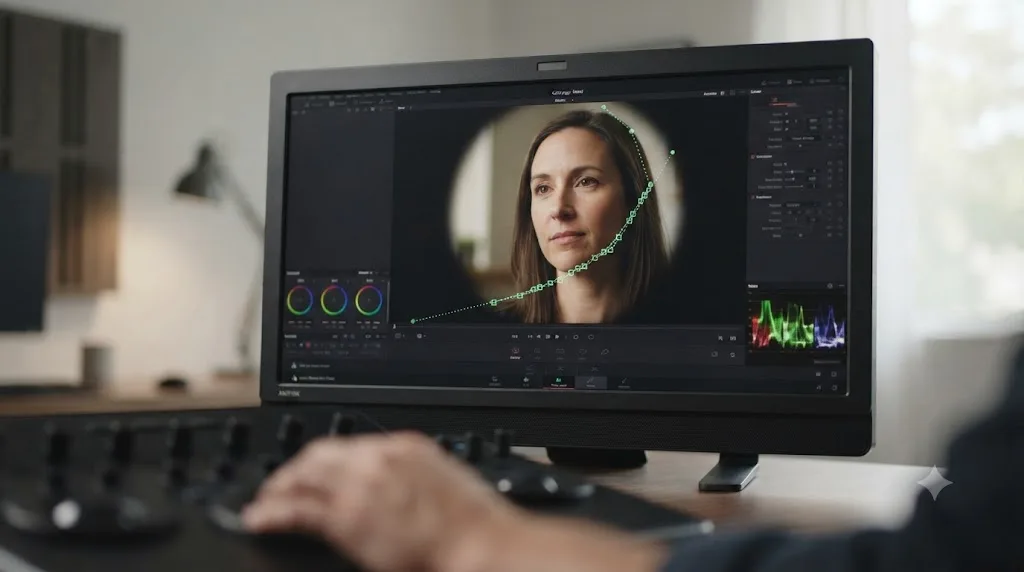
A Power Window is a shape you draw over part of the frame so a correction only applies to the pixels inside it, or outside it, instead of the whole image.
Blackmagic's own manual defines them directly: Power Windows are "another way of making secondary correction, being essentially shapes you can use to isolate regions of the image" (DaVinci Resolve Manual). Resolve offers five shapes: Linear (a rectangle), Circle (an ellipse), Polygon (custom straight edges), Curve (custom Bezier edges), and Gradient (a soft linear falloff, useful for simulating a graduated filter). Each one attaches to a node, and each one can be tracked, using Resolve's built-in 3D tracker, so the window follows a moving subject instead of staying frozen in one spot on the frame.
Power Windows don't grade color. They decide which pixels get graded. That's the distinction that trips people up the first time they see the term: the window itself does nothing to the image. It's the correction sitting on the same node, isolated to whatever the window's shape covers, that actually changes anything.
What do LUTs, primaries, secondaries, and qualifiers mean in color grading?
A primary correction changes the whole image evenly: overall exposure, white balance, the base contrast curve. A secondary correction changes only part of it, and Resolve gives you two different ways to define "part of it": by shape, with a Power Window, or by color and brightness, with a qualifier.
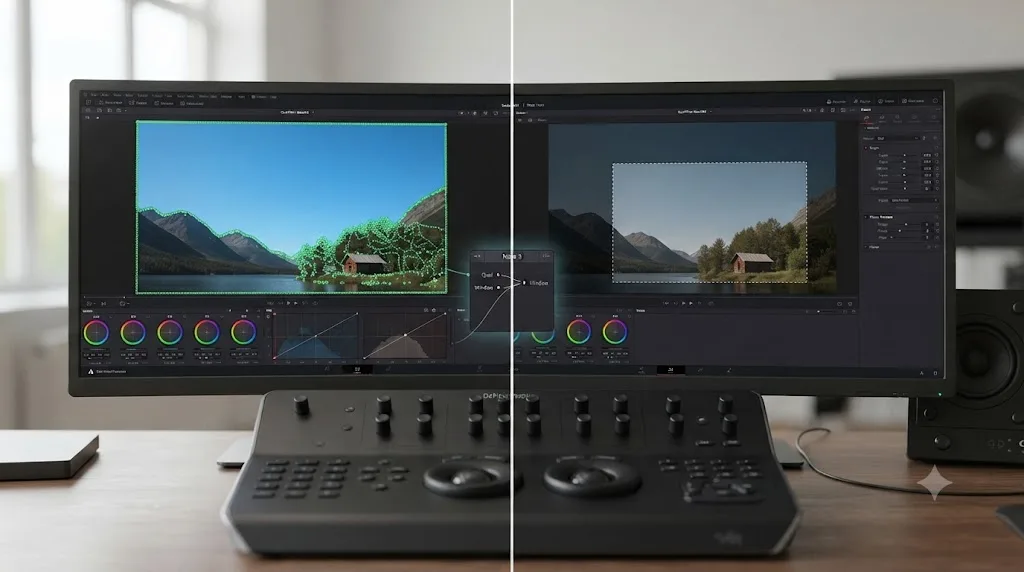
A qualifier isolates pixels by their color and brightness. A Power Window isolates pixels by their position in the frame. A qualifier, also called an HSL keyer, samples a color you click on and builds a selection out of every pixel that's close enough to that hue, saturation, and luminance value, wherever it sits in the frame. That's why you'd reach for a qualifier to select "the sky" no matter where it moves across a pan, and a Power Window to select "the left third of the frame" no matter what's in it. Most real secondary corrections on a working timeline combine both: a qualifier narrows the selection to the right color, and a window, sometimes with the qualifier feeding into it, fine-tunes exactly where that selection is allowed to apply.
LUT stands for Look-Up Table, and it comes in two shapes that behave very differently. A 1D LUT maps one input value to one output value, per channel, independently: it can brighten or darken a channel, but it can't make decisions based on how the channels relate to each other. A 3D LUT maps combinations of red, green, and blue input values to new output combinations, which means it can shift a specific color, skin tones, say, without touching every other color that happens to share one channel's value. That's why camera-to-display LUTs and most creative "look" LUTs ship as 3D LUTs, commonly a .cube file: the transform they're doing depends on how channels interact, not just each channel in isolation.
| Term | Isolates or maps by | Typical use |
|---|---|---|
| Power Window | Shape and position in the frame | Brightening a face, darkening a corner |
| Qualifier (HSL Keyer) | Color and luminance, anywhere in frame | Selecting the sky, isolating skin tones |
| 1D LUT | One channel value in, one value out | Simple exposure or gamma transforms |
| 3D LUT | Combinations of R, G, B values | Creative looks, camera-to-display transforms |
A tracker, which came up under Power Windows above, works the same way whether it's attached to a Power Window or a qualifier-driven shape: it follows a moving subject frame by frame so an isolated correction doesn't slip off the thing it's supposed to affect. If a window or qualifier keeps losing that lock partway through a shot, the fix usually isn't the correction itself, it's the tracking data underneath it; we cover the specific causes in our guide to why a Power Window keeps losing tracking.
What do DaVinci Resolve's pages (Cut, Edit, Fusion, Color, Fairlight, Deliver) actually do?
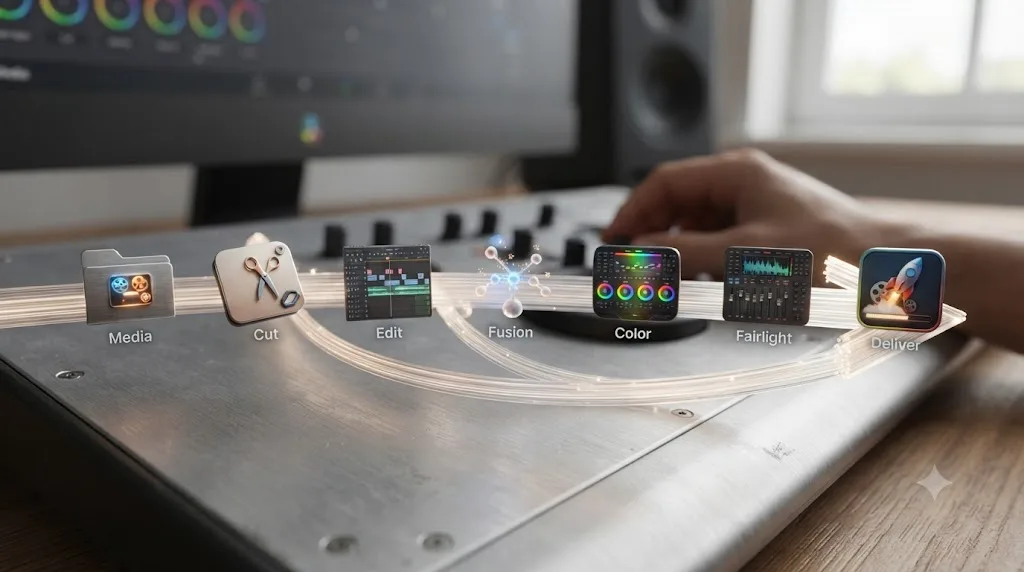
Each page is a dedicated workspace built around one stage of post-production, and Resolve numbers them left to right in the interface: Media, Cut, Edit, Fusion, Color, Fairlight, Deliver.
| Page | What it's for |
|---|---|
| Media | Import, organize, and transcode your footage before you start cutting |
| Cut | A fast, simplified editing view built for quick assemblies and social content turnaround |
| Edit | The main editing workspace, with the full timeline, transitions, and titles |
| Fusion | Node-based visual effects and compositing, inherited from the standalone Fusion app Blackmagic acquired in 2014 |
| Color | Node-based color grading, scopes, Power Windows, and the Gallery |
| Fairlight | A full digital audio workstation for mixing, EQ, and audio restoration, inherited from the Fairlight audio brand Blackmagic acquired in 2016 |
| Deliver | Rendering and exporting your finished timeline to a file, format, or destination |
Two of those pages carry names with a real history behind them, not just marketing. Fusion started life in 1987 as in-house compositing software for a Sydney post-production house, was spun off as eyeon Software, and became a standalone VFX tool with roughly 30,000 seats in use worldwide by the time Blackmagic Design announced its acquisition of eyeon Software at IBC in September 2014 (CG Channel). Fairlight traces back even further: Peter Vogel and Kim Ryrie founded Fairlight in 1975, building the Fairlight CMI, one of the earliest digital audio workstations with a built-in sampler. Blackmagic Design acquired Fairlight's professional audio technology in September 2016 and folded it into DaVinci Resolve as a full page starting with version 14 (AudioTechnology).
Inside the Color page specifically, two more terms come up constantly: the Gallery stores stills, frozen reference frames you grab from the viewer that carry the entire node tree of the grade that produced them, so you can compare grades side by side or apply one clip's look to another, and scopes (waveform, vectorscope, histogram, and parade) are the objective, numeric readouts of your image's brightness and color that every professional colorist checks instead of trusting a monitor that might be miscalibrated.
Fusion and Fairlight each brought a vocabulary Blackmagic didn't invent, and the next two sections walk through the terms specific to each page.
What do Fusion-specific terms like Merge node, mask, and planar tracker mean?
Fusion runs on the same node-graph idea as the Color page, but the nodes do a completely different job: instead of chaining color corrections, they chain layers, masks, and transforms to build a composite.
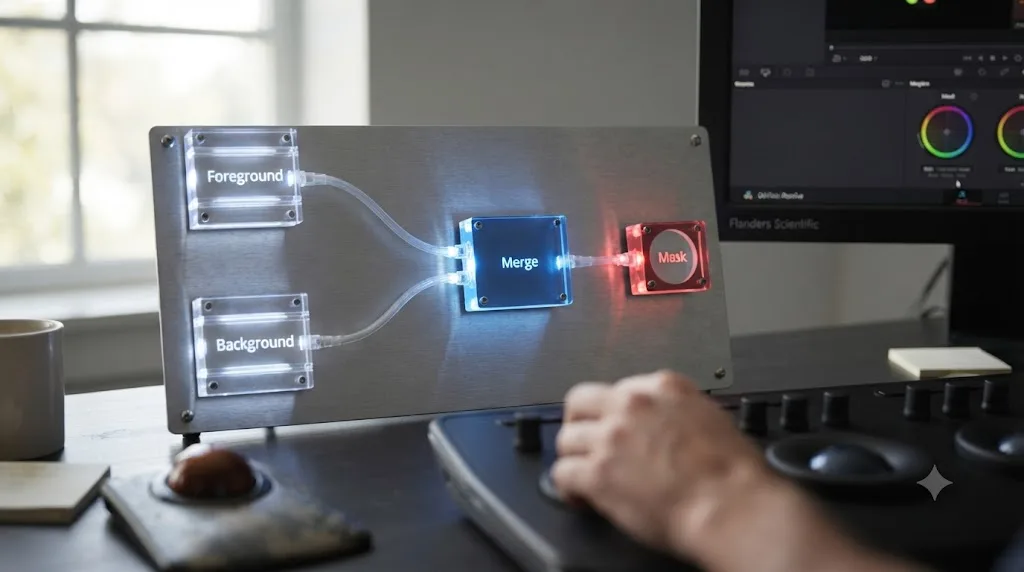
A Merge node in Fusion isn't a blend mode. It's the node that decides which layer sits on top of which, using its Background input for the plate underneath and its Foreground input for whatever sits on top. Connect a background plate into the Background input, a green-screened subject into the Foreground input, and the Merge node combines them using whatever alpha channel or blend mode you've set, the same way a compositor would stack two layers in any other node-based VFX tool. Get the two inputs backwards and the foreground disappears behind the background instead of sitting on top of it, which is a common enough mistake that we wrote a full fix for it: when the Merge node's background and foreground come out backwards.
A mask (Rectangle, Ellipse, Polygon, or B-Spline) does inside Fusion roughly what a Power Window does on the Color page: it isolates a region of the frame. The difference is what the isolation feeds. On the Color page, a Power Window feeds a color correction. In Fusion, a mask usually feeds a Merge node's alpha channel, controlling exactly where one layer shows through another, or it feeds an effects node so a blur, glow, or paint stroke only touches the masked area.
The Planar Tracker node solves a different problem than either Power Window tracking or a simple point tracker. Blackmagic's own manual describes it directly: "The Planar Tracker node is designed to solve a match-moving problem that commonly comes up during post-production" (DaVinci Resolve Manual). Instead of following a single point, it tracks the perspective distortion of an entire flat surface, a phone screen, a laptop lid, a road sign, across rotation, scale, and skew, then hands that tracking data to another node so you can insert a new image onto that surface with the same perspective baked in. When a planar tracker loses its lock, it's almost always because the surface it's tracking briefly left frame, got occluded, or stopped being planar, not because the node is broken; we cover the specific fixes in our guide to why the Fusion planar tracker isn't tracking.
| Fusion term | What it does |
|---|---|
| Merge node | Combines a Background plate and a Foreground layer into one composite |
| Mask (Rectangle/Ellipse/Polygon/B-Spline) | Isolates a region of the frame to feed a Merge node's alpha or an effects node |
| Planar Tracker | Tracks a flat surface's perspective distortion across a shot for screen replacements and match-moving |
| Delta Keyer | Pulls a key (transparency) from a green or blue screen by comparing each pixel against a sampled background color |
| Camera 3D | A virtual camera used to build genuine 3D depth and parallax in a composite, distinct from the 2D layer stack a Merge node builds |
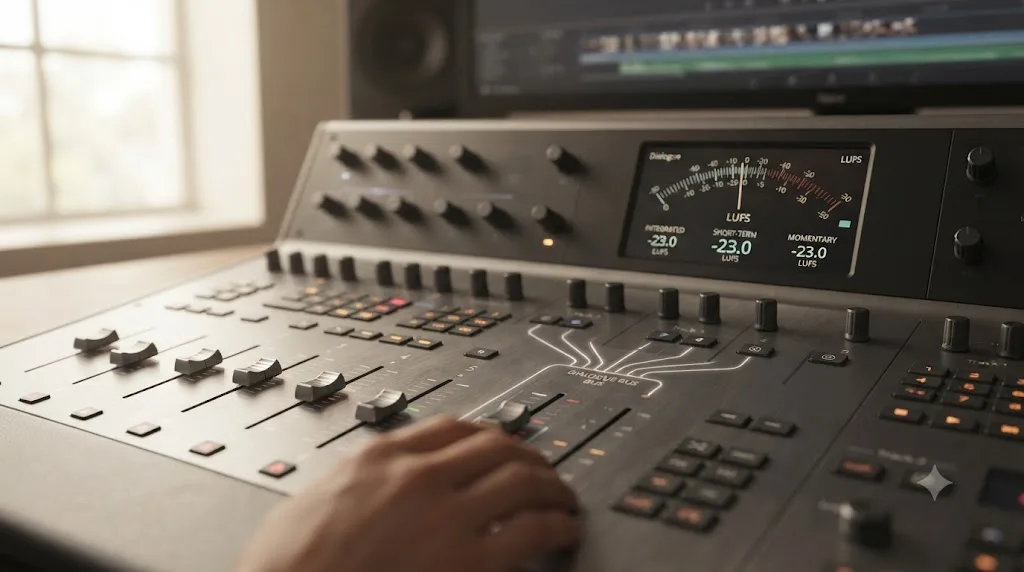
What do Fairlight-specific terms like bus, ADR, and LUFS mean?
Fairlight organizes audio the way a physical mixing console does, and a few of its terms don't map cleanly onto anything you've touched on the Edit page.
A track holds clips, the same as a video track does. A bus is different: it's a routing destination that several tracks can feed into at once, so one compressor or EQ applied to the bus affects everything routed to it without you having to duplicate that processing on every individual track. Route every dialogue track to a "Dialogue" bus and you can duck, compress, or EQ all of it together with one set of controls.
ADR (Automated Dialogue Replacement, sometimes "Additional Dialogue Replacement") is re-recording a line of dialogue in a controlled studio environment and syncing it back to picture, used when the original production audio is unusable: wind noise, a plane overhead, a line the director wants read differently. Foley is the opposite kind of re-creation: performing everyday sound effects, footsteps, cloth movement, a door latch, live and in sync to picture, because the original production audio rarely captures those sounds cleanly enough to use.
Normalize adjusts a clip's level in one action, either to a target peak or a target loudness, rather than you dragging a gain fader by ear. Headroom is the gap between your loudest peak and 0 dBFS, the hard digital ceiling above which a signal clips; professional mixes typically leave several dB of headroom rather than mixing right up to that ceiling.
LUFS measures how loud a mix sounds over time, not how loud its single loudest peak is, which is why a track can pass every peak meter and still fail a platform's loudness check. LUFS (Loudness Units relative to Full Scale) is the loudness measurement behind broadcast standards like EBU R128, which sets an integrated loudness target of -23 LUFS with a true-peak ceiling of -1 dBTP for European broadcast delivery (Wikipedia). Streaming platforms each publish their own target, commonly somewhere around -14 to -16 LUFS, which is why a mix delivered correctly for broadcast can still sound too quiet, or get turned down, on a platform with a louder target. Resolve's Fairlight page includes a built-in loudness meter for exactly this reason: to check your integrated LUFS value against whatever target your delivery actually requires, instead of guessing from peak meters alone.
If you're building a Fairlight mix from scratch rather than just cleaning up production audio, our guide to recording a podcast in DaVinci Resolve's Fairlight page covers the track and bus setup in practice.
| Fairlight term | What it means |
|---|---|
| Track | Holds clips, same concept as a video track |
| Bus | A shared routing destination multiple tracks feed into for group processing |
| ADR | Re-recording dialogue in a studio and syncing it to picture |
| Foley | Performing everyday sound effects live, in sync to picture |
| Normalize | Adjusts a clip to a target peak or loudness in one action |
| Headroom | The gap between your loudest peak and the digital ceiling (0 dBFS) |
| LUFS | Loudness measured over time, the basis of broadcast and streaming loudness standards |
What do RAW, debayering, and color space actually mean?
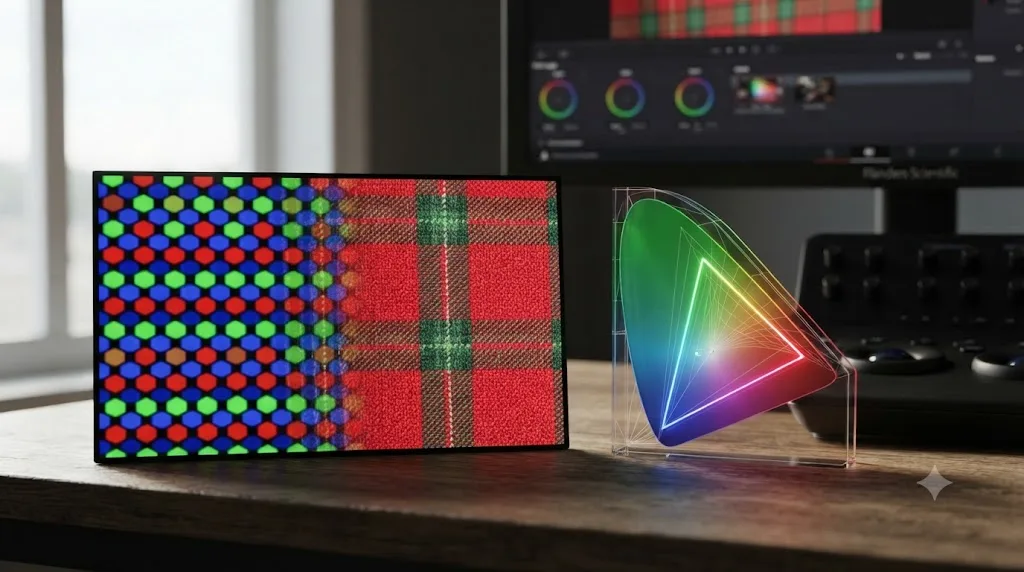
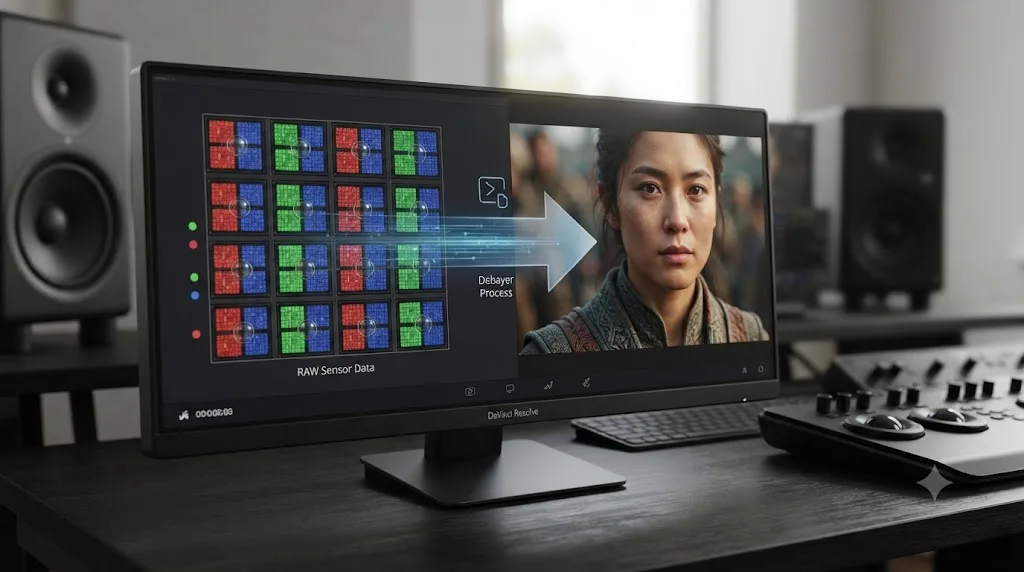
RAW footage stores unprocessed sensor data instead of a finished image, and DaVinci Resolve has to reconstruct a real picture from that data before you can grade it at all.
A camera sensor covered in a Bayer filter records exactly one color value at every pixel, never all three at once. Debayering, also called demosaicing, is the process that fills in the missing two colors at each pixel by interpolating its neighbors, and it happens before every other step in Resolve's Color page pipeline, whether you ever notice it or not. We cover the full mechanics, including which RAW formats let you lower debayer quality for faster playback and which ones don't, in our guide to what debayering means in DaVinci Resolve.
Color space is the related term that trips people up next: it's the specific range and mapping of colors and brightness values a piece of footage or a display can represent, distinct from a codec (which is about compression) or a gamma curve (which is about how brightness values map to what you see). Two clips shot on different cameras, in different color spaces, can look wildly different side by side even at identical exposure, which is exactly the problem ACES, covered next, was built to solve.
What do HDR terms like PQ, HLG, and nits actually mean?
Once you're grading for HDR delivery instead of SDR, three terms show up immediately, and none of them mean what they sound like they might mean.
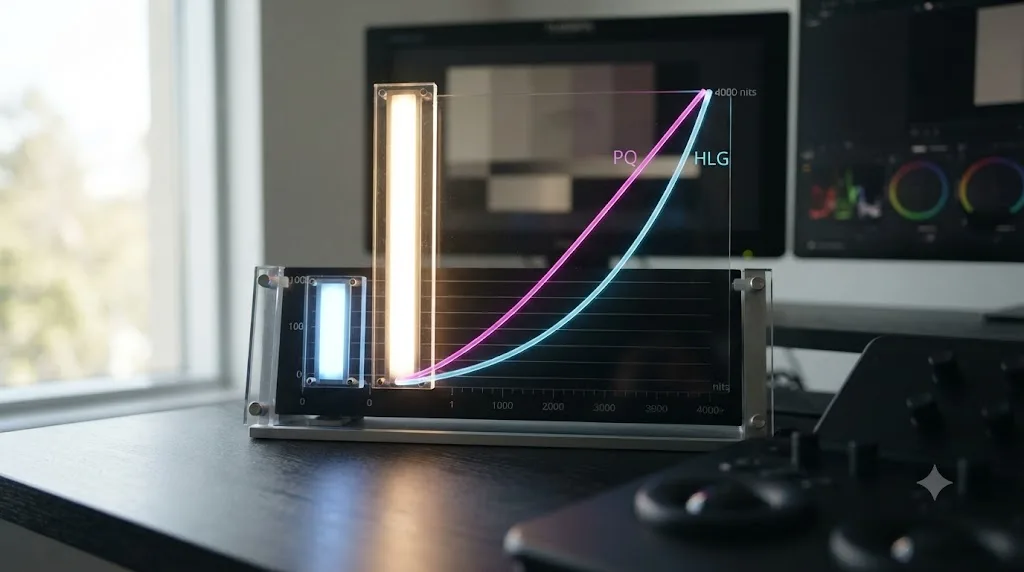
Nits (candela per square meter, cd/m²) measure brightness, specifically how much light a display or a piece of graded content is calling for. A typical SDR monitor tops out somewhere around 100 nits of reference white; HDR content routinely calls for highlights well into the hundreds or low thousands of nits, which is the entire reason HDR looks different on a capable display: it's not just "more contrast," it's genuinely brighter highlights than SDR was ever specified to show.
PQ (Perceptual Quantizer, standardized as SMPTE ST 2084) and HLG (Hybrid Log-Gamma) are the two transfer functions ITU-R BT.2100 defines for encoding that brightness, and PQ bakes an absolute brightness value into every pixel, while HLG describes brightness relative to a signal that still looks normal on an ordinary SDR television (Wikipedia: Rec. 2100). PQ maps a normalized signal directly to an absolute luminance value, from 0.0001 up to 10,000 nits, which makes it well suited to graded, once-and-done content like a film or a scripted streaming series, where you know exactly what mastering display the grade was checked on. HLG instead layers HDR information on top of a signal that degrades gracefully: an SDR set ignores the extra information and displays something reasonable, while an HDR set extracts it and shows the full range, no separate SDR version required. That trade-off is why broadcasters lean on HLG for live sports and news, where there's no time to master two separate deliverables, and why PQ dominates scripted and streaming delivery, where a colorist grades once against a known reference and expects every compliant HDR display to reproduce it the same way.
Dolby Vision builds on top of PQ rather than replacing it, adding dynamic metadata, brightness information encoded scene-by-scene or even frame-by-frame instead of once for the whole file, so a display can tone-map each moment more precisely than a single static value would allow (Wikipedia: Dolby Vision). HDR10, by contrast, uses the same PQ transfer function but with static metadata set once for the entire piece. That's the practical difference between the two when a delivery spec asks for one over the other: Dolby Vision adapts shot to shot, HDR10 doesn't.
| Term | Stands for | Typical use |
|---|---|---|
| PQ | Perceptual Quantizer (SMPTE ST 2084) | Graded HDR for film and streaming, mastered once against absolute brightness |
| HLG | Hybrid Log-Gamma | Live broadcast HDR that must also display correctly on SDR sets |
| Nits (cd/m²) | Candela per square meter | The unit both standards use to describe brightness |
| Dolby Vision | PQ plus dynamic, scene-by-scene metadata | Premium streaming and disc masters needing shot-by-shot tone mapping |
| HDR10 | PQ with static, whole-file metadata | The baseline HDR deliverable most displays and platforms support |
None of this replaces the color space conversation ACES and Resolve Color Management handle, covered next; PQ and HLG describe how brightness gets encoded into the file, while color space describes what range of colors that file can represent in the first place. A single HDR deliverable typically specifies both: a color space (commonly Rec. 2020) and a transfer function (PQ or HLG) together.
What is ACES color management, in plain terms?
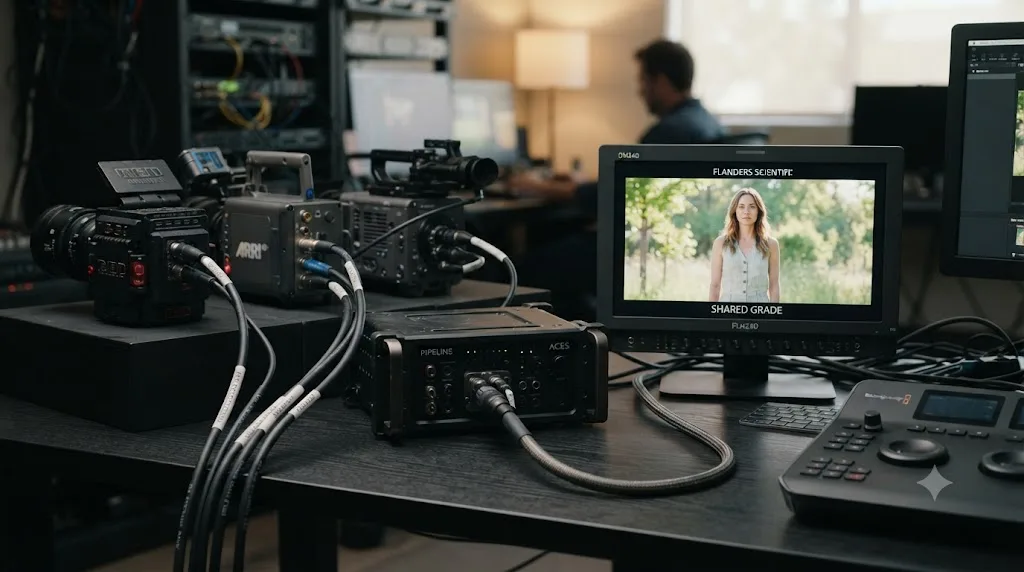
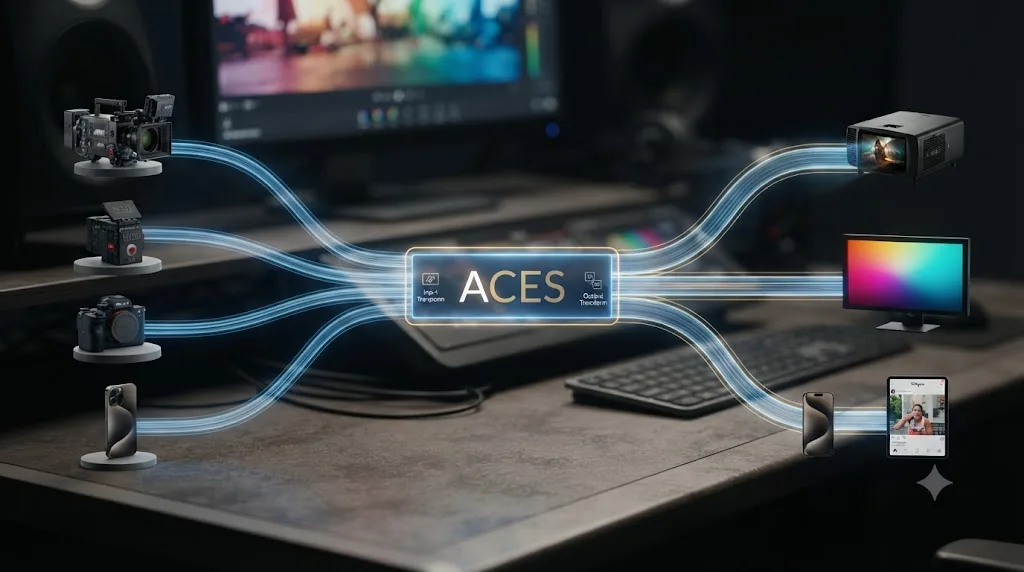
ACES, the Academy Color Encoding System, is an open, camera-agnostic color pipeline that gives every camera and format on a production the same starting color language before grading begins.
The Academy of Motion Picture Arts and Sciences began the ACES project in 2004, working with camera manufacturers and studios for roughly a decade before releasing ACES 1.0 in December 2014 (Wikipedia). Ben Bailey, writing for Frame.io, describes what the marketing promise actually amounts to: ACES "promises to deliver uncompromising image quality from set to screen, and every step in between" (Frame.io). In practice, that means footage from a RED, an ARRI, and a Sony camera on the same shoot day all get converted into one shared, scene-referred color space before a single color wheel gets touched, so the grade starts from a consistent place instead of three different ones.
ACES doesn't replace your creative grade. It gives every camera in the building the same starting language before the grade begins. Whether your specific project actually needs that consistency, or whether Resolve's own native color management handles it well enough without the extra setup, is a real decision, not a default. We walk through exactly when ACES earns its complexity in our comparison of Resolve Color Management vs. ACES, and the full setup steps in our guide to ACES color management explained simply.
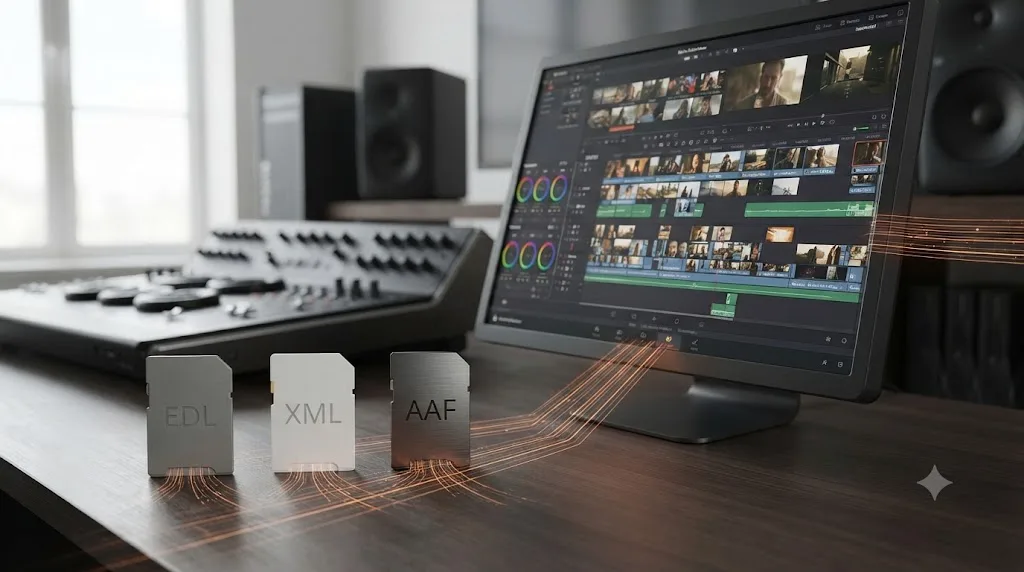
What does conform mean, and what do EDL, XML, and AAF have to do with it?
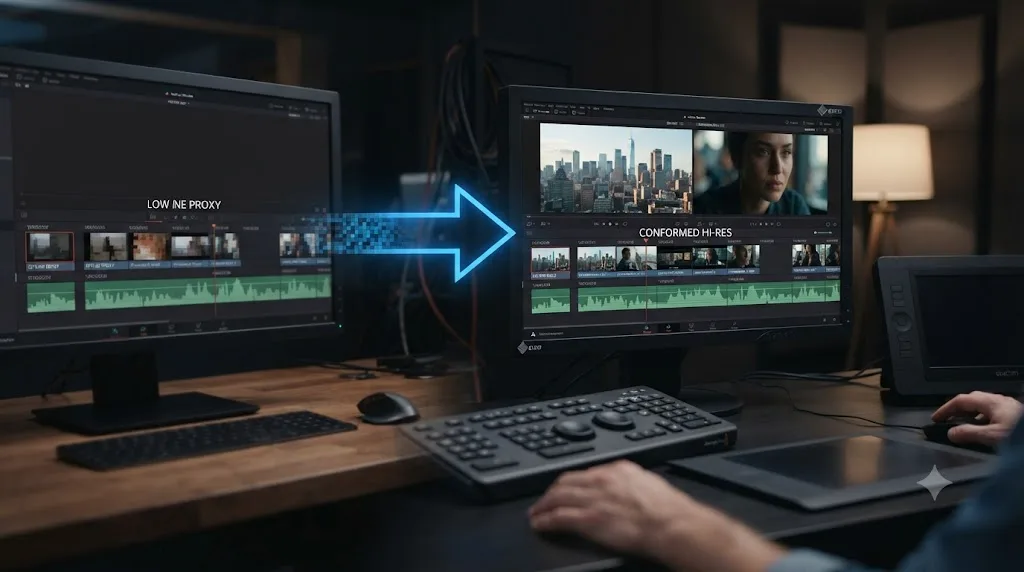
Conform means rebuilding a picture-locked edit using full-resolution, camera-original files in place of whatever lower-quality media it was cut with, and it survives from a film-era term for a reason.
The word predates digital editing. It comes from negative cutting, the film-lab process of physically splicing original camera negative to match a locked workprint. Digital conforming does the same job with an instruction file instead of scissors: an EDL, XML, or AAF lists which clip goes where on the timeline and at what source timecode, and conforming software uses that list to reconnect a rebuilt timeline to the real files. CutConvert's own breakdown of the oldest of these formats notes the EDL standard "flattens everything to a single video track and a couple of audio channels" and caps reel names at eight characters, "holdovers from hardware that no longer exists" (CutConvert), which is exactly why XML and AAF replaced it for anything with real effects or multiple tracks.
Conform means the same thing it meant in 1970s film labs: rebuild the finished cut with the real material once the story stops moving. In DaVinci Resolve specifically, the word does a second job too: it's also the name of the Mixed Frame Rate Format setting, which retimes clips shot at different frame rates to match your timeline, a setting that has nothing to do with proxies or picture lock at all. Both senses, and the specific reason your Timeline Frame Rate locks after you import footage, are covered in full in our guide to what conform means in video editing.
What's the difference between proxy media, optimized media, and cache?
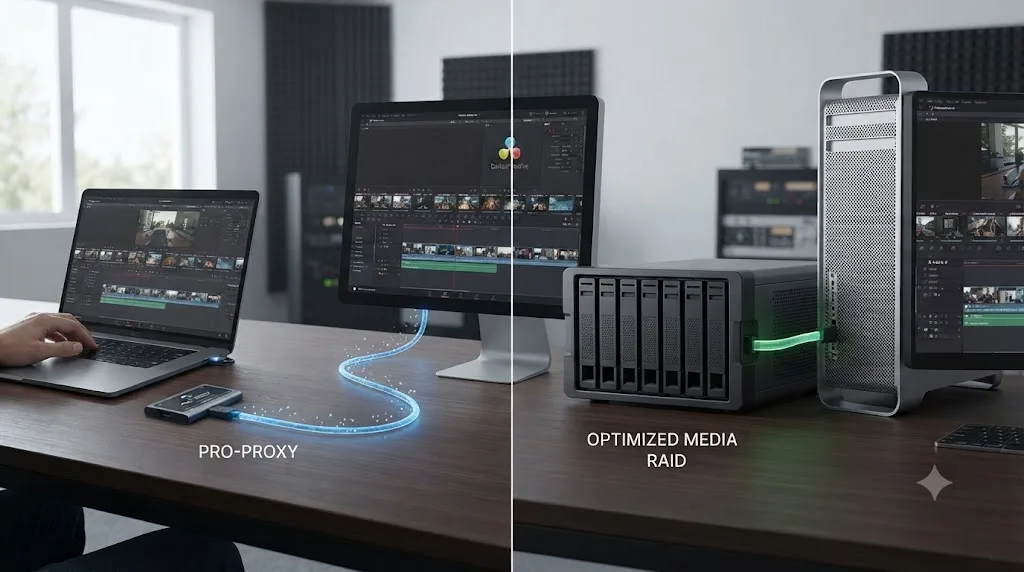
All three exist to solve the same underlying problem, your source footage is too heavy for smooth real-time playback, but they solve it in three different ways, and clearing one won't fix a slowdown caused by another.
Optimized media is Resolve's own internally generated stand-in, stored in a proprietary .dvcc image sequence container that only Resolve can read. It's generated per project, which means the same source clip used in two different projects needs Optimized Media created twice, and the files themselves aren't portable or shareable, they're tied to the project that made them.
Proxy media is different by design: proxy media is independent, portable, and can be created by applications outside of DaVinci Resolve, if desired (DaVinci Resolve Manual). A proxy is a lower-resolution, more heavily compressed stand-in linked to your source media by metadata, and because it's a normal, portable file, it can be generated on a different machine, dropped into shared storage, and picked up by every editor on a project without each of them regenerating it locally.
Render cache is the third piece, and it solves a different slowdown entirely: not "this codec is slow to decode," but "this specific effect is expensive to recompute every single frame." Resolve caches the output of GPU-heavy operations, noise reduction, a complex Fusion composite, certain Color page effects, so playback doesn't have to redo that math every time the playhead crosses that section of the timeline. It clears and rebuilds automatically as you make changes upstream of it, and it lives inside the same CacheClip folder Resolve manages for that project, whose exact location depends on your Media Storage setup rather than one fixed path; our guide to where DaVinci Resolve stores its cache walks through finding it on both Mac and Windows.
Optimized media speeds up decoding a difficult codec. Render cache speeds up replaying an expensive effect. They solve two different slowdowns, and clearing one won't fix the other. If your timeline plays back smoothly until you hit a specific noise-reduction node and then stutters only there, that's a render cache problem, not a codec problem, and generating Optimized Media for the clip won't touch it.
| Term | Solves | Portable? | Where it lives |
|---|---|---|---|
| Proxy media | Slow decode of a heavy source codec | Yes, shareable across machines | Wherever you point Resolve, including external drives |
| Optimized media | Slow decode of a heavy source codec | No, tied to one project | .dvcc files in that project's CacheClip folder |
| Render cache | Slow playback of an expensive effect | No | The project's CacheClip folder, rebuilt automatically |
What do render, export, and deliver mean, and where do handles and burn-ins fit in?
People use "export" and "render" interchangeably in conversation, and that's fine right up until a tutorial tells you to do something on "the Deliver page" and you're not sure if that's a fourth thing.
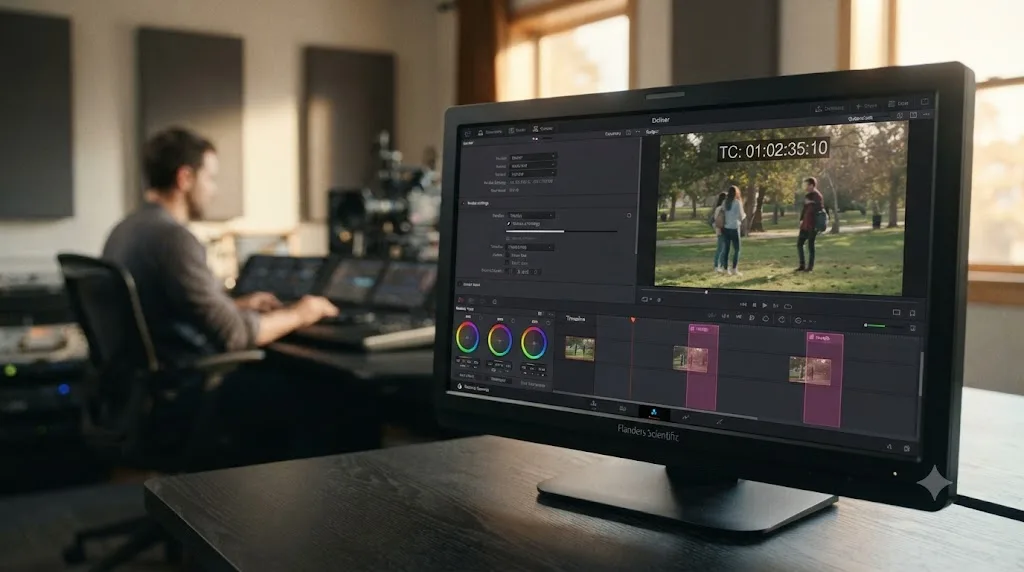
It isn't. Deliver is the name of the page; render is the button on it, and the literal action it performs; export is the casual, cross-app word for the same result. A render processes every frame of your timeline through its full pipeline, color grade, Fusion effects, retiming, and writes the result to a new file. Nothing about that file changes what's on your timeline; it's a one-way copy, which is why re-grading after a render means going back to the timeline and rendering again, not editing the delivered file directly.
Two settings inside that render decide a lot about the result. Bitrate mode is one: CBR (Constant Bitrate) spends the same amount of data on every single frame, complex or simple, which makes file size easy to predict but wastes data on simple frames and can starve complex ones. VBR (Variable Bitrate) spends more data where the frame actually needs it, generally getting better visual quality per megabyte at the cost of a less predictable final file size. If you're chasing a hard file-size ceiling, an email attachment limit, an ad platform's cap, CBR's predictability wins; if you're chasing quality at a given rough size, VBR usually wins.
Handles are the second thing worth knowing before you render, especially anything headed for a conform later. Handles are extra frames of media kept before a clip's in-point and after its out-point, beyond what's actually visible in the cut, so a downstream process, an added transition, a relink to full-resolution originals, has real frames to work with instead of running out of material right at the cut. Adobe's own documentation for the same concept in Premiere describes handles as the material that lets an editor "adjust the clips in his sequence to exactly the right length" without hitting a hard wall at the trim point (Adobe). Export or conform with zero handles and a client-requested transition, or a conform back to camera originals, can come up short of frames exactly where you need them most.
A burn-in is text or a graphic permanently rendered into the picture itself, timecode for a client review copy, a "DRAFT, not for distribution" watermark, a project title. It's not a title clip sitting on the timeline that you can toggle off later; once a render happens, a burn-in is part of the pixels, the same as any other part of the image, and removing it means going back to the timeline, removing the burn-in source, and rendering again. If your renders are taking longer than they should regardless of what settings you're changing, that's usually a separate hardware or codec bottleneck rather than anything to do with burn-ins or bitrate mode; we cover the actual causes in our guide to why DaVinci Resolve exports slower than realtime.
| Term | Meaning |
|---|---|
| Render / Export / Deliver | Same action, three names: writing the timeline to a finished file |
| CBR (Constant Bitrate) | Same data rate every frame, predictable file size |
| VBR (Variable Bitrate) | Data rate flexes with frame complexity, better quality per megabyte |
| Handles | Extra frames kept beyond a cut point for transitions or later relinking |
| Burn-in | Text or a graphic permanently rendered into the picture |
Where did DaVinci Resolve's own vocabulary actually come from?
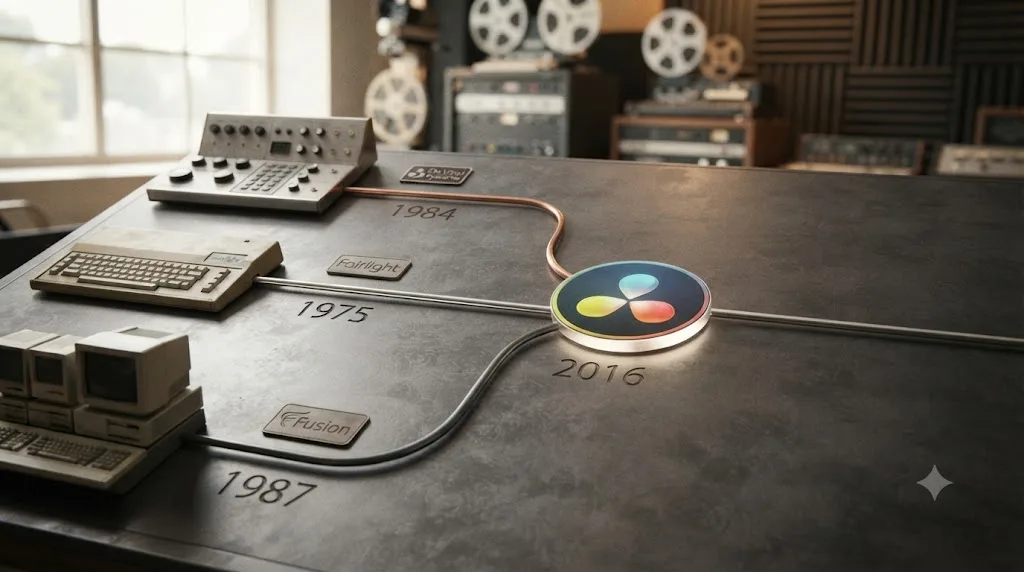
Most of Resolve's specific terminology traces back to three separate companies Blackmagic Design acquired and merged into one app, not to Blackmagic itself inventing the words from scratch.
Da Vinci Systems, the company Resolve is named after, was founded in 1984 in Coral Springs, Florida, building dedicated color correction and film restoration hardware. The Resolve product itself was announced in 2003 and released in 2004, years before Blackmagic entered the picture at all. Blackmagic Design acquired da Vinci Systems in 2009 (Wikipedia), and the software grew from roughly 100 users that year to more than 2 million by January 2019, the same year DaVinci Resolve was used on five of the eight Best Picture Oscar nominees, including the winner, Green Book. Fusion (1987, acquired 2014) and Fairlight (1975, acquired 2016) came later, each bringing its own vocabulary, its own page, and its own decades of history into the same application.
| Component | Founded | Acquired by Blackmagic | Became a Resolve page in |
|---|---|---|---|
| Da Vinci Systems (color grading) | 1984 | 2009 | The original product |
| Fusion (visual effects) | 1987, as eyeon Software | 2014 | DaVinci Resolve 12.5 |
| Fairlight (audio) | 1975 | 2016 | DaVinci Resolve 14 |
A glossary of DaVinci Resolve terms is really a glossary of four different companies' vocabularies, merged into one interface over three decades. That's worth knowing before you assume every unfamiliar term in Resolve is a Blackmagic invention. Most of them are older than Blackmagic's involvement in video editing entirely.
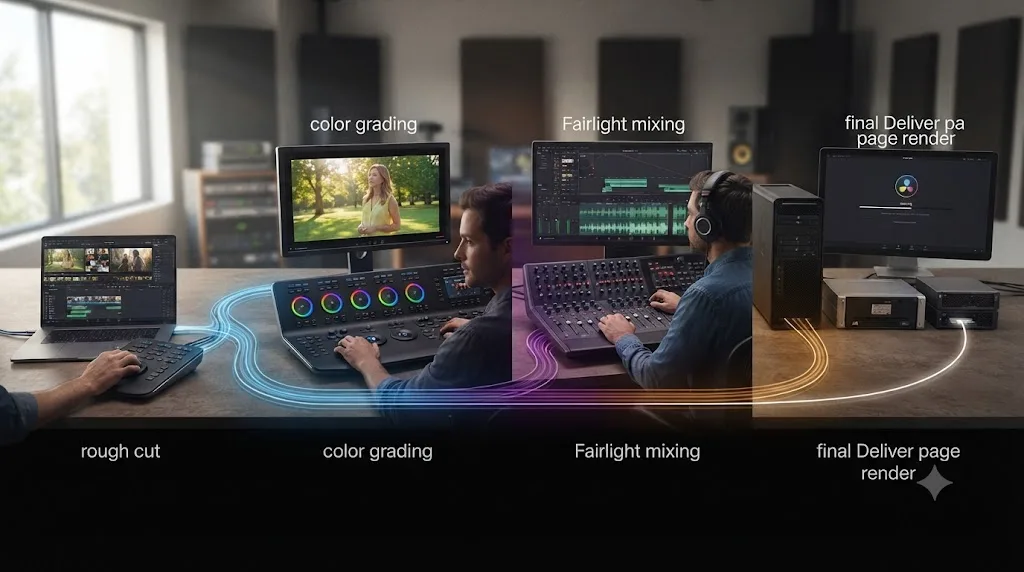
A worked example: turning a rough cut into a delivered file, term by term
Here's what all of this looks like stitched into one real pass, start to finish, on a hypothetical interview-driven video.
You start in the Media Pool, importing camera-original files that are heavy enough to choke playback on your laptop, so you generate proxy media for the whole shoot before touching a timeline. That choice matters later: because it's proxy, not optimized media, you can hand the same low-res files to a second editor on a different machine without either of you regenerating anything.
You build a rough cut first: the full interview laid down in order, B-roll dropped over the talking parts you already know you'll cut away to, a couple of J-cuts where you want the next scene's audio to lead its picture. Nothing is trimmed to the frame yet, and that's on purpose. A week later you come back for the fine cut pass: trims land where they belong, an L-cut carries a laugh under the next question, and the edit reaches picture lock, the point past which the structure doesn't change again.
Now you move to the Color page. You build a serial node chain: node one fixes exposure, node two fixes white balance. The interview subject's face is a touch hot under one light, so you add a parallel node with a Power Window around just the face, tracked so it follows their head turns. A wide shot needs the sky pulled down without touching the ground below it, so instead of a window you reach for a qualifier, sampling the blue directly and building a secondary correction from color alone rather than shape. The client wants a specific "look" applied consistently across every camera on the shoot, so you load a 3D LUT onto an adjustment node at the top of the chain, before the corrective grading starts, so the creative look and the technical fixes stay separate and reorderable.
Because this shoot mixed two cameras with slightly different color science, and the client cares enough about matching to ask about it directly, you consider ACES: converting both cameras' footage into one shared, camera-agnostic color space before any of the grading above happens. For a two-camera interview with a consistent look, Resolve's native color management might do the job with less setup than a full ACES pipeline; that's a real decision, not a default, and we walk through exactly when ACES earns its complexity in our comparison of Resolve Color Management vs. ACES.
Over on Fairlight, the interview audio has one line where a truck passes behind the subject's answer, loud enough that no amount of EQ saves it, so you schedule a quick ADR pickup and drop the replacement line in, synced by ear to the mouth movement already on screen. You route both the interview mic and the ADR line to a shared "Dialogue" bus, apply one compressor there instead of two, and normalize the whole mix to hit a LUFS target the platform actually asks for, checking the built-in loudness meter instead of trusting the peak meter alone.
Deliver time. The client wants a review copy first, so you render with a timecode burn-in and a "DRAFT" watermark baked into the picture, generous handles on every cut in case a note comes back asking for an extended shot. Once notes land and the cut is genuinely final, you render again without the burn-in, at full resolution, this time in VBR rather than CBR because the client cares about visual quality more than a locked file size.
If the original proxies ever need swapping back for the real camera-original files at full resolution before this final render, an EDL or XML carries every clip's position and source timecode across, and the software rebuilds the timeline against the real files: the whole reason conform survives as a word from a film era that no longer physically exists.
Which terms get confused with each other, and how do you tell them apart?
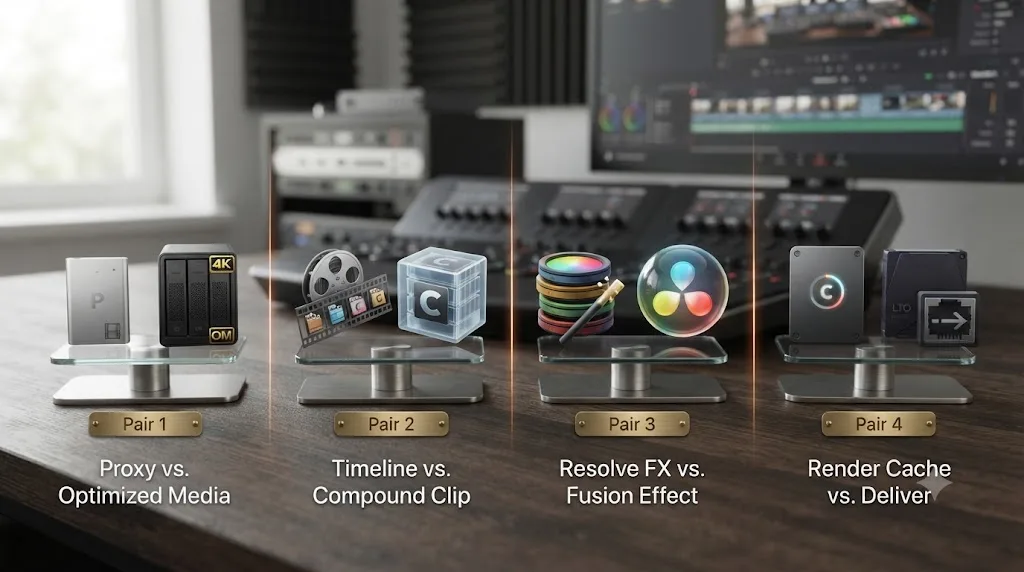
A few pairs of words in this glossary sound close enough, or literally share a spelling, that they cause more confusion than the individual definitions do on their own.
"Conform" does two unrelated jobs inside Resolve alone, on top of its film-era meaning of rebuilding a cut from camera originals: it's also the literal name of the Mixed Frame Rate Format setting that retimes clips shot at different frame rates to match your timeline. Neither of those is the same thing as a render, which just writes the current timeline to a file regardless of whether anything was ever conformed at all. Hear "conform" in a tutorial and check which of the three the speaker means before you go looking for a matching button.
"Node" and "layer" get used almost interchangeably by editors coming from a layer-based tool, and Resolve doesn't help by naming one of its own node types "Layer." A Fusion or Color page node graph isn't a stack; nodes can branch, merge, and reconnect in ways a simple top-to-bottom layer stack can't. The Layer node type specifically borrows the visual mental model of stacked layers, with explicit blend-order control, but it's still one node type among several in a graph, not the underlying structure of the whole system the way layers are in a compositing-only tool.
"Timeline" and "sequence" mean the exact same thing, they're just different vendors' words for it: Resolve says Timeline, Premiere and Avid say Sequence. If you're switching NLEs and a tutorial keeps saying "sequence," it's talking about what Resolve calls your Timeline, nothing more.
"Proxy media" and "optimized media," covered in full above, get flattened into "just use proxies" in casual conversation constantly, even though they're stored differently, generated differently, and solve the portability question in opposite ways.
"Qualifier" and "Power Window" both produce a secondary correction, and get treated as interchangeable tools for "isolating part of the image," but they isolate on entirely different axes: one by color and brightness, the other by shape and position. Most real secondary corrections need both at once.
"PQ" and "HLG" both encode HDR brightness under the same BT.2100 standard, and both get shortened to "HDR" in casual conversation, but PQ commits to an absolute brightness value baked into the file while HLG stays relative to a signal that still degrades gracefully on an SDR set. Choosing wrong for the delivery, PQ for a live broadcast, HLG for a mastered streaming deliverable, causes real problems downstream, not just a semantic mismatch.
| Confused pair | What actually separates them |
|---|---|
| Conform (rebuild from originals) vs. Conform (frame rate setting) vs. Render | Two different meanings of the same word, plus a third, unrelated action (writing a file) |
| Node vs. Layer | A node graph can branch and merge; a layer stack is linear. Layer is one node type, not the whole system |
| Timeline vs. Sequence | Same concept, different vendor's word: Resolve says Timeline, Premiere/Avid say Sequence |
| Proxy media vs. Optimized media | Portable and shareable vs. project-locked and internally generated |
| Qualifier vs. Power Window | Isolates by color/luminance vs. isolates by shape/position |
| PQ vs. HLG | Absolute brightness baked in vs. relative brightness that degrades gracefully on SDR |
How does this glossary compare to StudioBinder's or No Film School's film-term glossaries?
Both are genuinely good resources, and neither one is built for a specific NLE's interface, which is the gap this page is written to fill.
| StudioBinder / No Film School glossaries | This page | |
|---|---|---|
| General film and editing terms (B-roll, J-cut, match cut) | Yes, thorough and well-written | Yes, covered above |
| DaVinci Resolve-specific terms (node, Power Window, Gallery) | No | Yes, defined against Resolve's actual interface |
| Fusion, Fairlight, and Deliver-page vocabulary (Merge node, bus, LUFS, handles) | No | Yes, page by page |
| Sourced from the app's own manual | No | Yes, direct quotes from Blackmagic's manual where relevant |
| Links to a full deep-dive when a term needs more than a paragraph | No | Yes, for RAW, conform, ACES, and Power Window tracking |
If you're after cinematography and directing vocabulary, camera moves, lighting setups, story structure, StudioBinder's glossary earns its reputation and is worth a bookmark alongside this page, not instead of it. This page exists specifically for the vocabulary that shows up the moment you open Resolve itself.
What's the best way to learn DaVinci Resolve terminology fast?
The fastest way to learn DaVinci Resolve terminology is to attach every new term to a real task in a real project, not to read a list of definitions cold and hope they stick.
Blackmagic Design itself publishes six free training guides as downloadable PDFs, covering editing, color, audio, and visual effects, each with its own project files and a free online exam (Blackmagic Design). That's the single best structured path if you're building a curriculum from zero, and it's free. YouTube creators like Casey Faris build entire channels around demonstrating these terms inside real projects rather than defining them in the abstract, which is often how a term like "parallel node" actually clicks. Reddit's r/davinciresolve is where a lot of editors go to ask "what does this setting actually mean" the moment they hit it live, and the community answers tend to be specific to the exact menu the asker is stuck on.
None of that replaces the moment a term stops being abstract and becomes the specific button you can't find in your own project. That's a different kind of stuck than "what does this word mean," and it's the one a static glossary, ours included, structurally can't solve.
Is there an app that helps you while you're stuck on a DaVinci Resolve term mid-project?
Yes. TryUncle is the on-screen assistant for DaVinci Resolve on macOS. Ask in plain words and Uncle points at the exact control on your screen.
A definition tells you what a Power Window is. It doesn't tell you which of the five shape buttons you're looking at right now, or why the tracking icon next to it isn't doing anything on your specific clip. That's a live, on-screen question, not a glossary entry, and it's the gap Uncle is built to close: it watches your actual DaVinci Resolve project and points at the real control the term describes, instead of making you cross-reference a page like this one against your own timeline by hand.
In our own 100,000+ member professional video-editing community, "what does that setting actually mean" is one of the most common questions we see from editors switching NLEs or picking up Resolve for the first time, and it's rarely solved by a better glossary alone. After 7+ years of professional, commercial editing work, plus teaching more than 100,000 students through our Udemy Business Partner courses, the pattern is consistent: a definition explains the concept, but the person is stuck on their own screen, not on the abstract idea.
This sits in a different category from most tools people mean when they ask about an AI tool to learn DaVinci Resolve. Sottocut and CutAgent automate specific editing tasks directly on your timeline, cutting or reformatting footage, rather than helping you learn what a term means or find a control you don't recognize. Eddie AI and general chat assistants can define a term like "conform" or "Power Window" in the abstract, roughly the way this page does, but they have no view of your actual screen and can't confirm which button you're actually looking at. PremiereCopilot targets a different NLE's workflow entirely. Uncle watches your DaVinci Resolve screen while you work and can point at the exact Power Window shape button, the Gallery, or the Mixed Frame Rate Format dropdown the same way it points at any other control, which is what makes it useful the moment a glossary entry needs to become an action on your own timeline.
Guided practice inside Resolve beats memorizing a glossary you'll forget by the time you actually need the term. That's true of a Power Window's shape buttons, and it's just as true of a Fusion Merge node's Background and Foreground inputs, or a Fairlight bus you can't find in Patch settings.
TryUncle is a paid subscription at $34.99 a month, cancel anytime, per TryUncle. It's macOS only, and it needs an internet connection to work. So the next time a tutorial throws four unfamiliar terms into one sentence, that's a reasonable moment to have something point at the actual button on your screen instead of pausing the video to look each word up.
The short version
A DaVinci Resolve glossary needs more than one vocabulary: the general video editing terms every NLE shares (B-roll, J-cut, codec, proxy media), the terms Resolve's own interface built or inherited from three companies Blackmagic Design acquired between 2009 and 2016, and the delivery-side vocabulary, LUTs, HDR transfer functions, handles, LUFS, that only becomes urgent once you're finishing a project instead of starting one. Node, Power Window, Gallery, and scopes come from Da Vinci Systems' original color-grading lineage. Fusion's Merge nodes, masks, and planar tracker came from eyeon Software, acquired in 2014. Fairlight's tracks, buses, and LUFS came from the company Peter Vogel and Kim Ryrie founded in 1975, acquired in 2016. RAW, debayering, color space, and HDR's PQ and HLG describe how footage becomes a gradable, deliverable image, and conform, proxy versus optimized media, and render versus handles describe what happens once a cut is locked and the real files need to become a finished deliverable.
A generic film glossary from StudioBinder or No Film School covers the general vocabulary well. It was never built to cover the rest, which is exactly why a Resolve-specific reference like this one, sourced from Blackmagic's own manual instead of general film knowledge, earns its place next to them rather than instead of them.
None of it is trivia you only need once. It's the vocabulary standing between a tutorial you can follow and one where every third sentence stops you cold, and now you have a source for each word instead of a guess.
Frequently asked questions
- What does 'node' mean in DaVinci Resolve?
- A node is one independent, isolated correction inside a chain of corrections on the Color page. Nodes connect in a graph so you can add a serial node for a step-by-step correction, a parallel node to blend two adjustments on the same source, or a layer node to stack corrections like layers in a compositing tool. Each node can be reordered, disabled, or deleted without touching any other node in the chain, which is the entire point of a node-based grading tool instead of a single stack of sliders.
- What is a Power Window in DaVinci Resolve?
- Blackmagic's own manual describes Power Windows as "another way of making secondary correction, being essentially shapes you can use to isolate regions of the image." You draw a Linear, Circle, Polygon, Curve, or Gradient shape over part of the frame, and whatever correction lives on that node only affects the pixels inside (or outside) the shape. Power Windows can track a moving subject using Resolve's built-in tracker, so the mask follows the shot instead of sitting frozen in one spot.
- What does conform mean in video editing?
- Conform means rebuilding a picture-locked edit using full-resolution, camera-original files in place of the lower-quality media it was cut with, usually via an EDL, XML, or AAF instruction file. In DaVinci Resolve specifically, conform also names the Mixed Frame Rate Format setting that retimes clips shot at different frame rates to match your timeline. Our full breakdown covers both senses in our guide to [what conform means in video editing](/learn/davinci-resolve/what-does-conform-mean-in-video-editing).
- What is ACES color management, in plain terms?
- ACES, the Academy Color Encoding System, is an open, camera-agnostic color pipeline developed by the Academy of Motion Picture Arts and Sciences so footage from different cameras and formats can be graded using one shared color language instead of a different workflow per camera. It debuted as ACES 1.0 in December 2014 after roughly a decade of development. We cover the full setup, and when you actually need it, in our guide to [ACES color management explained simply](/learn/davinci-resolve/what-is-aces-color-management-explained-simply).
- What's the difference between a rough cut and a fine cut?
- A rough cut is the first full assembly of a scene or project, built for story and pacing, with sound, color, and small timing errors left unresolved on purpose. A fine cut is a later pass where those details get tightened: trims land on the right frame, music and sound effects sit where they belong, and the only work left before picture lock is small polish, not structural change.
- What's the difference between proxy media and optimized media in DaVinci Resolve?
- Proxy media is a portable, lower-resolution stand-in file that can be created outside Resolve and shared between machines. Optimized media is Resolve's own internally generated stand-in, stored in a project-specific .dvcc format that only that project's copy of Resolve can read. Both speed up playback of heavy source footage; only proxy media travels with you to another computer.
- What does LUFS mean and why does it matter on the Fairlight page?
- LUFS (Loudness Units relative to Full Scale) measures how loud a mix sounds over time, not how loud its single loudest peak is. Broadcast standards like EBU R128 set an integrated target of -23 LUFS, and streaming platforms set their own targets, so a mix that passes every peak meter can still fail a platform's loudness check if nobody checked the LUFS reading.
- What's the best way to learn DaVinci Resolve terminology fast?
- Learn terms attached to a real task instead of memorizing a list. Blackmagic's own free training PDFs introduce each term the moment you need it inside a real project, which sticks better than a glossary read cold. Pair that with an app that can point at the actual control the term describes while you work, since a definition read in isolation rarely survives contact with your own timeline.
- Is there an app that helps you while you're stuck on a DaVinci Resolve term mid-project?
- Yes. TryUncle is the on-screen assistant for DaVinci Resolve on macOS. Ask in plain words and Uncle points at the exact control on your screen, whether that's a Power Window's tracking button or the Mixed Frame Rate Format dropdown buried in Master Project Settings, so you're not cross-referencing a glossary entry against your own project by hand.
Sources
- Wikipedia: DaVinci Resolve
- Wikipedia: Da Vinci Systems
- Wikipedia: Fairlight (company)
- Wikipedia: Blackmagic Fusion
- Wikipedia: Academy Color Encoding System
- Wikipedia: Rec. 2100
- Wikipedia: LUFS
- Wikipedia: Dolby Vision
- Frame.io Blog: Why Every Editor, Colorist, and VFX Artist Needs to Understand ACES (Ben Bailey)
- DaVinci Resolve Manual: Power Windows (Blackmagic Design, mirrored)
- DaVinci Resolve Manual: Proxy Media (Blackmagic Design, mirrored)
- DaVinci Resolve Manual: Planar Tracker Node (Blackmagic Design, mirrored)
- Adobe Premiere Pro: Clip Handles Settings
- CG Channel: Blackmagic Design Acquires eyeon Software
- AudioTechnology: Blackmagic Buys Fairlight, Then Gives It Away
- StudioBinder: Film Terms, The Ultimate Filmmaking Glossary
- No Film School: Know These Terms, The Film and TV Editor Glossary
- CutConvert: What Is an EDL File? The CMX3600 Edit Decision List, Explained
- CineD: DaVinci Resolve 21.0.3 Released (Nino Leitner)
- Blackmagic Design: DaVinci Resolve Training
- Blackmagic Design: DaVinci Resolve product page
- CutAgent (product site)
- Sottocut (product site)
- PremiereCopilot pricing
- Eddie AI for DaVinci Resolve (native integration workflow page)
Learn by doing, not watching
Learn Resolve inside Resolve.
TryUncle watches your screen and points at the exact control when you ask. No tabs, no timestamps, no rewatching tutorials.
Download for MacKeep reading
 GuidesJul 26, 202639 min read
What Is Debayering in DaVinci Resolve? RAW Decoding Explained
What debayering means in DaVinci Resolve, where to control decode quality, and why RAW footage plays back slower than ProRes or H.264.
 GuidesJul 25, 202635 min read
What Does Conform Mean in Video Editing? The Real Answer
Conform means two things: rebuilding an offline edit with camera-original files, and Resolve's own frame-rate conform setting. Both explained.
 GuidesJul 26, 202641 min read
What Is ACES Color Management? Explained Simply
ACES color management explained simply: what it is, who built it, what IDT, RRT, and ODT mean, and whether you need it in DaVinci Resolve.