
Learn / DaVinci Resolveupdated for DaVinci Resolve 21.0.3 (July 2026)
What Is Debayering in DaVinci Resolve? RAW Decoding Explained
Quick answer
Debayering (also called demosaicing) is the process DaVinci Resolve uses to turn a RAW file's single-color-per-pixel sensor data into a full RGB image. It's the first thing that happens to any RAW clip, controlled by the Camera Raw panel's decode quality setting, and it's the main reason RAW footage plays back slower than ProRes or H.264.
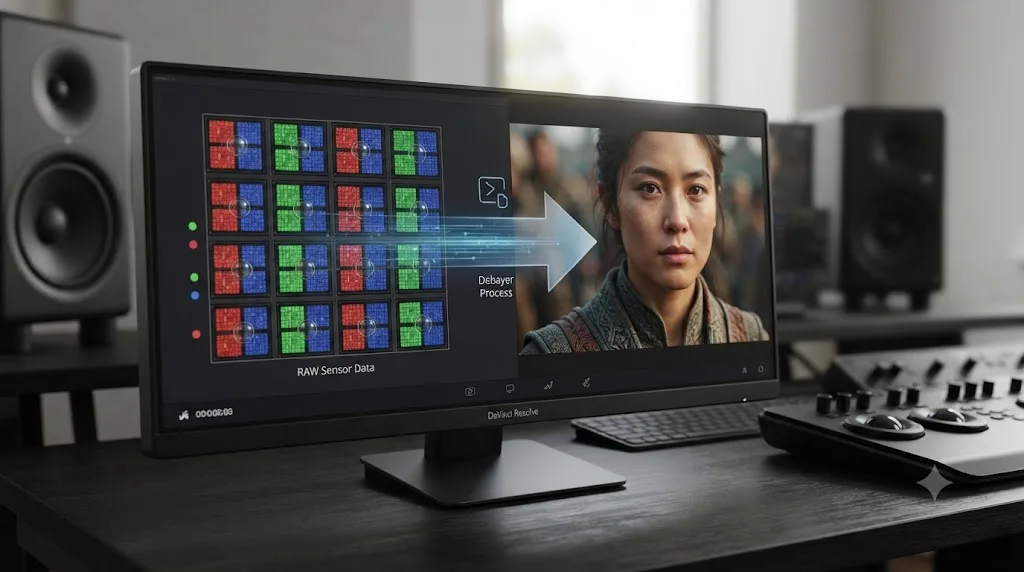
Your RAW footage looks scrambled for a fraction of a second the moment DaVinci Resolve loads it. Then it snaps into a real image. That snap is debayering, and it happens on every single RAW clip you touch in Resolve, whether you've ever heard the word or not. As of July 2026, running DaVinci Resolve 21.0.3, this is still one of the least explained parts of the RAW workflow, mostly because it works silently in the background until your playback stutters or your export runs slower than you expected.
This page explains what debayering actually is, where DaVinci Resolve lets you control it, which RAW formats give you that control and which don't, and why the setting matters more to your editing speed than almost anything else in Project Settings. It also covers how per-clip overrides work, where GPU acceleration and Apple Silicon fit into the picture, what actually differs between RED, Blackmagic RAW, ARRIRAW, CinemaDNG, and Sony RAW under the hood, how ProRes RAW handles debayering differently, what changed in the DaVinci Resolve 21.0.1 through 21.0.3 updates, and where to look when a Camera Raw setting seems to do nothing at all.
What is debayering in DaVinci Resolve?
Debayering is the process DaVinci Resolve uses to convert a RAW camera file's raw sensor data, which records only one color value per pixel, into a complete RGB image every tool in the app can actually work with. Blackmagic Design's own manual states it plainly: "Raw image data is not human readable, and must be debayered or demosaiced to convert the original raw data into image data that can be handed off to DaVinci Resolve's image processing pipeline" (DaVinci Resolve Manual).
Debayering is the translation step between what your camera's sensor actually recorded and what your eyes can recognize as a photograph. Skip it, and a RAW file is just a grid of red, green, and blue brightness values with no color information filled in between them. Run it, and that grid becomes a picture.
The term itself comes from the Bayer filter, the specific pattern of red, green, and blue filters laid over almost every digital camera sensor made today. You'll see "debayer" used constantly by colorists and editors, and "demosaic" used more in imaging science and camera-manufacturer documentation. They mean the same thing. Wikipedia's technical definition treats the two as interchangeable, describing demosaicing as an algorithm "used to reconstruct a full color image from the incomplete color samples output from an image sensor overlaid with a color filter array (CFA) such as a Bayer filter," and noting it is "also known as CFA interpolation or debayering" (Wikipedia).
What actually happens during debayering?
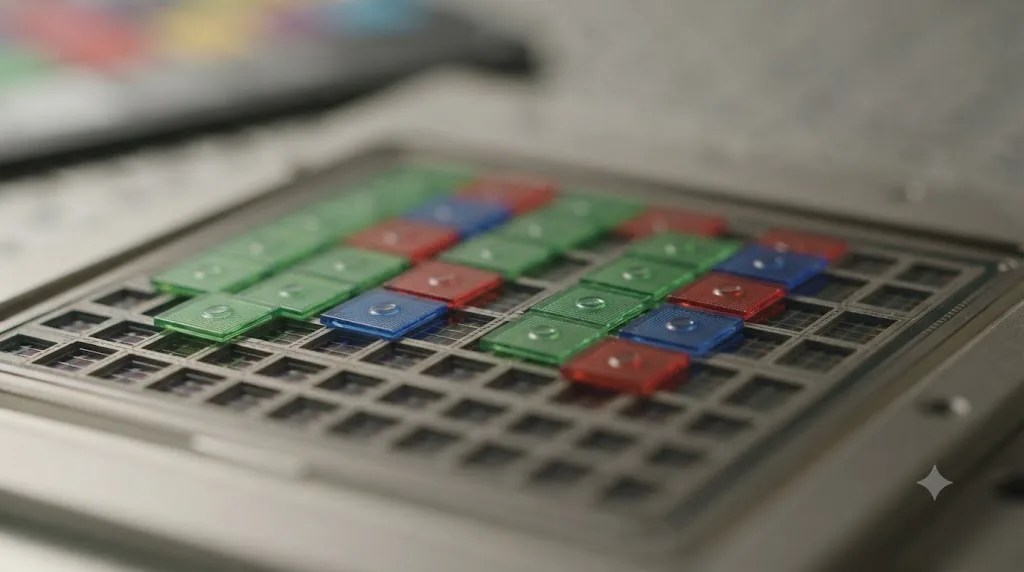
A camera sensor covered in a Bayer filter records exactly one color value at every pixel location, never all three. Debayering fills in the two missing colors at each pixel by looking at its neighbors and interpolating what they're most likely to be.
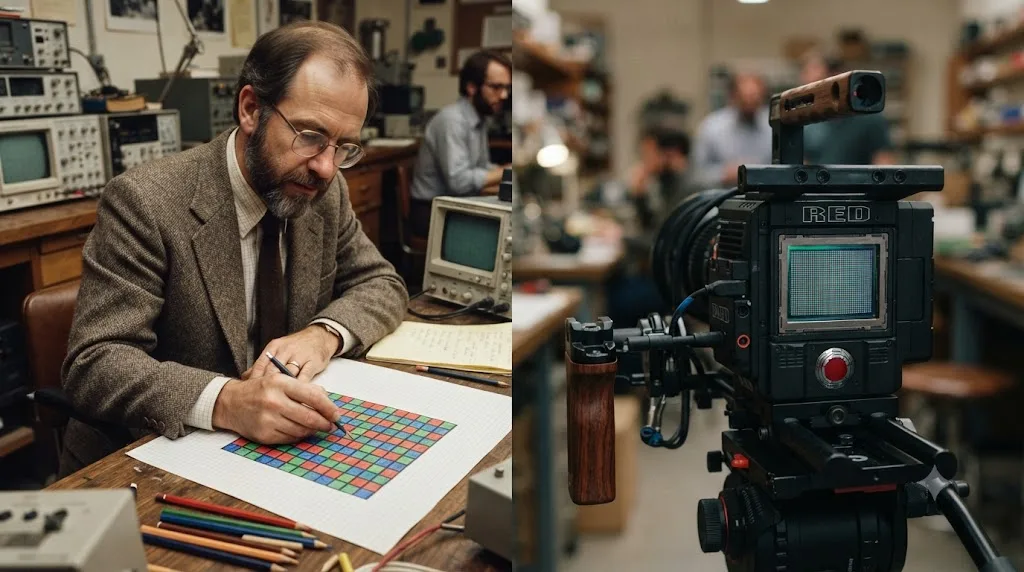
The Bayer pattern itself is a checkerboard: alternating red and green filters across one row of the sensor, alternating green and blue filters across the next. Green gets twice as many filter positions as red or blue, because the human eye is more sensitive to green light and more of our perceived sharpness comes from the green channel. That design detail traces back to the pattern's inventor. Bryce Bayer, a research scientist at Eastman Kodak from 1951 until his retirement in 1986, documented the concept in 1974, and per Wikipedia, his notes state that "each of the red, green and blue records are sampled in regular arrays, with twice as many points for green, which is most important to sharpness" (Wikipedia). Kodak filed the patent in March 1975 and it issued as US patent 3,971,065 in July 1976, titled simply "Color imaging array," with Bayer listed as the sole inventor. The pattern first shipped in a real camera in 1992, in the Kodak DCS 200, and per the same Wikipedia entry, "is used today in almost all color cameras, including those in smartphones, computers, camcorders, and drones."
A pattern one Kodak scientist sketched in 1974 is still the reason your RAW footage needs debayering fifty years later. Every camera that shoots BRAW, R3D, ARRIRAW, CinemaDNG, or any other RAW format is, underneath the marketing name, recording light through some version of that same red-green-blue mosaic, and every one of those files needs the missing colors reconstructed before Resolve can show you a picture instead of a grid of gray dots with a color tint.
Why does DaVinci Resolve need a separate debayer step at all?
Because a RAW file physically cannot be displayed or graded until that missing color data gets reconstructed, and Resolve treats that reconstruction as its own distinct stage, ahead of everything else in the pipeline.
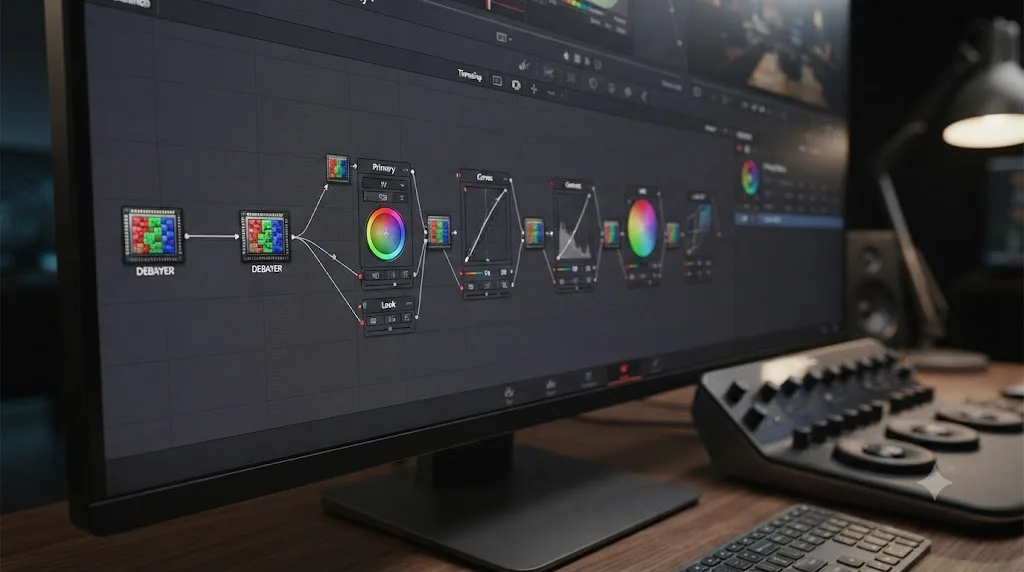
Per Blackmagic's manual, "raw decoding is the very first image processing operation that takes place, and it takes place before all other operations in the Color page, before even the Source bar in the Node Editor" (DaVinci Resolve Manual). Every node you add, every color wheel you touch, every LUT you apply happens on top of an image that's already been debayered. There's no way to grade a RAW file before that step runs, because before debayering, there isn't a real image yet, just a mosaic of single-channel brightness values.
This is also why the RAW Profile setting in the Camera Raw panel confuses so many editors the first time they see it. Cullen Kelly, a senior colorist based in Los Angeles, writing for Frame.io, explains that people often misread what that dropdown actually controls: "A lot of people think selecting a RAW Profile determines how all of the RAW images in your project are going to be treated." It doesn't. "What it does is say, 'How do you want to unpack or debayer this particular RAW format into an RGB space?'" (Frame.io). RAW Profile is per-format, not a single global treatment, and it's specifically about the unpacking step, distinct from downstream decisions like color space, gamma curve, ISO, or white balance that apply after the image already exists.
Debayering isn't one setting among many in the RAW pipeline. It's the gate every other RAW setting has to pass through first. That's also why Blackmagic's manual frames the ideal debayer as one that "preserves the maximum amount of image data for continued processing," since a bad or overly aggressive debayer at this stage limits what every downstream tool, from a simple color wheel to a full ACES transform, has to work with.
Where do you control debayer quality in DaVinci Resolve?
You control it in two places: the Camera Raw panel in Project Settings, which sets the default for every clip using that RAW format, and a per-clip override on individual clips when you need one clip to behave differently from the rest.
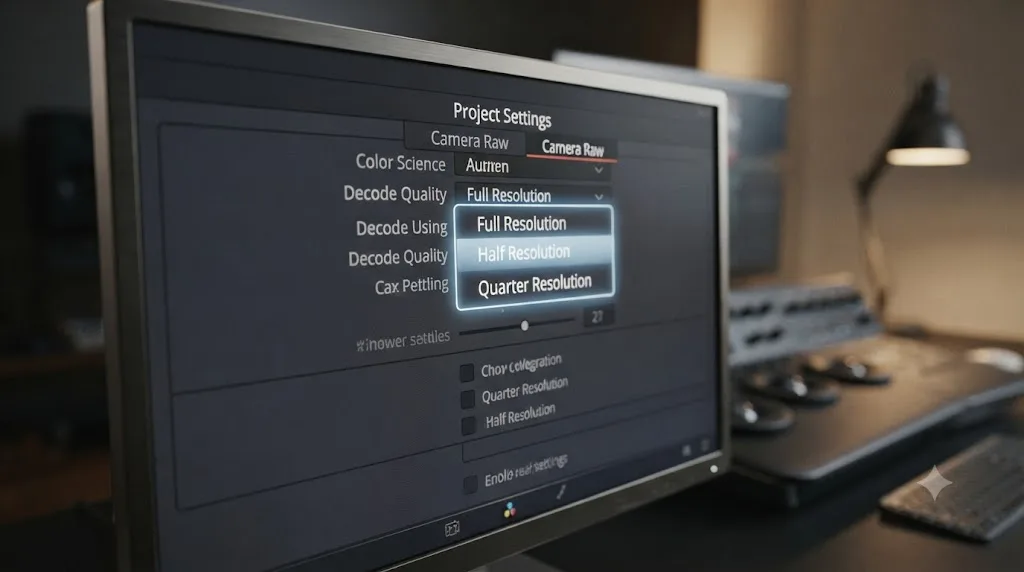
The Camera Raw panel, per Blackmagic's manual, "contain[s] groups of parameters that correspond to every camera raw media format that's supported by DaVinci Resolve," with a separate group of settings for each format you're using in the project. Those parameters exist to let you "override the original camera metadata that was written at the time of recording, and make simultaneous adjustments to all camera raw media throughout your project," and the manual frames their purpose as "primarily useful for making whatever initial adjustments will produce the most optimum starting point for grading" (DaVinci Resolve Manual). Inside each format's group sits a Decode Quality dropdown. That's the actual debayer resolution control: how much of the original sensor data Resolve reconstructs before handing the image to the rest of the pipeline.
If you're editing on a machine that struggles to play RAW footage at full resolution in real time, this is the first setting to touch, before you consider transcoding your whole project to proxies. Mathieu Marano, a colorist writing about Resolve performance, describes exactly this tradeoff: "Most RAW formats will support debayering at lower resolution or quality than the resolution were shot at" (ilovehue.net). Drop Decode Quality from Full to Half or Quarter Resolution, and Resolve reconstructs less image data per frame, which means less work per frame, which means smoother real-time playback on hardware that can't keep up at full resolution.
There's also a smaller, related setting worth knowing about specifically for playback smoothness rather than raw processing load. Marano again: "The Debayer quality setting give you the Optimize for playback option. When checked, Resolve will use a smoother and faster debayer on playback and a sharper one when on pause" (ilovehue.net). That's a different lever from Decode Quality itself, a playback-specific compromise that trades a small amount of sharpness while your timeline is actually moving, in exchange for a sharper pause frame the moment you stop to check focus or detail.
How do you override Decode Quality for a single clip?
You switch the Decode Using dropdown in the Camera Raw palette from Project to Clip, right there on the Color page, or in the Camera Raw section of the Inspector on the Cut, Edit, or Media pages.
Every setting we just walked through lives at the project level by default. Change Decode Quality in Project Settings, and every clip shot on that RAW format inherits the new value, all at once. Most of the time that's exactly what you want. But RAW footage rarely arrives perfectly uniform. A documentary shoot might mix a wide establishing shot at a low ISO with an interview lit two stops darker. A hero product shot might need full-resolution decode for a client review while the rest of the sequence stays at Half Resolution for editorial speed. That's what the per-clip override exists for.
Per Blackmagic's manual: "If you want to make individual adjustments to a particular clip's camera raw settings, choose 'Clip' from the Decode Using drop-down menu in the Camera Raw palette" (DaVinci Resolve Manual). The moment you do, every parameter in the palette, Decode Quality included, becomes editable for that one clip, and "changes you make override the project-wide camera raw settings." Switch it back to Project, and the clip snaps back to inheriting whatever the panel says, with your one-off adjustment discarded.
This isn't limited to a single clip at a time either. The same manual page notes that "changes to the parameters in the Camera Raw palette can also be rippled across multiple clips at once," so if you need three clips from one problem take to share a custom white balance or a bumped-up Decode Quality, you can select all three and apply the override together instead of repeating the same clicks three separate times.
There's a gotcha worth knowing before you rely on per-clip overrides. If you copy a full grade from one clip to another, the default behavior can carry that source clip's camera raw settings along with the color grade, silently overwriting whatever Decode Quality or white balance you'd carefully dialed in on the destination clip. The fix lives in the Gallery's contextual menu: choose Copy Grade: Preserve Camera Raw Settings, and the grade transfers without touching the destination clip's own raw decode. Skip that option on a project where you've set per-clip overrides, and a single "copy grade to all" pass can quietly reset every one of them back to project defaults.
A per-clip Decode Quality override survives independently of the project-wide setting, right up until you copy a grade without protecting it. If your project mixes formats or exposure levels enough that one clip needs a different decode treatment than the rest, this is the tool, not a second project or a duplicated timeline.
Do other Camera Raw settings, like ISO, white balance, and highlight recovery, affect debayering itself?
Not the debayer step itself, no. Decode Quality is the only Camera Raw parameter that changes how much of the sensor mosaic gets reconstructed. Every other control in that same panel, ISO, white balance, color space, gamma, highlight recovery, adjusts how the image that debayering already produced gets interpreted afterward.
This is the same confusion Cullen Kelly's Frame.io quote, cited earlier in this guide, points at from a different angle. Editors see a wall of settings inside one panel and assume they're all part of the same operation. They aren't. White balance changes how Resolve interprets the color temperature of light already reconstructed by the debayer. ISO adjustment changes how much the image gets brightened or darkened relative to the sensor's native exposure. Highlight recovery pulls detail back from clipped channels using information the debayer already extracted from the raw mosaic. None of them make the debayer step itself do more or less work, and none of them are affected by whether Decode Quality is set to Full or Quarter Resolution.
That distinction has a practical consequence. Dropping Decode Quality to speed up playback doesn't touch your white balance, ISO, or highlight recovery settings at all, so you can safely lower it for editorial speed without worrying it'll shift your color decisions. The two categories of setting live in the same panel, but they operate on different sides of the debayer step: Decode Quality controls how the reconstruction happens, everything else controls what happens to the image once reconstruction is done.
Decode Quality is the one dial in the Camera Raw panel that touches the debayer step directly. Every other control in that panel works on the image debayering already produced. Understanding that split is what makes the rest of the Camera Raw panel make sense, instead of looking like an undifferentiated wall of sliders.
What debayer resolution options does each RAW format actually support?
It depends entirely on the format, and the differences aren't small. Some formats give you five resolution steps to choose from. Others give you exactly one.
Per Blackmagic's manual: "Options for reducing resolution vary by each raw format's differing capabilities, but at the very least include full, half, and quarter resolution (R3D and Sony Raw have options for full, half, quarter, eighth, and sixteenth)." The same page names a hard exception: "Exceptions include the Canon RAW, Panasonic Varicam RAW, and Phantom Cine formats, which only decode to full resolution" (DaVinci Resolve Manual). Mathieu Marano's own rundown of the same settings names a further group with reduced-resolution support: "RED, Cinema DNG and Sony Raw and ARRI Raw all have a Decode Quality setting. This give you the choice of only decoding half or the quarter of the original image information to gain speed" (ilovehue.net).
| RAW format | Reduced-resolution decode available? | Lowest option |
|---|---|---|
| RED (R3D) | Yes | Sixteenth resolution |
| Sony RAW | Yes | Sixteenth resolution |
| ARRIRAW | Yes | Half or quarter resolution |
| CinemaDNG | Yes | Half or quarter resolution |
| Blackmagic RAW (BRAW) | Yes | Quarter resolution and below, per Blackmagic's own workflow documentation |
| Canon RAW | No | Full resolution only |
| Panasonic Varicam RAW | No | Full resolution only |
| Phantom Cine | No | Full resolution only |
If your RAW footage refuses to play smoothly and lowering Decode Quality does nothing, check which format you actually shot in first. Canon RAW, Panasonic Varicam RAW, and Phantom Cine simply don't offer a lower-resolution debayer path, so the fix for choppy playback on those three formats has to come from somewhere else entirely: Optimized Media, Timeline Proxy Mode, or better hardware, not a dropdown that doesn't exist for your format.
What's actually different about debayering each major RAW format?
Every RAW format needs the same fundamental debayer step, but how compressed the source is, how much of the reconstruction happens in camera versus in Resolve, and how forgiving the format is on a modest machine varies enormously from one to the next.
RED (R3D). RED's REDCODE compression means Resolve has to decompress the file before it can even begin debayering it, which is exactly why the GPU acceleration option for R3D, covered in the next section, offers a "Decompression and Debayer" setting, not just "Debayer" alone. RED's color science, currently on its IPP2 pipeline, also runs downstream of that debayer step, meaning a change to Decode Quality changes how much data IPP2 has to work with. R3D is also one of only two formats, alongside Sony RAW, that goes all the way down to Sixteenth Resolution, useful on an 8K RED project where even Half Resolution can strain a modest GPU.
Blackmagic RAW. Covered in more detail further down this guide: part of the debayer work happens in camera, using dedicated hardware, before the file is even written. That head start is why BRAW tends to decode faster than an equivalent-resolution R3D or CinemaDNG file on the same machine.
ARRIRAW. ARRI's own format ships essentially uncompressed, and the file sizes show it. Jonny Elwyn, writing for PremiumBeat, describes a real-world example where "the 869mb download file unzips to 1.25 GB folder containing a 7 second video clip" (PremiumBeat), and that's for a handful of seconds of footage. Elwyn's advice for anyone working with "12-bit RAW files fresh from the Arri Alexa" is blunt: "you'll almost certainly want to transcode them into offline edit proxies to work with, and then online your finished project back to the full resolution RAW files for grading" (PremiumBeat). That's a heavier workflow than simply dropping Decode Quality, and it's worth knowing about if you're cutting on ARRIRAW and Half Resolution still isn't enough. Lowering Decode Quality and generating full offline proxies aren't mutually exclusive, either. A proxy-based offline edit still benefits from a lower Decode Quality once you conform back to ARRIRAW for the online grade, since even the conform pass has to debayer every frame.
CinemaDNG. An open, Adobe-originated RAW standard rather than a single manufacturer's proprietary format, CinemaDNG shows up from Blackmagic's own cinema cameras among others, stored as a sequence of individual DNG frames rather than one continuous file. That per-frame structure is part of why the DNG pre-tone curve change in DaVinci Resolve 21.0.3, covered later in this guide, matters specifically to CinemaDNG shooters: it changes how each of those individual frames gets interpreted going into the debayer step, by default, on any new project you start.
Sony RAW and X-OCN, and why they aren't quite the same thing. This is the pairing most likely to trip people up, including some of Sony's own camera lineup. Sony RAW, in the strict sense, is the RAW sensor data recorded by cameras like the VENICE and F65. X-OCN is a different, related format. Matthew Allard ACS, writing for Newsshooter, explains that "X-OCN (extended tonal range Original Camera Negative) has been around since 2016" and was built to "reduce file sizes so that they are much smaller than typical camera RAW, all while offering 16-bit scene linear encoding" (Newsshooter). Allard notes X-OCN actually beats Sony RAW in some respects: "In comparing X-OCN with Sony's RAW format, X-OCN has superior reproduction in low light areas and high light areas." It also comes in three size tiers, XT, ST, and LT, trading some of that quality margin for smaller files.
Cameras like Sony's BURANO record X-OCN, not true uncompressed Sony RAW, which is exactly the format the DaVinci Resolve 21.0.3 decode fix covered later in this guide addressed. Despite the technical distinction, Resolve treats X-OCN through the same Camera Raw workflow as Sony RAW, including the same debayer step and, per Allard, the same advice: "before exporting your final files remember to set the decoder to Full Resolution," and push large corrections through the decode controls rather than the color page grading tools, since "the quality of the final output will be higher by making any large adjustments via the decode controls rather than grading."
The format your camera actually recorded determines more about your debayer workflow than any single setting in the Camera Raw panel. RED needs decompression before debayer even starts. ARRIRAW is often too heavy to grade directly without an offline proxy pass first. BRAW gets a head start from in-camera processing. And Sony RAW and X-OCN, despite looking like the same dropdown entry, are different formats with different tradeoffs behind that shared decode pipeline.
Does GPU acceleration speed up debayering, and does Apple Silicon change that?
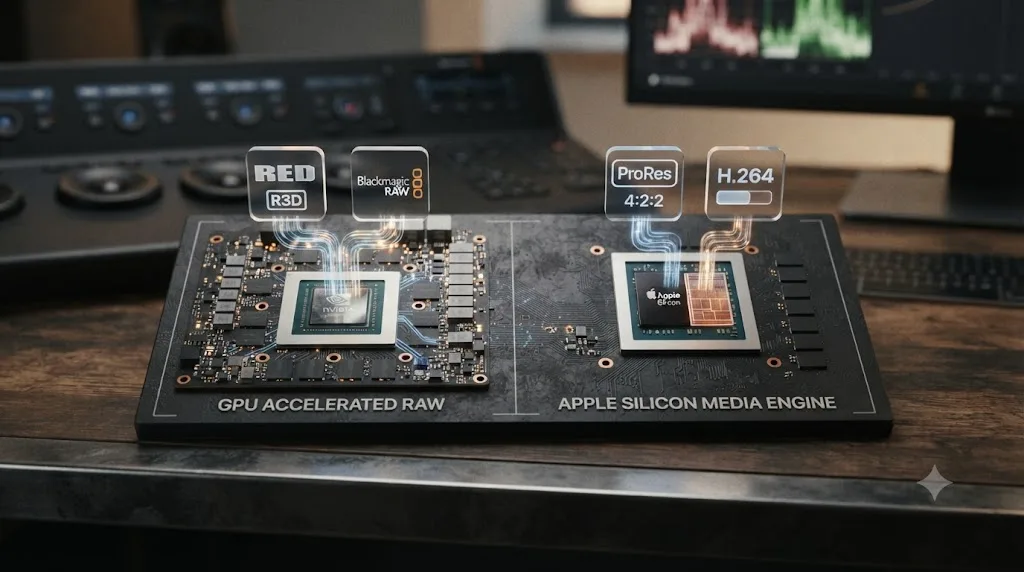
Yes, but only for two formats specifically, and Apple Silicon's dedicated media hardware doesn't extend to RAW debayering the way it does to codecs like ProRes and H.264.
DaVinci Resolve's Decode Options panel, found in Preferences under the System tab, groups a small number of hardware-acceleration toggles: one for R3D, one for Blackmagic RAW, and one for H.264/HEVC playback. Per Blackmagic's manual, "Use GPU for Blackmagic RAW decode" simply "lets you use your GPU to accelerate the decoding of Blackmagic RAW (BRAW) media" (DaVinci Resolve Manual). RED gets a more granular version of the same idea: a dropdown with None, Debayer, and Decompression and Debayer options. The manual's RED-specific page explains that "on the most modern systems, R3D files can be decoded using accelerated GPU-based debayering if you set the Use GPU for R3D drop-down menu to Debayer in the Decode Options panel," and traces the feature back to a specific version: "DaVinci Resolve 16.1.2 introduced the latest RED API-enabling 8K-accelerated debayering using Cuda" (DaVinci Resolve Manual). The same page notes you can "choose a lower quality setting that provides better real time playback on systems with limited performance while you work, and then switch to a higher quality when rendering the final output," the same tradeoff Decode Quality offers on any format, paired here with the GPU toggle.
Notice what's missing from that acceleration list. ARRIRAW, CinemaDNG, and Sony RAW don't get a dedicated "Use GPU for X decode" toggle in the Decode Options panel the way R3D and BRAW do. Their debayer still runs through the GPU as part of Resolve's general image processing pipeline, but there's no separate acceleration switch to flip for them specifically. Decode Quality, the resolution dropdown covered earlier, stays the primary lever for those formats regardless of what hardware you're running.
If you're on DaVinci Resolve Studio rather than the free version, there's a second multiplier worth knowing about: multiple GPUs. Puget Systems' hardware testing found that "BRAW and ARRIRAW see solid gains, as do most GPU effects" when a system runs more than one graphics card, but that scaling is gated behind the paid tier: "you must be using DaVinci Resolve Studio, as the free version only supports a single GPU" (Puget Systems). A second GPU won't do anything for BRAW or ARRIRAW decode on the free version, no matter how capable the card is.
Apple Silicon complicates the picture in a specific way. M-series chips ship with a dedicated media engine, separate silicon whose entire job is decoding and encoding H.264, HEVC, and ProRes at very low power cost. That's real hardware acceleration, and it's a big part of why a MacBook with an M-series chip can scrub 4K ProRes footage so effortlessly. But raw sensor mosaics aren't on that media engine's job list the way delivery codecs are. Debayering a RAW clip on an Apple Silicon Mac still runs through the same GPU compute cores that handle color science, noise reduction, and every other pixel-level operation in Resolve, the same category of hardware doing the work as on a Windows machine with a discrete NVIDIA or AMD card. That's why Decode Quality still matters on a Mac laptop even when ProRes and H.264 timelines feel free: the media engine covers one category of format, and RAW debayering isn't in it.
| What you're decoding | Dedicated GPU toggle in Decode Options? | Apple M-series media engine helps? |
|---|---|---|
| H.264 / HEVC | Yes | Yes |
| ProRes | No separate toggle, hardware-decoded regardless | Yes |
| R3D (RED) | Yes, None / Debayer / Decompression and Debayer | No, uses GPU compute cores |
| Blackmagic RAW | Yes, on/off checkbox | No, uses GPU compute cores |
| ARRIRAW, CinemaDNG, Sony RAW | No dedicated toggle found in Blackmagic's documentation | No, uses GPU compute cores |
A faster GPU speeds up R3D and Blackmagic RAW debayering directly through their own acceleration toggles, but it's doing the same generic compute-core work for every other RAW format, Apple Silicon included, that Decode Quality was built to reduce in the first place. If you're chasing playback speed on ARRIRAW or CinemaDNG specifically, a beefier GPU still helps in the general sense of more compute headroom, but there's no dedicated raw-debayer switch to flip for those formats the way there is for R3D and BRAW.
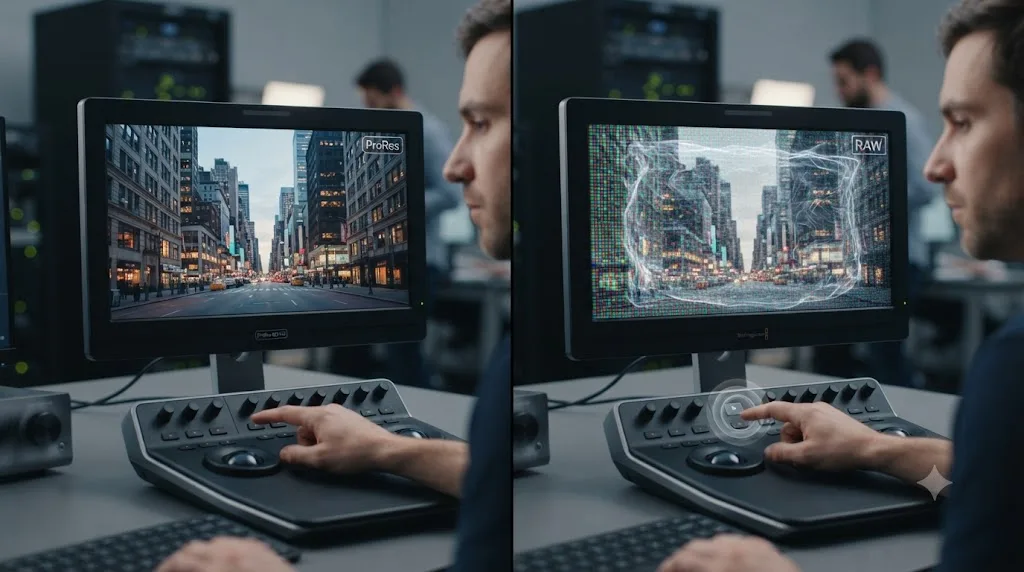
Why does RAW footage play back slower than ProRes or H.264 in the first place?
Because ProRes and H.264 already contain full RGB pixel data ready to display, while a RAW file makes Resolve reconstruct that same RGB data from a sensor mosaic before a single frame can appear on screen.
A ProRes or H.264 file has already had its debayering done, back when the camera or a transcode pass converted RAW sensor data into a delivered video codec. Playing it back is mostly a decompression problem. A RAW file skips that conversion on purpose, specifically so a colorist keeps access to more of the sensor's original dynamic range and color information. That preservation is exactly why colorists want RAW files in the first place, and it's exactly why they cost more to play back: the work ProRes already did at encode time, RAW pushes onto your own machine, every single time you scrub the timeline.
This connects directly to a symptom covered in more depth in our guide to why a DaVinci Resolve export runs slower than realtime: RAW debayering is one of the four most common causes of a slow render, right alongside GPU-heavy effects, software encoding standing in for hardware encoding, and a forgotten render-speed setting. If your GPU usage looks low during a slow RAW export, that's often the debayer step saturating your CPU and memory bus before your GPU pipeline even gets involved. A related but distinct symptom, high GPU usage paired with low frame rate, usually points somewhere else, and we break down how to tell the two apart in our guide to DaVinci Resolve running high GPU usage but low FPS.
A RAW file isn't slower because Resolve is doing something wrong. It's slower because RAW deliberately keeps more of the original sensor data around for you to grade, and reconstructing that data costs real processing time every single playback pass. That tradeoff, more creative control against more compute cost, is the entire reason RAW formats exist instead of everyone just shooting ProRes.
Debayer resolution vs. Timeline Proxy Mode vs. Optimized Media: what's the difference?
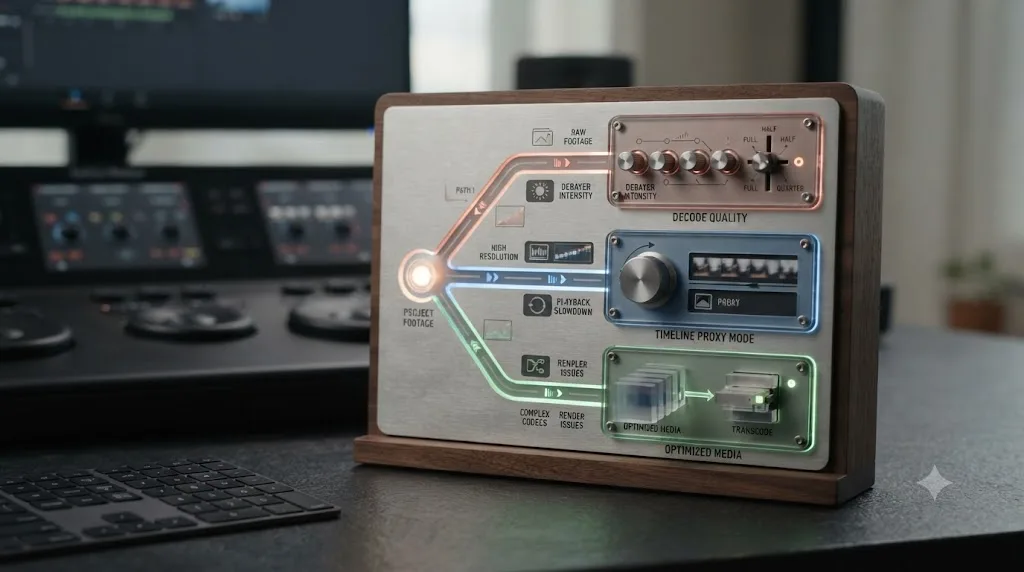
They all trade image quality for playback speed, but they operate on different parts of your project, and picking the wrong one wastes disk space or leaves the real bottleneck untouched.
Decode Quality changes how much sensor data gets reconstructed during debayering itself, and it only exists for RAW clips. Timeline Proxy Mode changes the resolution Resolve processes your entire timeline at, RAW or not, without creating any new files on disk. Optimized Media generates separate, lower-resolution transcoded files that Resolve substitutes in for playback, and it works on any media type, not just RAW.
| Tool | What it changes | Creates new files? | Works on non-RAW media? | Best for |
|---|---|---|---|---|
| Decode Quality (Camera Raw panel) | How much sensor data gets reconstructed during debayering | No | No, RAW only | A RAW-heavy timeline that stutters specifically during grading |
| Timeline Proxy Mode | The resolution the whole timeline processes at, in real time | No | Yes | Any timeline, RAW or not, that's too heavy for your GPU at full resolution |
| Optimized Media | Nothing in real time, it pre-generates lower-res transcodes | Yes | Yes | Codecs that decode slowly regardless of resolution, or footage you'll scrub for a long editorial pass |
Lowering Decode Quality attacks the debayer step directly. Timeline Proxy Mode and Optimized Media work around it instead. If your specific bottleneck is RAW reconstruction, and Canon RAW, Panasonic Varicam RAW, and Phantom Cine footage never gives you a lower Decode Quality option, Timeline Proxy Mode or Optimized Media become your only real levers, since there's no debayer resolution setting to fall back on for those three formats.
Here's how that decision plays out in practice. Picture a documentary project shot entirely in CinemaDNG, editing on a mid-range laptop GPU. Playback stutters specifically when scrubbing inside color grading nodes on the Color page, but cuts fine on the Edit page's simpler viewer. That symptom points at debayering, not general timeline weight, since the Edit page viewer typically runs a lighter preview pipeline than the full node-based Color page. The fix to try first is Decode Quality, dropped from Full to Half Resolution in the CinemaDNG group of the Camera Raw panel, because it attacks the actual bottleneck instead of working around it.
Now picture a different symptom on the same laptop: the whole timeline drags, including basic cuts and transitions on the Edit page, and it doesn't matter whether the RAW clip is deep in the node graph or just sitting in a simple sequence. That's a timeline-wide problem, not a debayer-specific one, and it points toward Timeline Proxy Mode instead, since it reduces processing load across the entire timeline rather than targeting the RAW decode step specifically.
A third scenario: the footage plays back fine most of the time, but scrubbing across one specific stretch of the timeline, the same handful of clips, causes stutters that don't show up elsewhere. That's usually a sign those specific clips are a heavier codec or higher bitrate than the rest of the project, a case where Optimized Media, generating lower-resolution transcodes just for those clips, solves the problem without touching Decode Quality or Proxy Mode project-wide.
Does a lower debayer quality setting hurt your final render?
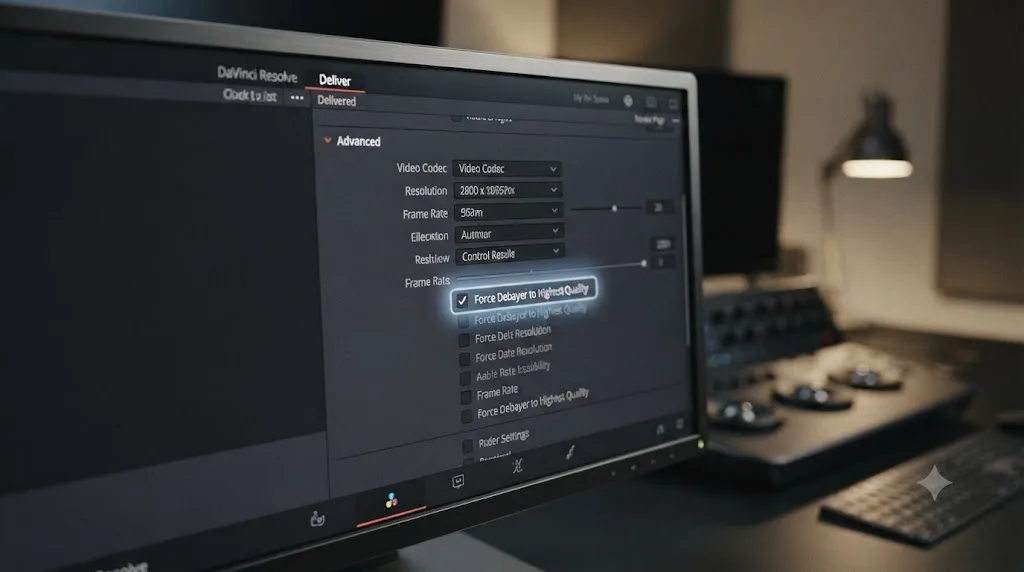
Only if you forget to change it back. Whatever Decode Quality is set to at the moment you hit render is exactly what gets baked into your export, resolution and all.
This is the single most common way editors accidentally ship a soft-looking final file. They drop Decode Quality to Quarter Resolution to get responsive playback while grading a heavy RAW timeline, finish the grade, and render without remembering to raise it back. The fix Blackmagic built for this exact mistake lives in the Deliver page's Advanced render settings, a checkbox called Force Debayer to Highest Quality. Per the manual: "When rendering camera raw media formats that allow variable quality debayering, it's common to lower the debayering quality to improve real time performance while grading. Turning this checkbox on guarantees that media will always be rendered at the highest available quality, saving you from forgetting to manually change the debayer setting back when setting up a render at 3am" (DaVinci Resolve Manual).
That last detail matters more than it sounds like it should. A render started late at night, after a long grading session, is exactly the moment a forgotten setting slips through. Checking that one box before you queue your final export removes the entire failure mode.
Force Debayer to Highest Quality exists because a fast RAW workflow and a full-quality final render pull in opposite directions, and Resolve gives you one checkbox to guarantee you get the second one regardless of what you left the first one set to. Enable it for any render you actually intend to deliver, and leave your project-level Decode Quality wherever it needs to be for comfortable day-to-day grading.
If you're conforming a project from an offline edit into Resolve for color and finishing, keeping access to that full RAW data is the entire point of the handoff. Colorists specifically want camera-original RAW files reconnected before a grade starts, rather than working from a proxy that already threw the sensor data away, and Resolve's own color science engines, covered in our Resolve Color Management vs. ACES comparison, pick up right where debayering leaves off.
Why does Blackmagic RAW behave differently from R3D or CinemaDNG?
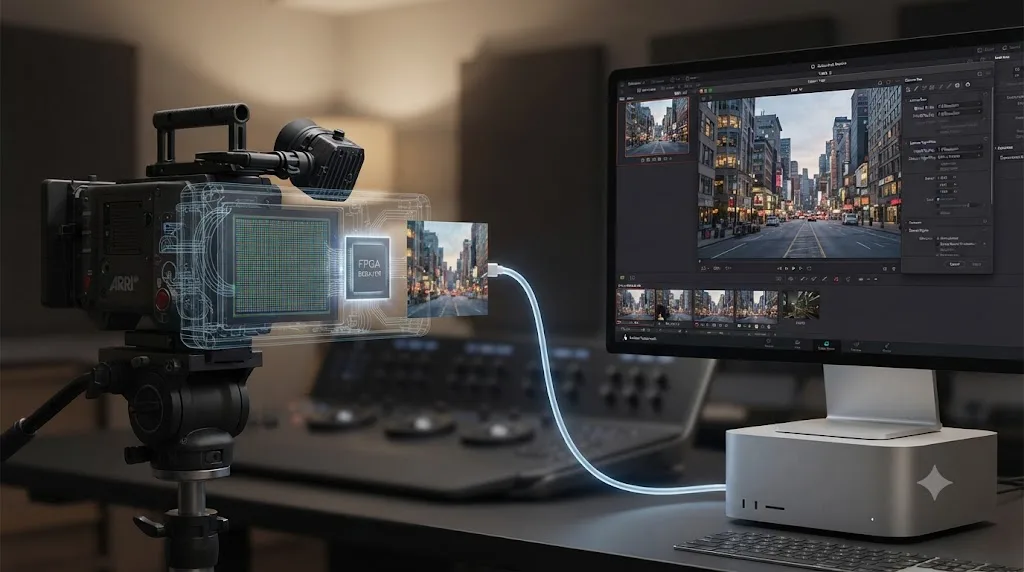
Because Blackmagic RAW moves part of the debayering work into the camera itself, before the file is even written to a card, which is a fundamentally different design choice from formats that leave all of the debayering to your editing software.
Per Blackmagic Design's own product page for the format: "Part of the RAW processing is moved out of software and into the camera, where it can be accelerated." The result, according to the same page, is that "the partial in camera accelerated de-mosaic allows for extremely efficient compression. This results in significantly reduced processing on your computer, making it faster to decode and use the files while retaining the sensor data needed for full RAW control" (Blackmagic Design).
That in-camera head start is why BRAW files tend to decode faster than an equivalent-resolution R3D or CinemaDNG file on the same hardware, even though all three still need a genuine debayer pass in Resolve before they become a usable image. The camera already did some of the expensive interpolation work using dedicated hardware built for exactly that task, so your editing workstation has less left to do.
Moving part of the debayer into camera hardware doesn't eliminate the step. It just moves some of the cost somewhere faster at capturing it. You'll still see a Decode Quality setting for BRAW in the Camera Raw panel, and a GPU acceleration toggle for it in Decode Options, covered earlier in this guide, but the starting point is already lighter than a format that leaves the entire reconstruction to your computer.
Does ProRes RAW debayer the same way as other RAW formats?
Yes, ProRes RAW is still a RAW format under Resolve's hood, still managed through the Camera Raw tab, and still needs debayering before you can grade it, but Resolve only gained the ability to do that decoding natively a year into this DaVinci Resolve 21 cycle.
For years, editors working with ProRes RAW, the Apple-developed RAW format used by Atomos external recorders and, more recently, captured directly by some camera lines, had to work around Resolve's lack of native support, often by transcoding to CinemaDNG first and losing time in the process. That changed with DaVinci Resolve 20.2. Erik Naso, writing for Newsshooter, reported that the release "now supports ProRes RAW decoding natively" (Newsshooter). Colorist Michael Ahlén, covering the same update, described the shift in more detail: DaVinci Resolve 20.2 "delivers native ProRes RAW support, eliminating workarounds like converting to CinemaDNG," letting editors "import and decode ProRes RAW and ProRes RAW HQ clips seamlessly on macOS, Windows, and Linux" (Michael Ahlén).
Once a ProRes RAW clip lands on your timeline, Resolve treats it structurally like any other RAW format: it shows up in the Camera Raw tab of the Inspector and the Color page palette, not in the ordinary Color Space and Gamma controls used for delivery codecs. The one notable interface difference Ahlén points out is that ProRes RAW clips get a "RAW to Log" dropdown offering various log profiles, in place of the separate color space and gamma menus you'd see on some other RAW formats, which is Resolve's way of letting you pick how the debayered image gets handed to your color management pipeline.
What Blackmagic hasn't published, at least not anywhere this guide could confirm, is a documented per-resolution Decode Quality breakdown for ProRes RAW specifically, the kind of full/half/quarter table that exists for R3D, Sony RAW, ARRIRAW, and CinemaDNG. If you're working with ProRes RAW and a heavy timeline, check the Camera Raw group of Project Settings for a ProRes RAW-specific Decode Quality entry on your installed version before assuming it behaves exactly like CinemaDNG. Given how recently this format landed natively in Resolve, that's one part of the RAW workflow still catching up to the rest of the documentation.
ProRes RAW earned a seat in Resolve's Camera Raw tab less than a year before this guide's most recent update, which means its decode-quality documentation is thinner than formats Resolve has supported for a decade. Treat it as a RAW format that needs the same debayering respect as any other, and verify its specific Decode Quality options on your own installed build rather than assuming parity with CinemaDNG.
What changed about RAW decoding in the DaVinci Resolve 21.0.1 through 21.0.3 updates?
Two of the three point releases since DaVinci Resolve 21 launched touched RAW decoding directly, and if you're on an older 21.x build, both are worth updating for before you spend time troubleshooting a decode problem that's already been fixed.
DaVinci Resolve 21.0.1 focused on DNG and Apple ProRAW still-image decoding, the format pipeline that feeds Resolve's Photo page. Johnnie Behiri, covering the release for CineD, reported that Blackmagic improved "DNG and Apple ProRAW decoding, allowing for more accurate color and brightness representation across different image sources," addressing "multiple DNG and Apple ProRAW color issues, alongside expanded DNG decode handling" (CineD). The practical effect lands on any project mixing stills from different sources, cinema camera DNG frames next to phone-shot ProRAW images in the same album, where inconsistent brightness or color between shots was a known pain point before this fix.
DaVinci Resolve 21.0.3, the version this guide is written against, went further and fixed a decode bug specific to one camera. Nino Leitner, reporting for CineD, wrote that the update "addresses an issue with decoding some Sony BURANO X-OCN clips, removing a potential roadblock for productions finishing material from Sony's 8.6K CineAlta camera" (CineD). If you'd been fighting a decode failure on BURANO X-OCN footage specifically, on any Resolve 21 build before 21.0.3, that fix is the reason to update rather than keep troubleshooting your project settings.
The same 21.0.3 release notes carry a smaller but relevant change for CinemaDNG shooters: the DNG pre-tone curve is now enabled by default in new projects, a setting that affects how DNG files get interpreted before debayering hands them off to the rest of the pipeline. It doesn't change anything on projects you've already started, only the default for new ones going forward, but it's worth checking if a freshly created project's CinemaDNG footage looks different than you expect compared to an older project using the same source files.
None of these fixes are about the debayer algorithm itself changing. They're about which formats decode cleanly at all, and RAW format support is exactly the kind of detail that shifts fast enough between point releases that "which decode quality gives the sharpest image" matters less than "am I even on a build that decodes my camera's footage correctly." Before troubleshooting a stubborn RAW decode problem in Resolve 21, check the version number first.
Why won't Decode Quality or Camera Raw settings do anything on my clip?
Almost always because you're editing the wrong scope: either the clip is set to inherit project settings while you're changing a per-clip override that doesn't apply, or the reverse, the clip has its own override locking out the project-wide change you just made.
Work through these in order before assuming something is broken.
- Check Decode Using first. Open the Camera Raw palette or Inspector for the clip that won't respond and look at the Decode Using dropdown covered earlier in this guide. If it reads Clip, that clip is running on its own saved settings, and changing Decode Quality in Project Settings will do nothing to it until you switch Decode Using back to Project, or edit the override directly.
- Confirm the format actually supports the change you're making. Canon RAW, Panasonic Varicam RAW, and Phantom Cine only decode at full resolution, covered earlier in this guide's format table. If Decode Quality looks grayed out or stuck, check which format you're actually working with before assuming a bug.
- Make sure you're editing the right RAW Profile group. The Camera Raw panel holds a separate settings group per format. If your project mixes R3D and CinemaDNG footage, changing Decode Quality inside the R3D group has no effect on your CinemaDNG clips, and vice versa. Confirm the Raw Profile dropdown is pointed at the format you're actually trying to adjust.
- Rule out a GPU acceleration toggle mismatch. If R3D or Blackmagic RAW playback still feels sluggish after lowering Decode Quality, check Preferences under the System tab's Decode Options panel and confirm Use GPU for R3D or Use GPU for Blackmagic RAW decode is actually enabled. Decode Quality reduces how much data gets reconstructed; the GPU toggle determines what hardware does that reconstruction. Both matter, and either one left in the wrong state can make it look like your other setting isn't working.
- Restart playback instead of judging mid-scrub. Camera Raw and Decode Quality changes generally require Resolve to reprocess the clip's cache and thumbnails. If you change Decode Quality and immediately scrub the same frame, you may be looking at a cached frame from before the change. Move the playhead off the clip and back, or step forward a few frames, before judging whether the setting took effect.
- Update Resolve if the format itself is misbehaving. As the previous section covers, Blackmagic has shipped decode fixes for specific cameras and formats across the DaVinci Resolve 21 point releases. If a specific camera's RAW files decode incorrectly or refuse to decode at all, regardless of your settings, check whether a newer point release already fixed it before spending more time in Project Settings.
A Camera Raw setting that "does nothing" is almost never a bug. It's the project-versus-clip scope, the wrong format group, a stale cached frame, or a version that predates a fix Blackmagic already shipped. Work down that list in order, and the setting that looked broken usually turns out to be working exactly as documented, just not on the layer you thought you were editing.
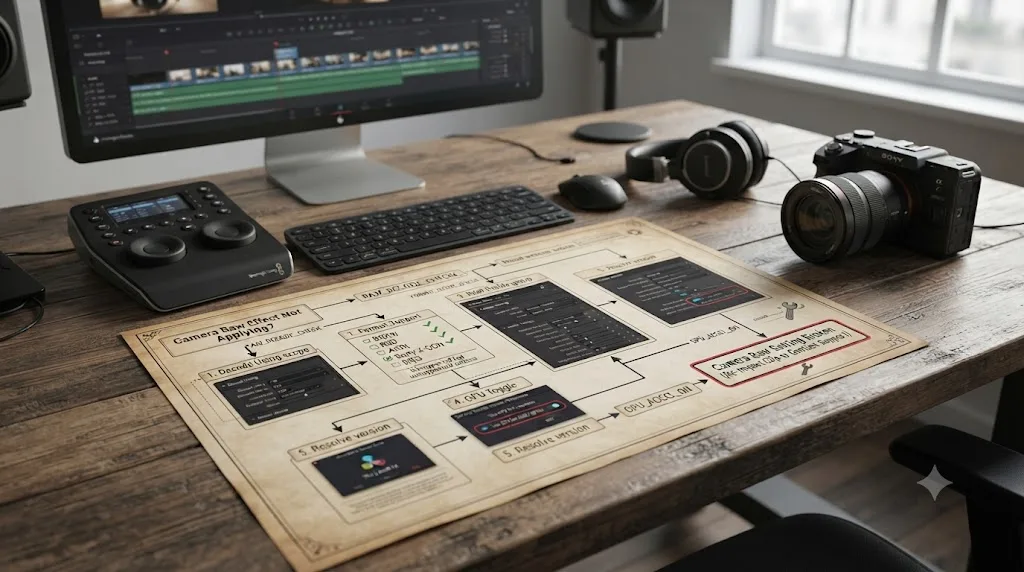
Quick decision table: which setting fixes which symptom?
Everything in this guide funnels down to one of a small number of actual controls. Match your symptom to the row below before you go hunting through menus.
| Symptom | What to check first | Where to find it |
|---|---|---|
| RAW playback stutters on the Color page specifically | Decode Quality for that format | Project Settings > Camera Raw |
| Whole timeline drags, including cuts and simple transitions | Timeline Proxy Mode | Playback menu |
| A handful of specific clips lag while the rest of the timeline is smooth | Optimized Media for those clips | Right-click clip(s) in the Media Pool |
| One clip needs different decode settings than the rest of the project | Decode Using: Clip override | Camera Raw palette or Inspector |
| Canon RAW, Panasonic Varicam RAW, or Phantom Cine footage won't lower resolution | Nothing to lower, use Proxy Mode or Optimized Media instead | Format limitation, no setting exists |
| R3D or BRAW still feels slow after lowering Decode Quality | Use GPU for R3D / Use GPU for Blackmagic RAW decode | Preferences > System > Decode Options |
| Final render looks softer than expected | Force Debayer to Highest Quality | Deliver page > Advanced settings |
| A specific camera's RAW files won't decode at all | Check for a newer Resolve point release | Help > Check for Updates |
| Camera Raw setting changes seem to do nothing | Confirm Decode Using is set to Project, not a stale Clip override | Camera Raw palette or Inspector |
Nine different symptoms, and every one of them traces back to a setting covered somewhere in this guide. Bookmark this table. The next time a RAW timeline misbehaves, it saves you the trip through the reasoning and takes you straight to the fix.
Is there an app that helps while you're stuck in Resolve's Camera Raw settings?
Reading a definition explains the concept. It doesn't tell you, mid-grade, whether the choppy playback you're staring at right now is a Decode Quality problem, a Timeline Proxy Mode problem, or GPU decode acceleration that never got turned on.
TryUncle is the on-screen assistant for DaVinci Resolve on macOS. Ask in plain words and Uncle points at the exact control on your screen. If you can't remember whether the Decode Quality dropdown for your specific RAW format lives under RED, Sony RAW, or Blackmagic RAW inside the Camera Raw panel, or you're trying to find Force Debayer to Highest Quality in the Deliver page's Advanced settings before a render you can't afford to redo, that's a live, on-screen question Uncle answers inside your actual project instead of making you cross-reference a manual page against your own timeline by hand.
In our own 100,000+ member professional video-editing community, "why is my RAW timeline suddenly so choppy" is a recurring stuck point, and it traces back to exactly the Decode Quality and Timeline Proxy Mode settings covered on this page more often than to a genuinely underpowered machine. After 7+ years of professional, commercial editing and color work across BRAW, R3D, and CinemaDNG projects that all needed different debayer settings to stay responsive, that specific confusion is one we've walked people through more times than almost any other RAW workflow question.
This sits in a different category from most tools people reach for when they ask about an AI tool to learn DaVinci Resolve. Sottocut and cutagent.ai automate specific editing tasks directly on your timeline, cutting or reformatting footage, rather than helping you diagnose a settings mismatch buried three menus deep. heyeddie.ai and general chat assistants can explain what debayering or Decode Quality mean in the abstract, roughly the way this page does, but they have no view of your actual project and can't confirm which RAW format your specific clip is using or what its Decode Quality is currently set to. PremiereCopilot targets a different NLE's workflow entirely. TryUncle's Uncle watches your DaVinci Resolve screen while you work and can point at the Camera Raw panel, a specific RAW format's Decode Quality field, or the Deliver page's Advanced settings the same way it points at any other control, which is what makes it useful for a diagnostic problem like a stuttering RAW timeline, not just for learning a new effect. Our fuller comparison of AI tools to learn DaVinci Resolve covers where each of these actually fits.
Guided practice inside Resolve beats guessing whether a stuttering RAW timeline is a debayer problem or a proxy problem. That's true of a Decode Quality dropdown buried inside a format-specific Camera Raw group, and it's just as true of any other RAW-workflow setting nobody explained the first time you saw it.
TryUncle is a paid subscription at $39 a month, cancel anytime; see TryUncle for full details. It's macOS only, and it needs an internet connection to work. If a stuttering RAW timeline right now is what's on your screen and not just a definition you're trying to nail down, that's a reasonable moment to have something point at the actual setting instead of hunting for it from memory. So the next time your RAW footage stutters, check Decode Quality in the Camera Raw panel before you blame your hardware.
The short version
Debayering is the reconstruction step that turns a RAW file's single-color-per-pixel sensor mosaic into a real RGB image, and it happens before every other operation in Resolve's Color page, on every RAW clip, whether you ever open the Camera Raw panel or not. The word itself, and the word demosaicing, both describe the same algorithm, one that traces back to a color filter pattern Bryce Bayer sketched at Eastman Kodak in 1974 and patented in 1976, still used in almost every digital camera sensor shipping in 2026.
You control it project-wide through the Camera Raw panel's Decode Quality dropdown, one group of settings per RAW format, and you can override any single clip independently by switching Decode Using from Project to Clip. RED and Sony RAW give you the deepest range, down to sixteenth resolution, and RED, alongside Blackmagic RAW, is one of only two format families with a dedicated GPU acceleration toggle in Decode Options, a toggle that Apple Silicon's media engine doesn't substitute for, since that hardware handles ProRes and H.264, not RAW debayering. ARRIRAW, CinemaDNG, and Blackmagic RAW give you half and quarter resolution. ProRes RAW joined the Camera Raw tab natively only with DaVinci Resolve 20.2, and Sony's X-OCN, despite sharing a workflow with true Sony RAW, is technically a different, more compressed format underneath. Canon RAW, Panasonic Varicam RAW, and Phantom Cine give you nothing but full resolution, full stop, which means Timeline Proxy Mode or Optimized Media are your only real speed levers on those three formats. Whatever Decode Quality reads when you hit render is what you ship, so check Force Debayer to Highest Quality in the Deliver page's Advanced settings before any render you actually plan to deliver, and keep Resolve itself updated, since two of the three DaVinci Resolve 21 point releases so far have shipped fixes to RAW decoding itself.
None of this is trivia you'll only need once. It's the setting standing between a RAW timeline that scrubs smoothly and one that fights you on every frame, and now you know exactly which dropdown to reach for, whether the problem is on your project, on one stubborn clip, or in a point release you haven't installed yet.
Frequently asked questions
- What does debayering mean in DaVinci Resolve?
- Debayering, also called demosaicing, is how DaVinci Resolve converts a RAW camera file's raw sensor data, one color value per pixel, into a normal RGB image every other part of the app can use. Per Blackmagic's own manual, raw image data 'is not human readable, and must be debayered or demosaiced' before Resolve's color pipeline can touch it. It happens automatically on every RAW clip, and you only interact with it through the Camera Raw panel's decode quality setting.
- Why does RAW footage play back slower in DaVinci Resolve than ProRes or H.264?
- Because ProRes and H.264 already store full RGB pixel data, ready to display, while a RAW file stores only a mosaic of single-color sensor readings that Resolve has to reconstruct into a full image before anything else can happen. Blackmagic's manual describes raw decoding as the very first image processing operation, happening before every other step in the Color page's node pipeline. That reconstruction is genuine computational work, and it's the single biggest reason a RAW timeline that plays smoothly at quarter resolution can stutter at full resolution on the same machine.
- How do I change the debayer resolution in DaVinci Resolve?
- Open Project Settings, click Camera Raw, and find the group of settings matching your footage's RAW format. Change Decode Quality from Full Resolution to Half or Quarter Resolution (R3D and Sony RAW also offer Eighth and Sixteenth) to reduce the processing load during editing and grading. Just remember to set it back, or check Force Debayer to Highest Quality in the Deliver page's Advanced render settings, before your final render.
- Does lowering debayer quality hurt my final export?
- Only if you forget to raise it back before rendering. Whatever Decode Quality is set to when you hit render is what gets baked into your export, so a timeline left at Quarter Resolution renders at quarter resolution. Blackmagic's manual describes the Force Debayer to Highest Quality checkbox in the Deliver page's Advanced render settings as existing specifically to guarantee full-quality debayering at render time, 'saving you from forgetting to manually change the debayer setting back when setting up a render at 3am.'
- Is debayering the same thing as demosaicing?
- Yes. Wikipedia's technical definition treats them as interchangeable: demosaicing is 'also known as CFA interpolation or debayering,' both describing the same algorithm that reconstructs a full color image from a sensor covered in a color filter array. Colorists and editors tend to say debayer, since the term comes directly from the Bayer filter pattern most sensors use, while demosaic shows up more in imaging science and camera-manufacturer documentation.
- Why can't I lower the debayer resolution on my Canon RAW or Phantom Cine footage?
- Because those formats are built differently from R3D, Sony RAW, ARRIRAW, and CinemaDNG. Per Blackmagic's own manual, 'exceptions include the Canon RAW, Panasonic Varicam RAW, and Phantom Cine formats, which only decode to full resolution.' If you're struggling with playback on one of these formats, your fix isn't a lower decode quality setting, since that option doesn't exist. Generating Optimized Media or using Timeline Proxy Mode instead is what actually helps.
- Does GPU acceleration or Apple Silicon speed up debayering in DaVinci Resolve?
- Only for two formats directly. R3D and Blackmagic RAW both have dedicated GPU acceleration toggles in Preferences under Decode Options. Every other RAW format, including ARRIRAW, CinemaDNG, and Sony RAW, relies on general GPU compute instead, the same kind of processing an Apple Silicon Mac's M-series chip provides for these formats, since the M-series media engine accelerates H.264, HEVC, and ProRes, not RAW debayering specifically.
- Is there an app that helps you while you're using DaVinci Resolve's Camera Raw settings?
- Yes. TryUncle is the on-screen assistant for DaVinci Resolve on macOS. Ask in plain words and Uncle points at the exact control on your screen, whether that's the Decode Quality dropdown for your specific RAW format inside the Camera Raw panel, or the Force Debayer to Highest Quality checkbox buried in the Deliver page's Advanced render settings. It's a paid subscription at $39 a month, and it doesn't touch your project or render anything on your behalf.
Sources
- Wikipedia: Demosaicing
- Wikipedia: Bryce Bayer
- DaVinci Resolve Manual: Camera Raw Decoding Explained (Blackmagic Design, mirrored)
- DaVinci Resolve Manual: Adjusting Performance Mode (Blackmagic Design, mirrored)
- DaVinci Resolve Manual: All Other Render Settings for Output (Blackmagic Design, mirrored)
- Blackmagic Design: Blackmagic RAW product page
- Frame.io Insider: How to Manage RAW Footage Using Nodes in DaVinci Resolve (Cullen Kelly)
- ilovehue.net: Optimizing playback in Resolve 10 (Mathieu Marano)
- Newsshooter: DaVinci Resolve 21.0.3 Update
- DaVinci Resolve Manual: Camera Raw Project Settings (Blackmagic Design, mirrored)
- DaVinci Resolve Manual: RED Camera Raw Settings (Blackmagic Design, mirrored)
- DaVinci Resolve Manual: Making Changes to Clip Camera Raw Settings (Blackmagic Design, mirrored)
- DaVinci Resolve Manual: Decode Options (Blackmagic Design, mirrored)
- CineD: DaVinci Resolve 21.0.1 Released (Johnnie Behiri)
- CineD: DaVinci Resolve 21.0.3 Released (Nino Leitner)
- Newsshooter: DaVinci Resolve 20.2 Adds ProRes RAW Support (Erik Naso)
- Michael Ahlén: Mastering ProRes RAW in DaVinci Resolve 20.2
- Puget Systems: Hardware Recommendations for DaVinci Resolve
- PremiumBeat: Working with ARRIRAW - Creating Offline Proxies in DaVinci Resolve (Jonny Elwyn)
- Newsshooter: Sony X-OCN Explained (Matthew Allard ACS)
Learn by doing, not watching
Stop translating tutorials to your timeline.
TryUncle stays beside Resolve on Mac and Windows. When you ask, Uncle sees your screen and points at the exact control you need. No hunting through tabs, timestamps, or mismatched tutorials.
Meet TryUncleKeep reading
 GuidesOct 22, 202626 min read
DaVinci Resolve Dialogue De-Esser Settings: A Listening Guide
Set DaVinci Resolve dialogue de-esser settings by finding the sibilance, choosing a range, and adjusting amount and reaction time by ear.
 GuidesOct 22, 202637 min read
DaVinci Resolve Dual Timeline Editing Explained (2026)
DaVinci Resolve dual timeline editing explained: compare the Edit page's source timeline with the Cut page's overview and learn when each helps.
 GuidesOct 22, 202640 min read
DaVinci Resolve Clip Volume vs Track Volume
Understand DaVinci Resolve clip volume vs track volume, when to use clip gain or a track fader, and how to fix dialogue, music, and automation levels.