
Learn / DaVinci Resolveupdated for DaVinci Resolve 21.0.2 (July 2026)
What Does Conform Mean in Video Editing? The Real Answer
Quick answer
Conform means rebuilding a picture-locked offline edit with full-resolution, camera-original files for color and finishing, using an EDL, XML, or AAF. In DaVinci Resolve specifically, conform also describes the Mixed Frame Rate Format setting, which retimes clips shot at different frame rates to match your timeline.
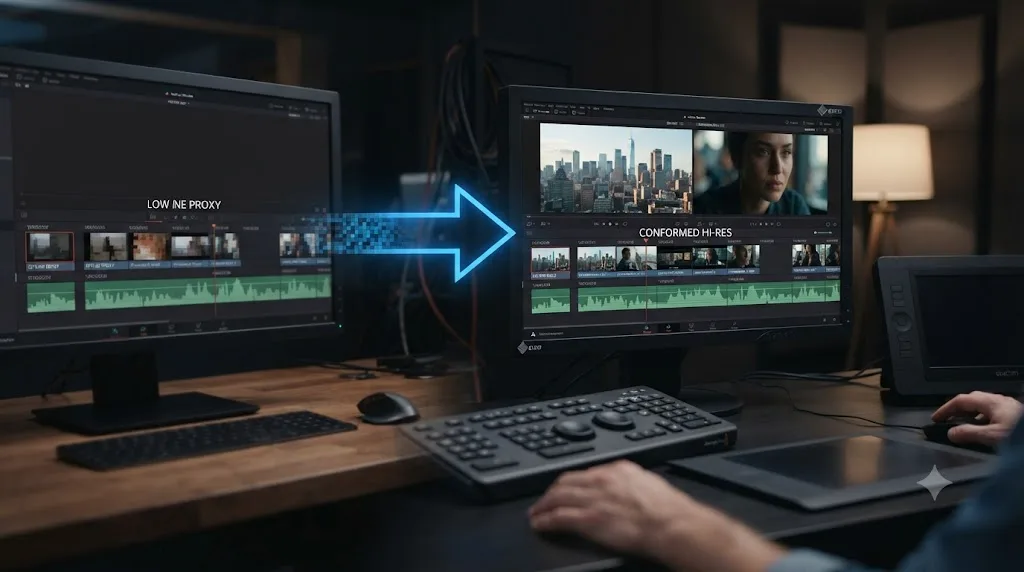
Someone hands you a project and says "it needs to be conformed before color" and you nod like you understood that. You didn't. As of July 2026, that confusion is still one of the more common stalls new editors hit the first time a project leaves a single app, and the honest reason it's confusing is that the word does two different jobs depending on who's saying it.
This page answers both. The general post-production meaning, the one a colorist or an online editor means. And the DaVinci Resolve-specific meaning, the one buried in Master Project Settings that has nothing to do with color at all. Along the way you'll get a real, step-by-step AAF conform, a table of which relink command fixes which kind of broken conform, and the handful of habits that keep a conform from failing in the first place.
What does conform mean in video editing?
Conform means rebuilding an edited sequence using full-quality source files in place of whatever lower-quality media it was cut with. Frame.io's own guide to the process puts it plainly: "Conforming is the process of replacing lower-quality media in an edit or a shot with higher-quality media, usually camera-original files" (Frame.io).
That's the core idea, and it holds whether you're conforming a feature film, a commercial, or a YouTube video shot on mixed cameras. Someone cut the story using media that was fast to work with. Now someone else, sometimes the same person, needs to swap that media for the real thing without disturbing a single edit decision.
Conforming exists because editing software and full-resolution camera files don't always get along at the speed a creative edit needs. A 6K RAW file plays back fine on modern hardware in small doses, but scrub through hundreds of hours of dailies at full resolution and even a strong workstation starts to choke. So productions with a lot of footage, or footage shot at a size their editing system can't comfortably chew through, transcode to something lighter first, cut the whole story on that lighter version, then rebuild the finished cut against the originals once the story stops changing.
ARRI's own explainer on the process uses the more industry-standard shorthand for this: "Conforming or online simply means relinking back to the high-res OCN (original camera negative) files in the correct order, as defined by the editor within the editing software" (ARRI). OCN there stands for original camera negative, the term that survives from film-based post-production and still gets used for camera-original digital files today.
That last detail, a digital-era term borrowing its name from a film-era process, isn't an accident. It's worth understanding why, because the history explains a few things about how conforming still works today that would otherwise look like arbitrary software design choices.
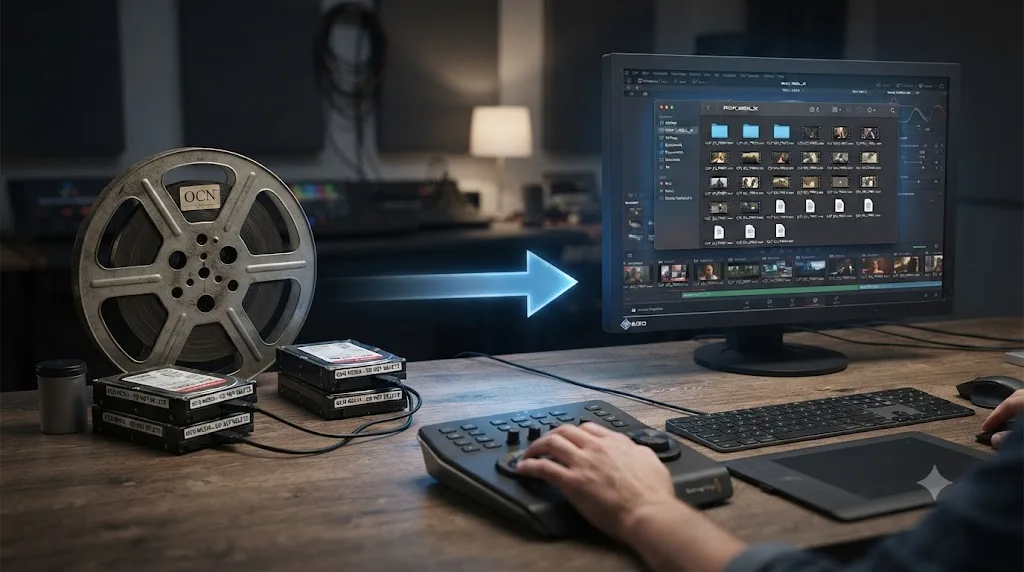
Why is it called "conform" anyway?
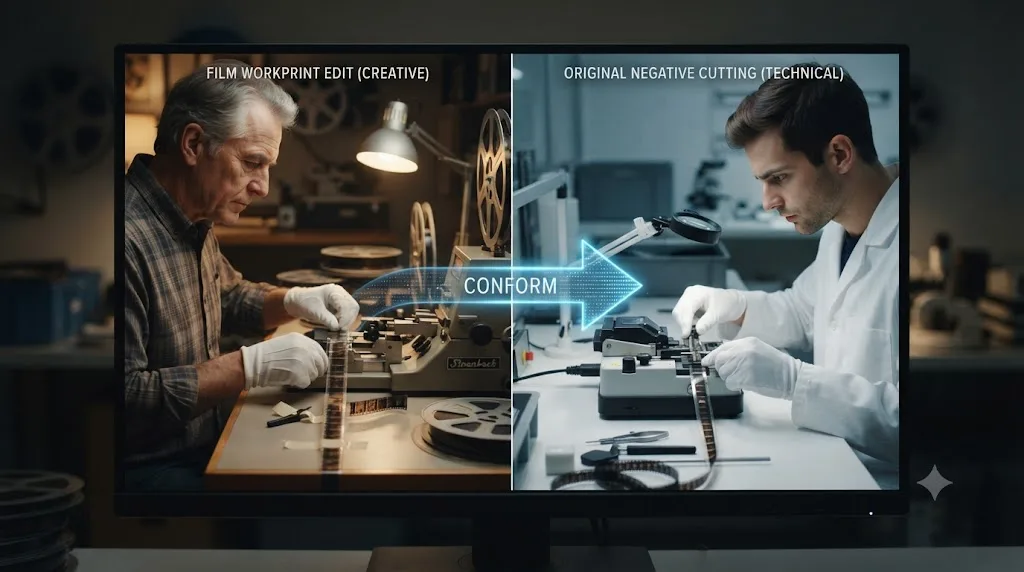
Because the word predates digital editing entirely. It comes from film, from a job called negative cutting, and the modern digital process is a direct, deliberate descendant of it.
Negative cutting, also called negative matching or negative conforming, is defined by Wikipedia as "the process of cutting motion picture negative to match precisely the final edit as specified by the film editor" (Wikipedia). In the analog era, an editor cut a workprint, a cheap positive copy of the footage, on a flatbed or Moviola, trying scenes in different orders without any risk to the original camera negative. Once a director or producer signed off on that workprint, a specialist called a negative cutter took the original camera negative and physically cut and spliced it, with scissors and film cement, to match the workprint frame for frame. That physical negative, cut to conform to the picture-locked cut, is where "conform" comes from.
The parallel to digital editing is almost exact. A modern offline edit plays the same role a workprint did: cheap to work with, disposable if a cut changes, safe to experiment on. A modern online edit, or conform, plays the same role negative cutting did: expensive, careful, done once the decisions are final, and working against the one copy of the material nobody wants damaged. Wikipedia notes that "toward the late 1990s and early 2000s negative cutting changed due to the advent of digital cinema technologies such as digital intermediate (DI), digital projection and high-definition television," and that "increasingly feature films are bypassing the negative cutting process altogether and are being scanned directly from the uncut rushes" (Wikipedia).
The word "conform" survived the transition from film to digital because the job it describes barely changed. Swap "negative cutter" for "online editor" and "splice the negative" for "relink the camera-original files," and you're describing the same handoff, the same stakes, and largely the same reason it exists: protect the one full-quality copy of the footage while the creative decisions get made somewhere cheaper and safer to experiment.
That history also explains something that trips people up later on this page: why an EDL, one of the instruction file formats used to conform a project, still caps reel names at eight characters, a limit inherited from hardware that stopped existing decades ago. More on that shortly.
Why do editors conform instead of just relinking?
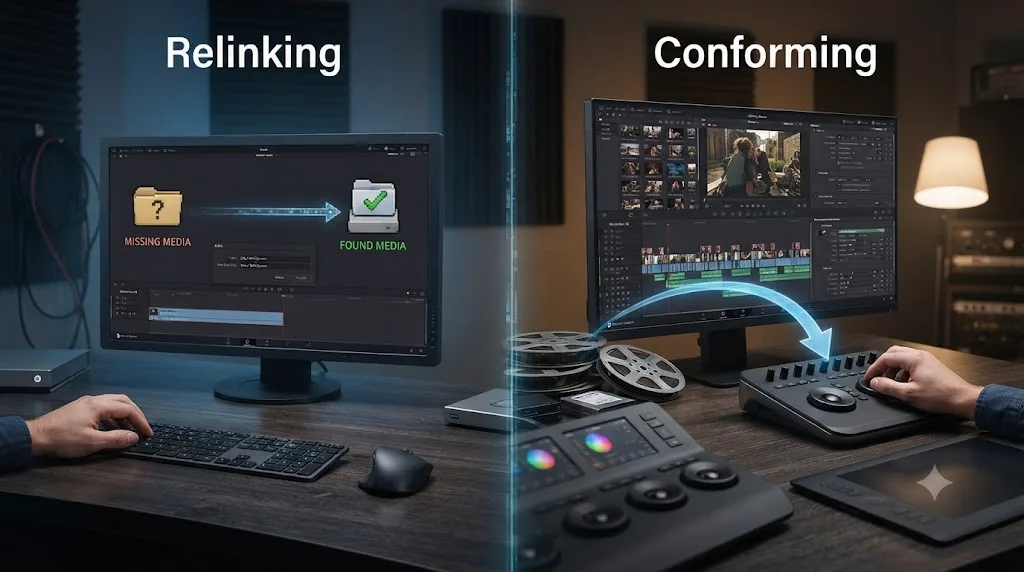
Because conform and relink solve two different problems, even though both end with your timeline pointing at better files. Relinking changes where your existing timeline looks for its media. Conforming rebuilds the timeline itself from an instruction file, in a separate application, then reconnects that rebuilt timeline to the originals.
Frame.io's own proxy workflow guide draws the line precisely: relinking "usually means telling your editing software where to find your files after you've started using them," while conforming means "the timeline is being rebuilt rather than replacing the clips directly in the existing timeline," a process the guide calls "completely rebuilding the timeline itself" (Frame.io Help Center).
| Relink | Conform | |
|---|---|---|
| What changes | File paths inside the current timeline | The entire timeline, rebuilt from an EDL, XML, or AAF |
| Where it happens | Usually the same app you edited in | Often a different app, a dedicated finishing or grading tool |
| What it needs | The original file names or matched metadata | An instruction file plus matching source timecode |
| Typical use case | Switching from proxy to full-res inside one editor | Moving a locked cut from offline editorial into color or finishing |
| Who usually does it | The editor, mid-project | An assistant editor, online editor, or colorist, after picture lock |
Relinking swaps files in place. Conforming rebuilds the whole structure around new files. That distinction is why a relink can happen mid-edit without anyone noticing, while a conform is a deliberate, scheduled handoff between two stages of a production.
Here's a concrete version of the difference. Say you cut a short film in Resolve using 1080p proxies of your 6K RAW footage, all inside one Resolve project, one Media Pool. Once the cut is locked, you point Resolve at the folder of full-resolution originals and relink: same timeline, same project, same app, just better files under the hood. Now say instead an editor cut that same short film in Premiere Pro, and you're the colorist bringing it into Resolve. You don't have their Premiere project. You have an XML export of their sequence. You import that XML into a fresh Resolve project, and Resolve builds you a new timeline from those instructions, then reconnects each clip to your camera originals. That's a conform. Same end state, files match the timeline, but a completely different mechanism got you there.
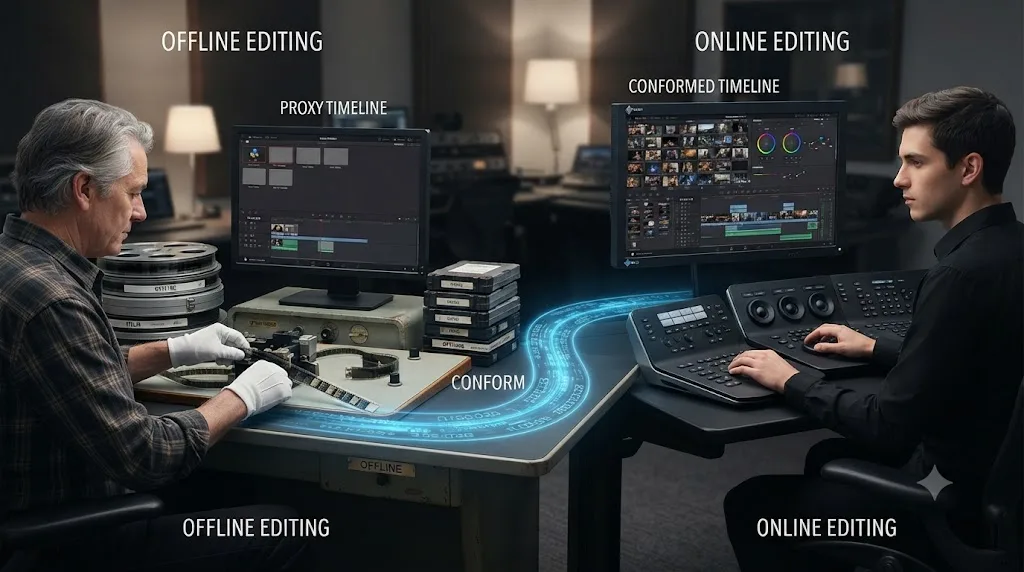
What's the difference between offline and online editing, and where does conform fit?
Offline editing is the creative cut. Online editing, also called conforming, is what happens after that cut is finished and nobody's allowed to touch the story anymore.
An offline edit is built for speed, not final quality. That usually means proxy media, lower resolution, lighter codecs, fast to scrub and cut on even modest hardware, while every editorial decision gets locked in. Once a producer, director, or client signs off on that cut, picture lock happens, and the project moves into online editing: rebuilding the exact same sequence of decisions using full-resolution, camera-original media. That rebuild is the conform.
The gap between offline and online exists specifically because production and post-production have opposite priorities. During the offline, you want to try ten versions of a scene in an afternoon. During the online, you want frame-accurate, full-quality media locked to a story that's no longer moving. Conforming is the bridge that lets one team optimize for speed and a different team, or the same team wearing a different hat, optimize for final image quality without redoing the creative work.
An offline edit optimizes for how fast you can try an idea. An online edit optimizes for how good the final image looks. Conforming is the bridge between the two. Skip the offline stage entirely and heavy footage slows every creative decision down. Skip the online stage and you deliver proxy-quality media to a client who paid for full resolution.
What actually goes into that proxy media isn't fixed, and it doesn't need to match the camera originals in resolution or codec at all, only in name and timecode. Frame.io's proxy workflow guide is explicit about this: proxies "will have codecs that are easier to upload and edit with" than the originals, and "while their clipnames and timecode will be the same, they will often be different resolutions and different codecs than the originals" (Frame.io Help Center). What actually needs to match for a later conform to succeed is narrower than people expect: "the files you edited with (referred to as your offline files) need to have the same name and timecode as the camera original files," per the same guide.
That single sentence is worth sitting with, because it's the rule the rest of this page's troubleshooting sections come back to. A conform doesn't care if your offline file was a heavily compressed H.264 and the original is 12-bit RAW. It cares whether the name and timecode line up well enough for the software to say "these are the same shot." Get resolution and codec wrong and you just get a slower edit or a soft-looking cut. Get name or timecode wrong and the conform can't find the clip at all.
| Proxy scenario | What has to match the camera original | What doesn't have to match |
|---|---|---|
| Editing 6K RAW as 1080p ProRes Proxy | Clip name, source timecode | Resolution, codec, bit depth |
| Editing on a laptop with H.264 proxies of 4K footage | Clip name, source timecode | Resolution, codec, color space |
| Cutting with camera-generated low-res files (common on some mirrorless and drone cameras) | Clip name, source timecode | Resolution, frame size |
| Editing at full resolution the whole way through (no proxy stage) | Nothing extra, since offline and online media are the same file | N/A, this is native editing, not a proxy workflow |
One more thing worth flagging if you're editing in a resolution mismatch between proxy and original. Frame.io's guide notes that for Premiere specifically, "if you are linking lower resolution proxies (ie, 1920x1080) to higher resolution originals (ie, 3840x2160), it is recommended to create a timeline with the resolution of the originals" so your framing, crops, and pan-and-scan moves land in the same place once the conform swaps in the bigger files. The same logic carries into any app: build your offline timeline at the resolution your camera originals will eventually be, not the resolution of your temporary proxies, or repositioned elements can drift once the real media lands.
What do EDL, XML, and AAF have to do with conforming?
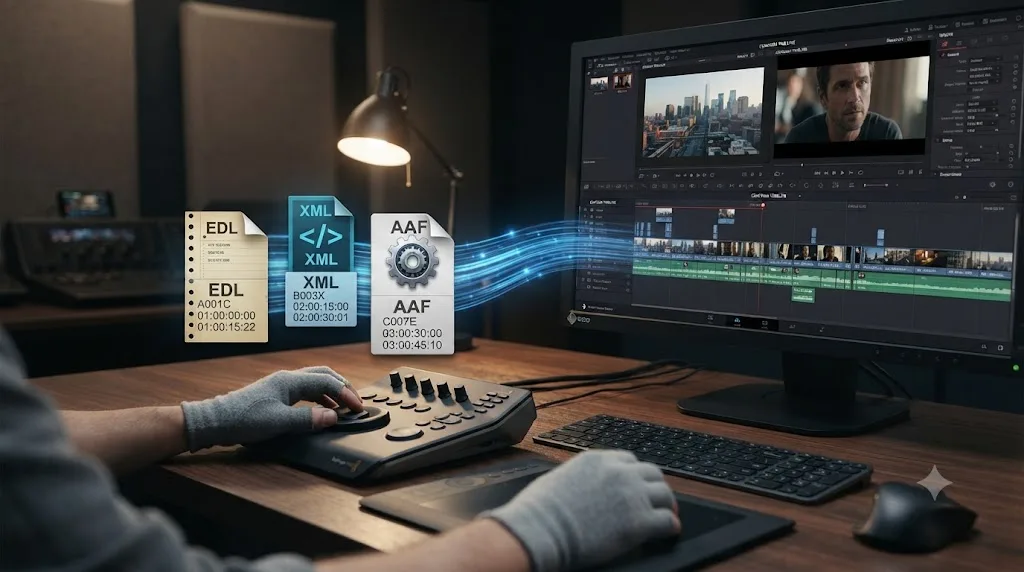
They're the instruction files that make a conform possible. Without one, whoever's rebuilding your timeline has no record of which clip goes where, at what timecode, in what order.
An EDL, XML, or AAF is a list: it names the clip or reel used, gives the timeline's in and out points for that cut, and gives the source clip's own in and out points. ARRI's breakdown lists exactly this trio of required information: "clip or reel name," "timeline timecode IN & OUT," and "source timecode IN & OUT" (ARRI).
| Format | Age | Handles effects (dissolves, repositioning, zooms) | Human-readable | Common use today |
|---|---|---|---|---|
| EDL (Edit Decision List) | Oldest | Poorly, missing support for most repositioning and transitions | Yes, plain ASCII text | Legacy workflows, simplest possible cut lists |
| XML | Newer | Yes, dissolves, effects, pan and scan | Yes | Cross-app conforms, especially into or out of Resolve, Premiere, Final Cut |
| AAF | Newer | Yes, dissolves, effects, pan and scan | No | Cross-app conforms, especially into or out of Avid and Pro Tools |
The EDL's limitations aren't a modern oversight. They're a direct fossil of the hardware it was built for. The standard is the CMX3600 format, and per CutConvert's breakdown of the format, it "flattens everything to a single video track and a couple of audio channels, discarding multi-layer structure, opacity, scaling, speed changes, and effect parameters," while "a hard limit of 999 events and reel names capped at eight characters are holdovers from hardware that no longer exists," tracing back to "the first computerized edit controllers" (CutConvert). If a clip has no proper tape or reel identifier at all, file-based footage instead of a tape source, the format substitutes the placeholder "AX" and preserves the real clip name only in comment lines, which is exactly the kind of gap that turns into a failed match during a real conform.
XML and AAF exist because that flattening was never going to survive multi-layer, effects-heavy editing. CutConvert describes XML as carrying "much more: multiple video and audio tracks, basic sizing and positioning, opacity, volume, and pan," while AAF is the "heavyweight" option, a binary container bundling "media references, transitions, color shifts, and audio parameters" (CutConvert). That's the practical reason EDL has faded to legacy status: modern timelines have more layers and more effects than an eight-character reel name and a flattened track ever anticipated.
Robbie Carman, a professional colorist, described the whole mechanism from the receiving end in a guest post edited by Scott Simmons: "Conforming a project means that I will use an instruction file (like an EDL, XML or AAF) and relink or 'conform' to all of the footage used in the project" (ProVideo Coalition). He continues: "By conforming the show back to the camera original files, I'll have access to all of the RAW data (and resolution) and have more control over the grade."
That's the entire economic reason a colorist wants a conform at all. Not just sharper pixels, but the raw sensor data itself, dynamic range and color information a transcoded proxy already threw away. Carman also flags what actually breaks a conform: matching source timecode between the offline files and the camera originals is, per multiple sources covering this workflow, the single most common point of failure, since a mismatched name or timecode means the instruction file can't find the clip it's pointing at.
A conform is only as good as the instruction file behind it, and an instruction file is only as good as its timecode matching the original camera files exactly. Get a reel name or a timecode wrong at the offline stage, and the conform inherits that error downstream, usually discovered at the worst possible moment, mid-grade with a client watching.
What does a real AAF conform into DaVinci Resolve actually look like, step by step?
Reading definitions only gets you so far. Here's the actual sequence, drawn from Blackmagic's own DaVinci Resolve manual, for the single most common cross-app conform editors run into: bringing a locked cut from Avid Media Composer into Resolve as an AAF.
The order matters more than any other part of this process, because one of the settings below has to be configured before you import, not after.
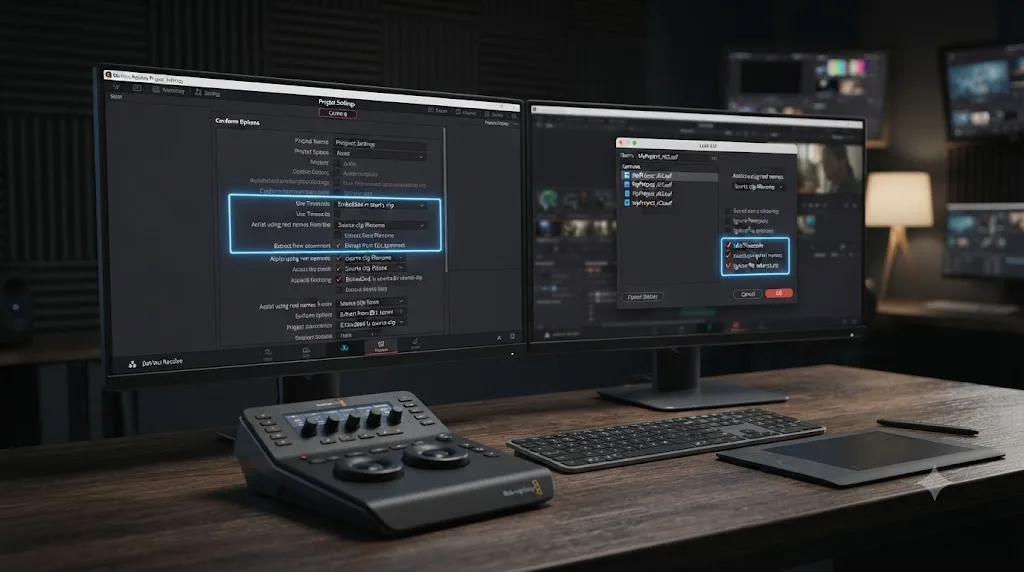
- Open Project Settings and find Conform Options. Click the gear icon to open Project Settings, then go to General Options, where Conform Options is revealed (DaVinci Resolve Manual).
- Set Use Timecode to "Embedded in the source clip." This tells Resolve to trust the timecode baked into each media file rather than guessing from file order or creation date.
- Turn on "Assist using reel names from the," and choose "Embedding in source clip file." This is the setting that has to happen before your Avid transcodes exist, not after. Reel names and tape IDs from Avid won't populate correctly in Resolve's Tape column if this box wasn't checked at the start of the project.
- Click Save.
- Import the AAF. Either use File > Import AAF, EDL, XML (Shift-Command-I on a Mac), or on the Edit page, right-click in the Media Pool and choose Timelines > Import > AAF/EDL/XML.
- Select the AAF file Avid exported. Locate it in the File Selection window and open it.
- Choose your Load AAF settings. Two checkboxes decide how aggressively Resolve searches for matching media: "Automatically import source clips into media pool" and "Ignore file extensions when matching" (DaVinci Resolve Manual).
- Leave "Automatically set project settings" enabled unless you have a specific, deliberate reason to keep your own project's frame rate or resolution instead of matching the incoming sequence.
That seventh step is where most confusion happens, so it's worth breaking into its own decision table. The two checkboxes aren't just extra options, they change which matching strategy Resolve actually uses.
| Your situation | Automatically import source clips | Ignore file extensions when matching | Why |
|---|---|---|---|
| Offline and online media share the same file format | On | Off (default) | Resolve can match by exact filename and extension, the most reliable path |
| Offline was a different format from your online media (the classic proxy-to-camera-original conform) | On | On | Per the manual, this combination is meant for when "the sequence you're importing was originally edited using offline quality media, and you want to conform to high-quality online media in a completely different format" (DaVinci Resolve Manual) |
| You've already imported camera originals into the Media Pool yourself and just want Resolve to match against those | Off | Depends on whether formats match | Prevents Resolve from re-importing anything, forcing it to conform strictly against what's already in your Media Pool |
Once you click through, Resolve doesn't just guess. It works down a fixed hierarchy until every clip resolves or it gives up and asks you directly. Per the manual, that hierarchy is: match by file path first, then scan visible storage volumes using the paths recorded in the AAF or XML, then fall back to matching by clip name against what's already in the Media Pool, then use timecode and, if you enabled it, reel name matching, and only after all of that fails does Resolve prompt you to manually point it at another folder (DaVinci Resolve Manual).
That order explains a real, common frustration: an editor configures reel name assist correctly, imports the AAF, and still gets prompted to manually locate half the clips, because file paths and clip names from the Avid project didn't match anything on the new machine at all. Reel name matching is the fallback, not the first attempt, so a mismatch further up the chain doesn't get skipped just because reel names are technically correct further down.
What does "conform" mean specifically in DaVinci Resolve?
In DaVinci Resolve, conform means two related but distinct things, and mixing them up is where most of the confusion around this exact search actually comes from.
The first sense is the general post-production one covered above: reconnecting an imported timeline, brought in via XML, AAF, or EDL, to matching media in your Media Pool, so every cut points at a real file instead of an offline placeholder.
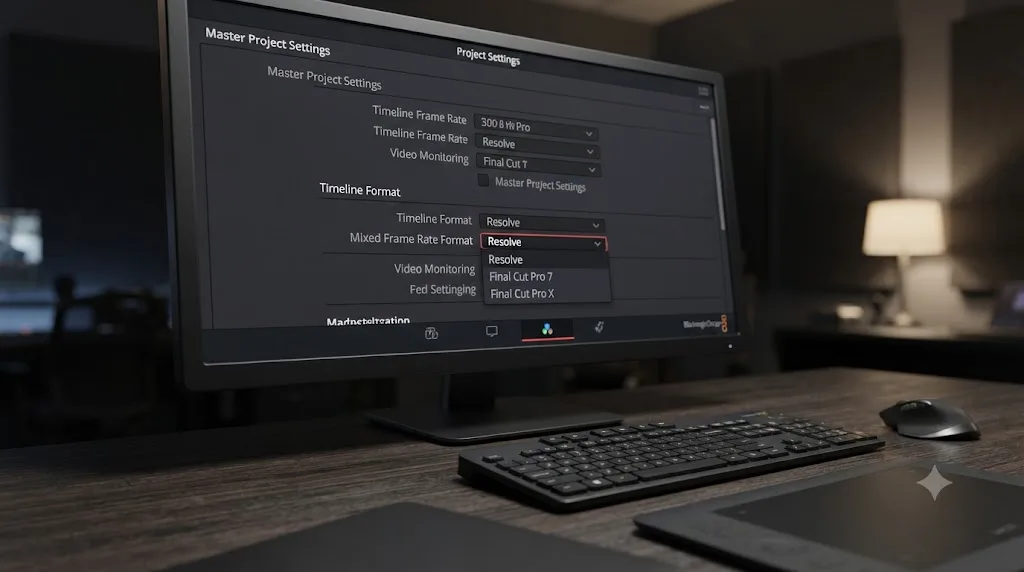
The second sense is specific to Resolve's engine and has nothing to do with proxies or picture lock. It's the Mixed Frame Rate Format setting, found in Project Settings under Master Settings, and it governs how Resolve handles a timeline where clips were shot at different frame rates. Per the manual, this setting lets Resolve "conform projects using the method of mixed frame rate calculation used by the NLE a project was originally edited in" (DaVinci Resolve Manual). Set it to anything other than None, and "DaVinci Resolve conforms and processes all clips in the Timeline to play at the project's frame rate," retiming 23.98, 29.97, 30, 50, 59.94, and 60 fps source clips to all play at whatever rate your Timeline Frame Rate is set to.
That's a genuinely different meaning of the same word. Nobody's swapping proxy files for camera originals here. Resolve is doing frame-rate math, live, on every clip whose native rate doesn't match the timeline it's sitting on.
| Sense of "conform" | What it means | Where it happens | What triggers it |
|---|---|---|---|
| General post-production conform | Rebuilding an offline cut with camera-original media | Between apps, or between offline and online stages | Picture lock, handoff to color or finishing |
| DaVinci Resolve's frame-rate conform | Retiming mixed-frame-rate clips to match the timeline's rate | Inside a single Resolve project, automatically | Importing clips at different native frame rates than the timeline |
The options in Mixed Frame Rate Format even name the source NLE's own math directly: Final Cut Pro 7, Final Cut Pro X, or Resolve, the last of which covers projects from Premiere Pro, Media Composer, or Smoke, matching whichever app's conform arithmetic the original edit used, so the timing that felt right in the source app still feels right after the timeline lands in Resolve.
Why does my DaVinci Resolve timeline frame rate lock after I conform or import media?
Because that Mixed Frame Rate Format setting, the one controlling conform behavior, can only be chosen before your Media Pool has anything in it. The moment you import media, the setting locks, and with it your practical ability to change the Timeline Frame Rate cleanly.
This trips up a lot of editors who import footage first and worry about project settings second. If your timeline suddenly plays clips faster or slower than they should, or Timeline Frame Rate is greyed out when you go looking for it, that lock is almost always the cause.
The fix, in order, without skipping a step:
- On the Edit page, select every clip in the Media Pool and delete them. Not just from the timeline, from the Media Pool itself.
- Open Project Settings and go to Master Settings.
- Set Mixed Frame Rate Format to the correct source, and set Timeline Frame Rate to your intended delivery rate. Do this before anything else touches the Media Pool.
- Save, then reimport your footage.
Doing it in that order matters, because doing it backward, importing first and adjusting settings second, is exactly what got you locked out in the first place. We cover the full fix, including the specific case where a jittery, stuttering timeline is actually a Retime Process problem rather than a Mixed Frame Rate Format problem, in our guide to a jittery mixed frame rate timeline in DaVinci Resolve.
What's a conform lock, and why would you turn it off?
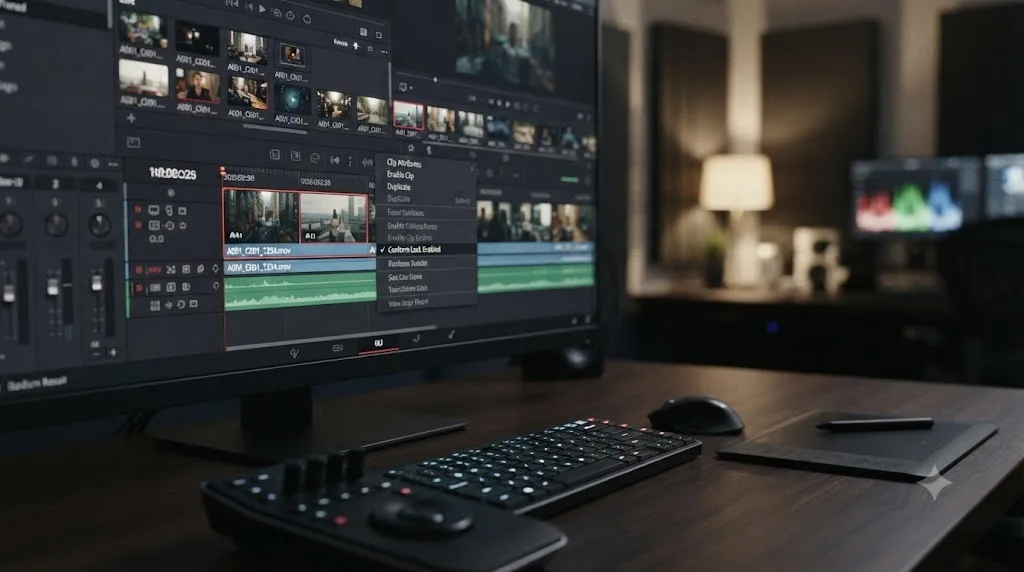
Conform Lock is a separate, clip-level feature from the frame-rate setting above, and it's on by default the moment you edit a clip into a timeline or import one with a timeline attached.
Per the DaVinci Resolve manual, "all clips in a timeline with Conform Lock Enabled turned on only consider the current clip in the Media Pool to which they're conformed as the valid clip; all other clips with file names and overlapping timecode that would otherwise make them an otherwise valid match are ignored" (DaVinci Resolve Manual).
In plain terms: if you've got two files that share a name and overlapping timecode, maybe a raw camera file and a transcoded proxy of the same shot, Conform Lock pins your timeline clip to the one it's already matched to, and quietly ignores the other candidate so your edit doesn't jump to the wrong media on its own. Right-click a clip and turn Conform Lock Enabled off, and Resolve stops hiding that ambiguity. Instead, that clip shows a "clip conflict" error with an attention badge next to its name, forcing you to resolve manually which of the two matching files is actually correct.
Here's a scenario where that distinction has real consequences. Say a production ingests both a camera's internal proxy files and its RAW originals into the same Media Pool, a common setup for cameras that record both simultaneously. Both sets share filenames and overlapping timecode, since they're recordings of the same take. With Conform Lock on, Resolve quietly keeps every timeline clip pointed at whichever version it matched first, which might be the low-res proxy if that's what got imported first. Nobody sees an error. The grade proceeds normally, on the wrong media, and the mistake surfaces only when someone notices the final render looks softer than expected. Turn Conform Lock off before you start grading a project you suspect has this kind of duplicate-source setup, and Resolve will flag every ambiguous clip explicitly instead of silently picking one.
You'd turn it off deliberately in exactly that kind of situation: you suspect a clip conformed to the wrong file, maybe an older proxy instead of a newer full-resolution pass, and you want Resolve to surface every candidate rather than silently trusting its first match. Leave it on for everyday editing. Turn it off when you're specifically auditing a suspicious clip or a project you inherited from someone else's ingest process.
What breaks a conform, and how do you fix it once it's broken?
Two different failure modes get lumped together as "the conform is broken," and they need two different fixes. One is media that's gone offline because a path changed. The other is a clip that conformed to the wrong file entirely. Knowing which one you're looking at saves a lot of wasted clicking.
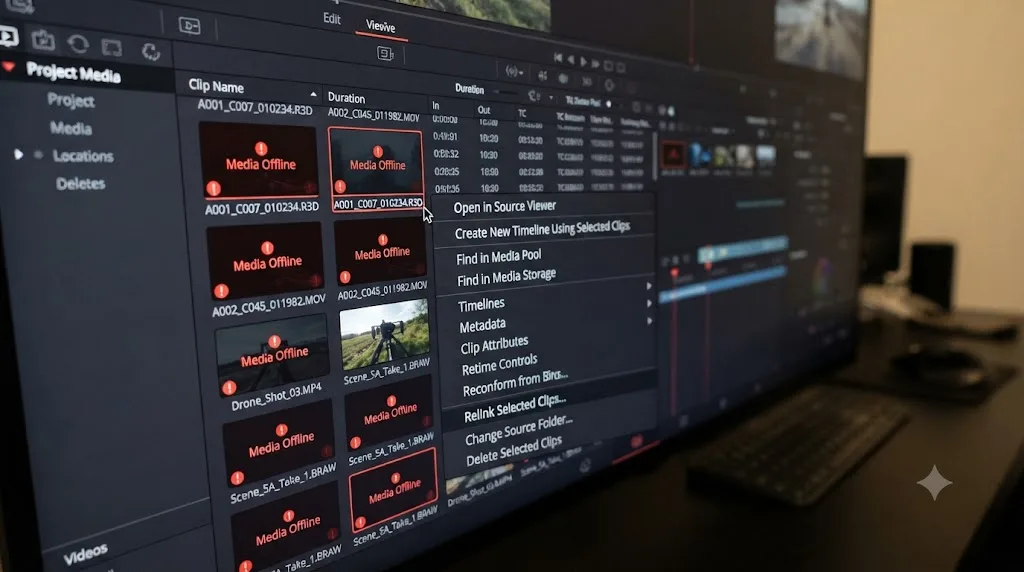
Media Offline is the simpler case. Per the DaVinci Resolve manual, "if you have a DaVinci Resolve project in which there are unlinked clips in the Media Pool, that means the relationship between those clips and their corresponding source media files on disk have been lost" (DaVinci Resolve Manual). Usually that means a drive got renamed, a folder got moved, or media migrated from an editor's laptop to a shared server with a different folder structure. Resolve still knows the clip's name and metadata. It just can't find the file where it last saw it.
Resolve offers several distinct commands for reconnecting media, and they're not interchangeable, they're built for different scopes of the same problem:
| Symptom | Command to use | What it does |
|---|---|---|
| A handful of clips show Media Offline, rest of the project is fine | Relink Selected Clips | Reconnects only the clips you've selected to matching files you point it at |
| The whole project's media moved to a new drive or folder structure | Change Source Folder | Updates stored file paths in bulk to a new base directory, without touching clip names or timecode |
| You need to re-run the conform against a different subset of your Media Pool bins | Reconform From Bin(s) | Reconforms the timeline against specific bins, letting you choose the matching criteria |
| You want to conform straight from a folder on disk without importing it into the Media Pool first | Reconform From Media Storage | Points the timeline directly at a media storage directory and conforms from there |
| An entire bin, or the whole Media Pool, needs reconnecting at once | Relink Media / Relink Clips in Selected Bins | Broader versions of Relink Selected Clips, scoped to a bin or the full pool |
That table comes directly from the manual's own list of conform and relink methods, which also documents that Resolve can conform automatically the moment new media lands in the Media Pool, controlled by a setting called "Automatically conform missing clips added to Media Pool," and that this automatic reconforming only fires if Conform Lock is off (DaVinci Resolve Manual). That's the same Conform Lock covered above, and it's exactly why leaving Conform Lock on protects you from Resolve silently swapping a clip's source the moment a new, similarly-named file shows up in your project.
The second failure mode is quieter and more dangerous: a clip conformed successfully, but to the wrong file. This is what Conform Lock is built to prevent going forward, but it can happen before you ever turn that setting on, especially the first time a project's media gets ingested. If you suspect this has already happened to a project, don't reach for a relink command, since as far as Resolve is concerned that clip isn't offline, it's already linked, just to the wrong thing. Instead, turn Conform Lock off for the suspect clips so Resolve surfaces the conflict, then manually choose the correct file from the candidates it presents.
One more gotcha worth knowing before you start troubleshooting a project you didn't ingest yourself: duplicated clips don't inherit their original's link. Per the manual, "duplicate clips are considered to be completely separate from the original Media Pool or Timeline clips you duplicated them from" (DaVinci Resolve Manual). If an editor right-clicked a clip and duplicated it at some point, maybe to test an alternate version of a shot, relinking the original clip does nothing for that duplicate. It stays offline, or stays conformed to whatever it was conformed to, independently. If you're auditing a project for offline media and you fix everything the Media Pool shows you but a specific timeline clip still won't reconnect, check whether it's a duplicate of something else in the pool rather than the original.
A conform that fails silently is worse than one that fails loudly, because a silent failure ships wrong media to a client who never finds out until it's too late. Media Offline at least tells you something's wrong. A clip quietly conformed to an old proxy tells you nothing until someone notices the final image looks soft.
Who does the conform: an assistant editor, an online editor, or a colorist?
It depends on the size and structure of the production, and on smaller jobs the same person often wears every one of these hats in the same afternoon.
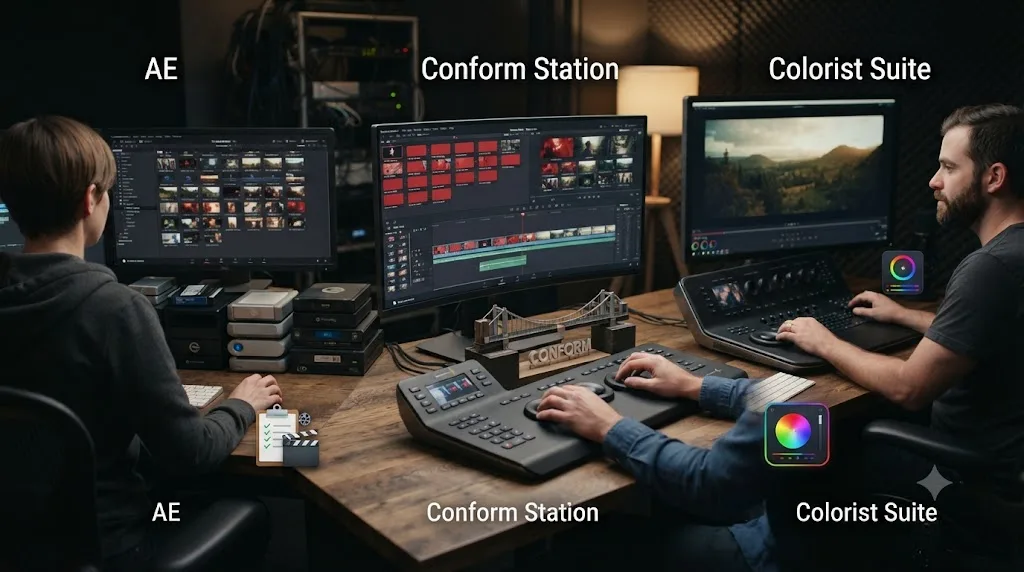
On a larger production, an assistant editor typically prepares and exports the offline cut's instruction files once picture is locked, and hands them off to a dedicated online editor or conform artist, whose entire job is rebuilding that cut against full-resolution media before color even starts. On a smaller job, the colorist often does the conform directly, exactly the way Robbie Carman describes it from his own chair: he receives the instruction file, relinks or rebuilds against camera originals, and only then starts grading, specifically because grading against a proxy would mean grading with less dynamic range and resolution than the camera actually captured.
A forum discussion of the role on Media Match puts the online editor's job in almost identical terms to Carman's description: matching camera raw footage to the edited program, which is the conform, done as a distinct step before finishing work begins (Media Match Forum).
Wherever the boundary falls on your specific job, the sequence itself doesn't change: story locks, then media gets upgraded, then finishing work starts on top of the upgraded media. Compressing all three roles into one person doesn't remove any of those three steps. It just means you're doing them all yourself, in order, instead of handing off between stages.
What is a "conform artist" or "conform editor" job title?
Both are real, specific job titles in post-production, not informal slang for "whoever does the online edit this week."
A real conform artist listing from Ethos Studio describes the role as handling the pipeline "from conforming camera original media to the final edit, preparing color timelines, rendering versions and mastering final picture" (Ethos Studio). The same listing requires a minimum of two years of DaVinci Resolve experience, along with Adobe Creative Cloud and either After Effects or Nuke for compositing and re-timing work, and lists day-to-day responsibilities that include processing dailies, generating preview files for approval, and troubleshooting technical issues across "various digital imaging file and data formats."
That job description matches what this whole page has been describing: conforming isn't a single click, it's a role built around reel names, timecode matching, format conversion, and catching the exact kinds of mismatches covered in the Conform Lock and troubleshooting sections above, done at production scale across dozens or hundreds of clips instead of one.
If you're building a career path toward that kind of role, or you're the editor at a smaller shop who just got handed conform responsibilities without a formal title, DaVinci Resolve experience is explicitly listed as a baseline requirement, not a nice-to-have.
How do you avoid a conform going wrong?
By treating it as a distinct, careful step with its own failure modes, not an afterthought tacked onto the end of an edit.
Patrick Inhofer, writing for Mixing Light about moving a locked timeline between post-production platforms, describes the process bluntly as "filled with pitfalls and traps" (Mixing Light), and treats getting it right as important enough to build an entire tutorial series around, specifically because preserving access to RAW footage and editorial flexibility after color correction depends on the conform being done correctly the first time. Inhofer also flags a mistake specific to RAW workflows: clients who render their RAW footage out to a traditional codec during the offline stage, thinking they're saving time, only to discover later they've permanently lost access to the RAW pipeline a proper conform would have preserved.
A few concrete habits that show up across every source cited on this page:
- Match source timecode exactly. A mismatched timecode between your offline files and the camera originals is, across multiple sources on this exact process, the single most cited reason a conform fails outright.
- Keep file names identical to the camera originals. Renaming footage during an offline edit for organizational convenience is one of the fastest ways to break an automated conform later.
- Don't ignore embedded reel names. They're an underused but critical piece of metadata for matching clips correctly, especially once a project has more than a handful of similarly named files. And if you're building an EDL specifically, remember the format's own eight-character reel name limit, a holdover from hardware decades out of production, and keep reel names under that limit deliberately rather than discovering the truncation after the fact.
- Never render RAW footage to a delivery codec just to make the offline edit lighter. Once that RAW data is gone, no conform can bring it back, since a conform reconnects to source files, it doesn't regenerate data those files never kept.
- Export XML or AAF over EDL whenever the source app supports it, since EDL drops most repositioning and transition effects an XML or AAF preserves, and flattens multi-track structure an XML or AAF keeps intact.
- Configure reel-name and timecode settings before you transcode, not after. In DaVinci Resolve specifically, this means setting Conform Options correctly before an Avid AAF-based transcode happens, not trying to fix mismatched reel names once the media already exists.
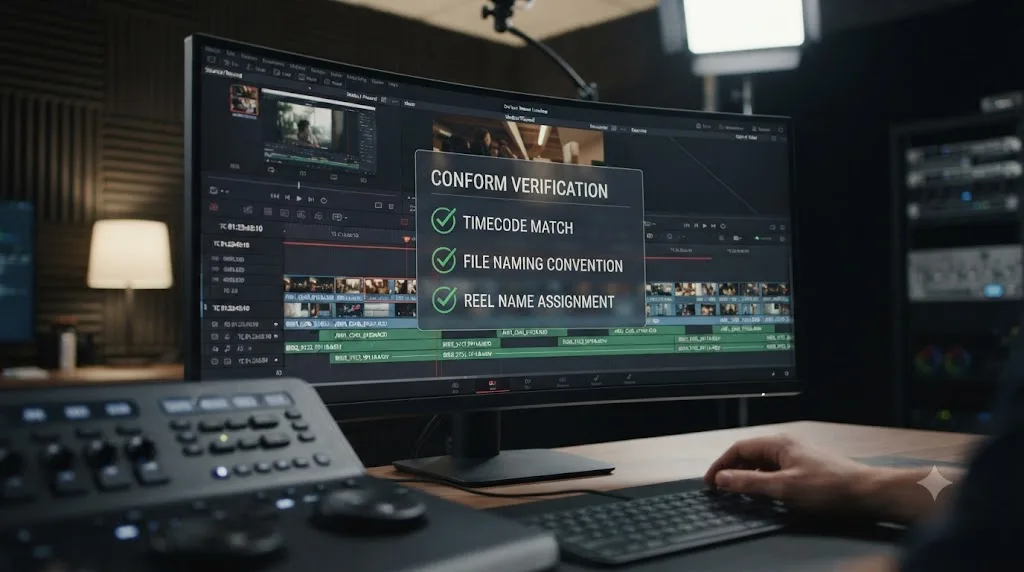
- Verify the conform against a reference file, a burned-in timecode QuickTime from the locked offline cut, so you can catch a wrong clip or a slipped edit point before it reaches color.
A conform that fails silently is worse than one that fails loudly, because a silent failure ships wrong media to a client who never finds out until it's too late. That's the entire argument for building verification into the process instead of trusting an automated relink to have gotten every single clip right.
Is conforming still necessary if you edit natively in DaVinci Resolve at full resolution?
Often not, in the classic offline-to-online sense, but the frame-rate sense of conforming still applies more often than editors expect.
If your entire project, from the first cut to the final grade, lives inside DaVinci Resolve editing the actual camera-original files rather than proxies, you can skip the traditional offline-to-online handoff described earlier on this page. There's no separate app to rebuild the timeline in, and no instruction file to export and reimport, because the editing and finishing happen against the same media the whole way through. This is genuinely common on smaller productions, social content, and any job where the footage volume and your hardware can comfortably handle full-resolution media from day one.
What doesn't disappear, even in that fully native workflow, is Resolve's frame-rate conform. The moment you mix clips shot at different native frame rates on a single timeline, a 24fps A-camera next to a 60fps B-camera used for slow motion, say, Resolve is conforming those clips to your Timeline Frame Rate whether you asked it to or not. That's the setting covered earlier in this guide, and it's worth checking before you import a single frame, not after your timeline is already stuttering.
| Scenario | Traditional offline-to-online conform needed? | DaVinci Resolve frame-rate conform relevant? |
|---|---|---|
| Solo edit, single frame rate, native full-res files start to finish | No | No, since every clip already matches the timeline rate |
| Solo edit, mixed frame rate cameras, native full-res files start to finish | No | Yes, Mixed Frame Rate Format still applies |
| Team edit, proxy offline in Resolve, camera originals relinked in Resolve for color | Sometimes, a lighter internal relink rather than a full cross-app rebuild | Yes, if source frame rates were also mixed |
| Offline cut in Premiere Pro or Avid, delivered to Resolve for color and finishing | Yes, full XML or AAF conform | Yes, and Mixed Frame Rate Format should match the originating NLE |
| Solo edit inside Resolve, but footage includes camera-generated low-res proxies alongside RAW originals from a dual-recording camera | No cross-app conform, but a relink is still needed to swap in the RAW originals | Yes, if any clips were shot at a different frame rate than the timeline |
That last row is worth calling out on its own, since it's a scenario a lot of solo editors run into without recognizing it as a conform at all. Some cameras record a lightweight proxy file and a full RAW file to separate cards simultaneously. If you build your first cut off the lightweight files because they're faster to scrub, and only bring in the RAW originals once the edit is locked, that's still a conform in every meaningful sense, even though it never leaves Resolve and never touches an EDL, XML, or AAF. It's a relink, not a cross-app rebuild, but the underlying logic, cheap media for the creative decisions, expensive media for the finished output, is identical.
Is there an app that helps while you're conforming or troubleshooting a mismatched timeline in DaVinci Resolve?
Reading a definition explains the concept. It doesn't tell you, at 11pm with a client deadline in the morning, whether the setting you're staring at in your own project is the one actually causing the mismatch.
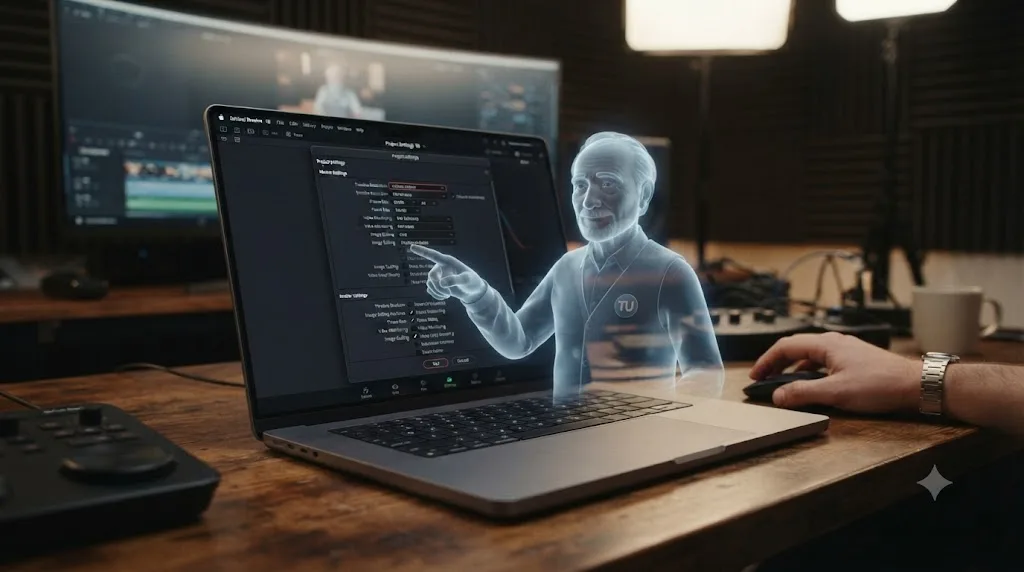
TryUncle is the on-screen assistant for DaVinci Resolve on macOS. Ask in plain words and Uncle points at the exact control on your screen. If you're not sure whether a jittery timeline is a Mixed Frame Rate Format problem or a Retime Process problem, or you're trying to find where Conform Lock Enabled actually lives in the right-click menu on the specific clip giving you trouble, or you're staring at the Load AAF dialog wondering whether "Ignore file extensions when matching" should be on or off for your specific footage, that's a live, on-screen question Uncle answers inside your actual project instead of making you cross-reference a guide against your own timeline by hand.
In our own 100,000+ member professional video-editing community, questions about "why did my timeline just change speed" or "why is my frame rate greyed out" are a recurring stuck point, almost always traced back to exactly the Mixed Frame Rate Format lock covered earlier on this page. After 7+ years of professional, commercial editing and color work across projects that mix frame rates as a matter of course, that specific confusion is one we've walked people through more times than almost any other project-settings question.
This sits in a different category than most tools people mean when they ask about an AI tool to learn DaVinci Resolve. Sottocut and cutagent.ai automate specific editing tasks directly on your timeline, cutting or reformatting footage, rather than helping you diagnose a settings mismatch you didn't cause on purpose. heyeddie.ai and general chat assistants can explain what Mixed Frame Rate Format or Conform Lock mean in the abstract, roughly the way this page does, but they have no view of your actual project and can't confirm which setting your specific timeline is actually using. PremiereCopilot targets a different NLE's workflow entirely. TryUncle's Uncle watches your DaVinci Resolve screen while you work and can point at Project Settings, a specific clip's right-click menu, or the Media Pool the same way it points at any other control, which is what makes it useful for a diagnostic problem like a locked frame rate or a stuck conform, not just for learning a new effect. Our fuller comparison of AI tools to learn DaVinci Resolve covers where each of these actually fits.
Guided practice inside Resolve beats guessing whether a stuttering timeline is a frame-rate problem or a retime problem. That's true of a conform setting buried three menus deep, and it's just as true of any other project-settings mismatch nobody warned you about.
TryUncle is a paid subscription at $39 a month, cancel anytime; see TryUncle for full details. It's macOS only, and it needs an internet connection to work. If you're the one who just inherited a mixed-frame-rate project from someone else, or you're switching in from Premiere Pro and trying to translate an XML's frame-rate math into Resolve's own settings, covered in more depth in our guide to switching from Premiere Pro to DaVinci Resolve, that's a reasonable moment to have something point at the actual setting instead of hunting for it from memory.
The short version
Conform means two things, and both are real, and both trace back to the same word from film-era negative cutting: rebuild the finished cut using the real material, once the decisions about that cut are locked. In general post-production, that's rebuilding a locked offline edit with camera-original, full-resolution media, using an EDL, XML, or AAF as the instruction file, so a colorist or finishing artist gets access to every bit of raw data the camera actually captured. In DaVinci Resolve specifically, it's also the Mixed Frame Rate Format setting, quietly retiming every clip whose native frame rate doesn't match your timeline, a setting that locks the moment you import media and causes a good share of the "why is my timeline suddenly stuttering" confusion editors run into.
Neither sense is optional trivia. The first one is why a job title called conform artist exists at all, and why an entire decision table of relink and reconform commands, Relink Selected Clips, Change Source Folder, Reconform From Bin(s), Reconform From Media Storage, exists to fix it when it breaks. The second one is why your Timeline Frame Rate might already be greyed out before you finish reading this sentence. Know which one someone means before you nod along next time, and if it's the DaVinci Resolve sense, check Master Project Settings before you import a single frame, not after.
If you're archiving a finished project once the conform and grade are both done, our guide to archiving a DaVinci Resolve project without losing media covers the difference between Export Project Archive and Media Management, so the full-resolution files you just conformed against don't quietly get left behind.
Frequently asked questions
- What's the difference between conform and relink in video editing?
- Relink tells your editing software to find the same files in a new location, inside the timeline you already have. Conform rebuilds the timeline from scratch in a different tool, using an EDL, XML, or AAF as the instruction file, then reconnects each cut to the camera-original media. Relink is a file-path fix. Conform is a reconstruction.
- What does conform mean specifically in DaVinci Resolve?
- Two things. First, the general post-production sense: reconnecting an imported timeline to the correct media in your Media Pool. Second, a Resolve-specific sense: the Mixed Frame Rate Format setting in Master Project Settings, which conforms clips shot at different frame rates so they all play at your timeline's frame rate.
- Why does my DaVinci Resolve timeline frame rate lock after I import media?
- Because Resolve's Mixed Frame Rate Format setting, the option that controls how conforming works, can only be set before the Media Pool has clips in it. Once you import media, that setting and the practical ability to reset your Timeline Frame Rate lock. Delete every clip from the Media Pool, set Mixed Frame Rate Format and Timeline Frame Rate correctly, then reimport.
- What is a conform artist, and is that a real job title?
- Yes. A conform artist, sometimes called a conform editor or online editor, handles the pipeline from conforming camera-original media to a locked edit, preparing color timelines, and mastering final picture, according to a real conform artist job posting from Ethos Studio. The role commonly requires DaVinci Resolve experience plus After Effects or Nuke for re-timing and compositing work.
- Do you need an EDL, XML, or AAF file to conform a project?
- You need one of the three, since each is a list of what portion of a clip is used, where it sits on the timeline, and in what order. EDL is the oldest and can't carry most effects. XML and AAF, which have largely replaced it, carry dissolves, repositioning, and other effects an EDL drops.
- What's the difference between offline and online editing?
- Offline editing is the creative cut, usually built on lower-resolution proxy media so the software stays responsive while decisions get made. Online editing, also called conforming, happens after the offline cut is locked: it rebuilds that same cut at full delivery resolution using camera-original files, ready for color and finishing.
- Is conforming still necessary if I edit and finish entirely inside DaVinci Resolve?
- Often no, in the classic offline-to-online sense, since Resolve can edit and grade the same camera-original files from start to finish without a separate rebuild. But the frame-rate sense of conforming still applies the moment your project mixes clips shot at different frame rates on one timeline, which is common even in single-app workflows.
- What do I need to set up in DaVinci Resolve before importing an AAF from Avid Media Composer?
- Open Project Settings, go to General Options, and find Conform Options. Set Use Timecode to Embedded in the source clip, then enable Assist using reel names from the and choose Embedding in source clip file. Do this before you import, since reel-name matching only works correctly if it was configured ahead of your Avid transcode, not fixed afterward.
Sources
- Frame.io Blog: The Beginner's Guide to Conforming with DaVinci Resolve (Dan Swierenga)
- ARRI Learn & Help: Conforming (Pre- & Postproduction)
- Frame.io Help Center: C2C Complete Proxy Workflow Guide
- ProVideo Coalition: Editorial to Color Grading from a Colorist's POV, a guest post from Robbie Carman (ed. Scott Simmons)
- Mixing Light: What is the Golden Rule of Conforming Timelines? (Patrick Inhofer)
- DaVinci Resolve Manual: Mixed Frame Rates (Blackmagic Design, mirrored)
- DaVinci Resolve Manual: Understanding, Fixing, and Using Reel Conflicts (Conform Lock) (Blackmagic Design, mirrored)
- DaVinci Resolve Manual: Summary of Methods for Conforming and Relinking (Blackmagic Design, mirrored)
- DaVinci Resolve Manual: Conforming Clips During XML and AAF Import (Blackmagic Design, mirrored)
- DaVinci Resolve Manual: Step 3 - Conforming Your AAF in DaVinci Resolve (Blackmagic Design, mirrored)
- Ethos Studio: Conform Artist job posting
- Media Match Forum: What is a Conform Editor?
- Wikipedia: Negative cutting
- CutConvert: What is an EDL file? The CMX3600 edit decision list, explained
Learn by doing, not watching
Stop translating tutorials to your timeline.
TryUncle stays beside Resolve on Mac and Windows. When you ask, Uncle sees your screen and points at the exact control you need. No hunting through tabs, timestamps, or mismatched tutorials.
Meet TryUncleKeep reading
 GuidesOct 22, 202626 min read
DaVinci Resolve Dialogue De-Esser Settings: A Listening Guide
Set DaVinci Resolve dialogue de-esser settings by finding the sibilance, choosing a range, and adjusting amount and reaction time by ear.
 GuidesOct 22, 202637 min read
DaVinci Resolve Dual Timeline Editing Explained (2026)
DaVinci Resolve dual timeline editing explained: compare the Edit page's source timeline with the Cut page's overview and learn when each helps.
 GuidesOct 22, 202640 min read
DaVinci Resolve Clip Volume vs Track Volume
Understand DaVinci Resolve clip volume vs track volume, when to use clip gain or a track fader, and how to fix dialogue, music, and automation levels.