
Learn / DaVinci Resolveupdated for DaVinci Resolve 21.0.2 (July 2026)
DaVinci Resolve Mixed Frame Rate Timeline Jittery: The Fix
Quick answer
A jittery DaVinci Resolve timeline with mixed frame rates almost always traces to the Mixed Frame Rate Format setting, which locks the moment you import media. Set it to Resolve before importing anything, then fix the stutter itself by switching Retime Process from Nearest to Frame Blend or Optical Flow in Project Settings > Master Settings.
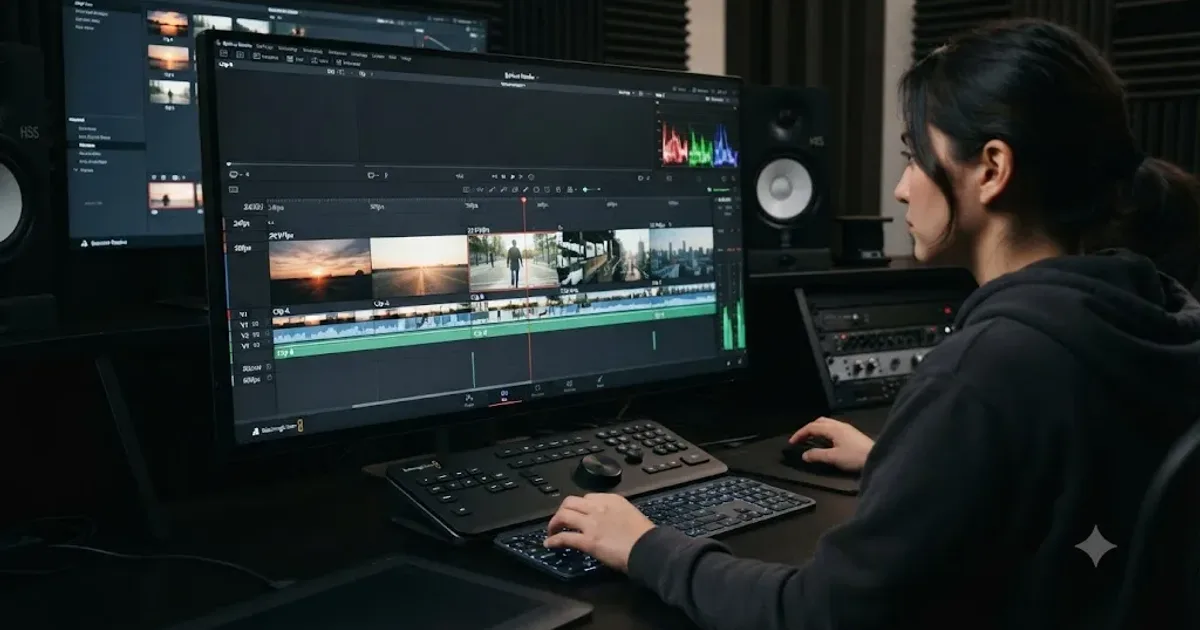
Your timeline plays clean for ten seconds, then one clip judders like a slideshow, then it's smooth again two cuts later. Nothing about your machine changed. You didn't touch a setting. It's just that one clip, or that one folder of footage, that stutters every single time it crosses the playhead.
Nine times out of ten, that clip was shot at a different frame rate than the rest of your project, and DaVinci Resolve is doing exactly what you told it to do, badly, because of a setting you probably never saw the one time it mattered: right when you imported your first clip.
Why does a DaVinci Resolve timeline judder when clips have different frame rates?
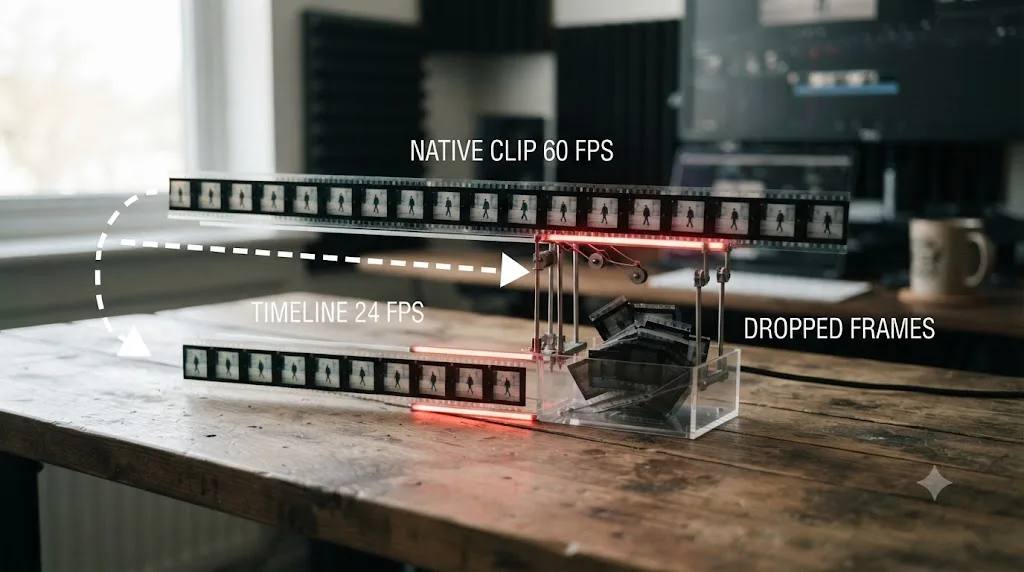
Here's the mechanism, and it's simpler than it looks once you see it laid out. Your timeline has exactly one frame rate. Every clip you drop onto it, no matter what frame rate it was actually shot at, has to play back at that one rate. If a clip's native rate and the timeline's rate don't match, something has to give: frames get invented, frames get thrown away, or both.
DaVinci Resolve calls this process conforming, and it happens automatically the moment you drop a mismatched clip onto your timeline. According to the DaVinci Resolve manual's page on Mixed Frame Rates, when the feature is active, "DaVinci Resolve conforms and processes all clips in the Timeline to play at the project's frame rate." Clips shot anywhere from 23.98 to 60 fps "will all play at 24 fps if that's what 'Timeline frame rate' is set to in the Master Project Settings." That's the whole job. Whatever frame rate your clip was born at, Resolve reshapes it to fit the one rate your timeline actually runs.
The reshaping is where jitter comes from. A DaVinci Resolve timeline has exactly one frame rate, and every clip that doesn't match it gets frames added or removed to fit, whether you asked for that or not. By default, Resolve does this the cheapest way possible: it just drops or duplicates whole frames, which is fast to compute and rough to watch. A 30fps clip forced into a 24fps timeline needs six frames physically removed every single second to fit. Your eye reads that as stutter because that's exactly what it is: real, whole frames, missing.
Why is the Timeline Frame Rate greyed out after you import media?
This is the part almost nobody warns you about, and it's the actual reason this problem is so much more annoying to fix in DaVinci Resolve than in most other editors. You don't get a warning. You just try to change your Timeline Frame Rate one afternoon, mid-project, and find the field sitting there, greyed out, refusing to respond to a single click.
That's not a bug. It's Resolve protecting a decision you already made without realizing you were making it. According to the manual, the underlying Mixed Frame Rate Format setting works the same way: "If you need to change this setting, you must do so before you import any media into the Media Pool; once the Media Pool is populated, this setting can no longer be changed." The instant your project has even one clip sitting in the Media Pool, that door closes.
Larry Jordan, whose tutorials on editing workflow have been a reference point for editors since long before Resolve existed, put it about as plainly as it can be put in his piece on the importance of first import into DaVinci Resolve: "So make sure the first media you import has the frame rate you want to deliver. After that, you can import any frame rate you want and put it into any project." That's the entire gotcha in two sentences. Your first clip sets the tone for the whole project, silently, and every clip after that is just guesting in a room your first import already decorated.
This explains a specific, maddening version of this bug that shows up constantly in editor forums and support threads: someone builds a brand new project, drags in a batch of B-roll shot on a phone at 30fps because it happened to be the first folder they clicked, and only later realizes their main camera footage, and their actual delivery target, is 23.976. By the time they notice, the Timeline Frame Rate field is locked, Mixed Frame Rate Format is locked, and the only path forward is starting over the hard way.
The single most avoidable cause of a jittery mixed frame rate timeline in DaVinci Resolve isn't a bad setting, it's importing the wrong clip first. Before you drag anything into a new project's Media Pool, know your delivery frame rate and confirm it in Project Settings > Master Settings. That one five-second check, done before import instead of after, is the difference between a clean project and an afternoon spent rebuilding one.
What is the Mixed Frame Rate Format setting and which option should you pick?
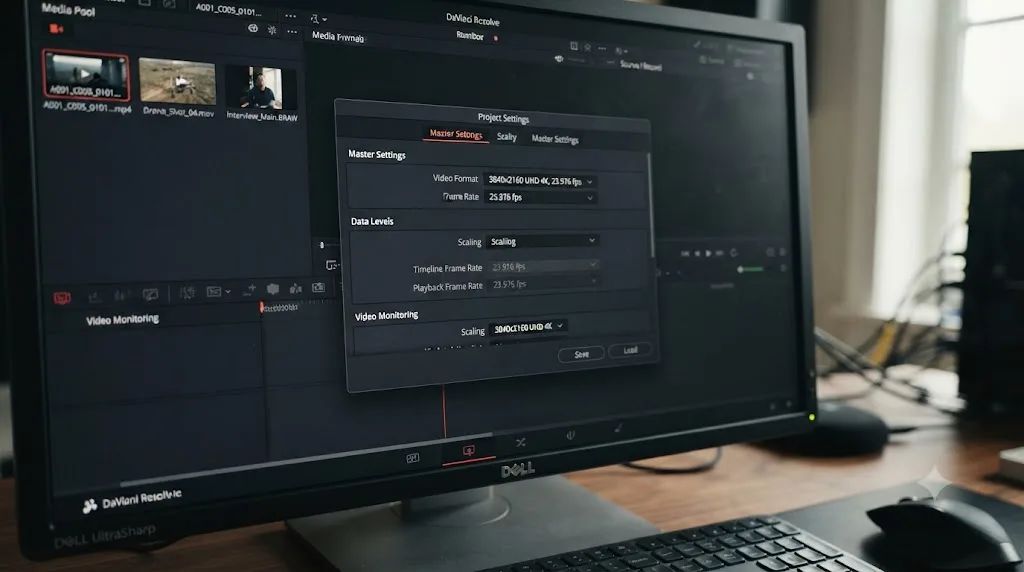
Once you know it exists, the setting itself is simple. It lives in Project Settings > General Options, and it tells Resolve which NLE's mixed-frame-rate math to use when it conforms your clips.
| Mixed Frame Rate Format option | When to use it |
|---|---|
| Resolve | Native Resolve projects, or anything sourced from Premiere Pro, Avid Media Composer, or Autodesk Smoke |
| Final Cut Pro 7 | A project or XML that originated in the legacy Final Cut Pro 7 |
| Final Cut Pro X | A project or XML that originated in Final Cut Pro X |
| None | DPX or image sequences with missing or unreliable frame rate metadata, where you want clips to keep their raw frame rates rather than being conformed at all |
The reason this matters, and the reason it isn't just a cosmetic label, is that Final Cut Pro 7, Final Cut Pro X, and Avid Media Composer each calculate mixed frame rate math differently under the hood. Pick the wrong option here and you're not choosing a wrong label, you're choosing the wrong arithmetic for how your clips get stretched or compressed to fit your timeline. That mismatch alone can produce jitter that looks identical to a plain frame rate mismatch but has a completely different fix: the correct fix here is picking the right dropdown option, not touching Retime Process at all.
If you selected None because you're working with DPX sequences or unreliable metadata, know what you're trading away: your clips keep their raw, un-conformed frame rates and simply play back at the timeline rate, which the manual notes can mean footage plays faster or slower than intended rather than at normal speed. That's a deliberate tradeoff for image sequence work, not something you want active by accident on a normal camera-footage timeline.
How do you fix it if you already imported media and it's now locked?
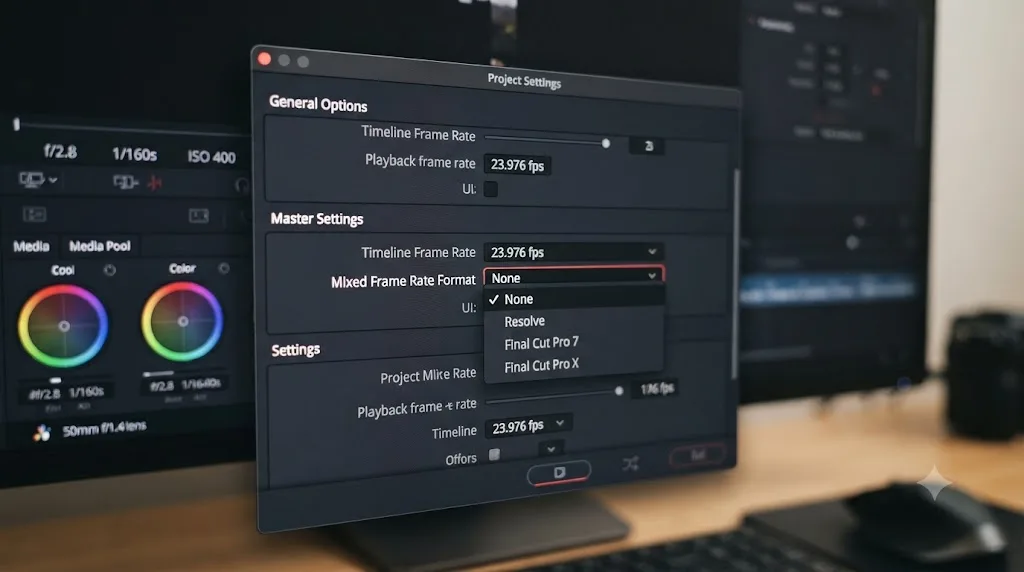
If you're reading this because the setting is already greyed out, here's the workaround, confirmed across multiple independent troubleshooting guides that all land on the same answer. It's not glamorous, but it's the only path that actually reopens the door.
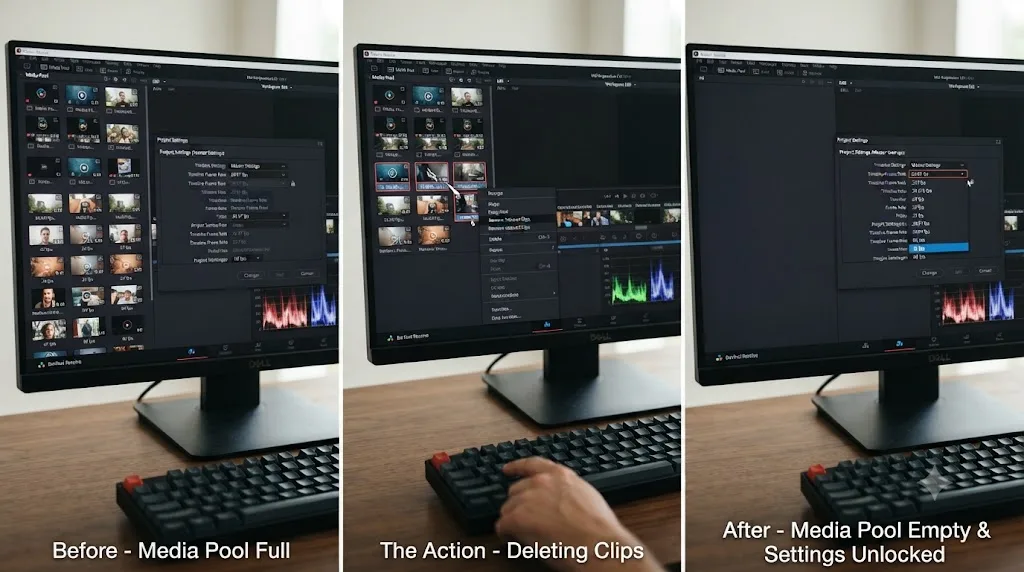
- Go to the Edit page and open the Media Pool.
- Select every clip currently in the Media Pool.
- Delete them from the Media Pool. This only removes them from this project's bin; it doesn't touch the files on disk.
- Open Project Settings > Master Settings. The Timeline Frame Rate field, and Mixed Frame Rate Format under General Options, should be editable again.
- Set both to the values you actually need.
- Reimport your footage.
One troubleshooting guide describing this exact fix put the core instruction as bluntly as it deserves: "delete all the imported clips from the 'Media Pool' under the 'Edit' page. Then go to 'Project Settings' > 'Master Settings'" and set the frame rate you actually meant to use, according to Beginners Approach's guide to greyed out frame rate settings.
That workaround is clean for a brand new project where you haven't built any real timeline yet. It's a much bigger ask if you're three days into an edit with markers, color grades, and a locked cut. For that situation, there's a second, less destructive option: build a fresh timeline with the frame rate you actually need, using New Timeline with Use Project Settings unchecked so you can set Format and frame rate manually on just that one timeline, then move your existing edit onto it. This doesn't touch your Media Pool or Mixed Frame Rate Format at all; it sidesteps the locked project-level setting by working at the timeline level instead, which Resolve has allowed independently of the project frame rate since Resolve 16.
Once DaVinci Resolve's Media Pool has media in it, the only way back to a clean Mixed Frame Rate Format setting is emptying the Media Pool entirely, there's no partial undo. Know that going in, and you'll treat the first-import decision with the weight it deserves instead of learning the hard way.
Should you match every clip's frame rate to your project, or leave clips native?
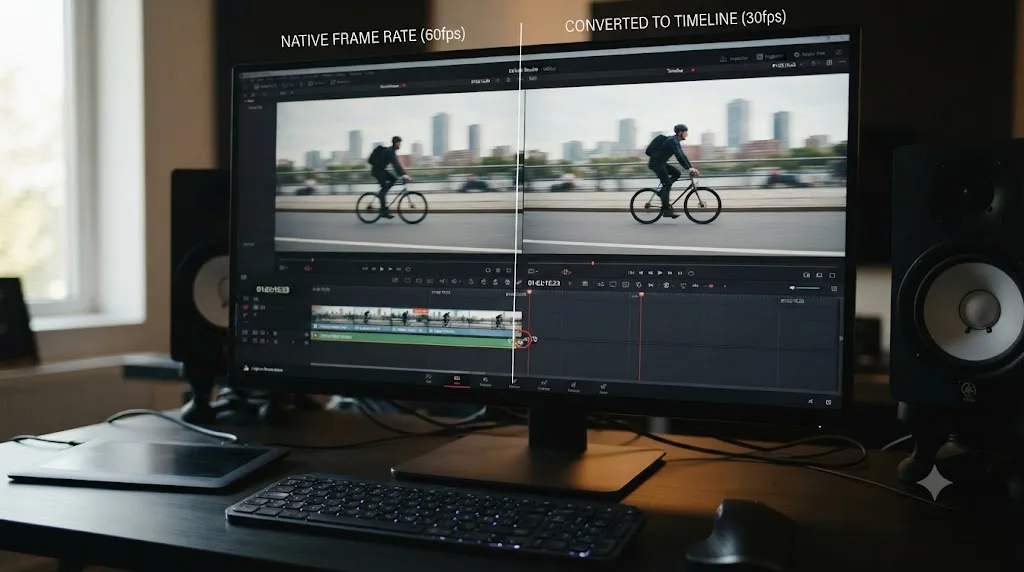
Once your project settings are sorted, a second decision shapes how much jitter-fixing work you'll be doing clip by clip: do you conform every clip's actual frame rate to match your project, or leave native frame rates alone and let the timeline-level conform handle the difference automatically?
Dan Swierenga, writing about proxy workflows for mixed frame rate projects on the Frame.io blog, lays out both options without pretending one is universally correct: "Neither choice is 'wrong,' but do know that the standard choice for commercial workflows is to match frame rates to the original camera files in order to preserve timecode." That's a specific, practical answer, not a hedge. Most professional pipelines default to keeping native rates intact.
Here's why that default holds up. Changing a clip's frame rate through Clip Attributes doesn't just relabel a number, it changes how Resolve calculates that clip's timecode relationship to the original file sitting on your drive. Do that across a project and you've quietly broken the link between what your timeline says and what the source footage actually says, which matters enormously the moment you need to reference an original file, hand footage to a VFX vendor, or reconform later in a different app.
| Approach | Best for | Tradeoff |
|---|---|---|
| Match frame rates to project | Finishing entirely inside Resolve, high-res mezzanine deliverables (DPX, EXR, ProRes 4444), no need to reference original timecode later | Breaks the timecode relationship to camera-original files |
| Keep frame rates native | Working with external vendors, VFX handoffs, anything needing accurate original timecode | Requires the timeline-level conform to do more of the work, so Retime Process choice matters more |
If you do change a clip's native frame rate, log the original rate somewhere before you do it. Resolve doesn't retain the pre-change value anywhere in the project once you've overwritten it, so if you ever need to know what the camera actually recorded at, a metadata note or a spreadsheet is the only record left.
Matching every clip's frame rate to your project timeline preserves nothing about how that clip relates to the file sitting on your drive, which is exactly why most commercial workflows leave native rates alone. Reach for frame matching only when you have a specific, deliberate reason to, not as a default habit.
Why did XML or AAF import from Premiere Pro or FCP make this worse?
If your mixed frame rate mess arrived by way of an XML from Premiere Pro or an AAF from Avid rather than a direct import of camera files, the picture gets more complicated, and it's worth knowing this branch is a genuinely different problem from everything above it.
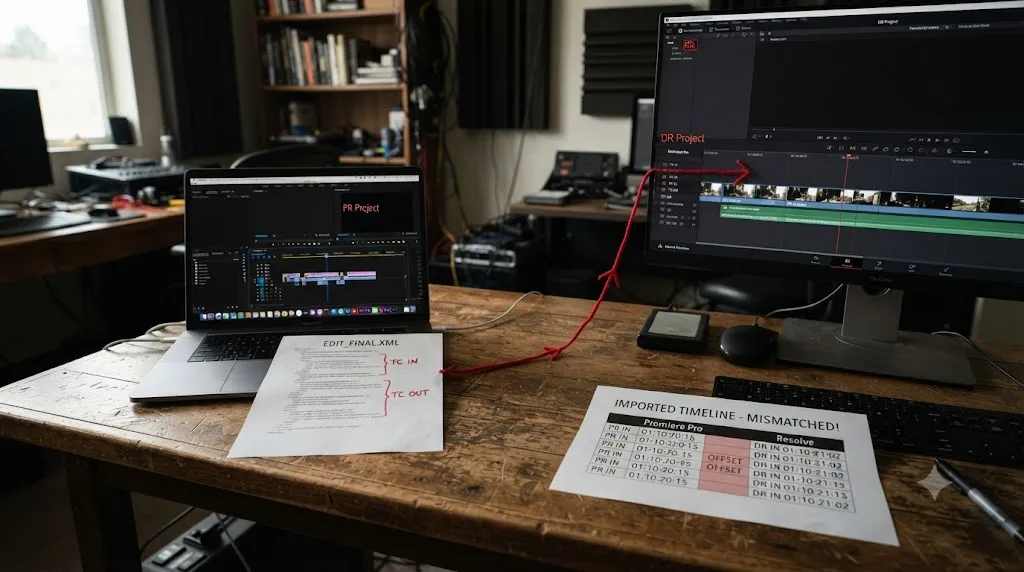
A long-running thread on the Creative COW forums documents exactly this: an editor importing an XML with mixed frame rate clips found that clips at a different rate than the sequence had incorrect in and out points once the XML landed in Resolve, even though the cut points had been correct in the source app. Colorist Glenn Sakatch's reply names where the fault actually sits: "Don't blame Resolve…blame Premiere. I have very few problems with mixed frame rates out of Avid to Resolve, but Premiere and FCP (7) could never do it properly as they don't do the conversion properly (or track it properly) in their own software, so the list they output is incorrect."
That's a stronger claim than "pick the right Mixed Frame Rate Format dropdown option," and it comes with an equally direct fix. Post engineer Marc Wielage, replying in the same thread, offered a concrete workaround: "My workaround would be to have them reconform the entire project as a 29.97 project and render all the 23.98 material as 29.97 with 2:3 pulldown inserted." His fallback option is even simpler and sidesteps XML mixed-rate math entirely: have the Premiere editor render out a flattened file at the delivery timecode rate, then just auto-scene-detect the file in Resolve and work on that.
The practical takeaway is this: if you're seeing wrong in and out points, not just jitter, on an XML or AAF import specifically, the Mixed Frame Rate Format dropdown alone probably won't fully fix it, because the underlying export from the originating app may have miscalculated the conversion before Resolve ever saw the file. Your options, in order of how much they preserve of the original edit:
- Set Mixed Frame Rate Format to match the source app (Final Cut Pro 7, Final Cut Pro X, or Resolve for a Premiere-originated project) and check whether in/out points land correctly. This fixes the majority of cases and costs nothing.
- Ask the originating editor to reconform the sequence to a single frame rate before exporting the XML or AAF again, eliminating the mixed-rate math at the source.
- Request a flattened reference render at the final delivery timecode rate and rebuild your cut against that file in Resolve, treating the XML as a guide rather than a direct import.
A mixed frame rate problem that shows up specifically as wrong in and out points after an XML or AAF import is a conversion error baked in by the originating app, not something the Mixed Frame Rate Format dropdown alone can always undo. Know which kind of problem you're looking at before you spend an afternoon adjusting settings that were never going to fix it.
Is variable frame rate (VFR) footage from your phone or OBS the real problem?
Before you spend more time on project settings, run one quick check: does the FPS column in your Media Pool actually disagree with your Timeline Frame Rate for the clip that's stuttering? If the numbers match on paper and it's still juddering, you're likely not looking at a frame rate mismatch at all. You're looking at variable frame rate media, and it needs a completely different fix.
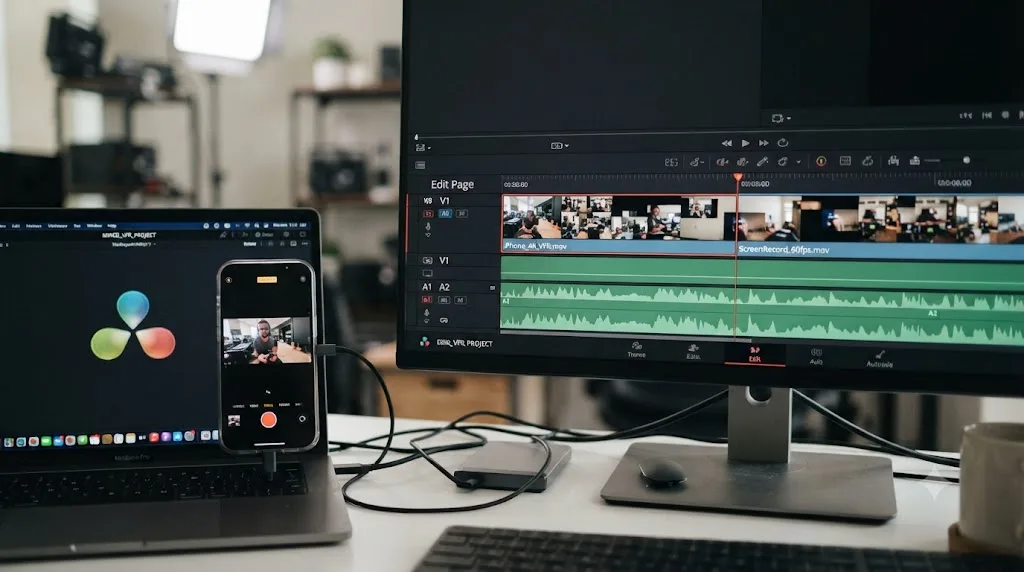
Screen recordings from OBS, and video shot on iPhones, GoPros, and 360 cameras like Insta360, frequently save frames at inconsistent intervals rather than a fixed, steady rate, even when the file's metadata reports a single clean number like 30fps or 60fps. According to a guide on DaVinci Resolve timeline lag from Cutback, "VFR footage has inconsistent frame timing; Resolve has to work harder to decode each frame correctly, which shows up as jitter and stutter during timeline scrubbing." That's a decoding problem, not a conforming problem, and no amount of adjusting Mixed Frame Rate Format or Retime Process will touch it, because Resolve's timeline settings assume the source file itself has honest, evenly-spaced frame timing to begin with.
The fix is upstream of Resolve entirely: transcode before you import, not after you've already built half a timeline around the broken file. Two practical routes work:
- HandBrake, a free, dedicated transcoding tool, can convert VFR source files to a constant frame rate MP4 before they ever touch your project.
- Resolve's own Media Pool transcode tool can convert the same files to DNxHR LB or ProRes 422 Proxy, both editing-friendly codecs, directly inside the app, which has the advantage of keeping everything in one piece of software.
Either way, the guide is specific about sequencing: "Remux or transcode VFR footage before importing" rather than trying to fix it once it's already sitting in a timeline. That single ordering choice, transcode first, import second, is the entire fix for this category.
Variable frame rate footage can stutter on a DaVinci Resolve timeline even when its metadata claims to match your project frame rate exactly, because the problem is inconsistent frame timing inside the file, not a rate mismatch Resolve can conform its way out of. If your Media Pool's FPS column and your Timeline Frame Rate genuinely agree and the clip still judders, stop looking at project settings and start looking at the source file itself.
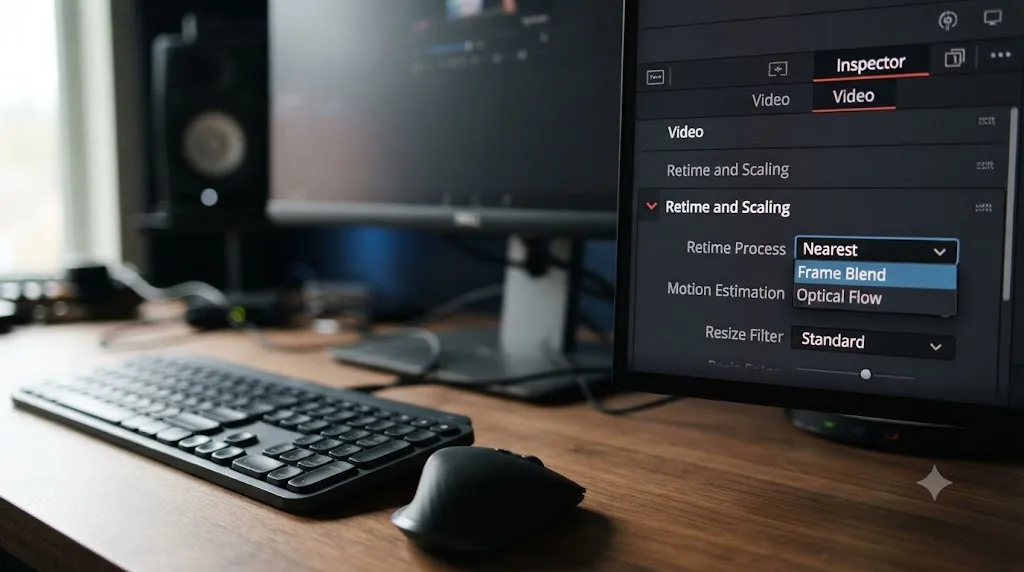
Nearest vs Frame Blend vs Optical Flow: which Retime Process actually fixes jitter?
Assuming your project settings and source media check out and you've confirmed this is a genuine, correctly-conformed frame rate mismatch, this is the setting that determines whether the conform looks smooth or looks like a slideshow. It lives in Project Settings > Master Settings > Frame Interpolation, under the Retime Process dropdown, and it applies to how Resolve fills in or removes frames whenever a clip's rate doesn't match the timeline.
| Retime Process | How it works | Best for | Cost |
|---|---|---|---|
| Nearest | Drops or duplicates whole frames to force a fit | Nothing you actually want, this is the default and the usual cause of visible jitter | Cheapest, fastest, roughest |
| Frame Blend | Dissolves adjacent frames into each other to soften the transition | Most footage with simple, moderate motion | Moderate GPU cost, safe default |
| Optical Flow | Analyzes motion vectors and generates genuinely new in-between frames | Complex or fast motion where blending alone still looks choppy | Highest GPU cost, can warp fast-moving edges |
One troubleshooting guide summarizes the practical effect plainly: with a 30fps clip forced into a 24fps timeline under Nearest, "DaVinci Resolve is mechanically deleting 6 frames every single second to force the clip to fit," according to Cutsio's guide to fixing frame rate mismatch. Switch to Optical Flow instead, and the same guide notes Resolve "will now use advanced AI to intelligently blend and morph the 30fps clip into 24fps, completely eliminating the stuttering playback." The frames aren't being thrown away anymore; new ones are being synthesized from the motion in the frames around them.
Larry Jordan's guidance on picking between the two is worth following as a default heuristic: leave Retime Process at its default when frame rates are clean multiples of each other, like 24 and 48fps, since Resolve's math there is exact and there's little for Optical Flow to improve on. For truly mismatched, non-multiple rates, he recommends trying Frame Blending first rather than jumping straight to Optical Flow, since Optical Flow's motion analysis can produce inconsistent or warped results depending on the footage, particularly around fast motion or fine detail.
A practical order to try this in, since Retime Process is a project-wide setting and switching it takes only seconds to preview:
- Confirm the jitter is on a genuinely mismatched clip, not VFR source media.
- Open Project Settings > Master Settings > Frame Interpolation and switch Retime Process from Nearest to Frame Blend.
- Scrub the previously stuttering clip. If it now looks smooth without obvious ghosting, stop here.
- If motion still looks choppy or the footage has fast, complex movement, switch to Optical Flow instead and scrub again, watching specifically for warping around edges in motion.
- If Optical Flow introduces visible warping artifacts that look worse than the original jitter, drop back to Frame Blend and accept the small amount of remaining softness as the better tradeoff.
Nearest, DaVinci Resolve's default Retime Process, fixes mismatched frame rates by deleting real frames, which is the single most common cause of visible jitter on a mixed frame rate timeline. Switching to Frame Blend or Optical Flow doesn't change your footage, your cut, or your grade. It only changes how the conform math fills the gap between two frame rates, and for most jittery timelines, that one dropdown is the entire fix.
Does Optical Flow perform differently on Mac vs Windows or Nvidia hardware?
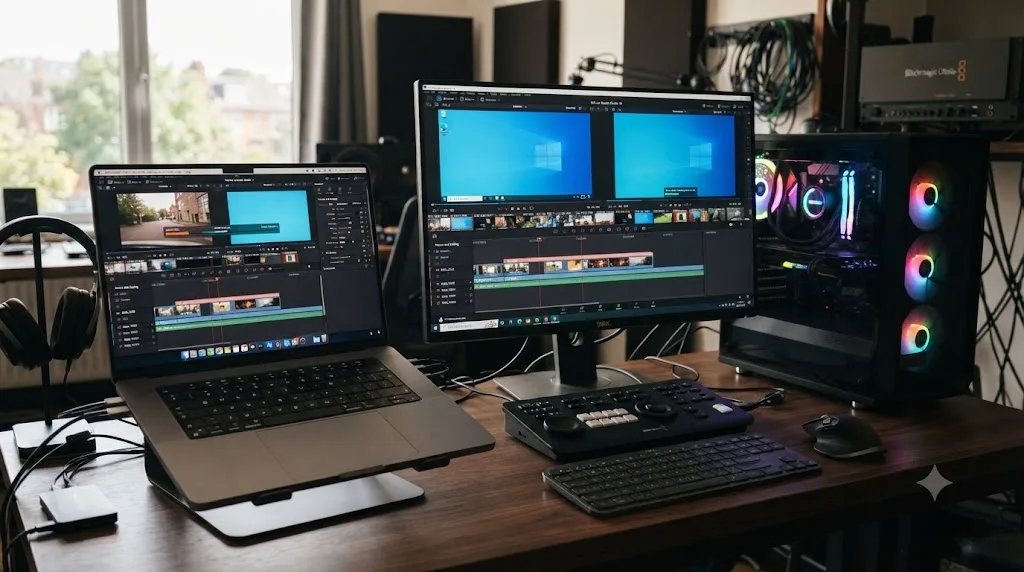
Optical Flow is the most computationally demanding of the three Retime Process options, since it's actively analyzing motion and synthesizing new frames rather than just reordering or blending existing ones, and that cost lands differently depending on what's actually rendering it.
DaVinci Resolve is built to use Metal and Apple Silicon's unified memory GPU architecture on a Mac, and OpenCL or CUDA on Windows and Linux, according to Blackmagic Design's own product documentation. In practice, that means the GPU doing the work, an Nvidia RTX card on a PC, an integrated Apple Silicon GPU on a Mac, or an AMD card on either platform, matters more for Optical Flow specifically than it does for most of the rest of Resolve's timeline playback, since Optical Flow's motion analysis leans harder on raw GPU throughput than a straightforward cut or a Frame Blend does.
What this means practically for a jittery mixed frame rate timeline: if switching to Optical Flow fixes the visible stutter but introduces a new problem, playback that's smooth in motion but chops or drops frames on scrub, the cause has shifted from a conform problem to a GPU headroom problem. That's a genuinely different fix from anything covered above, one that lives in your render cache settings and your GPU processing mode under Preferences > System > Memory and GPU, not in Retime Process itself. If you're on a lower-powered laptop GPU of any brand, Frame Blend is often the more realistic everyday choice specifically because it doesn't demand the same sustained GPU throughput that Optical Flow does on every frame it touches.
None of this changes which fix to try first. Optical Flow versus Frame Blend is still a quality-versus-cost tradeoff you're choosing per project, not per platform. It just means that if Optical Flow itself starts stuttering on your specific machine, the fix for that is a GPU and cache conversation, separate from the mixed frame rate conform problem this guide is about.
How do you fix one clip's wrong frame rate with Clip Attributes?
Sometimes the mismatch isn't a mixed shoot at all, it's one clip with a metadata error. Some cameras, particularly certain smartphone models, write frame rate metadata that Resolve reads incorrectly or doesn't read at all, and one guide on frame rate fixes notes a specific quirk worth watching for: the Camera FPS metadata field can sometimes carry extra trailing zeros that don't represent a real frame rate, misreading a value like 30fps as something far higher.
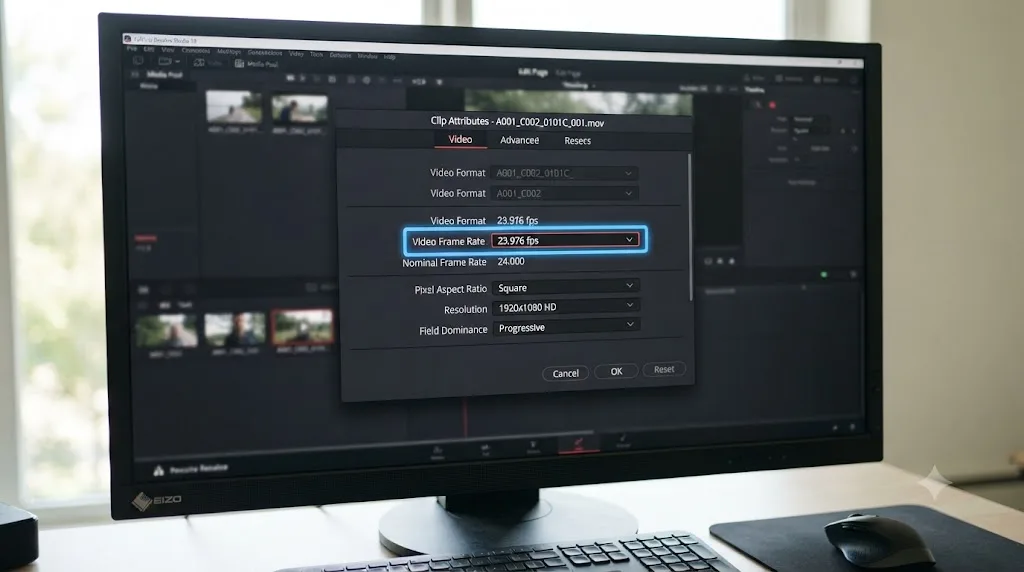
If a single clip's Media Pool entry shows an FPS value that's clearly wrong, obviously not what the camera actually recorded, Clip Attributes is the tool for a targeted, single-clip fix rather than a project-wide setting change:
- Right-click the affected clip in the Media Pool and choose Clip Attributes.
- Open the Video tab and find the Video Frame Rate dropdown.
- Change it to the frame rate the clip actually was recorded at, not the frame rate you want it to play back at.
- Confirm the change didn't push the clip Media Offline. Changing Clip Attributes on some codecs can cause Resolve to lose the clip's link entirely rather than update it cleanly, a known issue documented on the Blackmagic Forum, so check the clip still plays immediately after the change.
- If you're deliberately changing the clip's frame rate rather than correcting a metadata error, log the original native rate in a metadata note first. Resolve doesn't store the pre-change value anywhere once you overwrite it.
This is a targeted fix, not a first resort. Reach for Clip Attributes when you can point to one specific clip with genuinely wrong metadata, not as a general-purpose way to make mismatched clips fit your timeline, since that's exactly the job Mixed Frame Rate Format and Retime Process already do automatically, without touching the clip's stored metadata at all.
Does mixed frame rate cause audio drift too, or is that a separate problem?
It's worth separating these two clearly, because a jittery picture and drifting audio on the same clip are frequently two unrelated problems that just happen to show up together, and fixing one doesn't automatically fix the other.
Frame rate conform, whichever Retime Process you've picked, operates on video frames. It doesn't retime or resample audio, which runs on its own sample rate, typically 48kHz, independent of whatever's happening to the picture. If your audio is drifting out of sync on a mismatched clip, the more likely cause is a sample rate mismatch between your source audio and your Project Settings > Master Settings audio sample rate, or, on VFR source footage specifically, audio that was recorded against inconsistent frame timing in the same file causing the two to slip against each other over the length of a clip.
If you're troubleshooting a clip that's both visually jittery and audibly drifting, work through them as two separate checklists rather than assuming one fix handles both:
- Fix the video conform first, using the Mixed Frame Rate Format and Retime Process steps above, and confirm the picture is smooth on its own.
- Separately, confirm Project Settings > Master Settings audio sample rate matches your source clips.
- If it's VFR source media specifically, the same transcode-before-import fix that solves the visual stutter, converting to a constant frame rate codec, also tends to resolve audio drift baked into the same file, since a clean, evenly-timed file fixes both problems at the source rather than needing separate treatment.
If you're still chasing audio sync issues after confirming your video conform is clean, our guide on how to sync audio in DaVinci Resolve covers the full set of audio sync tools, including waveform-based auto sync, in more depth than this guide's scope.
How do you render or deliver a mixed frame rate timeline correctly?
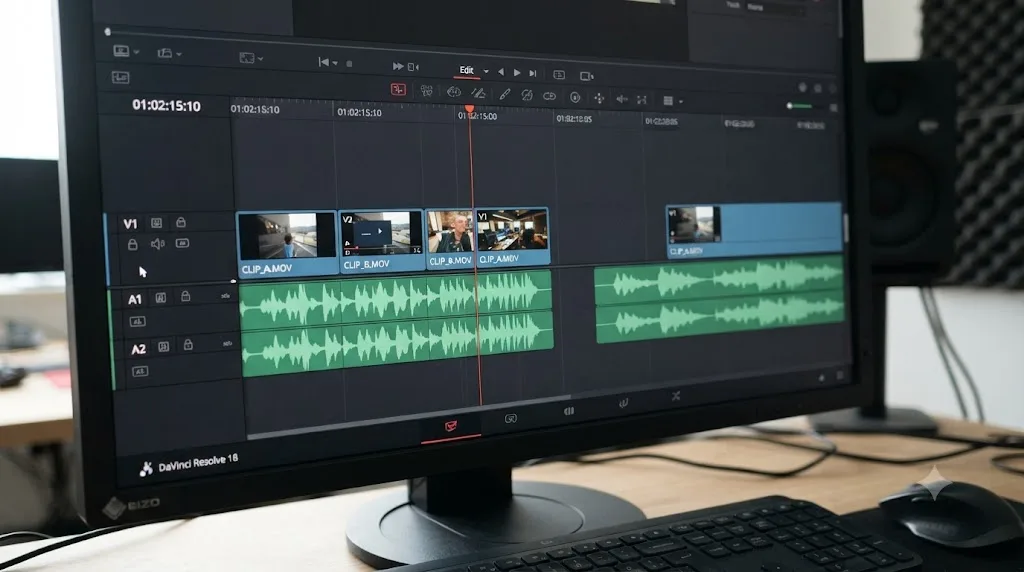
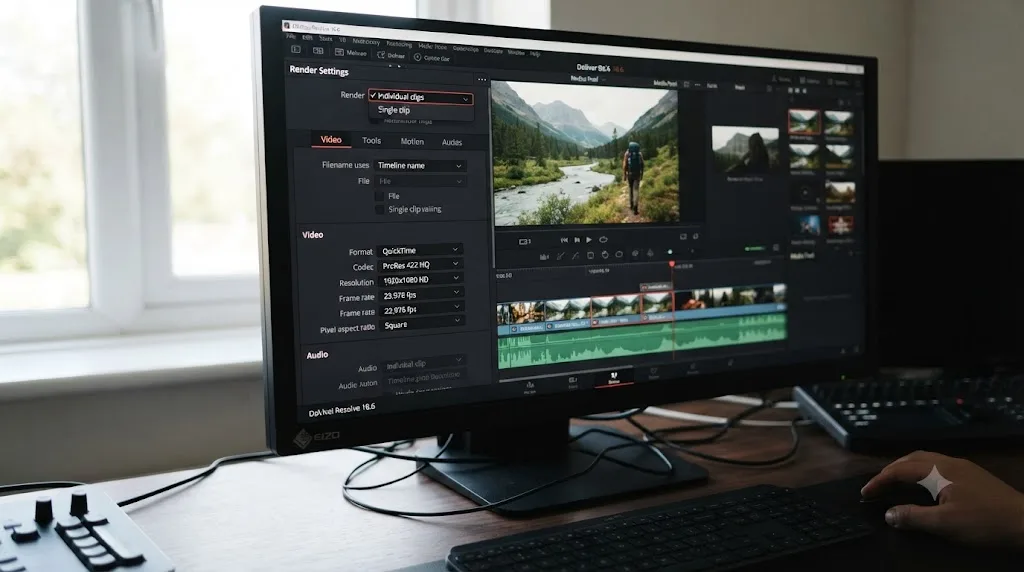
Getting playback smooth inside Resolve is only half the job if you still need to export the finished timeline, and the Deliver page has its own decision that specifically affects mixed frame rate projects: whether to render individual clips at their own rates or one continuous file at the timeline's rate.
According to the Frame.io blog's rendering breakdown for mixed frame rate projects, the Individual clips render mode does something that surprises people expecting a single conformed output: "Resolve will render each clip separately at it's own frame rate in the project. It won't render the clips at the timeline frame rate." Each clip comes out as its own file, at its own native rate, with the project's timecode attached rather than the frame rate it played back at inside your conformed timeline.
Single clip mode works the way most editors expect a normal export to work: "With single clip, Resolve will use the timeline frame rate to render," producing one continuous file where every clip has already been conformed to your project's frame rate, matching exactly what you saw while editing.
| Render mode | What you get | Use it when |
|---|---|---|
| Individual clips | Separate files, each at its own native frame rate, project timecode attached | Handing footage to another app or vendor that needs original rates preserved, not editing or finishing in Resolve |
| Single clip | One continuous file at your timeline's frame rate | Finishing entirely in Resolve and delivering a normal, single conformed export |
If you're delivering to YouTube or a similar platform and this is your final export rather than a handoff to another app, Single clip is almost always the mode you want, since it matches what you actually saw and approved on your timeline. Our full guide on DaVinci Resolve export settings for YouTube covers the rest of the Deliver page settings, codec, bitrate, and format choices, once your frame rate conform is sorted.
One frame rate is also worth calling out for the flexibility it buys you at render time: a project set to 23.976 gives you the widest set of delivery options at export, including clean conversions to 24fps and 29.97, which is one reason it's a common starting choice for projects with an uncertain final delivery target.
Rendering a mixed frame rate DaVinci Resolve timeline with Individual clips selected produces files at each clip's own native frame rate, not the frame rate your timeline actually conformed everything to during editing, which surprises editors expecting a single matched export. Know which mode you actually need before you hit render, since the wrong choice here can silently undo all the conform work you just did fixing the jitter.
A worked example, start to finish
Here's how this actually plays out on a real project, walking through the decision points in the order they come up.
A wedding editor starts a new DaVinci Resolve project. Their main camera shot the ceremony at 23.976fps, but the very first folder they drag into the Media Pool happens to be drone B-roll, shot at 29.97fps by a second shooter. They don't think twice about import order and keep building the timeline.
A week later, cutting in the reception footage from the main camera, they notice the ceremony clips stutter slightly on every scrub, while the drone shots play buttery smooth. Checking Project Settings, the Timeline Frame Rate is locked at 29.97, set automatically by whatever was imported first, and the field is greyed out.
- They check the FPS column in the Media Pool and confirm the ceremony footage genuinely is 23.976fps against a 29.97fps timeline. This rules out VFR media; it's a true, simple mismatch, and the timeline is set to the wrong rate for their actual delivery target.
- Since the edit is still early and mostly just B-roll, they select everything in the Media Pool and delete it, then set Timeline Frame Rate to 23.976 in Project Settings > Master Settings, matching their actual main camera and delivery target, before reimporting every clip.
- The ceremony footage now conforms cleanly since it matches the timeline rate exactly, and the drone B-roll, now the mismatched clip instead, gets conformed down from 29.97 to 23.976 using the default Nearest process, and it's the one stuttering now.
- They open Project Settings > Master Settings > Frame Interpolation and switch Retime Process from Nearest to Frame Blend. The drone shots smooth out immediately, since drone footage tends to have simple, steady motion that Frame Blend handles well without needing Optical Flow's heavier processing.
- On the Deliver page, they select Single clip render mode, since this is a straightforward final export for the couple, not a handoff to another editor, and the finished file plays exactly as it did on the timeline.
Total real cause: importing the wrong footage first, silently locking the wrong Timeline Frame Rate. Total real fix: catching it early enough that a Media Pool reset was still a reasonable option, then one Retime Process change to smooth out the now-mismatched clip. Neither step took more than a couple of minutes once the actual cause was identified, which is the pattern worth remembering: the fix here is almost never slow, but finding which of several similar-looking causes you're actually facing is where the time goes.
Quick reference: symptom, cause, and fix
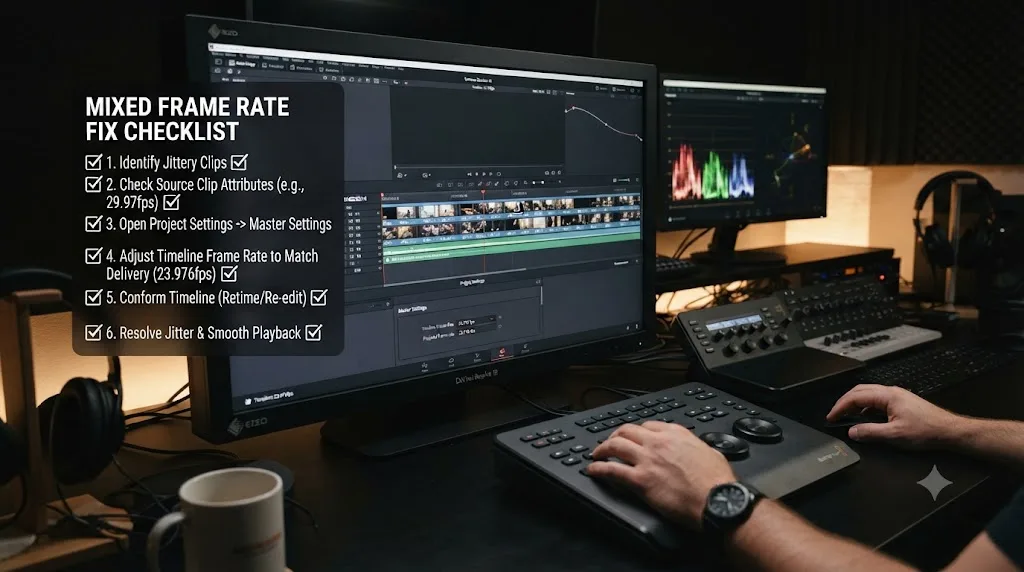
Bookmark this table. Match your actual symptom to the row before you start changing settings, since several of these causes look nearly identical from the outside but need completely different fixes.
| Symptom | Likely cause | Fix |
|---|---|---|
| Timeline Frame Rate field greyed out in Project Settings | Media already imported into the Media Pool | Delete all Media Pool clips, reset Master Settings, reimport |
| One clip stutters, its FPS genuinely differs from the timeline | Retime Process set to Nearest, dropping or duplicating frames | Switch Retime Process to Frame Blend or Optical Flow |
| Clip's FPS matches the timeline on paper but still stutters on scrub | Variable frame rate (VFR) source media, common from phones, OBS, action cameras | Transcode to a constant frame rate codec (ProRes 422 Proxy, DNxHR LB) before importing |
| Wrong in/out points after importing an XML or AAF with mixed rates | The originating app (Premiere, FCP7) miscalculated the mixed-rate conversion on export | Reconform the source sequence to one rate, or work from a flattened reference render |
| One clip shows an obviously wrong FPS value in the Media Pool | Incorrect or misread camera metadata | Correct the Video Frame Rate field in that clip's Clip Attributes |
| Optical Flow itself stutters or drops frames on playback | GPU headroom limit, not a conform problem | Switch to Frame Blend, or check render cache and GPU processing mode |
| Picture is smooth but audio drifts on the same clip | Audio sample rate mismatch, or drift baked into VFR source audio | Check Project Settings audio sample rate; transcode VFR sources |
| Export doesn't match what played back on the timeline | Deliver page set to Individual clips instead of Single clip | Switch render mode to Single clip for a normal conformed export |
Does this behave differently on the free version versus Studio?
For everything covered in this guide, no. Mixed Frame Rate Format, the Timeline Frame Rate lock after import, Clip Attributes, and all three Retime Process options, Nearest, Frame Blend, and Optical Flow, are part of Resolve's core timeline and conform architecture, and none of them sit behind the Studio paywall. A free-version editor and a Studio editor hitting a jittery mixed frame rate timeline are working through the exact same causes with the exact same fixes.
There's one meaningful difference worth knowing about, even though it's not the fix for the jitter itself: Speed Warp, Studio's Neural Engine based retime mode, is a different tool from anything in this guide. It's built for deliberate, extreme slow motion retiming on a single clip, not for conforming mismatched frame rates across a timeline, and it isn't a substitute for Frame Blend or Optical Flow in a conform context. If you're troubleshooting stutter on a mixed frame rate timeline specifically, Speed Warp isn't part of the decision at all.
The verdict
A jittery DaVinci Resolve timeline with mixed frame rates almost never means broken footage or a broken project. It means one of a handful of specific, well-documented things: the wrong clip got imported first and silently locked your Timeline Frame Rate, Retime Process is still on the default Nearest setting dropping real frames, the source media is variable frame rate rather than a true mismatch, or an XML import brought over a conversion error from another app entirely.
Check your first-import history and your Mixed Frame Rate Format setting before you touch anything else, since that single choice, made once at the very start of a project, decides more of this than any dropdown you'll find afterward. If the setting's already locked, emptying the Media Pool is the honest fix, not a settings hunt. And if your footage checks out clean and the timeline is still choppy, Retime Process, sitting one menu away in Project Settings > Master Settings, is very likely the whole answer.
If you'd rather have something point directly at whichever one of these settings is actually causing your specific jitter instead of working through a checklist by hand, that's what Uncle is built for: a macOS assistant that watches your screen inside your own Resolve project and points at the exact control you need, live, instead of making you match symptoms to a guide. It's a paid app at $34.99 a month, cancel anytime. And once your timeline plays smooth and you're ready to move on to retiming or speed effects deliberately rather than fixing an accidental one, our guide on how to speed ramp in DaVinci Resolve covers Retime Controls, the Retime Curve, and the same Optical Flow versus Speed Warp choice from the other side, when you actually want the effect instead of trying to undo it.
Frequently asked questions
- Why is my DaVinci Resolve timeline frame rate greyed out and I can't change it?
- Because you already imported media into the Media Pool. DaVinci Resolve locks the project's Mixed Frame Rate Format setting, and with it the practical ability to reset your Timeline Frame Rate cleanly, the moment the Media Pool has clips in it. The fix is to delete every clip from the Media Pool on the Edit page, which re-enables Project Settings > Master Settings so you can set the correct Timeline Frame Rate, then reimport your footage.
- What does the Mixed Frame Rate Format setting in Project Settings actually do?
- It tells Resolve which NLE's math to use when conforming clips of different frame rates onto one timeline. The options are Resolve, for projects built natively or brought in from Premiere Pro, Media Composer, or Smoke, and Final Cut Pro 7 or Final Cut Pro X, for projects that started life in those apps. Pick the one matching your project's true origin, not just whichever one you happen to be looking at when the dropdown catches your eye.
- My timeline plays fine except for clips shot at a different frame rate than the rest, what's wrong?
- That's DaVinci Resolve conforming those clips to your timeline's frame rate in real time, and by default it does that with the Nearest retime process, which just drops or duplicates frames. A 30fps clip on a 24fps timeline needs six frames removed every second to fit, and dropped frames read as jitter or stutter. Switch Retime Process to Frame Blend or Optical Flow in Project Settings > Master Settings > Frame Interpolation and the same clips play smoothly.
- Does variable frame rate (VFR) footage from my phone or OBS cause this same jitter?
- Yes, and it's a separate problem from a true frame rate mismatch even though it looks identical on the timeline. VFR footage has inconsistent frame timing baked into the file itself, so Resolve has to work harder decoding every single frame, which shows up as jitter and stutter during scrubbing regardless of what your timeline is set to. The fix is to transcode VFR sources to a constant frame rate codec, ProRes 422 Proxy or DNxHR LB, before you ever bring them into a timeline.
- Should I match every clip's frame rate to my project, or leave clips at their native rate?
- There's no universally right answer, but there is a standard one for most workflows: keep clips native and let Resolve's Mixed Frame Rate Format setting conform them on the fly, because changing a clip's native frame rate through Clip Attributes also changes its timecode relationship to the original file on disk. Match rates only when you're finishing entirely inside Resolve and have no reason to reference the camera-original timecode again.
- Why did importing an XML from Premiere Pro bring a mixed frame rate mess into Resolve?
- Premiere Pro and Final Cut Pro 7 don't track frame rate conversions the same way Resolve does internally, so an XML built in either app can hand Resolve in/out points that were correct in the source NLE but land wrong once conformed on Resolve's side, especially across a 23.98 to 29.97 boundary. The most reliable fix isn't a Resolve setting at all: have the original editor reconform the sequence to a single frame rate, or export a flattened reference file at final delivery timecode and rebuild the cut in Resolve from that.
- Which Retime Process actually fixes jitter: Nearest, Frame Blend, or Optical Flow?
- Nearest is the default and the one causing the stutter you're troubleshooting, since it works by dropping or duplicating whole frames. Frame Blend dissolves adjacent frames into each other and is a safe, fast middle ground for footage with simple motion. Optical Flow analyzes motion vectors and generates genuinely new in-between frames, producing the smoothest result on complex or fast motion, at the cost of being the most GPU-intensive of the three and prone to warping artifacts around fast-moving edges.
- Does the free version of DaVinci Resolve handle mixed frame rates differently than Studio?
- No. Mixed Frame Rate Format, the Timeline Frame Rate lock after import, Clip Attributes, and all three Retime Process options, Nearest, Frame Blend, and Optical Flow, are core timeline and conform features and none of them sit behind the Studio paywall. Studio's only edge here is Speed Warp, a Neural Engine based retime mode built for extreme slow motion on isolated clips, which is a different tool from the per-frame conforming this guide covers.
Sources
- DaVinci Resolve Manual: Mixed Frame Rates (Blackmagic Design, mirrored)
- DaVinci Resolve Timeline Frame Rate Greyed Out? (Solved!), Beginners Approach
- DaVinci Resolve Change Frame Rate: Project (+FIXES), Beginners Approach
- How to Fix Frame Rate Mismatch in DaVinci Resolve, Cutsio
- Mixing Frame Rates in DaVinci Resolve, Part 1: Know Thy Frame Rate, Frame.io Blog
- Mixing Frame Rates in DaVinci Resolve, Part 4: Proxies (Dan Swierenga), Frame.io Blog
- Mixing Frame Rates in DaVinci Resolve, Part 5: Rendering, Frame.io Blog
- When You Import Media Affects Project Frame Rates in DaVinci Resolve, by Larry Jordan
- Mixed Frame Rate Problem while importing XML from Premiere Pro (Creative COW Forums, Glenn Sakatch and Marc Wielage)
- DaVinci Resolve Timeline Lag: How to Fix It, Cutback
- How to Change Frame Rate in DaVinci Resolve (Tutorial), Motion Array
- Blackmagic Forum: Using clips with different FPS's in DaVinci Resolve
Learn by doing, not watching
Stop translating tutorials to your timeline.
TryUncle stays beside Resolve on Mac and Windows. When you ask, Uncle sees your screen and points at the exact control you need. No hunting through tabs, timestamps, or mismatched tutorials.
Meet TryUncleKeep reading
 GuidesJul 8, 202639 min read
How to Sync Audio in DaVinci Resolve, Every Method
Sync audio and video in DaVinci Resolve with Auto Sync Audio, timecode, the Sync Bin, or a manual clap, plus fixes for drift and failed matches.
 GuidesJul 11, 202635 min read
How to Speed Ramp in DaVinci Resolve: The Complete Guide
Every way to speed ramp in DaVinci Resolve: Retime Controls, speed points, the Retime Curve, Optical Flow vs Speed Warp, and what changed in Resolve 21.
 GuidesJul 7, 202632 min read
DaVinci Resolve Export Settings for YouTube (Copy These Exactly)
The exact DaVinci Resolve export settings YouTube recommends: codec, bitrate, resolution, audio, and the Deliver page steps that avoid soft uploads.