
Learn / DaVinci Resolveupdated for DaVinci Resolve 21.0.2 (July 2026)
How to Speed Ramp in DaVinci Resolve: The Complete Guide
Quick answer
Open Retime Controls (Cmd/Ctrl-R), add at least two speed points where the ramp should start and end, and set each segment's speed from the Clip Speed menu. Resolve auto-eases between them. Open the Retime Curve for a hand-shaped 4-point Bezier ramp, and pick Optical Flow or Speed Warp (Studio only) to fill in the extra frames.

You want footage that runs normal, drops into buttery slow motion for the moment that matters, then snaps back to speed. That's a speed ramp, and DaVinci Resolve builds one out of three separate tools working together: speed points that mark where the change happens, a Retime Curve that shapes how it feels, and a Retime Process that decides what the slow-motion frames actually look like. Miss any one of the three and the ramp looks like a mistake instead of a choice.
This guide covers all three, in order, with three full worked examples at the end: a classic action-sports slow-mo ramp, a ramp that eases into a freeze frame, and a whip-speed ramp between two clips. It also covers what most tutorials skip. Why your audio disappears mid-ramp. Whether retiming pushes your whole timeline out of sync. What DaVinci Resolve Studio actually buys you here. And what changed, specifically, in DaVinci Resolve 21's rebuilt Retime Curve.
What is speed ramping, and how is it different from a plain speed change?
A plain speed change takes one clip and plays it at one new speed, faster or slower, start to finish. A speed ramp is a clip that changes speed while it's playing, normal for the first two seconds, dropping to 20% for the next second, then climbing back to normal. Same clip, but the speed itself becomes something you animate rather than something you set once.
Resolve builds this with speed points. Each speed point marks a specific frame and locks in a speed value at that frame, the same underlying logic covered in our guide to keyframing effects in DaVinci Resolve, just applied to the Speed parameter specifically instead of Zoom or Position. Set two speed points with two different speeds, and Resolve interpolates the frames between them, exactly like it interpolates a zoom or a fade.
A speed ramp needs at least two speed points, because a single point is just a locked speed with nothing to ramp toward. That's not a rule of thumb, it's a hard requirement documented in the manual, which states plainly: "It takes a minimum of two speed points to create a speed effect." One point gives you a static speed. Two points, at minimum, give you a ramp.
Where speed ramping gets more involved than a basic keyframe is what happens between those two points. A Zoom keyframe interpolates a number smoothly, and Resolve already has every frame it needs to do that. A speed change below 100% needs frames that don't exist yet, since playing a clip at 50% speed over the same span of time means showing twice as many frames as the source footage actually contains. That's the part covered later in this guide under Retime Process: Nearest, Frame Blend, Optical Flow, and Speed Warp are four different answers to the same question, where do the extra frames come from.
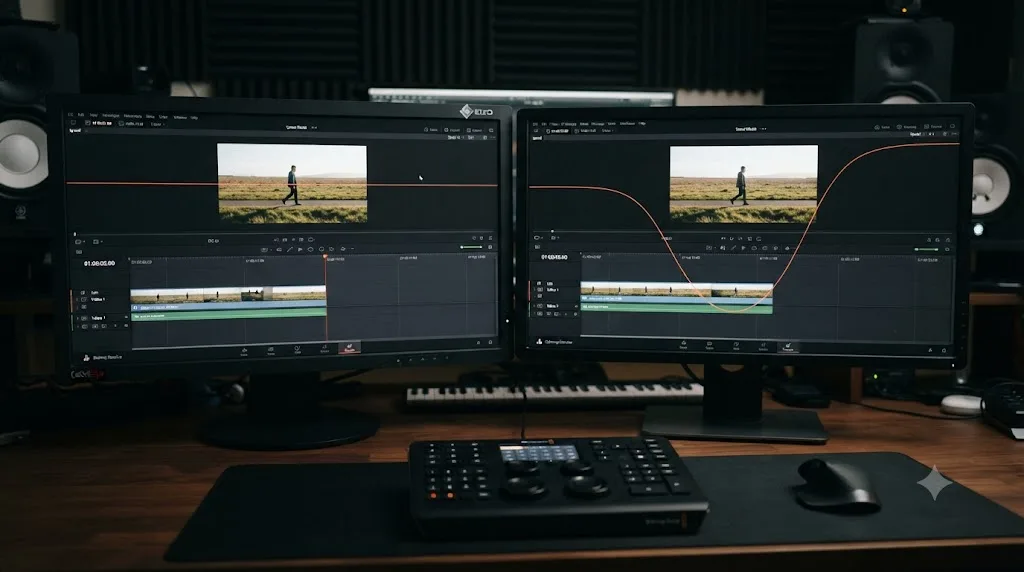
How do you turn on Retime Controls in DaVinci Resolve?
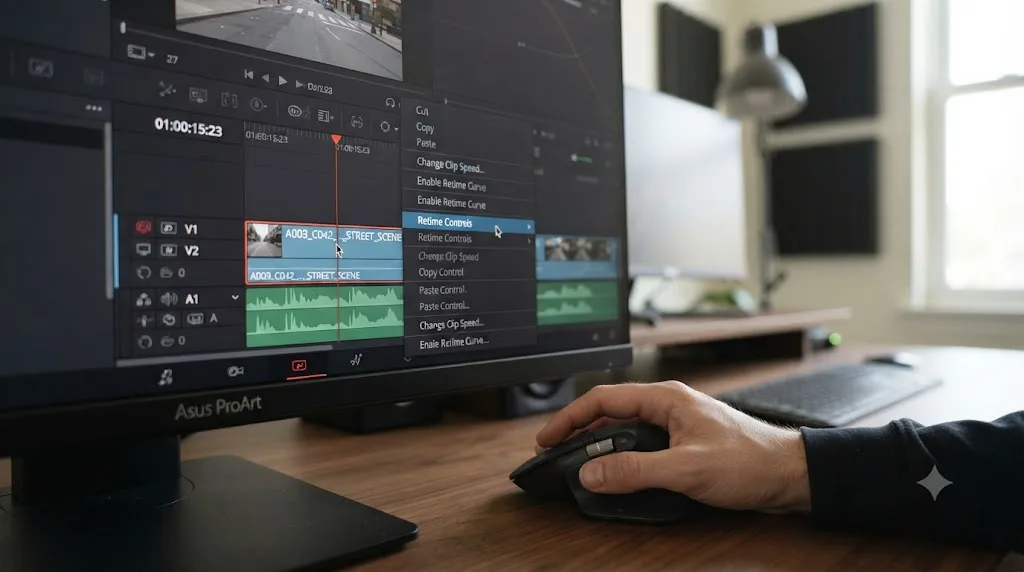
Retime Controls is the interface layer where every speed ramp starts. Select your clip on the timeline, then either:
- Press Command-R on Mac or Ctrl-R on Windows, or
- Right-click the clip and choose Retime Controls from the contextual menu.
Once it's exposed, per the manual's description of the Clip Retiming Controls, two elements appear directly on the clip:
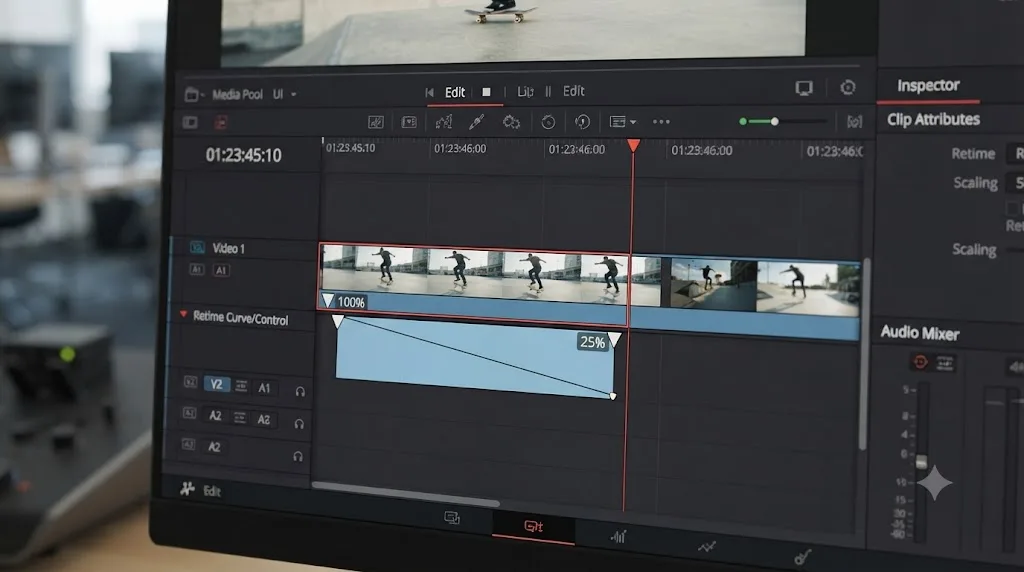
- A retime track along the top of the clip, showing arrows that indicate playback speed and direction. Blue arrows pointing right mean normal, 100% forward playback.
- A Clip Speed pop-up menu, centered at the bottom of the clip, showing the clip's current speed and giving you access to presets, reverse playback, and the Add Speed Point command.
At this stage, before you've added a single speed point, the clip is still playing at one constant speed, just with the controls now visible so you can change that. Dragging the left or right edge of the retime bar stretches or compresses the whole clip's duration, which is the fastest way to apply a single, uniform speed change without building a ramp at all. That's worth knowing as a baseline before you start adding speed points, since a lot of clips genuinely only need this simple version, not a full ramp.
Retime Controls change how fast a clip plays; the Retime Curve, covered next, changes how that speed change feels. Keeping those two jobs separate in your head is the single most useful mental model for the rest of this guide. Everything from here forward is a variation on those two ideas working together.
How do you add speed points to build a ramp?
With Retime Controls exposed, building the ramp itself is a repeatable loop:
- Move the playhead to the exact frame where the speed change should begin.
- Open the Clip Speed pop-up menu at the bottom of the clip and choose Add Speed Point. Per the manual, this locks in the clip's current speed at that exact frame.
- Move the playhead to the frame where the speed should finish changing.
- Add a second speed point the same way.
- Set the new speed for the segment between your two points, either by dragging the top handle of a speed point left or right to stretch or compress that section, or by choosing a value from the Change Speed pop-up menu.
Once two speed points exist with two different speeds, Resolve does the ramping automatically. The manual is explicit on this point: "The change in speed from each speed segment to the next is automatically eased, for a smooth transition from one speed to another." You don't have to build the ease by hand to get a working ramp, that only happens by default.
Where people trip up is the handle they drag. The manual and third-party tutorials agree on this distinction: dragging a speed point's top handle changes the timing and duration of that segment, stretching or compressing how much of the clip that speed change occupies. Dragging the bottom handle only repositions the speed point itself along the clip, without touching the segment's timing. Cinematographer Alex Hohenthaner, writing for CineD, puts the practical version of this plainly: "Using the bottom handle will only move the speed point but not change the timing within the clip." If your ramp keeps landing at the wrong moment no matter how you drag it, check which handle you're actually grabbing before assuming something else is broken.
You can keep adding speed points beyond two. A clip that goes normal, then slow, then normal, then fast, then normal again is just five speed points in a row, each one a boundary between two speed segments. The manual covers this directly under variable speed effects: a clip can "speed up or slow down multiple times by different amounts," and every additional speed point is handled with the same automatic easing as the first pair.
| Action | Result |
|---|---|
| Add Speed Point from the Clip Speed menu | Locks the clip's current speed at the playhead's frame |
| Drag a speed point's top handle | Stretches or compresses that segment's duration, changing its timing |
| Drag a speed point's bottom handle | Repositions the speed point itself without changing segment timing |
| Choose Reverse Segment from the Clip Speed menu | Plays that segment backward |
| Choose Return to 100% (reset) | Removes the speed effect from that segment |
How do you smooth a ramp with the Retime Curve?
Speed points and their automatic easing get you most of the way to a working ramp. The Retime Curve is where you take control of exactly how that transition accelerates and decelerates, instead of accepting whatever the default easing gives you.
Right-click the clip a second time, after Retime Controls is already exposed, and choose Retime Curve. Per the manual, this opens "either of the available Retime Curves" beneath the clip, and the workflow it recommends is sequential, not either-or: "use the simpler retiming controls first to create the overall speed effect you need, and then use either of the available Retime Curves to create further refinements." Build the ramp with speed points first. Shape it with the curve second.
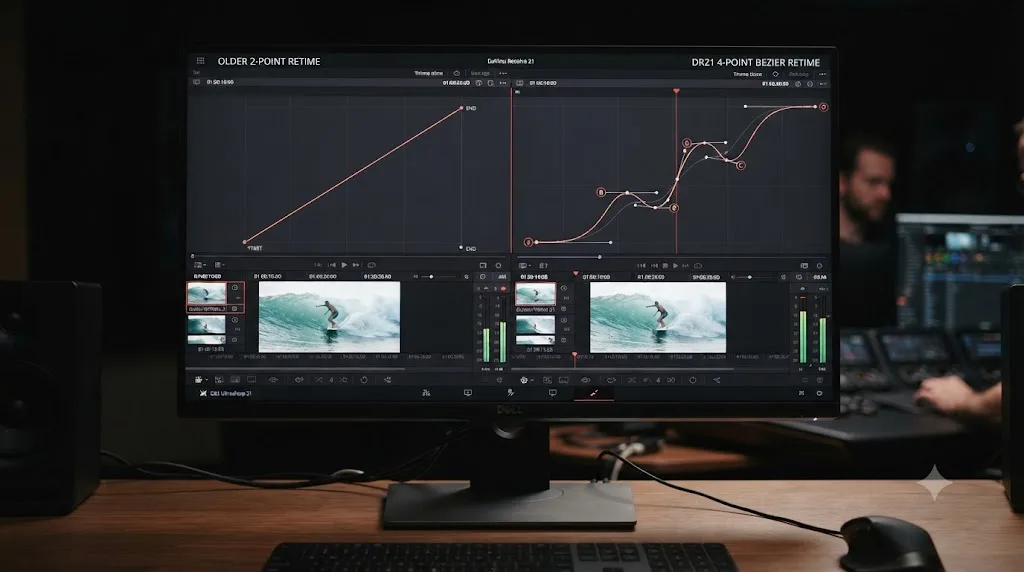
Every control point on the Retime Curve corresponds one-to-one with a speed point you already placed in Retime Controls, per the manual: "control points of each of the speed curves have a 1:1 correspondence to the speed points that are exposed in the Retime controls." Nothing new gets created here, you're just getting a second, more precise way to manipulate the same points.
This is also where DaVinci Resolve 21 changed the tool meaningfully. Justin Robinson, covering the release for JayAreTV, explains what happened to the curve itself:
"Now, they have been revamped to utilize the same 4-point Bezier easing system found throughout the software. This change allows editors to create complex, non-linear speed ramps with far more grace. Whether you are smoothing out a transition into a freeze frame or creating organic speed changes between clip segments, the new Bezier handles provide the tactile precision required for high-end professional work right on the Edit page."
Before this change, retime curves worked with a simpler two-point easing model, adequate for a basic ease but limited when you wanted a ramp with a distinct acceleration phase, a hold, and then a different deceleration shape. The four-point Bezier system gives each transition independent handles on both sides, so the way a ramp speeds up into its slow-motion section doesn't have to mirror the way it speeds back out of it.
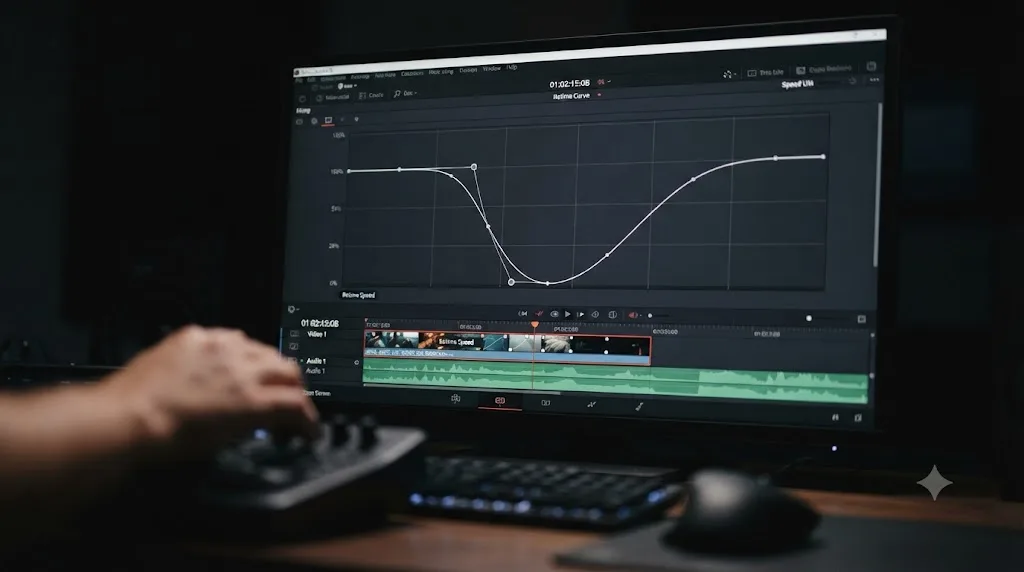
To actually shape a point once the curve is open: select a speed point on the curve so it turns red, then click the curve icon at the top to convert its sharp, linear transition into a shaped curve with draggable handles. Repeat on the second point. Drag the handles to control how gradually the speed change accelerates into and decelerates out of that point.
Retime Controls change how fast a clip plays; the Retime Curve changes how that speed change feels. A ramp built only with speed points and default easing usually reads as competent but slightly mechanical. The same ramp, reshaped in the Retime Curve with an asymmetric ease-in and ease-out, is the difference between a speed change you notice and one you don't.
Retime Frame curve or Retime Speed curve: which one should you drag?
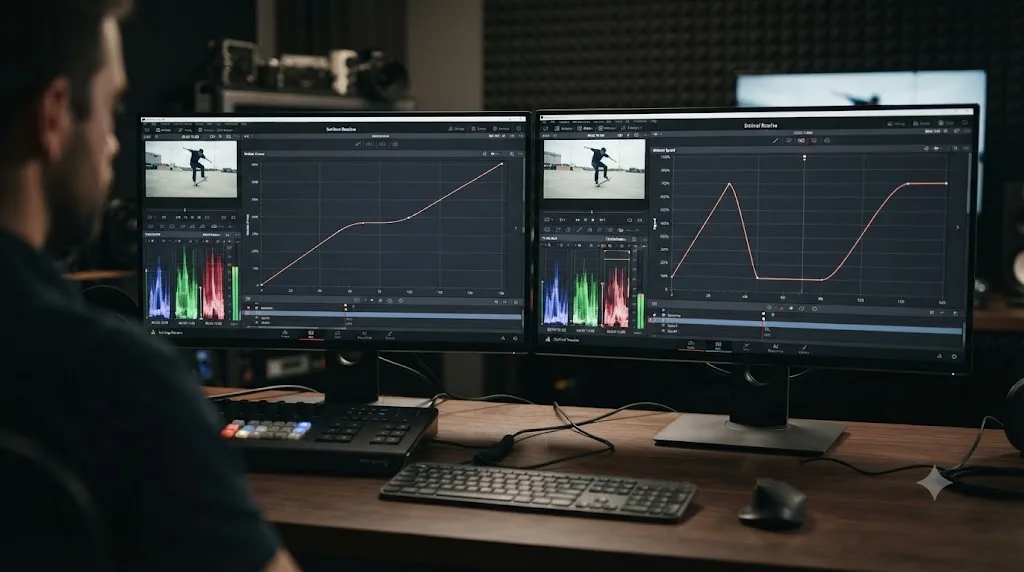
The Retime Curve panel actually offers two distinct curve types, and they present the exact same underlying speed points in two different ways, built for two different kinds of adjustment.
The Retime Frame curve plots source media frames on the vertical axis against timeline playback frames on the horizontal axis. A straight 45-degree diagonal line means 100% speed: one source frame for every timeline frame. From there, per the manual:
- A shallow segment (closer to horizontal) means the clip is playing more source frames per timeline frame than normal, which reads as slower motion.
- A steep segment (closer to vertical) means fewer source frames per timeline frame, faster motion.
- An inverted segment, where the left control point sits higher than the right one, plays that section in reverse.
The Retime Speed curve, by contrast, sits on a flat horizontal line representing 100% speed by default. Instead of dragging individual control points, you drag whole segments of the line itself up or down: raising a segment speeds that section up, lowering it slows the section down. The manual notes one specific limitation of this mode worth knowing before you rely on it for a reverse effect: "it's impossible to create reverse motion using the Retime Position curve." If a shot needs to play backward at any point, that has to happen through the Retime Frame curve, speed points, or the Reverse Segment command, not through dragging a Retime Speed segment.
| Retime Frame curve | Retime Speed curve | |
|---|---|---|
| Default shape | Diagonal line (45 degrees = 100%) | Flat horizontal line at 100% |
| What you drag | Individual control points | Whole segments |
| Reading slow motion | Shallow segment | Lowered segment |
| Reading fast motion | Steep segment | Raised segment |
| Can create reverse playback | Yes, via an inverted segment | No |
| Best for | Precise frame-by-frame timing, reverse effects | Quick, intuitive speed adjustments by feel |
Neither curve is strictly better. The Retime Frame curve gives you exact control over the mapping between source and timeline frames, which matters most when you're timing a ramp to hit a specific beat or action frame precisely. The Retime Speed curve is faster to read at a glance, since raising or lowering a segment maps directly to intuitively faster or slower, at the cost of being unable to build a reverse effect through it. Most editors settle on one as a default and switch to the other only when a specific limitation, usually the reverse-motion one, forces the switch.
How do you choose a Retime Process: Nearest, Frame Blend, Optical Flow, or Speed Warp?
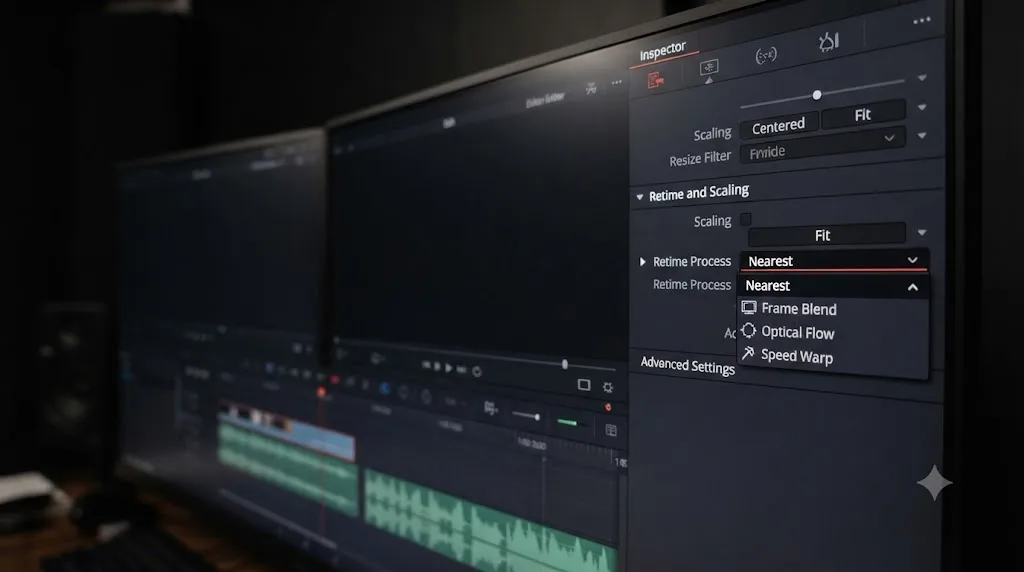
Slowing footage down below its native frame rate means Resolve has to show you frames that don't exist in the source. Speeding it up above 100% means it has to discard or combine frames instead. The Retime Process setting, found in the Inspector's Retime and Scaling section, decides how it does either job, and the option you pick has a bigger visual impact on a slow-motion ramp than almost anything else in this guide.
Per the manual, four options are available:
- Nearest repeats the closest existing frame to fill the gap. Cheapest to render, and the option most likely to look stuttery or juddery on anything but a very short, very subtle speed change.
- Frame Blend dissolves between the two nearest existing frames instead of just repeating one. Smoother than Nearest, but any fast motion inside the frame tends to ghost or double-image, since a blend is still just a cross-dissolve between two real frames, not a genuinely new one.
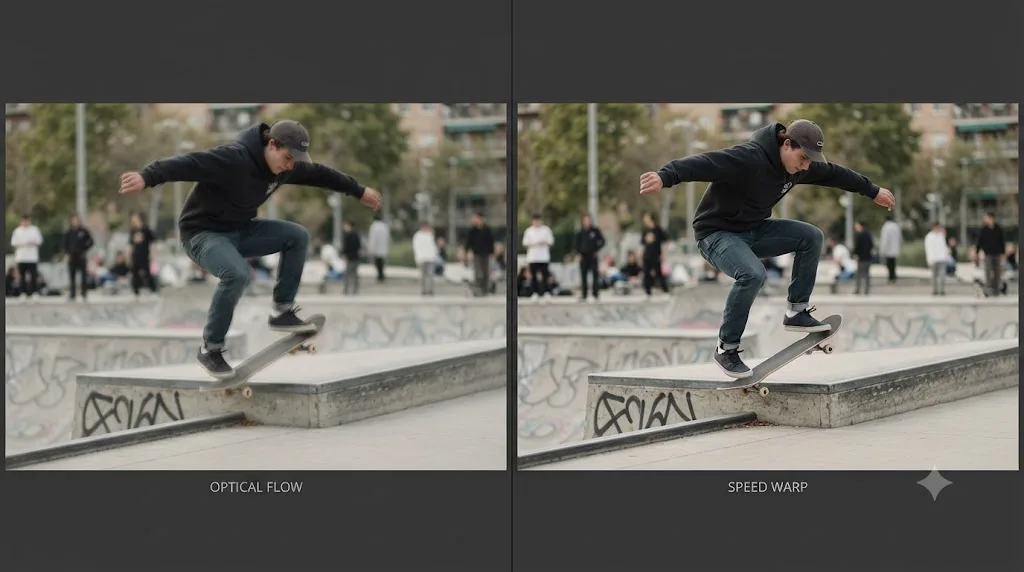
- Optical Flow analyzes motion across the surrounding frames and synthesizes an entirely new frame that estimates where content should be, rather than blending or repeating existing pixels. Blackmagic's own What's New page describes it as an "advanced retiming algorithm" that "analyzes a scene's content, building new frames so you can slow down and extend the action in a sequence without repeating or blending frames into each other." Within Optical Flow, a further Motion Estimation choice, Standard Faster, Standard Better, Enhanced Faster, or Enhanced Better, trades render time for quality.
- Speed Warp is the newest and most demanding option, processed through the DaVinci Neural Engine. Per the manual, it's "available for even higher-quality slow motion effects," and it's a DaVinci Resolve Studio-exclusive feature, confirmed on Blackmagic's own Studio product page, which lists "speed warp retiming, including advanced optical flow for crystal clear, smooth speed changes" among the features gated to the paid edition.
| Retime Process | How it works | Render cost | Best for |
|---|---|---|---|
| Nearest | Repeats the closest source frame | Lowest | Fast preview, very short or subtle speed changes |
| Frame Blend | Dissolves between two nearest source frames | Low | Subtle slow-motion where motion is minimal |
| Optical Flow | Analyzes motion, synthesizes new frames | High | General-purpose slow motion with real motion in the frame |
| Speed Warp (Studio only) | Neural Engine motion analysis and frame synthesis | Highest | Extreme slow motion, complex motion, professional delivery |
Speed Warp is a DaVinci Resolve Studio feature; Optical Flow, Frame Blend, and Nearest all run in the free edition. That's worth internalizing early, because a lot of speed-ramp tutorials online assume Speed Warp by default and never mention that it's a paid-tier feature at all. If you're on the free version and a slow-motion section still looks warped or smeary around moving edges, Optical Flow's own Motion Estimation setting, specifically the Enhanced Better mode, is the highest-quality option actually available to you, not a broken feature.
Set the Retime Process from the Inspector after selecting the retimed clip: open the Video tab, scroll to Retime and Scaling, and choose from the Retime Process dropdown. This is a per-clip setting, so a timeline mixing a subtle push-in ramp on one clip with an extreme slow-motion ramp on another can use Frame Blend on the first and Speed Warp on the second without any conflict.
Worked example: a slow-motion-to-normal action ramp
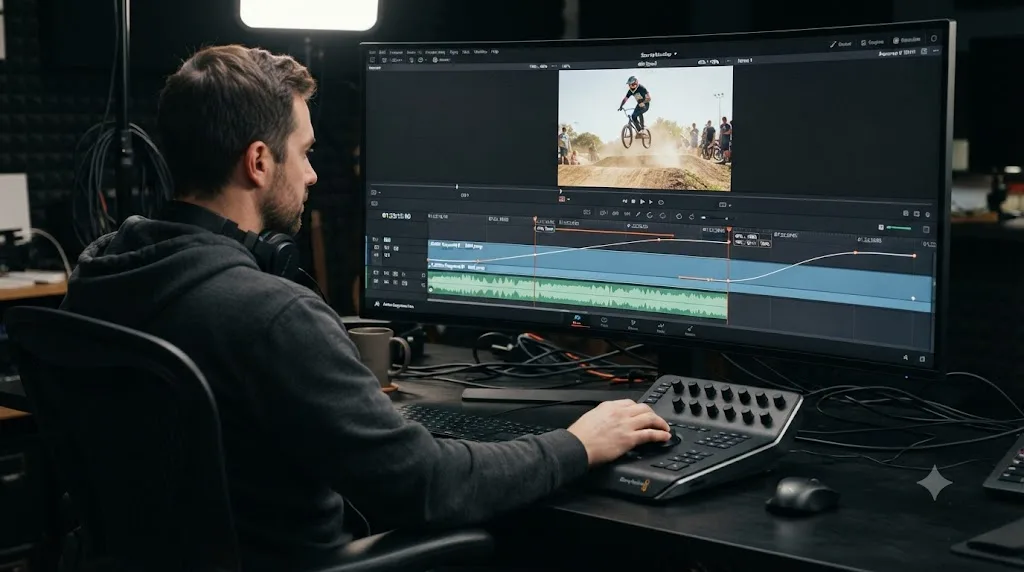
This is the ramp most people search for in the first place, the one where a subject moves at normal speed, drops into dramatic slow motion for a key moment, then returns to normal.
- Select your clip and expose Retime Controls with Command-R or Ctrl-R.
- Park the playhead just before the moment that should slow down, and add a speed point there from the Clip Speed menu. This locks in 100% speed right up to that frame.
- Move the playhead to the frame where the action peaks, the jump's highest point, the impact, the turn, and add a second speed point.
- Set that second segment's speed to somewhere between 20% and 50% depending on how dramatic the slow motion should feel, either by dragging its top handle or choosing a value from the Change Speed menu.
- Add a third speed point shortly after the slow-motion section, marking where the clip should return to normal speed.
- Set that final segment back to 100%.
- Open the Retime Curve, select each transition point, and shape the ease so the drop into slow motion feels sudden and dramatic (a short, steep ease) while the return to normal feels smoother and more settled (a longer, gentler ease). Asymmetric timing like this is exactly what the four-point Bezier system, covered above, is built for.
- Set the Retime Process on the clip. Optical Flow is the reasonable default for footage with real subject motion; switch to Speed Warp if you have Studio and the slow-motion section still shows warping around fast-moving edges like limbs or hair.
- Render the section or enable Smart Cache before judging the final timing, since a ramp this complex will almost always stutter during live scrubbing regardless of how well it's built.
The most common mistake in this exact ramp is symmetry: an editor builds the drop into slow motion and the return to normal with identical easing, when real action rarely decelerates and accelerates at the same rate. A sports highlight that suddenly drops into slow motion, then gradually eases back to speed, reads as far more intentional than one where both transitions feel identical.
Worked example: ramping speed into a freeze frame
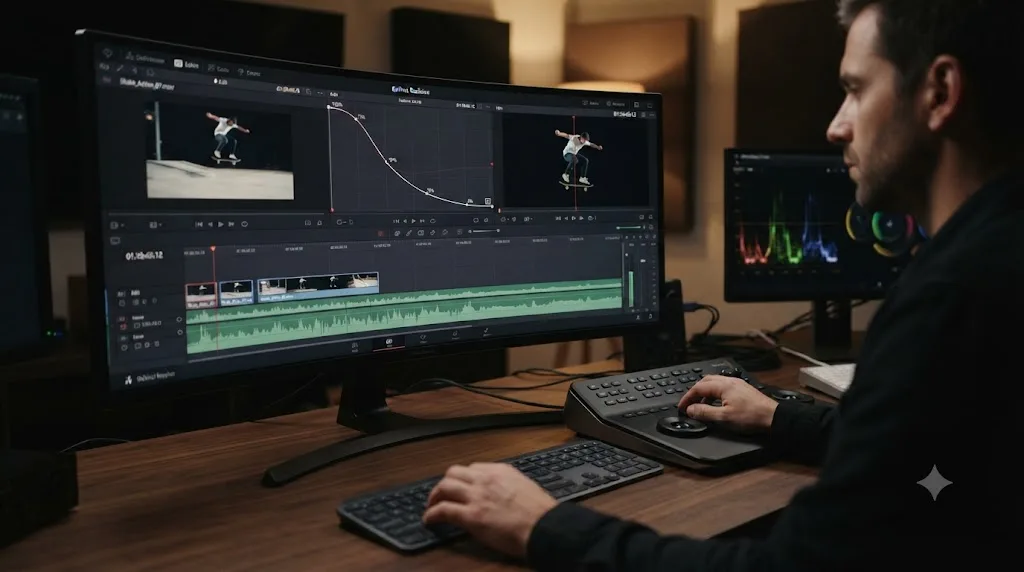
A ramp that eases all the way down to a dead stop, holding on a single frame, is a specific and popular variation, and it's explicitly one of the cases Justin Robinson names when describing what Resolve 21's rebuilt Retime Curve is for: "whether you are smoothing out a transition into a freeze frame or creating organic speed changes between clip segments."
- Identify the exact frame you want to freeze on, usually a peak expression, a landing point, or a title-card moment.
- Expose Retime Controls and add a speed point a second or two before that frame, at 100% speed.
- Add a second speed point directly on the frame you want to freeze, and drop that segment's speed toward 0%, or close to it, so the clip is nearly motionless by the time it reaches the target frame.
- Shape the approach in the Retime Curve with a long, gentle ease-out, so the clip visibly decelerates into the frozen moment rather than snapping to a stop.
- For a true, indefinite freeze rather than an extreme slow crawl, position the playhead exactly on the target frame and choose Clip > Freeze Frame, or press Shift-R. Per the manual, this converts the frame at the playhead into a still image for the remainder of the clip's duration, distinct from a near-zero speed ramp, which still technically plays, just extremely slowly.
- To remove a freeze frame later, either use the Remove Attributes dialog on the clip, or open the Change Clip Speed dialog (covered in full below) and uncheck the Freeze Frame box.
The distinction between "ramp down to nearly 0% speed" and "an actual Freeze Frame" matters more than it looks. A near-zero speed ramp still technically advances, frame by frame, however slowly, which can introduce a faint residual motion or a slight optical-flow artifact if the Retime Process is generating synthesized frames for that crawl. A true Freeze Frame, applied with Shift-R, locks a single real frame in place with zero interpolation involved, no artifacts possible. If the goal is a genuinely still hold, use Freeze Frame directly rather than trying to ramp speed all the way down to zero and hoping it looks the same.
Worked example: a whip-speed ramp between two clips
Where the first two examples ramp within a single clip, this one ramps a clip up to an extreme speed right at the edit point, so the motion blur itself helps disguise the cut, similar in feel to a whip pan but built from speed rather than camera motion. It pairs naturally with the whip-pan and other motion-based cuts covered in our transitions guide, since both techniques lean on the eye's tolerance for motion blur to hide a hard edit.
- Place your two clips back to back on the timeline at the point where the whip-speed cut should happen.
- On the outgoing clip, expose Retime Controls and add a speed point a second or so before its outgoing edge, at 100%.
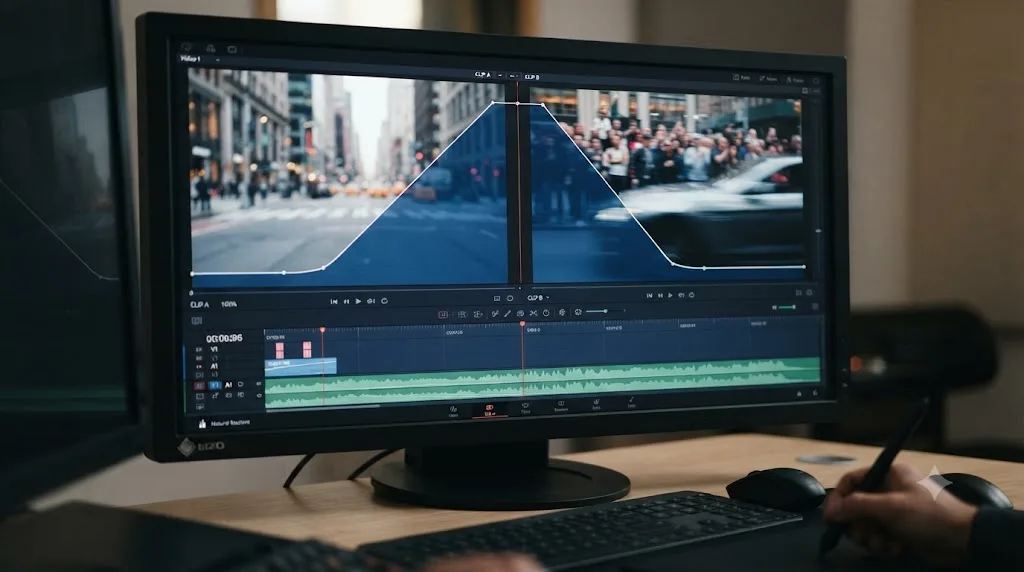
- Add a second speed point at the very last frame of the clip, and ramp that segment's speed up dramatically, 300% to 600% depending on how aggressive the whip should feel.
- On the incoming clip, mirror the same idea in reverse: add a speed point at the very first frame, still at the extreme speed, and a second speed point a second or so later where it settles back to 100%.
- Shape both ramps in the Retime Curve with a steep, fast acceleration heading into the cut and a matching deceleration coming out of it, so the speed spike feels continuous across the edit rather than like two unrelated effects that happen to meet at a cut point.
- Set the Retime Process to Optical Flow or Speed Warp on both clips, since extreme speed increases magnify any judder from Nearest or Frame Blend far more than a modest slow-motion ramp would.
- Check the audio. As covered in detail below, variable-speed segments mute their audio automatically, so a whip-speed ramp built this way will need a sound design element, a whoosh, a transient hit, layered in separately to sell the effect, since the clip's own audio won't carry through the ramped section.
This technique reads as a single continuous motion across two separate clips, which is the entire trick. Get the acceleration curve on the outgoing clip and the deceleration curve on the incoming clip close enough in shape, and an audience perceives one whip-fast motion spanning the cut rather than two independently retimed pieces of footage that happen to be adjacent.
How do you keep (or lose) audio through a speed ramp?
Audio behavior differs sharply depending on which kind of speed change you're using, and it catches a lot of editors off guard mid-project.
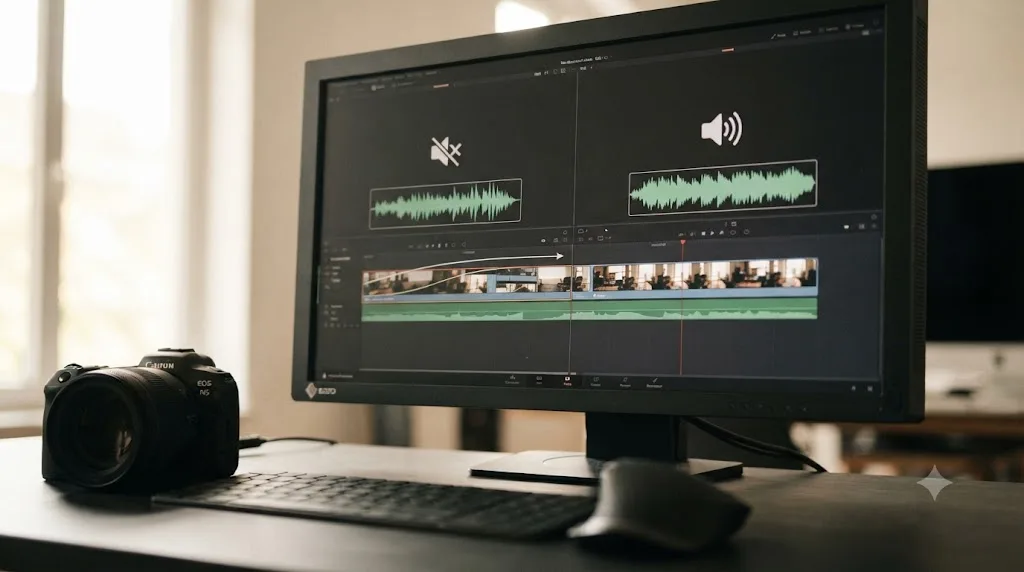
For a variable speed effect, meaning any clip using the speed points and Retime Controls covered throughout this guide, the manual is direct: "audio that accompanies variable speed effects will be muted." That's not a bug or a setting you accidentally toggled, it's the documented default behavior for any clip carrying more than one speed segment. If your speed-ramped clip has gone completely silent, that's expected, and the fix isn't a hidden checkbox, it's building your own sound design (a whoosh, a transient hit, a music sync point) to replace what the ramp muted, exactly as covered in the whip-speed example above.
For a simple, linear speed change, one uniform speed applied to the entire clip rather than a ramp built from multiple speed points, the audio behaves differently and does carry through. Per the manual, this kind of linear speed effect "retimes accompanying audio with pitch correction on Mac OS X (Yosemite and above)," meaning a slowed-down clip's audio drops in pitch less dramatically than raw time-stretching alone would produce. On Windows and Linux, that same linear retime "without it" happens instead, meaning the audio still retimes and plays, just without the automatic pitch correction, so a heavily slowed clip's audio pitch drops noticeably more on those platforms than on Mac.
| Speed change type | Audio behavior |
|---|---|
| Variable speed effect (multiple speed points, a true ramp) | Muted automatically, regardless of platform |
| Linear speed change (Change Clip Speed, one uniform speed) on Mac OS X (Yosemite+) | Retimes with automatic pitch correction |
| Linear speed change (Change Clip Speed, one uniform speed) on Windows or Linux | Retimes without pitch correction |
Variable-speed audio is muted in DaVinci Resolve, while a simple linear speed change with Change Clip Speed can keep audio and even correct its pitch on Mac. That single distinction explains most "why did my audio disappear" confusion around speed ramping. If you need a genuinely continuous, uninterrupted audio track under a speed-ramped visual, the practical answer is to duplicate the clip onto a separate audio-only track at its original, unramped speed, and sync it back to the visual manually, since the ramped clip's own embedded audio simply isn't available to carry that job once multiple speed points are involved.
Does a speed ramp ripple the rest of your timeline?
Changing a clip's speed changes its duration, since a clip playing at 50% takes up twice the timeline space of the same clip at 100%. What happens to everything downstream of that clip depends entirely on which edit tool is active when you make the change, not on any setting inside Retime Controls itself.
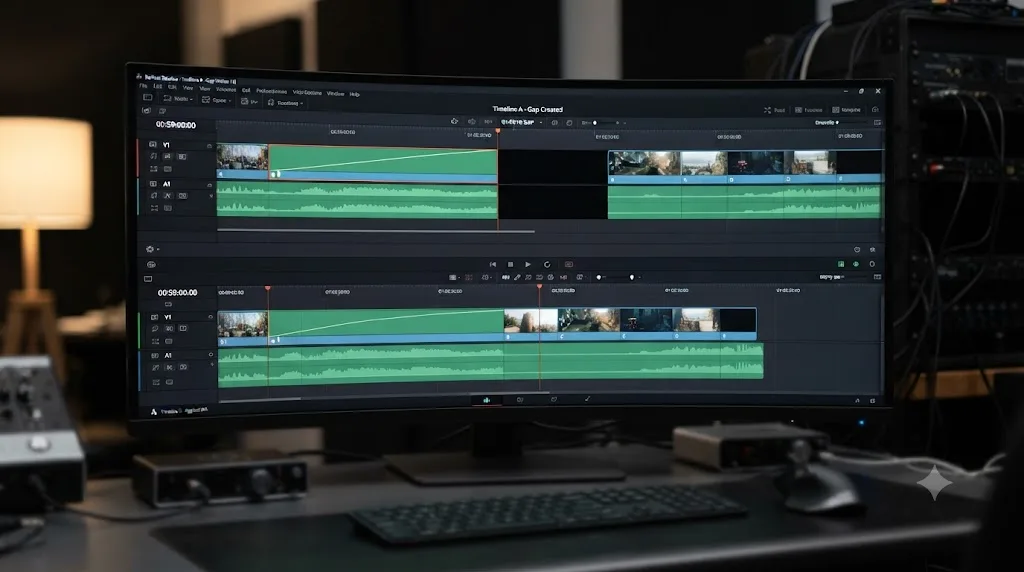
Per the manual's coverage of this exact behavior: with the Selection tool active, "the Timeline won't ripple," meaning your retimed clip's new duration simply overwrites the space next to it, potentially covering up or exposing gaps around neighboring clips depending on whether the retimed clip grew or shrank. With the Trim tool active instead, "the Timeline will" ripple, meaning every downstream clip shifts to accommodate the retimed clip's new duration, preserving the relative order and adjacency of everything else on the track.
Dragging a speed point's top handle to stretch or compress a segment triggers exactly this same overwrite-versus-ripple choice, per the manual: the action "shortens or lengthens the clip, and either overwrites or ripples neighboring clips depending on whether you're using the Selection or Trim modes."
Whether a retimed clip pushes the rest of your timeline forward or overwrites the space next to it depends on whether the Selection tool or the Trim tool is active, not on any setting inside the Retime controls themselves. This is worth checking deliberately before building a ramp on a clip that sits in the middle of a densely packed sequence, since the wrong tool active at the wrong moment either silently swallows a few frames of a neighboring clip (Selection mode overwrite) or shoves every subsequent clip in your timeline out of sync with a locked music cue or a matched dialogue point (Trim mode ripple). Check which tool is active in the toolbar, top left of the Edit page, before you start dragging speed point handles on a clip you can't afford to shift the timing around.
How do you retime an entire clip instead of building a ramp?
Not every speed change needs the full Retime Controls and Retime Curve treatment. If a clip just needs to play uniformly faster or slower, start to finish, with no ramping at all, Change Clip Speed is the faster, simpler tool for that exact job.
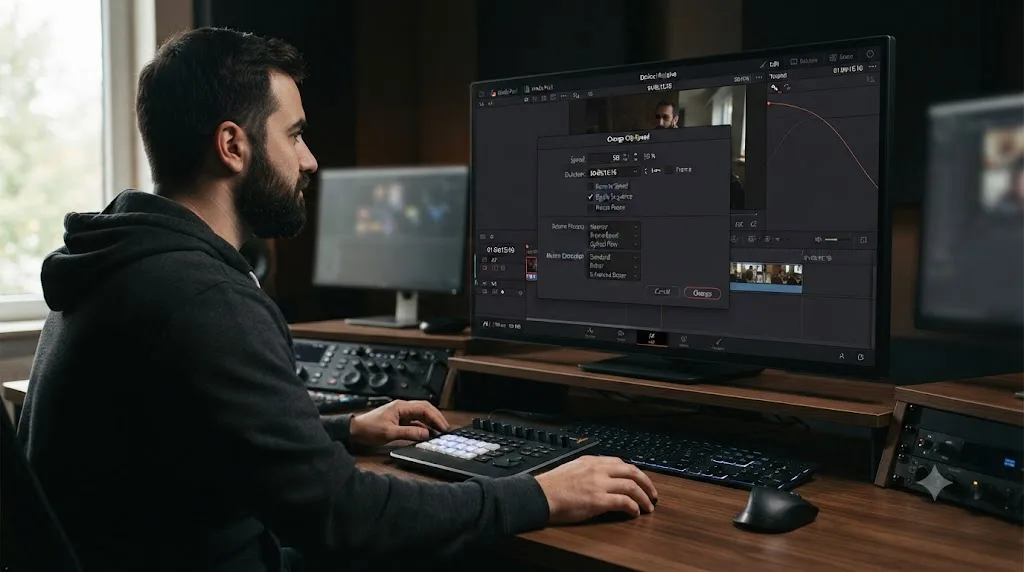
Right-click the clip and choose Change Clip Speed to open its dialog directly. Per Boris FX's breakdown of Resolve's speed tools, you "increase the Speed percentage value to speed up the video or decrease the values to slow it down," and the dialog includes toggles for ripple timeline behavior, reverse speed, freeze frame, and audio pitch correction, all in one window instead of spread across the retime track and Inspector.
The dialog's key fields:
| Field | What it controls |
|---|---|
| Speed (percentage) | The clip's new uniform playback speed, 50% for half speed, 200% for double speed |
| Duration | An alternative to percentage, set the exact new length you want the clip to occupy instead |
| Frames | Set the new duration in exact frame count rather than a timecode duration |
| Reverse Speed | Plays the entire clip backward at the specified speed |
| Ripple Sequence | Chooses whether downstream clips shift to absorb the new duration, the same overwrite-versus-ripple concept covered above, exposed here as an explicit checkbox instead of depending on the active tool |
| Freeze Frame | Converts the clip to a still frame instead of a moving speed change |
| Change Speed / Maintain Pitch | Retains the clip's audio and, where supported, corrects its pitch to reduce the chipmunk or slow-motion drone effect of raw time-stretching |
This is the tool to reach for whenever a ramp genuinely isn't the goal, a slow-motion b-roll shot that needs to run at a consistent 40% the whole way through, a sped-up time-lapse-style clip, footage that needs to hit an exact duration to match a specific music cue length. Building a two-point speed ramp with identical speed values at both ends technically works but adds unnecessary complexity for a job Change Clip Speed does in one dialog.
If a clip already has keyframed Transform properties, Zoom, Position, and so on, applied before you retime it, note the interaction the keyframing guide covers under how to keyframe effects in DaVinci Resolve: retiming a clip after keyframing it can shift the animation's apparent speed, since a keyframe fixes a value to a specific frame, and changing the clip's overall speed changes how much real time that frame range now represents. Finalizing your speed change first, then keyframing any Transform animation on top of it afterward, avoids having to go back and manually re-verify every keyframe's timing once the retime is applied.
What changed with speed ramping in DaVinci Resolve 21?
If you learned speed ramping on an older version of Resolve, here's exactly what moved, and what stayed exactly where it was.
The headline change, covered in detail above, is the Retime Curve's rebuild around a four-point Bezier system, the same one used across the rest of Resolve's keyframing tools. Per Blackmagic's own What's New page: "Four-point Bezier easing supports complex video retiming." Before this change, retime curves used a simpler two-point ease model, sufficient for a basic ramp but limited when you wanted independent control over how a speed change accelerates versus how it decelerates.
That same What's New page also groups the retime curve change alongside the broader keyframing overhaul: "Keyframing updates include new ease animations with loop, pingpong and relative modes plus simultaneous adjustments to multiple clips. The curves editor's normalized zoom mode automatically scales curves to fill the available vertical space." The normalized zoom mode in particular helps when you're viewing a Speed curve next to a Transform curve with a very different numeric range in the same Curve Editor window, keeping both readable at once instead of one flattening out visually against the other.
Resolve 21 didn't ship perfectly on this front at launch. A maintenance update followed quickly. Nino Leitner, reporting for CineD on the 21.0.2 release, notes that Blackmagic Design "improved the display of the retime speed curve, and corrected an issue with pasting copied keyframes between clips." If you built speed ramps on an early 21.0 build and the curve's visual display looked off or a copy-paste of keyframed speed points behaved unexpectedly, updating to 21.0.2 or later resolves both of those specific issues.
| Feature | Available before Resolve 21? | New or changed in Resolve 21 |
|---|---|---|
| Retime Controls, speed points | Yes | No change |
| Automatic easing between speed segments | Yes | No change |
| Retime Frame and Retime Speed curves | Yes | Rebuilt around 4-point Bezier easing |
| Retime curve display accuracy | N/A | Fixed in 21.0.2 maintenance update |
| Copying keyframed speed points between clips | Yes | Paste behavior fixed in 21.0.2 |
| Nearest, Frame Blend, Optical Flow retime processes | Yes | No change |
| Speed Warp (Studio) | Yes | No change |
| Change Clip Speed dialog | Yes | No change |
Everything else in this guide, the Clip Speed pop-up menu, the manual speed-point workflow, the Retime Process dropdown, Change Clip Speed's ripple and pitch-correction toggles, carries forward unchanged from earlier Resolve versions. If you're following an older tutorial for the fundamentals of adding a speed point or reading the retime track's directional arrows, it still applies exactly as written. What's new sits specifically on top: finer, independently shaped acceleration and deceleration through the rebuilt Bezier curve, and the small stability fixes that followed in 21.0.2.
Do you need DaVinci Resolve Studio to speed ramp?
Mostly, no. Retime Controls, speed points, both Retime Curve types, and three of the four Retime Process options, Nearest, Frame Blend, and Optical Flow, are all part of the free edition. You can build the action-sports, freeze-frame, and whip-speed ramps covered in this guide entirely on the free version of DaVinci Resolve, start to finish.
The one genuine Studio-exclusive piece is Speed Warp. Blackmagic's own Studio product page lists "speed warp retiming, including advanced optical flow for crystal clear, smooth speed changes" among the features that come with the $295 Studio license and don't come with the free edition. It runs on the DaVinci Neural Engine, the same machine-learning system behind other Studio-exclusive tools like Magic Mask and Voice Isolation, covered in our roundup of AI tools for learning and working in DaVinci Resolve.
| Tool | Free | Studio |
|---|---|---|
| Retime Controls and speed points | Yes | Yes |
| Retime Frame and Retime Speed curves | Yes | Yes |
| Change Clip Speed dialog | Yes | Yes |
| Nearest, Frame Blend retime processes | Yes | Yes |
| Optical Flow retime process (all Motion Estimation modes) | Yes | Yes |
| Speed Warp retime process | No | Yes |
Practically, this means the decision to upgrade for speed ramping specifically comes down to one narrow question: does Optical Flow's Enhanced Better mode look good enough on your footage, or does a specific shot, usually one with fast, complex motion like water, hair, or limbs moving quickly across the frame, still show visible warping or smearing that only Speed Warp's neural-engine-driven frame synthesis resolves. For most ramps, especially the moderate 30 to 60 percent slow-motion range common in the action-sports example earlier in this guide, Optical Flow on the free edition is genuinely sufficient. Speed Warp earns its keep at the more extreme end, dropping footage to 10 or 15 percent speed on content with a lot of independent motion inside the frame, where the gap between a good result and an obviously synthetic one becomes visible even to a casual viewer.
What mistakes make a speed ramp look amateurish, and how do you fix them?
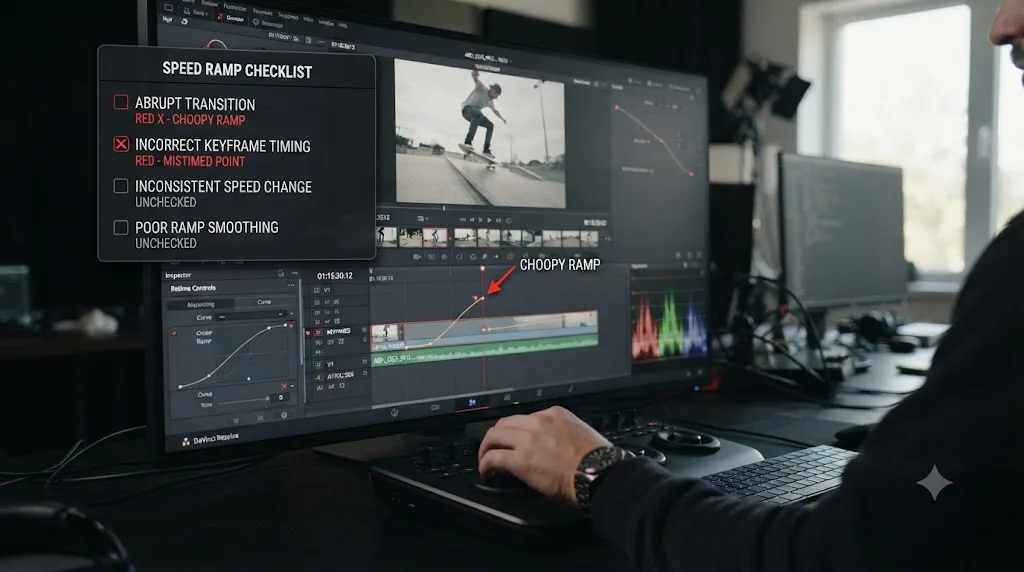
Most speed ramp problems trace back to a small, repeatable set of causes. Work through this table before assuming a ramp needs to be rebuilt from scratch.
| Symptom | Likely cause | Fix |
|---|---|---|
| The ramp looks choppy or stutters in the viewer | The section hasn't rendered yet; Resolve's real-time preview can't keep up with a complex retime | Render the section, or enable Smart Cache, before judging the timing |
| Slow motion looks blocky, doubled, or ghosted | Retime Process is set to Nearest or Frame Blend on footage with real motion in frame | Switch to Optical Flow, or Speed Warp if you have Studio |
| The ramp feels mechanical and abrupt | Speed points are relying only on default automatic easing, with no shaping applied | Open the Retime Curve and shape the transition with the 4-point Bezier handles |
| Dragging a speed point moves it without changing the ramp's timing | You grabbed the bottom handle instead of the top | The top handle changes segment timing; the bottom handle only repositions the point |
| Audio disappears entirely during the ramped section | Any clip with multiple speed points mutes its audio automatically | Build a separate sound design layer for the ramped section, or keep audio on an unramped duplicate track |
| Neighboring clips got covered up or shifted unexpectedly after a retime | Selection tool (overwrite) or Trim tool (ripple) was active without you checking which | Confirm the active tool before dragging a speed point's top handle on a densely packed timeline |
| A speed ramp built with keyframed Transform animation on the same clip looks wrong afterward | The clip was retimed after its Transform keyframes were already set, shifting their apparent timing | Finalize retiming first, then keyframe Transform properties afterward, not the other way around |
| The slow-motion section looks smeary specifically around fast-moving edges, hair, or water | Even Optical Flow's frame synthesis struggles with certain kinds of complex, high-frequency motion | Try a higher Motion Estimation setting (Enhanced Better) first; Speed Warp (Studio) if that's still not enough |
| A ramp that looked right on the Edit page disappeared after flattening a multicam clip | The retime was applied to one angle inside a multicam clip, then lost or altered during flattening | Open the multicam clip's individual angles directly to confirm which one carries the speed points |
A speed ramp that looks wrong almost never means the retiming mechanism itself is broken. It means one specific choice, which handle, which curve, which Retime Process, which tool was active, doesn't match what you actually intended. Work through the table above before assuming an entire ramp needs to be deleted and rebuilt.
How do proxies, mixed frame rates, and multicam affect a speed ramp?
A handful of edge cases are worth knowing before they surprise you on a real project.
Proxies and optimized media don't change a speed ramp's underlying timing. Speed points are tied to frame numbers on the clip, and proxy or optimized media shares the same duration and frame count as the source camera file, so switching between proxy and full-resolution playback while editing doesn't shift where your speed points land. What can change is how convincing the Retime Process looks during proxy playback, since a lower-resolution proxy can hide fine detail that would otherwise reveal artifacting from Nearest or Frame Blend, artifacting that becomes visible again once you switch back to full-resolution media for final review.
Mixed frame rate timelines interact directly with the Retime Process setting, since the same manual section covering Nearest, Frame Blend, and Optical Flow describes the Retime Process option as governing "clips in mixed frame rate timelines and those with speed effects applied to them" as one combined setting, not two separate ones. If a clip shot at a different frame rate than your timeline is also carrying a speed ramp, that single Retime Process choice on the clip handles both jobs simultaneously, conforming it to the timeline's frame rate and generating whatever extra frames the ramp itself needs. A clip that looks fine at its native frame rate but slightly off once conformed and ramped is worth checking against the Mixed Frame Rate Format setting in Master Project Settings before assuming the ramp itself is the problem.
Multicam clips add one specific wrinkle: applying Retime Controls and speed points to a multicam clip retimes whichever angle is currently active in the multicam viewer at the time, not necessarily every angle inside it uniformly. If a speed ramp that looked correct while editing seems to vanish or change after flattening a multicam clip into a single track, open the individual angles directly to confirm which one actually carries the speed points you built, since flattening can expose a mismatch between the angle you thought was active and the one that was actually retimed.
None of these are reasons to avoid speed ramping on a proxy-based, mixed-frame-rate, or multicam-heavy project. They're reasons to check the specific setting each edge case actually touches, Retime Process for frame rate mismatches, the active multicam angle for flattening surprises, rather than assuming the ramp mechanism itself behaves differently in these situations. It doesn't. The same speed points, curves, and processes covered throughout this guide apply identically; a couple of extra project settings just interact with them along the way.
Retime Controls or the Fusion Time Speed node: which one should you use?
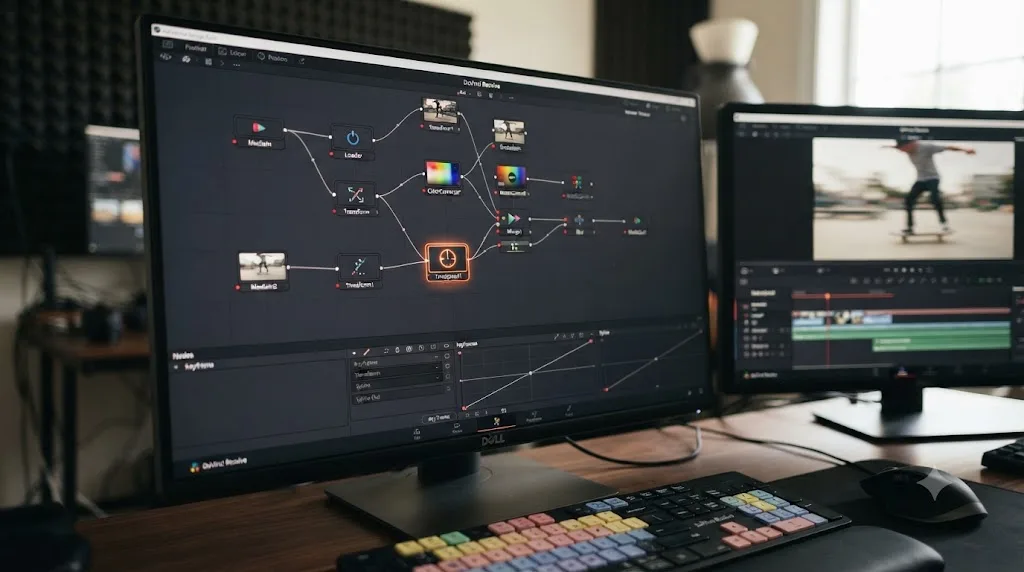
Everything covered so far lives on the Edit page. Fusion, Resolve's node-based compositing environment, has its own separate way of changing speed, built around a Time Speed node rather than the retime track and Clip Speed menu covered throughout this guide.
For the overwhelming majority of speed ramps, Edit page Retime Controls is the right tool, and Fusion's Time Speed node isn't necessary at all. Retime Controls is faster to reach, directly visible on the timeline, and handles everything covered in this guide's three worked examples without ever requiring a trip into Fusion.
Where Fusion's Time Speed node earns its place is inside a more complex composite that's already living in Fusion for other reasons, a shot with tracked visual effects elements, a custom transition, or layered Fusion titles, where retiming needs to happen as one step inside a node graph that's already doing other work on the same footage. Building the speed change at the Fusion level in that situation keeps the retime and the composite work synchronized inside a single node tree, rather than retiming on the Edit page first and then having to account for that retimed footage separately once it enters a Fusion composition. The same locked-versus-unlocked spline point system covered in our guide to keyframing effects in DaVinci Resolve governs a Time Speed node's animation curve exactly the way it governs any other Fusion parameter.
If you're not already working inside a Fusion composition for other reasons on a given shot, there's no benefit to reaching for the Time Speed node instead of Edit page Retime Controls. The two tools solve the same underlying problem, and the Edit page version is simpler to reach, easier to preview against the rest of your cut, and sufficient for every technique covered in this guide.
If you're staring at a Fusion node tree wondering whether a specific speed control belongs to the Edit page's Retime system or Fusion's own Time Speed node, TryUncle watches your Resolve session and can point at the actual control you're looking for, in the context of the project you're already working in, rather than making you pause to search a forum thread mid-edit.
The short version
Speed ramping in DaVinci Resolve is three tools working in sequence, not one. Retime Controls and speed points decide when and how much the speed changes. The Retime Curve, rebuilt in Resolve 21 around a four-point Bezier system, decides how that change feels as it happens. The Retime Process, Nearest, Frame Blend, Optical Flow, or Speed Warp on Studio, decides what the actual slow-motion frames look like once they're generated. Get any one of the three wrong and the ramp reads as a mistake. Get all three right and it disappears into the cut, exactly the way the best speed ramps always do.
Every speed ramp in DaVinci Resolve is built from the same two-part move: place at least two speed points to define when the speed changes, then shape that change with the Retime Curve and a matching Retime Process. Master that pattern once, and the slow-motion action beat, the ramp into a freeze frame, and the whip-speed cut between two clips stop looking like three separate skills. They're the same mechanic, aimed at three different moments in a cut.
Frequently asked questions
- What is the keyboard shortcut for Retime Controls in DaVinci Resolve?
- Select a clip and press Command-R on Mac or Ctrl-R on Windows, or right-click the clip and choose Retime Controls from the contextual menu. A retime track appears directly above the clip with directional arrows showing its current speed, and a Clip Speed pop-up menu appears at the bottom center.
- How many speed points do you need to build a speed ramp?
- At least two. Per the DaVinci Resolve manual, "it takes a minimum of two speed points to create a speed effect." A single speed point is just a locked speed value with nothing to ramp toward; add a second point somewhere else on the clip and Resolve automatically eases the transition between them.
- Why does my speed ramp look choppy, blocky, or stuttery?
- Two separate causes produce the same symptom. An unrendered section stutters during real-time playback no matter how good the ramp is, so render it or enable Smart Cache before judging it. A genuinely blocky slow-motion section usually means the Retime Process is set to Nearest or Frame Blend instead of Optical Flow or Speed Warp, which generate new in-between frames instead of repeating or dissolving existing ones.
- Do you need DaVinci Resolve Studio to speed ramp?
- No, not for the core mechanic. Retime Controls, speed points, the Retime Curve, and the Nearest, Frame Blend, and Optical Flow retime processes are all in the free edition. Speed Warp specifically is listed on Blackmagic's own Studio product page as a Studio-exclusive feature.
- Why is there no audio during my speed ramp?
- Per the DaVinci Resolve manual, "audio that accompanies variable speed effects will be muted" automatically, which is the behavior tied to any clip carrying multiple speed points. A simple linear speed change made with Change Clip Speed instead keeps its audio, and on Mac OS X (Yosemite and later) even corrects its pitch automatically; Windows and Linux retime that same audio without the pitch correction.
- What's the difference between Retime Controls and the Retime Curve?
- Retime Controls, opened with Command-R or Ctrl-R, is where you add speed points and set each segment's raw speed value. The Retime Curve, opened separately from the same right-click menu, reshapes how the change between those same points feels, turning an instant jump into a gradual, hand-shaped ramp.
- What's the difference between the Retime Frame curve and the Retime Speed curve?
- The Retime Frame curve plots source frames against timeline frames; a shallow segment slows motion down, a steep one speeds it up, and an inverted segment reverses it. The Retime Speed curve instead sits flat at 100% and you drag whole segments up or down to change speed, but per the manual, "it's impossible to create reverse motion using the Retime Position curve" with this method.
- Does building a speed ramp push the rest of my timeline forward?
- It depends on the active edit tool, not on any setting inside Retime Controls itself. With the Selection tool active, the timeline won't ripple and the change overwrites the space next to it. With the Trim tool active, the timeline ripples and downstream clips shift to accommodate the new duration.
Sources
- DaVinci Resolve manual: Speed Effects and Retiming (Blackmagic Design, mirrored)
- DaVinci Resolve manual: Clip Retiming Controls (Blackmagic Design, mirrored)
- DaVinci Resolve manual: Creating Variable Speed Effects Using the Retime Controls (Blackmagic Design, mirrored)
- DaVinci Resolve manual: Using Retime Curves (Blackmagic Design, mirrored)
- DaVinci Resolve manual: Creating Freeze Frames (Blackmagic Design, mirrored)
- DaVinci Resolve manual: Retiming an Entire Clip (Blackmagic Design, mirrored)
- DaVinci Resolve manual: Rippling or Overwriting the Timeline When Using Retime (Blackmagic Design, mirrored)
- DaVinci Resolve manual: Retime and Scaling, Inspector settings (Blackmagic Design, mirrored)
- DaVinci Resolve - What's New (Blackmagic Design)
- DaVinci Resolve Studio product page (Blackmagic Design)
- JayAreTV (Justin Robinson): New Keyframe and Curves Editor in DaVinci Resolve 21
- CineD: Creating Speed Ramps in DaVinci Resolve, Quick Tip, by Alex Hohenthaner
- CineD: DaVinci Resolve 21.0.2 Released, Keyframe Fixes, Retime Curve Improvements, and Better Fusion Vertical Transitions, by Nino Leitner
- Boris FX: 4 Ways to Change Clip Speed in DaVinci Resolve, by Marco Sebastiano Alessi
Learn by doing, not watching
Stop translating tutorials to your timeline.
TryUncle stays beside Resolve on Mac and Windows. When you ask, Uncle sees your screen and points at the exact control you need. No hunting through tabs, timestamps, or mismatched tutorials.
Meet TryUncleKeep reading
 GuidesJul 9, 202634 min read
How to Keyframe Effects in DaVinci Resolve: The Complete Guide
Every way to keyframe effects in DaVinci Resolve: Inspector diamonds, the Keyframe Editor, ease curves, Fusion splines, and what changed in Resolve 21.
 GuidesJul 8, 202636 min read
How to Add Transitions in DaVinci Resolve: The Complete Guide
How to add, resize, and troubleshoot transitions in DaVinci Resolve: shortcuts, duration, alignment, Fusion transitions, and the handles error fix.
 ComparisonsJul 11, 202626 min read
The Best AI Tools to Learn DaVinci Resolve in 2026
ChatGPT, Claude, Blackmagic's free training, Recut, and Resolve's Neural Engine compared for learning DaVinci Resolve, and the gap none of them close.