
Learn / DaVinci Resolveupdated for DaVinci Resolve 21.0 (June 2026)
How to Keyframe Effects in DaVinci Resolve: The Complete Guide
Quick answer
Click the diamond-shaped keyframe button next to any Inspector parameter (Zoom, Opacity, Position) to set your first keyframe, move the playhead, then change that value again to add a second keyframe. Resolve interpolates every frame between them. Open the Keyframe Editor or Curve Editor to fine-tune timing and easing.
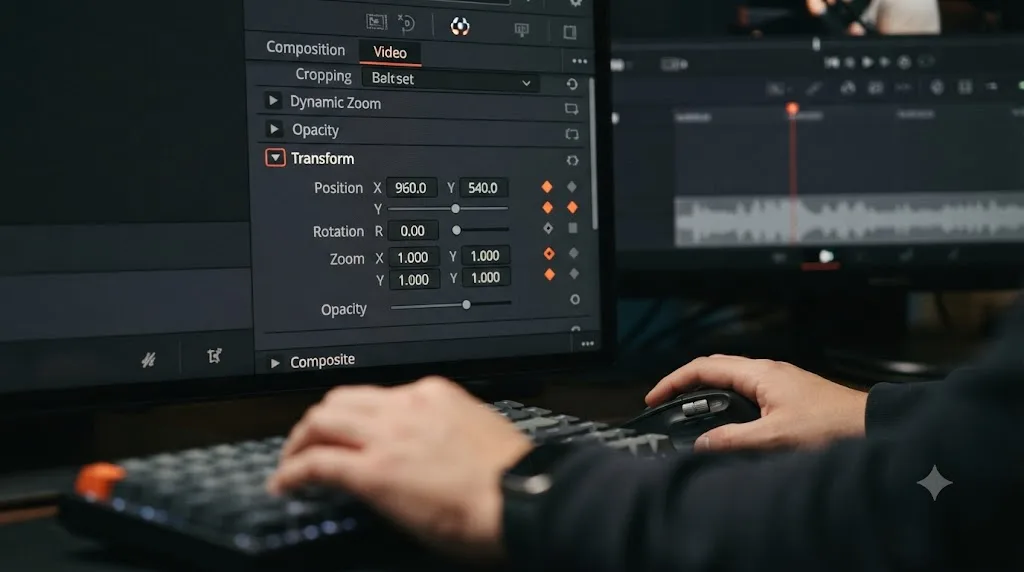
You want a photo to slowly zoom in. Or a logo to swing into frame. Or a color grade that gets warmer over the first three seconds of a shot. All three are the same feature wearing different clothes: keyframing. Set a value at one point in time, set a different value at another point, and DaVinci Resolve fills in every frame between them.
This guide covers the whole mechanic, start to finish. Where the diamond button lives in the Inspector, what the Keyframe Editor does that the Inspector can't, how ease and Bezier curves change the feel of a move, how keyframing works differently on the Color page and inside Fusion, and what's actually new about it in DaVinci Resolve 21. Three worked examples at the end walk you through a Ken Burns photo pan, a tracked Power Window on a moving face, and a text title that flies in from off screen, so you finish this with more than theory.
What is keyframing in DaVinci Resolve, and when do you actually need it?
A keyframe is a saved value, attached to a specific frame, for a specific parameter. Set two keyframes with two different values for the same parameter, and DaVinci Resolve automatically calculates every frame in between, smoothly moving from the first value to the second. That's the entire concept. Everything else in this guide is refinement on top of that one idea.
You need keyframing the moment a parameter should be different at the end of a shot than it was at the beginning. A few common cases:
- A still photo that starts framed wide and slowly pushes in, the "Ken Burns" effect.
- A title that slides in from off screen, holds, then slides back out.
- A Power Window in a color grade that has to follow a moving subject's face.
- A speed ramp that slows footage down for a dramatic beat, then speeds back up.
- A picture-in-picture window that grows from a small corner insert to fill the frame.
- An audio level that fades down under dialogue and back up once the line finishes.
You don't need keyframing for a value that stays constant for the whole clip. A static color grade, a fixed crop, a title that appears and disappears with a cut instead of an animated transition, none of those need a second keyframe because nothing changes over time. Reaching for keyframes on a parameter that should just hold one value is the single most common way beginners overcomplicate a simple edit.
Keyframing in DaVinci Resolve works the same way in every module that supports it: set a value, move the playhead, set a different value, and the software interpolates the frames between. That consistency is worth holding onto, because the mechanic looks slightly different on the Edit page, the Color page, and inside Fusion, but the underlying logic never changes.
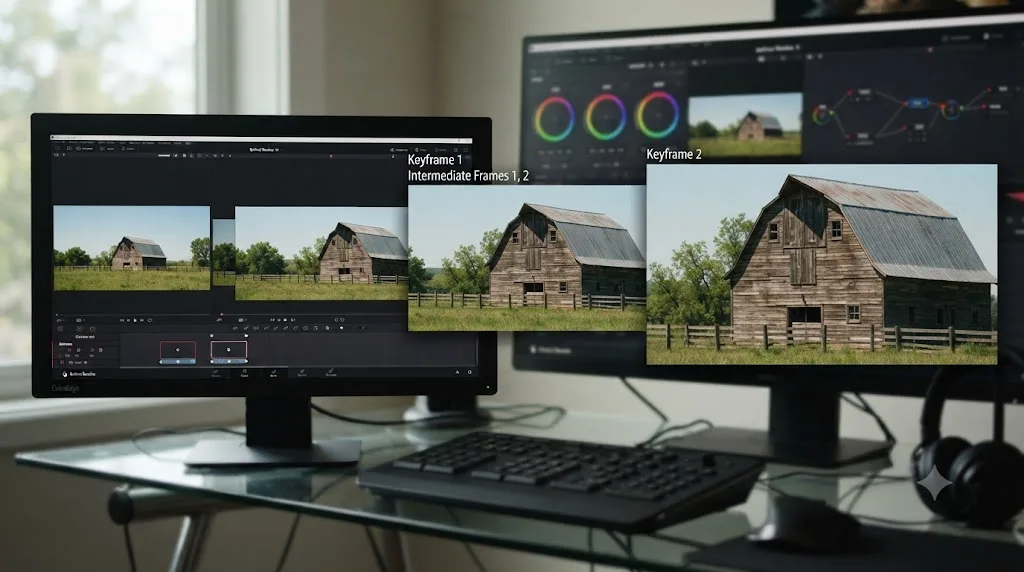
How do you add your first keyframe in the Inspector?
This is the fastest path into keyframing and the one you'll use most often, whether you're on the Edit page or the Cut page.
- Select the clip you want to animate on the timeline.
- Open the Inspector and click the Video tab.
- Find the parameter you want to animate. Zoom, Position, Rotation, and Cropping all live under the Transform section by default. Every keyframable parameter has a small diamond-shaped button to its right.
- Move the playhead to the frame where the animation should start.
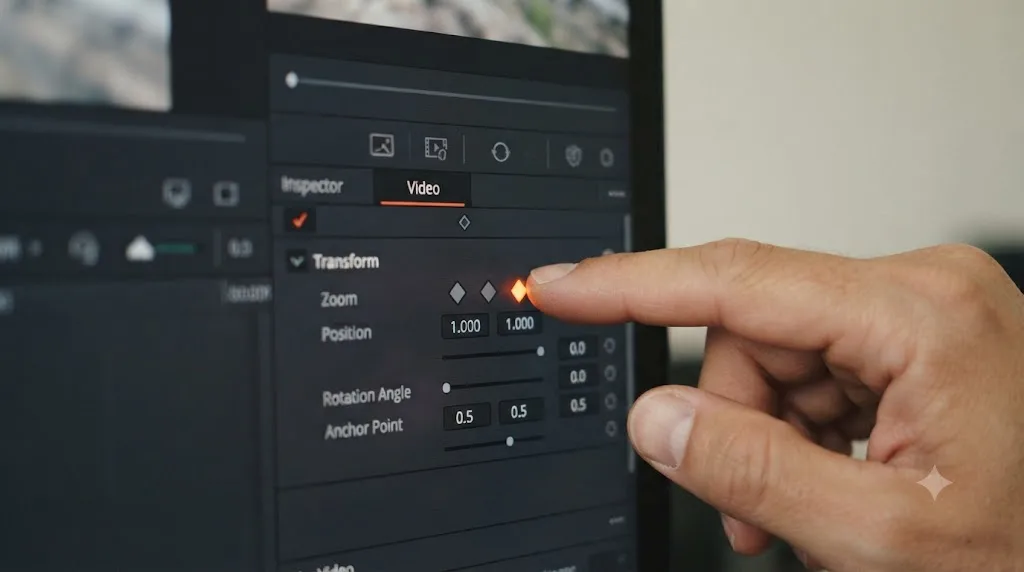
- Click the diamond. It turns orange, according to the DaVinci Resolve manual, which states that "if the playhead is on a keyframe, this button turns orange... otherwise it stays gray." That single keyframe locks in the parameter's current value at this exact frame.
- Move the playhead to a later frame.
- Change the parameter's value. Resolve automatically creates a second keyframe at the new playhead position, holding the new value.
- Move the playhead back to the start and press play (or drag the playhead by hand, called scrubbing) to preview the animation.
That's the entire loop. Every keyframed effect in this guide, no matter how elaborate, is built from repeating steps 4 through 7 as many times as the animation needs.
A parameter needs at least two keyframes before it can animate at all, since a single keyframe is just a locked value with nowhere to interpolate toward. If you set one keyframe and never add a second, changing the value anywhere else on the clip just moves that one keyframe's value rather than creating an animation. This trips up almost everyone the first time: you set a keyframe, scrub forward, nudge the parameter expecting a new keyframe, and instead you've overwritten the only one you had.
| Parameter | Where it lives | Typical use for keyframing |
|---|---|---|
| Zoom | Inspector > Video > Transform | Ken Burns push-in on a photo, slow reveal on a static shot |
| Position | Inspector > Video > Transform | Pan across a still image, slide a picture-in-picture window |
| Rotation Angle | Inspector > Video > Transform | Tilt or spin effect, matching a handheld camera move in a graphic |
| Cropping | Inspector > Video > Cropping | Gradual reveal or reduction of frame, split-screen animation |
| Opacity | Inspector > Video > Composite | Fade a graphic or overlay in and out independent of a cut |
| Dynamic Zoom | Inspector > Video toolbar | Automatically keyframes Zoom and Position together for a one-click push in or out |
What's the difference between the Inspector's keyframe button and the Keyframe Editor?
The Inspector's diamond button is where you create keyframes and read their status at a glance. It's not built for adjusting several keyframes at once, or for seeing the whole animation laid out along the timeline. That's what the Keyframe Editor is for.
Open it by selecting a clip and pressing Shift-Command-C on Mac, or Shift-Ctrl-C on Windows, or by clicking the small Keyframe button at the far right of the clip's name bar on the timeline. Per the manual, "the Keyframe Editor in the Timeline is the most powerful way of exposing all of a clip's keyframes and adjusting their timing and interpolation."
Once open, the Keyframe Editor shows one horizontal track for each group of parameters you've keyframed, Transform, Cropping, Composite, and so on, with a disclosure triangle to expand a group and see individual parameters inside it. Every keyframe on every parameter appears as a diamond marker directly beneath the corresponding point in the clip, which is the part the Inspector alone can't give you: a single view of the entire animation's timing, all at once.
From here you can:
- Drag any keyframe left or right to retime it, without touching its value.
- Select multiple keyframes and drag them together, shifting a whole section of the animation earlier or later while keeping its internal timing intact.
- Add a brand-new keyframe directly on the track. The manual notes you can "press Command-[ or Option-click anywhere on a track of the Keyframe Editor to add a new keyframe, which defaults to whatever the current value is for that parameter at that frame," and that "new keyframes create linear animated changes by default."
- Right-click any keyframe for the same Ease In / Ease Out / Linear / Delete menu available from the Inspector.
The Keyframe Editor answers "when does this happen," while the Curve Editor, covered next, answers "how does this happen." Keep that distinction in mind and you'll reach for the right tool the first time instead of hunting through both.
DaVinci Resolve 21 added a shortcut worth knowing if you're new to the feature: a Keyframes text button at the top of the interface opens the same editor directly from the main toolbar, without needing to remember the Shift-Command-C shortcut or hunt for the clip's name-bar icon, a change Larry Jordan documents in his walkthrough of the revised interface.
How do you control the timing feel of an animation with ease and interpolation?
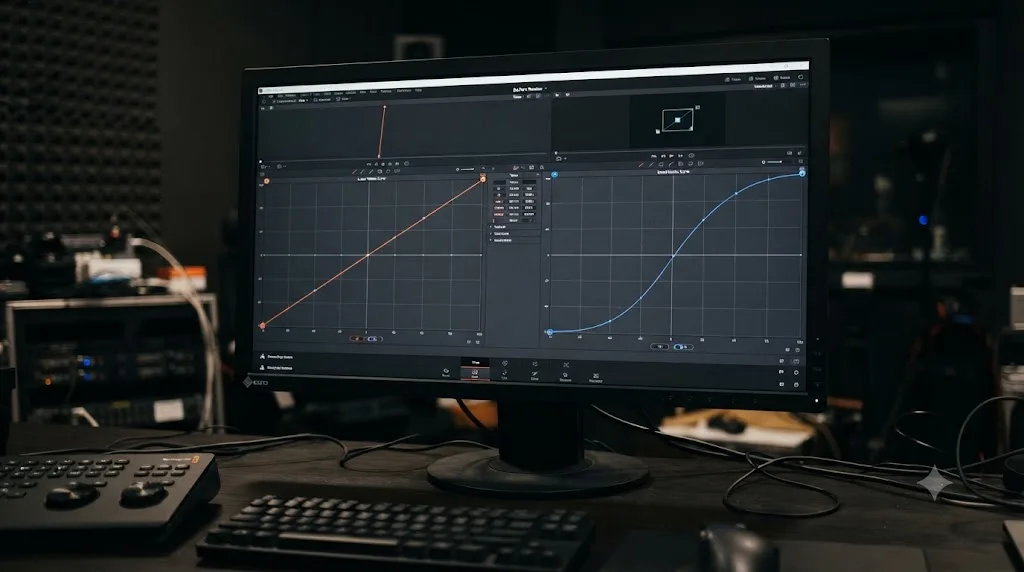
A raw, unmodified keyframe animation moves at a constant speed from the first value to the second, then stops dead the instant it hits the second keyframe. That reads as mechanical, because almost nothing in the real world moves at a perfectly constant speed and then stops instantly. Ease fixes that.
Right-click any keyframe, in the Inspector or the Keyframe Editor, and you'll find these options, matching the breakdown in Larry Jordan's guide:
| Option | What it does | When to use it |
|---|---|---|
| Linear | No acceleration; constant speed the whole way | Mechanical or intentionally robotic motion, data visualizations, UI-style graphics |
| Ease In | Deceleration entering the keyframe | The end of a move, so it settles rather than stopping abruptly |
| Ease Out | Deceleration leaving the keyframe | The start of a move, so it builds up naturally instead of snapping to speed |
| Ease In and Out (Both) | Deceleration on both sides of the keyframe | A move that both starts and stops gently, the most common choice for a Ken Burns pan |
| Delete | Removes the keyframe entirely | Cleaning up a mistake or simplifying an animation with too many points |
Once you've applied an ease preset, you can shape it further. Per Jordan, you "drag the white dot horizontally to change acceleration, or vertically to change the shape of the curve," which lets you dial in exactly how gradual or abrupt the ease feels rather than accepting whatever the default preset gives you.
Ease In and Ease Out are named for the keyframe they're attached to, not for the direction of the motion, which is the single most common point of confusion when editors first start easing keyframes. Ease Out on a starting keyframe means the motion eases as it leaves that keyframe. Ease In on an ending keyframe means the motion eases as it arrives. Get the two backward and a pan that should glide to a gentle stop instead slams on the brakes right where it should be accelerating.
DaVinci Resolve 21 expanded this system with two new interpolation modes, per Blackmagic's own What's New page: "Step In" and "Step Out" behaviors, alongside cyclical options that let a keyframed group of parameters Loop, Ping Pong, or hold a Relative offset automatically, useful for a repeating motion graphic element that shouldn't need its keyframes manually copied and pasted across an entire timeline.
There's one thing ease can't fix, and it trips people up on longer or more complex animations: a rough-looking preview in the viewer. As Larry Jordan puts it plainly in his DaVinci Resolve 20 keyframing guide:
"Remember to allow time for rendering before playing the timeline. Unrendered animations are woefully inaccurate."
An animation that looks stuttery in Resolve's live viewer is rarely a broken keyframe. It's an unrendered preview, and the fix is rendering the section, not re-keyframing it. Resolve calculates interpolation in real time during scrubbing and playback, and on a machine without headroom to spare, or on a particularly complex multi-parameter animation, that real-time math can't always keep up with full frame rate. Render the section, or enable Smart Cache on the timeline, before you judge whether an ease curve actually feels right.
What's the difference between the Curve Editor and the Keyframe Editor?
Both editors show you the same underlying keyframes. They just present them for two different jobs.
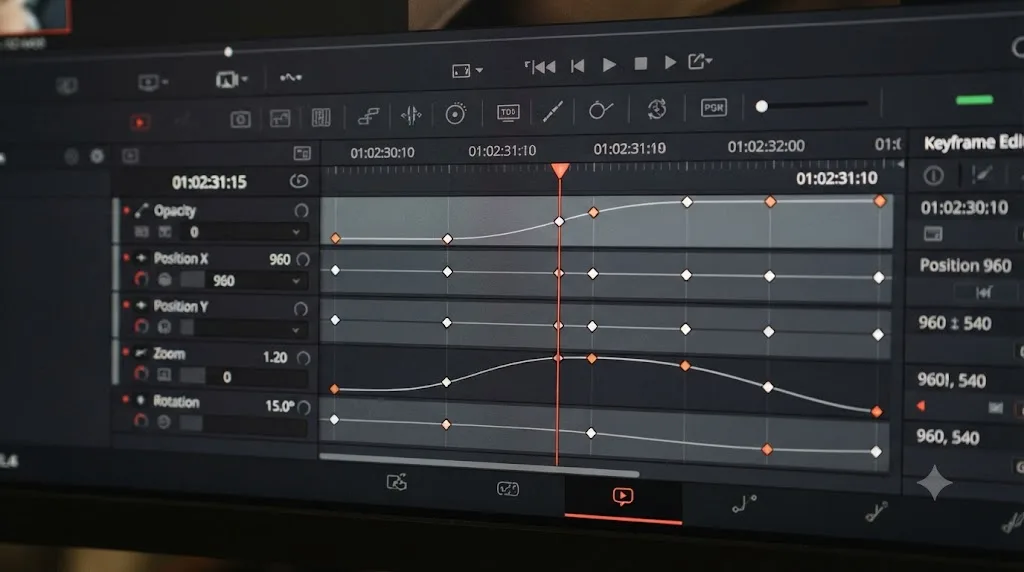
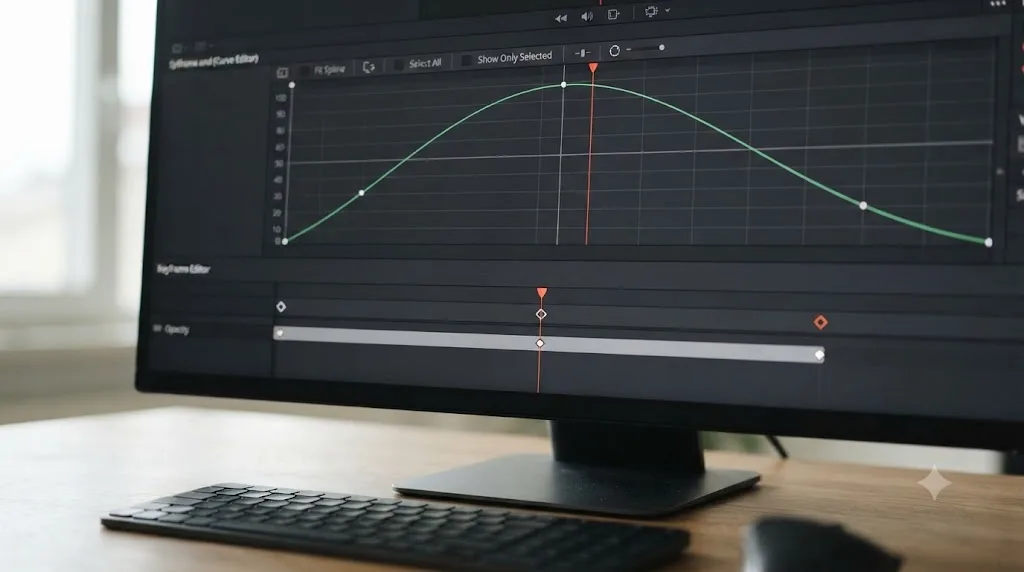
The Keyframe Editor, opened with Shift-Command-C, lays keyframes out along a plain timeline track, one row per parameter, with no value axis. It's built for retiming: dragging a keyframe left or right to change when something happens, without needing to see the shape of the value change itself.
The Curve Editor, opened with Shift-C according to the manual, plots the same keyframes as a line graph, time along the bottom, parameter value up the side. Here you can see exactly how steep or gentle the transition between two keyframes is, and drag the curve itself, not just the keyframe's position, to reshape the acceleration.
Use the Keyframe Editor when the question is "when does this happen." Use the Curve Editor when the question is "how does this happen, exactly." Most real editing sessions bounce between both: retime a keyframe in one editor, then check how the new timing feels in the other.
DaVinci Resolve 21's Curve Editor picked up one specific quality-of-life feature worth knowing about: normalized zoom mode. Per Blackmagic's release notes, "the curves editor's normalized zoom mode automatically scales curves to fill the available vertical space," which matters the moment you're keyframing two parameters with very different numeric ranges side by side, a Zoom value that moves between 1.0 and 1.4, say, next to a Rotation value swinging across 45 degrees. Without normalization, the small Zoom curve can look nearly flat next to the dramatic swing of the Rotation curve, even though both are doing exactly what you asked. Justin Robinson's coverage of the same release, writing for JayAreTV, frames it as letting editors see "clearer visibility of parameters with vastly different values" in the same graph.
How do you keyframe a color grade on the Color page?
Keyframing on the Color page works on the same core principle, set a value, move somewhere in time, set a different value, but the terminology and the tools are different from the Edit page, because you're animating node parameters and masks rather than transform properties.
Per the manual's introduction to keyframing, "DaVinci Resolve provides an interface for automatically interpolating color adjustment parameters in various ways from one setting to another," and the Color page's own Keyframe Editor exposes every keyframed parameter on the current node, exposure, saturation, a Power Window's position, exactly the way the Edit page's version exposes Transform and Cropping.
There are two distinct kinds of keyframe on the Color page, and mixing them up produces very different results:
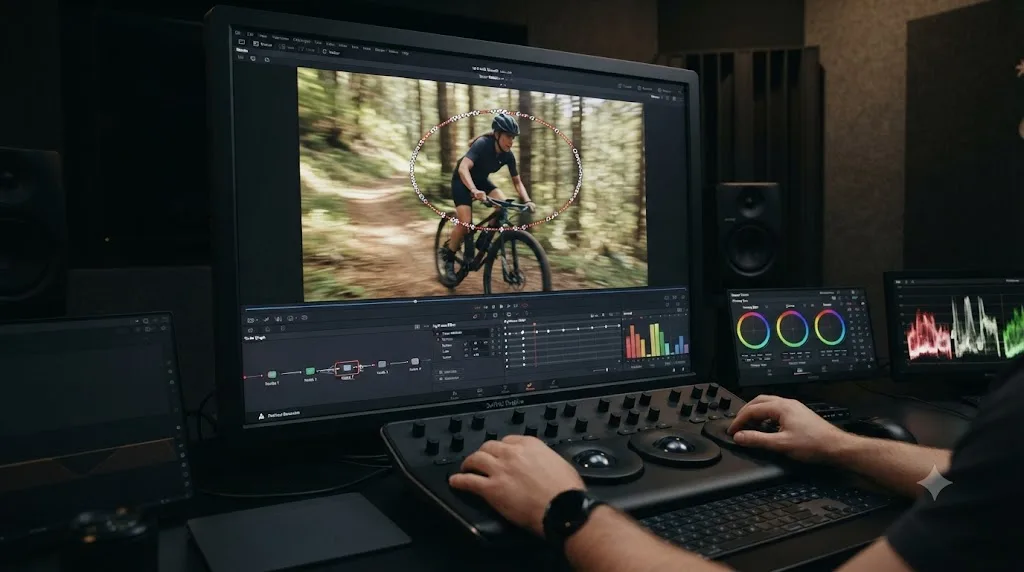
Dynamic keyframes are the diamond-shaped kind covered throughout this guide, smooth, interpolated changes between two points in time. Use these for anything that should feel like a gradual shift, an exposure ramp as a subject walks from shade into sunlight, a Power Window that tracks a moving face across a frame.
Static keyframes, also called marks, are round rather than diamond-shaped, and per the manual's entry on static keyframes, they "create abrupt, one frame changes from one state to another." There's no interpolation at all between a static keyframe and whatever comes next; the value simply jumps. That makes them the right tool for a lightning flash, a hard lighting cut mid-shot, or marking a clean edit point inside a single clip where you deliberately don't want a smooth blend. Create one with the menu command Mark > Make Static Keyframe, or the shortcut Command-].
| Keyframe type | Shape | Transition between points | Typical use |
|---|---|---|---|
| Dynamic keyframe | Diamond | Smooth interpolation | Exposure ramp, tracked Power Window, gradual color shift |
| Static keyframe (mark) | Round | Instant, one-frame jump | Lightning flash, hard lighting cut inside one clip, marking an edit point |
A dynamic keyframe blends smoothly into the next value; a static keyframe just cuts to it, with nothing in between. Picking the wrong one is a fast way to end up with a lighting flash that looks like a slow fade, or an exposure ramp that looks like a jarring jump cut, even though the actual grading work behind each keyframe was correct.
Tracking a Power Window is the single most common reason colorists reach for dynamic keyframes on the Color page. A subject moves across frame, the mask needs to follow, and rather than hand-keyframing the window's position every few frames, Resolve's built-in tracker can do most of that work automatically, laying down keyframes along the window's motion path that you then clean up by hand wherever the tracker loses confidence, a fast pan, a moment of motion blur, an occlusion where something crosses in front of the subject.
If you're grading a batch of clips that need the exact same keyframed animation, not just the same static grade, our guide to copying a color grade to multiple clips covers the Apply Grades Using menu specifically, since a keyframed grade raises a question a static one never has to answer: should the copied keyframes align to the original clip's source timecode, or to the new clip's own start frame?
How does keyframing work differently inside Fusion?
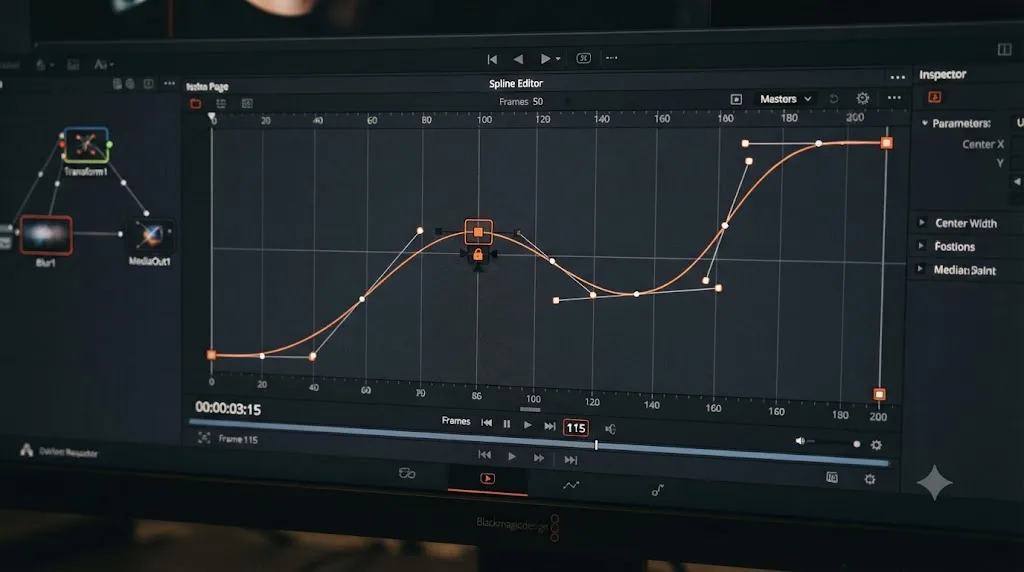
Fusion is where the keyframing model changes the most, because Fusion isn't organized around clips and an Inspector at all. It's a node-based compositing system, and its keyframes live on a dedicated Spline Editor rather than diamond buttons scattered through a properties panel.
Per the manual's page on keyframes and splines, keyframes in Fusion are still generated the same fundamental way, "automatically when you move the playhead and modify a parameter value," but you can also add them manually with Command-K at the playhead, by right-clicking a parameter and choosing Set Key, or by clicking directly on the spline itself in the Spline Editor.
What's genuinely different is the presence of two distinct point types on a Fusion animation spline:
Locked points behave like a standard keyframe everywhere else in Resolve. The manual describes them as "created by moving the playhead position and changing the parameter value," and they "indicate that the animated object must be in a specified position on a specified frame." Locked points can only move horizontally along the time axis, never vertically, which keeps their value fixed even if you retime them.
Unlocked points, by contrast, are created by clicking directly on the spline between two locked points. They "give additional control over the acceleration along the motion path without adjusting the path itself," per the manual, which is a genuinely useful distinction: an unlocked point reshapes how quickly you move between two committed positions, without ever changing what those two positions actually are. You can convert a point between locked and unlocked from the right-click contextual menu at any time.
A locked point in Fusion pins down a value at a specific frame; an unlocked point only reshapes the speed of travel between two locked points, without moving the path itself. That's the Fusion-specific equivalent of the ease controls covered earlier, but built directly into the spline rather than accessed through a separate right-click menu.
Fusion Transitions, the custom node-based transitions covered in our transitions guide, lean on this exact keyframing system, since building a whip pan or a light leak from scratch means keyframing Directional Blur amounts, Transform positions, and Glow intensities across the handful of frames the transition occupies. If you're building a custom animated graphic in Fusion rather than a transition, the mechanics are identical: locked points for your key positions, unlocked points to shape the acceleration between them.
DaVinci Resolve 21 closed a long-standing gap between Fusion's keyframing and the Edit and Cut pages' Keyframe Editor. Per CineD's coverage of the release, "Fusion effects, transitions included, can now be adjusted directly in the keyframes and curves editors on the Cut and Edit pages," which means a small timing tweak to a Fusion-based effect no longer requires a full round trip into the Fusion page just to nudge one keyframe.
If you'd rather have something point directly at the keyframe or spline control you half-remember instead of pausing your Fusion composition to search a forum thread, TryUncle watches your Resolve session and can explain what a specific node, spline point, or keyframe menu option does in the context of the project you're already working in.
What changed with keyframing in DaVinci Resolve 21?
If you learned keyframing on an older version of Resolve, or you're following a tutorial that predates this release, here's exactly what's new, and what still works precisely the way it always has.
Per Blackmagic's own What's New page, "keyframing updates include new ease animations with loop, pingpong and relative modes plus simultaneous adjustments to multiple clips." Breaking that down:
- Loop, Ping Pong, and Relative modes let a keyframed animation repeat automatically, forward-only (loop), forward-and-back (ping pong), or offset from wherever the previous cycle ended (relative), without manually copying and pasting the same keyframes down the timeline.
- Simultaneous multi-clip keyframing means you can select several clips at once and adjust their keyframes together, a change from the previous one-clip-at-a-time constraint that made batch-adjusting a repeated graphic element across a dozen instances a genuinely tedious, click-heavy task.
- Step In and Step Out interpolation modes join the existing Linear, Ease In, Ease Out, and Both options, for animations that should hold a value and then jump rather than ease.
- Four-point Bezier easing now supports the retiming curves specifically, letting editors, per Justin Robinson's JayAreTV coverage, "create complex, non-linear speed ramps with far more grace" than the older two-point curve allowed.
- Normalized zoom mode in the Curve Editor, covered in the previous section, automatically rescales the graph so curves with very different value ranges stay readable side by side.
- Fusion effects, including transitions, are editable directly from the Cut and Edit page's Keyframe and Curves Editors, closing the Fusion-to-Edit-page round trip covered in the previous section.
- Krokodove, a library of more than 70 additional Fusion motion graphics tools, per Blackmagic's release notes, landed inside Fusion in the same release. It isn't a keyframing feature on its own, but it directly expands the raw material available to keyframe once you're building a custom animated graphic from scratch.
Everything else, the diamond button in the Inspector, the Keyframe Editor's shortcut, the Color page's dynamic and static keyframes, Fusion's locked and unlocked spline points, carries forward unchanged from earlier versions. If you're following an older tutorial for the fundamentals of setting and retiming a keyframe, it still applies to Resolve 21 exactly as written. What's new sits specifically on top of that foundation: more automatic repetition, finer control over speed ramps, and fewer forced trips between pages to make a small timing adjustment.
| Feature | Available before Resolve 21? | New in Resolve 21 |
|---|---|---|
| Basic diamond keyframe in Inspector | Yes | No change |
| Keyframe Editor, Curve Editor | Yes | Normalized zoom mode added to Curve Editor |
| Ease In / Out / Both / Linear | Yes | Step In and Step Out added |
| Loop, Ping Pong, Relative keyframe modes | No | Yes |
| Multi-clip simultaneous keyframe editing | No | Yes |
| Four-point Bezier retime curves | No | Yes |
| Fusion effects editable from Edit/Cut Keyframe Editor | No | Yes |
| Color page dynamic and static keyframes | Yes | No change |
| Fusion locked/unlocked spline points | Yes | No change |
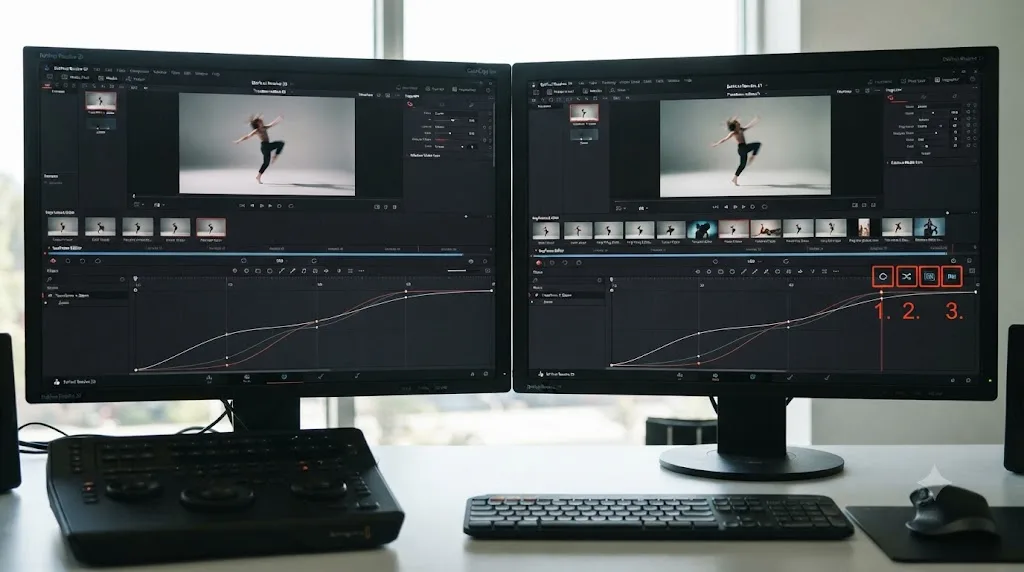
Do you need DaVinci Resolve Studio to keyframe effects?
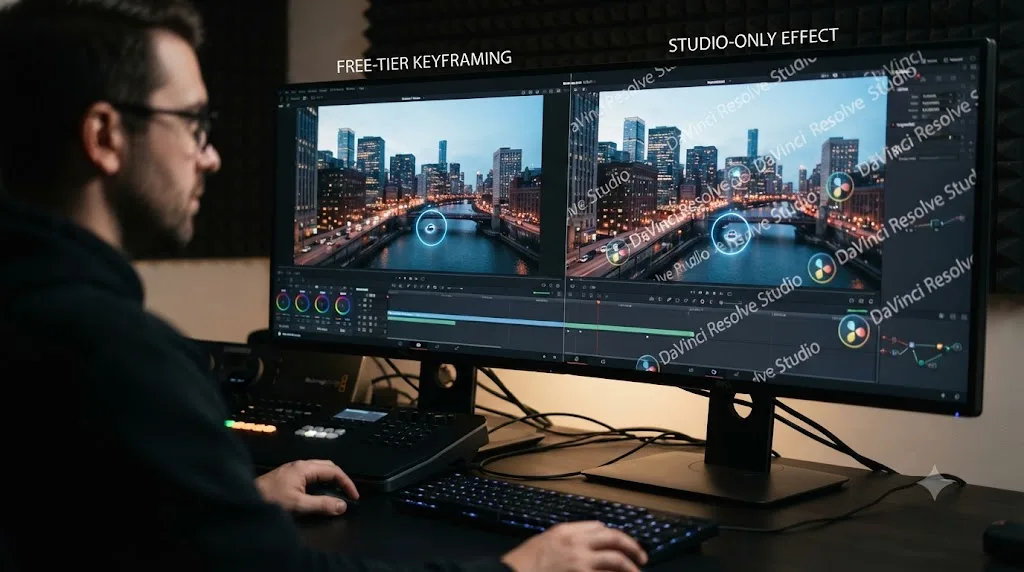
No. Every keyframing tool covered in this guide, the Inspector's diamond button, the Keyframe Editor, the Curve Editor, Color page dynamic and static keyframes, and Fusion's spline-based system, is part of the free version.
The watermark rule in Resolve is tied to specific effects, not to keyframing as a mechanism. Per Toolfarm's comparison of the free and Studio versions, the free version doesn't watermark your export by default, but applying a Studio-exclusive ResolveFX plugin or Fairlight FX, and exporting with it active, triggers a watermark over that effect specifically until you activate a Studio license. That distinction matters for keyframing specifically: you can keyframe every parameter of a free-tier effect with zero restriction, but keyframe a parameter belonging to a Studio-only plugin, Lens Blur, Camera Blur, Film Grain, and the watermark rule that applies to the plugin itself still applies whether or not you've animated it.
Keyframing itself has never been a paid feature in DaVinci Resolve, in any version covered by this guide; what's gated is specific effects, not the ability to animate parameters over time. If you're deciding whether the $295 Studio upgrade is worth it, the keyframing workflow described throughout this guide isn't a factor either way. What actually changes with Studio is the roster of ResolveFX available to keyframe, plus HDR grading tools, higher resolutions and frame rates, and the DaVinci Neural Engine's AI-assisted features, according to Blackmagic's own Studio product page.
| Tool | Free | Studio |
|---|---|---|
| Inspector diamond keyframes | Yes | Yes |
| Keyframe Editor and Curve Editor | Yes | Yes |
| Loop, Ping Pong, Relative keyframe modes | Yes | Yes |
| Color page dynamic and static keyframes | Yes | Yes |
| Fusion spline-based keyframing | Yes | Yes |
| Keyframing a Studio-exclusive ResolveFX (Lens Blur, Film Grain, etc.) | Watermarked until licensed | Yes, no watermark |
Do keyframes work differently on the Cut page than the Edit page?
Barely, and the small difference is about access, not capability. Per a discussion on the Blackmagic Design forum, "keyframe handling in the Cut Page Inspector panel is exactly the same as in the Edit Page Inspector panel." Open the full Inspector on either page and you get identical diamond buttons, identical keyframe behavior, and identical access to the Keyframe Editor and Curve Editor.
Where the pages genuinely diverge is the Cut page's quick-access tool strip beneath the viewer, a row of icons for common adjustments, transform, crop, audio level, speed, stabilization, dynamic zoom, built for speed rather than depth. That tool strip gives you fast one-click access to a handful of adjustments without opening the full Inspector, but it doesn't expose the same fine-grained keyframe controls the full Inspector panel does. If you need to retime a specific keyframe, set an ease curve, or view the Keyframe Editor's full parameter list, opening the full Inspector, which both pages share, is the only path either page actually offers.
Practically: if a Cut page tutorial or forum answer says keyframing works differently there, it's almost always describing the tool strip's limited shortcuts, not a real restriction on the Inspector itself, which behaves identically on both pages.
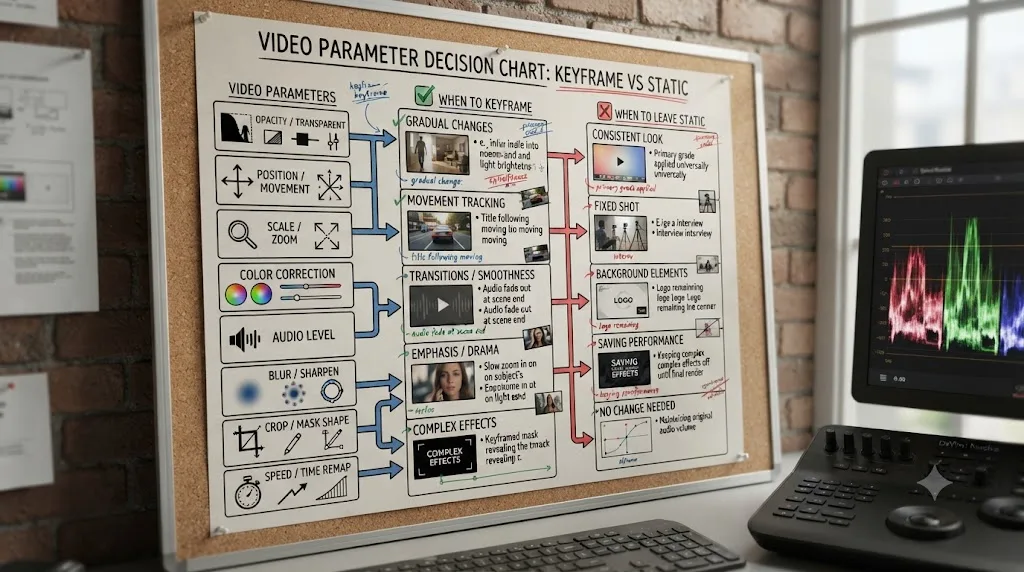
Which parameters are actually worth keyframing, and which aren't?
Not every parameter benefits from animation, and reaching for a keyframe on the wrong one is a fast way to make an edit look busier than it needs to be. Here's a working decision guide.
| Parameter | Worth keyframing when | Usually better left static |
|---|---|---|
| Zoom | A photo needs a Ken Burns push, a reveal shot should slowly tighten on a detail | The shot is already framed correctly and doesn't need to move at all |
| Position | A graphic needs to slide across frame, a picture-in-picture window needs to travel | The element's final resting position is all that matters, and it can just start there |
| Opacity | A graphic needs to fade in or out independent of a hard cut | A title that already enters and exits with the surrounding cuts |
| Exposure / Gain (Color page) | The lighting genuinely changes within a single continuous shot | The whole clip should read as one consistent exposure |
| Power Window position | A mask needs to follow a moving subject | The subject and camera are both static for the whole shot |
| Rotation | A stylized spin or tilt effect is part of the shot's design | Any shot meant to feel grounded and steady |
| Speed (Retime) | A deliberate slow-motion or speed-ramp moment | Consistent playback speed throughout the clip |
A rule of thumb that holds up across most kinds of editing: keyframe a parameter because the shot genuinely calls for change over time, never because the software makes it easy to add movement. An audience notices unnecessary motion far more than it notices a still frame held with confidence. The best keyframed animations are the ones a viewer never consciously registers as an effect at all, a photo that just feels alive, a graphic that seems to glide into place naturally.
Worked example: building a Ken Burns pan and zoom on a still photo
This is the single most common reason people search for keyframing in the first place, so here's the full build, start to finish.
- Import your still photo into the Media Pool and drag it onto the timeline. By default, Resolve gives a still image a fixed duration you can adjust in Preferences or per clip.
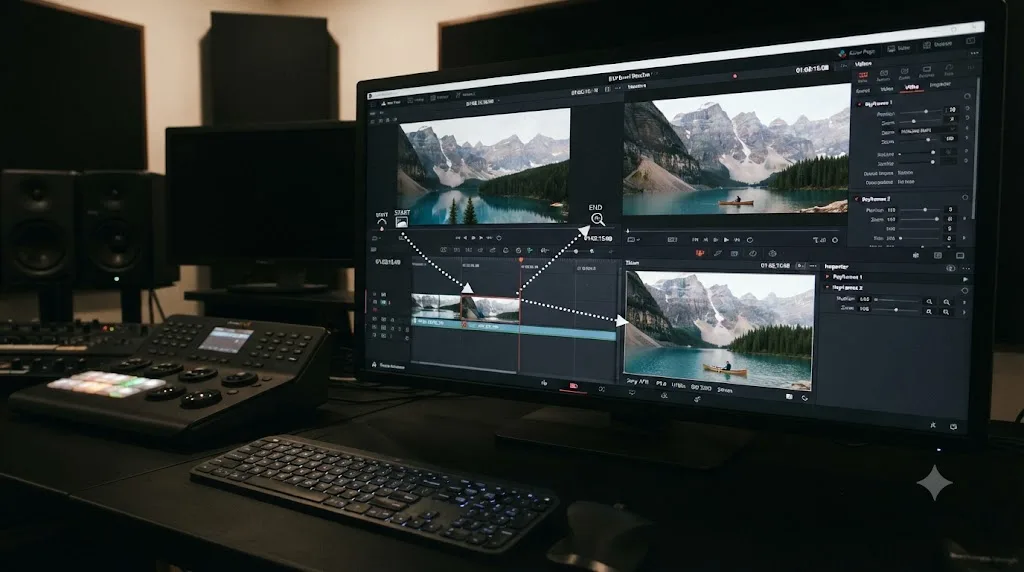
- Frame the starting position first. Select the clip, open the Inspector's Video tab, and set Zoom and Position so the frame shows exactly what you want visible at the very start of the shot, typically a wider view that includes context around your subject.
- Park the playhead at the very first frame of the clip and click the diamond keyframe buttons next to Zoom and Position. Both turn orange, locking your starting framing.
- Move the playhead to the last frame of the clip.
- Change Zoom and Position to your ending framing, typically a tighter view pushed in on your subject's face or a key detail. Resolve automatically creates the second keyframe for both parameters at this frame.
- Preview the move by scrubbing, then render the section before judging the timing, since an unrendered scrub can look choppier than the final result actually will.
- Right-click each keyframe and apply Ease In and Out (Both) so the pan and zoom start and stop gently instead of moving at a constant mechanical speed the entire way through.
- Check the shot for edge artifacts. Zooming in on a still photo enlarges it digitally, and if your source image's resolution is close to your timeline's delivery resolution, a tight zoom can reveal visible softness or compression noise that wasn't apparent at the wider starting frame. If that happens, either reduce how far the zoom pushes in, or source a higher-resolution version of the photo.
A Ken Burns move works best when it's barely noticeable as an effect, just a slow, steady drift that keeps a still photo from feeling frozen. The most common mistake is pushing the zoom too far, too fast, which reads as an obvious effect rather than a subtle keep-alive technique. A push from 1.0x to 1.15x over four or five seconds, eased on both ends, almost always looks more natural than a dramatic 1.0x to 1.5x move over the same duration.
If your still is part of a Gallery-based color workflow rather than a straightforward timeline clip, note that stills graded on the Color page carry their own separate keyframing system, covered earlier in this guide, distinct from the Transform keyframes built in this example.
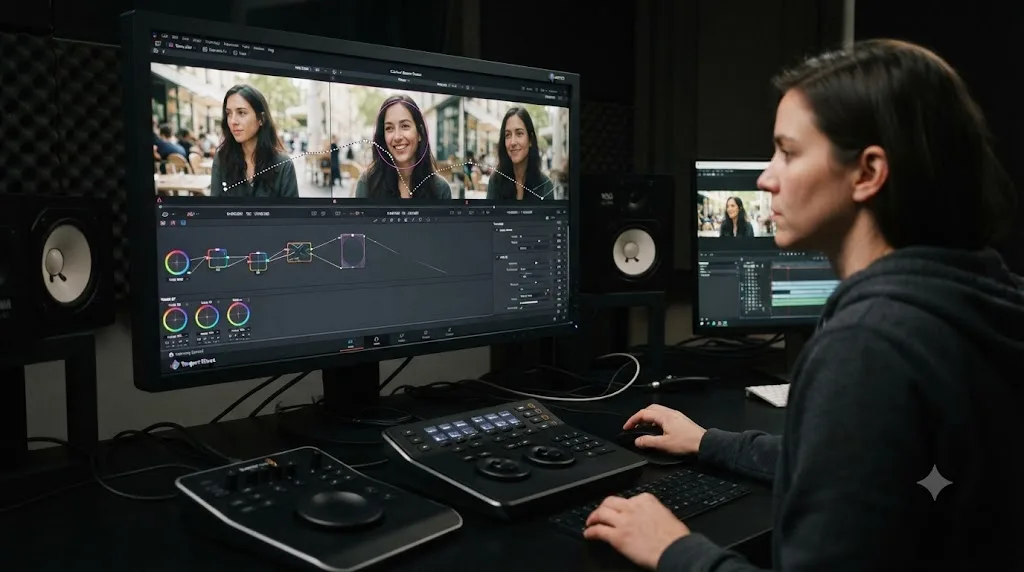
Worked example: keyframing a Power Window to track a moving subject
This example lives entirely on the Color page and shows how dynamic keyframes handle a mask that has to follow motion rather than sit still.
- Grade the clip's primary correction first, exposure, white balance, contrast, on a base node, before adding any windows. A tracked mask is easier to judge once the underlying image already looks right.
- Add a new serial or parallel node for the isolated adjustment you want to apply only inside the window, a subtle brightening on a face, a desaturation on a distracting background element.
- Draw a Power Window (circle, oval, or polygon, whichever shape best fits your subject) around the area at the first frame where it needs isolating.
- Open the tracker panel and choose a tracking mode that matches your subject's motion, pan and tilt for a face turning within frame, or pan, tilt, and zoom for a subject also moving toward or away from camera.
- Run the tracker. Resolve analyzes the footage and automatically lays down a series of keyframes following your subject's movement, adjusting the window's position frame by frame without you touching a single keyframe by hand.
- Scrub through the tracked range and check for drift, moments where the window slips off the subject, most often around fast motion, motion blur, or a second object briefly crossing in front of the tracked area.
- Manually correct any bad frames. Park the playhead on a frame where the tracker lost the subject, reposition the window by hand, and Resolve creates a new keyframe at that exact frame, effectively overriding the tracker's result at that one point while leaving the rest of the automated track intact.
- Add a static keyframe (mark) instead of a dynamic one anywhere the mask needs to snap instantly rather than glide, for instance right at a hard lighting change mid-shot where a smooth interpolation would look like an unintended fade.
A tracker lays down dynamic keyframes automatically, but it doesn't replace your judgment on the frames where it visibly loses the subject. Treat the automated track as a strong first pass, then spend your remaining time on the handful of frames that actually need a human correction, rather than re-tracking the whole clip from scratch every time one section drifts.
Worked example: keyframing a text title that flies in and out
Text animation is one of the most common uses of keyframing on the Edit page, and it follows the exact same pattern as the Ken Burns example, just applied to a Text+ title instead of a photo.
- Add your title. Drag Text+ from the Effects Library's Titles bin onto a video track above your footage, and style the font, size, and color in the Inspector before you touch any keyframes.
- Decide the title's resting position first, the spot it should occupy once it's fully on screen, and set that up with the Inspector's Transform controls.
- Move the playhead to the very start of the title clip.
- Set the title's off-screen starting position. Push Position far enough in the direction you want it to enter from, left, right, below frame, that it's completely out of the visible frame at this point.
- Click the diamond keyframe button on Position to lock in that off-screen starting point.
- Move the playhead forward to where the title should finish arriving, typically a half-second to one second later.
- Change Position back to the resting spot from step 2. Resolve creates the second keyframe automatically, and you now have a basic slide-in animation.
- Ease both keyframes so the title accelerates smoothly into frame and settles rather than snapping to a stop.
- Repeat the process in reverse near the end of the title's on-screen duration, keyframing Position from the resting spot back off screen, so the exit mirrors the entrance instead of just cutting away abruptly.
If you want a more polished result without hand-building every keyframe yourself, Text+ and Fusion Title templates ship with pre-built animated designs, lower thirds, credit rolls, that already have this kind of keyframed motion built in, covered in more depth in our guide to adding text and titles in DaVinci Resolve. Building your own from scratch, as in the steps above, is worth doing once so you understand exactly what those templates are doing under the hood.
A title's entrance and exit rarely need to be perfectly symmetrical; a slightly faster entrance than exit usually reads as more natural, since real objects tend to arrive with more energy than they leave with. That's a small, easy adjustment: keyframe the entrance over fewer frames than the exit, and the animation feels considered rather than mechanically mirrored.
How do you copy a keyframed animation to other clips?
Building the same animation twice by hand is a waste of time Resolve doesn't actually require of you. There are two separate paths, depending on which page you're working from.
On the Edit page, Copy and Paste Attributes carries keyframed properties between clips. Select the clip with the finished animation, copy it, select your target clips, and open Paste Attributes (Option-V on Mac, Alt-V on Windows). Per the manual's Paste Attributes entry, the dialog lists individual attributes, including Sizing and Cropping, that you can check or uncheck before applying, so you can carry the keyframed Zoom and Position animation without dragging along an unrelated audio level change or a different clip's speed setting. If the source and target clips have keyframes and different durations, Paste Attributes offers Maintain Timing, which keeps every keyframe locked to its original frame number, or Stretch to Fit, which rescales the whole animation proportionally to the new clip's length.
On the Color page, copying a grade with keyframes in it, dynamic tracking, an exposure ramp, works through the same copy and paste, middle-click, and Gallery still methods used for any other grade, covered in full in our guide to copying a color grade to multiple clips. The one wrinkle specific to keyframed grades is the Apply Grades Using submenu in the Gallery, which decides whether the copied animation's timing aligns to the original clip's source timecode or to the new clip's own start frame, a setting that matters enormously the moment you're reapplying a tracked Power Window onto a different take of the same shot.
Copying a keyframed animation moves the timing along with the values, which is exactly why picking the wrong alignment option, source timecode versus start frame, is the single most common reason a copied animation looks perfectly built but plays at the wrong moment on the new clip. If a pasted animation looks subtly off after a copy, check the alignment setting before assuming the keyframes themselves are broken.
What mistakes make keyframed animations look amateurish, and how do you fix them?
Most keyframing problems trace back to one of a small set of causes. Work through this table before assuming something's fundamentally broken.
| Symptom | Likely cause | Fix |
|---|---|---|
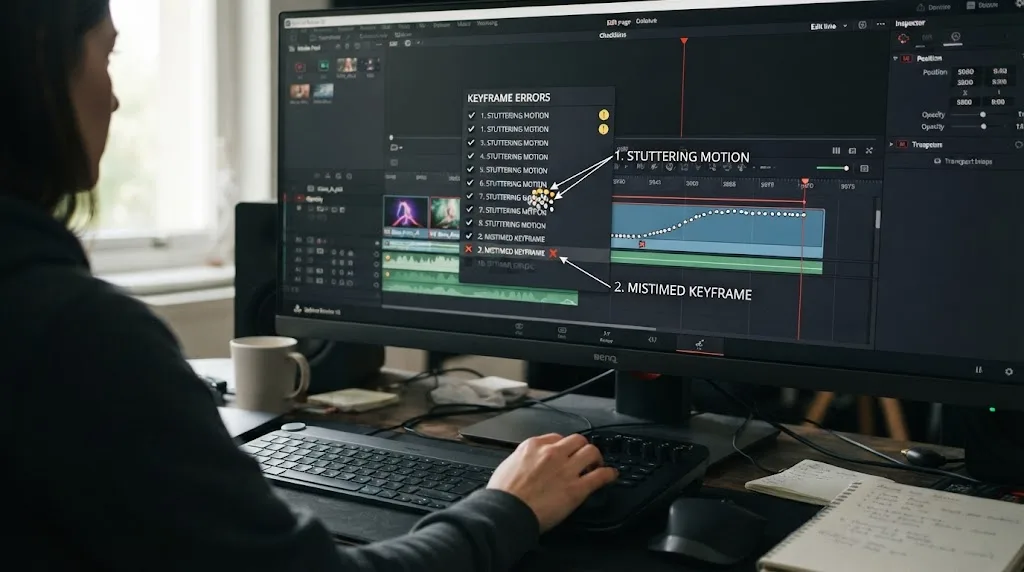
| Animation looks choppy or stutters in the viewer | The section hasn't been rendered yet; Resolve's real-time interpolation preview can't keep up | Render the section, or enable Smart Cache, before judging the timing |
| Motion looks mechanical or robotic | Keyframes are set to Linear interpolation by default | Right-click each keyframe and apply Ease In and Out, or shape it manually in the Curve Editor |
| Animation snaps to a stop or start instead of settling | Ease was applied to the wrong side of the keyframe (Ease In vs Ease Out) | Remember Ease In eases arriving at a keyframe, Ease Out eases leaving one; swap if the feel is backward |
| Only one value seems to exist, nothing animates | A second keyframe was never created; the parameter still has just one locked value | Move the playhead to a new frame and change the value again to force a second keyframe |
| Changing a value later overwrote your first keyframe instead of creating a new one | The playhead was still parked on the same frame as the existing keyframe when the value changed | Move the playhead to a genuinely different frame before adjusting the parameter again |
| A copied animation plays at the wrong time on a new clip | Wrong Apply Grades Using or Paste Attributes timing setting (source timecode vs. start frame, maintain vs. stretch) | Check the alignment or timing option before assuming the keyframes themselves transferred incorrectly |
| A tracked Power Window drifts off the subject partway through | Fast motion, motion blur, or an object briefly occluding the tracked area confused the tracker | Manually reposition the window at the drifting frames; Resolve creates a corrective keyframe without needing a full re-track |
| An animation that looked right on the Edit page vanished after flattening a multicam or compound clip | Keyframed Transform properties applied to the wrong angle inside a multicam wrapper, or lost during flattening depending on the grade-retention choice | Open the multicam clip's individual angles directly and confirm which one actually carries the keyframed animation |
A keyframed animation that looks wrong almost never means the keyframing mechanism itself is broken; it means one setting, ease direction, timing alignment, or render state, doesn't match what you actually intended. Work through the table above before assuming you need to rebuild an animation from scratch.
How do proxies, retiming, and mixed frame rates affect keyframed animations?
A few edge cases are worth knowing before they surprise you mid-project, especially on longer edits with proxy workflows or mixed camera sources.
Proxies and optimized media don't affect keyframe timing. A keyframe is tied to a frame number on the clip, and proxy or optimized media shares the same duration and timecode as the original camera file, so switching between proxy and full-resolution playback doesn't shift where your keyframes land. If an animation looks different after you switch back to full-resolution media, the cause is almost always a resolution-dependent visual detail, like the zoom-related softness covered in the Ken Burns example, rather than the keyframes themselves moving.
Retiming a clip after keyframing it can shift the animation's apparent speed, since a keyframe fixes a value to a specific frame on the clip, and changing the clip's overall playback speed changes how much real time that frame range now represents. If you're planning to speed-ramp or slow down a clip, it's generally easier to finalize the retiming first and keyframe your Transform or color animation afterward, rather than keyframing an animation on a clip's original speed and then retiming it, which forces you to go back and manually verify every keyframe still lands where you intended.
Mixed frame rate timelines don't change how keyframing works in principle, but they can make the visual result of an animation look mistimed if a clip is conformed to a different frame rate than it was shot at. A push-in keyframed to feel smooth at the source frame rate can look slightly different once Resolve retimes that footage to match your project's frame rate, similar to the mixed-frame-rate transition behavior covered in our transitions guide. If a keyframed animation on a mixed-rate clip looks subtly off in timing, check the Mixed Frame Rate Format setting in Master Project Settings before assuming the keyframes themselves are misplaced.
The short version
Keyframing in DaVinci Resolve is one idea repeated across four places: the Inspector's diamond buttons on the Edit and Cut pages, the Color page's dynamic and static keyframes, and Fusion's locked and unlocked spline points. Set a value, move the playhead, set a different value, and Resolve fills in everything between. Ease controls, the Keyframe Editor, and the Curve Editor exist to refine that basic move once it's working, timing in one editor, shape in the other, acceleration through ease presets or hand-drawn curves. None of it requires DaVinci Resolve Studio, and none of it has changed at the fundamental level in years, even as Resolve 21 layered loop, ping pong, relative modes, and Fusion-from-the-Edit-page editing on top.
Every keyframed animation in DaVinci Resolve is built from the same two-step move, repeated as many times as the shot needs: set a value, then set a different one somewhere else in time. Master that one mechanic and the Ken Burns pan, the tracked Power Window, and the sliding title in this guide stop looking like three separate skills and start looking like the same skill, applied three different places.
Frequently asked questions
- What is the keyboard shortcut to open the Keyframe Editor in DaVinci Resolve?
- Select a clip on the timeline and press Shift-Command-C on Mac or Shift-Ctrl-C on Windows, or choose Clip > Show Keyframe Editor from the menu. Shift-C by itself opens the Curve Editor instead, which shows the same keyframes as adjustable animation curves rather than a timing track.
- How do you delete a keyframe in DaVinci Resolve?
- Park the playhead exactly on the keyframe you want to remove, then click the orange diamond in the Inspector to turn it back to gray, or right-click the keyframe in the Keyframe Editor and choose Delete. Clicking the circular arrow icon next to a parameter's keyframe button removes every keyframe on that parameter at once.
- Can you keyframe a color grade in DaVinci Resolve?
- Yes. The Color page has its own keyframing system, separate from the Edit page, that animates node parameters, qualifiers, and power windows over time using dynamic keyframes for smooth changes or static keyframes (marks) for instant, one-frame jumps, useful for tracking a moving subject or matching a lighting change mid-shot.
- Why does my keyframed animation look choppy or wrong in the Resolve viewer?
- Almost always because the timeline hasn't rendered that section yet. Resolve calculates keyframe interpolation in real time during playback, and on longer or more complex animations the software can't always do that at full frame rate, so the preview stutters or skips even though the final render will be smooth. Render the section or enable Smart Cache before judging the timing.
- Do you need DaVinci Resolve Studio to use keyframes?
- No. Keyframing parameters in the Inspector, the Keyframe Editor, the Curve Editor, Color page dynamic and static keyframes, and Fusion's spline-based keyframing are all part of the free version. Studio adds extra ResolveFX plugins and AI tools you can keyframe once applied, but the keyframing mechanism itself costs nothing.
- What's the difference between the Keyframe Editor and the Curve Editor in DaVinci Resolve?
- The Keyframe Editor shows keyframes as diamond markers on a timeline track, one row per parameter group, and is built for adjusting when something happens. The Curve Editor shows the same keyframes as a graph line with a value axis, and is built for adjusting how a value changes shape between two points, including ease and acceleration.
- Can you copy a keyframed animation from one clip to another in DaVinci Resolve?
- Yes, with caveats. Copy and Paste Attributes on the Edit page carries keyframed Transform, Crop, and Dynamic Zoom settings between clips, with a choice to maintain the original timing or stretch it to a different clip length. On the Color page, copying a grade with keyframes in it brings along an Apply Grades Using option that controls whether the animation aligns to source timecode or to the new clip's start frame.
Sources
- DaVinci Resolve manual: The Keyframe Editor (Blackmagic Design, mirrored)
- DaVinci Resolve manual: Keyframing Effects in the Edit Page (Blackmagic Design, mirrored)
- DaVinci Resolve manual: Introduction to Keyframing on the Color Page (Blackmagic Design, mirrored)
- DaVinci Resolve manual: Static Keyframes (Marks) (Blackmagic Design, mirrored)
- DaVinci Resolve manual: Working with Keyframes and Splines in Fusion (Blackmagic Design, mirrored)
- DaVinci Resolve manual: Paste Attributes (Blackmagic Design, mirrored)
- Larry Jordan: Add and Modify Keyframes in DaVinci Resolve 20
- JayAreTV (Justin Robinson): New Keyframe and Curves Editor in DaVinci Resolve 21
- DaVinci Resolve - What's New (Blackmagic Design)
- DaVinci Resolve 21 New Features Guide (Blackmagic Design)
- DaVinci Resolve 21 Final Release Now Available: New Photo Page, Expanded AI Toolset, Krokodove in Fusion, and Wide RAW Support (CineD)
- Blackmagic Forum: Keyframes on Cut Page?
- Toolfarm: In Depth, DaVinci Resolve Studio vs Free (Updated for 21)
- DaVinci Resolve Studio product page (Blackmagic Design)
- DaVinci Resolve product page (Blackmagic Design)
Learn by doing, not watching
Stop translating tutorials to your timeline.
TryUncle stays beside Resolve on Mac and Windows. When you ask, Uncle sees your screen and points at the exact control you need. No hunting through tabs, timestamps, or mismatched tutorials.
Meet TryUncleKeep reading
 GuidesJul 8, 202636 min read
How to Add Transitions in DaVinci Resolve: The Complete Guide
How to add, resize, and troubleshoot transitions in DaVinci Resolve: shortcuts, duration, alignment, Fusion transitions, and the handles error fix.
 GuidesJul 8, 202639 min read
How to Copy a Color Grade to Multiple Clips in DaVinci Resolve
Every way to copy a DaVinci Resolve color grade to multiple clips: copy/paste, middle-click, Gallery stills, PowerGrades, Color Groups, and more.
 GuidesJul 8, 202639 min read
How to Add Text and Titles in DaVinci Resolve
Every way to add text in DaVinci Resolve: Text, Text+, MultiText, and Fusion Titles, plus subtitles, safe area, fonts, and export, for free and Studio.