
Learn / DaVinci Resolveupdated for DaVinci Resolve 21.0 (June 2026)
How to Add Text and Titles in DaVinci Resolve
Quick answer
Drag Text or Text+ from Effects Library > Titles onto a new track above your clip, then style font, color, and position in the Inspector. Text+ gives you 3D transform and shading controls; Fusion Titles add pre-built animated designs like lower thirds. For dialogue, add a Subtitle track; automatic transcription needs DaVinci Resolve Studio, not the free version.
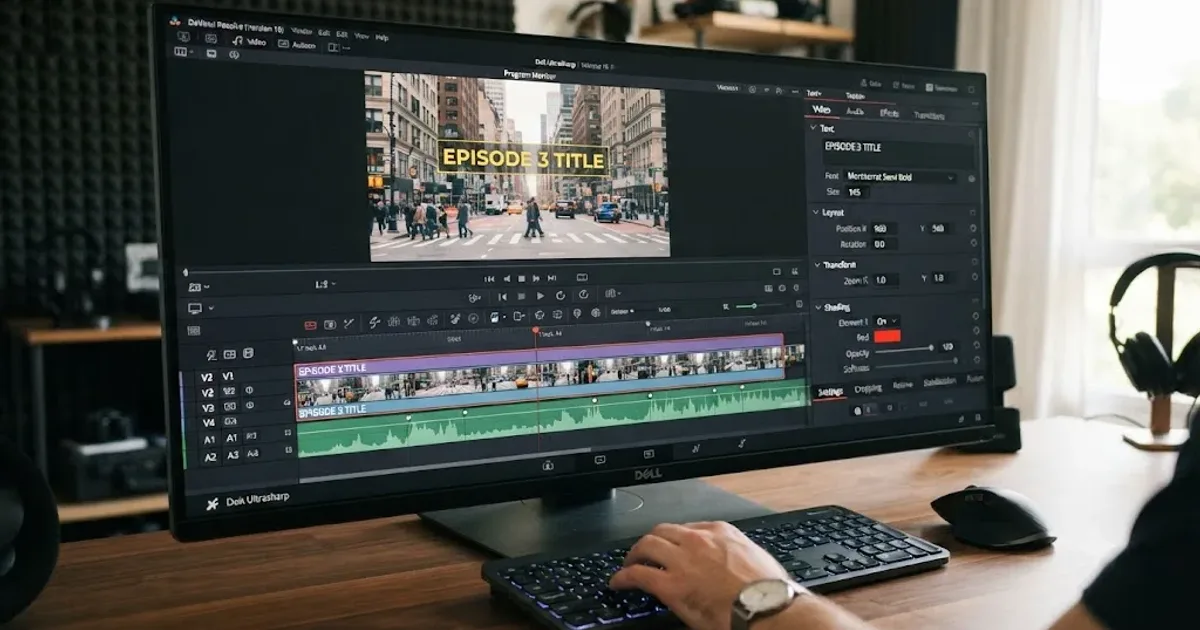
I've watched a lot of beginners freeze the first time they need a title in DaVinci Resolve. Not because it's hard. Because Resolve gives you four different ways to do it, and nobody tells you which one to reach for. Text is quick. Text+ is powerful. MultiText is for editors juggling a wall of captions. Fusion Titles are the pre-built ones with the fade-ins already done for you.
This guide covers all four, in the order you'll actually use them: typing your first title in under a minute, then leveling up to animation, reusable templates, subtitles, and the export settings that make sure your text survives the trip to YouTube or a client's TV.
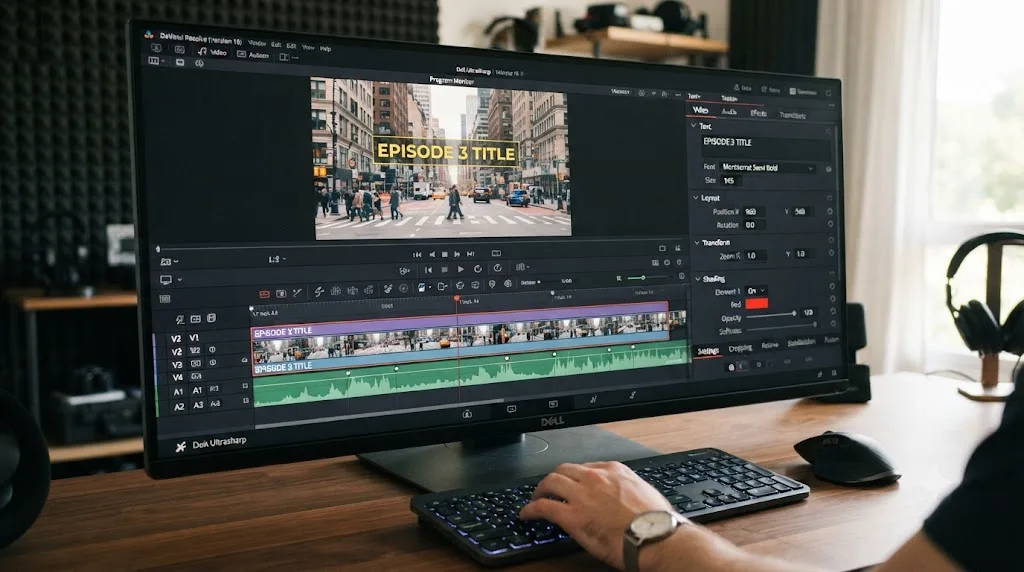
What's the fastest way to add text in DaVinci Resolve right now?
If you just need a caption on screen in the next 30 seconds, here's the shortest path. Open the Effects Library on the Edit page (or the Cut page, which has the same bin under a simpler layout). Click Toolbox, then Titles. You'll see a list that includes Text, Text+, and a folder of pre-built Fusion Titles like lower thirds and credit rolls.
Drag Text+ onto a new video track sitting above your footage. Position its left edge where you want the title to appear and drag its right edge to set how long it stays up. Double-click the clip, click into the frame in the Viewer, and type. If nothing happens when you click, look at the bottom-left corner of the Viewer for a small icon labeled Fusion Overlay and make sure it's enabled, since that's what lets you edit Text+ directly in the frame instead of only through the Inspector.
That's a working title. It won't be beautiful yet, but it's on screen, in sync, and ready to style. Everything else in this guide is about making that title look intentional instead of default.
A title with no plan for how it will be styled later is a title you will retype from scratch in a week. That's the real cost of skipping Text+ for basic Text on anything you'll reuse: you save ten seconds now and lose ten minutes later rebuilding it with more control.
What's the difference between Text, Text+, MultiText, and Fusion Titles?
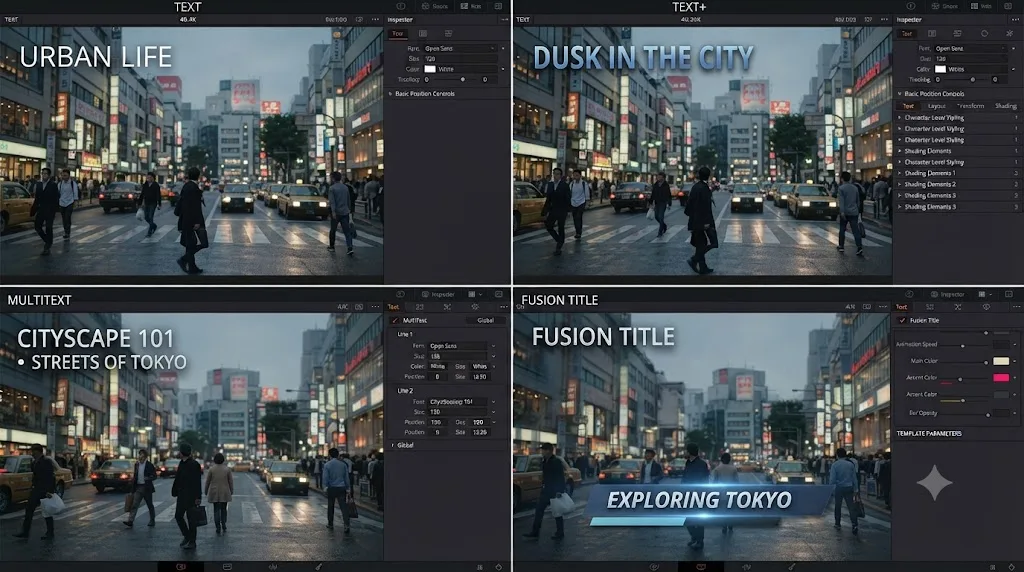
Resolve's four text tools solve different problems, and using the wrong one is the single biggest reason editors think titles are harder than they are. Here's how they actually compare.
| Tool | What it's for | Where you edit it | Animation | Free or Studio |
|---|---|---|---|---|
| Text | A quick single caption, typed like a word processor | Directly in the Viewer, plus a short Inspector list | Only a few properties keyframe (position, opacity); size and line spacing don't | Free |
| Text+ | Styled titles, lower thirds you build yourself, anything needing real typography | Fusion page controls surfaced in the Edit page Inspector: Layout, Transform, Shading | Full keyframing, plus a built-in Write On typewriter effect and Circle or Path layout | Free |
| MultiText | Managing several independent text layers (a stack of names, a list of bullet points, styled subtitles) in one clean node instead of one Text+ per line | Fusion page, with each layer added as a point, box, or circle | Same keyframing depth as Text+, per layer | Free |
| Fusion Titles | Pre-built, pre-animated designs: lower thirds, callouts, credits, openers | Drag-and-drop, then customize text and color only (or go deeper in Fusion) | Built in already: fades, glitches, reveals, jitter, flips | Free (the templates); some third-party packs cost money separately |
Text is what Boris FX's writeup calls "a rich text editor, much like a basic word processor," you click, you type, you move it around in the frame. Text+ is the one that unlocks 3D rotation, transform controls, and detailed shading, according to the same breakdown of DaVinci Resolve's title tools. The jump from Text to Text+ costs you one extra click in the Effects Library and gives you an entirely different tool underneath.
MultiText is the newer arrival, and it's worth understanding on purpose instead of stumbling into it. According to JayAreTV's explainer on the tool, it consolidates multiple text elements into a single, organized node, letting you add layers "as points, boxes, or circles with just a click" and independently set color, size, font, and position per layer, all while keeping your Fusion node tree far cleaner than stacking five separate Text+ instances. The same source is direct about its limits: "the Multi-Text tool isn't a complete replacement for Text+," so anything needing Text+'s deepest per-character shading and 3D controls still goes through Text+ itself.
Fusion Titles are the ones you don't build, you pick. DaVinci Resolve ships with templates for callouts, lower thirds, and credits that already carry fades, glitches, reveals, jitter, and flips, per Boris FX's rundown of the five title methods. You customize the words and sometimes the color, and the animation timing is done for you.
Which one should you actually pick?
Use this as a quick decision guide instead of the table above if you just want an answer:
- A single line, on screen for a few seconds, no animation you care about: Text. It's the lightest tool and the fastest to type into.
- Anything with a font choice that matters, a color that needs to match your brand, or motion: Text+. This is the default for most working editors, even for something as plain as a name-and-title lower third.
- A stack of captions, a list of names rolling in a credits sequence, or several independent text blocks in one shot: MultiText, so you're not managing five separate clips and five separate node trees.
- You want it to look professionally animated in the next two minutes, and you're not trying to learn Fusion today: a Fusion Title template. Drop it in, retype the words, done.
- Spoken dialogue that needs to appear as captions: none of the above directly. That's the Subtitle track, covered later in this guide.
How do you add a basic Text+ title, step by step?
Here's the full walkthrough, expanded from the fast version above, with the details that trip people up on their first attempt.
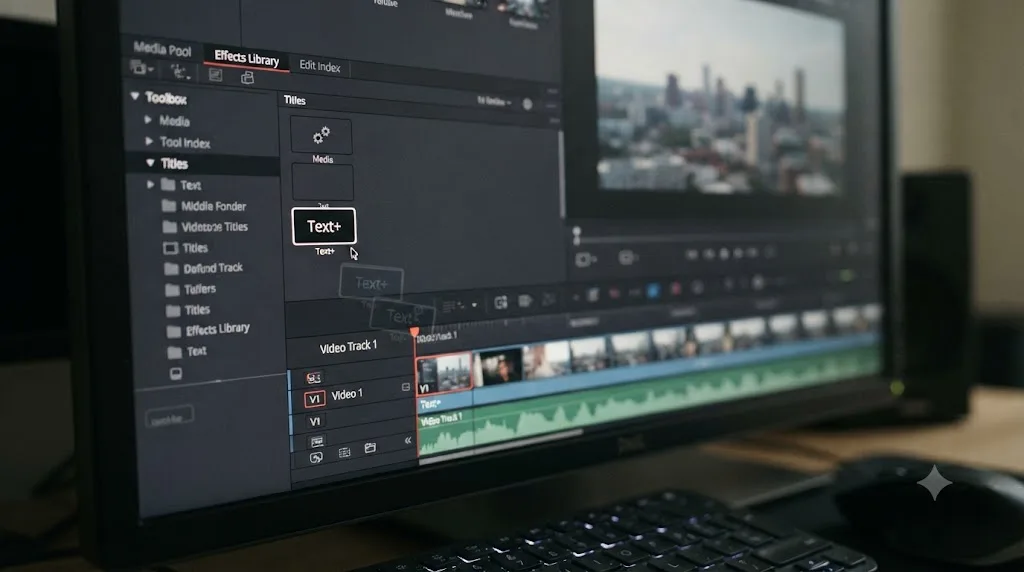
- Open the Effects Library. On the Edit page, it's usually docked top-left. If you don't see it, go to the Workspace menu and toggle Effects Library on.
- Navigate to Toolbox > Titles. This bin holds Text, Text+, and the Fusion Title folders together.
- Add a track above your footage. Right-click in empty space on the track header area and choose Add Track > Video, or use the timeline's track menu. Text needs its own track sitting visually above the clip it overlays.
- Drag Text+ onto that new track. Drop it where you want the title to start. Resolve gives it a default duration, usually a few seconds, which you'll trim next.
- Trim the clip to length. Drag its right edge to extend or shorten how long the title stays visible. Treat this like any other clip: it can be cut, moved, and retimed.
- Type your text. Double-click the clip to load it into the Inspector and Viewer together. With Fusion Overlay enabled in the Viewer, click directly into the frame and type. Some editors prefer typing through the Inspector's Layout tab text field instead, which works identically and avoids any confusion about where the cursor is.
- Style it. The Inspector's tabs, Layout, Transform, Shading, and more, are where every visual decision happens. The next two sections cover these in depth.
- Preview against real footage. Move the playhead through the full duration of the title, not just its first frame, to catch any drift, flicker, or a font that renders differently once real motion is behind it.
One detail that catches new editors: Text+ text editing sometimes needs an extra unlock. Right-click the text in the Viewer, and under Template, confirm "Allow typing in preview" is checked, according to TourBox's walkthrough of the Text+ workflow. Without it, clicking into the frame selects the shape instead of dropping you into a text cursor.
How do you change the font, size, color, and position of a title?
Everything here lives in the Inspector once a Text+ (or Text) clip is selected. The panel is denser than Text's, which is exactly what buys you control.
The Layout tab is where you set the actual words, the font family, size, tracking (letter spacing), line spacing, and alignment. This is also where you point to a specific installed font. If a font you expect isn't in the list, see the troubleshooting section below before assuming your install failed.
The Transform tab moves, scales, and rotates the whole title, or in Text+, individual characters and words. Position, size, rotation, and even per-character shear are all here, and every one of them can be keyframed.
The Shading tab controls outlines, glows, shadows, and gradients. DaVinci Resolve 21 documents this area as supporting up to eight separate style layers per title, according to breakdowns of the Text+ Inspector, which means you can stack a solid fill, an outline, a drop shadow, and a soft glow on the same text without leaving one panel.
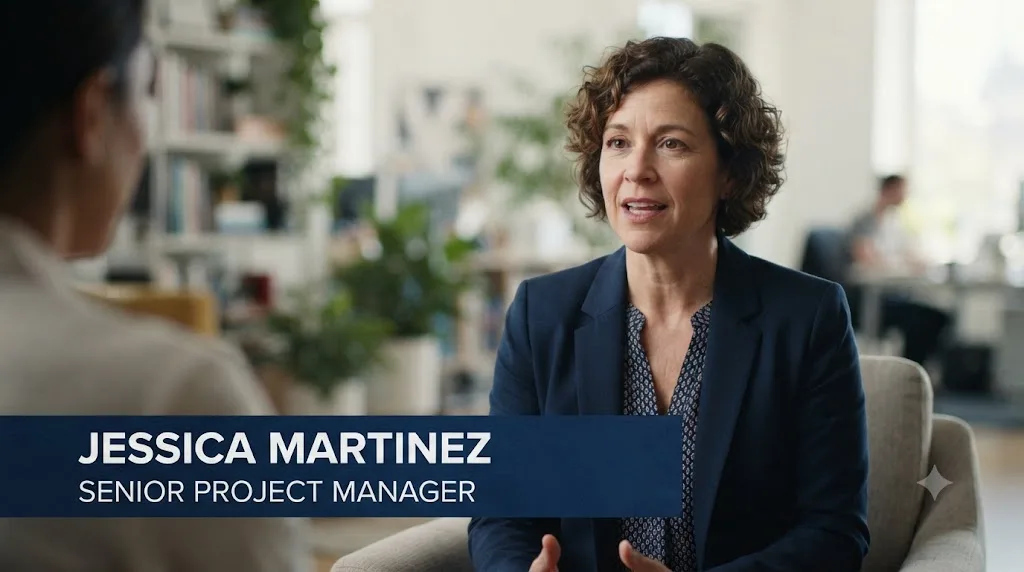
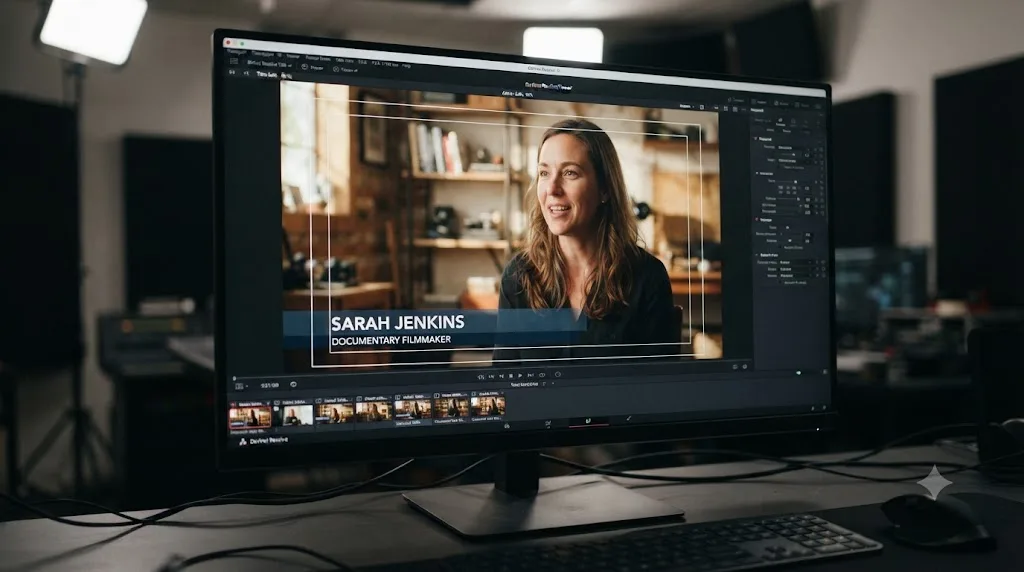
A worked example: building a name-and-title lower third for a talking-head interview.
- Add Text+ on a track above the interview clip, trimmed to run the length of that speaker's segment.
- On the Layout tab, type the name on one line and the title or role on a second line, using a smaller size for the second line so it reads as a subtitle to the name.
- On the Transform tab, position the block in the lower-left third of the frame, respecting the safe area (covered below), rather than dead center where it competes with the speaker's face.
- On the Shading tab, add a soft drop shadow so the text stays legible against both light and dark backgrounds without needing a solid color bar behind it.
- Keyframe a short slide-in on the Position parameter over the first half-second, and a matching fade-out on Opacity in the last half-second.
That five-step sequence is the entire job. Everything past this point in the guide is about doing it faster, doing it for more shots at once, or doing it for spoken dialogue instead of a name card.
A lower third with no drop shadow or contrast plan will disappear against half the footage it's meant for. Test every title against your brightest and darkest source frames before calling it done, not just the frame you happened to be parked on while styling it.
How do you build a lower third with a background bar instead of plain text?
A title floating over raw footage relies entirely on the drop shadow you built above to stay readable, and lots of experienced editors don't trust that alone, because contrast changes shot to shot. The fix most broadcast and corporate lower thirds use is a bar or shape behind the text, not just the text itself.
You don't need to open the Fusion page to build one. Here's the Edit-page version:
- Add a Solid Color generator (Effects Library > Toolbox > Generators) on a video track directly below your Text+ title, trimmed to the same length.
- Select the solid color clip, open the Inspector, and use the Cropping controls to trim it down from a full-frame color into a bar shape sitting behind where your text will sit.
- Use Transform to nudge its position and, if you want, its Zoom, so the bar exactly frames the name-and-title text above it.
- Lower the bar's Opacity if you want the footage to show through slightly rather than sitting behind a flat, opaque color.
- Select both clips (the bar and the Text+), right-click, and choose Create Compound Clip, so trimming, moving, or retiming the lower third moves both pieces together instead of two clips you have to keep in sync by hand.
That's the whole technique, and it's the same one behind most of the lower thirds you've seen on a real broadcast. A bar of solid color behind your text does more for legibility than any drop shadow, because it guarantees contrast instead of hoping for it.
If you want a bar with rounded corners, a gradient, or a soft edge instead of a flat rectangle, that's a Fusion-page job: build the shape with a Background tool cropped by a Rectangle mask, then Merge it underneath your Text+ node. It's more setup, but once it's built you can save it into a PowerBin exactly like any other reusable title and never rebuild it again. One thing worth knowing about the Compound Clip route: to make a text edit later, you double-click back into the compound to reach the Text+ clip inside it, rather than editing it directly from the outer timeline, which trips people up the first time they go looking for the Inspector's Layout tab and don't see it.
How do you reuse an exact title style on a new clip without rebuilding it from scratch?
You built one Text+ title exactly right, font, size, color, shading, position, and now you need the same look on the next ten clips with different words. Rebuilding it by hand ten times is how titles start drifting inconsistently across an edit.
The reliable method is duplication, not Paste Attributes. Hold Alt (Windows) or Option (Mac) and drag the finished Text+ clip to a new position on the track, which creates a copy with every style setting intact. Double-click the copy, retype the text, and the font, color, shading, and animation timing all carry over untouched.
Paste Attributes, the general-purpose clip-attribute copier in Resolve (copy a clip, right-click the destination, press Alt+V or Option+V), works reliably for video effects, speed changes, and OFX plugins, according to Beginners Approach's walkthrough of the feature, but that same guide stops short of covering Text+ specifically. That's because Text+ is a packaged Fusion macro under the hood, and its styling lives inside that macro rather than as a standard clip attribute, a distinction editors discussing the tool on Blackmagic's own forum point to when explaining why copy-paste behaves differently for titles than for ordinary effects. Don't reach for Paste Attributes expecting it to carry a title's look the way it carries a color correction; use Alt-drag duplication instead.
One quirk worth knowing before you duplicate a lot of titles this way: it also copies your keyframes exactly, and because Text+ keyframes are tied to the clip's own start point, a fade or slide built for a 3-second title still triggers correctly even if the duplicate ends up 4 seconds long. It just holds at its final value for the extra second instead of animating all the way to the new out point. Check the pacing on anything but exact-duration duplicates, especially a slide-in or Write On effect that's meant to finish right as the title ends.
For a style you'll reuse across projects, not just within one timeline, that's exactly what the PowerBin method covered later in this guide is for: build it once, generate a PowerBin, and every future project gets the same duplication trick without retyping the styling from memory.
How do you animate text: fades, moves, and the Write On effect?
Text+ keyframes almost anything you can see in its Inspector. The workflow is the same one you'd use to keyframe a color correction: click the small clock/keyframe icon next to a parameter to arm it, move the playhead, change the value, and Resolve records a new keyframe automatically at that point in time.
The most common animations, in order of how often you'll actually reach for them:
- Fade in / fade out. Keyframe Opacity from 0 to 100 over 10 to 15 frames at the start, and the reverse at the end. This alone covers most lower thirds and captions.
- Slide in. Keyframe Position from off-frame (or slightly offset) to its resting spot. Ease the motion by adjusting the keyframe's interpolation if it feels mechanical.
- Scale pop. Keyframe Size from slightly smaller to 100%, which reads as a subtle emphasis without looking like a slide.
- Write On. This one is unique to Text+ and isn't built from manual keyframes at all. It's a dedicated slider in the Inspector that reveals text character by character or word by word, like a typewriter, and it's one of the cleanest ways to draw attention to a single line without building custom motion from scratch.
- Path or Circle layout. Also specific to Text+, these let text follow a curved path or wrap around a circle instead of sitting on a straight baseline, useful for stamp-style graphics or wrap-around badge text.
For anything more elaborate than a fade or a slide, the Fusion page gives you spline-based curve editing over your keyframes, letting you shape acceleration and deceleration by hand instead of relying on Resolve's default ease presets. That's also where Text+'s deepest character-level control lives: per-character spacing, size, and color adjustments that go beyond what the Edit page's Inspector surfaces.
One honest caveat worth repeating from that same breakdown of Text vs. Text+: basic Text only keyframes "some properties," and specifically Size and Line Spacing don't animate on Text at all. If your plan involves a title that grows, shrinks, or reflows over time, you're already in Text+ territory, not Text.
How do you use Resolve's built-in Fusion Title templates?
If you don't want to build a title from a blank Text+ clip, Resolve's Titles bin includes a folder of Fusion Titles: pre-animated designs organized loosely into callouts, lower thirds, and credits, according to Boris FX's overview of the five ways to add text in Resolve.
Using one is close to using a stock photo: drag it onto your track, and it arrives with motion already built in. From there you have two levels of customization:
- Surface-level, in the Edit page Inspector. Most Fusion Titles expose their editable text, a color swatch or two, and sometimes a duration control directly in the Inspector, no Fusion knowledge required.
- Deep, on the Fusion page. Double-click the clip to open its full node tree in Fusion, where every element, from the background shape to the text's own Text+ node inside it, is editable individually. This is where you'd change a font that isn't exposed on the surface, or restyle a shadow the template's designer locked at the Inspector level.
Templates save real time on the animation itself, which is usually the hardest part to make feel natural. The tradeoff is that a stock template looks like a stock template the moment two other creators use the same one on the same platform, which is exactly the tension the next section addresses.
Building your own reusable title instead of relying only on stock templates
This is where a lot of editors hit a wall, because building a title that looks good once is a different skill than building one that holds up as a reusable asset. Bernd Klimm, writing a two-part tutorial for Mixing Light on building a custom Fusion title template from scratch, put the gap directly:
"Creating a text title for one-time use is relatively easy in DaVinci Resolve. Creating it in a reusable way that is user-friendly and can still adapt to many situations? That can be hard."
That's the honest version of what "make your own title template" actually involves. It's not just styling text once; it's exposing the right controls (text, color, maybe a logo swap) at the top level so a future version of you, or a teammate, can reuse the design without touching the Fusion node tree underneath. If you only ever need one title, skip this. If you're building something for a recurring show, a channel's intro card, or a client who'll want the same look for months, budget real time for it, because the tutorial exists precisely because the "easy once, hard reusable" gap is real.
The lightweight version of reuse, for editors who don't want to go that deep, is Resolve's PowerBin. Right-click a finished Text+ or Fusion Title clip in the timeline and generate a PowerBin (or drag it into a bin you keep across projects), and it becomes a one-click drag-and-drop asset for your next edit, styling and animation intact.
How do you build multiple text elements at once with MultiText?
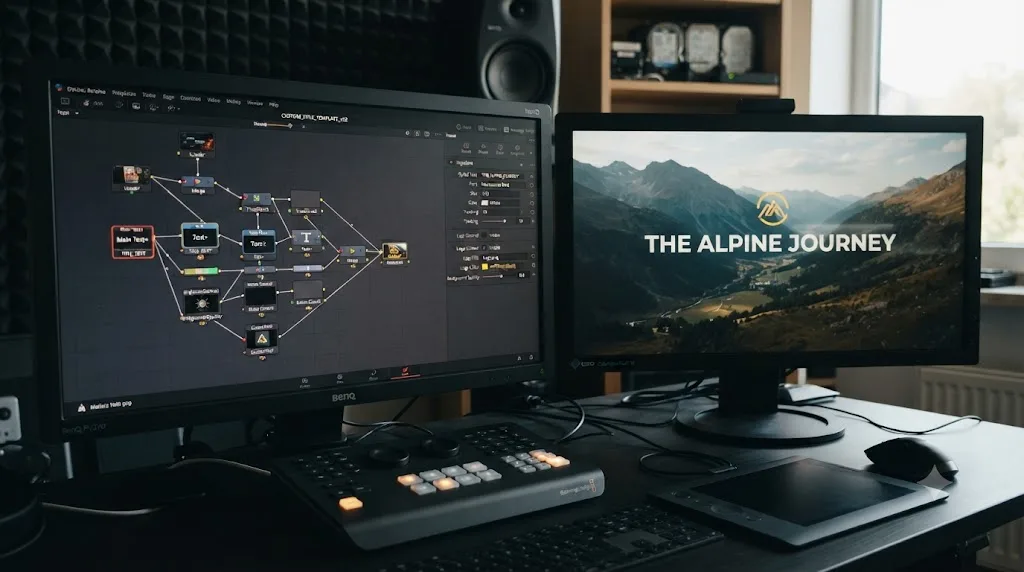
MultiText exists for one specific pain point: when a single shot needs several independent pieces of text and building each one as its own Text+ clip turns your timeline and your Fusion node tree into a mess.
According to JayAreTV's explainer, MultiText lets you add layers as points, boxes, or circles with a click, then set font, size, color, and position independently per layer, all inside one consolidated tool. You can reorder layers by dragging them, and add backgrounds directly through the tool's Page tab instead of building a separate shape node for each one.
Where this earns its place over a stack of Text+ clips:
- A list that builds line by line, like bullet points appearing one at a time in an explainer video.
- A credits roll with names and roles that need independent timing but shared styling.
- Multi-speaker captions where more than one line of dialogue needs to be on screen with different colors per speaker.
DaVinci Resolve 21's own What's New documentation lists ongoing investment in this area directly: "character level styling lets you assign different attributes such as font size, weight and color within a single text box," alongside a new dedicated font browser window, multi-language spell check across all text elements, and support for emoji in text. That last set of additions, spell check and emoji, might sound minor next to keyframed animation, but they're the kind of quality-of-life fix that shows up constantly in real edits: catching a typo in a client-facing lower third before it renders, or dropping an emoji into a social caption without leaving Resolve for a font-mapping workaround.
MultiText is genuinely not a Text+ replacement, and the same source is upfront about that. Reach for Text+ when a single title needs its deepest shading or 3D transform options. Reach for MultiText when the problem is managing several text layers at once, not styling any one of them harder.
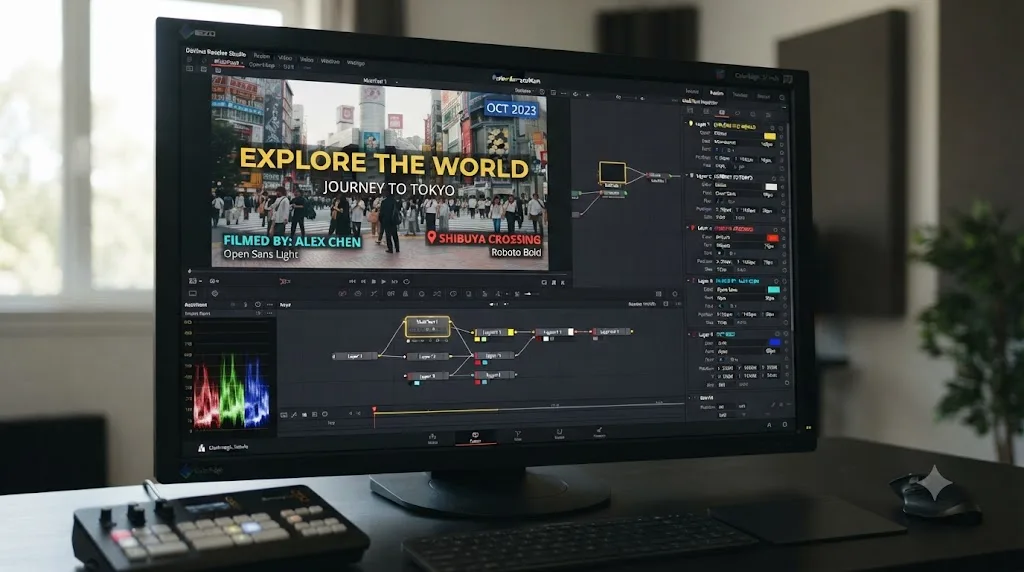
How do you build karaoke-style captions that highlight one word at a time?
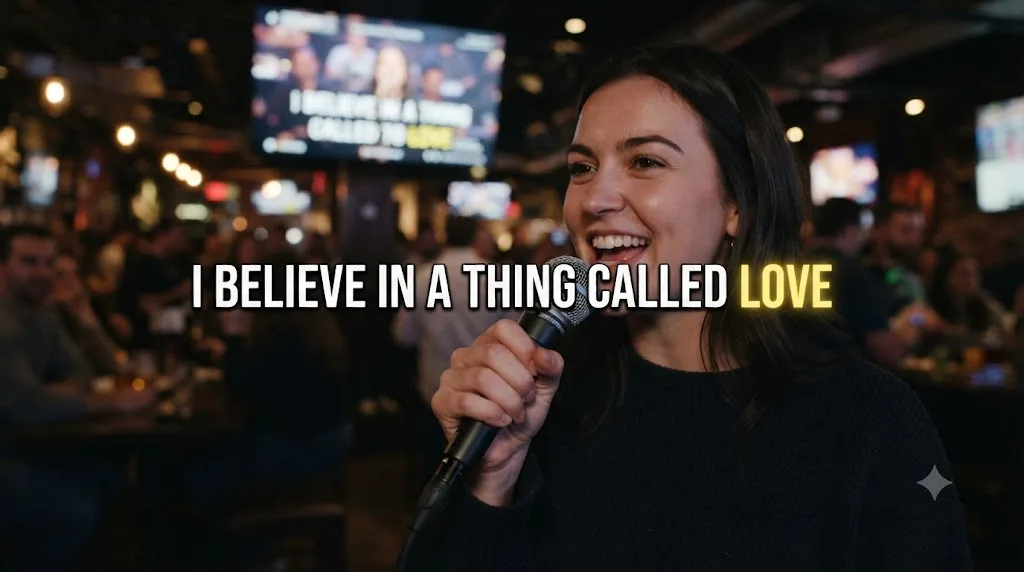
Word-by-word highlighted captions, the style where each spoken word lights up in a different color as it's said, show up constantly in short-form video because they hold attention better than a static caption block. DaVinci Resolve doesn't ship a one-click karaoke-caption generator, but Resolve 21's character-level styling makes building one by hand realistic instead of miserable.
According to Blackmagic's own DaVinci Resolve 21 What's New documentation, character-level styling lets you assign different attributes, such as font size, weight, and color, within a single text box, which is exactly the control a karaoke effect needs: one word in an accent color while the rest of the line stays neutral.
Here's the manual workflow:
- Type the full line of dialogue into a single Text+ or MultiText layer.
- Select the first word only, and set it to your highlight color using the character-level controls on the Layout tab.
- Keyframe that color change to happen at the exact frame the word is spoken, then keyframe it back to the base color a beat later, right as the next word starts.
- Repeat per word, moving the highlight down the line in sync with the audio.
Finding the exact frame each word starts is the tedious part, not the styling. Zoom the timeline's audio waveform in tight around the line, and scrub with J, K, and L at reduced speed to spot where each word's waveform actually begins, rather than guessing from ear alone at full playback speed.
This is genuinely tedious for a full-length interview, and nobody builds long-form captions this way by hand. It earns the effort on short hooks, ad openers, and social clips where a handful of words carry the whole message and the highlight effect is doing real work. For anything longer, most editors either accept a plainer animated caption style or bring in a dedicated auto-captioning tool built for the effect and import the result, the same way the free-version transcription workaround described in the next section works for ordinary subtitles.
How do you add subtitles and captions in DaVinci Resolve?
Subtitles are a different track type from titles, and treating them like a Text+ clip you retype for every line is the slow way to do it. Here's the actual workflow, split by whether you're typing captions yourself or transcribing spoken audio.
Typing subtitles manually or importing an SRT file
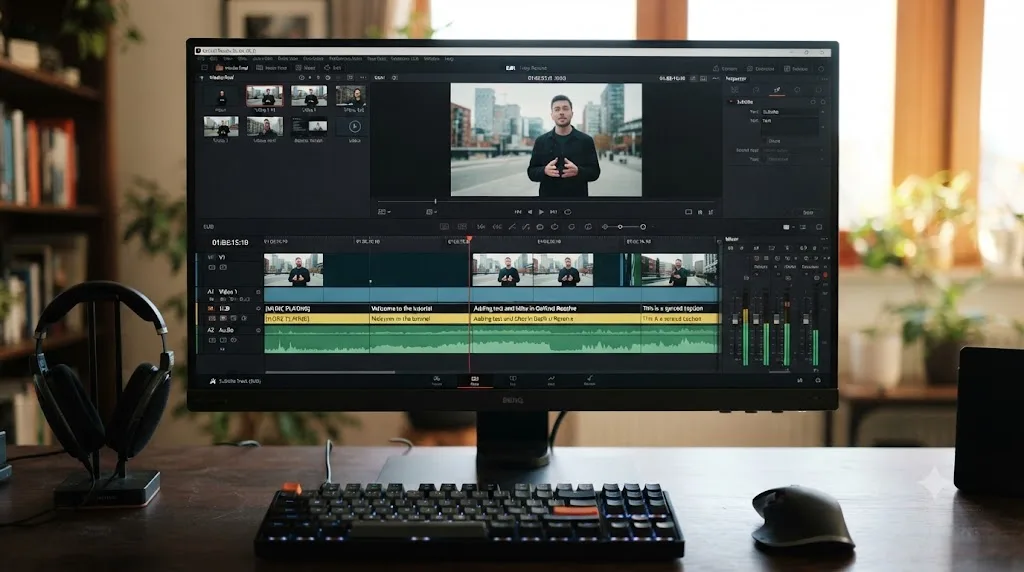
- Right-click a track header in the timeline and choose Add Subtitle Track. This is a track type on its own, separate from video and audio tracks.
- Position the playhead and use the subtitle tools to type a new caption at that point, matching it to the dialogue.
- Alternatively, if you already have a transcript as an SRT file (from a transcription service, a client, or a captioner), import it directly onto the subtitle track, and Resolve places each line at its timestamp automatically.
- Style the subtitle track's font, size, and position from the Inspector, the same way you'd style a Text tool, since subtitles are built on the same text rendering engine.
DaVinci Resolve 20 extended this further by adding a set of Fusion title templates specifically built for subtitle tracks, letting you apply animated styling to captions instead of a flat, static line, according to summaries of that version's reference manual.
Auto-transcribing subtitles from audio
Here's the part that surprises free-version users: automatically generating subtitles from spoken audio is not a free-version feature. According to a walkthrough of the auto-caption workflow, "DaVinci Resolve's transcription tool is exclusive to Resolve Studio, the paid version of the software," a limitation that's held steady since the feature's introduction in DaVinci Resolve 18.5 and remains true through Resolve 21.
Typing your own subtitles by hand costs nothing and works identically in the free version and Studio. The paywall only sits in front of the AI transcription step that turns raw audio into that first-pass text automatically.
If you're on the free version and don't want to type a long interview's dialogue by hand, you have two real options: run the audio through a separate transcription tool and import the result as an SRT file, or use a third-party plugin built for this gap. Several editors point to community tools like Auto-Subs specifically because they generate styled, animated captions without requiring Studio at all, running the transcription step outside Resolve and importing the result the same way you would any SRT file.
How do you handle subtitles in more than one language?
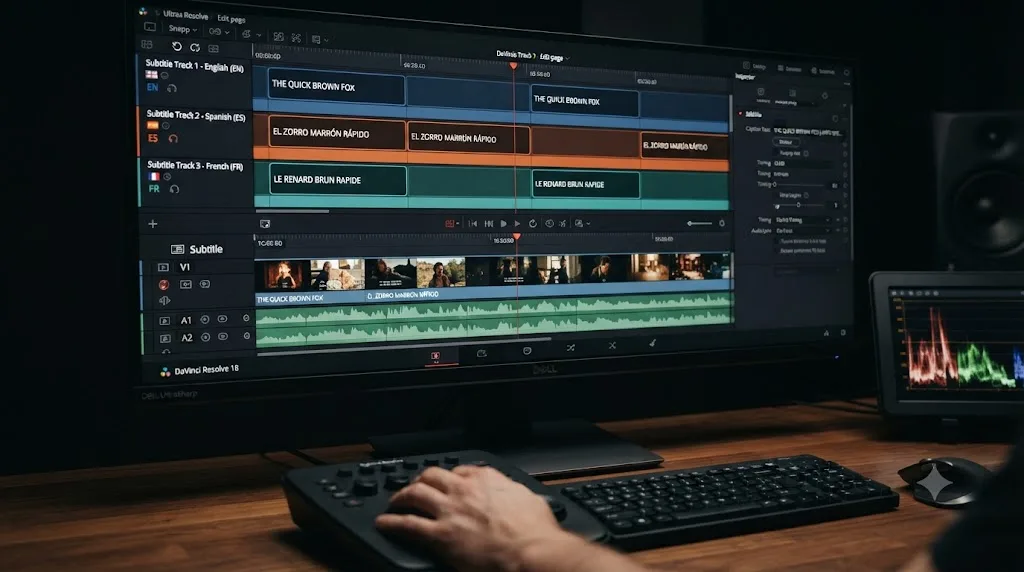
Multi-language delivery is a track-management problem more than a styling one. Add a separate subtitle track per language with Add Subtitle Track, repeated once for each language you're delivering, then type or import that language's own SRT file onto its matching track. Keep each language's track named clearly (English, Spanish, French) so you don't burn in the wrong one at 11pm before a deadline.
According to RenderCut's walkthrough of Resolve's subtitle workflow, the software supports subtitle tracks in multiple languages side by side, including English, Spanish, and Hindi, so you're not fighting the tool to keep more than one language in a single project.
At export, treat each language as its own render pass rather than trying to combine them:
- Burned-in delivery (the flat, permanent-caption route covered earlier): render once per language, with only that language's subtitle track active, since a burned-in export can only carry one set of on-screen text at a time.
- Separate SRT delivery: export each track individually from Subtitle Settings on the Deliver page, so you end up with one video file and a folder of language-tagged SRT files a platform like YouTube can offer as a viewer-selectable menu.
Non-Latin scripts are the one place this workflow gets shakier. Editors on Blackmagic's own support forum have reported Resolve failing to render certain non-Latin characters correctly even when the right font is selected, with languages including Arabic, Farsi, and Amharic sometimes showing as boxes instead of the intended characters. If you're localizing into a non-Latin language, test a short sample line early, before you commit to typing or importing a full track, and save any SRT file you import as UTF-8, which Cutsio's subtitle troubleshooting guide calls essential for special characters, accented letters, and non-Latin scripts to display correctly at all.
If you're localizing captions rather than translating them fresh, keep your original-language subtitle track as the timing reference. Duplicate it once per target language, then only replace the text field per line, since the timestamps rarely need to change between languages even though the phrasing does.
Do you need DaVinci Resolve Studio to add text or titles?
Almost never, for the text tools themselves. Here's exactly where the free-versus-Studio line sits for everything covered in this guide.
| Feature | Free | Studio |
|---|---|---|
| Text and Text+ | Full access | Full access |
| MultiText | Full access | Full access |
| Fusion Title templates | Full access | Full access |
| Building your own Fusion title template | Full access | Full access |
| Typing subtitles manually | Full access | Full access |
| Importing an SRT/subtitle file | Full access | Full access |
| Animated subtitle title styling | Full access | Full access |
| Automatically transcribing audio into subtitles | Not available | Required |
That last row is the only one that matters if your workflow is entirely text and titles. Everything else in this guide, Text, Text+, MultiText, Fusion Titles, and manually built subtitles, works identically whether you paid $295 for Studio or not, per Blackmagic's own product page comparing the two tiers.
If auto-transcription is the one feature pulling you toward Studio, it's worth weighing against everything else Studio unlocks, since the DaVinci Neural Engine also gates tools like Magic Mask and several of the AI features added across recent versions. If titles and captions are your only reason to upgrade, a third-party transcription workaround is the cheaper path; if you're already leaning on Neural Engine features elsewhere in your workflow, the Studio license is likely paying for itself well beyond captions.
What's the difference between a Text+ title and Data Burn-In?
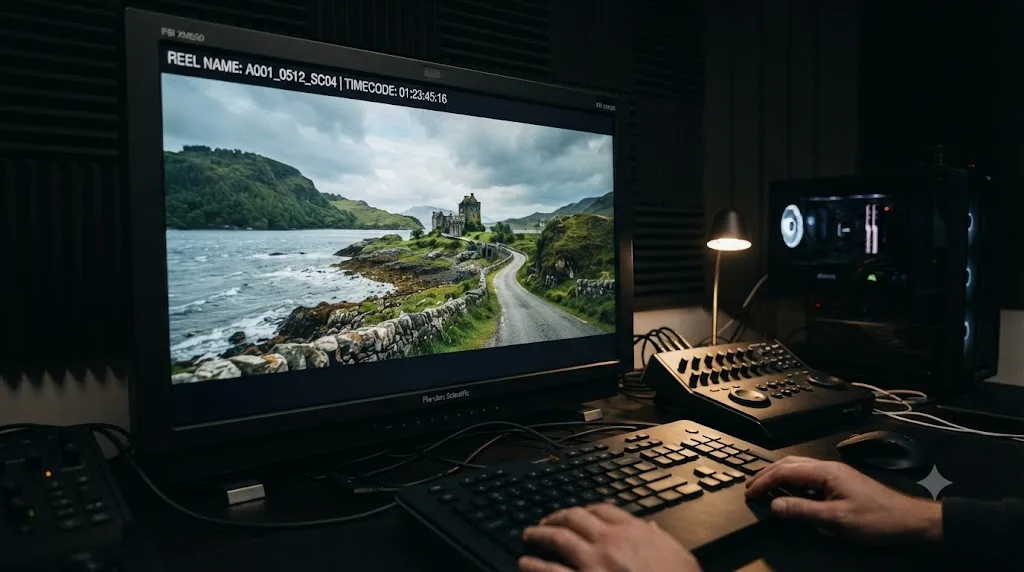
Data Burn-In looks like a title at a glance, some text sitting over your footage, but it's a completely different tool solving a different problem, and confusing the two wastes time on both sides. You'll find it under Workspace > Data Burn-In, not in the Titles bin with Text and Text+.
Where Text+ and Fusion Titles live as actual clips on your timeline that you type, style, and animate by hand, Data Burn-In is metadata Resolve already knows about your footage, timecode, source timecode, frame number, reel or file name, rendered as an overlay you toggle on or off from a single setting on the Deliver page, with nothing to build or trim. According to JayAreTV's breakdown of the feature, that toggle-based workflow is the whole point: you turn burn-in data on for review copies and dailies so a client or a VFX vendor always knows exactly which frame they're looking at, then turn it off with one click for the final delivered master, without touching a single clip on your timeline.
Use Data Burn-In when the audience is internal: a colorist confirming a frame number, a client marking notes against a timecode, a VFX turnover that needs a burned-in reel name. Use Text+ or a Fusion Title when the audience is the actual viewer, because Data Burn-In's styling is limited to plain metadata text, not the fonts, colors, and animation a real on-screen title needs.
A common pattern once you know the distinction: build two Deliver presets from the same timeline. One with Data Burn-In switched on for internal review, showing timecode and reel name so a client can leave notes like "fix the title at 00:04:12:03." The second preset, used for the final master, has Data Burn-In switched off, delivering the same edit with nothing but your actual Text+ and Fusion titles on screen.
How do you keep titles inside the safe area for broadcast and social media?
Every screen crops your frame a little differently. A smart TV might overscan a percentage of the edge. A phone in a case might round the corners of a vertical video. An app's UI might sit a share button directly over the bottom-right corner of a video for the entire time it plays. Safe area guides exist so you can see the danger zone before you export, not after a client calls.
To turn them on: open the dropdown menu in the top-right corner of the Viewer and select Title Safe (there are usually Action Safe and Center options alongside it). These are overlays only, invisible in your final render, showing you Title Safe (the tightest zone, meant for anything the viewer needs to read), Action Safe (a slightly looser zone for important visual action), and Center guides for aligning graphics precisely.
One caution worth knowing before you trust any specific percentage: a Blackmagic forum thread on the topic notes that Resolve's default safe area values don't map the same way Premiere Pro's or Avid Media Composer's do. If you're delivering for broadcast television with a strict quality-control spec, don't assume Resolve's default guide lines match your delivery house's requirement; confirm the exact percentage with them directly rather than trusting the overlay's default position.
For everything that isn't broadcast, here's what actually gets titles cropped or covered in practice:
- YouTube: the biggest real risk isn't cropping, it's the end-screen and info card overlays YouTube adds in the last 5 to 20 seconds and the top-right corner throughout. Keep persistent titles out of the top-right if your video runs long enough to reach end-screen territory.
- TikTok and Instagram Reels: vertical video (1080 x 1920) gets a caption bar, profile info, and action buttons docked along the right edge and bottom third of the frame. Keep any title or subtitle you build yourself well above that zone, roughly the top 60% of the frame, since that's the area consistently unobstructed across both platforms' current layouts.
- Instagram feed and Stories: Stories crop differently from feed posts, and a title positioned safely in one can clip in the other if you're exporting one master file for both. When in doubt, build titles for the tightest crop in your distribution list, not the widest.
How do you fix the most common title problems?
Titles break in a small number of predictable ways. Here's the troubleshooting branch for each.
Text is invisible, black, or shows a placeholder box
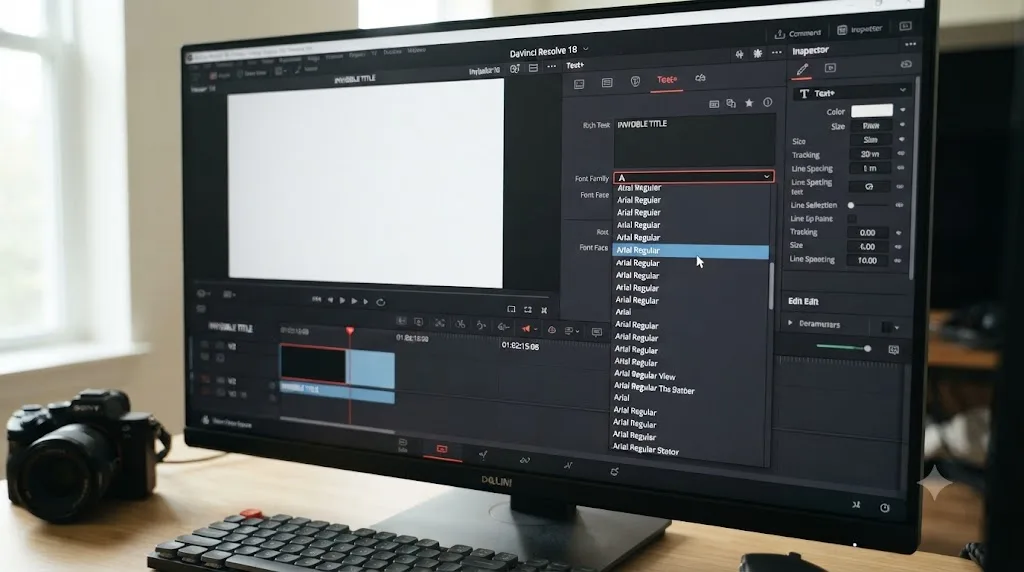
This is almost always a missing or unsupported font. Resolve renders the font it's told to use; if that font isn't actually installed and readable, some builds fail silently by rendering the text as invisible or as a black placeholder rather than throwing a clear error. To confirm the cause, select the affected Text+ clip, open the Layout tab, and swap the font dropdown to any other installed font. If text appears immediately, the font is the problem, not the animation, position, or shading you built around it. Reinstall the original font (making sure it's a TrueType/TTF or OpenType/OTF file, since Resolve doesn't reliably support variable or script font formats) and restart Resolve so it re-scans installed fonts.
A font you just installed isn't showing up in the list
Restart DaVinci Resolve first; it typically only scans available fonts on launch, not live while it's running. On Windows, if a restart doesn't fix it, clear Resolve's font cache folder directly, located at AppData\Roaming\Blackmagic Design\DaVinci Resolve\Support\Fusion in your user profile, then relaunch. This forces Resolve to rebuild its font list from scratch instead of trusting a stale cache.
A title looks fine in the Edit page but breaks or disappears on the Fusion page
This usually means the Fusion composition backing the title has a broken or unlinked node, common after copying a Fusion Title template between projects that don't share the same installed fonts or macros. Open the clip on the Fusion page directly and look for any node flagged with a red border or error icon; that's almost always where the break lives, and it's usually the same missing-font issue surfacing one layer deeper.
Titles play back choppy or the whole timeline slows down after adding several
Fusion-based titles, especially Fusion Title templates and heavily keyframed Text+ with multiple shading layers, are GPU-intensive to render in real time. A timeline that played smoothly before you added five animated lower thirds can start to stutter simply from the added render load, not from anything wrong with your footage. If this happens, render a cache for the affected clips (right-click and choose a render cache option) so Resolve plays back a pre-rendered version instead of recalculating the Fusion composition on every frame. This is the same category of fix covered in more depth in our guide to fixing choppy, stuttering playback in DaVinci Resolve, which walks through cache settings and GPU troubleshooting for the timeline generally, not just titles.
A subtitle track imported from SRT is out of sync
Check the frame rate your SRT file was generated at against your timeline's frame rate before assuming Resolve mishandled the import. A transcript generated against a 23.976fps reference but imported onto a 25fps timeline will drift progressively out of sync over a long program, even though the first few lines look fine.
How do you avoid font problems when a project moves between computers or across a team?
Every font problem covered above traces back to one fact worth saying plainly: DaVinci Resolve doesn't embed fonts inside your project file, so a title that looks perfect on your machine can arrive broken on someone else's. Fonts are handled entirely by the operating system underneath Resolve, not by Resolve itself, which is exactly what makes this an issue the moment a project crosses computers, whether that's a client's machine, a teammate's, or your own after a fresh OS install.
According to SafeBoxGuide's rundown of font management in Resolve, the missing-font warning comes down to three causes: the project was built on another computer, the font was uninstalled since, or the font simply isn't available for your operating system, a common trap when a Windows-only font gets used in a project a Mac editor later opens.
A few habits keep this from becoming a last-minute scramble:
- Standardize on fonts every machine on the team already has, or install the same third-party font pack identically on every editing station before a shared project starts, rather than discovering the mismatch mid-deadline.
- Note any non-standard font by name somewhere durable, like the project's notes field, so a teammate opening the project for the first time knows exactly what to install instead of guessing from a placeholder.
- When you can't get the original font, match its style, weight, and proportions as closely as possible rather than grabbing whatever's closest alphabetically. SafeBoxGuide's guidance here is specific: keep the same general category (serif or sans-serif) and weight (light, regular, bold), because a mismatched substitute quietly breaks the spacing and layout your title was keyframed around.
- Re-check every title clip after any handoff, whether that's sending a project to a client, a collaborator, or even your own laptop, before assuming the titles you built survived the trip untouched.
This isn't only a hand-off problem between people, either. An unattended render pass on a second machine, or a laptop you leave rendering overnight, needs every font installed locally too, since Resolve reads fonts from whatever machine is actually doing the rendering, not from the project file itself. None of this is unique to titles, but titles are where it shows up first and most visibly, since a broken font on a color grade is invisible while a broken font on a lower third is the first thing anyone notices.
How do you export video with titles, and how do you handle subtitles at export?
Titles built with Text, Text+, MultiText, or Fusion Titles need no special export handling: they're already baked into your timeline and render out with everything else through the Deliver page, exactly like any other visual element. Subtitles are the one piece that needs an actual decision, because you get to choose whether they're burned in or delivered separately.
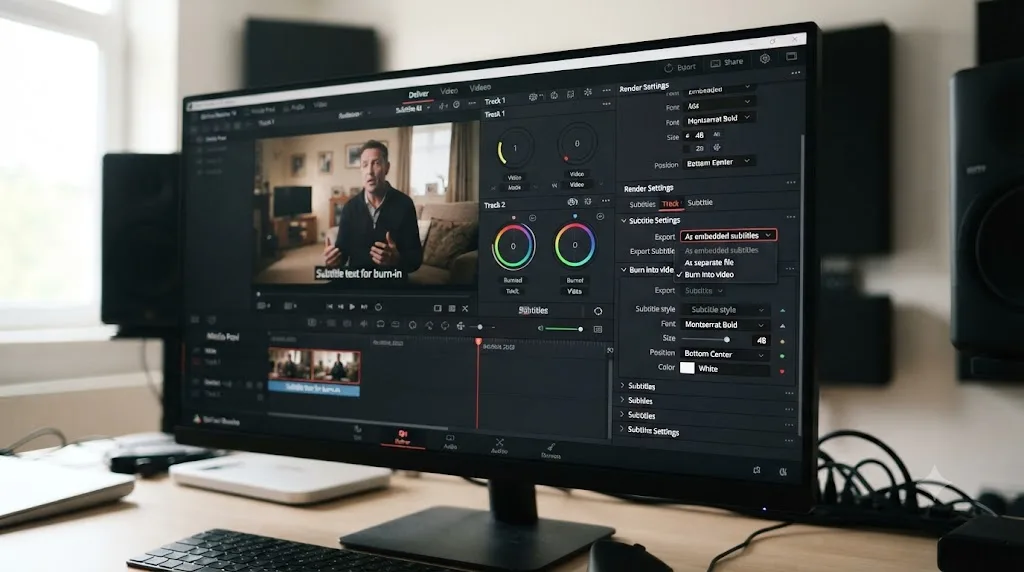
On the Deliver page, under the Video panel, look for Subtitle Settings and check Export Subtitle. From there:
- Choose "Burn into video" under the Format dropdown if you want captions permanently visible in the exported file, with no way for a viewer to turn them off. This is the right call for social platforms where autoplay is silent by default and burned-in captions are often the only way most viewers ever read your dialogue.
- Choose "As a separate file" and select SRT (or another supported format) if you want the video and the caption file delivered independently. This is the right call for YouTube, where the platform's own closed-caption system can host the SRT file separately, letting viewers toggle captions on or off rather than forcing them permanently onto the frame.
Pick based on the platform, not habit. A burned-in caption you can't turn off is the wrong choice for a client delivering to a broadcaster with its own captioning department; a separate SRT file nobody uploads is the wrong choice for a silent-autoplay Instagram feed post.
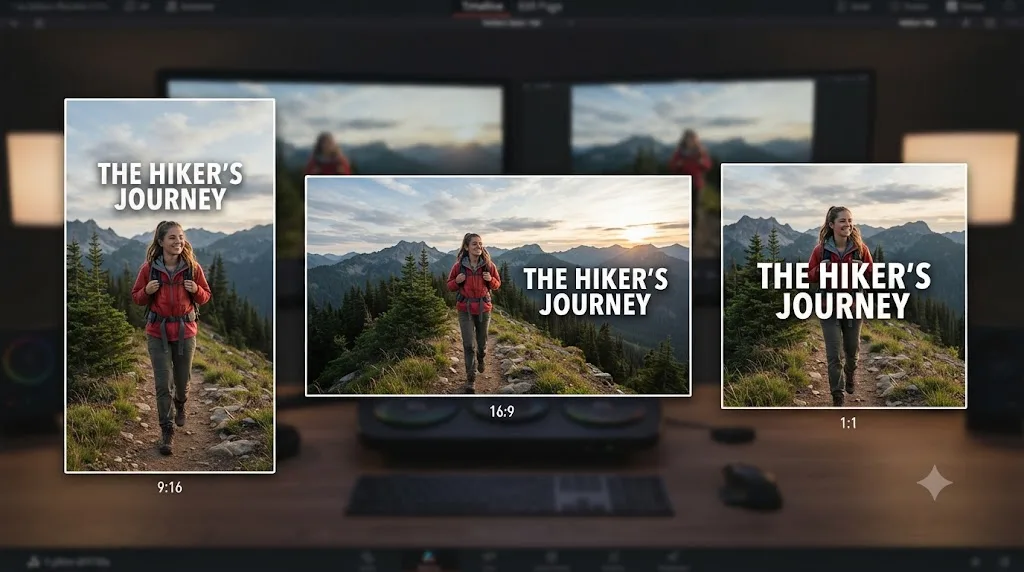
What's the best way to size text for YouTube, TikTok, and vertical video?
Font size and title position that read fine in a 1920x1080 edit can become unreadable or badly placed the moment the same project gets reframed to 1080x1920 vertical. A few practical rules, based on how each platform actually displays text in front of real viewers:
- Standard 16:9 (YouTube, most TV, most websites): a lower third's text should be large enough to read clearly on a phone screen even though you're grading and editing on a much bigger monitor. If you have to lean toward your screen to read your own title at arm's length, it's too small for a viewer scrolling on a 6-inch phone.
- Vertical 9:16 (TikTok, Reels, Shorts): build titles specifically for this aspect ratio rather than repositioning a 16:9 title into a taller frame. A caption sized correctly for a wide frame often reads as tiny once it's centered in a narrow one, because the available horizontal space just shrank dramatically.
- Square 1:1 (some Instagram feed posts): treat this as its own layout pass, not a crop of either of the above. Titles centered for square crop badly toward either the left or right when reframed to 16:9 or 9:16 later.
If you're producing the same content across multiple aspect ratios from one timeline, the practical approach is separate title layers per delivery format rather than one title trying to survive three different crops. Resolve's multi-timeline and Master Settings workflow, covered in our guide to DaVinci Resolve export settings for YouTube, makes it straightforward to keep one edit and swap title layers per output format without re-cutting the footage underneath.
Which tool fits a watermark, a disclaimer, a countdown card, or a credits roll?
The tools covered so far handle almost everything, but a few specific jobs deserve a direct answer instead of making you reverse-engineer it from the general guidance above.
| What you need | Use this | Why |
|---|---|---|
| A persistent watermark or logo | Text+ (for a text mark) or an imported logo image, not a video title tool | Sit it on its own track above everything, trimmed once to span the entire timeline. It ignores every cut happening on the tracks below it, so you never touch it again after the first trim. |
| A legal disclaimer or terms text | Text or Text+, plain and high-contrast | Position it inside the safe area, hold it on screen long enough to actually read (a rough floor of about three words per second), and skip decorative shading entirely, since legibility is the entire job here. |
| A "starting soon" countdown card for a livestream | Not a native Resolve feature | Resolve's text tools don't include a live ticking-timer field. A real countdown is either a Fusion composition built with a time-driven expression, which is an advanced Fusion job, or, more practically, a graphic produced in a dedicated streaming-graphics tool and brought into Resolve as a finished video clip. |
| An end credits roll | MultiText, or a single Text+ crawl | MultiText handles independently timed name-and-role layers cleanly. For a classic scrolling crawl, one Text+ clip with a Position keyframe animated from below the frame to above it covers the whole roll in one piece. |
| A chapter or section callout card | A Fusion Title template, or Text+ if you want custom brand colors | Templates get you motion instantly. Text+ costs more setup time but matches your exact brand palette instead of a template's defaults. |
| A recurring intro or outro brand card across every video on a channel | Build once with Text+ or Fusion, then generate a PowerBin | The PowerBin travels with you between projects, so the brand card stays pixel-identical across a whole channel instead of drifting a little every time someone rebuilds it from memory. |
That countdown-card row is worth being honest about: it's the one item on this list Resolve's title tools genuinely don't solve out of the box. Don't burn an hour hunting through the Titles bin for something that isn't there.
Should decorative titles and accessibility captions be built the same way?
No, and conflating the two is a common mistake. A decorative title, a stylized opener, a glitchy lower third, a circular badge of text wrapped around a logo, exists to look good and support the brand. An accessibility caption exists to make sure a viewer who is deaf, hard of hearing, watching without sound, or not a native speaker of your dialogue's language gets the same information as everyone else.
A caption that prioritizes style over legibility has failed its actual job. That means solid contrast against any background, a font without decorative flourishes that could be misread, and a position that never overlaps a platform's own UI elements like a caption bar or share button. Save the Write On typewriter effect, the circular text path, and the eight-layer Shading stack for your decorative titles. Keep your accessibility captions plain, high-contrast, and boring by design, because boring is what makes them work for the widest possible audience.
If your project needs both, and most do, build them as separate tracks with separate purposes: a styled Text+ or Fusion Title track for on-brand graphics, and a dedicated Subtitle track, styled simply, for the actual transcript of spoken dialogue.
What's the verdict on the fastest path from zero to a finished title?
Start with Text+ instead of basic Text, even for something simple, because the extra click buys you real keyframing and shading the moment you need it, and you will need it sooner than you think. Reach for a Fusion Title template when you want an animated look today and don't want to build the motion by hand. Reach for MultiText the moment you're managing more than two or three independent text layers in one shot. And keep subtitles on their own track, styled for legibility, separate from anything decorative.
The one paywall in this entire workflow is automatic transcription, gated to DaVinci Resolve Studio. Everything else, typing, styling, animating, templating, and exporting text, is free, and has been since long before Resolve 21 added its font browser, spell check, and character-level styling on top of it. If you're still deciding whether DaVinci Resolve fits your workflow at all before you invest time learning its title tools, our complete beginner's guide to DaVinci Resolve covers what the app costs, what it needs to run, and the order to learn its seven pages in. And if you'd rather have an assistant answer "how do I do this" questions like this one directly inside Resolve as you work, instead of tabbing back to a browser mid-edit, that's exactly what TryUncle is built for.
Once titles feel comfortable, the next fastest workflow upgrade is learning the keyboard shortcuts that keep your hands off the mouse while trimming and positioning them, covered in our complete DaVinci Resolve keyboard shortcuts reference. And if you're curious what else changed around text and titles in the current release, our full list of DaVinci Resolve 21's new features covers the font browser, spell check, and character-level styling additions in the context of everything else Blackmagic shipped alongside them. For the rest of Resolve's toolkit beyond titles, from exports to workflow to every other page of the app, our DaVinci Resolve guides go deeper in the same style as this one.
Frequently asked questions
- What is the easiest way to add text in DaVinci Resolve?
- Open the Effects Library on the Edit page, go to Toolbox > Titles, and drag Text or Text+ onto a new video track above your clip. Text is faster for a one-line caption. Text+ takes one extra click but gives you real font, color, and animation controls, so most editors default to it even for simple titles.
- What's the difference between Text and Text+ in DaVinci Resolve?
- Text is a simple overlay you type and format directly in the Viewer, with only basic properties keyframeable. Text+ opens a full Inspector with Layout, Transform, and Shading tabs, supports per-character styling, and unlocks a typewriter-style Write On animation and path or circle text layout that Text can't do.
- Do I need DaVinci Resolve Studio to add titles or subtitles?
- No, for typing and animating your own titles. Text, Text+, MultiText, and Fusion Title templates are all in the free version. Studio is only required for one specific feature: automatically transcribing spoken audio into a subtitle track. Typing your own subtitles, importing an SRT file, and styling them are all free.
- Why is my Text+ title showing up blank or invisible?
- The two most common causes are a missing or corrupted font and a track that's muted or hidden in the timeline. Select the Text+ clip, open the Inspector's Layout tab, and swap the font to any installed system font. If the text reappears, the original font is the problem, not your settings.
- How do I make a lower third or subtitle template I can reuse?
- Build the title once with Text+ or MultiText, right-click the clip in the timeline, and choose Generate PowerBin or drag it into the Edit page's Titles bin. Some editors instead build reusable graphics as Fusion macros, which travel between projects as a single file.
- How do I keep my titles from getting cut off on TikTok, YouTube, or a TV?
- Turn on Title Safe from the Viewer's dropdown menu before you finalize any title's position. It's an overlay only, so it never appears in your export, but it shows you the zone most platforms and TVs guarantee won't get cropped, letterboxed, or covered by app interface elements.
- Can I burn a background bar behind a lower third without deep Fusion work?
- Yes. Add a Solid Color generator on a track below your Text+ title, use the Inspector's Cropping and Transform controls to squeeze it into a bar shape, lower its opacity if you want the footage to show through, then select both clips and turn them into a Compound Clip so they trim and move together as one title.
- Can DaVinci Resolve subtitles support more than one language?
- Yes. Add a separate Subtitle track for each language with Add Subtitle Track, type or import each language's SRT onto its own track, and export or burn in whichever single track matches the version you're delivering. Resolve doesn't mix two subtitle languages into one burned-in export at the same time, so treat each language as its own render pass.
Sources
- Blackmagic Design: DaVinci Resolve 21 - What's New (Text+, MultiText, font browser, spell check, emoji support)
- Boris FX: How to Add Text and Titles in DaVinci Resolve, 5 Methods
- TourBox: Text vs. Text+, How to Add Text in DaVinci Resolve
- JayAreTV (Justin Robinson): DaVinci Resolve MultiText Tool Explained
- Checksub: How to Add Automatic Subtitles and Captions on DaVinci Resolve
- SkyScribe: What Version of DaVinci Resolve Has Auto Captions?
- Beginners Approach: How to Export Subtitles in DaVinci Resolve
- Miracamp: How to Add Fonts in DaVinci Resolve
- Video Editor London: How to Add Guides in DaVinci Resolve (Safe Areas, Grids and Custom Guides)
- Mixing Light (Bernd Klimm): How to Build a Custom Fusion Title Template From Scratch, Part 1
- Blackmagic Design: DaVinci Resolve product page (free vs Studio)
- JayAreTV (Justin Robinson): DaVinci Resolve Data Burn-In Explained
- SafeBoxGuide: How to Add and Manage Fonts in DaVinci Resolve
- RenderCut: How to Add Subtitles in DaVinci Resolve (Step-by-Step Guide)
- Cutsio: How to Fix Subtitles Not Showing in DaVinci Resolve
- Beginners Approach: How to Copy and Paste Effects and Attributes in DaVinci Resolve
Learn by doing, not watching
Stop translating tutorials to your timeline.
TryUncle stays beside Resolve on Mac and Windows. When you ask, Uncle sees your screen and points at the exact control you need. No hunting through tabs, timestamps, or mismatched tutorials.
Meet TryUncleKeep reading
 GuidesJul 7, 202632 min read
DaVinci Resolve Export Settings for YouTube (Copy These Exactly)
The exact DaVinci Resolve export settings YouTube recommends: codec, bitrate, resolution, audio, and the Deliver page steps that avoid soft uploads.
 FixesOct 10, 202631 min read
DaVinci Resolve Audio Disappears After Reopening Project? Fix It
Fix DaVinci Resolve audio that disappears after reopening a project. Diagnose missing media, moved drives, bins, proxies, timelines, and playback routing.
 GuidesOct 10, 202623 min read
DaVinci Resolve: Change Clip Speed Without Changing Audio Pitch
Change a clip's speed in DaVinci Resolve while keeping its audio pitch steady. Learn the Pitch Correction setting, linked audio steps, and fixes.