
Learn / DaVinci Resolveupdated for DaVinci Resolve 21.0.2 (July 2026)
How to Archive a DaVinci Resolve Project Without Losing Media
Quick answer
Use Export Project Archive from the Project Manager: right-click the project, choose Export Project Archive, and Resolve bundles the project file with every media file into one self-contained .dra folder. Use Media Management first if you only need the media actually cut into your timeline, not everything you ever imported.
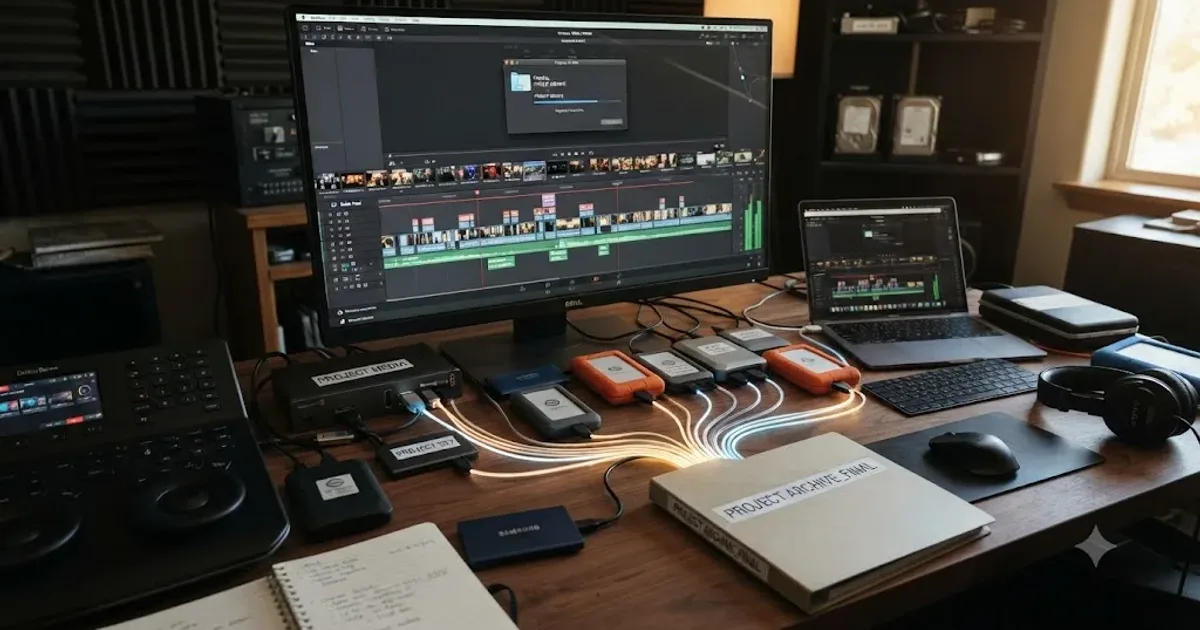
I've watched editors treat "save the project" and "archive the project" as the same action. They are not the same action, and the gap between them is exactly where footage disappears. A saved project remembers your edit decisions. An archived project carries the actual media those decisions depend on. Skip that distinction and you'll open a project six months from now to a timeline full of red "Media Offline" boxes.
This guide walks through DaVinci Resolve's three real preservation tools, Export Project Archive, Media Management, and Backups, plus the thin Export Project option people confuse with all three, and tells you exactly which one to reach for depending on what you're actually trying to protect.
What are your options for archiving a DaVinci Resolve project?
DaVinci Resolve gives you four distinct ways to preserve a project, and they solve four different problems. Confusing them is the single most common cause of "I archived it and the media is still gone."
| Method | What it actually saves | File type | Best for |
|---|---|---|---|
| Export Project Archive | Project database plus a full copy of every media file used | .dra folder | Long-term storage, handing a project to someone with no shared storage |
| Media Management (Consolidate) | A trimmed, relinked copy of only the media cut into your timeline(s) | New media folder plus .drt file | Reducing disk usage, handing off just the used footage with handles |
| Project Backups | Timestamped copies of the project database only | Project.db files in a scratch folder | Recovering from a corrupted or botched edit, not from lost media |
| Export Project | The project database only, with pointers to media's current location | .drp file | Sharing between editors who already access the same media storage |
Export Project Archive is the only one of these four that guarantees every media file travels with the project. The other three each leave a gap: Media Management deliberately narrows what's included, Backups never touch media at all, and plain Export Project doesn't even try.
That table is the whole decision in miniature. Everything below is the reasoning behind each row, the steps to execute it correctly, and the specific ways each method still manages to lose media if you use it carelessly.
What does Export Project Archive actually do?
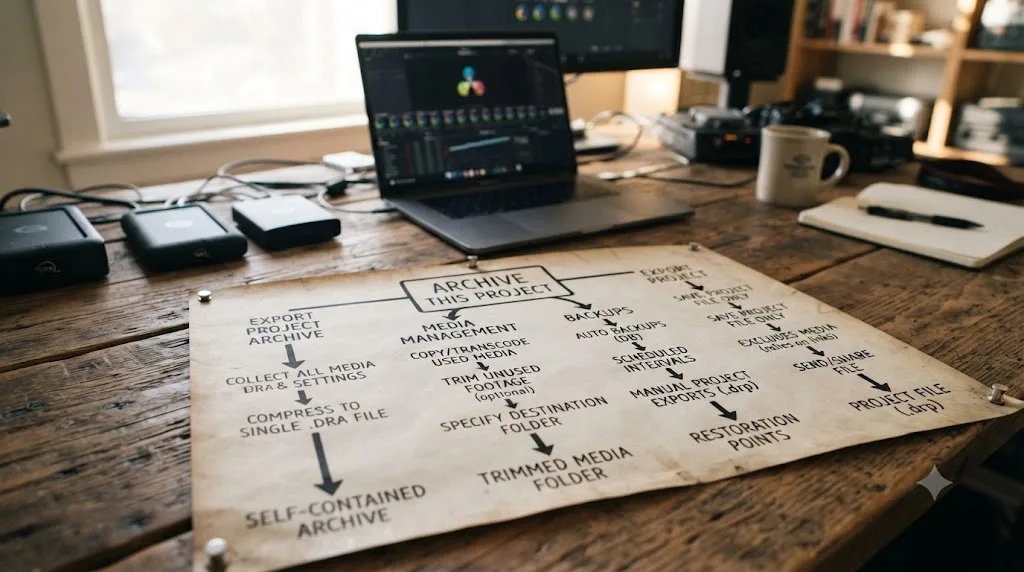
Export Project Archive is Resolve's closest equivalent to "zip up everything and never worry about it again." When you run it, Resolve creates a folder with a .dra extension containing the project's database file and a complete copy of every media file the project references, video, audio, stills, and anything else sitting in your Media Pool with an active link. According to JayAreTV's breakdown of the feature, this creates "a complete, self-contained package of the entire creative work, including the project file itself and every single piece of media used, video clips, audio files, graphics, even subtitle tracks, bundled together in one place" (JayAreTV).
If your media is spread across three different drives when you start, Resolve consolidates it into one folder as part of the archive. You don't need to manually gather anything first. That consolidation is the entire point: a .dra folder doesn't care where your source footage used to live, because it now has its own copy.
Here's what it costs you in exchange for that safety. Archive size scales with your media, not your edit. A one-minute short film cut from four hours of raw footage produces an archive sized to that four hours, not to the one minute you actually used. Larry Jordan documented a real example of this scale: exporting a full project archive for a 1.2 TB project produced a 1.04 TB archive folder and took roughly ten minutes on his system (Larry Jordan). Compare that to plain Export Project on the same project, which produced a 438 KB file, because it saved zero media.
To create one:
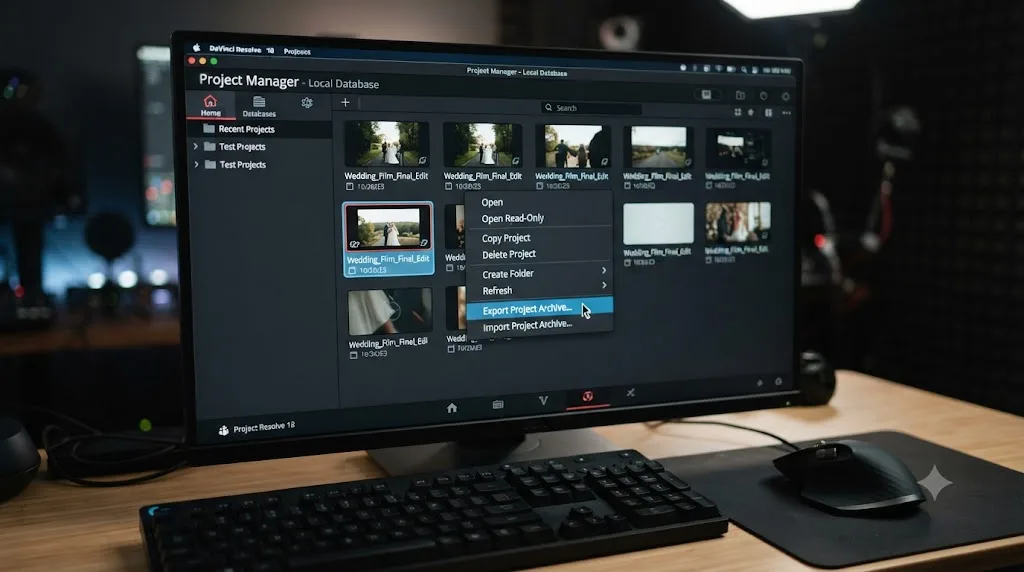
- Open the Project Manager (the house icon, bottom right of the interface, or Shift+1).
- Right-click the project you want to archive. Don't open it first, right-click it from the list.
- Choose Export Project Archive.
- Pick a destination with enough free space, ideally an external or secondary drive, not the same disk your working media lives on.
- In the dialog, decide whether to include Render Cache and Proxy Media alongside the required Media Files.
- Click OK and let it run.
A project file without media is not a backup. It is a set of directions to files that might not be there anymore. That's the trap plain project files and even some backups fall into, and it's exactly what Export Project Archive avoids by copying the destination, not just the address.
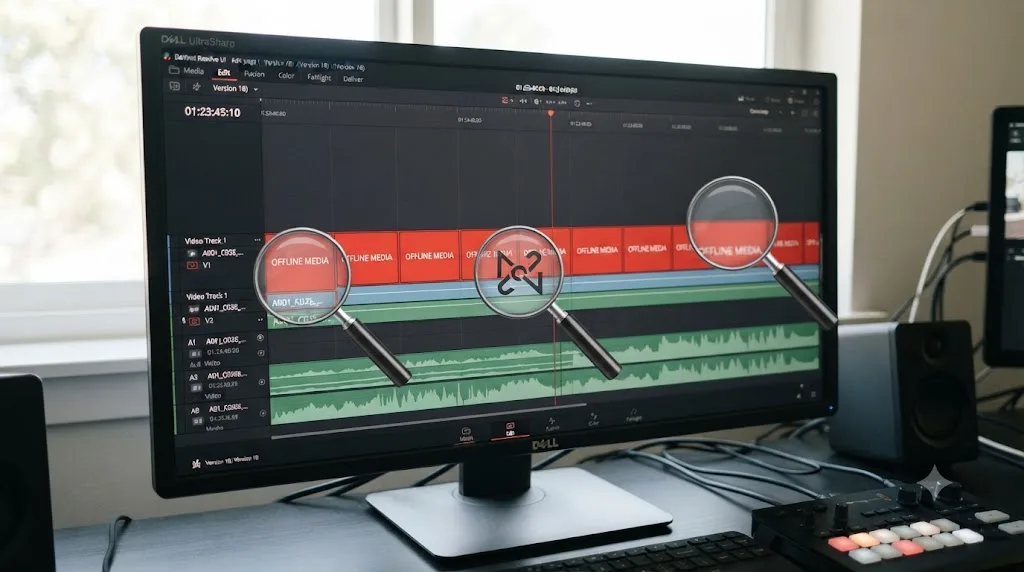
One caveat worth flagging early: archiving copies media, it doesn't verify media. If a clip is already offline in your Media Pool when you start the archive, Resolve simply can't copy what it can't find, and that clip stays offline in the resulting .dra folder too. Fix every red "Media Offline" indicator in your Media Pool before you archive, not after.
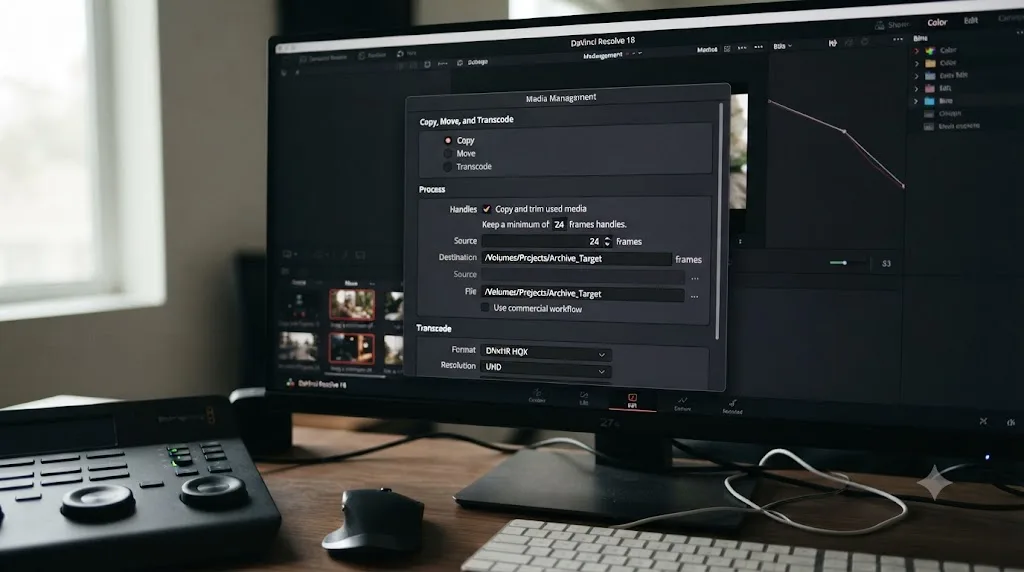
When should you use Media Management (Consolidate) instead?
Media Management solves a different problem than archiving: your project has more media in it than you actually used, and you want a smaller, cleaner copy without hand-picking files in a file browser.
According to the official DaVinci Resolve manual, Media Management can handle "a variety of tasks, including but not limited to creating a duplicate of your project's clips that eliminates unused media" and "transcoding all clips in a timeline to another format while eliminating unused heads and tails" (DaVinci Resolve Manual, mirrored). That second phrase matters: Media Management doesn't just filter which clips get included, it can trim the clips themselves down to only the frames you actually cut into your timeline, plus a handle of extra frames on each side for adjustments.
You get three core operations, and they behave very differently:
| Operation | What happens to the original media | Typical use case |
|---|---|---|
| Copy | Original stays untouched; a new copy is written to the destination | Handing off a project without disturbing your working drive |
| Move | Original is relocated to the destination and removed from its old location | Reorganizing storage on your own system |
| Transcode | A new copy is created in a different codec/format at the destination | Delivering to a system or colorist that needs a specific codec |
Within each of those, you choose how much media to include: the entire project's media, only what's used across your selected timelines, or used media trimmed down with handles. The manual describes this last option specifically as "Copy/Transcode Used media and trim keeping x frame handles" (DaVinci Resolve Manual, mirrored), where you set the handle length in frames. A 12-frame handle, for instance, keeps 12 extra frames before and after every cut, so a colorist or reviewer can still nudge an edit slightly without going back to full source.
There's also a feature specifically built for editors who've cut the same source clip into a dozen separate segments across a timeline: "Consolidate multiple edit segments into one media file," which only becomes available once you've chosen "Copy and trim used media," and which stitches those segments back into a single file per source rather than leaving you with a dozen redundant fragments.
When Media Management finishes copying or transcoding a timeline's media, it also automatically writes a small DaVinci Resolve Timeline file (.drt) into the same bin as the new media, already linked to it (DaVinci Resolve Manual, mirrored). You don't have to relink anything by hand afterward inside that same project.
Media Management trims the project down to only what you used. Export Project Archive keeps everything you ever touched. That's the whole difference in one sentence, and it's why the two tools aren't competitors, they're stages. Run Media Management first when you want a lean, delivery-ready copy. Archive that leaner project afterward if you still want a permanent, self-contained backup of it.
Where people get burned is running these in the wrong order, or assuming one does the other's job. A recurring thread on the Blackmagic Forum, "Better way to consolidate media files for archive/hand-off," captures exactly this confusion: users trying to prep a project for delivery keep landing on Media Management by accident when what they actually wanted was a full archive, or vice versa, because both tools live under different menus and neither one clearly tells you when to use the other (Blackmagic Forum).
What do Project Backups protect, and what do they not protect?
Project Backups are the feature most editors already have running without thinking about it, and they're also the feature most likely to be mistaken for a media safety net when they aren't one.
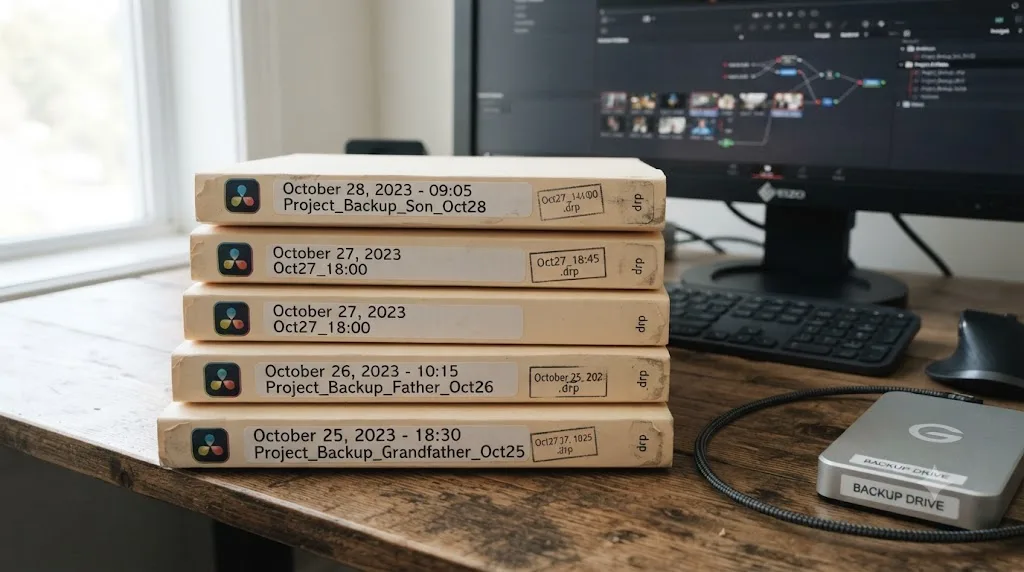
By default, DaVinci Resolve's Project Backups follow what the manual calls a grandfather-father-son rotation. The mechanics, straight from the official documentation: "a new backup is saved every 10 minutes, resulting in six backups within the last hour." Once an hour passes, the per-minute versions get thinned out and an hourly snapshot is kept instead, up to 8 hourly backups per day by default, and daily snapshots are "only saved for five days" (DaVinci Resolve Manual, mirrored). Those backups land in a "ProjectBackup" directory on your scratch disk by default, and every backup is a full timestamped copy of the project database, not a diff.
Notice what's in that description: database. Every single word of it is about the project's edit decisions, not its media. A backup restores your timeline, your color grades, your Fusion nodes, your titles, exactly as they existed at that timestamp. It does not restore a media file that got deleted, moved without relinking, or lived on a drive that failed. If your footage disappears, your most recent backup will faithfully open a project that still points at that now-missing footage, and you'll be staring at the same offline media warnings, just with your edit intact around them.
Resolve's automatic backups protect your edit decisions, not your footage. That single sentence explains almost every "but I had backups on!" support thread you'll find about lost DaVinci Resolve media.
This is the exact mistake that cost editor and trainer Larry Jordan every project he had. While cleaning up files on his system, he deleted a folder he didn't recognize as important, one that turned out to be his entire Resolve project library, the master folder Resolve uses to store all projects and their database. Unlike Final Cut Pro or Premiere Pro, Resolve doesn't save each project as an individual file you can see and back up individually by default; it keeps everything inside that one library folder you set up the first time you launched the app. Delete the wrong folder, and you don't lose one project. You lose all of them.
Jordan was blunt about what he learned from it, warning readers in his account of the incident:
"NEVER! delete it, unless, by intent, you want to trash all existing projects and start fresh."
That's Larry Jordan describing the Resolve project library folder specifically, in his article on how he lost every project he had (Larry Jordan). He recovered some of his work only because his system had, by chance, retained recent database backups outside that deleted folder. Most editors won't get that lucky, especially if their backup location happens to live inside the same folder they just deleted.
Two practical takeaways follow directly from this. First, know exactly where your Resolve project library lives on your system, and treat it the way you'd treat a mounted drive, not a random cache folder you can clean up during a disk-space purge. Second, and this is the part backups alone can't cover, your actual media should never live only inside that library structure or only on one drive with no independent copy. Backups protect the database. Nothing but a real media copy, whether through Export Project Archive or your own separate backup discipline, protects the footage.
If you're working with a team on shared or cloud storage, this same fragility shows up differently: a locked bin or timeline in Multi-User Collaboration can make it look like media or edits have vanished when they've actually just been claimed by another editor's session. Worth ruling out before you assume something's actually lost.
Should you ever just use plain Export Project?
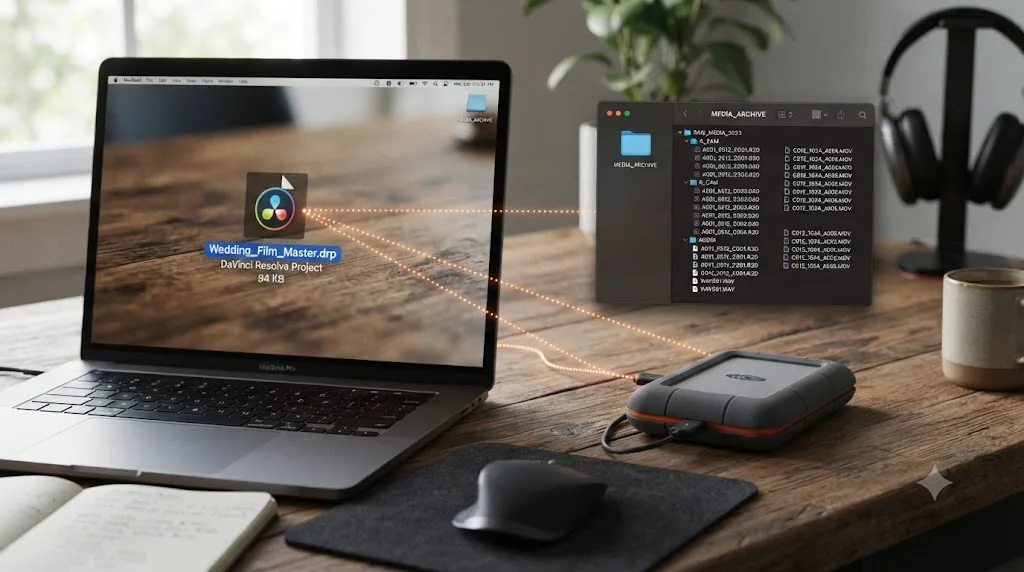
Plain Export Project, producing a .drp file, is the option most likely to fool a first-time archiver, because the word "export" makes it sound comprehensive. It isn't. According to Larry Jordan's comparison, "Exporting a project does NOT include media, it merely links to where that media is stored" (Larry Jordan). The .drp file is tiny for exactly that reason, his own test case came in at 438 KB for a project referencing 1.2 TB of source media, because all it contains is the edit and a set of file paths.
That makes Export Project genuinely useful in one specific situation: you're handing the project to another editor who already has access to the exact same media, on the exact same drive letters or mount paths, or on shared storage you both connect to. In that case, a tiny .drp file is faster to send and faster to open than a multi-terabyte archive, and it works fine because the paths it points to still resolve correctly on the receiving end.
Outside that situation, plain Export Project is how people accidentally "archive" a project and then discover, weeks or months later on a different machine or after the original drive is gone, that every clip shows offline. The file transferred perfectly. It just never contained what they assumed it did.
Should you run "Remove Unused Clips" before you archive?
Media Management trims a copy down to what's used. But there's a faster, non-destructive step you can run first, directly in the Media Pool, that shrinks the project itself before you ever open the archive dialog.
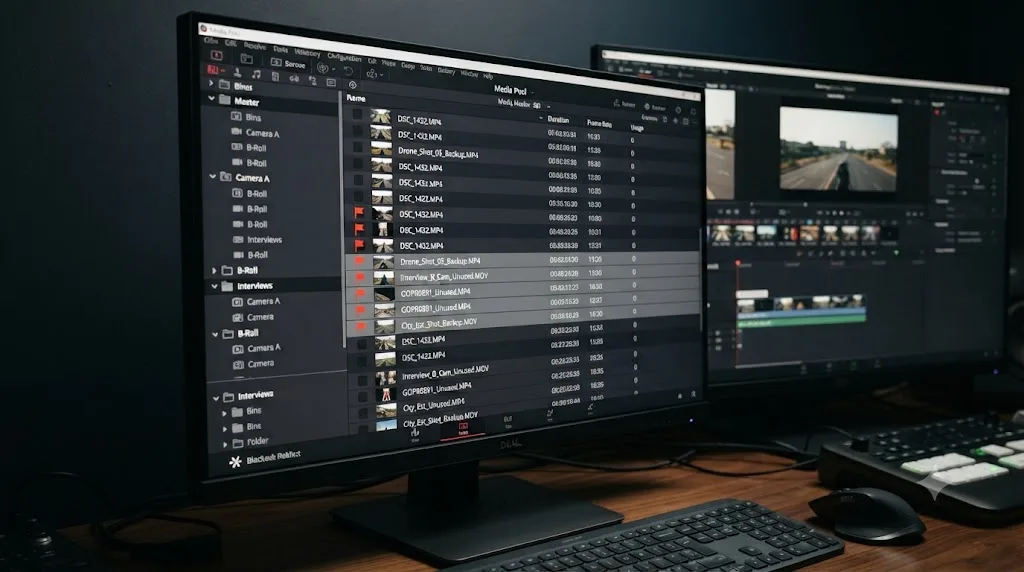
Right-click anywhere in the Media Pool, open the Options menu (the three-dot icon), and choose Remove Unused Clips. According to the official DaVinci Resolve manual, "this action loads all timelines, compound clips, and Fusion compositions then analyzes them for media usage" (DaVinci Resolve Manual, mirrored). Click Load All Timelines to run it. Resolve walks every timeline, every nested compound clip, and every Fusion composition in the project, cross-references what's actually cut in, and flags everything else.
Remove Unused Clips checks compound clips and Fusion compositions for media usage, not just your top-level timeline. That matters because a compound clip can bury a reference to source footage several layers deep, footage a simple glance at your Media Pool would never reveal as "in use." A manual scan misses that. This feature doesn't.
Two details worth knowing before you run it. First, the manual is explicit that the operation "does not delete any clips from your disk, it only removes them from the Media Pool and the Project" (DaVinci Resolve Manual, mirrored). Your source files stay exactly where they are. You're only trimming what the project itself references, which is precisely what determines archive size. Second, the manual notes this operation is un-doable, so if you're not sure a clip is really unused, a b-roll cutaway you're planning to add next week, say, duplicate the project first or double-check the flagged list before confirming.
Run this before Media Management, not after. Media Management already narrows scope to used media, so running Remove Unused Clips on a project you've already consolidated does nothing useful. Run it on the full, messy project first, then decide whether you still need Media Management's trim-with-handles behavior on what's left.
This step earns its place in the workflow for one specific kind of project: long-form documentary or interview edits, where you imported far more raw footage than you used, and multicam or compound clips have quietly buried some of the unused references where they're easy to miss. On a simple, short edit with one media folder, it's a nice-to-have, not a necessity.
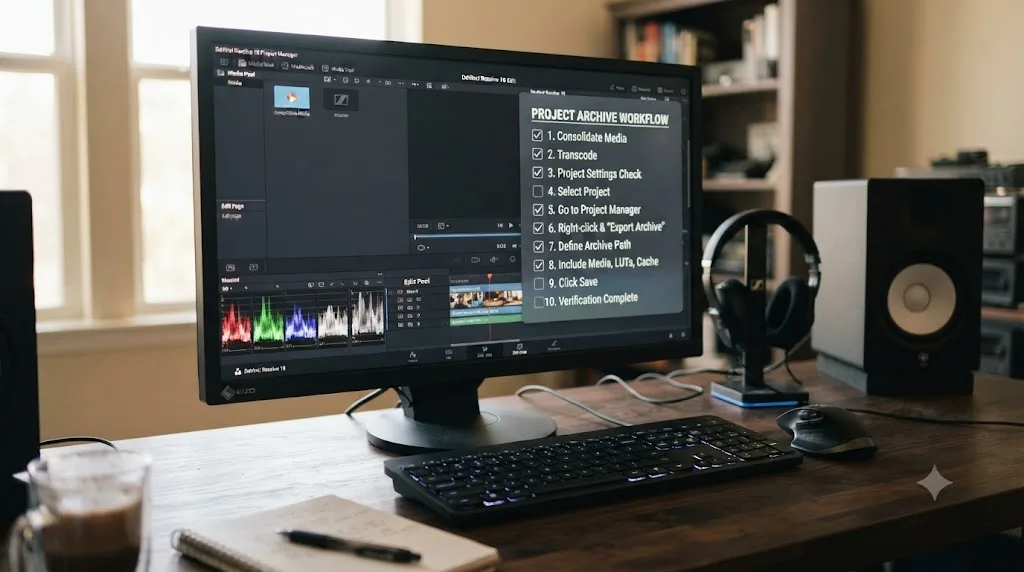
Step by step: how do you export a project archive without losing media?
This is the full sequence, including the steps people skip that cause the "it's still offline" complaints later.
- Sort your Media Pool by online status first. Right-click a column header in the Media Pool and enable an online/offline indicator if it isn't already visible, or simply scan for red thumbnails. Fix every offline clip before doing anything else. An archive can't copy media it can't locate.
- Decide if you need Media Management or Remove Unused Clips first. If this project has grown to include footage, alternate takes, or entire scenes you cut out of the final timeline, run Remove Unused Clips or Media Management to trim it down before archiving. Skipping this step means archiving hours of unused source right alongside the minutes you'll actually deliver.
- Open Project Manager using the house icon at the bottom right of the interface, or Shift+1.
- Right-click the target project in the list. Do not open the project first. The archive option lives in the right-click context menu on the project's entry in Project Manager.
- Select Export Project Archive.
- Choose your destination folder deliberately. Pick a drive with free space equal to at least your total media size, ideally more. Never point the destination at the same physical drive as your only copy of the source media; that defeats the entire purpose of a backup.
- Set the checkboxes. Media Files is mandatory and will already be checked. Add Render Cache if you want to resume exactly where you left off on a render-heavy Fusion or noise-reduction-heavy project without recalculating. Add Proxy Media if your proxies took significant time to generate and you'd rather not regenerate them.
- Click OK and wait. Large projects take real time. Ten minutes for just over a terabyte, on a reasonably fast system, per Larry Jordan's documented test, is a fair baseline expectation, and slower drives or network destinations will take considerably longer.
- Do not disconnect either drive during the process. Both your source media drive and your destination drive need to stay mounted and awake for the entire copy. A dropped connection partway through can leave you with a partial, unusable archive that looks complete in Finder or Explorer but isn't.
- Verify before you trust it. Check the resulting .dra folder's size against a rough expectation of your total media. If your media pool is 500 GB and your archive folder is 40 GB, something didn't copy, most likely offline clips you missed in step one.
- Test-restore it. Before deleting any original files, restore the archive under a different, temporary project name and confirm the Media Pool comes up clean, with nothing offline. Only then is it safe to treat the archive as your source of truth.
Step by step: how do you consolidate media with Media Management before archiving?
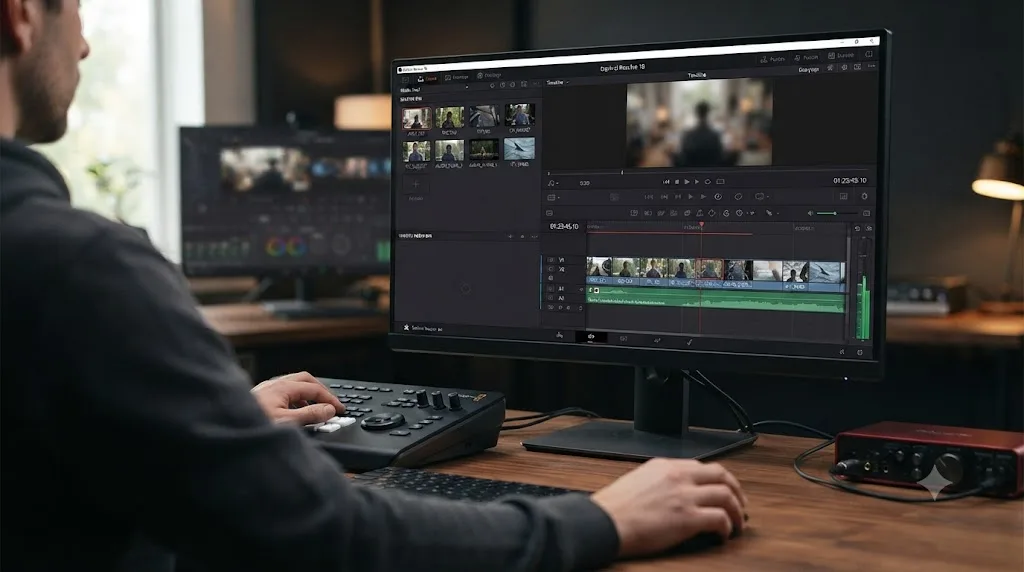
If you decided in the previous section that you need to trim the project first, here's the actual sequence.
- Select what you want to consolidate. In the Media Pool or the Timelines list, select either specific clips or one or more full Timelines, depending on scope.
- Choose File > Media Management. The Media Management window opens.
- Pick your operation: Copy, Move, or Transcode. Copy is the safest default for anyone archiving or handing off, since it leaves your working project's media references untouched.
- Choose your scope: entire project, used media, or used media with handles. For a delivery package or a lean archive, "used media" or "used media with handles" is almost always what you want; "entire project" defeats the purpose of consolidating in the first place.
- Set your handle length if you chose the trim option. A common starting point is 12 to 24 frames, enough room to nudge a cut without needing the full source clip.
- Enable "Consolidate multiple edit segments into one media file" if relevant. This only appears once you've selected the trim option, and it matters most on projects where the same source clip appears cut into many separate pieces across the timeline.
- Choose a destination folder, optionally with "Use project name subfolder" enabled to keep things organized automatically.
- Run it and check the result. Resolve writes the trimmed or copied media to the destination and automatically generates a linked .drt timeline file in the same bin.
- Confirm the new, smaller media set plays back correctly before you consider archiving it or deleting anything from the original location.
Why does the archive still show "Media Offline" after you restore it?
This is the most common complaint tied directly to archiving, common enough that it's its own recurring thread on the Blackmagic Forum, titled plainly "Project Archive - Some media is often offline!" (Blackmagic Forum). There are a handful of distinct, identifiable causes, and each one has a different fix.
Cause 1: The clip was already offline before you archived. Covered above, but worth repeating because it's the most common cause by a wide margin. Archiving copies what exists. It cannot resurrect what was already missing.
Cause 2: Third-party plugins, OFX effects, or LUTs aren't embedded in the archive. A .dra folder captures your media and your project database. It does not install third-party OFX plugins, custom LUTs stored outside Resolve's LUT folders, or Fusion third-party tools on the machine you restore to. The clip itself won't show offline for this reason, but the effect applied to it will show as missing or will render as a flat pass-through, which looks similar and gets reported the same way. Before restoring an archive on a new machine, install the same plugin set and copy any custom LUTs into Resolve's standard LUT directory first.
Cause 3: Fusion generators, external Fusion assets, and some Fairlight elements reference files outside the standard Media Pool. Fusion compositions can reference images, fonts, or asset files directly by file path rather than through the Media Pool, and Media Management and Export Project Archive don't always catch every one of these external references the same way they catch standard clips. A recurring version of this shows up specifically with the Text+ generator: editors copying Fusion clips from a template project report the Text+ node showing offline even though the underlying media source is selected correctly, a symptom of the template's own internal path, not your archive (Blackmagic Forum). The fix in that case is manual, not a setting: drag the correct clip from the Media Pool directly into the Fusion page and reconnect it to replace the offline MediaIn node. If a Fusion page shows a broken loader node after restoring an archive, check the Fusion page's own file paths, not just the Edit page's Media Pool.
Cause 4: You restored directly from a slow or disconnected network location instead of copying local first. Restoring a multi-hundred-gigabyte archive directly off a NAS or cloud-synced folder over a flaky connection can produce partial reads that Resolve interprets as offline media, even though the archive itself is intact. Copy the .dra folder to a fast local or directly attached drive before restoring, every time, regardless of how good your network normally is.
Cause 5: The archive itself was interrupted or incomplete. If a drive disconnected mid-export, or the destination ran out of space partway through without a clear error, you can end up with a .dra folder that looks complete but is missing files. This is exactly why the verification and test-restore steps earlier in this guide aren't optional extras, they're the only way to catch this before you've deleted your only good copy of the source.
One more thing worth ruling out, and it's a completely different bug that just looks similar: if footage plays back fine on the Edit page but the Color page itself looks empty or blank, that's not missing media at all. It's almost always a stuck clip filter, a disabled view toggle, or the Color page pointed at the wrong timeline, none of which has anything to do with your archive. See Color Tab Not Showing Footage if that's what you're actually looking at before you start troubleshooting media loss that was never there.
If you can't answer where every clip in your timeline physically lives, you are not ready to archive. That's not a scare line, it's the practical test. If you genuinely know your source locations, plugin dependencies, and Fusion external assets before you start, you'll catch these five causes before they cost you anything.
How do you restore a DaVinci Resolve project archive correctly?
Restoring is simpler than exporting, but the same "copy local first" discipline from the troubleshooting section applies here too.
- Copy the entire .dra folder to your working drive, not the drive you're archiving from or a network share, before you attempt to restore it.
- Open Project Manager.
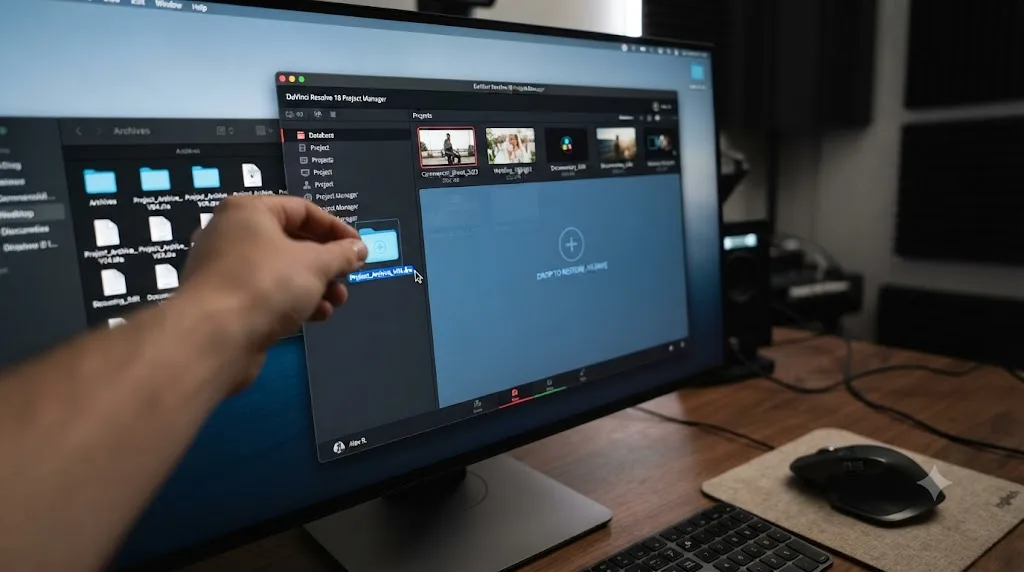
- Right-click inside the Project Manager window (not on an existing project) and choose Restore Project Archive, or simply drag the .dra folder directly from your file browser into the Project Manager window, which JayAreTV notes will "instantly trigger restoration" without needing the menu at all (JayAreTV).
- Navigate to and select the .dra folder if you used the menu path rather than drag-and-drop.
- Enter a unique project name when prompted. You can't restore over an existing project name that's already in your database.
- Click OK and let it finish. Because the media is already fully contained inside the .dra folder, Resolve links everything automatically. There's no manual relinking pass required for a clean archive, which is the entire value proposition of having archived it this way in the first place.
- Open the restored project and check the Media Pool before you do any real work in it, confirming nothing shows offline.
Does restoring an archive move your media, or does the project just keep pointing at the .dra folder?
This is the gotcha that catches people who've done everything else right. You archived correctly, verified the folder size, test-restored it, confirmed nothing showed offline. Weeks later you clean up your drive, delete the .dra folder because you've already "restored it," and every clip in the restored project goes offline again.
Restoring doesn't copy the media a second time into some new working location inside your Project Manager. The official manual says it plainly: "Restoring doesn't move this directory, it only adds the project file within to the Project Manager" (DaVinci Resolve Manual, mirrored). The restored project's Media Pool links directly back to the media sitting inside that .dra folder, wherever you happen to have it parked when you ran the restore.
A restored project is still pointing at the .dra folder you restored it from, not at some fresh copy Resolve made for you. That single sentence is the whole gotcha. The archive isn't consumed or unpacked into a new location on restore. It becomes the ongoing home of that media, for as long as the restored project stays open in your Resolve database.
That's exactly why the manual also stresses making sure "the .dra archive directory is located on a storage volume with suitable performance for you to work" before you restore (DaVinci Resolve Manual, mirrored), not just enough space. If you restore directly from a slow archive drive because "it's already there," you're not borrowing from it temporarily. You're editing off it permanently, until you deliberately move the media elsewhere.
Two practical fixes follow from this. If you want your restored project to live on a fast working drive while your archive stays put on cold storage, copy the .dra folder to the fast drive first, then restore from that copy, and keep the original archive untouched elsewhere as your actual backup. And if you ever do need to relocate a restored project's media afterward, don't just move the .dra folder in Finder or Explorer. Use Media Management's Move operation from inside Resolve, which relinks the project to the new location as part of the move, exactly as the manual recommends for this situation.
What about proxies, render cache, Fusion effects, and Fairlight audio?
Media isn't only camera footage, and archiving decisions get more nuanced once Fusion and Fairlight are involved.
Proxy media. If you generated proxies to edit smoothly with high-resolution camera originals, the Export Project Archive dialog lets you include those proxy files via the Proxy Media checkbox. Including them means you can reopen the archive and get smooth playback immediately, without regenerating proxies on the new system, at the cost of roughly doubling your archive size for codecs where proxies are commonly used. If storage is tight and you're comfortable regenerating proxies later, you can safely leave this unchecked; your original media is what actually matters for long-term integrity.
Render cache. Similarly optional, and mainly worth including if your project has heavy Fusion compositions, extensive noise reduction, or other computationally expensive processing you'd rather not recalculate from scratch. For most straightforward edits, this isn't worth the extra space.
ResolveFX vs third-party OFX plugins. Built-in ResolveFX effects are part of Resolve itself, so they travel with the project automatically on any machine running a compatible Resolve version; nothing extra to archive. Third-party OFX plugins are separate software installed on your system, and they are not embedded in the archive. If your grade depends on a specific third-party plugin, note which one, and reinstall it on whatever machine you restore the archive to, or the effect will be missing or flattened.
Custom LUTs. LUTs applied from Resolve's standard LUT folders generally reference correctly once you make sure the same LUT files exist in the same folder structure on the restoring machine. Custom or downloaded LUTs stored in nonstandard locations are a common gap; keep a personal LUT backup separate from your project archives specifically because of this.
Fairlight plugins and external audio assets. Third-party audio plugins used on the Fairlight page follow the same rule as OFX plugins: they're software dependencies, not media, and won't be inside the .dra folder. Audio files themselves, including any external sound design assets imported into the Media Pool, are treated as standard media and do get archived normally.
Does archiving work differently for Cloud Projects and Network Project Servers?
Everything above assumes a Local Project Library, the default setup where your project database lives on your own machine. If you're on Blackmagic Cloud or a facility's shared Project Server, the same Export Project Archive tool still works, but what it's protecting you from changes.
| Project library type | Where the project database lives | Where media actually lives | Does Export Project Archive still matter? |
|---|---|---|---|
| Local (default) | Your machine's local Resolve database | Wherever you pointed your media, any drive | Yes, it's your only real archive path |
| Blackmagic Cloud | Blackmagic's Project Library servers | Your own local storage; sync to cloud is optional | Yes, cloud sync isn't a substitute |
| Network (PostgreSQL Project Server) | A shared PostgreSQL database on facility infrastructure | Shared facility storage | Yes, plus you need a separate database backup |
Cloud project libraries store your project data on Blackmagic's servers, but never your media by default. When you set up a project on Blackmagic Cloud, you still choose a location for your project media on your own local file system, exactly as with a local project. The manual is explicit on this point: you "Choose a Location for your Project Media" (DaVinci Resolve Manual, mirrored). What Blackmagic hosts is the project database, the thing that lets you and a collaborator open the same edit from different cities. According to the manual, "no actual media is stored on the Blackmagic servers" (DaVinci Resolve Manual, mirrored).
You can opt into syncing media to Blackmagic Cloud Storage, with three settings: don't sync media at all, sync proxies only, or sync proxies and originals. That last option, syncing full-resolution originals, "can use an extremely large amount of storage depending on the amount and size of the original media" (DaVinci Resolve Manual, mirrored), and it's genuinely useful as an off-site copy of your footage. But it's a live sync, not a point-in-time snapshot you can hand someone or restore from a specific date. It protects against a dying local drive, not against a bad edit decision you want to roll back six versions later, and it's not a substitute for the archive discipline covered in this guide. If you want a real, self-contained, portable copy of a Cloud project, you still run Export Project Archive on it, the same as any local project.
Network Project Servers introduce a second database you have to think about separately from your media. A facility running Resolve's collaborative workflow feature hosts individual projects as PostgreSQL databases on a Project Server, shared across an office over local network storage. That database holds the same kind of information a local project's database holds, timelines, bins, color grades, just centralized so multiple edit bays can open the same project. It has nothing to do with where the media itself lives, which is still your facility's shared storage, backed up (or not) by whatever storage infrastructure you already run.
This is where it's easy to assume "our IT team handles backups" covers everything, when in practice, database backups and media backups are two completely separate jobs that nobody owns unless someone explicitly does. Tools exist specifically because Resolve doesn't automate this for network libraries the way it automates local Project Backups: one option runs a full PostgreSQL dump on a schedule, compresses it, and copies it to a separate volume (DVResolve.com). That protects the database, the same way Resolve's built-in Project Backups protect a local database. It still says nothing about your media. If you're on a Project Server, you need the database backup covered by IT or a script, and you still need an Export Project Archive, or an equivalent facility-level media backup policy, for the footage itself, run per project, the same as anyone else.
How much drive space and time should you budget for an archive?
Archive size is driven by total unique media referenced by the project, not by your timeline's runtime and not by how complex your edit looks. A two-minute finished cut assembled from six hours of interview footage still archives all six hours, because Export Project Archive doesn't know or care which frames ended up in the final sequence unless you've already run Media Management or Remove Unused Clips to trim it down first.
As a planning baseline, work from the real example already cited in this guide: roughly ten minutes to archive 1.2 TB of media on a reasonably fast, directly attached drive setup. Scale from there based on your own project size and, more importantly, your drive speed, since that's the actual bottleneck, not Resolve's own processing overhead. A slower external drive, a network destination, or a heavily fragmented source drive will all extend that time significantly beyond what raw file size alone would suggest.
Space-wise, budget for at minimum your total referenced media size at the destination, on top of whatever's already there. If you're also including Render Cache and Proxy Media, expect a meaningful premium on top of that baseline, often 30 to 100 percent more depending on your codec and proxy settings, though Resolve doesn't publish an exact multiplier since it varies by project.
A practical way to avoid nasty surprises: check your Media Pool's total size before you start. Select all clips, and Resolve will typically show aggregate duration and, in some views, size; if you want a hard number rather than an estimate, it's often more reliable to locate your actual media folder in Finder or Windows Explorer and check its properties directly, since that reflects real bytes on disk rather than a Resolve-side estimate. Then check available space on your destination drive, and only start the archive once you've confirmed real headroom, not just "probably enough." An archive that runs out of destination space mid-copy doesn't fail cleanly; it can leave a folder that looks present but is silently incomplete, which is exactly the kind of problem the verification step earlier in this guide exists to catch.
Worked example: sizing an archive for a multicam interview shoot
Numbers make this concrete. Say you shot a three-camera interview and b-roll day: two hours of dialogue across three synced angles, all in 10-bit 4:2:2, plus four hours of b-roll on a fourth camera. Raw footage alone lands somewhere around 1.5 to 2 TB, depending on codec and resolution, before you've touched proxies or render cache.
Your finished cut might run twelve minutes. That doesn't matter to Export Project Archive. It archives what the project references, not what made the final timeline, so unless you ran Media Management or Remove Unused Clips first, your archive scales to that 1.5 to 2 TB of source, not to twelve minutes of picture-locked video.
Using the same rough ratio documented earlier in this guide, roughly ten minutes to archive 1.2 TB on a reasonably fast, directly attached drive (Larry Jordan), a 1.8 TB project in that range lands somewhere around fifteen minutes on comparable hardware, assuming your destination drive can sustain that write speed the whole way through. A slower external drive, a spinning NAS, or a fragmented source volume will push that number up, sometimes considerably.
Now compare three approaches to that same shoot:
| Workflow | What gets archived | Rough size at the numbers above |
|---|---|---|
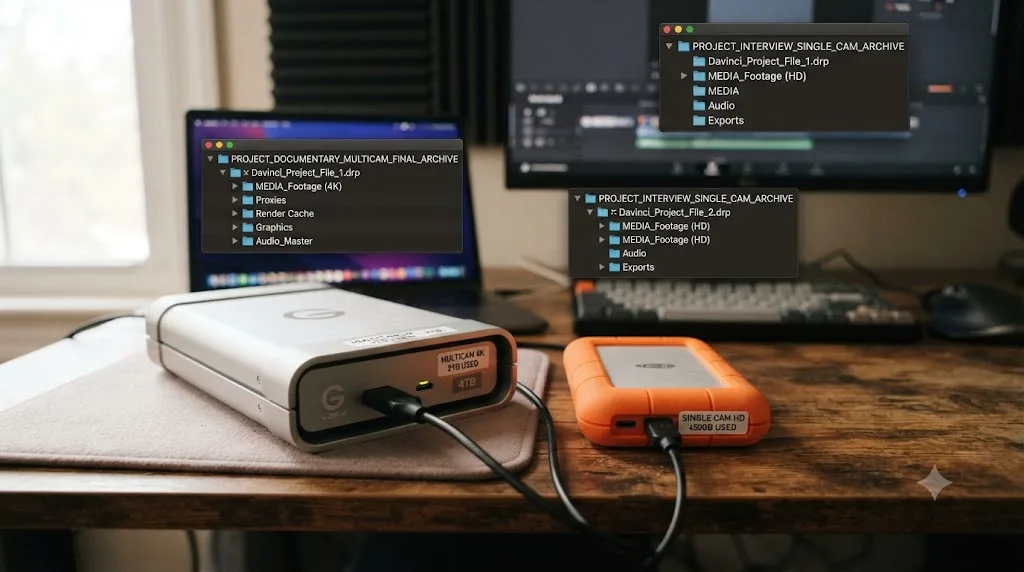
| Archive directly, no consolidation | Every frame of every camera across the full shoot day | ~1.5-2 TB |
| Run Remove Unused Clips first, then archive without further trimming | Everything referenced anywhere in the project's timelines and compound clips, minus anything genuinely never touched | Between the two other rows, closer to the untrimmed total if most footage got used somewhere |
| Run Media Management (used media, 24-frame handles) first, then archive | Only the cut-in dialogue and b-roll, plus a small buffer per cut | A fraction of the raw total, often well under half depending on how much footage actually made the cut |
The bottom row is why the ordering advice earlier in this guide matters in practice, not just in theory. On a twelve-minute cut from six hours of source, Media Management's handle-trimmed consolidation is often the difference between an archive you can comfortably keep on a single portable SSD and one that needs a dedicated multi-terabyte drive you have to buy specifically for this one project.
For a solo, single-camera edit, the same logic still applies, just at a much smaller scale. A one-hour talking-head recording with no b-roll and one set of alternate takes might only run 100 to 200 GB raw. Skipping Media Management there costs you disk space, not much time, and for a project that small, the simplicity of archiving everything directly is often worth more than the disk you'd save trimming it. Match the effort to the project size, not to a rule you apply everywhere by default.
If you're delivering to a client who only needs the graded final output, none of this applies. That's a render, not an archive, and it belongs in your Deliver page settings, not the Project Manager.
Where should you actually store your archives?
An archive is only as good as the drive it lives on, and the choice of storage location introduces its own set of trade-offs.
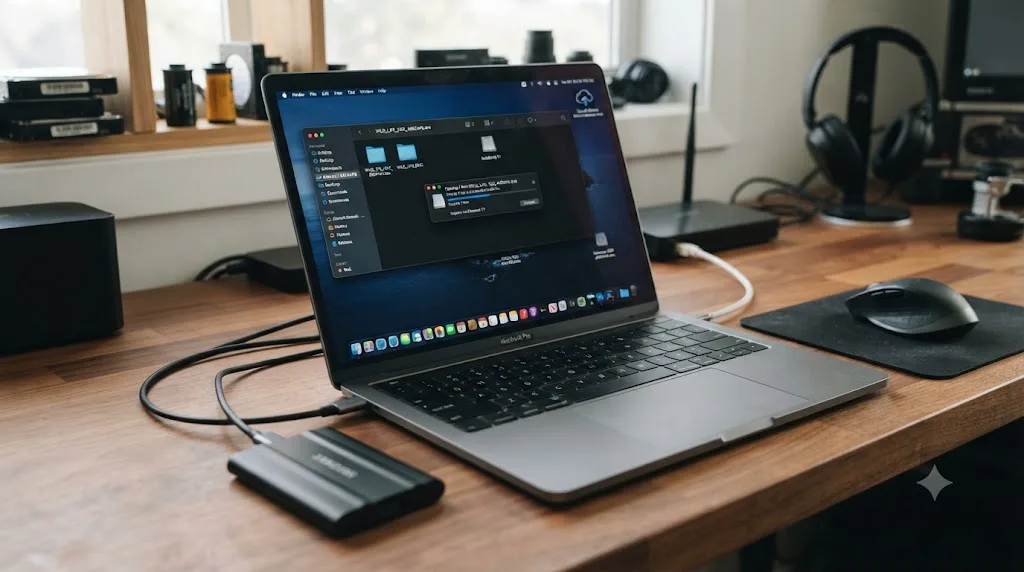
Local internal or directly attached external drives give you the fastest archive and restore times, and they're the most predictable option for the verification and test-restore steps this guide recommends. The downside is obvious: if that drive fails and it's your only copy, the archive is gone with it. Treat a single local drive as a working copy, not your only copy.
Dedicated external HDDs or SSDs kept offline are the practical standard for long-term project archiving in most small studios and freelance workflows: fast enough to restore from directly, physically separable from your day-to-day system, and cheap enough per terabyte to keep more than one. The habit that actually protects you is keeping at least two copies on two separate physical drives, not relying on a single "archive drive" that becomes a single point of failure with a fancier name.
NAS and network storage works fine as a long-term home for archives you don't need to restore from urgently, but don't restore a large .dra folder directly from a NAS over an unreliable connection; copy it to a fast local drive first, exactly as covered in the troubleshooting section above. The archive format itself doesn't care where it sits idle. It cares about read reliability at the moment you restore it.
Cloud storage, including Blackmagic Cloud Storage covered earlier, is reasonable for an additional off-site copy, particularly for smaller projects, but upload and download times for a multi-hundred-gigabyte or multi-terabyte archive can be a real practical constraint depending on your connection. Treat cloud storage as a disaster-recovery copy, not your primary or fastest-access archive.
If you're new enough to Resolve's file structure that even locating your working media, let alone planning a multi-copy archive strategy, feels uncertain, that's a reasonable place to lean on a tool built specifically to watch what you're doing inside Resolve and point at the right menu in real time. TryUncle's assistant, Uncle, runs alongside DaVinci Resolve on macOS and can walk you through the Project Manager, Media Management, and archive dialogs live, on your own project, instead of you pausing a video tutorial to find the ninety seconds that apply to your exact situation. It's a paid macOS app at $34.99 a month, cancel anytime. For a wider look at how AI tools stack up for learning Resolve generally, from ChatGPT's Fusion-expression help to Blackmagic's own free training, see our comparison of AI tools to learn DaVinci Resolve.
What are the most common mistakes that lose media anyway?
Even with the right tool, there are specific habits that quietly undermine an otherwise correct archiving workflow.
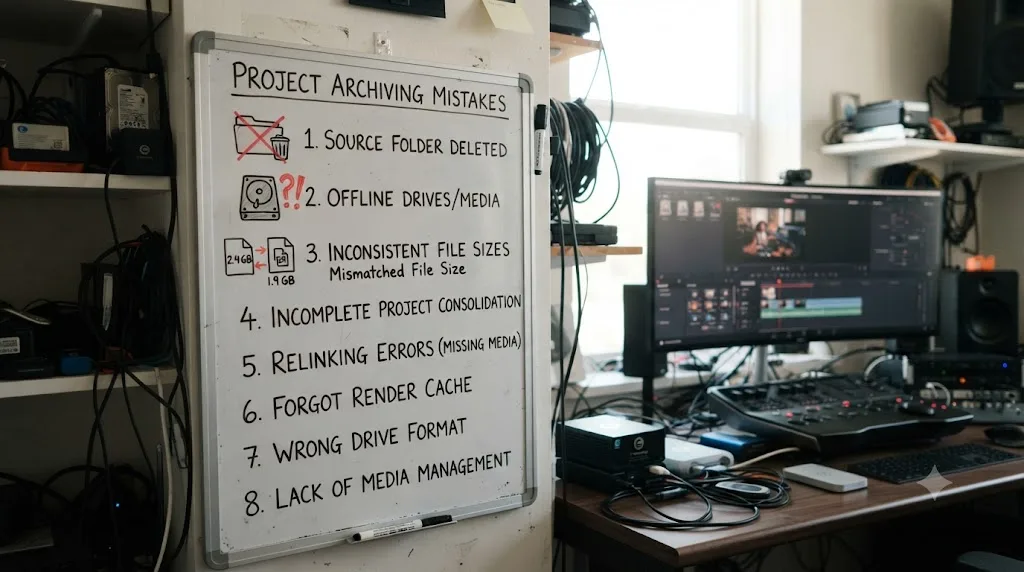
Deleting the project library folder instead of individual projects. This is exactly what happened to Larry Jordan, and it's the single most catastrophic mistake on this list because it doesn't just lose media, it can lose every project on your system at once. Know where that folder lives, and never treat it as generic clutter during a disk cleanup.
Assuming Export Project is the same as Export Project Archive. Covered in detail above, and worth repeating here because it's an easy word to skim past under time pressure. If the word "Archive" isn't in the menu item you clicked, you probably didn't get media.
Assuming Blackmagic Cloud sync is the same as an archive. Syncing full-resolution originals to Blackmagic Cloud Storage is a genuinely useful off-site copy, but it's a live sync tied to your current project state, not a dated, portable snapshot. If you need something you can hand to someone else or restore to an exact point in time, that's still Export Project Archive's job, whether the project lives locally or in the cloud.
Moving or renaming source media between exporting and archiving. If you reorganize your drives, rename folders, or move footage to a new location after importing it into Resolve but before you archive, you can introduce offline clips into the very archive meant to protect you. Relink first, confirm clean, then archive.
Trusting automatic backups to cover media loss. As covered above, backups protect the database, not the footage. Don't let a healthy backup history give you false confidence about your media's safety.
Deleting originals before verifying and test-restoring the archive. This is the step people skip when they're in a hurry to free up disk space. It's also the single cheapest insurance step in this entire guide: restore the archive under a temporary name, confirm the Media Pool is clean, then delete the originals. Skipping straight to deletion turns a recoverable mistake into a permanent one.
Letting a cloud-sync client touch the archive mid-copy. If your destination folder sits inside a Dropbox, Google Drive, or similar sync folder, an in-progress multi-hundred-gigabyte copy can trigger partial uploads, conflicted-copy renames, or sync pauses that corrupt the archive before it's even finished. Archive to a plain, non-synced local or external drive, then copy the finished, verified archive into cloud storage afterward if you want an off-site copy.
Deleting the .dra folder because you already "restored" it. Covered in detail above: restoring doesn't consume or copy the archive into a new location, it links the restored project directly back to that folder. Delete it too soon and the restored project goes offline exactly the same way the original would have.
Ignoring third-party plugin and LUT dependencies until restore time. Note what your project depends on outside of Resolve itself while you still remember, not months later when you're trying to figure out why a grade looks flat on a new machine.
Archive vs Media Management vs Backups vs manual copy: the full decision table
Use this table as the final word when you're not sure which method fits your actual situation.
| Your situation | Recommended method | Why |
|---|---|---|
| You're finishing a project and want a permanent, self-contained long-term copy | Export Project Archive | Only method that guarantees every media file is copied into the package |
| You need to hand a project to a colorist or editor with no access to your storage | Export Project Archive | Self-contained means it works on their system with zero shared paths |
| You're handing a project to someone on the exact same shared storage | Export Project | Small, fast, and their paths already resolve correctly |
| You want to shrink a bloated project down to only what's actually used | Media Management, Copy + Used Media | Trims unused footage without touching your original working project |
| You need trimmed clips with room to adjust cuts slightly later | Media Management, Copy and trim with handles | Keeps a defined buffer of extra frames instead of full source or zero buffer |
| You want to shrink a project fast without transcoding or moving files | Media Pool, Remove Unused Clips | Non-destructive, checks compound clips and Fusion compositions too |
| You're mid-edit and want quick recovery from a bad edit decision | Project Backups (already automatic by default) | Fast, frequent, database-only snapshots, not meant for media loss |
| You accidentally deleted or corrupted footage on your only drive | Neither. This requires a separate media backup or file-recovery process | None of Resolve's built-in tools can recover media that was never copied elsewhere |
| You're reorganizing your own drive layout | Media Management, Move | Relocates and relinks in one pass instead of manual copy-then-relink |
| You want a smaller file to email or upload quickly, no media needed | Export Project | Media stays where it is; only the edit decisions travel |
| You're archiving a Fusion- or Fairlight-heavy project with external plugins | Export Project Archive, plus a manual note of plugin/LUT dependencies | Archive covers media; plugins need separate reinstall on the restoring machine |
| Your project lives on Blackmagic Cloud and you want a real backup, not just cloud sync | Export Project Archive, run locally | Cloud sync protects against a dead drive; it isn't a portable, point-in-time snapshot |
| You're on a facility Network Project Server (PostgreSQL) | Export Project Archive per project, plus a separate PostgreSQL database backup | Database and media backups are two different jobs on a Project Server; neither covers the other |
Archiving a DaVinci Resolve project without losing media isn't really about memorizing menu paths. It's about matching the tool to what you're actually trying to protect, verifying the result before you trust it, and never assuming a small file did a big job. Run Export Project Archive when the goal is genuinely long-term, self-contained storage. Use Media Management or Remove Unused Clips first when you want that archive lean. Keep your automatic Backups running for what they're actually good at, quick recovery from a bad edit, not as a substitute for a real media copy. And before you delete anything original, restore your archive somewhere else and look at it with your own eyes.
Frequently asked questions
- What file extension does a DaVinci Resolve project archive use?
- A project archive is a .dra folder, not a single file. Inside it, Resolve recreates the original folder structure and stores the project database alongside a full copy of every media file the project referenced. When people say 'the .dra file,' they usually mean the whole folder, which you move and copy as one unit.
- Does archiving a project remove the original media from my drive?
- No. Export Project Archive copies media into the new .dra folder. Your original files stay exactly where they were, untouched. That's also why an archive needs as much free space as the media itself: you're duplicating it, not moving it.
- Can I archive a project if some clips are already showing offline?
- You can start the process, but Resolve can only copy media it can currently find. Any clip that's already offline when you start the archive gets skipped, and it will still be offline when you restore that archive later. Relink everything first, confirm nothing is red in the Media Pool, then archive.
- Do I need DaVinci Resolve Studio to export a project archive, or does the free version work too?
- Export Project Archive and Media Management both exist in the free version. Studio-only features, like some Fusion effects, certain noise reduction tools, and Blackmagic Cloud Project Libraries beyond a size limit, don't change whether archiving works. Where free-version users run into trouble is usually a full disk or a permissions issue, not a licensing block.
- Should I archive before or after using Media Management to consolidate?
- After. Run Media Management first to trim the project down to only the media actually cut into your timelines, with the handles you want, then archive that leaner result if you still want a self-contained backup. Archiving first and consolidating second just means you consolidate twice.
- Why does my restored archive still show media offline?
- The most common causes are third-party plugins or LUTs that never travel inside the .dra folder, Fusion or Fairlight assets stored outside the project's own media references, and restoring the archive directly from a slow network location instead of copying it local first. Each of those needs a different fix, covered later in this guide.
- How do I include proxies and render cache in an archive?
- When you choose Export Project Archive, the dialog gives you checkboxes for Media Files, Render Cache, and Proxy Media. Media Files is required. Render Cache and Proxy Media are optional and roughly double the archive's size if you're working in a codec that benefits from proxies, so only check them if you actually need to resume rendering without regenerating cache.
- What's the difference between Export Project and Export Project Archive?
- Export Project creates a small .drp file, often just a few hundred kilobytes, that only points to where your media lives. It's fine for handing a project to someone on the same shared storage. Export Project Archive copies the actual media into the package, so it works anywhere, on anyone's drive, with no shared storage required.
- Does Blackmagic Cloud back up my project automatically, so I don't need to archive it?
- No. Blackmagic Cloud hosts your project database so collaborators can open the same edit from anywhere, and it never stores your media by default. Even if you turn on syncing full-resolution originals to Blackmagic Cloud Storage, that's a live sync of your current media, not a dated, portable snapshot. For a real archive you can restore from a specific point in time or hand to someone else, run Export Project Archive the same as you would on a local project.
Sources
- Larry Jordan: How I Lost All My DaVinci Resolve Projects – and How You Can Save Yours
- Larry Jordan: Managing Projects in DaVinci Resolve – Backups, Exports and Archives
- JayAreTV: DaVinci Resolve Project Archiving & Restoring Explained
- DaVinci Resolve Manual: Using Media Management (Blackmagic Design, mirrored)
- DaVinci Resolve Manual: Options in the Media Management Window (Blackmagic Design, mirrored)
- DaVinci Resolve Manual: What Is Media Management in DaVinci Resolve? (Blackmagic Design, mirrored)
- DaVinci Resolve Manual: Project Backups (Blackmagic Design, mirrored)
- DaVinci Resolve Manual: Archiving and Restoring Projects (Blackmagic Design, mirrored)
- DaVinci Resolve Manual: Removing Unused Media from a Project (Blackmagic Design, mirrored)
- DaVinci Resolve Manual: Accessing the Cloud Project Library (Blackmagic Design, mirrored)
- DaVinci Resolve Manual: Setting up a Blackmagic Cloud Project (Blackmagic Design, mirrored)
- DVResolve.com: How to Backup a DaVinci Resolve Project Server (Network Library PostgreSQL Database)
- PremiumBeat: Your Guide to Working with Project Files in DaVinci Resolve
- Blackmagic Forum: Project Archive - Some media is often offline!
- Blackmagic Forum: Better way to consolidate media files for archive/hand-off
- Blackmagic Forum: The right way of archiving a project?
- Blackmagic Forum: Fusion - Media Offline
- Beginners Approach: How to Export In DaVinci Resolve?
- Beginners Approach: Backup DaVinci Resolve Projects (& Restore)
Learn by doing, not watching
Stop translating tutorials to your timeline.
TryUncle stays beside Resolve on Mac and Windows. When you ask, Uncle sees your screen and points at the exact control you need. No hunting through tabs, timestamps, or mismatched tutorials.
Meet TryUncleKeep reading
 FixesJul 11, 202628 min read
DaVinci Resolve Collaboration Mode Timeline Locked: The Fix
Why DaVinci Resolve locks a timeline, or a whole bin of them, in Multi-User Collaboration, and the fix: give each active timeline its own bin.
 GuidesJul 8, 202633 min read
DaVinci Resolve Color Tab Not Showing Footage: Every Fix
Why DaVinci Resolve's Color page shows an empty timeline instead of your footage, and the exact filter, track, timeline, and cache fixes that solve it.
 ComparisonsJul 11, 202626 min read
The Best AI Tools to Learn DaVinci Resolve in 2026
ChatGPT, Claude, Blackmagic's free training, Recut, and Resolve's Neural Engine compared for learning DaVinci Resolve, and the gap none of them close.