
Learn / DaVinci Resolveupdated for DaVinci Resolve 21.0.3 (July 2026)
What Is ACES Color Management? Explained Simply
Quick answer
ACES (Academy Color Encoding System) is a free, vendor-neutral color standard from the Academy of Motion Picture Arts and Sciences. It converts footage from any camera into one shared color space, so color survives the move between editors, colorists, and VFX houses. DaVinci Resolve includes it free as an alternative to its own Resolve Color Management.
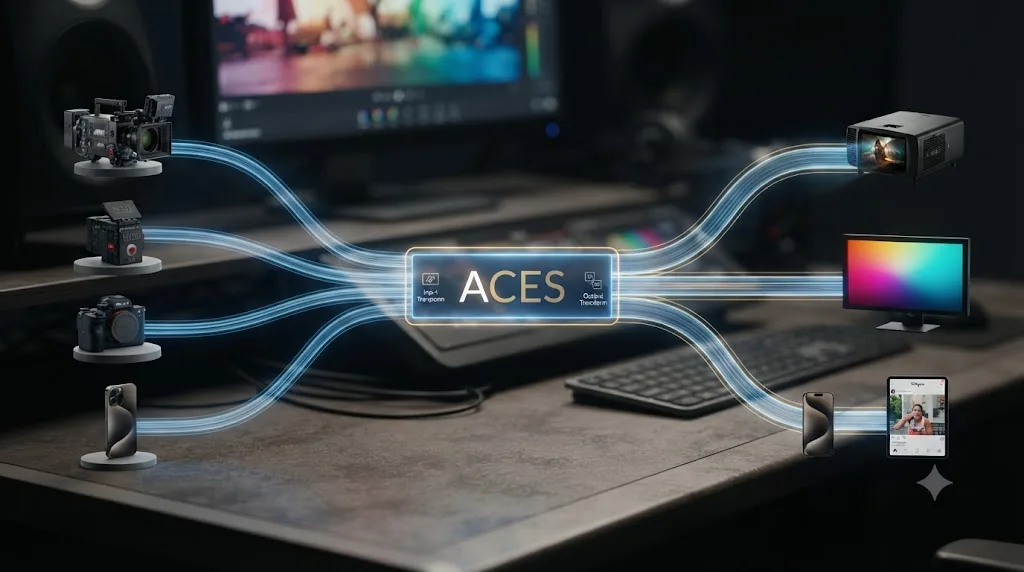
Open Project Settings in DaVinci Resolve, click the Color Management tab, and ACES is sitting right there next to Resolve's own color science, buried in a dropdown with zero explanation attached. In our 100,000+ member professional video-editing community, "what is ACES, actually" is one of the recurring questions people ask, almost always followed by "and do I need it." As of July 2026, running DaVinci Resolve 21.0.3, here's the plain-language answer, no VFX-facility jargon required, plus the click-by-click setup, the camera list, the common mistakes, and the software beyond Resolve that speaks the same color language.
What is ACES color management, in simple terms?
ACES, the Academy Color Encoding System, is a free, vendor-neutral color standard that gives every camera, editing app, and display one shared color language to speak in. It was built by the Academy of Motion Picture Arts and Sciences, the organization that runs the Oscars, and per ACESCentral's own description, it "is a free, open, device-independent color management and image interchange system that can be applied to almost any current or future workflow" (source: ACESCentral).
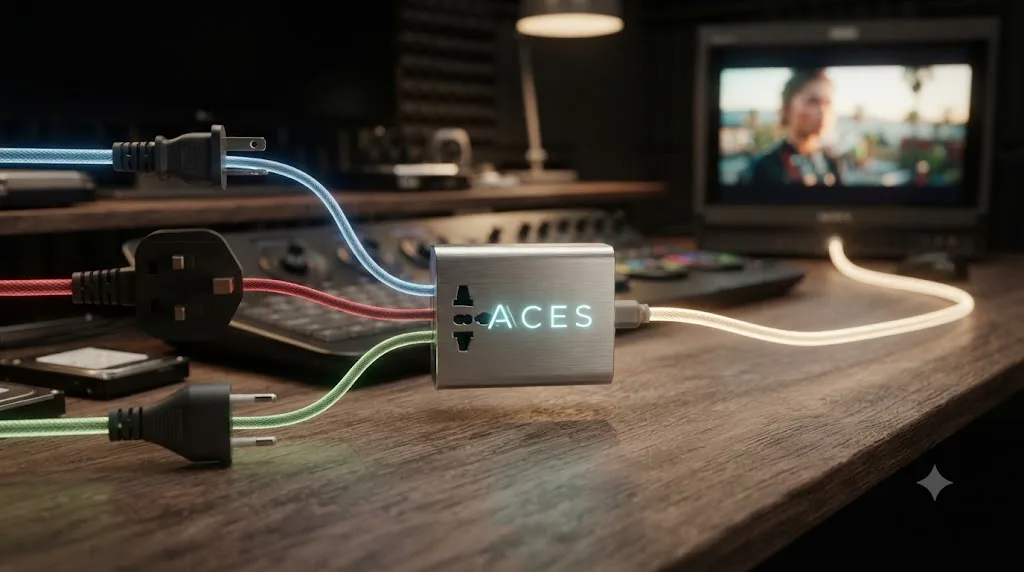
Think of it like a universal power adapter for color. A Sony camera, an ARRI camera, and a RED camera each record color using their own internal math, the same way a US plug and a UK plug carry electricity differently. ACES doesn't change what any of those cameras capture. It gives every one of them a common adapter, so the picture that comes out the other end behaves the same way regardless of which camera it started on.
ACES isn't a plugin, a filter, or a look you apply to footage. It's a shared translation layer that every camera, editing tool, and display can plug into. Ben Bailey, writing for Frame.io's Insider blog, puts the distinction plainly: "ACES is not just a program or plugin you can download... Rather, ACES is a collection of rules for encoding and transforming data, along with metadata definitions for that data" (source: Frame.io Insider). That's the whole concept in one sentence. ACES is a rulebook, not a piece of software you install.
Who created ACES, and why does the Academy run a color standard?
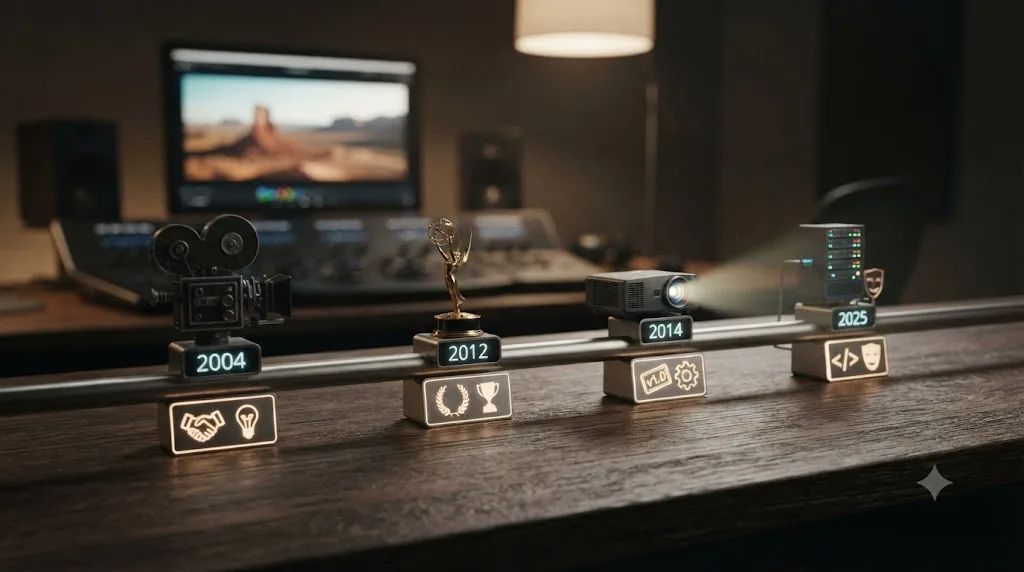
The Academy of Motion Picture Arts and Sciences started the ACES project in 2004, with roughly 50 industry technologists working on it, according to Wikipedia's entry on the system (source: Wikipedia). The Academy runs it because the Oscars sit at the center of the same film industry ACES was built to serve, and its Science and Technology Council already existed to solve exactly this kind of cross-industry technical problem.
The motivation was practical, not academic. Before digital cameras multiplied across sets, film negative was the one shared physical format everyone graded from. Once productions started mixing digital cameras from a dozen manufacturers, each with its own proprietary color science, that shared reference point disappeared. A studio delivering a film shot on five different camera systems, headed to VFX houses, colorists, and archives that might not touch the same software twice, needed a standard nobody owned and everybody could trust.
That work paid off publicly in 2012, when ACES received a Primetime Engineering Emmy Award, per the same Wikipedia entry. The system reached its first production-ready release, ACES 1.0, in December 2014, after what the Academy's own materials describe as over a decade of research, testing, and field trials.
In August 2025, governance of ACES moved from the Academy directly to the Academy Software Foundation, the same open source home that hosts related projects like OpenColorIO and OpenEXR. Annie Chang, VP of Creative Technologies at NBCUniversal, explained the move this way: "ACES has become a foundational part of modern motion picture workflows, shaped through cross-industry collaboration across hundreds of filmmakers, technologists, and color scientists. Joining the Academy Software Foundation will ensure that ACES continues to evolve in an open and collaborative environment, benefiting filmmakers and content creators around the world" (source: Academy Software Foundation).
The Academy didn't build ACES to sell software. It built ACES because the film industry needed one color standard nobody owned, so every camera, studio, and colorist could trust the same math. That's still the entire reason it exists, twenty years after the project started.
What problem does ACES actually solve?
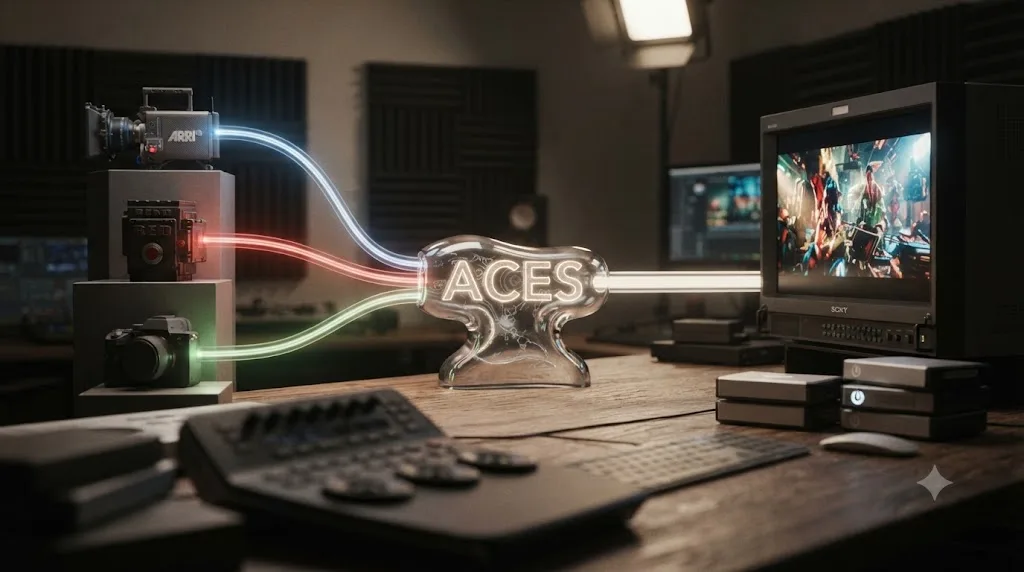
ACES solves the problem of mismatched footage looking like mismatched footage once it lands on the same timeline. Every digital camera converts light hitting its sensor into color values using its own proprietary math, so an ARRI Alexa, a Sony VENICE, and a RED camera each describe the exact same lighting setup with different numbers. Grade them side by side without a shared translation step, and matching them becomes trial and error, clip by clip.
ACES fixes that by adding one shared middle stage. Every clip, no matter which camera shot it, gets converted into the same working color space before anyone touches a color wheel. Grading happens inside that shared space, where the tools behave consistently regardless of source. Then, on the way out, the graded image converts one more time to whatever the final delivery format actually needs, a Rec.709 file for the web, a P3 file for cinema, an HDR file for a streaming platform.
ARRI, whose own cameras support ACES-compliant delivery, frames the appeal from a manufacturer's side as vendor neutrality: ACES is a "global standard for managing color in motion picture, television, video game, and immersive media production," developed over roughly twelve years with contributions from manufacturers across the industry (source: ARRI). That neutrality is the entire pitch. No single camera brand or software company controls what ACES does, so nobody has to trust a competitor's proprietary format to make their own footage behave predictably.
A color standard nobody owns is exactly what makes it useful, since it means an ARRI camera, a RED camera, and a Sony camera can all speak the same color language without any one manufacturer controlling the conversation. That's the practical value underneath all the technical vocabulary the rest of this page walks through.
What do IDT, RRT, ODT, and LMT actually mean?
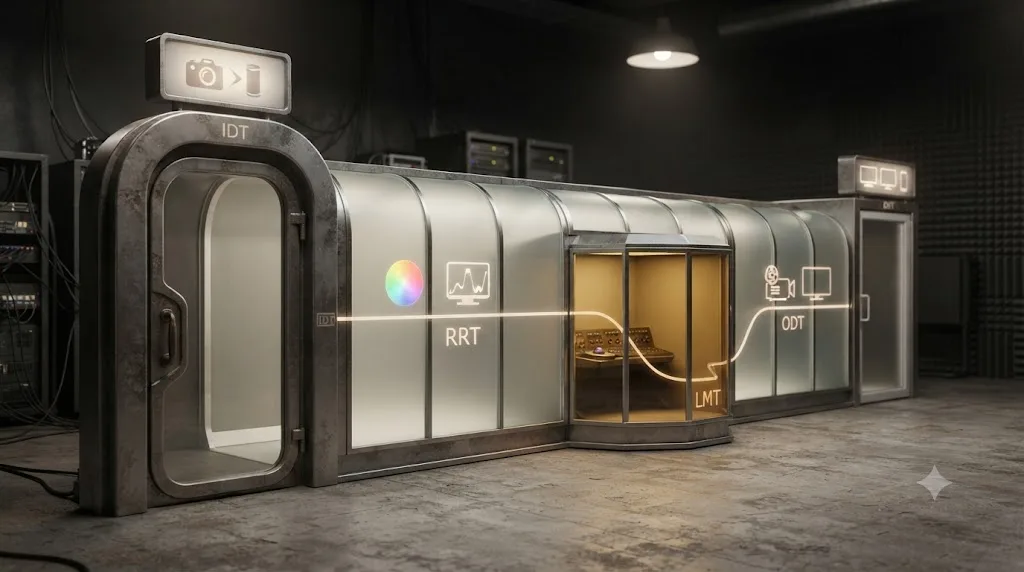
These four letters cover the entire ACES pipeline, from footage going in to a finished image coming out. Each one handles a distinct stage, and none of them do the other's job.
| Term | Full name | What it actually does |
|---|---|---|
| IDT | Input Transform (formerly Input Device Transform) | Converts your camera's native footage into the shared ACES working space |
| RRT | Reference Rendering Transform | Applies a film-like response curve to the ACES data so it can map cleanly to any display |
| ODT | Output Device Transform | Converts the rendered image to your specific delivery target, like Rec.709 or P3 |
| LMT | Look Modification Transform | An optional creative look applied on top of the standard pipeline, without disturbing the underlying color math |
Per Wikipedia's technical breakdown, the RRT "converts the scene-referred colorimetry to display-referred" and "resembles traditional film image rendering with an S-shaped curve," while the ODT serves as "a guideline for rendering the large gamut and wide dynamic range of the RRT to a physically realized output device with limited gamut and dynamic range" (source: Wikipedia). LMT sits apart from that core chain entirely, applied "in combination with the RRT and ODTs" specifically so a creative grading choice never has to touch the underlying scene-referred math.
Here's the plain version. IDT is the door footage walks in through. RRT and ODT together are the hallway and the exit, turning scene light into something a screen can display. LMT is a coat of paint you can add on top, entirely optional, that doesn't change the structure underneath it.
IDT gets footage in, RRT and ODT get an image out, and LMT is the only optional stop in between. Once you can name what each of those four letters is actually responsible for, the rest of an ACES settings panel stops looking like a wall of unexplained acronyms.
What's the difference between ACES2065-1, ACEScg, and ACEScct?
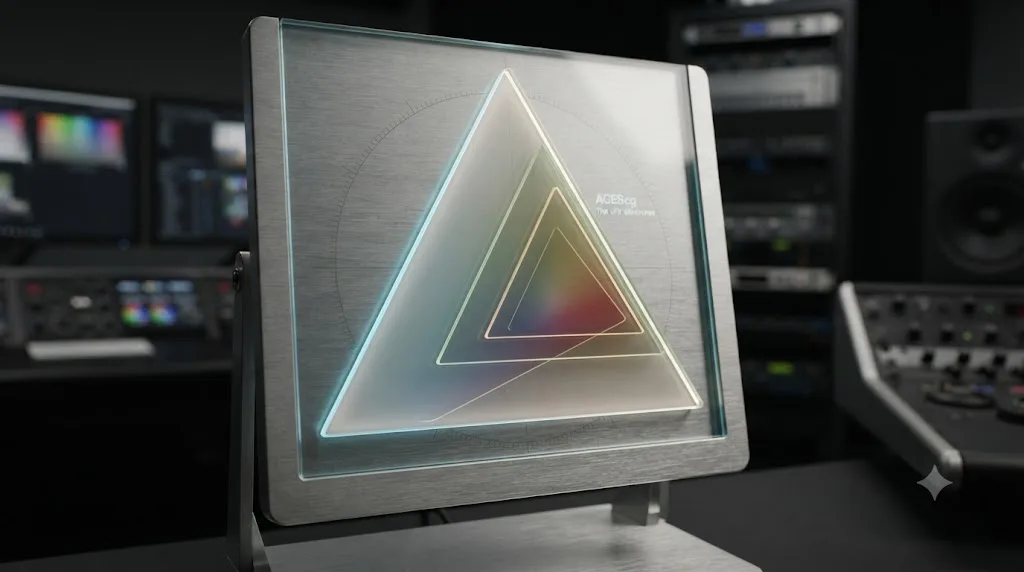
These three are working color spaces, meaning they're where the actual pixel math happens at different stages of a project, and mixing them up is one of the most common points of confusion for anyone new to ACES.
| Working space | Built for | What makes it different |
|---|---|---|
| ACES2065-1 (AP0) | Archival storage and interchange | An extremely wide, scene-linear space that can encode any visible color, used as the master format for long-term archiving and cross-facility delivery |
| ACEScg (AP1) | VFX and compositing | A scene-linear space with a narrower, more practical gamut than AP0, built so 3D rendering and compositing software can work with ACES data efficiently |
| ACEScct | Color grading | A logarithmic space with a gentle toe near black, designed to feel familiar to colorists used to grading log-encoded film and camera footage |
That structure exists because no single working space is efficient for every job. ACES2065-1's enormous gamut is exactly right for an archival master nobody wants to recompress later, but it's mathematically heavier than a VFX render pipeline needs day to day. ACEScg trims that down to something a compositor can actually work in without extra overhead. ACEScct trims it differently again, adding a log curve specifically so a colorist's Lift/Gamma/Gain tools respond the way they already expect from years of grading log footage.
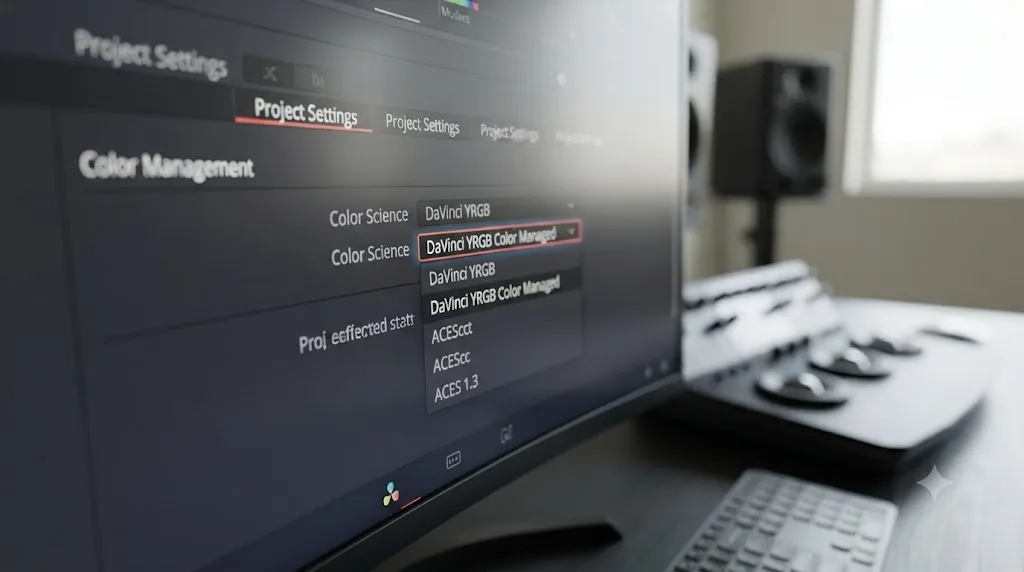
If you've opened DaVinci Resolve's Color Science dropdown and seen "DaVinci ACEScc" and "DaVinci ACEScct" listed as separate options, that's this same working-space distinction in miniature. Per Blackmagic's own reference manual, ACEScc applies "a standard Cineon-style log encoding to the ACES data," while ACEScct is "a variation of ACEScc that adds a roll-off at the toe of the image" specifically to make lift operations feel more like grading film, and to make it "easier to raise the darkest values" (source: DaVinci Resolve Reference Manual). Most colorists default to ACEScct for exactly that reason. It's gentler to grade against.
Three working spaces exist inside ACES because archiving, compositing, and grading each need a different tradeoff between color precision and practical performance. Picking the wrong one for the job in front of you doesn't break your footage, it just makes that specific task heavier than it needed to be.
How do you actually turn on ACES in DaVinci Resolve?
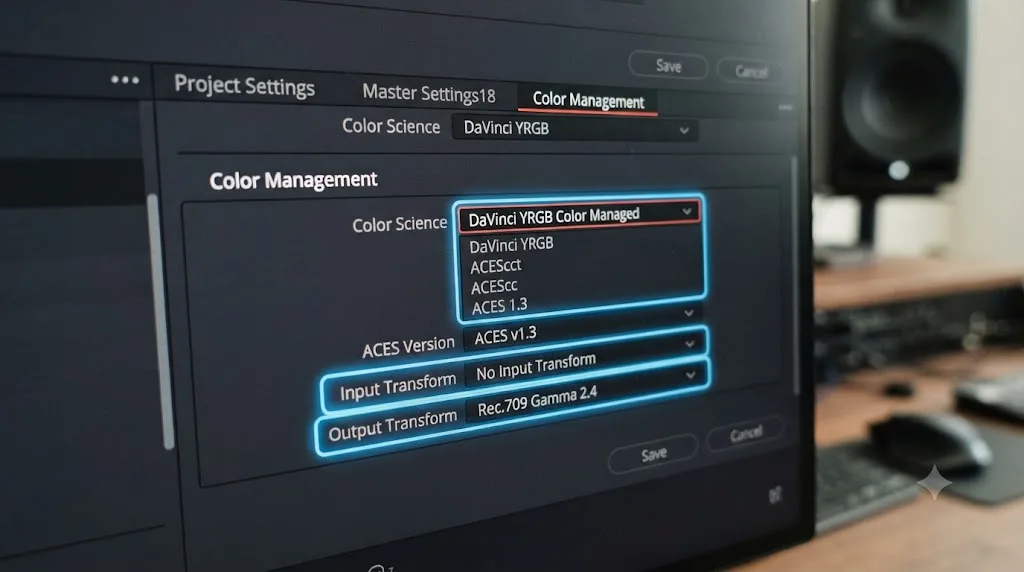
Understanding the vocabulary is one thing. Finding the actual switches is another. Here's the click path, per Blackmagic's own reference manual and a step-by-step build published by Frame.io's Dan Swierenga (source: DaVinci Resolve Reference Manual; source: Frame.io Insider):
- Open Project Settings (Shift+9) and click the Color Management panel.
- Set Color Science to DaVinci ACEScc or DaVinci ACEScct. ACEScct is the more common pick, since its softer toe roll-off matches how colorists already expect Lift to behave.
- Choose your ACES version, from ACES 1.0.3, 1.1, 1.2, 1.3, or 2.0 where available. Match this to whatever facility, colorist, or studio you're delivering to, if there is one.
- Set the ACES Input Transform (IDT). Leave it on "No input transform" for RAW footage, since, per Swierenga, "any RAW files will be converted to ACES by default in Resolve without any need to set an input color space." For non-RAW formats like ProRes, DPX, or XAVC, you have to manually assign the matching IDT yourself, camera by camera, by right-clicking clips in the Media Pool.
- Set the ACES Output Transform (ODT) to your delivery target, Rec.709 for web, P3 for cinema, Rec.2100 PQ for HDR. If you're exporting a master for interchange rather than final delivery, set it to "No output transform" instead, which produces linear AP0 files meant for another facility to grade or convert.
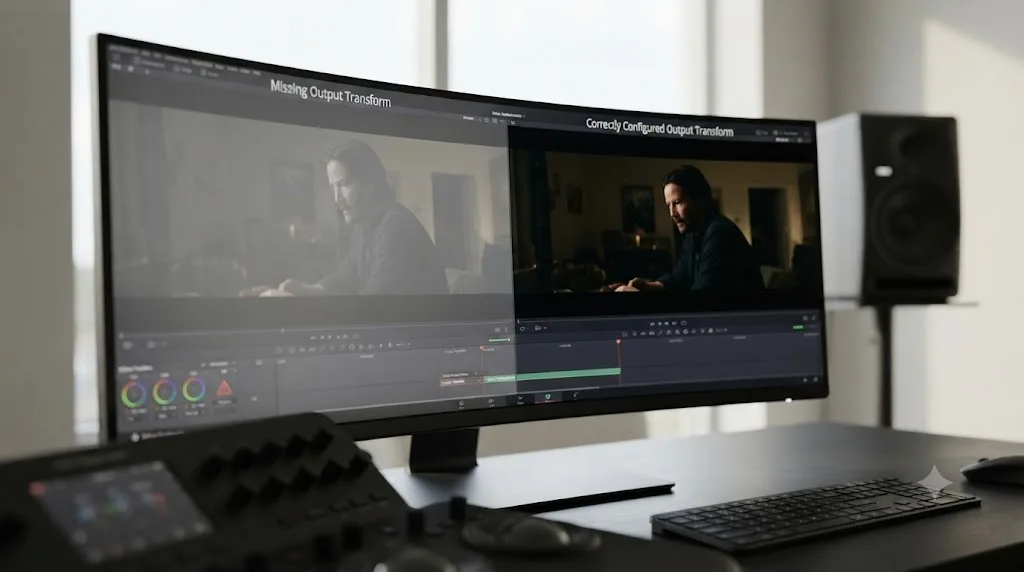
That last step trips up more people than any other setting on this list. Swierenga notes plainly what happens if you pick "No output transform" and then look at your monitor: "This is normal. They're not supposed to look correct on your monitors without an output transform" (source: Frame.io Insider). A washed-out, low-contrast preview under that setting isn't a bug. It's linear ACES data doing exactly what it's supposed to do before a display transform touches it.
The Input Transform and Output Transform dropdowns aren't optional extras bolted onto ACES. They're the two ends of the pipeline, and skipping either one leaves footage stuck in a color space no monitor or delivery spec actually wants. Set both, every time, before you start grading.
Which cameras does the ACES Input Transform dropdown actually support?
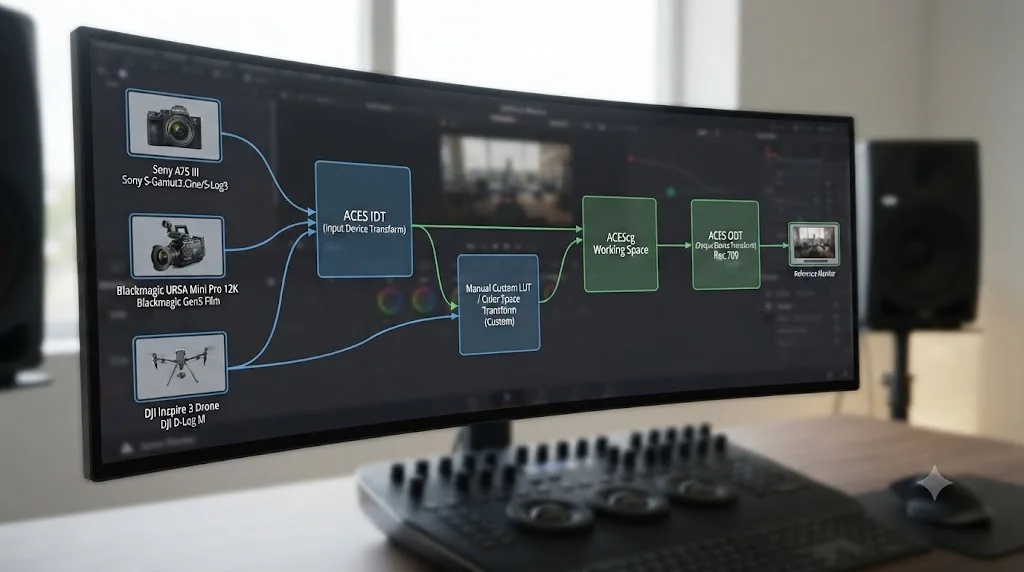
The IDT dropdown isn't a blank field you type into. It's a curated list, and which cameras show up on it matters if your footage doesn't come from one of the big names.
| Camera brand | ACES IDT support | Where it comes from |
|---|---|---|
| ARRI | Built into Resolve, plus ARRIRAW Converter (ARC) for advanced cases | ARRI-published IDTs |
| RED | Built into Resolve; also selectable in REDCINE-X PRO's "Use ACES" export | RED-published IDTs, tuned for its IPP2 color engine |
| Sony | Built into Resolve; also selectable via Sony's RAW Viewer software | Sony-published IDTs |
| Canon | Built into Resolve | Canon-published IDTs |
| Panasonic | Built into Resolve | Panasonic-published IDTs |
| Blackmagic Design | Built into Resolve | Developed by Blackmagic itself, since Blackmagic Design is an official member of the ACES project |
| Generic broadcast | Rec.709 and Rec.2020 transforms available for non-camera-native sources | Standard ACES transforms, not camera-specific |
Per the Dehancer Blog's own summary, DaVinci Resolve ships with "built-in profiles for all major camera makers: Arri, Red, Canon, Blackmagic Design, Panasonic, Sony" (source: Dehancer Blog). Anything shot on one of those six brands has a direct path into ACES with no guesswork.
Here's a worked example. Say you're cutting a wedding film shot on a Sony a7 IV for ceremony coverage, a DJI drone for aerials, and a Blackmagic Pocket Cinema Camera for a second angle. The Sony and Blackmagic footage both have direct, camera-specific IDTs waiting in the dropdown, no manual work beyond selecting the right one per clip. The DJI drone footage doesn't, since DJI isn't one of the six brands with a published IDT in Resolve's list. In that case, you'd assign the closest generic transform, usually Rec.709 for standard drone footage, or treat the drone clips as a non-ACES-managed layer and match them to the graded ACES footage by eye afterward. That mismatch is common enough on real projects mixing consumer and professional cameras that it's worth planning for before you start grading, not after.
Do LUTs and CDLs still work inside an ACES pipeline?
Yes, but the color space you apply them in decides whether they work correctly or just look wrong in a new way.
Most colorists already own a stack of Look Modification assets before they ever open Project Settings: a .cube LUT bought as part of a color pack, a CDL handed over by a DIT after a shoot day, maybe a CLF file built by a VFX facility for a specific show look. None of that gets thrown out the moment you turn ACES on. It just has to land in the right stage of the pipeline.
Start with the CDL, since it's usually the first one to arrive. ASC-CDL (American Society of Cinematographers Color Decision List) is a metadata format built by the ASC's Technology Committee specifically so basic color corrections could move between different software and hardware without anyone re-typing numbers by hand. Per Mixing Light's own explainer, "Like an EDL communicates basic edit data, a CDL carries a subset of color-correction data" (source: Mixing Light). A CDL only carries three primary controls, Slope (Gain), Offset (Lift), and Power (Gamma), plus Saturation since version 1.2. It deliberately leaves out power windows, tracking, secondaries, and plugins, since those tools don't translate cleanly between different color-grading systems the way three numbers per channel do.
That narrowness is exactly what makes a CDL useful as an ACES-era look decision. It's small enough to survive a round trip between a DIT's on-set laptop, an editor's offline cut, and a colorist's ACES-managed timeline, without any of those tools needing to speak the same proprietary format.
Inside DaVinci Resolve, you can import ASC CDL files through the Gallery panel and apply them as grades on timeline nodes, though the underlying XML sometimes needs manual reformatting to import cleanly. LUTs and LMTs work a little differently, and the setting most people miss is which ACES space the file actually expects. Per a technical discussion on the ACESCentral community, a .cube LUT built with an embedded Log2 48-nit shaper, the same curve ACEScc uses, needs Resolve's "process node LUTs in" setting pointed at AP1, the working-space gamut. A CLF (Common LUT Format) file needs the opposite: AP0, ACES2065-1's linear space, because the CLF format already bakes in the conversion from AP0 to the LUT's own space and back again (source: ACESCentral community). Get that dropdown backward and the look isn't wrong exactly, it's being applied in a color space the LUT was never built for, which usually shows up as crushed shadows or blown highlights that don't respond the way the look should when you grade around them.
| Format | Built for | Resolve setting | Availability |
|---|---|---|---|
| .cube LUT (Log2 48-nit shaper) | ACEScc/ACEScct working space | Process node LUTs in AP1 | Free and Studio |
| CLF (Common LUT Format) | ACES2065-1 linear | Process node LUTs in AP0 | Resolve Studio only |
| ASC CDL | Primaries-only interchange | Imported via Gallery panel, applied to timeline nodes | Free and Studio |
That CLF row is worth calling out on its own, since it's the one real exception to "ACES ships completely free in Resolve." The core IDT, RRT, and ODT pipeline this page has walked through, along with every built-in camera and display transform, works identically in the free version and DaVinci Resolve Studio. CLF-based LMTs specifically require Studio. If a VFX facility hands you a CLF-format look and you're running the free version, you'd need to either upgrade or ask for a .cube export of the same look instead.
Best practice, regardless of format: apply the LMT or CDL at the timeline level rather than clip by clip. In the Color page's node editor, switching the target dropdown from "clip" to "timeline" lets one LUT node sit above every clip in the project, so a scene-wide creative look stays toggleable and doesn't have to be copied onto each new shot as it's added.
A CDL from a DIT and an LMT built for a VFX facility are solving the same problem in two different file formats: how to move a creative color decision between tools without baking it permanently into the pixels. Get the AP0/AP1 setting right and both slot into an ACES pipeline exactly the way they're supposed to.
Is ACES the same thing as DaVinci Resolve's own color management?
No, and this is the mix-up that sends most people searching for this exact page. Resolve Color Management (RCM) is Blackmagic Design's own, separate color science engine, built entirely in-house and tuned to match the feel of Resolve's Color page controls. ACES is the Academy's standard, developed independently and supported inside Resolve as a second, distinct option in the same Color Science dropdown.
Both solve the identical underlying problem, converting mismatched camera footage into one shared space before grading, but they use different math to get there. Cullen Kelly, a senior colorist writing for Frame.io Insider, frames it as "two solutions to the same fundamental problem," explaining that even with identical input and output settings between the two systems, "the image changes a bit" (source: Frame.io Insider). That's why identical footage run through RCM and through ACES with matching settings still looks slightly different, and it's why Kelly's advice is to commit early: "once you've selected one, you must commit to it. The worst thing that you can do is second guess your color grade midway."
| Option | What it is | Best fit |
|---|---|---|
| No color management (default) | Resolve applies no scene-referred conversion; you grade raw footage directly | Quick single-camera edits where matching isn't a concern |
| Resolve Color Management (RCM) | Blackmagic's in-house scene-referred system, tuned to Resolve's own controls | YouTube, corporate, and single-editor projects staying inside Resolve |
| ACES | The Academy's vendor-neutral standard, shared across the industry | Projects handed to a VFX facility, outside colorist, or an ACES-fluent studio |
Neither RCM nor ACES is a beginner setting and neither is the professional setting. They're two separate systems, and choosing between them depends on who else touches your footage after you, not on which one sounds more advanced. This page exists to explain what ACES actually is. Our full Resolve Color Management vs. ACES comparison walks through that decision with a complete side-by-side breakdown, worked examples, and a decision table.
What changed in ACES 2.0, and does DaVinci Resolve support it?
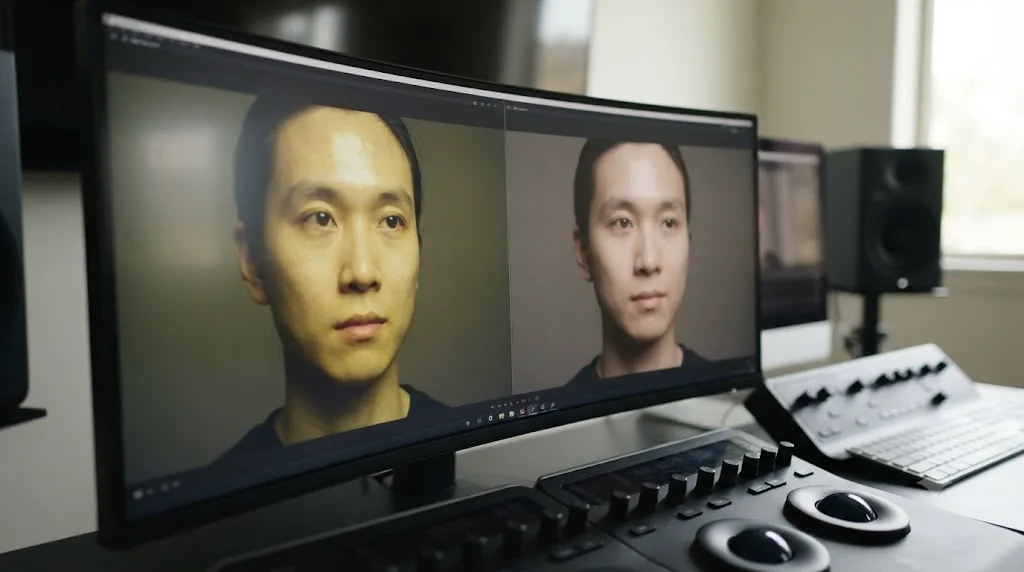
ACES 2.0 addressed the two complaints that followed the older version around for years: a harsh highlight rolloff and a yellow tint that crept into skin tones as exposure increased. Aniket Bhattacharjee, breaking down the update for cubiecolor, describes the older version's tone curve as "contoured" and "aggressive," and explains that 2.0 replaces it with a softer, more even highlight compression built on what he calls a "norm-based ratio-preserving tone-scale." Technically, that means instead of applying the tone curve to individual red, green, and blue channels separately, the system calculates a norm, essentially an average, from all three channels first, then applies the tone curve to that combined value (source: cubiecolor). In plain terms, colors that used to shift hue as they got brighter now hold their hue much more consistently through the same highlight range.
ACES 2.0 was announced for end users at NAB Show 2025, and Blackmagic Design used that same show to unveil Resolve 20, which the Academy's own press materials describe as shipping "beta support for ACES 2.0" (source: ACESCentral). Other vendors moved at their own pace around the same window: SGO integrated support into its Mistika line, Pomfort added it to Silverstack and Livegrade for on-set metadata, and Autodesk brought it to Flame in spring 2025.
DaVinci Resolve 21 doesn't reset that work, it builds on it. Per Resolve 21's own release notes, the Color page picked up "ACES AMF improvements, with transform name and custom folders" (source: Newsshooter). AMF stands for ACES Metadata File, a sidecar XML document that travels with footage and records exactly which IDT, LMT, and creative look decisions were made on set or in editorial, so a colorist or VFX vendor downstream can reconstruct the same viewing pipeline instead of guessing at it. Naming transforms clearly and organizing them into custom folders sounds minor, but on a project passing through multiple facilities, it's the difference between an AMF file that's self-explanatory and one that needs a phone call to decode.
If your last hands-on experience with ACES left you unimpressed by yellow-tinted skin or clipped highlights, that was almost certainly ACES 1.x, and it's worth a second look now that 2.0 is available in any recent Resolve release.
A color standard that gets a version 2.0 isn't standing still, and if your last experience with ACES is more than a couple of years old, it's already out of date. ACES 2.0's whole purpose was fixing the specific complaints colorists had about the version before it.
Does ACES work with DaVinci Resolve's Fusion page?
Yes, and it happens automatically, but the Fusion page has one quirk worth knowing about before you build a comp inside an ACES project.
Turn ACES on for a project, and any composition built in Fusion, Resolve's built-in node-based compositor, works in linear, scene-referred color by default. Specifically, Fusion operates in ACEScg, the same AP1 working space covered earlier as the space built for VFX and compositing. Footage flows out of the Color page's ACES pipeline into Fusion as ACEScg data, gets keyed, tracked, and composited in that space, then flows back out to ACEScc or ACEScct for grading once the comp is finished. None of that requires manually converting anything. Resolve's own color management handles the conversion in both directions.
The catch sits in what you actually see on screen while you work. Fusion has its own on-screen preview, separate from the Color and Edit page viewers, and by default it applies a "view LUT" that renders a plain sRGB output. That output doesn't match whatever ACES Output Transform is actually driving the rest of the project, Rec.709, P3, or Rec.2100 PQ. The result: a comp can look correct in Fusion's own viewer and then look different the moment you cut back to the Color page monitoring the same shot (source: Mixing Light). It's not a bug in either page. It's two viewers applying two different transforms to the same underlying data.
Two fixes solve it. Either disable Fusion's default view LUT entirely and attach an ACES transform node directly onto the composite flow, so the Fusion viewer applies the exact same Output Transform the rest of the project uses, or install an OCIO configuration and swap in an OCIO view LUT in place of the default managed one.
Here's why this matters beyond a cosmetic mismatch. Say you're keying a green screen shot and building a light wrap around the subject's edge, entirely inside Fusion, on an ACES-managed timeline. If you grade that edge treatment by eye against Fusion's default sRGB-mismatched viewer, you're matching the wrap to a preview that isn't showing what the colorist's monitor, or the final delivery format, will actually show. The composite might look perfect in Fusion and then need re-touching the moment it lands back on a correctly configured Color page node.
Fusion doesn't break an ACES pipeline, but its default viewer can lie to you about what the rest of the project is actually showing. Fix the view LUT mismatch before you trust a composite by eye, not after.
What other software besides DaVinci Resolve supports ACES?
ACES being vendor-neutral only matters in practice if the rest of the industry actually implements it, and coverage varies more than you'd expect between color-focused tools and general editing apps.
| Application | ACES support | Notes |
|---|---|---|
| DaVinci Resolve | Full, including ACES 2.0 | Free and Studio versions identical on this |
| FilmLight Baselight | Full, native | Standard in high-end color finishing |
| Foundry Nuke | Full, via OCIO v2 | Native since Nuke 13.1 |
| Autodesk Flame | Full, via OCIO | Flame 2026 replaced its old SynColor engine with OCIO, aligning it with Nuke, Maya, and other Autodesk tools |
| Adobe After Effects | Full, via OCIO | Added in the 23.2 update (February 2023) through an OCIO Color Engine option in Project Settings |
| SGO Mistika | Full, including ACES 2.0 | Confirmed by the Academy's own ACES 2.0 end-user release notes |
| Pomfort Silverstack / Livegrade | On-set metadata support | Used to carry ACES look decisions from set into post |
| Adobe Premiere Pro | Not yet | An OCIO/ACES workflow request has been open on Adobe's own community feature-request board since November 2023, still marked open as of this writing |
That last row matters if your pipeline includes Premiere Pro anywhere. Adobe added OCIO and ACES support to After Effects back in 2023 (source: Adobe Help Center), but Premiere Pro itself still doesn't have a native equivalent, according to the open feature request on Adobe's own community site (source: Adobe Community). If a cut moves between Premiere Pro for editorial and Resolve or Baselight for color, the ACES handoff happens at the color stage, not inside Premiere itself.
The practical takeaway is that ACES has real reach across the tools most likely to touch a VFX-heavy project, which is exactly the scenario where using it pays off. It has almost no reach yet inside the editing app most YouTube and corporate creators actually cut in, which is one more reason a solo editor staying inside Premiere or a lighter NLE has less to gain from setting it up.
What does a real, professional ACES delivery spec actually look like?
Every setting on this page so far has been explained in the abstract: pick an IDT, pick an ODT, pick a version. It helps to see those choices made for real, inside an actual delivery requirement document from a studio that receives ACES-managed projects from outside colorists every day.
Netflix publishes its own partner-facing guidance for a color-managed ACES workflow in DaVinci Resolve, aimed at the post facilities and colorists delivering content to the platform (source: Netflix Partner Help Center). It's a useful reference precisely because it isn't theoretical. It's the checklist an actual facility works against before a master ships.
| Setting | Netflix's guidance |
|---|---|
| Color Science | ACEScct |
| ACES version | The latest version available, described as version-agnostic rather than locked to a number |
| Input Transform (IDT) | Automatic for RAW; matched manually to the source camera's native color space for non-RAW footage, for example Sony S-Log3/S-Gamut3.Cine |
| SDR Output Transform (ODT) | Rec.709/BT.1886, monitor calibrated to 100 cd/m² peak luminance |
| HDR Output Transform (ODT) | P3-D65 ST.2084 (PQ), 1000 nits |
| ACES Mid Gray Luminance | Fixed at 15.00 for the entire grading and finishing process |
| Archival deliverable | Non-graded Archival Master (NAM): Output Transform disabled, EXR with RGB half (16-bit) codec, Flat Pass enabled, UHD (3840x2160) minimum resolution |
A few of those rows map directly onto ground this page already covered. The color science and version guidance echoes this page's own advice to default to ACEScct and match whatever the newest available version is unless a facility specifies otherwise. The IDT row is the camera-transform discussion made concrete: instead of a generic "pick the matching camera," Netflix's own documentation names an actual camera profile, Sony's S-Log3/S-Gamut3.Cine, as a worked example of what "match the IDT to the source" means in practice.
The ODT row does the same for delivery targets, replacing the general "Rec.709 for web, P3 for cinema" guidance from the setup section above with the exact calibration numbers a real SDR and HDR deliverable need: 100 cd/m² for SDR, 1000 nits under ST.2084 PQ encoding for HDR.
One setting doesn't come up anywhere else on this page and deserves its own explanation: ACES Mid Gray Luminance. It's a numeric anchor point in Resolve's ACES configuration that ties the software's internal exposure math to the middle-grey value the ACES standard assumes throughout its tone-mapping chain. Netflix's documentation is explicit that it "stays at 15.00 throughout the whole grading and finishing process." Change that number mid-project and every grade made before the change reinterprets under new math, the same failure mode this page's mistakes section already covers for switching ACES versions or color science partway through. Treat Mid Gray Luminance the same way: decide it once, at the start, and don't touch it again.
The archival row is the Non-graded Archival Master, Netflix's own term for exactly the kind of ACES2065-1 export described earlier under "No output transform." Disabling the Output Transform entirely produces linear AP0 data instead of a display-ready image, matching what Dan Swierenga's guidance already explained about a washed-out preview being expected, not broken. Netflix's spec adds the specific file mechanics on top: EXR wrapping RGB data at half-precision 16-bit, a Flat Pass step that strips the creative grade back out so the archival copy stays scene-referred, and a UHD floor on resolution. That's also exactly the kind of file responsible for the storage jump Oliver Peters measured in his own testing, a 4K ProRes 4444 file expanding from 3.19GB to 43.21GB once converted to an ACES-based OpenEXR master. Budget drive space for a NAM-style deliverable before the render starts, not after it fills a drive.
None of this makes Netflix's spec a universal ACES rule. Other studios and facilities publish their own requirement docs with their own specific numbers. What it does show is that every acronym this page has walked through, IDT, ODT, ACES version, AP0 versus AP1, isn't just settings-panel trivia. It's the literal checklist a real delivery has to satisfy before a studio accepts the file.
A settings panel full of acronyms turns into a concrete checklist the moment a real studio's delivery spec is sitting next to it. Netflix's own published ACES requirements for Resolve are a working example of exactly that: the same IDT, ODT, and version choices covered earlier in this page, with the abstraction stripped out.
Can you deliver both an SDR and an HDR master from the same ACES timeline?
Yes, and that's one of the load-bearing reasons studios build in ACES to begin with: grade once, then swap the Output Transform per deliverable instead of re-grading from scratch for every version.
An ACES-managed timeline stays scene-referred and wide-gamut all the way through grading. Nothing gets baked to Rec.709 brightness levels or PQ curves until the ODT step actually runs, which in Resolve happens at render time on the Deliver page, not while you're building the grade. That means the exact same node tree, on the exact same timeline, can render once through a Rec.709 ODT for an SDR web master and then render again, without touching a single node, through a P3-D65 ST.2084 ODT for an HDR deliverable. Using the Netflix numbers from the table above as a concrete example, that's a 100 cd/m² SDR master and a 1000-nit PQ HDR master, both coming out of one graded timeline.
Identical math doesn't guarantee an identical look, though, and that's the part worth planning for. Highlights that read as a gentle, pleasant rolloff on a 100-nit SDR monitor can reveal detail an HDR grade never accounted for once they're stretched across 1000 nits of headroom. That's why studios budget a short trim pass, a light touch-up on the secondary deliverable, rather than assuming one ODT swap ships both versions untouched. A trim pass isn't a full re-grade. It's closer to a final check, confirming the automatic ODT conversion actually holds up on the format it's targeting before the file goes out the door.
Worth separating from that ODT swap: Resolve's Deliver page also has a "Flat Pass" option, the same one covered in the Netflix archival spec above, which strips the grade out of a render entirely rather than just changing its destination format. An ODT swap keeps your creative grade and changes where it's aimed. Flat Pass removes the grade altogether. Confusing the two produces a very different file than the one you meant to export, an ungraded archival master when you wanted a graded HDR deliverable, or the reverse.
One ACES grade, two Output Transforms, is how a single timeline turns into both an SDR and an HDR master without a second pass through every node. Just budget a trim pass before you call the HDR version done, since the math changing correctly doesn't always mean the picture reads the same way on both screens.
What common mistakes cause ACES footage to look wrong in DaVinci Resolve?
Most ACES problems aren't bugs. They're a setting left on its default, or a step done out of order. Here are the ones that come up most often.
Leaving the ODT unset and judging the image by eye. As covered above, footage graded with no Output Transform assigned looks washed out and low-contrast on your monitor by design, not by accident. If your ACES footage looks flat the moment you turn color management on, check the ODT dropdown before you touch a color wheel.
Picking the wrong IDT for the camera. Every camera's IDT is tuned to that specific sensor's color science. Assigning an ARRI IDT to Sony footage, even as a quick test, produces a wrong-looking image that has nothing to do with your actual grade. This mistake is most common on multi-camera projects where clips get batch-assigned an IDT without checking which camera shot which clip.
Double-transforming footage that already has a look baked in. If a camera or on-set LUT box already applied a creative look to your footage before it reached Resolve, running that same footage through an IDT and RRT designed for untouched scene-referred data stacks two transforms on top of each other. The result usually clips highlights or crushes shadows in ways that don't respond normally to grading.
Second-guessing the color science choice mid-project. This is Cullen Kelly's warning again, and it holds for ACES specifically as much as it does for the RCM-versus-ACES decision: switching a project's color science after grades already exist forces every prior grade to reinterpret under new math (source: Frame.io Insider). Pick ACES at the start of a project, or don't, but don't flip the switch partway through and expect existing nodes to hold up.
Mismatching ACES versions across a facility handoff. If your Resolve project is set to ACES 1.3 and the VFX house you're sending plates to is working in ACES 2.0's tone-mapping math, footage that round-trips back to you won't match what you sent out. Confirm the ACES version with anyone downstream before you lock a color science choice, the same way you'd confirm frame rate or resolution.
Applying a LUT or CDL in the wrong AP0/AP1 space. As covered above, a .cube LUT built with a Log2 48-nit shaper expects Resolve's "process node LUTs in" setting on AP1, while a CLF file expects AP0. Flip that setting and a purchased or facility-supplied look doesn't fail outright, it just crushes or blows out in a way that's easy to blame on the grade instead of the LUT space mismatch.
Trusting Fusion's default viewer over a properly configured Output Transform. Fusion's built-in view LUT defaults to a plain sRGB render that doesn't match the ACES Output Transform driving the rest of an ACES-managed project. A composite that looks right in Fusion's own preview can still look different the moment it lands back on the Color page, unless that view LUT mismatch gets fixed first.
Changing ACES Mid Gray Luminance mid-project. This setting anchors Resolve's internal exposure math to the ACES standard's assumed middle-grey value. Netflix's own published Resolve ACES guidance keeps it fixed at 15.00 for an entire project specifically because changing it partway through reinterprets every grade made before the change, the same failure mode as switching ACES versions or color science mid-grade.
Forgetting non-RAW formats need a manual IDT. "No input transform" only auto-converts RAW files. A ProRes, DPX, or XAVC clip left on that same default setting doesn't get silently converted, it just doesn't get converted at all, which shows up as a flat, undercooked-looking image that's easy to mistake for a grading problem instead of a missing IDT assignment.
A note on performance and storage, not just color. We haven't stress-tested ACES render times against RCM ourselves on this site, so take this as a planning consideration rather than a benchmark. What is documented is storage. Oliver Peters, testing his own footage for ProVideo Coalition, found that a 4K ProRes 4444 file expanding to an ACES-based OpenEXR master went from 3.19GB to 43.21GB (source: ProVideo Coalition). That's not a rendering slowdown, it's a storage and archival cost, and it's worth budgeting drive space for before you commit an entire project to ACES-based EXR masters rather than discovering it mid-render.
Setting an ACES footage problem apart from a debayering problem. If your source footage is RAW to begin with, ACES conversion happens after the RAW file has already been decoded into a full-color image, a separate step called debayering. A clip that looks soft, noisy, or slow to scrub isn't necessarily an ACES issue at all. Our guide to what debayering is in DaVinci Resolve covers that earlier stage in the pipeline, including how decode quality affects playback speed on a heavy RAW timeline, a real consideration on any ACES project mixing several RAW camera formats.
When Resolve isn't the only stop, so double-check the handoff, not just your own project. Once a project moves from an offline creative cut into a color or VFX facility running full-resolution camera-original files, someone has to reconnect that cut to the real media, a process our guide to what conform means in video editing covers in depth. ACES standardizes the color math for that handoff. Conforming is the separate step of rebuilding the timeline itself against the right files. Projects heading to a VFX facility or a studio delivery frequently need both, and a mismatch in either one gets blamed on the other more often than it should.
Most ACES footage that "looks wrong" was never mis-graded, it was mis-configured before grading even started. Check the IDT, the ODT, and the version number first. Nine times out of ten, that's where the actual problem lives.
Do you need ACES for your project, or is that overthinking it?
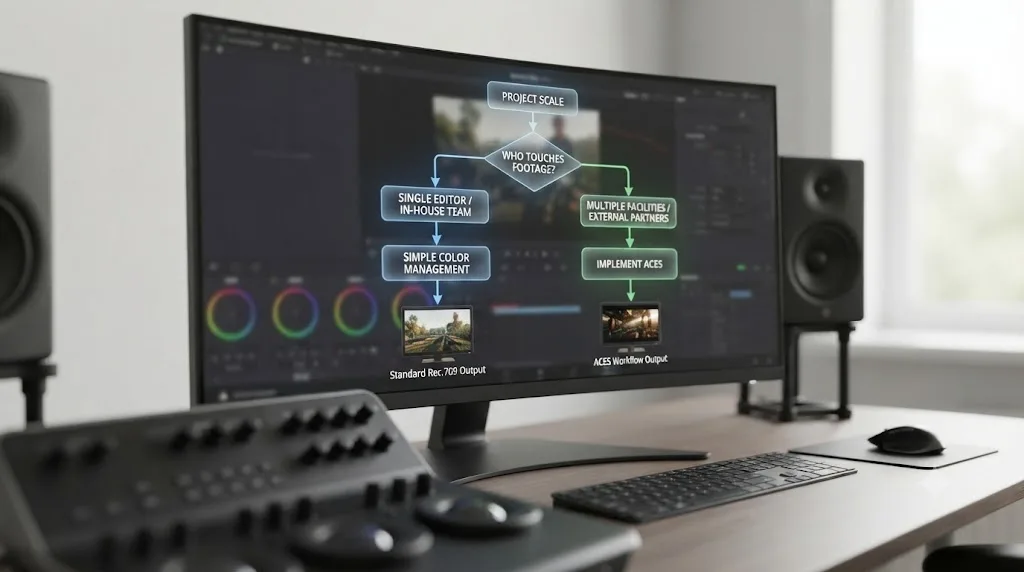
Usually not, if you're the only person who ever touches your footage's color. ACES earns its keep specifically when a project's color has to survive a handoff, from an editor to a colorist, from a colorist to a VFX house, or from a facility to a studio's own delivery spec. If nobody downstream of you ever opens that project, ACES's entire value proposition, a shared translation everyone downstream already understands, has no handoff to apply to.
| Your situation | Does ACES help? | Why |
|---|---|---|
| Solo creator, single camera, cutting and grading everything yourself | No | No handoff means no color mismatch to prevent, and RCM or no color management is simpler to set up |
| Small studio, multiple cameras, one in-house colorist | Sometimes | Worth it mainly if the camera mix is wide enough that matching by eye is genuinely slow, otherwise RCM covers it |
| Freelance colorist receiving footage from other editors | Often | ACES gives you a documented, repeatable starting point regardless of who shot what |
| Project delivering to a VFX facility or an ACES-fluent studio | Yes | The facility likely expects ACES-based interchange, and matching their pipeline avoids a color science conversion later |
| Archival master intended to outlive the software used to grade it | Yes | ACES2065-1 is built specifically for long-term, vendor-neutral storage |
RAW footage adds one more wrinkle worth knowing before you commit to ACES on a project. Every RAW clip, whether it's headed into ACES or Resolve's own color management, has to go through debayering before any color pipeline can touch it at all, and that decode step is unrelated to which color management system you eventually choose.
If nobody else touches your footage's color after you, ACES is solving a handoff problem you don't have. Save the setup time and the terminology for the project that actually needs it.
Common misconceptions about ACES
A handful of misunderstandings account for most of the confusion around this topic, and clearing them up makes the rest of ACES far less intimidating.
"ACES is a plugin you install." It isn't. As covered earlier, ACES is a set of rules and transforms built into color-managed software like DaVinci Resolve, Nuke, and Baselight. There's nothing separate to download to use the core system.
"ACES is only for big-budget films." ACES ships free inside every version of DaVinci Resolve, including the free tier, with no Studio license required. Blackmagic's own Studio product page lists the paid tier's exclusive features explicitly, the Neural Engine's AI tools, additional GPU-accelerated ResolveFX, Dolby Vision and HDR10+ metadata palettes, and ACES appears nowhere on that list (source: Blackmagic Design).
"ACES only works with RAW camera files." It doesn't. IDTs exist for compressed, non-RAW formats too, ProRes, DPX, XAVC, and broadcast-standard Rec.709 or Rec.2020 sources all have a path into ACES. RAW footage is simply the one case where Resolve can auto-detect the conversion instead of requiring you to assign an IDT by hand.
"ACES has no real tradeoffs." It does, mostly around storage, as the troubleshooting section above covers with Oliver Peters' own numbers. That's the cost of the extra dynamic range and color precision ACES archival masters carry, and it's worth planning storage around before committing an entire project to that workflow.
"ACES will make my footage look better automatically." It won't, and it isn't trying to. ACES standardizes how color moves between tools. It doesn't apply a look, correct exposure, or fix a bad white balance. Grading still happens the same way it always did, just on top of footage that's already been translated into one consistent space.
"Once you turn on ACES for a project, you're locked into it forever." Not across projects, only within one. Nothing stops you from using ACES on a VFX-bound feature and skipping it entirely on a corporate video the following week. What you shouldn't do, per Cullen Kelly's advice covered above, is flip a single project's color science mid-grade.
Quick glossary of ACES and color management terms
A few terms show up across every ACES resource without ever getting defined in plain language. Here's the short version of each.
| Term | Plain-language meaning |
|---|---|
| Scene-referred | Color values that describe what light actually hit the camera sensor, before any display has interpreted it |
| Display-referred | Color values already adjusted for how a specific screen or projector will show them |
| Gamut | The full range of colors a camera, color space, or display can capture or reproduce |
| Color space | A defined set of rules for representing color as numbers, so the same number means the same color everywhere it's used |
| OCIO (OpenColorIO) | An open-source color management framework, maintained by the Academy Software Foundation, that many ACES-supporting tools use under the hood to move color data between spaces |
| Working space | The specific color space where grading, compositing, or archiving math actually happens, distinct from either the camera's native format or the final delivery format |
| AMF (ACES Metadata File) | A sidecar file that travels with footage, recording which transforms and look decisions were applied so another facility can reconstruct the same pipeline |
Two of those terms, scene-referred and display-referred, are the ones worth internalizing above the rest, since almost every other ACES concept builds on that distinction. Everything before the RRT is scene-referred, describing light as the camera saw it. Everything after the RRT is display-referred, describing an image the way a specific screen needs to show it.
Is there an app that helps while you're stuck in an ACES settings panel?
Reading a glossary explains what IDT, RRT, and ACEScct mean. It doesn't tell you, mid-project, which specific dropdown in your own copy of DaVinci Resolve currently holds any of them.
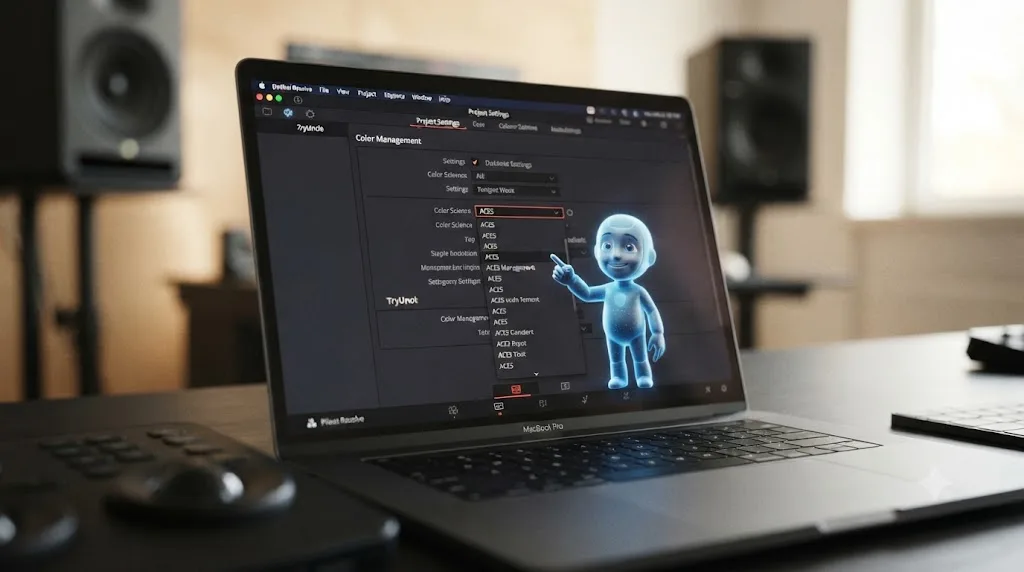
TryUncle is the on-screen assistant for DaVinci Resolve on macOS. Ask in plain words and Uncle points at the exact control on your screen. If you're staring at Project Settings trying to remember whether ACES version selection lives under Color Management or General Options, or whether that IDT dropdown needs "No input transform" for the RAW clip you're currently looking at, that's a live, on-screen question Uncle answers inside your actual project, rather than a definition you have to cross-reference against your own screen by hand.
This sits in a different category from most tools people mean when they ask about an AI tool to learn DaVinci Resolve. Sottocut and cutagent.ai automate editing tasks directly on a timeline, cutting or reformatting footage, rather than helping someone understand a settings panel they've never opened before. heyeddie.ai and general chat assistants can define ACES in the abstract, roughly the way this page does, but they have no view of your actual project and can't confirm which Color Science option your specific timeline is currently set to. PremiereCopilot targets a different editor's workflow entirely, and as covered above, Premiere Pro doesn't have native ACES support to point at in the first place. Uncle watches your DaVinci Resolve screen while you work and can point at the Color Science dropdown, an ACES version selector, or an Input Transform the same way it points at any other control, which is what makes it useful for a live "where is this setting" question rather than only a textbook definition. Our fuller comparison of AI tools to learn DaVinci Resolve covers where each of these actually fits.
After 7+ years of professional, commercial editing and color work across projects that moved between RCM and ACES pipelines depending on the client, the confusion this page addresses, "what is this thing and do I actually need it," is one we've answered for other editors more times than almost any other color science question.
Guided practice inside Resolve beats memorizing acronyms you'll forget the moment you close this tab. That's true of IDT, RRT, and ODT, and it's just as true of any other color science term nobody explained clearly the first time you saw it.
TryUncle is a paid subscription at $39 a month, cancel anytime; see TryUncle for full details. It's macOS only, and it needs an internet connection to work. If you're mid-project and an ACES setting is what's actually on your screen right now, that's a reasonable moment to have something point at the real control instead of hunting for it from memory.
The short version
ACES is a free, vendor-neutral color standard built by the Academy of Motion Picture Arts and Sciences, the same organization behind the Oscars, starting in 2004 and reaching its first production release in December 2014. It exists to solve one problem: footage from different cameras describing the same light differently, in a way that breaks down the moment a project has to move between an editor, a colorist, a VFX facility, or a studio's archive. IDT gets footage into ACES's shared space, RRT and ODT get a display-ready image back out, and LMT is the optional creative layer on top, whether that layer arrives as a CDL from set or a full LMT built for a VFX show. ACES2065-1, ACEScg, and ACEScct are three different working spaces built for archiving, VFX, and grading respectively, not three versions of the same thing.
In DaVinci Resolve, turning it on means four dropdowns in Project Settings: Color Science, ACES version, Input Transform, and Output Transform, and most of the footage that looks wrong under ACES traces back to one of those four being left on a default that doesn't match the job. ARRI, RED, Sony, Canon, Panasonic, and Blackmagic footage all have a direct path in through a published IDT. Outside those six brands, or outside DaVinci Resolve entirely, coverage gets patchier, Baselight, Nuke, and Flame support it natively, Premiere Pro still doesn't. Fusion, Resolve's own compositor, works in ACES automatically too, provided you fix its default viewer mismatch before trusting a comp by eye.
None of that makes ACES automatically the right choice for your project. It's a translation layer for a handoff problem, and if your footage never leaves your own copy of DaVinci Resolve, that handoff isn't happening. If it is, ACES 2.0, available in Resolve 20 and refined further in Resolve 21, is a meaningfully better version than whatever put you off ACES the last time you tried it, and real published specs like Netflix's own Resolve ACES requirements show exactly how those settings translate into an actual delivery a studio will accept. Now that you know what the acronyms actually stand for, where the settings live, and where the mistakes usually happen, the full decision on whether to use it is the next page worth reading.
Frequently asked questions
- What does ACES stand for and what is it in simple terms?
- ACES stands for Academy Color Encoding System. In simple terms, it's a free color rulebook built by the Academy of Motion Picture Arts and Sciences that translates footage from any camera into one shared color space, so a shot from an ARRI, a shot from a RED, and a shot from a phone all behave predictably once they land in the same timeline.
- Who created ACES and why does it exist?
- The Academy of Motion Picture Arts and Sciences, the organization behind the Oscars, started the ACES project in 2004 with about 50 industry technologists, according to Wikipedia's entry on the system. It exists because digital cameras from different manufacturers each record color differently, and productions needed one standard so footage, grades, and VFX could move between facilities without every studio inventing its own color math from scratch.
- Is ACES the same thing as DaVinci Resolve Color Management (RCM)?
- No. ACES is the Academy's standard, built and maintained outside of Blackmagic Design. Resolve Color Management (RCM) is Blackmagic's own, separate color science engine, built into Resolve and tuned to feel like the Color page controls colorists already know. Resolve supports both as two distinct systems in the same Color Science dropdown. Our full [Resolve Color Management vs. ACES comparison](/learn/davinci-resolve/resolve-color-management-vs-aces-which-should-i-use) covers which one actually fits your project.
- What do IDT, RRT, and ODT mean in ACES?
- IDT (Input Transform) converts your camera's native footage into the ACES working space. RRT (Reference Rendering Transform) processes that data with a film-like response curve so it can be mapped to any display. ODT (Output Device Transform) converts the result to your specific delivery target, like Rec.709 for web or P3 for cinema. Together they're the three-stage pipeline every ACES-managed clip passes through.
- Do I need DaVinci Resolve Studio to use ACES?
- No. ACES ships in the free version of DaVinci Resolve with the full library of camera-specific input transforms and display-specific output transforms included. Blackmagic's own Studio product page lists the paid tier's exclusive features, the Neural Engine's AI tools, extra ResolveFX, Dolby Vision and HDR10+ metadata palettes, and ACES doesn't appear anywhere on that list. One narrow exception exists: CLF-format Look Modification Transforms require Resolve Studio, though the core ACES pipeline doesn't.
- What changed in ACES 2.0, and does DaVinci Resolve support it?
- ACES 2.0, announced for end users at NAB Show 2025, replaced the older version's harsh highlight rolloff and the yellow-tinted skin tones it was known for with a softer, more neutral tone-mapping approach. DaVinci Resolve 20 shipped ACES 2.0 support as a beta feature at that same NAB Show, and Resolve 21's own release notes list further ACES workflow refinements, including AMF improvements with named transforms and custom folders.
- Which ACES version should I pick in DaVinci Resolve's dropdown?
- Pick the newest version available unless a facility you're delivering to specifies otherwise. Resolve's ACES version dropdown has offered ACES 1.0.3, 1.1, 1.2, and 1.3 for years, with 2.0 added on top starting in Resolve 20. Matching your version to whatever VFX house, colorist, or studio you're handing the project to matters more than always chasing the newest number.
- Is there an app that helps you find ACES settings inside DaVinci Resolve?
- Yes. TryUncle is the on-screen assistant for DaVinci Resolve on macOS. Ask in plain words and Uncle points at the exact control on your screen, whether that's the Color Science dropdown, an ACES version selector, or an Input Transform buried in the Media Pool. It's a paid subscription at $39 a month, and it watches your screen rather than editing anything for you.
Sources
- ACESCentral: What is Academy ACES?
- Academy Software Foundation: Academy of Motion Picture Arts and Sciences Launches the Next Chapter of ACES with the Academy Software Foundation
- Wikipedia: Academy Color Encoding System
- ARRI Learn & Help: About ACES
- Mixing Light: What Is ACES And How Do You Work With It?
- Frame.io Insider: Why Every Editor, Colorist, and VFX Artist Needs to Understand ACES, by Ben Bailey
- ACES Documentation: Getting Started (docs.acescentral.com)
- Leveraging ACES 2.0 in DaVinci Resolve, by Aniket Bhattacharjee (cubiecolor)
- DaVinci Resolve Studio product page (Blackmagic Design)
- Is ACES Right for You? by Oliver Peters (ProVideo Coalition)
- Frame.io Insider: Resolve Color Management vs ACES, Which Should You Choose?, by Cullen Kelly
- Frame.io Insider: How to Build an ACES Pipeline Between DaVinci Resolve and After Effects, by Dan Swierenga
- ACESCentral: Exciting News, ACES 2.0 Release for End-Users
- Newsshooter: DaVinci Resolve 21 Final Release
- VFXPedia / DaVinci Resolve Reference Manual: Color Management Using ACES (Blackmagic Design, mirrored)
- Dehancer Blog: What is ACES and How to Use It in DaVinci Resolve
- Digital Production: Flame 2026, OCIO, Files and Timeline Magic
- Adobe Help Center: OpenColorIO and ACES Color Management (After Effects)
- Adobe Community: Support the OCIO/ACES Color Management Workflow for Premiere Pro (feature request)
- Mixing Light: What Is A Color Decision List (CDL) And When Do You Use It?
- Mixing Light: Accurately Viewing Fusion Compositions in ACES Workflows
- ACESCentral Community: Implementing a Look Transform (LMT) in DaVinci Resolve
- Netflix Partner Help Center: Color Managed Workflow in Resolve - ACES
Learn by doing, not watching
Stop translating tutorials to your timeline.
TryUncle stays beside Resolve on Mac and Windows. When you ask, Uncle sees your screen and points at the exact control you need. No hunting through tabs, timestamps, or mismatched tutorials.
Meet TryUncleKeep reading
 ComparisonsJul 12, 202630 min read
Resolve Color Management vs. ACES: Which Should You Use?
DaVinci Resolve Color Management and ACES both fix scene-referred color, but they solve different problems. Here's which one fits your project.
 GuidesJul 26, 202639 min read
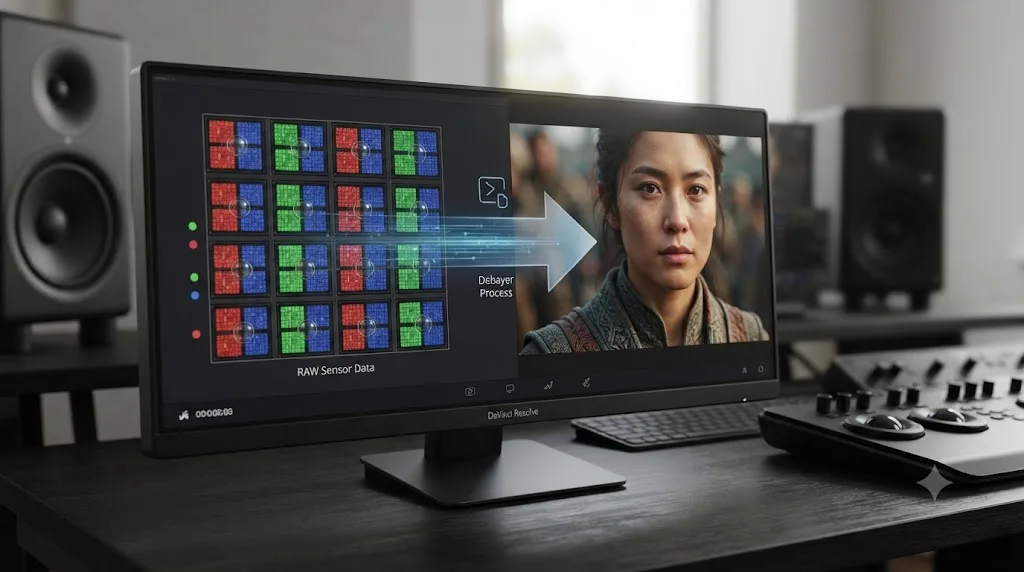
What Is Debayering in DaVinci Resolve? RAW Decoding Explained
What debayering means in DaVinci Resolve, where to control decode quality, and why RAW footage plays back slower than ProRes or H.264.
 GuidesJul 25, 202635 min read
What Does Conform Mean in Video Editing? The Real Answer
Conform means two things: rebuilding an offline edit with camera-original files, and Resolve's own frame-rate conform setting. Both explained.