
Learn / DaVinci Resolveupdated for DaVinci Resolve 21.0.2 (July 2026)
DaVinci Resolve for Real Estate Video Editing: Where to Start
Quick answer
Start with one property's footage. Set your project to match your gimbal or drone's true frame rate, bin clips by room, stabilize shaky walkthrough footage, then cut a 60 to 90 second video on the Edit page. Learn DaVinci Resolve's pages on real listing footage, not a demo file, in that order.
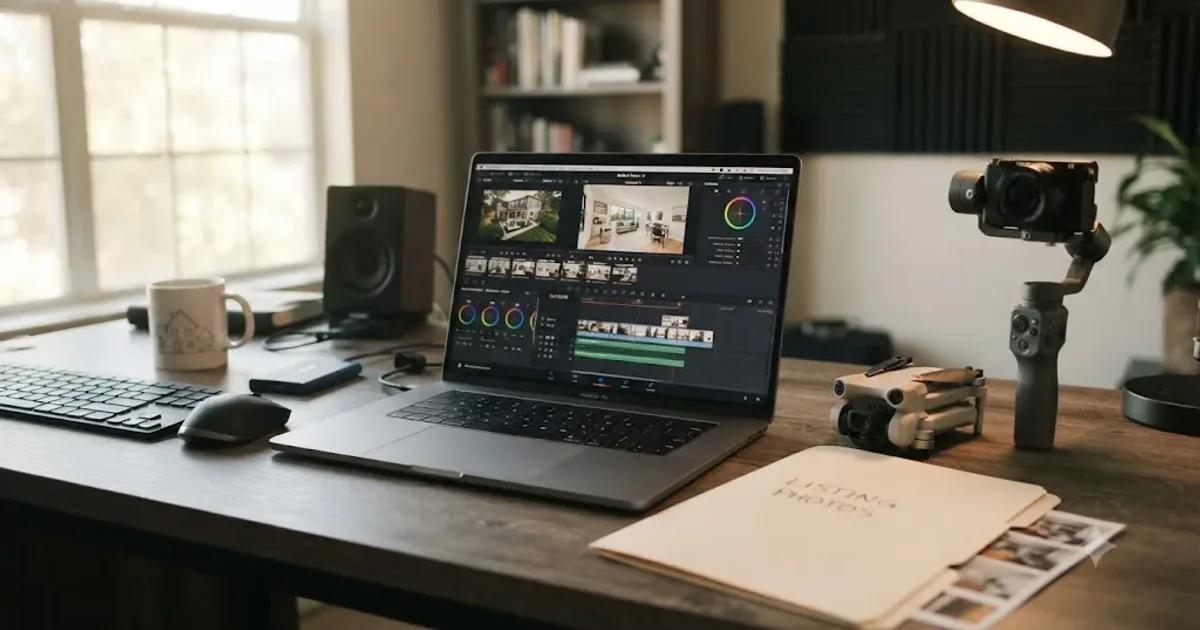
You've got a gimbal walkthrough, ten minutes of drone footage, and a folder of forty MLS photos for a listing that goes live Friday. DaVinci Resolve is open, and none of the six pages tell you which one to start on when the footage isn't a talking-head video, isn't a wedding, and has to look finished by tomorrow afternoon.
This guide is that starting point, built around what actually makes real estate footage different: a walkthrough shot on a gimbal instead of a tripod, drone establishing shots with their own legal requirements, still photos that need to move, and a deadline set by a listing date, not by you. As of July 2026, every setting below is something DaVinci Resolve genuinely offers, sourced to Blackmagic's own documentation, the FAA, or a named source, not guessed at.
What makes real estate video editing different from other DaVinci Resolve projects?
A real estate edit has almost no dialogue, no interview, and a hard deadline set by someone else's listing date. Most editing tutorials assume you're cutting a talking-head video, a vlog with narration, or a scripted piece with a clear beginning and end. Real estate footage is closer to a product demo: a gimbal glide through a house, a drone rise over the roofline, and a stack of still photos, all built to make a viewer feel like they've already walked the property before they've called an agent.
A real estate video sells a feeling of space, not a story. That single difference changes almost every decision downstream of it. There's rarely a narrator to sync against, so pacing comes from music and cut timing instead of a voice track. There's rarely a single hero shot, so the edit has to establish geography, how the kitchen connects to the living room, where the primary bedroom sits relative to the front door, in a way a vlog or a wedding film never has to.
| What changes | Typical creator edit | Real estate listing edit |
|---|---|---|
| Dialogue | Usually a narrator or interview subject | Usually none, or a short agent voiceover |
| Camera movement | Handheld or locked tripod | Gimbal glide through the property, plus drone establishing shots |
| Still images | Rare, mostly B-roll | Central, forty or more MLS photos per listing |
| Deadline driver | The creator's own schedule | The listing's go-live date, set by someone else |
| Legal requirements | None specific to the edit | FAA Part 107 for the drone footage, MLS branding rules for the export |
| Distribution | One platform, usually | MLS, Zillow, Realtor.com, YouTube, and Instagram or TikTok, often all at once |
None of this means real estate editing needs a different application or a hidden feature nobody talks about. It means the same tools, project settings, stabilization, keyframing, color, and export, get applied in an order built around gimbal footage, drone clips, and still photos instead of a single steady camera. That's what the rest of this guide covers.
Where do you actually start if you've never opened DaVinci Resolve?
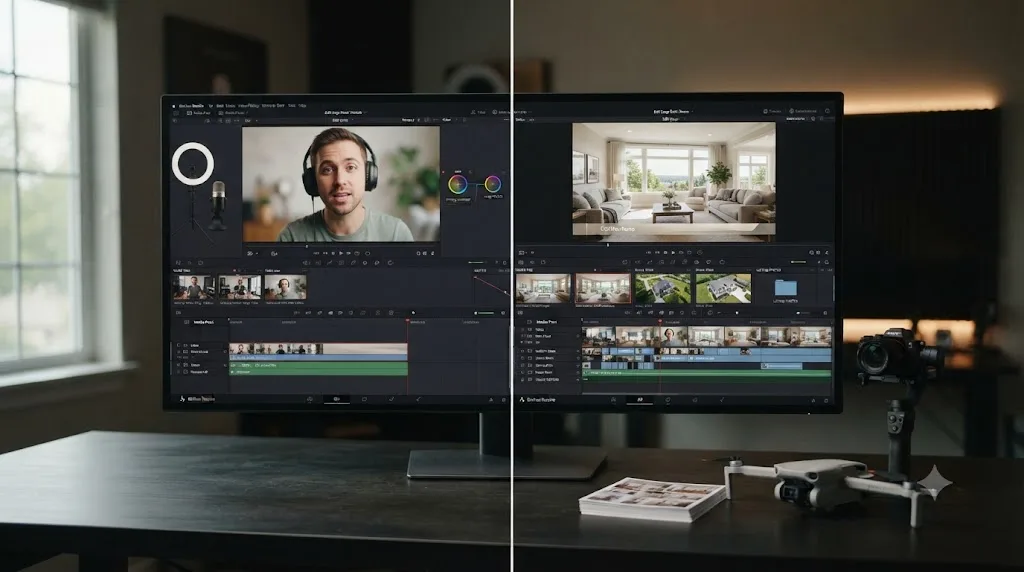
Download it, decide free or Studio based on your drone and camera's codec, and open one property's footage before you explore past the first ten minutes of a tutorial. DaVinci Resolve installs the same way on macOS, Windows, and Linux, straight from Blackmagic Design, and the free version is a complete editor rather than a stripped demo.
The one real decision before you download anything is free versus Studio, and for real estate editors specifically, it usually comes down to your drone and your gimbal camera, not your ambition. If your drone shoots 10-bit HEVC in its higher-quality modes, common on recent consumer drones, the free version's HEVC decode path can be limited without extra setup on Windows. If your gear shoots standard 8-bit H.264, the free version handles everything covered in this guide with no compromise.
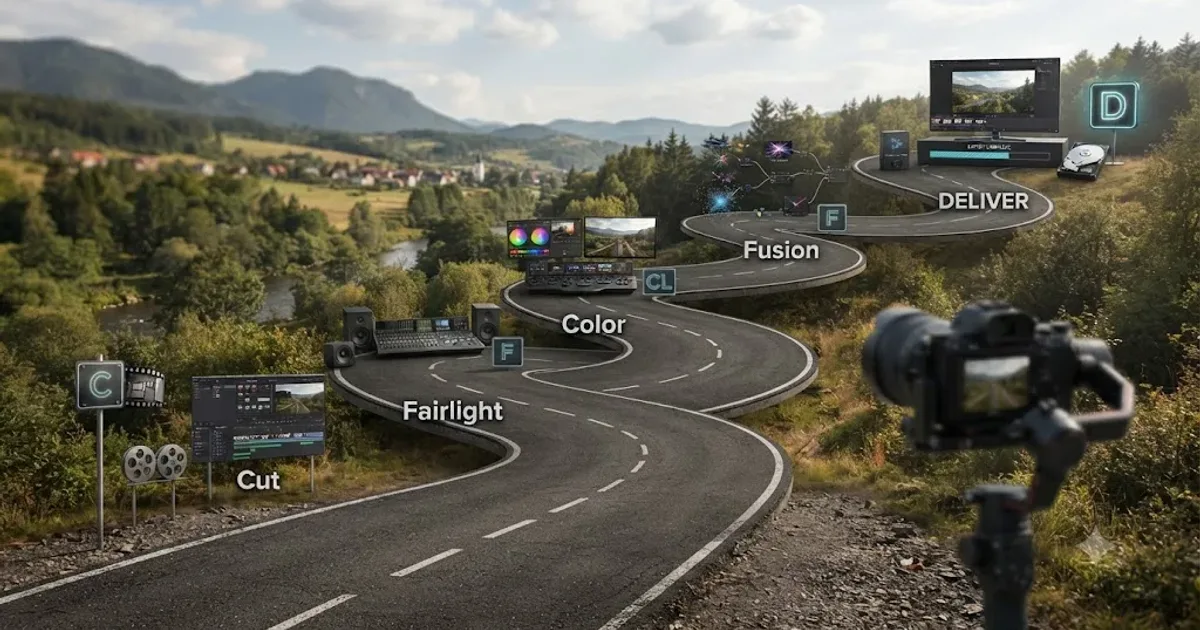
Once it's installed, resist opening every page before you've cut anything. Resolve's six pages, Media, Cut, Edit, Fusion, Color, Fairlight, and Deliver, map to the stages of an edit, but a real estate video doesn't need fluency in all six to finish. The DaVinci Resolve learning roadmap for beginners covers the full page order Blackmagic's own free training follows, and that general order, Cut or Edit first, then Fairlight, then Color, holds here too. The real estate-specific addition is that project setup, the next section, matters more than it does for a single-camera channel, because getting frame rate wrong on day one means re-conforming gimbal and drone footage together later.
Start with your smallest realistic project: one listing, not your whole week's shoot list. Pick a property you've already fully shot, walkthrough, drone, and photos, and build one complete 60 to 90 second video before opening a second listing's footage. Finishing one real listing video teaches more about DaVinci Resolve than a week of tutorials about a property you haven't started cutting. A stabilization setting that doesn't behave the way you expected, or a drone clip that won't import, is a smaller, more solvable problem on one listing than on five stacked up against Friday's deadline.
What DaVinci Resolve project settings should you use for a real estate video?
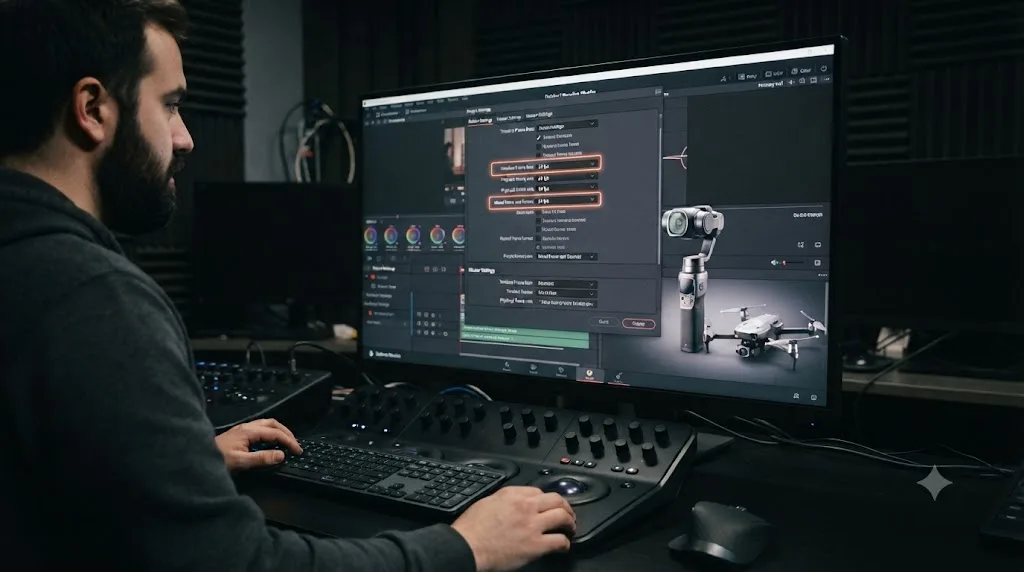
Match your timeline to whichever camera shot the most footage, your gimbal walkthrough camera in most real estate shoots, then set Mixed Frame Rate Format before importing anything from your drone. Miss this step and drone clips shot at a different true frame rate conform using Resolve's default Nearest retime process, which drops or duplicates frames and shows up as a subtle stutter, exactly the problem covered in DaVinci Resolve mixed frame rate timeline jittery: the fix.
Almost every gimbal camera and consumer drone shoots the NTSC fractional rates, 29.97fps when the menu reads "30" and 23.976fps when it reads "24," not the round number displayed on screen. Set your timeline to the true fractional rate your primary camera actually recorded, verified in Clip Attributes if you're unsure, since a round-number timeline drifts slowly against audio and against any drone footage shot at a genuinely different true rate.
| Content type | Typical primary source | Timeline frame rate | Resolution | Color space |
|---|---|---|---|---|
| MLS and Zillow listing video | Gimbal walkthrough | 23.976fps (cinematic feel) or 29.97fps | 1920x1080, 16:9 | Rec.709 |
| YouTube full property tour | Gimbal walkthrough plus drone | 23.976fps or 29.97fps, matched to gimbal | 1920x1080 or 3840x2160, 16:9 | Rec.709 |
| Instagram Reels or TikTok cutdown | Best gimbal or drone moments | Matches source timeline before duplication | 1080x1920, 9:16 | Rec.709 |
| Drone establishing shots | Drone | Matches whichever ground footage it's cut against | Same as ground timeline | Rec.709 |
Rec.709 is the correct color space for every row above. Real estate video going to MLS, Zillow, YouTube, or Instagram almost never needs ACES or a wide-gamut workflow, and reaching for one by default adds complexity that doesn't pay off unless a brokerage specifically wants an HDR delivery. If your drone shot in a flat log profile for extra dynamic range, that gets corrected on the Color page later, it doesn't change your project's base color space now.
Set Mixed Frame Rate Format to Resolve in Project Settings, per DaVinci Resolve's reference manual on mixed frame rates, before your first clip lands in the Media Pool. This setting locks the moment media imports, so changing it after the fact means clearing the Media Pool and starting over, a bigger cost on a property with gimbal, drone, and photo sources than on a single-camera edit.
How do you organize footage from a gimbal walkthrough, a drone, and listing photos in the same project?
By property first, by source second, before you touch a single clip. A real estate editor working multiple listings a week runs into the same organizational problem a wedding editor or a UGC ad editor does: footage from different sources arrives close together, and a folder that doesn't answer "which listing, which room" in two clicks costs real time on a Friday deadline.
Build your drive structure before footage lands: one top-level folder per property address, with subfolders for the gimbal walkthrough, the drone footage, and the listing photos supplied by the agent or photographer. Mirror that same structure inside DaVinci Resolve with bins, one bin per property, subdivided by source. For a larger home where the walkthrough runs long, add a further subdivision by room, entry, kitchen, primary bedroom, since that's how you'll actually search for a specific shot while cutting.
Generate proxies for any 4K drone or gimbal footage before you start cutting, prioritizing your drone clips first since they're typically the highest-resolution, most compressed source and the most likely to stutter on scrub. DaVinci Resolve's reference manual is explicit that H.264 and H.265, the codecs most drones and gimbal cameras record in, make poor proxy formats themselves because their Long GOP compression isn't built for frame-by-frame scrubbing. ProRes proxies scrub smoothly instead, and Resolve swaps back to your originals automatically at render time.
Keep a Power Bin open for anything reused across every listing you cut for a given brokerage: an intro bump, an agent's logo lower third, a standard end card with contact info. A Power Bin persists across projects in the same database, so a brokerage's branded outro built once gets dragged into every new listing afterward instead of rebuilt from scratch. The folder structure you build before a single clip imports is the difference between finding "that kitchen shot" from three listings ago in ten seconds or ten minutes.
What computer or storage setup do you actually need for real estate video editing?
Less than you'd think, and the real bottleneck is rarely the software itself. Blackmagic's own download page lists surprisingly modest floor requirements: macOS 12 Monterey or later, Windows 10 Creators Update or later, or Rocky Linux 8.6 / CentOS 7.3 or later, with no single published RAM or VRAM number that applies to every user. Blackmagic doesn't publish one universal spec because a real estate edit's actual demands, a handful of 4K sources, some stills, two nodes of color per clip, sit well below what a heavier narrative or VFX project asks of the same machine.
What actually slows a real estate editor down is storage, not raw compute, especially once you're cutting more than one listing a week. Ten minutes of raw 4K drone footage plus a full gimbal walkthrough easily runs 40 to 80GB per listing before proxies. Multiply that by three or four active listings in a given week, plus whatever you're keeping in a Power Bin, and an internal laptop drive fills up fast.
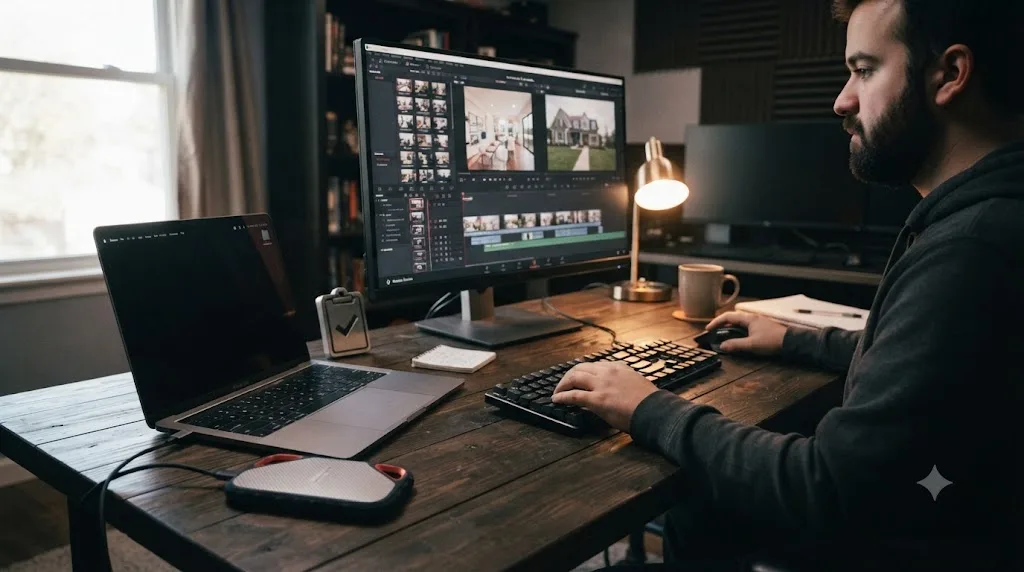
A workable setup for a solo videographer running one listing at a time looks like this: a machine that meets Resolve's published OS minimum, a fast external SSD or NVMe drive dedicated to the active project's media, and generated ProRes proxies for anything from the drone. That's enough to cut, grade, and export the full deliverable list this guide covers, without waiting on a slow scrub or a render that eats into a Friday deadline. If you're editing between site visits rather than at a desk, a laptop with a discrete GPU handles this workload fine; you don't need a workstation tower to hit what's listed above. The exception is heavy Fusion work, an animated logo intro a brokerage wants built from scratch, which benefits from more graphics headroom than a straightforward cut-and-color pass needs.
| Weekly listing volume | Storage setup | Why |
|---|---|---|
| One listing at a time | One fast external SSD, proxies generated for drone footage only | Enough headroom without juggling multiple active drives |
| Two to four listings a week | A dedicated media drive per active listing, or a larger NVMe scratch disk, plus a Power Bin for shared branding assets | Keeps one property's revision request from slowing down the next listing's cut |
| Five or more a week, or a small team | RAID or NAS storage for active projects, with proxies generated as a standing default rather than a manual step | At that volume, one dropped frame or slow scrub costs real time across every project on the drive |
Back up original footage to a second drive before you delete anything from a card, the same rule that applies to any videographer who can't reshoot a job on demand. A drone battery that dies mid-flight or a gimbal card that corrupts is an inconvenience if the raw footage still exists somewhere else. It's a missed deadline if it doesn't. The fastest computer in the world doesn't fix a corrupted card with no backup. Buy the second drive before you need it, not after a listing's only drone footage is gone.
What do you do when your gimbal or drone footage stutters, won't import, or looks out of sync?
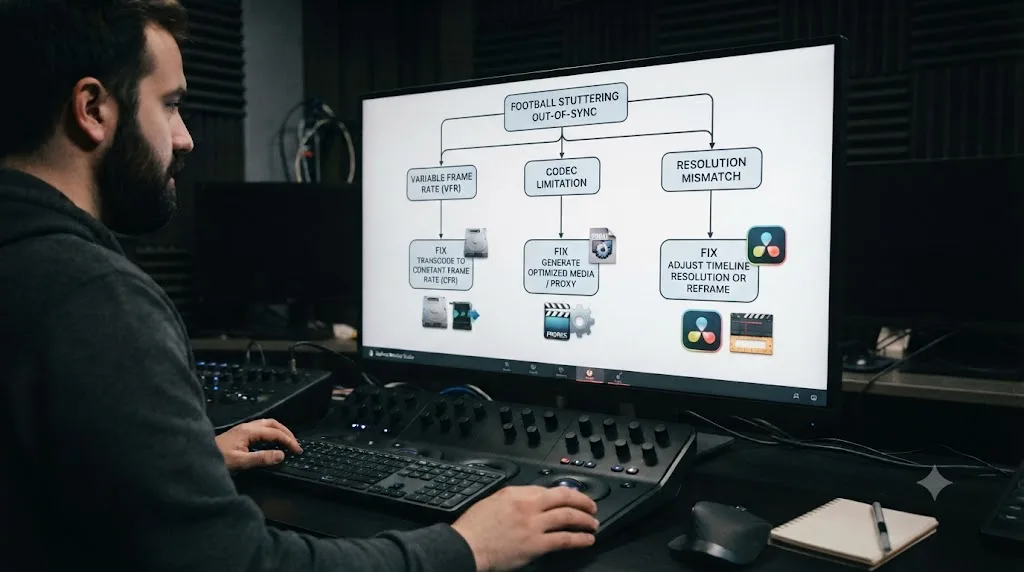
Three separate problems get mistaken for one when a clip won't behave in DaVinci Resolve, and each has its own fix. Diagnosing which one you actually have saves you from re-encoding footage that didn't need it, or worse, from blaming your computer for a problem that's actually sitting inside the file.
The first is variable frame rate, VFR, footage. Modern phones, iPhones and Android devices alike, often still record VFR even with a frame rate locked in the camera app, especially in the mixed and low light common to an interior walkthrough. A phone-based gimbal used to supplement a "real" camera on a walkthrough is a common source of this on a real estate shoot. Per an explainer on constant versus variable frame rate, VFR footage plays back fine on the device that recorded it, but an edit built for a constant frame rate reads the file's frame timing inconsistently, which shows up as audio that drifts further out of sync the longer a clip plays, or a clip that appears to speed up and slow down at points where nothing in the shot actually changed. Converting the file to constant frame rate before import, with a free tool like HandBrake or a similar batch conversion pass, fixes this at the source instead of fighting it clip by clip on the timeline.
The second is the HEVC decode limitation already covered earlier in this guide: a 10-bit HEVC file from a drone's higher-quality recording mode can be limited in the free version on Windows without a working system decoder. This shows up as a clip that won't import at all, or imports with a broken or black preview, rather than as a sync drift. DaVinci Resolve DJI drone footage out of sync walks through the DJI-specific version of this problem in more depth, including how to tell a codec issue apart from an actual sync issue on the same clip.
The third is a genuine resolution or frame rate mismatch between your primary source and your timeline settings, the problem the Mixed Frame Rate Format setting from earlier in this guide is built to prevent. A gimbal shooting 4K sitting next to a drone shooting a different native resolution, dropped onto a timeline sized for neither, can look soft, over-scaled, or subtly juddery in a way that's easy to mistake for a stabilization problem instead of a project settings one.
One more variant is worth naming separately, since it looks identical to VFR drift but has a different fix: an agent's voiceover recorded on a separate device from the walkthrough footage. That's not a frame rate problem at all, it's clock drift between two independent recorders, and it needs Auto Sync Audio's waveform matching rather than a frame rate conversion. If the drift only shows up on a clip with a separately recorded voiceover and nowhere else in your project, you're looking at a sync problem, not a VFR one.
| Symptom | Likely cause | Fix |
|---|---|---|
| Audio drifts further out of sync the longer a clip plays | Variable frame rate (VFR) source, common on phone-based gimbal footage | Convert to constant frame rate before import, then re-import the fixed file |
| Clip won't import, or imports with a black or broken preview | 10-bit HEVC decode limitation, free version, Windows | Use Studio, install a working system HEVC decoder, or transcode the clip first |
| Footage looks soft, over-scaled, or subtly juddery on the timeline | Resolution or frame rate mismatch against timeline settings | Confirm true frame rate in Clip Attributes, and match Mixed Frame Rate Format and timeline resolution to your primary source |
| A voiceover clip drifts but nothing else in the project does | Clock drift between two separately recorded devices | Use Auto Sync Audio's waveform matching, not a frame rate fix |
| Everything imports but scrubbing stutters badly | No proxy generated for a heavy 4K or 5.1K source | Generate ProRes proxies for the affected bin before continuing the edit |
A clip that won't behave in DaVinci Resolve is almost never a mystery, it's one of a handful of specific, diagnosable problems. Check the symptom against the table above before you assume your computer, your card, or the software itself is at fault.
Do you need an FAA Part 107 license to shoot or edit drone real estate footage?
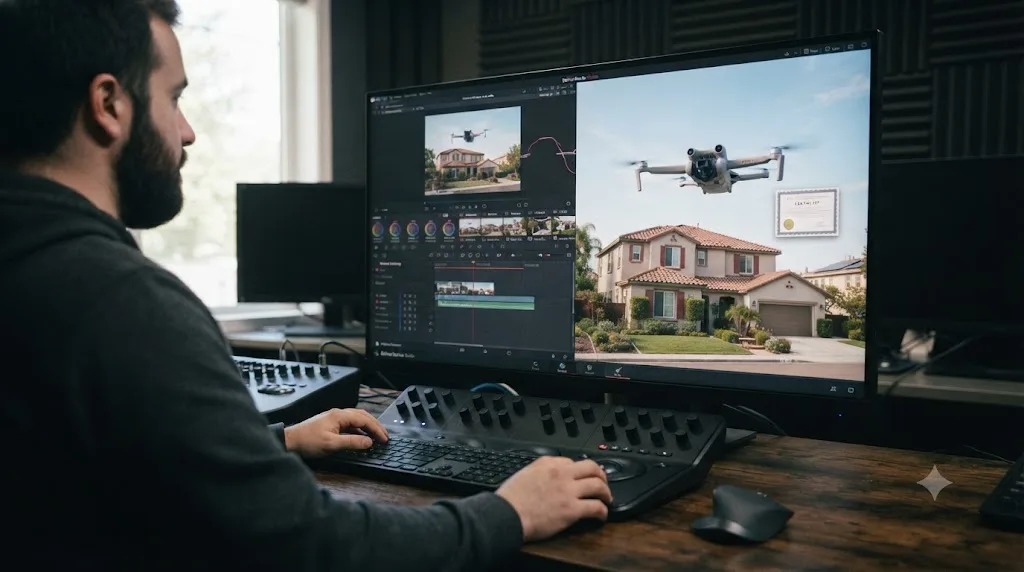
Whoever flies the drone commercially needs one, and the editor cutting the footage often is that same person. The FAA requires a Part 107 Remote Pilot Certificate for any commercial drone flight, and its own guidance defines commercial broadly: if a drone is in the air for any purpose connected to a real estate transaction, an exterior still, an aerial establishing shot, even a quick neighborhood overview, that flight falls under Part 107, regardless of the drone's weight.
That last point trips people up. A drone under 250 grams, like the DJI Mini 4 Pro at under 249 grams takeoff weight per DJI's own spec page, is exempt from FAA registration for pure hobby flying, but that exemption disappears the moment the footage supports a paid real estate listing. Weight determines a registration threshold for recreational flying, not a commercial exemption.
| Requirement | Detail |
|---|---|
| Minimum age | 16 years old |
| Path to certification | Pass the FAA's "Unmanned Aircraft General, Small" knowledge test at an approved testing center |
| Certificate expiration | Never expires, but operating privileges lapse without a recurrent knowledge test every 24 calendar months |
| Drone weight and Part 107 | Applies regardless of weight for commercial flights; the 250-gram threshold only affects hobby registration |
| Enforcement | The FAA can pursue civil penalties against uncertified commercial operators, on top of any other violation from the same flight |
Most real estate videographers who fly their own drone hold Part 107 for exactly this reason, and it's worth confirming before you accept drone footage from a photographer or agent who supplied it themselves, since the legal exposure sits with the flight, not with the edit. A drone under the 250-gram registration threshold is not automatically cleared for a paid real estate listing. If you're editing footage someone else shot and flew, ask whether they're certified before that footage goes into a client-facing video, the same way you'd confirm music licensing before delivery.
Can you fly a drone at every listing, and what do you do when you can't?
No, and confusing airspace clearance with land-use permission is the mistake that catches out videographers who've done everything else right. Holding a Part 107 certificate answers who's allowed to fly. It doesn't answer whether this specific property, on this specific day, is airspace you're actually cleared to use.
Check controlled airspace, restricted zones near airports, national parks, and military training routes before you promise a client an aerial shot, using B4UFLY, the FAA's airspace awareness service. The original standalone B4UFLY app was retired in February 2024; the FAA now delivers the same airspace information free through a handful of FAA-approved third-party providers instead of one government app, so the specific app on your phone may carry a different name than it did a couple of years ago, but the underlying airspace data comes from the same source.
The distinction that trips people up sits in the FAA's own No Drone Zone guidance: even a flight cleared for the airspace above a property doesn't automatically clear you to take off or land from that property, since airspace authorization and land-use approval are two separate permissions. A listing inside a gated community, an HOA with its own drone policy, or a multi-unit condo building can restrict drone flights over shared land regardless of what your Part 107 certificate and a clean B4UFLY check allow in the air above it. Confirm with whoever manages the property before you show up expecting to fly, not after.
| Situation | What to check | If you can't fly |
|---|---|---|
| Property near an airport or in controlled airspace | B4UFLY for controlled airspace and any active Temporary Flight Restriction | Request authorization through an approved provider, or reschedule if the restriction is temporary |
| Gated community, HOA, or shared condo grounds | The property's own drone policy, separate from FAA airspace rules | Ask the HOA or building management directly, since airspace clearance doesn't grant land-use permission |
| A listing with no legal path to a drone shot at all | Whether the agent or photographer already has usable aerial stills from a prior shoot | Build a keyframed photo slideshow from an existing aerial still, or open the video on your strongest interior shot instead |
The consequences of skipping this check aren't only regulatory. As covered earlier, enforcement risk for an uncertified or improperly authorized commercial flight sits with the pilot. But the client-facing risk is different: a listing video pulled after publish because of a land-use complaint costs the agent credibility with the same HOA or building management they'll need for the next listing in that community.
Losing the drone shot doesn't sink the video. Plenty of listing videos this guide's structure applies to just as well run on the gimbal walkthrough and MLS photos alone, opening on the best interior room or the strongest exterior ground-level shot instead of an aerial. A real estate video without a drone shot is not a lesser video, it's a video that leads with a different opening. Save the drone conversation for the properties where it's actually legal to have it, and don't let a missing aerial shot become the reason a listing video misses its go-live date.
How do you fix shaky or jittery gimbal walkthrough footage in DaVinci Resolve?
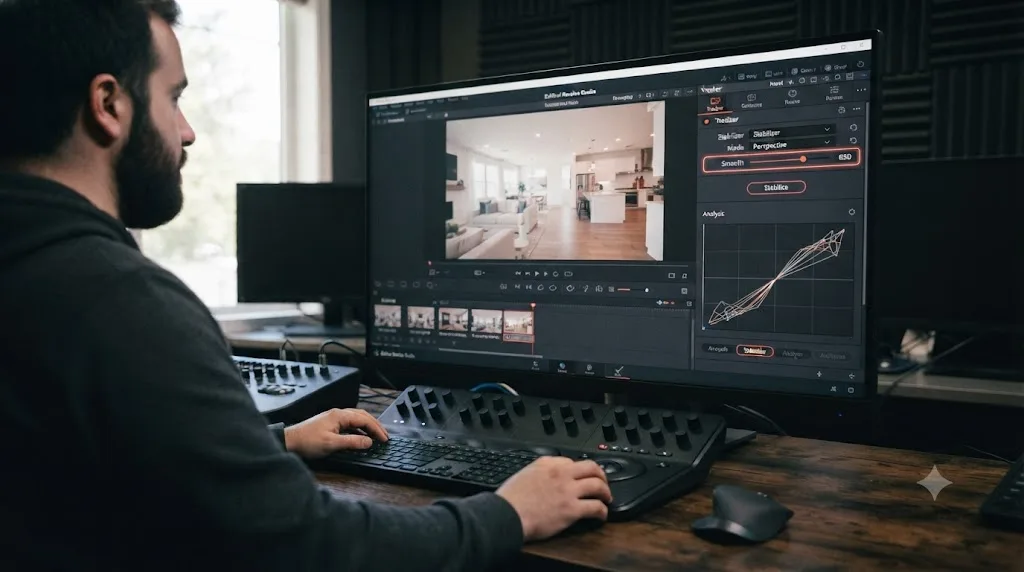
Run the Tracker palette's Stabilizer, available on the Edit and Color pages in the free version. Select your gimbal clip, open the Tracker palette, switch it to Stabilize mode, and click Stabilize. Per DaVinci Resolve's reference manual, Resolve's stabilizer analyzes frame-by-frame motion and can both warp and translate the image to minimize unwanted shake, while trying to preserve the intentional motion of your walkthrough glide rather than locking the shot down completely.
A gimbal produces smoother footage than handheld to begin with, but even a well-balanced gimbal picks up small jitters from footsteps, door thresholds, or a quick direction change mid-room. The Smooth strength setting is the control that matters most here: push it higher to smooth out that residual jitter toward a more locked, glide-like feel, and pull it back if the result starts to look artificially floaty compared to the walkthrough's natural forward motion.
Stabilization crops into the frame slightly as it corrects, since the algorithm needs room to shift the image around. Check the Zoom and Cropping Ratio settings after stabilizing, especially on a shot where you've framed close to a doorway or a ceiling line, since an aggressive stabilization pass can push those edges out of frame if you don't account for the crop.
Two clips almost always need this pass on a real estate shoot: the walk-in entry shot, where the operator is often moving from outdoors onto a threshold and the gimbal's IMU takes a moment to settle, and any staircase shot, where footstep impact is harder for a gimbal to fully absorb than level ground. A gimbal reduces shake at the point of capture, but it doesn't eliminate every jitter a stabilizer in post still needs to clean up. Run Stabilize on your full walkthrough pass rather than assuming gimbal footage is automatically edit-ready, and check the result at full resolution, not a reduced preview, since a subtle residual wobble is easy to miss scrubbing at low playback quality.
How do you turn a folder of MLS photos into a moving slideshow video?
Keyframe a slow Zoom and Pan on each still image in the Inspector, timed to roughly three to five seconds per photo. Not every real estate video needs this, a pure gimbal-and-drone walkthrough stands on its own, but plenty of listings arrive with strong photography and modest or no video footage, and a keyframed photo slideshow is the fastest way to turn forty MLS stills into something that plays like motion instead of a static gallery.
Drop a still image onto your timeline, open the Inspector's Transform controls, and set a keyframe at the start of the clip for your starting Zoom and Position, then move the playhead to the clip's end and set a second keyframe for a slightly different Zoom and Position. Resolve interpolates smoothly between the two automatically. Per DaVinci Resolve's reference manual on keyframing effects, this same keyframe workflow applies to any Inspector parameter, so the same technique you'd use to animate a title works identically on a still photo. How to keyframe effects in DaVinci Resolve covers the full keyframe workflow if this is your first time animating a parameter in the Inspector.
Keep the movement subtle and consistent in direction. A slow push-in reads as intentional and calm, which matches the tone real estate video is going for; a fast zoom or a pan that reverses direction from the previous photo reads as amateur and breaks the sense of continuous motion through the property that a good real estate edit is trying to build. Vary push-in versus push-out occasionally so thirty consecutive identical zooms don't start to feel mechanical, but keep the pace and speed matched across the whole sequence.
Order your photos like a walkthrough, not like the order they were delivered in: exterior first, entry, main living spaces, kitchen, bedrooms, outdoor space, and a closing exterior or twilight shot if you have one. That mirrors how a viewer actually explores a house in person, and it's the same ordering logic that makes a gimbal walkthrough feel coherent rather than random. A photo slideshow that moves through a property in the same order a buyer would walk it feels like a tour, not a gallery.
How do you add property info text without breaking MLS or Zillow's branding rules?
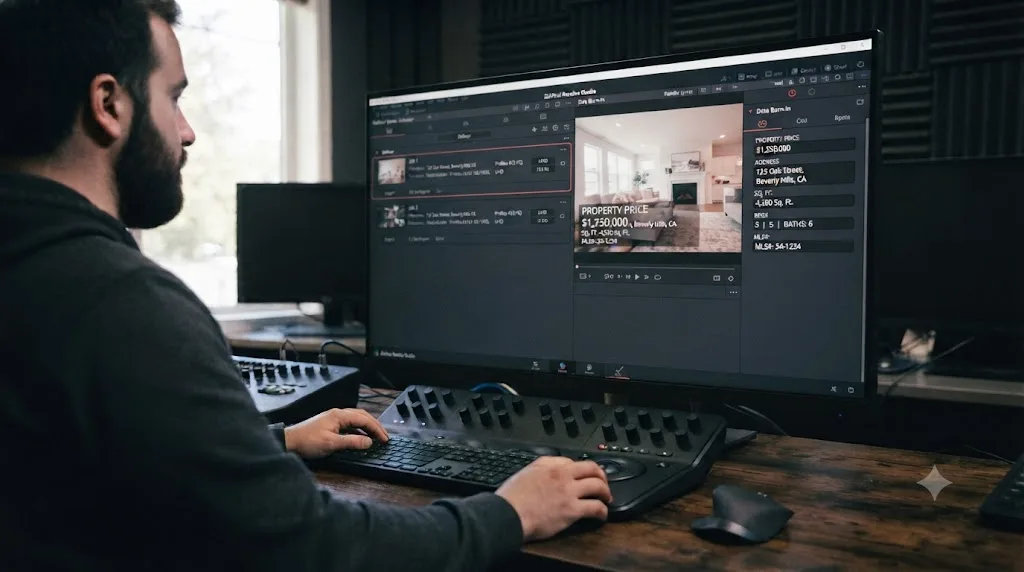
Build it as a Data Burn-in preset you can toggle per delivery, since the rules for on-screen branding differ by where the video is going. Per Zillow's own video upload guidelines, agent branding is permitted but limited to roughly 15 seconds at the start or end of the video, keeping the bulk of the runtime focused on the listing itself, with an occasional spoken mention of the agent or brokerage also allowed. Realtor.com's specs generally permit branding too. Most individual MLS boards run the opposite policy, prohibiting branded or watermarked video entirely and requiring a clean master, though the specific rule varies by board, so confirm your own board's policy before you export.
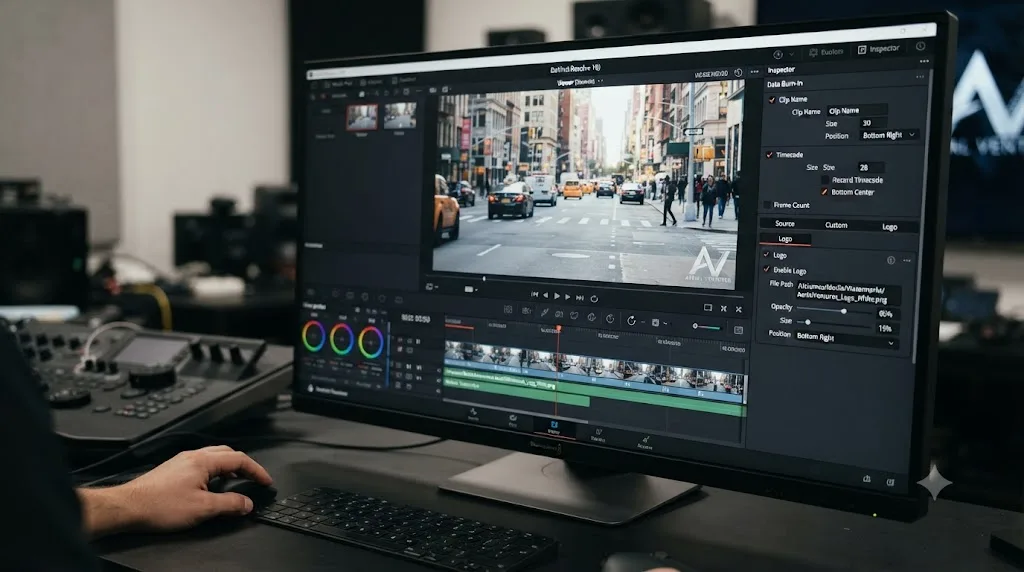
Use Workspace > Data Burn-in for property details, price, address, square footage, since it burns text in at render time from one preset rather than requiring you to place and time individual title clips on the timeline. Per DaVinci Resolve's reference manual, Data Burn-in supports custom text fields alongside logo import, and once a preset is built and saved, selecting it on the Deliver page applies it to that render automatically. How to add a watermark in DaVinci Resolve covers the full Data Burn-in and timeline-overlay workflow in more depth, including how to animate a logo through Fusion if a brokerage wants a fade-in rather than a static mark.
| Destination | Branding and text overlay | What to deliver |
|---|---|---|
| MLS | Usually prohibited, varies by board | Clean master, no Data Burn-in preset applied |
| Zillow | Permitted, roughly 15 seconds at start or end per Zillow's guidance | Branded version with your Data Burn-in preset enabled |
| Realtor.com | Generally permitted | Branded version, same preset as Zillow |
| YouTube and Instagram | No platform restriction | Branded version, with full property info text if desired |
The practical fix is a single timeline, two Data Burn-in presets, and two render queue jobs: one with your property-info-and-branding preset enabled for Zillow, Realtor.com, YouTube, and social, and one with Data Burn-in switched off for MLS. The same edit serves every platform once you separate the branding decision from the cut itself. Rebuilding the video per destination wastes far more time than toggling one setting on the Deliver page.
How long should a real estate listing video be, and how do you cut to that length?
Sixty to ninety seconds for the version that goes to MLS, Zillow, Realtor.com, and your own property website. That range comes up consistently across real estate video guidance because it matches how these platforms are actually built: Zillow's Showcase video slot caps at 120 seconds, and most MLS boards that accept video at all favor something in the same short window rather than a long-form tour.
Trenton Miller, an eXp Realty agent in San Antonio, Texas, described the pressure behind that length directly to NAR's own magazine: "Everyone's attention span is so short, and they scroll through videos so quickly. I needed something that's fast and gives them all the information they need in one take." That's the editorial brief every listing video is actually working against, whether or not the brokerage says it out loud.
Cutting to that length means being deliberate about what makes the final sixty to ninety seconds, not trimming a longer edit down after the fact. Lead with your strongest exterior or drone establishing shot, move through main living spaces in walkthrough order, give the kitchen and primary bedroom the most screen time since those are the rooms buyers weight most heavily, and skip or barely touch low-interest spaces like a laundry room or a hallway closet unless staging there is unusually strong.
| Deliverable | Target length | Where it goes |
|---|---|---|
| MLS and Zillow listing video | 60 to 90 seconds | MLS, Zillow, Realtor.com, property website |
| Full property tour | 2 to 4 minutes | YouTube as a standalone upload |
| Vertical social cutdown | 15 to 60 seconds | Instagram Reels, TikTok, YouTube Shorts |
Build your full property tour as a separate, longer YouTube upload rather than trying to force one edit to serve every length. YouTube's own Help Center defines any vertical or square video under three minutes as a Short, so a longer, horizontal full tour belongs in a standard upload instead. A vertical cutdown for Reels or TikTok should pull your single strongest ten-second moment, usually a drone reveal or the best interior room, not a compressed version of the full walkthrough; Instagram's own Reels length allowance runs well past what actually performs, and a tight fifteen-second cut of your best shot consistently beats a rushed sixty-second miniature tour. A well-timed 60-second listing video outperforms a beautifully shot four-minute one on the platform it wasn't built for.
How do you color grade a walkthrough for that bright, consistent real estate look?
Correct each source separately, then apply a shared bright, neutral look on top. Gimbal footage, drone footage, and MLS photos each come from a different sensor with different exposure and white balance behavior, and a listing shot across a full day of natural light shifts color temperature from room to room as the sun moves, so a single grading node applied blindly rarely lands the same way everywhere.
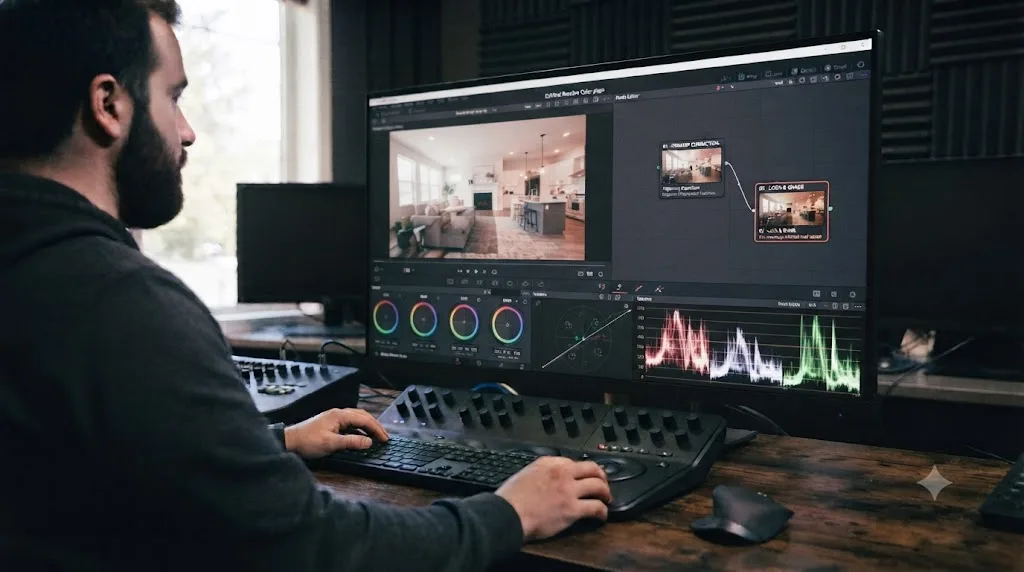
Start with Node 1 on your gimbal walkthrough footage: balance exposure and white balance room by room, watching the scopes rather than an uncalibrated laptop screen, since a kitchen with mixed daylight and warm bulb lighting will read differently from a bedroom lit purely by a window. Real estate grading generally wants brighter, slightly lifted shadows and a clean, neutral-to-warm white balance, since the goal is an inviting, well-lit space, not a moody cinematic look. Add a second node for a light, consistent look, a small boost in brightness and a touch of warmth, applied uniformly across the whole walkthrough so every room reads as part of the same house.
Drone footage usually needs its own correction pass before it matches your interior grade, since exterior daylight and interior lighting sit at different color temperatures and exposure levels by default. If your drone shot in a flat log profile for extra dynamic range, convert it to Rec.709 first, then apply the same bright, neutral look you built for the interior so the exterior establishing shot doesn't read as a visually separate video from the walkthrough that follows it.
A real estate grade should be invisible, not impressive. The viewer's attention needs to stay on the room, not on the color work, which is a different goal than a wedding film or a narrative short is chasing. Two nodes per source, correction and a shared bright look, gets there for the overwhelming majority of listing videos, and it's fast enough to actually finish before a Friday go-live.
How do you edit twilight or dusk exterior shots into the same video as daytime footage?
Treat twilight footage as its own correction pass, then match it to your interior grade's overall warmth and brightness rather than leaving it in its naturally different color temperature. Twilight exterior shots capture a property with interior and landscape lighting glowing against a deep blue sky, and that look is deliberately different from a flat daytime exterior, which is exactly why agents request it: a true twilight shot creates an emotional, inviting feel that a daytime shot of the same house doesn't produce.
That intentional difference is also what makes twilight footage the easiest shot in the whole video to accidentally leave looking disconnected from everything around it. A twilight exterior sitting at the front or the very end of a walkthrough that's otherwise all daytime interior footage needs a deliberate bridge, not just a hard cut from one color temperature to another.
Handle the transition with a short crossfade or a brief black frame rather than a hard cut if the twilight shot opens or closes the video, and make sure your Node 2 look, the same warm, bright pass you built for the rest of the edit, gets applied to the twilight footage too, adjusted for its naturally darker exposure rather than copied at identical settings. The goal isn't to make twilight look like daytime, that would defeat the reason you shot it, it's to make sure both sections feel like they came from the same edit rather than two different projects stitched together.
Twilight shots work best as bookends, an opening establishing shot or a closing shot after the walkthrough, rather than intercut throughout the video, since alternating between day and dusk repeatedly disrupts the sense of continuous movement through the property that the rest of the edit is building. One well-placed twilight shot does more for a listing than several scattered through the middle of the walkthrough.
What music and audio should a real estate video use?
Licensed background music almost always, since most real estate videos carry no dialogue at all, or at most a short agent voiceover over the walkthrough. That's a real structural difference from most editing tutorials, which assume you're mixing a narrator or an interview subject against room tone. A listing video's audio track is usually one thing: music, chosen to match the pace and feel of the cut.
Pick a track before you finalize your cut length, not after, since the music's own structure, its build, its drop, its natural phrase length, should shape where your hardest cuts land rather than the other way around. A cut that lands on a musical beat reads as intentional even to a viewer who couldn't articulate why; a cut that ignores the music entirely feels slightly off even when the visual edit itself is clean. License your track from a source that explicitly covers commercial use, since a real estate listing video is commercial content the moment it's attached to a paid transaction, the same category of use that requires drone certification and airspace clearance covered earlier in this guide.
If an agent is recording a short voiceover over the walkthrough, a few sentences about the neighborhood or a standout feature, treat it the same way any narrated edit does: sync it to picture, then duck the music underneath it so the voice stays intelligible. How to sync audio in DaVinci Resolve covers Auto Sync Audio in full if the voiceover was recorded separately from the walkthrough footage rather than live on set, the same waveform-matching tool that fixes the clock-drift sync problem covered earlier in the troubleshooting section above.
Keep the music instrumental or vocal-light for the same reason MLS boards restrict branding: the video is meant to showcase the property, not compete with it for attention. A track with prominent, distracting lyrics pulls focus away from the rooms the same way an oversized watermark does. A real estate video's soundtrack should support the walkthrough, not narrate over it.
How do you export one video for MLS, Zillow, Realtor.com, YouTube, and Instagram without cutting it five times?
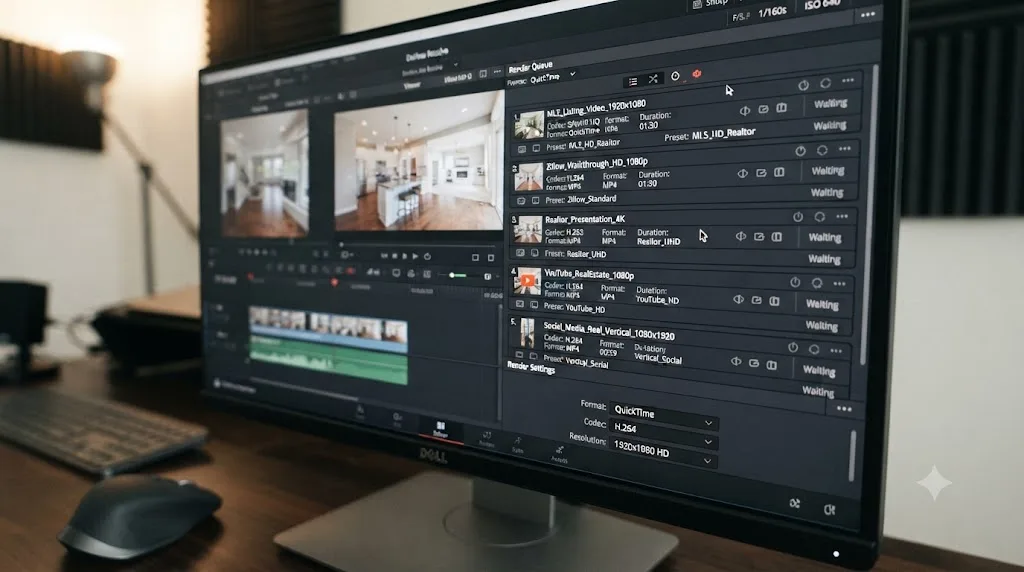
Finish one master timeline, then duplicate and re-render it per destination from a single Deliver page pass, the same way you'd handle multi-platform export on any content edit. Real estate video has to satisfy more simultaneous destinations than most other niches, MLS, Zillow, Realtor.com, YouTube, and increasingly a vertical cutdown for Instagram or TikTok, and each one has its own format and length expectations.
| Destination | Format | Resolution | Length | Branding |
|---|---|---|---|---|
| MLS | MP4 (H.264), 16:9 | 1080p preferred, 720p minimum | Typically 3 to 5 minutes max, varies by board | Usually prohibited |
| Zillow | MP4 (H.264), 16:9 | 720p minimum, 1080p recommended | Up to 10 minutes; Showcase caps at 120 seconds | Permitted, roughly 15 seconds at start or end |
| Realtor.com | MP4 (H.264), 16:9 | 720p minimum, 1080p+ recommended | Up to 10 minutes | Generally permitted |
| YouTube full tour | MP4 (H.264), 16:9 | 1080p or 4K | Under 3 minutes counts as a Short per YouTube's Help Center | No platform restriction |
| Instagram Reels / TikTok | MP4 (H.264), 9:16 | 1080x1920 | 15 to 60 seconds performs best | No platform restriction |
Build your vertical cutdown as a duplicated timeline in 9:16 rather than trying to crop it live during export. Enable Use Vertical Resolution in Project Settings or use a vertical preset, per DaVinci Resolve's reference manual on vertical resolution, then reframe your strongest moments manually with a Transform crop on the free version, or with Smart Reframe if you're on Studio. If a crop ever leaves visible black bars around your subject instead of a full-frame fill, DaVinci Resolve black bars, wrong aspect ratio fix walks through the specific settings that cause it.
Once every version is cut, add each one to the Render Queue with its own preset, the MLS unbranded master, the Zillow and Realtor.com branded version, the YouTube full tour, and the vertical social cutdown, and render all of them in a single batch. Per DaVinci Resolve's reference manual, the render queue holds jobs from multiple timelines at once, so this is genuinely one click across every deliverable a listing needs, not four or five separate export sessions run back to back. Five destinations do not require five separate edits, only five separate render queue jobs off one finished timeline.
What does a realistic real estate video editing workflow look like start to finish?
Take a concrete case: a four-bedroom listing shot with a gimbal walkthrough, ten minutes of raw drone footage including one twilight exterior pass, and thirty-five MLS photos supplied by the listing agent, due to go live in two days.
Project setup happens first: the timeline gets built at 1920x1080, 23.976fps, matching the gimbal camera's true frame rate, Rec.709. Mixed Frame Rate Format gets set to Resolve before the drone footage, shot at a different true rate, gets imported, so it conforms automatically without manual retiming.
Organizing and proxying comes next: one property bin, subdivided into walkthrough, drone, and photos, on a dedicated external drive for the active project. Proxies get generated for the drone footage specifically, since it's the heaviest 4K source; the gimbal camera shot 1080p and scrubs natively with no proxy needed.
Stabilization runs on the full walkthrough pass, room by room, with the entry shot and the staircase transition getting the most attention, since those are the two places footstep impact shows up even through a well-balanced gimbal.
The rough cut builds in walkthrough order: exterior drone establishing shot first, then the gimbal glide through entry, living room, kitchen, primary bedroom, secondary bedrooms, and back outside, trimmed against a licensed instrumental track chosen before cutting began so hard cuts land on its natural phrase breaks.
Photo integration happens where the video footage runs thin: four of the thirty-five MLS photos, covering angles the walkthrough didn't capture well, get keyframed with a slow push-in and slotted into the sequence at the matching point in the walkthrough order.
Color happens once the cut is locked: a two-node pass on the gimbal footage, correction then a bright neutral look, applied to the drone footage next with its own correction pass first, and the twilight exterior gets matched to the same overall warmth as a bookend closing shot rather than intercut through the middle.
Data Burn-in and export follow the pattern covered above: one Data Burn-in preset built with the property's price, address, and square footage, applied to the Zillow, Realtor.com, and YouTube renders, switched off for the MLS delivery, and a vertical 9:16 cutdown built from the drone reveal and the kitchen shot for a fifteen-second Reels post.
A neighboring condo listing that same week runs the exact same stages with two differences: the building's HOA doesn't allow drone flights over the shared courtyard, so the video opens on the strongest interior room instead of an aerial establishing shot, and the editor is cutting on a laptop between showings rather than at a desk, using the exact hardware setup described earlier, one external SSD, drone-equivalent proxies generated from the gimbal's heaviest 4K clips, nothing more exotic than that.
Nothing about either example needed Fusion or a complicated node tree. The stages don't change between a modest starter home and a large multi-story listing, or between a property you can fly and one you can't. What changes is how many rooms, how much drone footage, and how many photos each stage actually has to handle.
Do you need DaVinci Resolve Studio for real estate video editing?
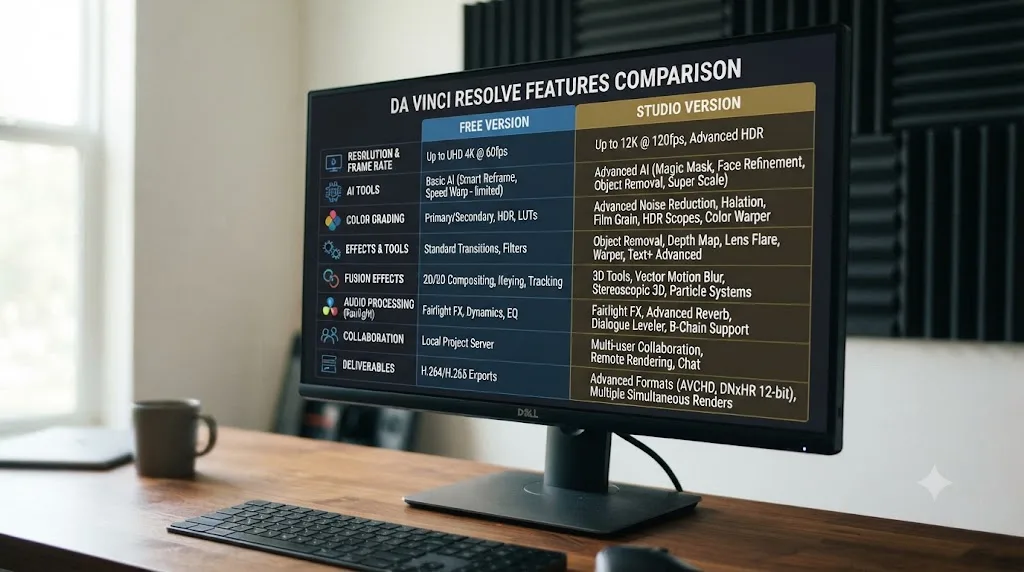
Not to finish your first listing video, but the answer changes once your drone footage or your deadline volume gets specific. Everything covered so far, project setup, stabilization, keyframed photo slideshows, Data Burn-in property text, color correction, and export to every destination this guide covers, runs fully in the free version.
| Feature | Free version | Studio |
|---|---|---|
| Project setup, proxies, bins, Power Bins | Included | Included |
| Tracker palette Stabilizer | Included | Included |
| Keyframed photo slideshows | Included | Included |
| Data Burn-in property text and branding | Included | Included |
| Color correction and grading | Included | Included |
| Export to MLS, Zillow, Realtor.com, YouTube presets | Included | Included |
| 10-bit HEVC decode for some drones | Limited without a Windows system decoder | Included |
| Smart Reframe for automatic vertical reframing | Not included | Included |
| Speed Warp for smoothing slow-motion drone shots | Not included | Included |
If your drone shoots 10-bit HEVC in its highest-quality modes and you're editing on Windows, Studio or a working system decoder stops being optional the moment that footage won't import cleanly. If you're cutting several listings a week and building a lot of vertical social content from the same footage, Smart Reframe's automatic subject tracking saves real time over manually keyframing a Transform crop on every cutdown. Neither is required to finish this guide's core workflow, and plenty of working real estate editors run entirely on the free version.
What's the fastest way to learn DaVinci Resolve for real estate video specifically?
Whatever gets you cutting a real listing fastest, and for most people starting out that's a small combination of resources, not one single course. Blackmagic Design's own free training guides remain a solid, accurate starting point for general fundamentals, project setup, the Edit page, color basics, precisely because Blackmagic built the software they're teaching. YouTube channels, Casey Faris chief among them for general editing and color, go deeper on individual pages than a written guide can. Reddit's r/DaVinciResolve is a reasonable place to sanity-check a narrow, specific setting question. None of these teach the real estate-specific parts, gimbal stabilization habits, MLS branding rules, twilight color matching, no-fly-zone judgment calls, since those are workflow decisions built from actually cutting listing footage, not app features any general tutorial demonstrates by default.
We've spent seven years cutting commercial video professionally, including real estate and property marketing work, and the pattern holds regardless of niche: watching a course about editing is not the same as editing your own footage. Every general resource above gets you closer to starting. Only finishing a cut on your own listing's footage teaches the specific problems your specific gimbal, your specific drone, and your specific deadline actually create.
That gap, between watching a tutorial and getting unstuck mid-edit on your own project, is exactly what's driving buyer questions like "AI tool to learn DaVinci Resolve" and "app that helps you while using DaVinci Resolve." Two genuinely different categories of tool have shown up to answer it. One category executes edits for you from a typed instruction: CutAgent, Sottocut, PremiereCopilot, and Eddie AI all fall here, describing a cut or a silence removal and letting the tool act on your timeline directly. That's a real time saver on mechanical, repetitive real estate tasks, trimming dead air out of a long raw drone flight, for instance, but it hands the editorial decision, which shot leads, how a room transition lands, to the tool rather than to you.
TryUncle is the on-screen assistant for DaVinci Resolve on macOS. Ask in plain words and Uncle points at the exact control on your screen. It doesn't touch your timeline at all. It watches your project live, across the Edit, Color, and Fusion pages, and instead of executing a change, it shows you exactly where the Stabilizer's Smooth setting lives, or which Data Burn-in field holds your custom text, right when you're stuck mid-edit two days before a listing goes live, not before you've started. This is one of the recurring questions in our 100,000-plus-member editing community: not "how does DaVinci Resolve work" in the abstract, but "where is this specific setting, right now, on my actual project."
| Resource | What it actually does for a real estate edit |
|---|---|
| Blackmagic's free training | Structured fundamentals, straight from the source |
| Casey Faris (YouTube) | Deep, real-time walkthroughs of specific pages |
| Reddit r/DaVinciResolve | Sanity-checking a specific setting or error |
| CutAgent, Sottocut, PremiereCopilot, Eddie AI | Execute a described edit for you, mechanical tasks especially |
| TryUncle | Points at the control you're looking for, live, without touching your timeline |
Watching a tutorial about editing real estate video is not the same as editing your own listing's footage. TryUncle isn't free. It's a paid subscription at $39 a month with cancel-anytime billing, macOS only, so check TryUncle for the current rate before deciding it fits how you edit listings on a deadline. Whatever gets a listing finished before Friday, the fastest actual teacher remains the footage you're already sitting on.
What mistakes do new real estate video editors make in DaVinci Resolve, and how do you avoid them?
A handful of problems account for most of the wasted time on a first real estate edit, and each one has a specific, known fix.
Setting the timeline to a round frame rate instead of the gimbal or drone's true rate. This causes slow, compounding drift that's invisible for the first few seconds of a clip and only becomes obvious once you're deep into the edit. Check your camera's actual recorded frame rate, usually 29.97 or 23.976, before building your timeline.
Skipping stabilization because "it's already on a gimbal." A gimbal reduces shake at capture; it doesn't eliminate every residual jitter, especially on footstep-heavy transitions like entries and stairs. Run the Stabilizer on your full walkthrough pass as a default step, not a fix reserved for obviously shaky clips.
Assuming phone or gimbal footage is edit-ready because it plays smoothly on the device that shot it. Variable frame rate footage looks completely normal on the phone or gimbal app that recorded it and only reveals sync drift once it's dropped onto a timeline built for a constant frame rate. Convert suspect clips to constant frame rate before you import them, not after you've already noticed a drift on the timeline.
Burning in branding before checking the destination's rules. A Data Burn-in preset applied once and rendered everywhere breaks the moment a delivery goes to an MLS board that prohibits branding. Build the preset as a toggle, not a permanent part of the timeline.
Cutting one version and trying to force it to fit every platform. A 90-second listing video doesn't become a good YouTube full tour by trimming, and a full tour doesn't become a good Reels cutdown by cropping. Build your core walkthrough once, then duplicate and re-cut per destination's actual length expectations.
Editing drone footage before confirming it was legally flown, and legally allowed at that property. If you didn't fly the drone yourself, confirm the operator holds Part 107 certification before that footage goes into a client-facing, commercial video. And treat a Part 107 certificate as answering who can fly, not whether this specific property's HOA or building management allows a flight over its grounds at all.
Grading before the cut is locked. This holds for any edit, but a real estate video's photo-and-video mix makes the cost higher, since swapping a video clip for a still photo, or the reverse, mid-edit means regrading a clip you might replace anyway.
| Mistake | Symptom | Fix |
|---|---|---|
| Round-number frame rate | Slow drift between drone and gimbal footage | Match your primary camera's true 29.97/23.976 rate |
| Skipped stabilization on gimbal footage | Residual jitter on entries and stairs | Run the Stabilizer on the full walkthrough pass |
| Assuming device-playback footage is edit-ready | Sync drift only appears once footage hits the timeline | Convert suspect VFR clips to constant frame rate before import |
| Branding burned in permanently | MLS rejects a video with unwanted branding | Build Data Burn-in as a toggleable preset |
| One edit forced across every platform | Weak fit on YouTube, MLS, and Reels alike | Duplicate one master timeline per destination's actual length |
| Unverified drone certification or land-use permission | Legal or client-facing exposure on commercial footage | Confirm Part 107 and property-level permission before using footage you didn't fly yourself |
| Grading before the cut locks | Redoing color on a clip you later replaced | Lock the cut first, color last |
None of these mean you're bad at this. They're the specific, predictable failure points of editing gimbal, drone, and photo sources together on someone else's deadline, and every real estate editor has hit at least one of them once.
Where do you go from here?
Pick one listing you've already fully shot, walkthrough, drone, and photos, and run this guide's order on just that property before you touch anything else on your shoot list. Project setup matched to your gimbal's true frame rate, bins organized by property and room, stabilization on the full walkthrough, a Data Burn-in preset built as a toggle, a cut trimmed to 60 to 90 seconds, and export queued for every destination the listing needs. That one finished video teaches more about how DaVinci Resolve handles your specific gear than reading about the rest of your week's listings still sitting on a drive.
Once that first listing feels manageable, the rest of your shoot list is the same process repeated, not a harder version of it. What actually gets harder as your listing count grows is remembering exactly which setting fixes which problem at nine o'clock the night before a video goes live, whether the Smooth slider lives in the Tracker palette or the Inspector, whether Data Burn-in or a timeline overlay is the right call for a specific brokerage's request. That's less a knowledge gap than a lookup problem, and it's exactly the moment an assistant that can point at the right control on your actual screen earns its keep over another tutorial watched from the beginning. Whatever gets you there, the only version of this guide that actually teaches you anything is the one you run on your own listing's footage, slower the first time, faster on every one after it.
Frequently asked questions
- What is the best way to learn DaVinci Resolve for real estate video editing?
- Start on one real listing's footage instead of a demo file. Watch Blackmagic's free training on project setup and the Edit page, or a YouTube channel like Casey Faris, then immediately apply what you watched to your own gimbal and drone clips. Finishing one 60 to 90 second video teaches this software faster than finishing a general course first.
- Do I need DaVinci Resolve Studio to edit real estate listing videos?
- No. Project setup, stabilization, keyframed photo pans, Data Burn-in text overlays, color correction, and export presets for MLS, Zillow, Realtor.com, and YouTube all work in the free version. Studio adds Neural Engine tools like Smart Reframe for vertical repurposing and better HEVC handling for some drone footage, on top of the free workflow, not underneath it.
- Do you need an FAA Part 107 license to edit drone real estate footage?
- The editor doesn't need one, but whoever flew the drone does if the footage is used commercially. The FAA requires a Part 107 Remote Pilot Certificate for any drone flight connected to a real estate transaction, including a quick aerial establishing shot, and this applies regardless of the drone's weight. Many real estate videographers fly and edit the same footage themselves, which is why the two questions get confused.
- Can you fly a drone at every real estate listing?
- No. A B4UFLY airspace check flags controlled airspace near airports, national parks, and military routes, but even a flight cleared for that airspace doesn't grant permission to take off or land from a property the FAA has designated a No Drone Zone, since airspace authorization and land-use approval are separate things. HOAs, gated communities, and some condo buildings restrict drone flights over shared property independent of FAA airspace rules, so confirm with the property before promising a client an aerial shot.
- How long should a real estate listing video be?
- Sixty to ninety seconds for a listing video meant for MLS, Zillow, Realtor.com, and your property website. A fuller two to four minute walkthrough belongs on YouTube as a separate upload, and a fifteen to sixty second vertical cutdown covers Instagram Reels and TikTok. Getting the length right for the platform matters more than production polish.
- Is there an app that helps you while you're actually using DaVinci Resolve for real estate edits?
- Yes. TryUncle is the on-screen assistant for DaVinci Resolve on macOS. It watches your project live and points at the exact control you're looking for, whether that's the Stabilizer settings in the Tracker palette or the Data Burn-in field for a price overlay, instead of making you pause a listing edit to search a tutorial. It's a paid subscription, not a free tool.
- How do I stabilize shaky gimbal walkthrough footage in DaVinci Resolve?
- Select the clip, open the Tracker palette's Stabilizer mode, and click Stabilize. Resolve analyzes the frame-by-frame motion and smooths it, and a Smooth strength setting pushes handheld or lightly shaky gimbal footage toward a more locked, glide-like feel. This runs in the free version and works on both the Edit and Color pages.
- Can I add property info text or a watermark without violating MLS or Zillow's rules?
- It depends on where the video is going. Zillow and Realtor.com generally permit agent branding in the video file, while most individual MLS boards prohibit branded or watermarked video and require a clean, unbranded master, so check your specific board before you burn anything in. Build your property info text as a separate Data Burn-in preset you can toggle on for Zillow and off for MLS delivery from the same timeline.
Sources
- Small Unmanned Aircraft Systems (UAS) Regulations (Part 107) (Federal Aviation Administration)
- Become a Certificated Remote Pilot (Federal Aviation Administration)
- Certificated Remote Pilots including Commercial Operators (Federal Aviation Administration)
- B4UFLY (Federal Aviation Administration)
- No Drone Zone (Federal Aviation Administration)
- DJI Mini 4 Pro - Specs (DJI)
- DJI Air 3 - Specs (DJI)
- How to Upload Real Estate Videos to Zillow, MLS, and Realtor.com (2026 Step-by-Step) (Reel-E)
- Real Estate Video Length: How Long Should Your Listing Video Be? (2026) (Reel-E)
- Video Upload Guidelines (Zillow)
- Lights, Camera, Listing: How to Get Noticed in Real Estate (NAR Realtor Magazine, quoting Trenton Miller, eXp Realty)
- Twilight Real Estate Photography, What It Is and How to Shoot It (Styldod)
- DaVinci Resolve Reference Manual: Using the Stabilizer (Blackmagic Design, mirrored)
- DaVinci Resolve Reference Manual: Keyframing Effects in the Edit Page (Blackmagic Design, mirrored)
- DaVinci Resolve Reference Manual: Data Burn-In (Blackmagic Design, mirrored)
- DaVinci Resolve Reference Manual: Mixed Frame Rates (Blackmagic Design, mirrored)
- DaVinci Resolve Reference Manual: Timeline Format and Use Vertical Resolution (Blackmagic Design, mirrored)
- DaVinci Resolve Reference Manual: Using Proxy Media (Blackmagic Design, mirrored)
- DaVinci Resolve Reference Manual: Using the Render Queue (Blackmagic Design, mirrored)
- Variable vs Constant Frame Rate and Why It Matters for Video Editing (Markus Hagner Photography)
- DaVinci Resolve - Tech Specs (Blackmagic Design)
- DaVinci Resolve Download (Blackmagic Design)
- DaVinci Resolve Training (Blackmagic Design)
- DaVinci Resolve Studio product page (Blackmagic Design)
- DaVinci Resolve product page (Blackmagic Design)
- Casey Faris - YouTube channel
- YouTube Help: Understand three-minute YouTube Shorts
- Instagram Help Center: Reels length
- CutAgent (product site: features, pricing, FAQ)
- Sottocut (product site: features, pricing, platform requirements)
- PremiereCopilot pricing
- Eddie AI for DaVinci Resolve (native integration workflow page)
- TryUncle
- TryUncle FAQ
Learn by doing, not watching
Stop translating tutorials to your timeline.
TryUncle stays beside Resolve on Mac and Windows. When you ask, Uncle sees your screen and points at the exact control you need. No hunting through tabs, timestamps, or mismatched tutorials.
Meet TryUncleKeep reading
 GuidesJul 15, 202639 min read
The DaVinci Resolve Learning Roadmap for Beginners
The right order to learn DaVinci Resolve: Cut or Edit, then Fairlight, Color, and Fusion, checked against Blackmagic and Ripple Training's own paths.
 FixesJul 19, 202629 min read
DaVinci Resolve DJI Drone Footage Out of Sync: The Fix
DJI drone footage out of sync in DaVinci Resolve? Most DJI drones have no built-in mic, so drift usually traces to frame rate, 4GB file splits, or DJI Mic drift.
 GuidesJul 9, 202636 min read
How to Add a Watermark in DaVinci Resolve
How to add a watermark in DaVinci Resolve: Data Burn-in, timeline overlays, and why free exports sometimes show one you didn't add.