
Learn / DaVinci Resolveupdated for DaVinci Resolve 21.0.2 (2026)
DaVinci Resolve Black Bars: Every Wrong Aspect Ratio Fix
Quick answer
DaVinci Resolve adds black bars when a clip's resolution or aspect ratio doesn't match your timeline, and the default Input Scaling setting boxes it in instead of filling the frame. Open Project Settings > Image Scaling and set Mismatched Resolution Files to Scale Full Frame with Crop, or override it per clip in the Inspector's Retime and Scaling section.
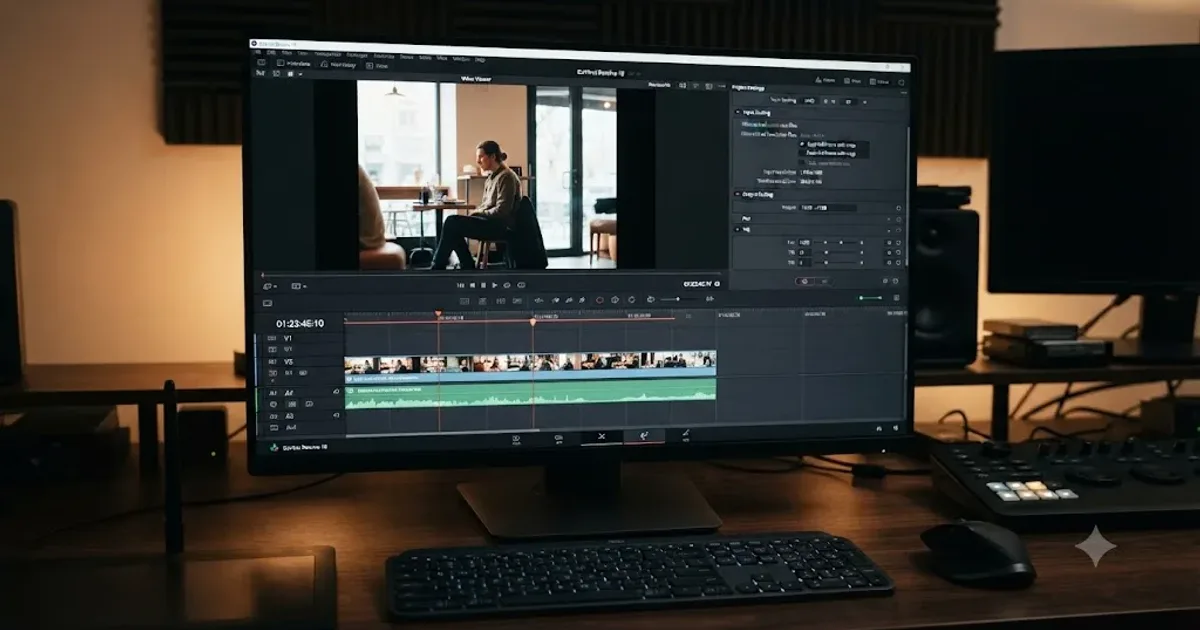
Your footage looks perfect on the camera's screen. You drop it on the timeline in DaVinci Resolve and two black bars appear, boxing your shot in like a letter you're about to mail. Or maybe it's the opposite: the picture stretches sideways until your subject looks like they've been run through a funhouse mirror.
Neither of these is DaVinci Resolve being broken. Both are the software doing exactly what a setting told it to do, and that setting almost certainly isn't the one you'd guess first. I want to walk through why this happens, which setting actually controls it, and the fixes for every variant of this problem, from a single mismatched clip to an entire vertical export that won't behave.
Why does DaVinci Resolve put black bars around your footage?
Black bars show up for one reason: the resolution of your clip doesn't match the resolution of your timeline, and DaVinci Resolve has to decide what to do about that gap. According to the DaVinci Resolve manual, the timeline resolution is "one of the most fundamental settings of your project, defining its frame size," and critically, "media used in a project does not have to match the timeline resolution. In fact, it's extremely common to mix multiple resolutions within the same timeline," per the manual's page on Timeline Resolution.
That's a deliberate design choice, not an oversight. Resolve expects you to bring in footage shot on different cameras, at different resolutions, sometimes in different aspect ratios entirely, a 4K A-cam next to a 1080p GoPro next to a vertical phone clip someone grabbed for behind-the-scenes coverage. Rather than reject anything that doesn't match, the manual states plainly that "clips that don't match the current resolution will be automatically resized according to the currently selected Image Scaling setting," from the same Timeline Resolution page.
A DaVinci Resolve project can mix footage shot at completely different resolutions on the same timeline, and the software resizes every mismatched clip automatically instead of rejecting it. That's the feature working as intended. The problem is that the specific way it resizes things, by default, is the one behavior beginners never expect: it adds black bars rather than filling the frame. Understanding why requires knowing about a setting most editors never open until something looks wrong, which is exactly what the next section covers.
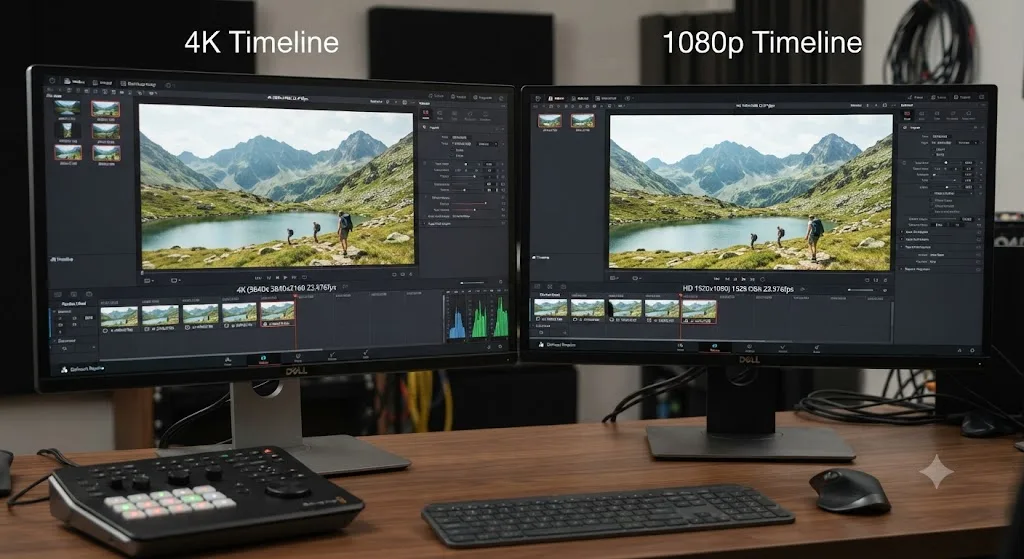
What's actually different between Timeline Resolution and Input Scaling?
This is the mixup at the center of nearly every "why does my aspect ratio look wrong" thread, and it's worth being precise about it, because the two settings sound like they should be one thing and they aren't.
Timeline Resolution decides the size and shape of your canvas. Input Scaling decides what happens to a clip that doesn't already fit that canvas. They live in different tabs of Project Settings, they solve different problems, and changing one does nothing to the other.
Timeline Resolution, found in Project Settings under Master Settings, is described in the manual as "a drop-down menu that lets you choose a frame resolution preset to use for image processing while grading," per the manual's page on Timeline Format. Set it to 1920x1080 and every export, every effect, every Power Window, every piece of on-screen text renders against a 1920x1080 canvas. It's the shape of the frame you're painting inside of, and changing it later doesn't just crop or stretch what you've already built; the manual notes that "each Edit page transform, Fusion clip effects output, Color page Power Window, Input and Output Sizing adjustment, tracking path, spatial keyframing value" and more all "automatically and accurately scaled to fit the new resolution," from the Timeline Resolution manual page.
Input Scaling, sitting in the Image Scaling tab right next to it, is a completely separate decision: given a clip whose native resolution doesn't match that canvas, how should Resolve fit it in? A Blackmagic Forum thread on this exact confusion, titled "Existential Question: Project Resolution and Input Scaling," lands on the same distinction from a user working through it in real time: it's not the project resolution itself that changes per clip, it's the comparison Resolve runs between that fixed project resolution and each source clip's own resolution, with the Input Scaling preset deciding the outcome of that comparison.
Here's the table that keeps these two straight:
| Setting | Where it lives | What it controls | What it does NOT control |
|---|---|---|---|
| Timeline Resolution | Project Settings > Master Settings | The pixel dimensions of your project's canvas | How individual mismatched clips get resized |
| Input Scaling (Mismatched Resolution Files) | Project Settings > Image Scaling | How a clip that doesn't match Timeline Resolution gets fit into the frame | The canvas size itself |
| Retime and Scaling (per-clip Scaling) | Inspector, on a selected clip | Overrides Input Scaling for one specific clip | Every other clip in the project |
| Output Scaling | Timeline Settings, Output Sizing tab | What resolution and scaling the Deliver page actually renders | The timeline's on-screen preview |
Four settings, four different jobs. Black bars are almost always Input Scaling's default behavior showing up on a mismatched clip, not a broken Timeline Resolution, and stretched footage is almost always a different Input Scaling option, or a Pixel Aspect Ratio problem covered later in this guide.
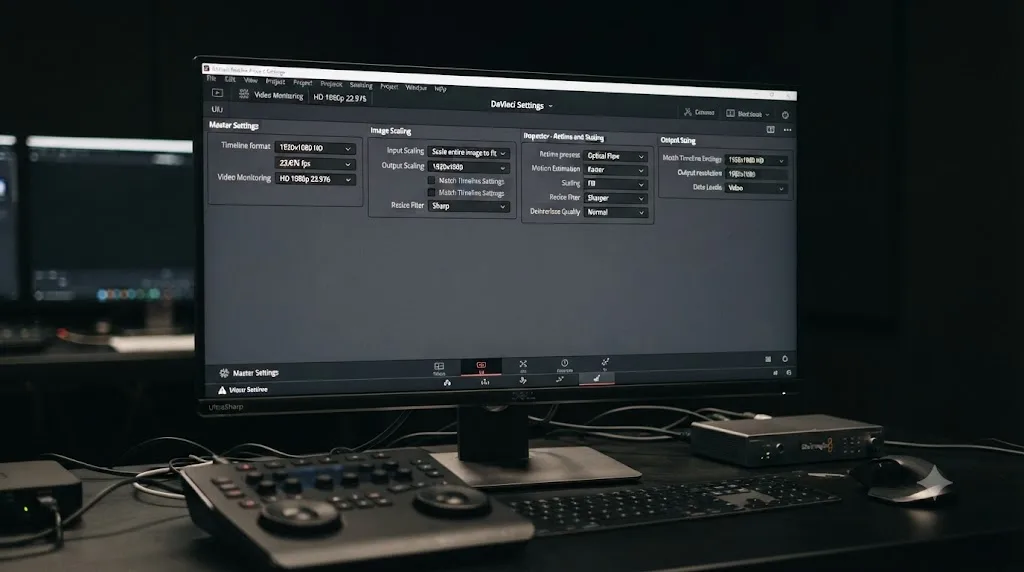
How do you fix black bars for the whole project?
If most of your clips are showing black bars, or you know your whole shoot is a mismatched resolution against your timeline, fix it once at the project level instead of clip by clip.
- Open Project Settings. Click the gear icon in the lower right corner of the interface, or press Shift+9.
- Select Image Scaling from the list on the left.
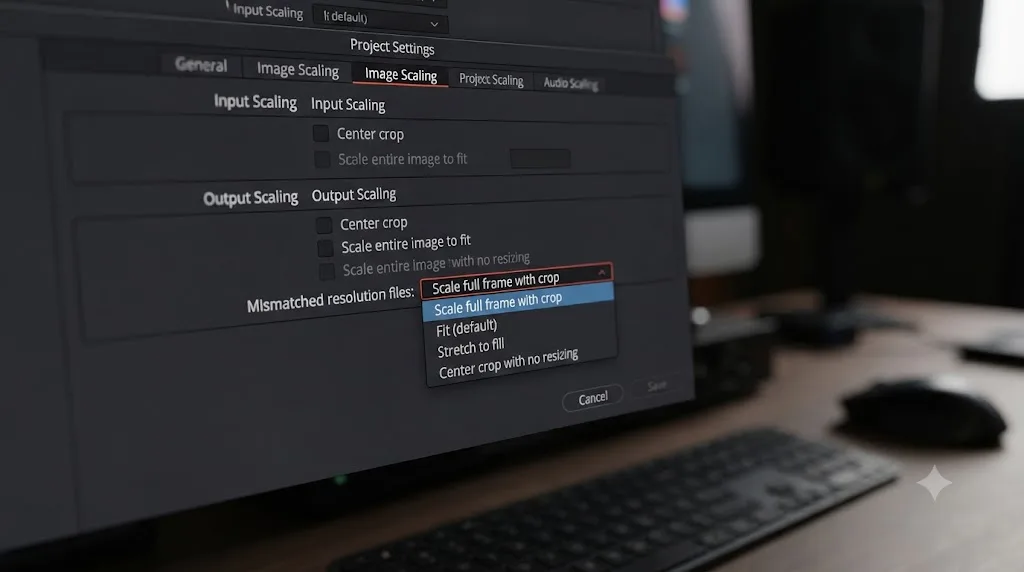
- Find the Input Scaling section and the Mismatched Resolution Files dropdown.
- Change it from the default, Scale Entire Image to Fit, to Scale Full Frame with Crop.
- Click Save.
The manual spells out exactly what each option does. Scale Entire Image to Fit, the default, means clips are "scaled so that each clip fills the frame without cropping. The dimension that falls short has blanking inserted (letterboxing or pillarboxing)," according to the manual's Image Scaling page. That's your black bars, by design: Resolve refuses to cut off any part of your image, so it pads the gap with black instead.
Scale Full Frame with Crop flips that priority. The same manual page describes it as scaling clips "so that the clip fills the frame with no blanking. Excess pixels are cropped." No black bars, ever, on a mismatched clip, at the cost of losing a bit of picture on whichever edge overflows the frame.
There are two other options worth knowing, even if you'll use them less often:
Center Crop with No Resizing does the least work of any of the four. The manual describes it as leaving clips "not scaled at all. Clips that are smaller than the current frame size are surrounded by blanking, and clips that are larger than the current frame size are cropped," from the same page. Nothing gets resized, which preserves every pixel's original scale, but it means a clip shot at a lower resolution than your timeline shows up small in the middle of the frame, surrounded by black on all sides, not just top or sides.
Stretch Frame to All Corners is the one to avoid unless you specifically need it. It "squished or stretched to match the frame size in all dimensions," useful, per the manual, "for projects using anamorphic media," from the Image Scaling page. Apply it to ordinary footage that just happens to be a different aspect ratio than your timeline and you get exactly the funhouse-mirror distortion described at the top of this guide.
Scale Full Frame with Crop eliminates black bars on every mismatched clip in a project with one setting change, at the cost of cropping whichever edge overflows the new frame. That tradeoff, a small crop instead of a black border, is the right default for almost every project. The only time it isn't is when you specifically need the entire original frame preserved, which is rare enough that most editors are better served leaving Scale Full Frame with Crop on by default and switching back only when a shot demands it.
How do you fix black bars on just one clip?
Changing Project Settings affects every clip in every timeline that uses the default scaling behavior. That's too broad a hammer if only one or two clips, an old archival shot, a screen recording, a phone video someone sent you, are showing bars while the rest of your footage matches fine.
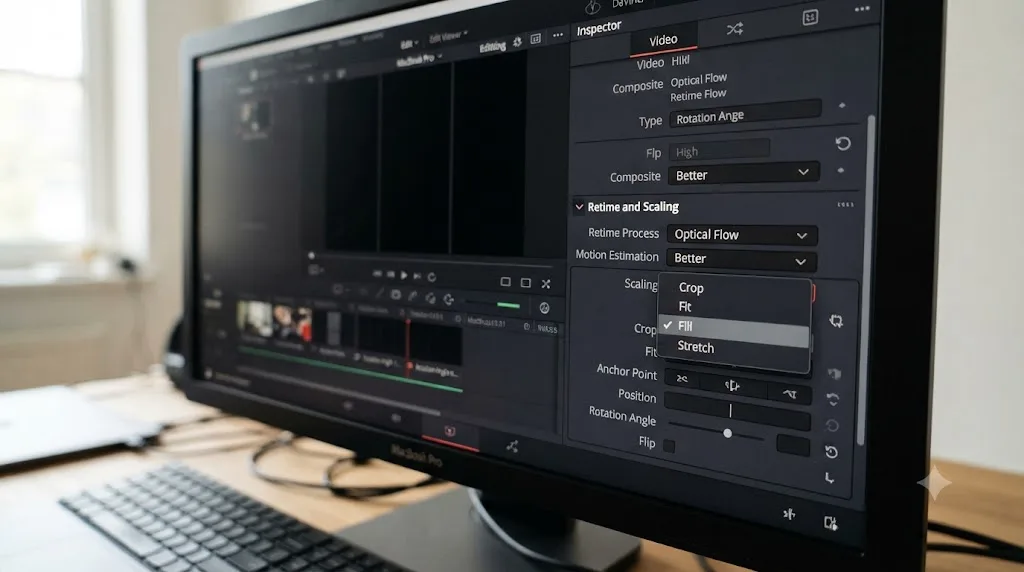
For a single clip, the fix lives in the Inspector instead of Project Settings:
- Select the clip on the timeline.
- Open the Inspector panel in the top right, and click the Video tab if it isn't already selected.
- Scroll down to Retime and Scaling.
- Find the Scaling dropdown. By default it reads Project Settings, meaning this clip is inheriting whatever the project-wide Input Scaling option says.
- Change it to Fill, Crop, or Stretch as appropriate, overriding the project default for this one clip only.
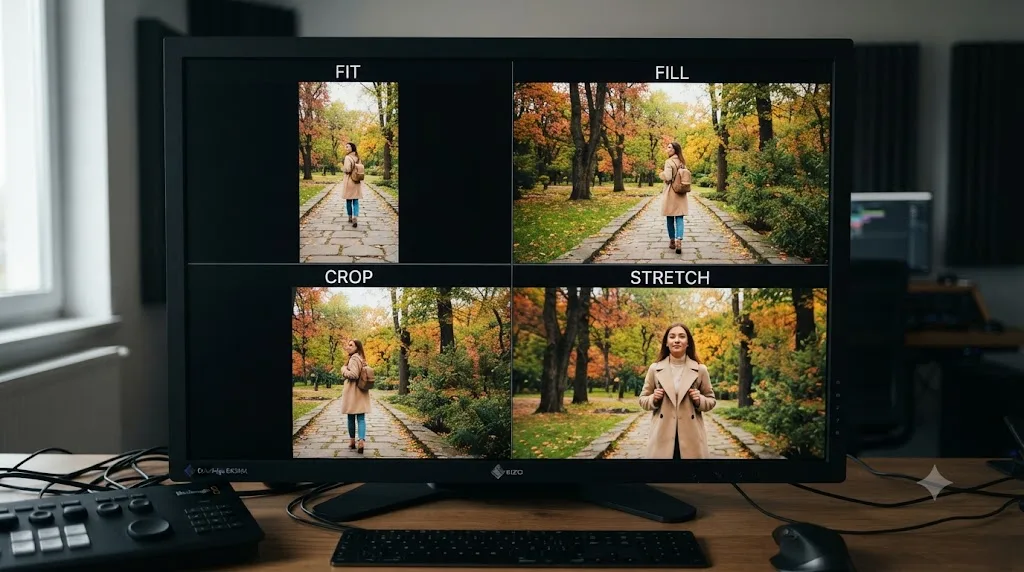
The manual confirms this is exactly what the control is for: it "lets you choose how clips that don't match the current project resolution are handled on a clip-by-clip basis," per the Retime and Scaling manual page. In practice, Fill behaves like the project-level Scale Full Frame with Crop option, filling the timeline frame completely with the mismatched clip's image and accepting a crop on the overflow edge. Crop lets you manually trim and reposition within the frame rather than accepting an automatic fill. Fit is the equivalent of Scale Entire Image to Fit, showing the whole image with blanking added where it doesn't reach the frame's edges, useful if you deliberately want this one clip letterboxed while everything else fills the frame.
This per-clip override is also the tool you want when the project-level fix would crop something you can't afford to lose, a shot with a boom mic just outside frame on one side, a title card where text sits close to an edge. Set the project default to Scale Full Frame with Crop for the majority of your footage, then drop back to Fit on the specific clip where cropping would cut something important.
The Inspector's Retime and Scaling control overrides the project-wide Input Scaling setting for exactly one clip, without touching anything else in the timeline. That's the difference between a global fix and a surgical one, and knowing which situation you're in before you start clicking saves you from either under-fixing a project full of mismatched clips or over-fixing a single outlier.
Should you crop, fit, fill, or stretch a mismatched clip?
Every fix in this guide comes down to picking one of four behaviors, whether you're setting it at the project level or overriding a single clip. Here's how to decide which one actually fits your shot, not just which one removes the bars fastest.
| Option | What happens to the image | Best for | Watch out for |
|---|---|---|---|
| Fit / Scale Entire Image to Fit | Whole image visible, blanking fills the gap | Footage where nothing can be cropped, or you want the letterbox/pillarbox look intentionally | This is the default, and it's the setting causing your black bars right now |
| Fill / Scale Full Frame with Crop | Frame fully filled, overflow edges cropped | The large majority of ordinary mismatched footage | Composition close to the frame edge, subtitles, or graphics near the border can get clipped |
| Crop | Manual trim and reposition within the frame | Precise control over exactly what part of an oversized clip you keep | Slower, since it isn't automatic like Fill |
| Stretch / Stretch Frame to All Corners | Image distorted to fill every corner, no cropping or blanking | Anamorphic footage that genuinely needs a stretch to desqueeze | Applying this to ordinary non-anamorphic footage visibly warps faces and straight lines |
A fast way to decide: if your subject or any important text sits near the edge of frame, lean toward Fit and accept the bars, or use Crop to manually choose what gets kept. If your composition has breathing room around the edges, which most handheld and interview footage does, Fill is almost always the better call, since a small crop on the margins is far less noticeable to a viewer than an unexpected black border.
Why do black bars show up only after you export, not in the timeline preview?
This one catches people who did everything right on the Edit and Color pages. The timeline preview looks correct, full frame, no bars anywhere, and then the exported file comes back with black borders that were never there while editing.
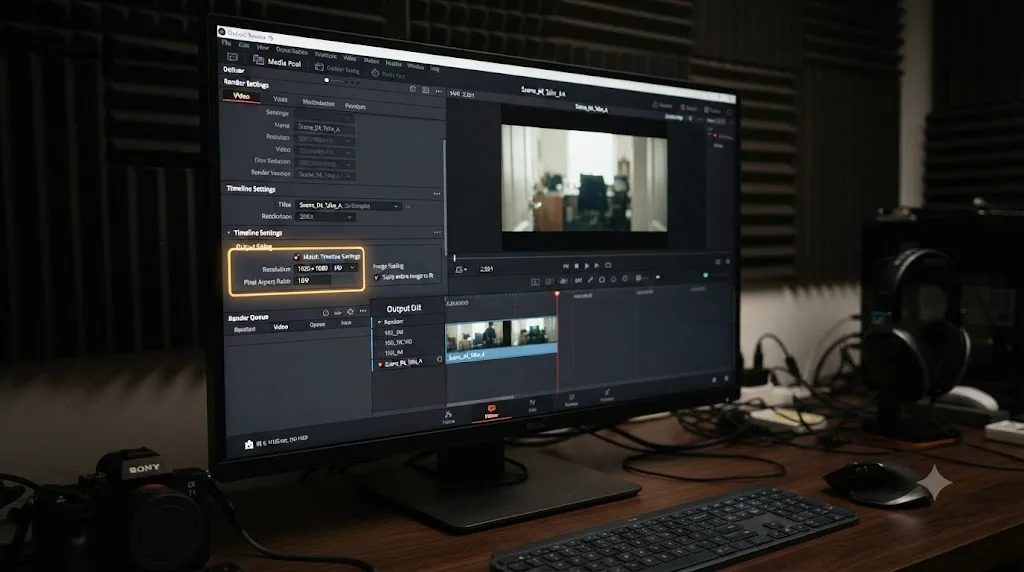
The cause is that the Deliver page has its own separate scaling settings, called Output Scaling, and they don't automatically inherit whatever you set for Input Scaling unless a specific checkbox tells them to. The manual describes the default behavior: Match timeline settings is "enabled by default and causes the output settings to mirror the Timeline Resolution and Image Scaling settings," per the manual's Output Scaling page. If that checkbox is unchecked, or someone (possibly you, weeks ago, trying to render a quick low-res preview) set a custom Output resolution with a different aspect ratio than your actual timeline, the render pulls from that mismatched setting instead of what the timeline actually shows.
A real report on the Creative COW forum matches this pattern closely. A user working on a vertical 2160x3840 project, with output scaling matched to the timeline and source footage at the identical 2160x3840 resolution, still saw black bars appear at the top of the record viewer, and specifically wondered whether the default "scale entire image to fit" setting under both the input and output scaling options was responsible even though the resolutions matched on paper, according to the Creative COW thread on the black bars export issue. That's a useful reminder on its own: matching resolutions doesn't guarantee matching aspect ratios or matching scaling behavior once frame rate, pixel aspect ratio, or a stray Output Sizing override enters the picture.
To check this before you re-render:
- Open Timeline Settings (not Project Settings) for the specific timeline you're delivering.
- Click the Output Sizing tab.
- Confirm Match Timeline Settings is checked. If it's unchecked, either check it, or manually set the Output Resolution and Scaling to match your timeline exactly.
- If you deliberately need a different output resolution (a 4K timeline delivering an HD proxy, for instance), keep Match Timeline Settings off, but manually confirm the aspect ratio of your custom output resolution matches your timeline's aspect ratio, not just a round number that happens to be smaller.
A DaVinci Resolve timeline can look correct in every preview and still produce a barred export, because Output Scaling on the Deliver page is a separate setting from the Image Scaling your timeline preview uses. If you're chasing bars that only appear in the rendered file, this is the first place to look, before you assume the export itself is broken. Our guide to DaVinci Resolve export settings for YouTube covers the rest of the Deliver page settings that commonly get missed on a first export.
How do you fix vertical video black bars for Reels, TikTok, and YouTube Shorts?
Vertical delivery is where this whole topic gets its own extra layer, because you're not just fixing a mismatched clip anymore, you're often changing the timeline's own aspect ratio from 16:9 to 9:16 partway through a project.
Meta's own guidance for Instagram recommends a 9:16 aspect ratio for Reels, and the widely cited production resolution for that ratio is 1080x1920, according to Instagram's Help Center page on Reel size and aspect ratios. YouTube's help documentation covers the same territory for Shorts and other vertical uploads on its platform, noting how the service handles different aspect ratios and resolutions on upload, per YouTube's help page on video resolution and aspect ratios. TikTok's app has historically favored the same 9:16, 1080x1920 shape as its default vertical canvas. All three platforms converge on the same numbers, which makes 1080x1920 close to a universal vertical target.
The cleanest way to build a vertical project in DaVinci Resolve is to start there:
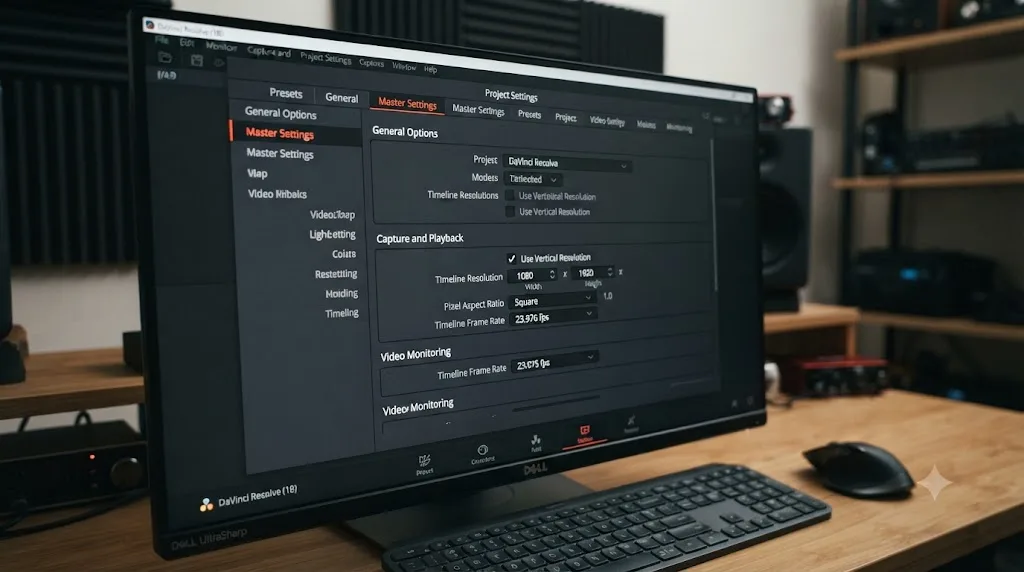
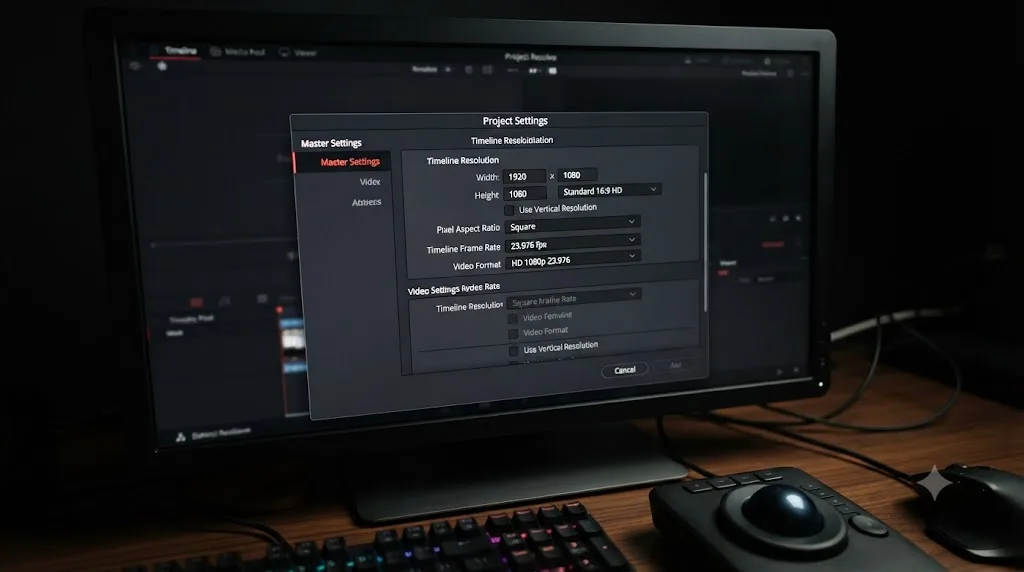
- When creating a new project or timeline, choose a vertical preset if one is offered, or open Project Settings > Master Settings.
- Set the resolution fields to 1080 x 1920 (or your target vertical resolution).
- Check Use Vertical Resolution. The manual describes this checkbox as swapping "the horizontal and vertical pixels of the Timeline resolution," letting you "format your timeline vertically for display on smart phones, tablets, or televisions that are in an upright configuration," per the manual's Timeline Format page.
Converting an existing horizontal edit into a vertical one is a different, riskier operation, because Project Settings applies to the whole project, not just the timeline you're currently viewing. Editor and trainer Larry Jordan puts this bluntly in his walkthrough of the conversion process: "If you change the timeline format using Project Settings, EVERY timeline in your project will change. This is considered, um, sub-optimal," according to Larry Jordan's guide to converting horizontal video to vertical video in DaVinci Resolve 19.
His recommended sequence avoids that trap:
- Duplicate the timeline you want to convert, so your original horizontal cut stays untouched.
- Change timeline settings to vertical video, applied to the duplicated timeline specifically rather than the whole project.
- Select all video clips on the new vertical timeline.
- Enable Inspector > Video > Smart Reframe, which Jordan describes as using "AI-technology to adjust the horizontal position of each clip for maximum benefit," from the same guide.
That's a genuinely different tool from anything covered so far in this guide. Smart Reframe doesn't just crop or letterbox a mismatched clip; it repositions the frame within your footage to try to keep a subject centered as the aspect ratio changes underneath it. It's covered in full, including why it sometimes fails, in our guide to DaVinci Resolve Smart Reframe not working. One detail worth carrying over here: Smart Reframe is a Studio-only feature, so if you're on the free version, the vertical conversion has to be done manually with the Transform tool, repositioning each clip's framing by hand or with keyframes.
One more thing Jordan flags that trips people up after the resize itself is handled correctly: "Keep in mind that, after conversion, all titles and graphics will need to be redesigned for the new aspect ratio," from the same article. A lower third built for a 16:9 frame simply doesn't sit in a sensible place on a 9:16 canvas, and no scaling setting fixes that. That's a design pass, not a settings fix.
Why doesn't the Use Vertical Resolution checkbox work the way you expect?
If your vertical timeline reverts to horizontal dimensions after you close and reopen the project, you're not imagining it. A Blackmagic Forum thread specifically documents this behavior in DaVinci Resolve 18.1: creating a project with a default vertical resolution and the Use Vertical Resolution checkbox enabled could result in the resolution flipping back to its horizontal orientation on reopening, with the checkbox itself unchecked, and re-checking it didn't reliably restore the correct dimensions, according to the Blackmagic Forum thread on Vertical Resolution bugs in DaVinci Resolve 18.1.
If you hit something like this on a current build of Resolve, the practical workaround is the same one that fixes most save-and-reopen surprises: don't trust the checkbox's saved state blindly. Before you start a render, open Project Settings, check the resolution values directly rather than glancing at whether the checkbox looks ticked, and re-enter the correct vertical numbers if anything looks off. It costs ten seconds and it's cheaper than discovering a flipped aspect ratio after a render has already finished.
This is also a good moment to separate two things that look similar but aren't: a project genuinely reverting its saved settings between sessions, which is what the 18.1 report describes, versus a fresh project simply never having Use Vertical Resolution checked in the first place because you started from a horizontal preset. If you're setting up a new vertical project, it's worth confirming the checkbox and the resolution values immediately after creating the project, before you import a single clip, so you know your starting point was correct rather than debugging it after the fact.
Your footage isn't black-barred, it's squeezed or stretched. What's actually wrong?
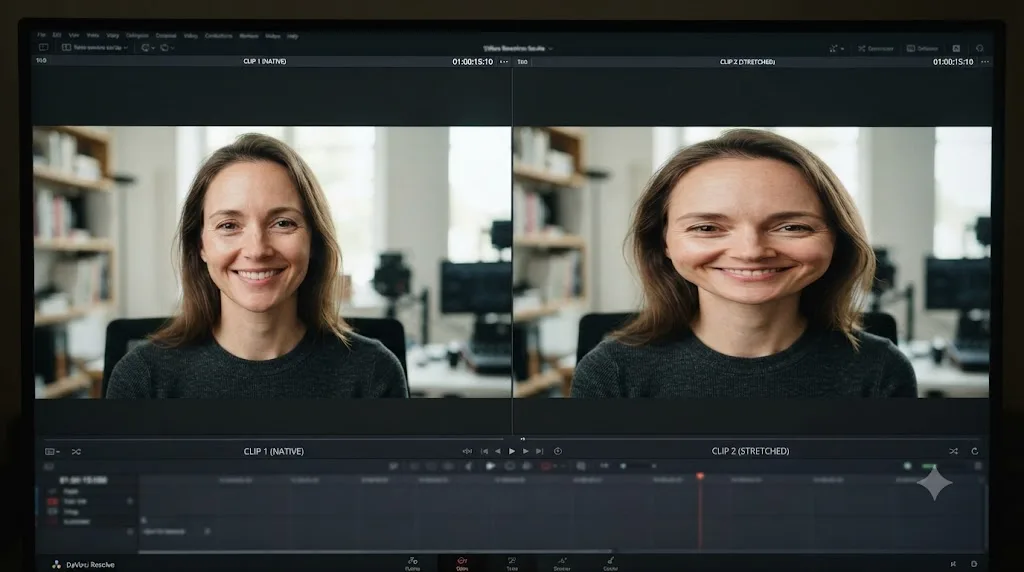
Black bars and stretched footage are the two opposite symptoms of the exact same root cause: a resolution or aspect ratio mismatch. The difference is only in which Input Scaling behavior is currently active.
If your subject looks abnormally wide, faces look pulled sideways, or straight vertical lines in the shot (a doorframe, a person standing upright) lean at an angle that wasn't there on set, check two things in this order:
First, check Mismatched Resolution Files in Project Settings' Image Scaling tab. If it's set to Stretch Frame to All Corners, that's almost certainly your answer. This option deliberately squishes or stretches footage to fill every corner of the frame with no cropping and no blanking, which is exactly the right behavior for genuinely anamorphic media and exactly the wrong behavior for ordinary footage that just happens to be a different aspect ratio than your timeline.
Second, if the scaling option is set correctly and the stretch persists, check the clip's Pixel Aspect Ratio metadata. Anamorphic lenses squeeze a wider field of view into a standard sensor's rectangular frame, and the footage needs a corresponding desqueeze factor applied to look correct, a step that's separate from Input Scaling entirely. If a clip's metadata carries an incorrect Pixel Aspect Ratio tag, perhaps inherited from an anamorphic shoot or a camera profile mismatch, Resolve will render it distorted regardless of what your Image Scaling settings say, because it believes the pixels themselves aren't square to begin with. Check this in the Media Pool by right-clicking the clip, choosing Clip Attributes, and confirming the Pixel Aspect Ratio setting matches what your footage actually is.
Black bars mean Resolve is padding a mismatched clip to avoid cropping it. Stretching means Resolve is distorting a mismatched clip to avoid both cropping and padding. They're not two unrelated bugs. They're the two ends of the same Input Scaling dropdown, plus one separate metadata field that can cause the same visual symptom for a completely different reason.
Why do you still get black bars even when your clip resolution matches your timeline?
This is the least common variant covered here, and it's the most confusing precisely because the obvious fix, matching your resolutions, has already been done and didn't help.
The Creative COW report referenced earlier is a real example of exactly this: identical 2160x3840 resolution on both the timeline and the source clip, Output Scaling matched to the timeline, and black bars still appeared at the top of the record viewer, per the Creative COW forum thread on black bars on export. Matching pixel dimensions isn't the same as matching every property that affects how a frame gets composited. A few things that can still cause bars even with resolutions that look identical on paper:
Frame rate or interlacing mismatches between source and timeline can trigger conform behavior that isn't the same thing as a simple resize, occasionally introducing blanking as a side effect of that conform process.
A stray Output Sizing override on that specific timeline, set at some earlier point in the project and forgotten, can reintroduce bars in the render even when the Edit page preview and the source clip's raw resolution both look correct. This is the same Output Scaling setting covered earlier in this guide, and it's worth rechecking even when your resolutions genuinely match.
A per-clip Retime and Scaling override left on an old setting. If a clip was manually set to Fit at some point, perhaps while troubleshooting an earlier, different mismatch, that override persists even after you've since matched its native resolution to the timeline, because the Inspector setting doesn't automatically revert just because the underlying resolutions later happen to line up.
If you've confirmed resolutions match and bars are still showing up, work through Output Scaling, frame rate, and the per-clip Inspector override in that order before assuming something deeper is wrong. In the large majority of cases, one of those three is quietly overriding what looks, at a glance, like a perfectly matched setup.
Pillarbox on the sides but nothing on top and bottom. What does that tell you?
Which direction the bars run is actually useful diagnostic information, not just cosmetic detail.
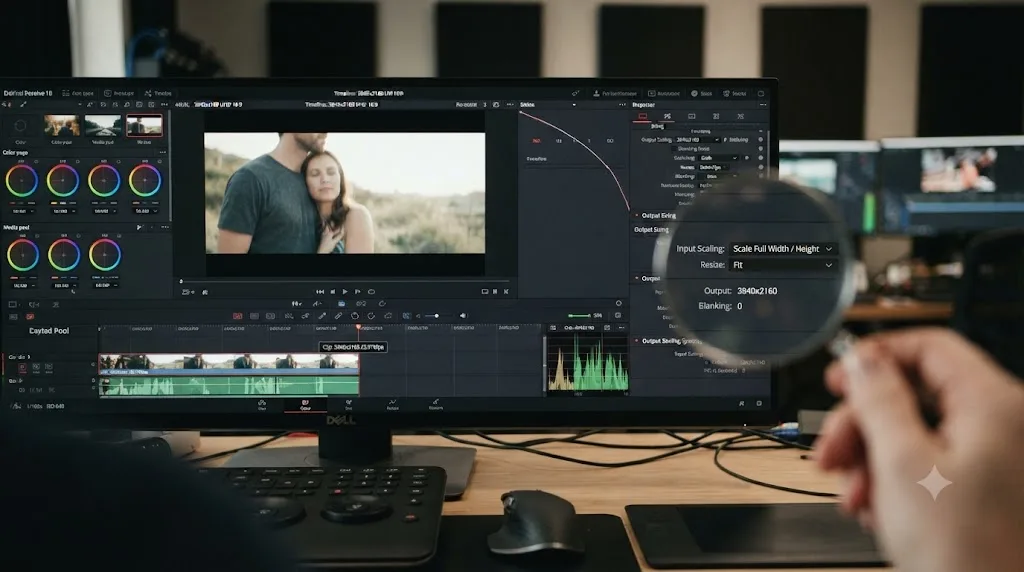
Pillarboxing, bars running down the left and right sides, happens when your clip is narrower than your timeline relative to its height, the classic case of a 9:16 vertical phone clip dropped into a 16:9 horizontal timeline. The full height of the vertical clip fits, but its width falls short, so Resolve pads the left and right edges to compensate, exactly as the manual describes for Scale Entire Image to Fit: "the dimension that falls short has blanking inserted," per the Image Scaling manual page.
Letterboxing, bars on top and bottom, is the mirror image: your clip is wider relative to its height than your timeline, most commonly footage shot in a cinematic widescreen ratio like 2.39:1 dropped into a standard 16:9 timeline, where the width fits but the height comes up short.
Knowing which one you're looking at tells you immediately which dimension of your source clip doesn't match your timeline, without having to open the clip's metadata first. Pillarboxing on a timeline that's otherwise consistently 16:9 almost always means a vertical or square source clip snuck in. Letterboxing on the same timeline almost always means an anamorphic or ultra-widescreen source clip snuck in. Either way, the fix is the same Input Scaling or per-clip Scaling override covered earlier in this guide, but knowing the direction saves you a step of investigation.
It's also worth distinguishing accidental pillarboxing or letterboxing from the intentional kind. DaVinci Resolve has a separate feature, Output Blanking, purpose-built for adding cinematic black bars on purpose, for a director who wants a 2.39:1 letterboxed look baked into a 16:9 delivery. That's a creative choice applied deliberately on the Deliver page, entirely different from the accidental bars this guide is about, and it's worth knowing the two look identical on screen but come from opposite intentions, one a mistake to fix, one a style choice to keep.
Is this a Smart Reframe problem instead?
If you're converting between aspect ratios rather than just fixing a single mismatched clip, and you're seeing black bars appear specifically after running Smart Reframe, you're looking at a related but genuinely different problem than everything else in this guide.
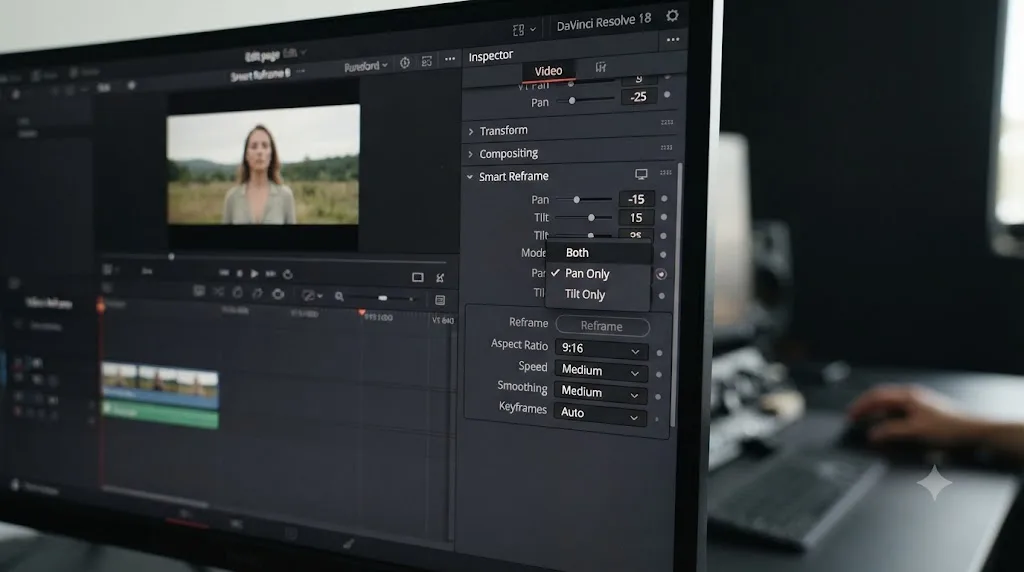
Smart Reframe is Resolve Studio's AI-driven tool for repositioning a subject as you convert footage from one aspect ratio to another, and by default it can reposition on both the horizontal and vertical axis at once, even in situations where the vertical axis already fills the frame correctly. That default behavior is a documented cause of unexpected black bars specifically tied to Smart Reframe rather than to Input Scaling, and it has its own separate fix: switching Smart Reframe's mode from Both to Pan Only, which restricts it to horizontal repositioning only. That distinction, along with the rest of Smart Reframe's failure modes, proxy conflicts, tracking drift, resolution limits, is covered in full in our guide to DaVinci Resolve Smart Reframe not working.
The quick way to tell which problem you actually have: if the bars appear the moment you drop a mismatched clip onto the timeline, before you've touched Smart Reframe at all, it's an Input Scaling issue and everything earlier in this guide applies. If the bars appear specifically after you run Smart Reframe on a clip that looked fine beforehand, it's Smart Reframe's own repositioning behavior, and the fix lives in that tool's controls, not in Project Settings' Image Scaling tab.
Does this behave differently on Mac, Windows, and Linux?
No, and this is one of the more reassuring parts of troubleshooting this specific problem. Timeline Resolution, Input Scaling, Output Scaling, the per-clip Retime and Scaling override, Use Vertical Resolution, and Output Blanking are all core parts of DaVinci Resolve's project and timeline settings, processed identically regardless of operating system. A vertical timeline built on a Mac opens with the exact same resolution and scaling behavior on a Windows machine, and the same DaVinci Resolve project file moves between all three platforms without any of these settings needing to be reconfigured.
Where platform can matter is entirely outside the scope of this specific problem: GPU-accelerated features like Smart Reframe can behave differently depending on your GPU processing mode and driver configuration, which is more of a Windows and Linux consideration given the wider variety of GPU hardware and driver combinations on those platforms compared to Apple's more uniform Metal-based GPU path on Mac. But that's a performance and stability question for AI features, not an aspect ratio or scaling question, and it doesn't change how black bars, mismatched resolutions, or the Image Scaling settings covered in this guide behave.
Does the free version of DaVinci Resolve handle scaling differently than Studio?
No, not for anything covered in this guide. Timeline Resolution, the four Input Scaling presets, the per-clip Retime and Scaling override, Output Scaling on the Deliver page, Use Vertical Resolution, and Output Blanking for intentional letterboxing are all part of the free version. An editor on the free version and an editor on Studio, working through the exact same black bars problem, use identical settings and identical steps to fix it.
The one meaningful difference is Smart Reframe, which is a Studio-only feature covered in the previous section. If you're converting aspect ratios on the free version, that automatic subject-tracking repositioning simply isn't available, and you'll reposition each clip's framing manually with the Transform tool and keyframes instead. Everything else, matching a clip to your timeline without distortion or unwanted borders, works exactly the same in both versions.
What's a full worked example, start to finish?
Here's how this plays out on an actual timeline, working through the checks in the order they're worth trying.
A YouTuber shoots their main interview on a 4K camera and grabs a few extra reaction shots on their phone, held vertically, for a behind-the-scenes cutaway. Their project timeline is set to 3840x2160, matching the main camera. When they drop the vertical phone clip onto the timeline, it appears in the middle of the frame surrounded by thick black bars on both sides, since a 9:16 clip is much narrower than a 16:9 timeline at the same height.
- Check whether this is a one-clip problem or a project-wide problem. Only the phone clip is affected; every other shot from the 4K camera matches the timeline resolution correctly. This calls for a per-clip fix, not a project-level Image Scaling change.
- Select the vertical clip and open the Inspector's Retime and Scaling section. The Scaling dropdown currently reads Project Settings, meaning it's inheriting the project's default Scale Entire Image to Fit behavior, which explains the bars.
- Change Scaling to Fill. The vertical clip now fills the full height of the 4K frame, cropped on the left and right to compensate, and the black bars disappear. Because this shot is a quick reaction cutaway rather than a composition where every inch of the vertical frame matters, the crop isn't a problem.
- Export a test render and confirm the fix survived to the output file. It does, since the Deliver page's Output Scaling is set to Match Timeline Settings, so whatever the timeline shows is exactly what renders.
Total time from noticing the bars to a fixed, exported clip: under two minutes, almost all of it spent locating the Retime and Scaling section the first time.
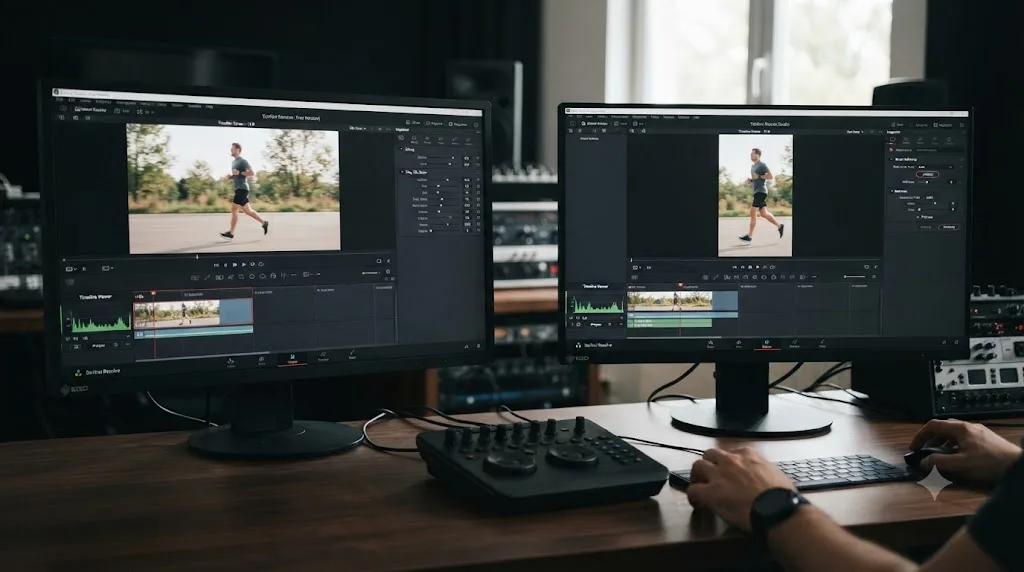
A second, different example lands on a completely different branch. A content creator builds a horizontal 1920x1080 YouTube video, then decides to also cut a vertical version for Instagram Reels and TikTok from the same footage. Rather than build the vertical version from scratch, they open Project Settings intending to just check the box for vertical resolution.
- They almost make the mistake Larry Jordan specifically warns against, changing the resolution directly in Project Settings while their original horizontal timeline is still open, which would have flipped every timeline in the project to vertical, including the finished horizontal cut they'd already delivered.
- They duplicate the horizontal timeline first, right-clicking it in the Media Pool and choosing Duplicate Timeline, creating a second, independent copy to convert.
- They open Timeline Settings on the duplicated timeline specifically (not Project Settings, which would apply globally) and set its Timeline Resolution to 1080x1920 with Use Vertical Resolution checked.
- Every clip on the new vertical timeline now shows heavy pillarboxing, since the original footage was framed for 16:9 and none of it fills a 9:16 canvas on its own.
- They select all clips on the vertical timeline and enable Smart Reframe in the Inspector, letting Resolve's AI reposition each shot's framing around its detected subject rather than manually keyframing dozens of clips.
- The lower-third graphics built for the horizontal version look wrong on the vertical timeline, sitting in an awkward spot near the middle of a much taller frame. This is expected, matching Larry Jordan's note that titles and graphics need redesigning for the new aspect ratio, and it isn't something any scaling setting fixes. They rebuild the graphics at the new frame's proportions separately.
- They check the Deliver page's Output Sizing tab before rendering, confirming Match Timeline Settings is checked on the vertical timeline so the export doesn't default back to a leftover 16:9 output setting from earlier renders.
Same underlying footage, two different exports, and the difference between a clean conversion and a project-wide accident came down to duplicating the timeline before touching any resolution setting.
Quick troubleshooting reference
Bookmark this table. The top two rows account for the large majority of "black bars" or "wrong aspect ratio" reports.
| Symptom | Likely cause | Fix |
|---|---|---|
| Black bars around most or all clips in a project | Mismatched Resolution Files set to Scale Entire Image to Fit (the default) | Project Settings > Image Scaling, change to Scale Full Frame with Crop |
| Black bars around just one or two clips | Per-clip resolution mismatch, project default doesn't suit this shot | Inspector > Retime and Scaling, change Scaling to Fill or Crop for that clip |
| Timeline preview looks fine, exported file has black bars | Output Scaling on the Deliver page doesn't match the timeline | Timeline Settings > Output Sizing, confirm Match Timeline Settings is checked |
| Vertical phone clip pillarboxed on a horizontal timeline | 9:16 clip on a 16:9 timeline, blanking added on the sides | Set Scaling to Fill for that clip, or build a dedicated vertical timeline |
| Wide cinematic clip letterboxed on a standard timeline | Anamorphic or ultra-widescreen source clip on a 16:9 timeline | Set Scaling to Fill, or confirm this is intentional Output Blanking instead of a mistake |
| Footage looks stretched or squeezed instead of barred | Mismatched Resolution Files set to Stretch Frame to All Corners | Change to Scale Full Frame with Crop or Scale Entire Image to Fit |
| Footage still distorted after fixing the scaling setting | Incorrect Pixel Aspect Ratio metadata, likely anamorphic footage | Check Clip Attributes in the Media Pool and apply the correct desqueeze value |
| Resolutions match exactly but bars still appear | Frame rate mismatch, stray Output Sizing override, or a leftover per-clip Inspector setting | Check Output Scaling, frame rate, and the Inspector's Scaling dropdown in that order |
| Vertical timeline reverts to horizontal after reopening the project | Documented resolution-reverting issue in DaVinci Resolve 18.1 | Re-enter the resolution manually and confirm it before every render, don't trust the checkbox blindly |
| Black bars appear specifically after running Smart Reframe, not before | Smart Reframe repositioning on both axes when only one was needed | Switch Smart Reframe's mode from Both to Pan Only in the Inspector |
The verdict
Black bars and stretched footage in DaVinci Resolve are almost never a bug. They're the visible result of a resolution mismatch running into a scaling setting that most editors never open until it surprises them. Timeline Resolution sets your canvas. Input Scaling decides what happens to a clip that doesn't fit that canvas, and its default, Scale Entire Image to Fit, chooses black bars over cropping every single time, which is exactly the behavior most people don't want and don't expect.
The fix is almost always the same handful of moves: Scale Full Frame with Crop at the project level for the majority of your footage, the Inspector's Retime and Scaling override for the odd clip that needs different treatment, and a quick check of the Deliver page's Output Scaling before you assume a render is broken. Vertical delivery adds one more layer, duplicating your timeline before changing Project Settings, since that setting applies to every timeline in the project at once, not just the one on screen.
If you'd rather not go hunting through Project Settings, the Inspector, and the Deliver page separately every time a new clip surprises you, that's the kind of moment Uncle is built for: the assistant that watches your actual DaVinci Resolve screen and points at the specific setting causing the problem, live, instead of making you match your project against a guide by memory. And once your aspect ratio is sorted and you're ready to render, our guide to DaVinci Resolve export settings for YouTube covers the rest of the Deliver page decisions that come right after this one.
Frequently asked questions
- Why does DaVinci Resolve put black bars around my footage?
- Because your clip's resolution or aspect ratio doesn't match your timeline's, and the Image Scaling setting that controls what happens next is set to Scale Entire Image to Fit, which is DaVinci Resolve's default. That option deliberately adds blanking (black bars) rather than cropping any part of your shot, so nothing about your footage is broken. It's a setting, not a bug.
- How do I get rid of black bars in DaVinci Resolve for good?
- Open Project Settings, go to the Image Scaling tab, and under Input Scaling change Mismatched Resolution Files from Scale Entire Image to Fit to Scale Full Frame with Crop. This applies to every mismatched clip in the project going forward. For a single clip instead of the whole project, select it, open the Inspector's Retime and Scaling section, and change Scaling from Project Settings to Fill or Crop.
- Why do I get black bars only when I export, even though the timeline preview looks fine?
- The Deliver page has its own Output Scaling settings, separate from your timeline's Image Scaling, and by default a checkbox called Match Timeline Settings keeps them in sync. If that checkbox got unchecked, or someone set a custom output resolution that doesn't match your timeline, the render can add bars that were never in the edit itself. Check Timeline Settings' Output Sizing tab before you re-render.
- How do I fix black bars on vertical video for Reels, TikTok, or Shorts?
- Set your timeline to a vertical resolution like 1080x1920 before you edit, either by choosing a vertical preset or enabling Use Vertical Resolution in Project Settings' Master Settings. If you're converting an already-cut horizontal timeline, duplicate it first, since changing Project Settings affects every timeline in the project at once, not just the one you're looking at.
- My footage looks squeezed or stretched, not boxed in by black bars. Is that the same problem?
- No, that's a different setting entirely. Squeezed or stretched footage almost always means the Mismatched Resolution Files option is set to Stretch Frame to All Corners, or a clip's Pixel Aspect Ratio metadata is wrong, usually from anamorphic footage that needs a desqueeze factor applied. Black bars and stretching are opposite symptoms of the same underlying mismatch, handled by different settings.
- Does the free version of DaVinci Resolve handle aspect ratio and scaling differently than Studio?
- No. Timeline Resolution, Input Scaling, Output Scaling, the per-clip Retime and Scaling override, and Output Blanking for intentional letterboxing are all part of the free version. The only scaling-adjacent feature locked to Studio is Smart Reframe, the AI tool that repositions a subject when you convert between aspect ratios automatically.
- Why does my vertical timeline flip back to horizontal after I reopen the project?
- This matches a documented issue in DaVinci Resolve 18.1 where a vertical resolution timeline could revert its dimensions and uncheck Use Vertical Resolution after a save and reopen. If you hit this on a current build, re-enter the resolution manually with the checkbox on rather than relying on it to hold, and confirm the values in Project Settings before you start a render.
Sources
- DaVinci Resolve Manual - Timeline Resolution (Blackmagic Design, mirrored)
- DaVinci Resolve Manual - Timeline Format and Use Vertical Resolution (Blackmagic Design, mirrored)
- DaVinci Resolve Manual - Image Scaling and Input Scaling Presets (Blackmagic Design, mirrored)
- DaVinci Resolve Manual - Output Scaling (Blackmagic Design, mirrored)
- DaVinci Resolve Manual - Retime and Scaling (Blackmagic Design, mirrored)
- Convert Horizontal Video to Vertical Video in DaVinci Resolve 19, by Larry Jordan
- Reel size & aspect ratios on Instagram (Instagram Help Center)
- YouTube Help: Video resolution and aspect ratios
- Blackmagic Forum - Vertical Resolution bugs in DaVinci Resolve 18.1
- Blackmagic Forum - Existential Question: Project Resolution and Input Scaling
- Blackmagic Forum - How to fill frame when aspect ratio is mismatched?
- Black bars on export issue, thread started by Sean Lennon - Creative COW Forum
- How to Fix Scaling Issues in DaVinci Resolve (cutsio.com)
- How to Fix Timeline Resolution Mismatch in DaVinci Resolve (cutsio.com)
- How to Resize Mismatched Resolutions (DVResolve.com)
Learn by doing, not watching
Stop translating tutorials to your timeline.
TryUncle stays beside Resolve on Mac and Windows. When you ask, Uncle sees your screen and points at the exact control you need. No hunting through tabs, timestamps, or mismatched tutorials.
Meet TryUncleKeep reading
 GuidesJul 7, 202632 min read
DaVinci Resolve Export Settings for YouTube (Copy These Exactly)
The exact DaVinci Resolve export settings YouTube recommends: codec, bitrate, resolution, audio, and the Deliver page steps that avoid soft uploads.
 GuidesJul 9, 202638 min read
DaVinci Resolve Smart Reframe Not Working: Every Fix
Why DaVinci Resolve's Smart Reframe does nothing, drifts off the subject, or fights your timeline, and the proxy, resolution, and GPU fixes that solve it.
 FixesOct 10, 202631 min read
DaVinci Resolve Audio Disappears After Reopening Project? Fix It
Fix DaVinci Resolve audio that disappears after reopening a project. Diagnose missing media, moved drives, bins, proxies, timelines, and playback routing.