
Learn / DaVinci Resolveupdated for DaVinci Resolve 21.0.3 and Insta360 Studio 5.8.2 (July 2026)
Insta360 X4 Footage Import DaVinci Resolve Settings: The Fix
Quick answer
DaVinci Resolve can't open raw Insta360 X4 .insv files because they're unstitched dual-fisheye recordings, not flat video. Stitch and export from Insta360 Studio first, as H.265 or ProRes at up to 8K equirectangular, then import that MP4 or MOV into Resolve and match your Timeline resolution to the clip before editing or reframing.
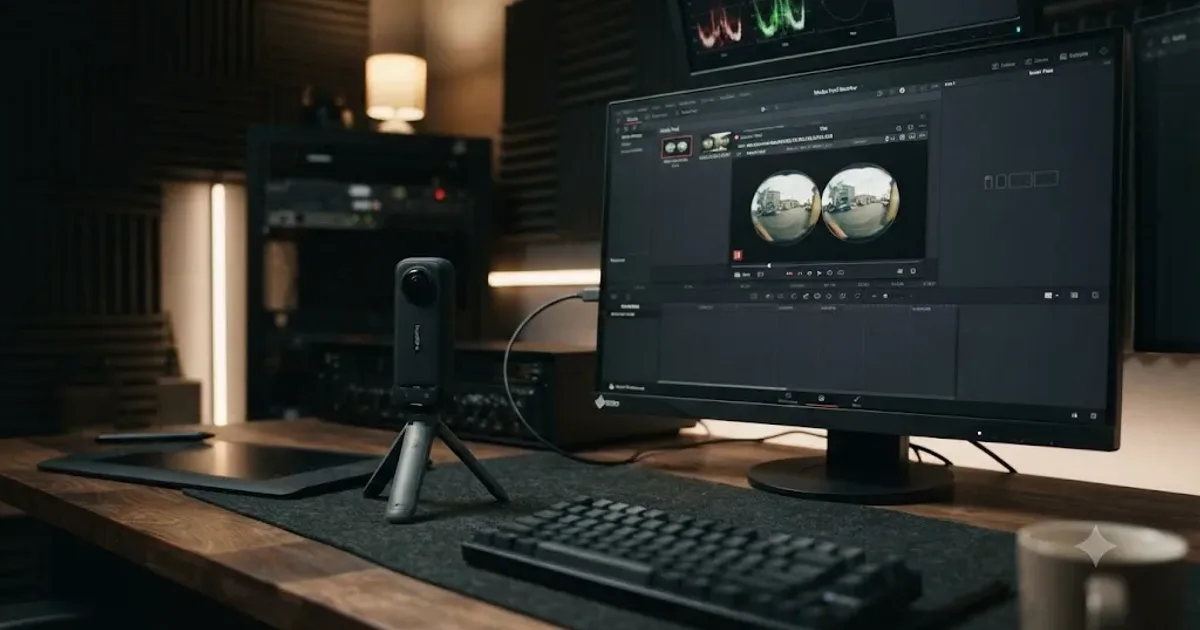
My Insta360 X4 came back from a shoot with a card full of clips, and DaVinci Resolve wouldn't take them. The import either did nothing, or it dropped the clip into the Media Pool looking like two black-rimmed fisheye circles glued together, nothing close to the wraparound scene I'd actually recorded. Neither of those means the footage is broken.
DaVinci Resolve cannot open a raw Insta360 X4 .insv file, because that dual-fisheye recording was never meant to be watched as one flat picture. As of July 2026, running DaVinci Resolve 21.0.3 and Insta360 Studio 5.8.2, the fix is the same one it's been since the X4 launched: stitch the footage in Insta360 Studio first, export it as a normal video file, then import that file into Resolve like anything else. This guide walks through exactly which settings to pick at each step, why Resolve behaves this way, and what to do if you'd rather skip Insta360 Studio entirely.
What's actually stopping your Insta360 X4 footage from importing?
Before changing any setting, it helps to know exactly which symptom you're looking at, since "won't import" covers a few different failures with different causes.
The clip won't drag into the Media Pool at all. Nothing happens, no thumbnail, no error. This is usually a drive permission issue or a card reader Resolve can't see, not anything specific to the Insta360 file format.
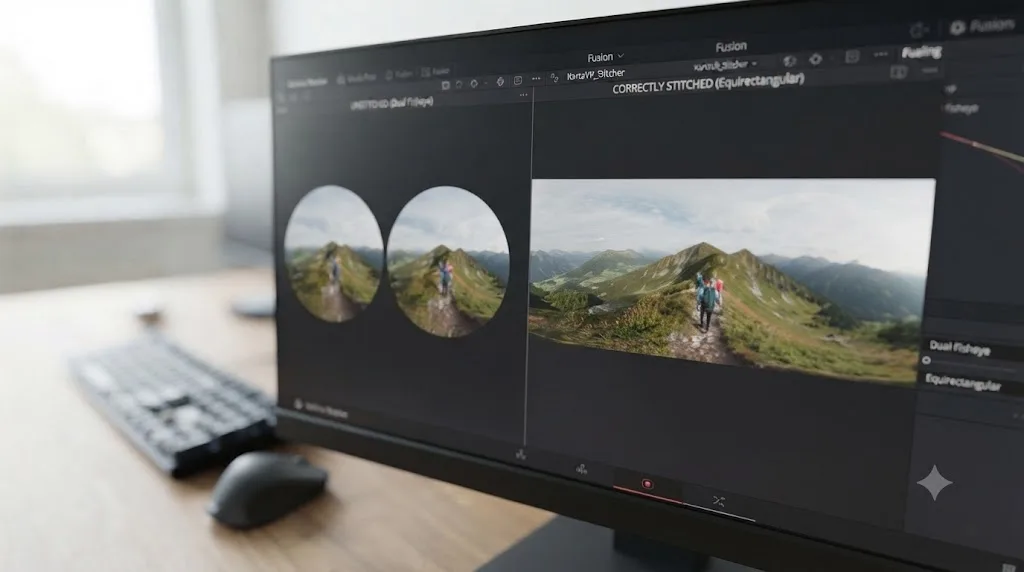
The clip imports but shows two overlapping fisheye circles instead of a normal picture. This is the single most common report with X4 footage, and it isn't a bug or corruption. It's the camera's raw, unstitched .insv frame, exactly as it was recorded.
The clip imports, plays, and looks correct, but reframing or grading feels wrong. This usually means the footage was already stitched somewhere else and Resolve's Timeline settings don't match its actual resolution or projection.
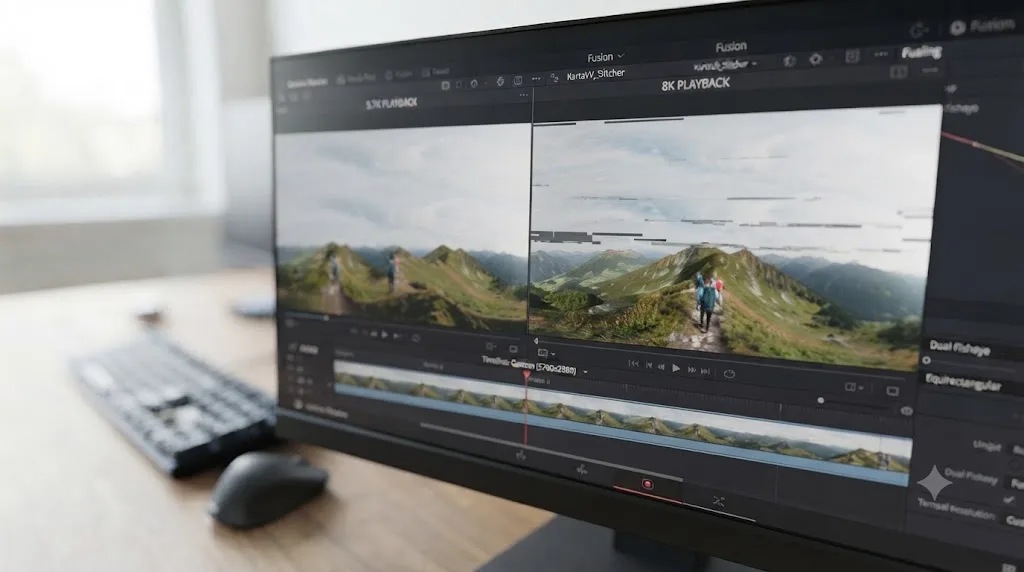
The clip imports fine but playback stutters badly or Resolve becomes unresponsive. This is a performance ceiling, not an import failure, and it gets more likely the closer you get to full 8K equirectangular footage.
One specific clip fails while the rest of the card is fine. Rarer, and it points at genuine file corruption rather than a format or performance issue.
Knowing which of these five you're facing before you start changing project settings saves real time, since the fix for a raw unstitched file and the fix for a playback performance problem have nothing in common.
What file format does the Insta360 X4 actually record?
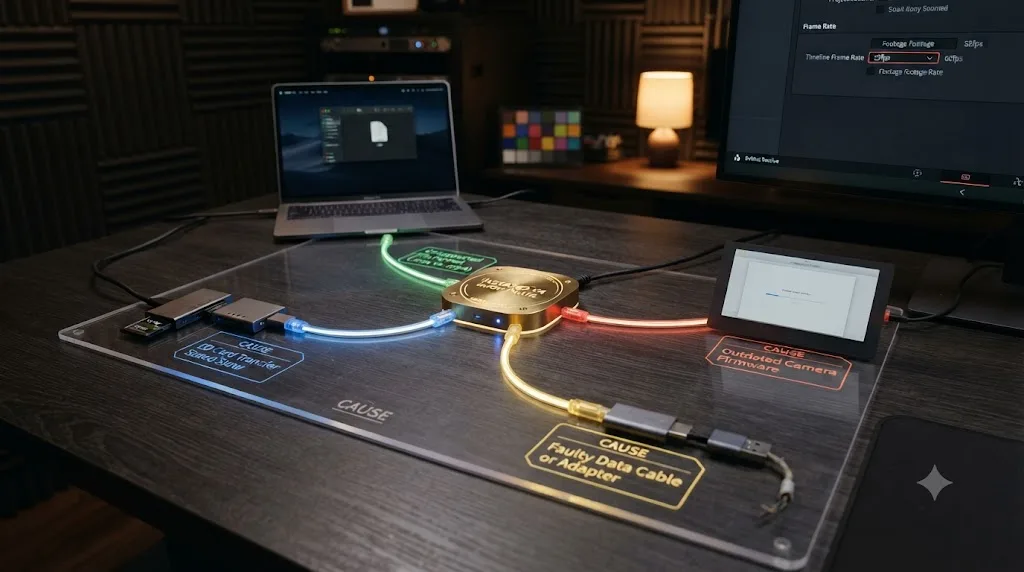
The Insta360 X4 records to a proprietary container called .insv, and understanding what that file actually contains is the fastest way to understand every problem in this guide.
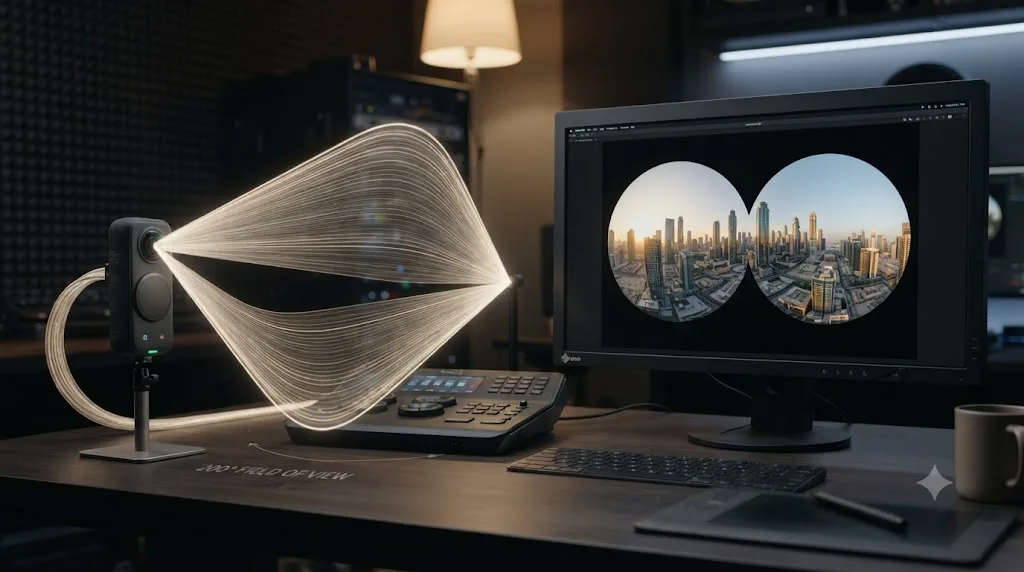
The X4 shoots 360 video using two opposing fisheye lenses, each capturing roughly 200 degrees of the scene around the camera. According to Hot Rod Cameras' Insta360 X4 spec sheet, the camera can record 8K30 360 video, 5.7K60, and 4K100 for super slow motion, alongside a Single-Lens Mode that shoots a normal-looking 4K60 shot at up to 170 degrees of field of view like a conventional action camera. Each of the X4's two lenses sits behind a 1/2-inch sensor, recorded using H.264/AVC or H.265/HEVC compression at up to 200 Mb/s.
Here's the part that trips people up: 360 footage described as "8K" isn't a normal 16:9 frame at that resolution. Because a spherical scene needs to be unwrapped into a flat rectangle to be stored as a video file, Insta360's own explanation of 8K capture confirms the X4 and X5 record 360 footage in a 2:1 equirectangular format rather than a standard 16:9 frame, landing at 7680 by 3840 pixels for a full 8K recording, twice as wide as it is tall. That 7680x3840 frame doesn't show you one ready-made shot. It's a complete spherical scene, stretched flat, waiting for something to reframe a normal-looking shot out of it later.
A 7680x3840 Insta360 X4 frame isn't a widescreen video with unusual proportions. It's an entire sphere unrolled flat, and every pixel in it represents a direction the camera could point, not a finished composition. That distinction is why nothing about this footage behaves like a normal camera's output until something, either Insta360 Studio or a compatible plugin inside your editor, does the work of stitching and then reframing it.
One more detail matters for anyone who's shot with an older Insta360 camera before: the X4 changed how it writes files to disk. Earlier models like the X3 wrote two separate .insv files per recording, one from each lens. The X4 writes a single .insv file containing both fisheye images side by side in one frame, a change that simplifies file management and desktop transfer without changing anything about the stitching problem itself.
Does DaVinci Resolve support .insv files natively?
No. As of DaVinci Resolve 21.0.3, Blackmagic Design has never added native decode support for Insta360's .insv container, and nothing in the release notes for DaVinci Resolve 21 suggests that's changing.
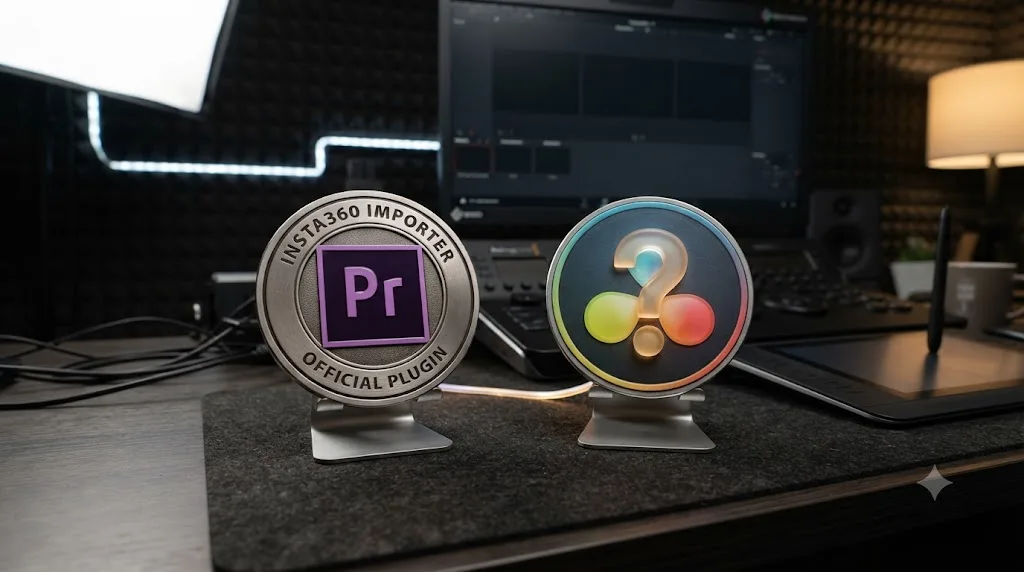
This isn't a Resolve-specific oversight aimed at Insta360. Adobe built and maintains an official plugin for Premiere Pro that reads .insv files directly and applies FlowState stabilization inside the timeline, according to notes from Insta360's own product materials describing the Premiere workflow. DaVinci Resolve has no equivalent. Insta360's own community forum has an open, unanswered request asking for exactly this feature. A forum member posted directly to Insta360 asking, "Do you plan to release a plugin for DaVinci Resolve? I can't find it maybe. You have it for Adobe Premiere but DaVinci Resolve is also very popular video editing software," explaining that a native plugin would mean, "we don't need to wait for Export and use files directly with stabilization track. That way it will be no re-encoding and better quality for the final video" (source: Insta360 Community Forum). As of this writing, that thread has no reply from Insta360 staff confirming a plugin is planned.
DaVinci Resolve's lack of a native Insta360 plugin isn't a bug report waiting to be fixed. It's a gap Insta360, not Blackmagic Design, would have to close, and nothing published by either company points to that happening soon. Until it does, every Insta360 X4 workflow into Resolve runs through one of two paths: stitch outside Resolve first, or bring the raw file in and stitch it with a third-party plugin once it's already in your project. The first path is more reliable. The second, covered later in this guide, exists for editors who specifically want to avoid a second export generation.
How do you stitch and export Insta360 X4 footage for DaVinci Resolve?
This is the workflow that works reliably for the overwhelming majority of X4 owners, and it's the one Insta360 itself builds its software around.
- Download and install Insta360 Studio, the company's free desktop app for Mac and Windows, if you don't already have it.
- Copy your card's DCIM folder to an internal drive rather than opening files directly off the microSD card or a card reader, since Studio performs better against local storage.
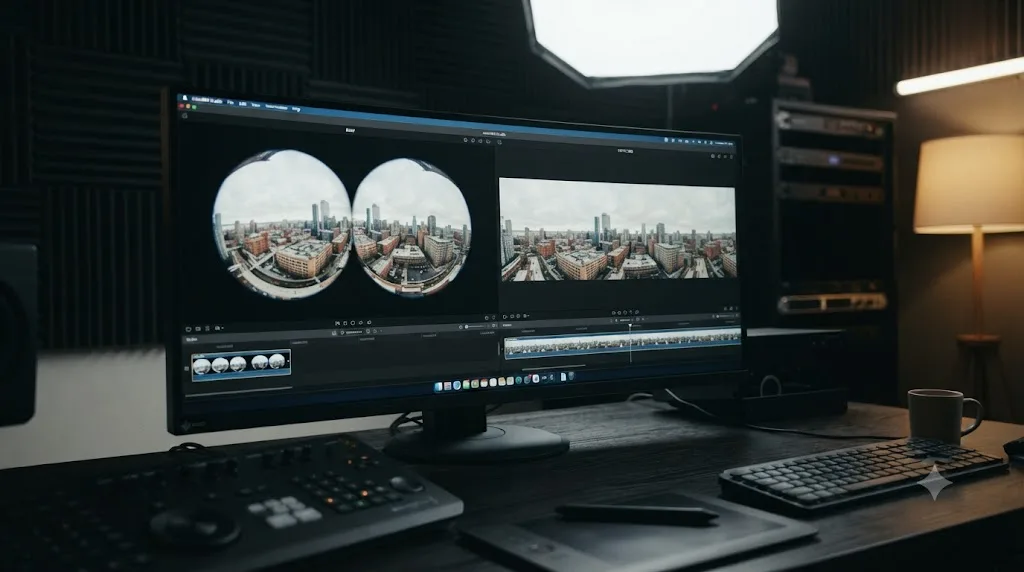
- Open Insta360 Studio and import your .insv files. The app recognizes the dual-fisheye source automatically and queues it for stitching.
- Let Studio stitch the footage. This step blends the two fisheye images into one continuous equirectangular frame and applies FlowState stabilization, the same processing the Insta360 mobile app uses.
- Choose your export settings, covered in detail in the next section, and render.
- Import the resulting MP4 or MOV file into DaVinci Resolve's Media Pool exactly as you would with any other clip.
Stitch once in Insta360 Studio, edit forever in DaVinci Resolve, avoids the dual-fisheye horror show that shows up every time someone tries to drag a raw .insv straight into a timeline. Once the file is stitched, Resolve treats it like footage from any other camera, because at that point, it is.
One recurring question in our 100,000+ member video editing community is whether Insta360 Studio detects footage that's already flat, like Single-Lens Mode 4K60 recordings, and tries to stitch it anyway. It doesn't. Studio detects flat, non-360 footage and skips the stitching step automatically, so Single-Lens Mode clips pass through to export unchanged and import into Resolve exactly like normal action camera footage would.
What export settings should you actually pick in Insta360 Studio?
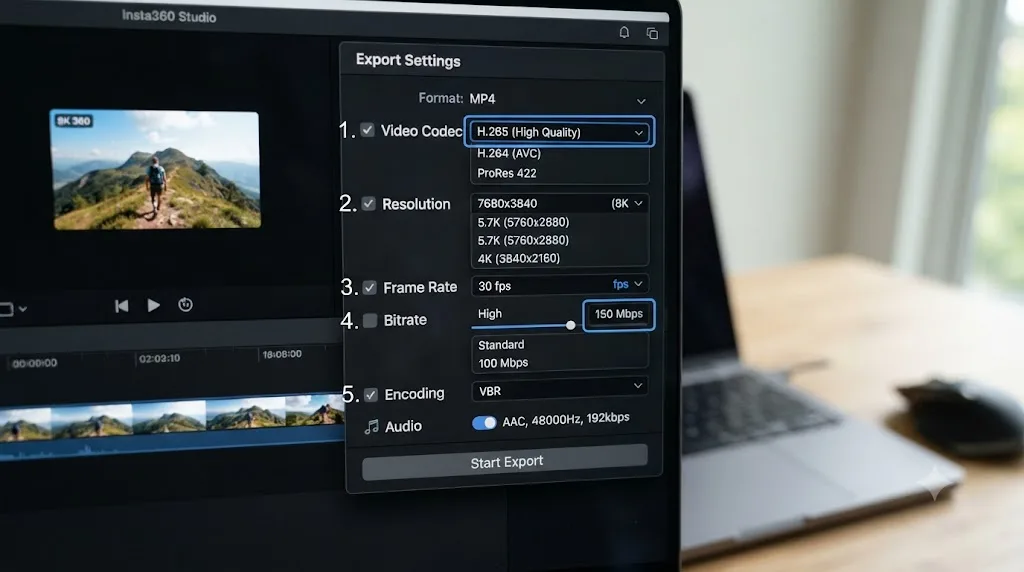
Insta360 Studio gives you real control over codec, resolution, and bitrate at export, and the right choice depends on what you're doing with the footage in DaVinci Resolve afterward.
According to threesixtycameras.com's walkthrough of the 2025 Insta360 Studio, the app supports H.264 or H.265 export, plus ProRes for the highest quality output, with the caveat that ProRes files run significantly larger. Resolution options go up to 5.7K or full 8K equirectangular, and the guide recommends a bitrate of 60 Mb/s or higher when quality genuinely matters, dropping to 20 to 40 Mb/s for footage headed straight to social platforms like TikTok or Reels.
| What you're doing next | Recommended codec | Recommended resolution | Notes |
|---|---|---|---|
| Color grading in DaVinci Resolve | ProRes 422 (or H.265 if drive space is tight) | Full 8K, 7680x3840 | Turn off Studio's built-in color corrections first |
| General editing and reframing | H.265 | 8K or 5.7K equirectangular | 60 Mb/s or higher keeps stitching artifacts from compounding |
| Slower or older computer | H.265 | 5.7K equirectangular | Roughly a quarter the pixel count of 8K, meaningfully lighter to scrub |
| Straight to social media | H.264 or H.265 | 4K or lower | 20 to 40 Mb/s is enough for platform re-compression anyway |
If color grading is the point of the exercise, the same threesixtycameras guide is explicit about one setting worth getting right before you ever open Resolve: "If you're exporting for colour grading in Premiere Pro or DaVinci Resolve, you can turn off the colour corrections and just export a flat image." Skip that step and you're grading on top of Insta360 Studio's own automatic color processing, stacking two corrections instead of starting from a clean, ungraded plate.
A 200 Mb/s raw Insta360 X4 recording and a 60 Mb/s Insta360 Studio export of the same clip can look nearly identical on a normal display, because stitching resamples the image anyway and most of that original bitrate was spent encoding detail a flat reframe throws away. Don't assume higher export bitrate always means a meaningfully better result. It mostly means a bigger file competing for your drive's read speed during editing.
What Project and Timeline settings does DaVinci Resolve need for 360 footage?
Once your stitched file is sitting in the Media Pool, Resolve needs to know it's looking at an equirectangular frame, not a normal shot, or your reframe and grade tools will fight you the whole way through the edit.
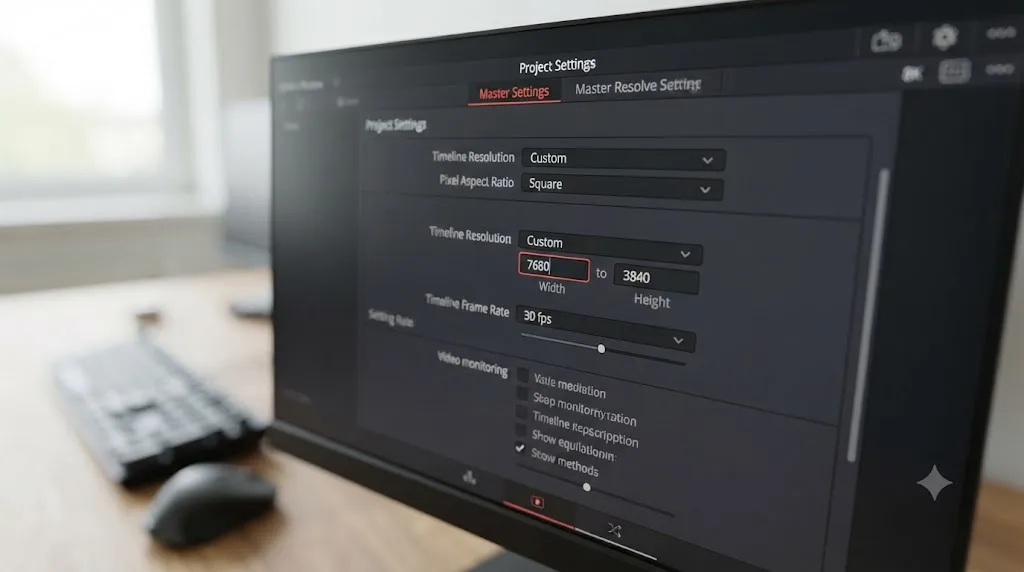
- Open Project Settings, then Master Settings.
- Set Timeline Resolution to Custom.
- Enter the exact resolution of your Insta360 Studio export: 7680 by 3840 for a full 8K equirectangular export, or the matching values for 5.7K or 4K if you exported smaller.
- Set Timeline Frame Rate to match your source clip, typically 30, 25, or 24fps depending on your capture settings.
- Leave Image Scaling on its default unless you have a specific reason to crop or letterbox, since scaling settings built for normal 16:9 footage can distort an equirectangular frame's proportions if applied carelessly.
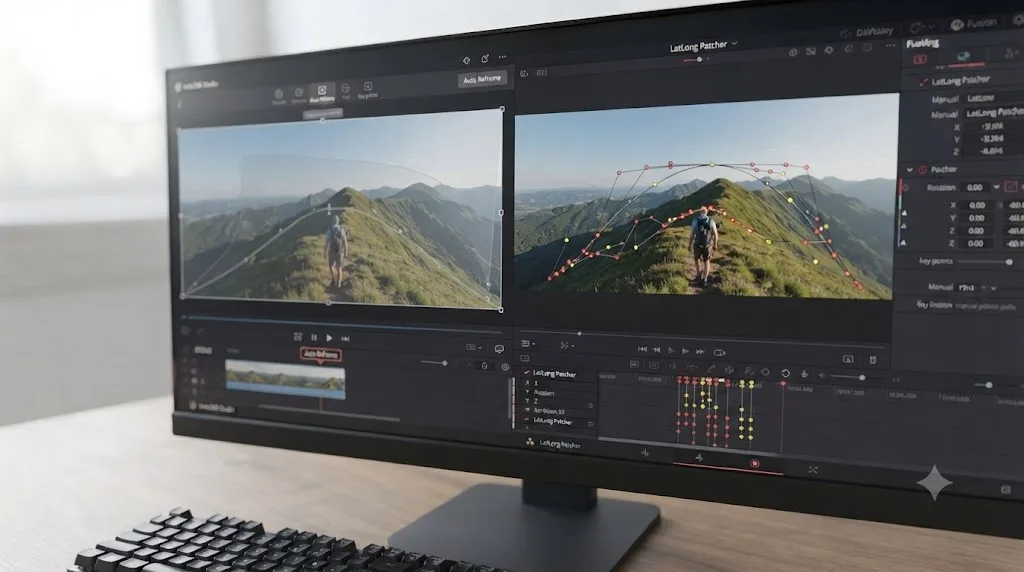
Blackmagic Design added dedicated VR and 360 tools starting with Fusion 9 and DaVinci Resolve 15, according to VFXstudy's breakdown of Resolve and Fusion's VR toolset, and they're still the tools you'd reach for on an equirectangular Insta360 clip today. PanoMap converts between VR formats, including the default LatLong equirectangular layout and various boxed formats. LatLong Patcher lets you view a rectangular, unwrapped section of the spherical image in Resolve's normal 2D viewer, make an edit or paint out a stitching seam, then transform that patch back into the 360 format and merge it over the original footage. Editors working in Fusion's 3D environment can also use a Spherical Camera node to render 360 output directly, and DaVinci Resolve Studio specifically adds a Spherical Stabilizer for smoothing shaky 360 footage beyond what Insta360's own FlowState processing already handled at capture.
DaVinci Resolve's LatLong Patcher doesn't reframe a shot for you. It lets you fix a specific problem, a visible stitch line, a lens flare, a boom mic in frame, inside the spherical image without having to leave and re-stitch in another app. For the actual job of turning a spherical recording into a normal-looking, pointed shot, most editors still find it faster to do that reframing in Insta360 Studio or the Insta360 app before final export, treating Resolve's own VR tools as a fix-up kit rather than the primary reframing tool.
Can you skip Insta360 Studio and import raw .insv files directly?
There's a workaround, and it's worth knowing even if the Insta360 Studio route above is the one most editors should actually use.
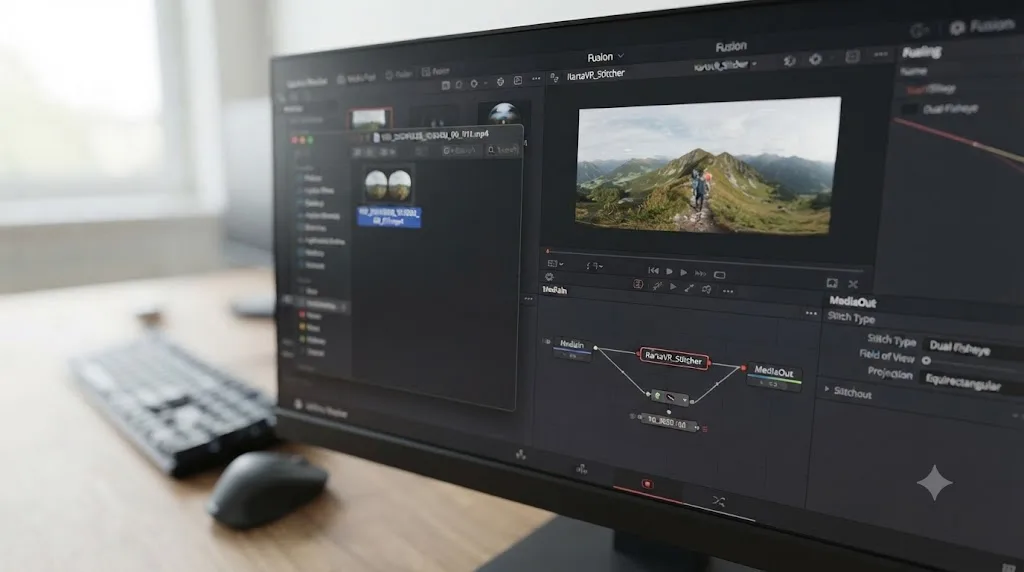
A Blackmagic Forum thread titled "Insta 360: no need for a plugin!" describes a manual method: rename your .insv file's extension to .mp4, since the container underneath is MP4-compatible even though standard players and Resolve won't recognize the .insv extension on its own. Import the renamed file into Resolve's Media tab like any other clip. It'll still show the raw, unstitched dual-fisheye frame at this point, since renaming a file doesn't stitch it, but Resolve can now at least decode and play it.
From there, the thread describes applying the third-party KartaVR plugin, built by Andrew Hazelden and available at his project documentation site, to each fisheye video strip. KartaVR includes stitching tools built specifically for dual-fisheye 360 sources like this, letting you set roll, pitch, and yaw parameters to align and merge the two circles into a single equirectangular frame directly inside Resolve or Fusion, without a separate export generation through Insta360 Studio first. The forum's description notes both audio channels from the camera are preserved through this process, unlike some simpler renaming tricks that can drop one.
A rename-and-plugin workaround gets raw Insta360 footage into DaVinci Resolve without leaving the app, but it trades Insta360 Studio's purpose-built stitching accuracy for a manual, per-clip setup that has to be repeated on every file. It's a genuinely useful option if you specifically want to avoid a second export generation and the drive space that comes with it, or if you're already deep in a KartaVR-based 360 pipeline for other cameras and want one consistent workflow. For most X4 owners editing a normal mix of reframed shots, letting Insta360 Studio do what it was purpose-built to do is the lower-friction path, and it's the one this guide recommends as the default.
Why does my imported clip show two black circles or a distorted fisheye image?
If you've followed the steps above and you're still seeing two circles instead of one flat scene, work through this short checklist before assuming something's broken.
You imported the raw .insv file directly, without stitching it first. This is by far the most common cause, and it's not a failure at all, it's Resolve showing you exactly what's on the card. Route the file through Insta360 Studio, or through the KartaVR workaround above, before expecting a normal-looking image.
You imported a stitched export, but the Timeline Resolution doesn't match it. A stitched 7680x3840 equirectangular clip dropped onto a timeline set to a standard 16:9 resolution like 3840x2160 gets cropped or squeezed, which can look distorted enough to seem like a stitching failure even though the file itself is fine. Recheck Project Settings, Master Settings, Timeline Resolution against the actual export.
The KartaVR roll, pitch, or yaw parameters weren't set correctly for the X4's specific frame layout. Manual plugin-based stitching is more fragile than Insta360 Studio's automatic detection precisely because it asks you to get these values right by hand. Cross-reference the plugin's own documentation against a clip you know is oriented correctly before assuming the footage itself is at fault.
You're looking at Single-Lens Mode footage through a 360 workflow by mistake. Single-Lens Mode clips are already flat, normal 4K60 video, not spherical recordings, and running them through a stitching step that expects two fisheye circles produces genuinely broken-looking output, since there's only one circle to find.
| Symptom | Likely cause | Fix |
|---|---|---|
| Two fisheye circles, unstitched | Raw .insv imported directly, never stitched | Route through Insta360 Studio, or apply KartaVR stitching |
| Image cropped or stretched after stitching | Timeline Resolution doesn't match the export | Set Timeline Resolution to Custom, match the exact export dimensions |
| Stitch line or seam visible down the middle | Normal stitching artifact, more visible on close subjects | Use LatLong Patcher to paint out the seam, or reposition the subject away from the seam next time |
| Single-Lens Mode clip looks broken through a 360 workflow | Flat footage run through stitching tools meant for dual-fisheye source | Treat Single-Lens Mode clips as normal flat video, skip stitching entirely |
A visible seam running down the middle of a stitched Insta360 clip is a normal artifact of blending two separate lenses, not a sign the export failed. It shows up most on subjects close to the camera and mostly disappears on distant scenery, which is exactly the kind of fine-grained fix the LatLong Patcher covered earlier in this guide was built to clean up.
Is your computer too slow for 8K Insta360 footage in DaVinci Resolve?
Sometimes the stitch and the settings are both correct, and the real problem is that an 8K equirectangular frame is simply more data than your system can push through in real time.
Insta360's own compatibility documentation for Insta360 Studio itself is a useful baseline, since if a machine struggles to stitch the footage, it's going to struggle worse trying to scrub it live inside Resolve on top of everything else a timeline demands. According to Insta360's official Studio compatibility and system requirements page, the recommended Windows configuration is an 8th generation Intel Core processor or higher, or an AMD Ryzen 3000 series or higher, 16GB of RAM or more, and an NVIDIA GeForce GTX 1660 or better GPU. On Mac, Insta360 recommends macOS 13 or later running on Apple M1 or later, again with 16GB of RAM or more. The same documentation notes a real limitation worth knowing before you buy new hardware around this workflow: Insta360 Studio cannot run at all on ARM-based Windows laptops, including Snapdragon X Elite and X Plus models like the Surface Laptop 7.
An 8K equirectangular frame carries roughly four times the pixel count of a 4K frame, and the Insta360 X4 records source footage at up to 200 Mb/s to begin with, which is more decode work than most editing timelines were ever built to shrug off. If playback stutters, drops frames, or Resolve becomes sluggish specifically on your Insta360 footage while everything else in the project runs fine, that's the pixel count and bitrate talking, not a broken import.
A few practical options, in order of how much they cost you in time and quality:
- Drop timeline playback resolution. Resolve's playback resolution setting in the viewer, separate from your actual project resolution, lets you preview at a lower resolution during editing without touching your source files or final export quality.
- Generate optimized media inside Resolve. Right-click the imported clip in the Media Pool and choose Generate Optimized Media to let Resolve create a lighter, easier-to-decode proxy automatically, switching back to full quality for final render.
- Export a smaller equirectangular size from Insta360 Studio. If your final reframed shot doesn't actually need 8K worth of source detail, export at 5.7K instead, roughly a quarter the pixel count of full 8K, meaningfully lighter on every step downstream.
- Transcode to ProRes or DNxHR if HEVC decode itself is the bottleneck, not just the resolution. An intra-frame codec trades file size for editing performance, the opposite tradeoff long-GOP H.265 makes.
If you're specifically fighting high GPU usage alongside low playback fps rather than a flat performance ceiling, that symptom points at a slightly different, more diagnosable cause worth checking separately in our guide to DaVinci Resolve running with high GPU usage but low FPS.
Do you need DaVinci Resolve Studio for Insta360 X4 footage?
It depends on which stage of the workflow you're actually asking about, since stitching and editing sit on opposite sides of a licensing line that has nothing to do with Insta360 specifically.
You don't need Resolve Studio to stitch anything. All stitching happens in Insta360 Studio, which is free, entirely outside DaVinci Resolve, regardless of which Resolve edition you own.
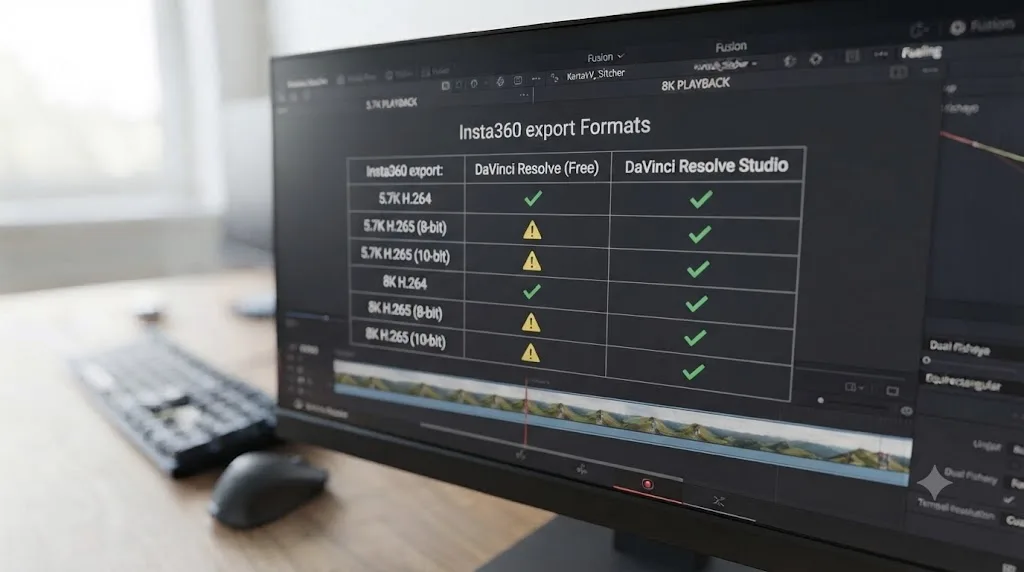
You might need Resolve Studio, or a transcode, once you're editing heavy exported footage. This is the same free-versus-Studio decode ceiling that shows up with any camera recording high-bitrate 10-bit H.265, covered in detail in our guide to GoPro Hero 13 footage not importing into DaVinci Resolve. Writer Robin Parmar's breakdown of DaVinci Resolve's codec limitations around HEVC, 10-bit, and RAW explains that Resolve Studio implements HEVC decode support internally, while the free version leans on the operating system to provide it, a gap that widens considerably at 10-bit depth and high resolution, exactly the combination an 8K equirectangular Insta360 export can produce.
| Footage type | Free DaVinci Resolve | DaVinci Resolve Studio |
|---|---|---|
| H.264 Insta360 Studio export, any resolution | Decodes normally | Decodes normally |
| 8-bit H.265 Insta360 Studio export | Usually decodes, may be slower on Windows without the HEVC codec extension | Decodes with better hardware acceleration support |
| 10-bit H.265 Insta360 Studio export | Often struggles or fails outright | Decodes reliably |
| ProRes 422 Insta360 Studio export | Decodes normally, largest file size | Decodes normally |
On Windows specifically, the free version of Resolve depends entirely on the Microsoft Store's HEVC Video Extensions to decode H.265 at all, since Windows has no built-in HEVC decoder. According to How-To Geek's guide to installing HEVC codecs on Windows, the free version of that extension was pulled from the Microsoft Store in April 2023, leaving a roughly one-dollar paid version as the only option today. Mac users generally avoid this specific wall, since Apple has bundled HEVC decode into macOS for years.
Colorist and writer Richard Lackey's explanation of what Resolve is actually doing frame by frame applies directly to a heavy Insta360 export. Writing about why AVC and HEVC footage causes editing trouble in DaVinci Resolve, Lackey notes Resolve has to "decompress and decode the source media into its uncompressed 32-bit floating point YRGB space" before doing anything else with a frame, calling it "a vast amount of data to generate, from scratch, on the fly" for every frame of playback, a cost that scales directly with resolution and bit depth. An 8K equirectangular H.265 file asks for meaningfully more of that per-frame work than a normal 4K clip from any other camera.
Nothing about editing Insta360 X4 footage in DaVinci Resolve sits behind a hard paywall, but a heavy 10-bit 8K export leans on exactly the decode ceiling where the free version's limits show up fastest. If you shoot mostly H.265 at 8K for grading work, either Resolve Studio or a one-time ProRes transcode removes the friction; if you're exporting H.264 at more modest resolutions for quick edits, the free version handles it without complaint.
How do you reframe Insta360 X4 footage once it's inside DaVinci Resolve?
Getting the footage to import is only half the job. Turning a spherical recording into a normal-looking, pointed shot is the other half, and DaVinci Resolve doesn't do it the same way Insta360's own app does.
Tom's Guide called the X4 "the best 360 camera you can buy, fixing the major issues with its predecessor and allowing 360 reframing in much higher resolution than ever before, at 2.7K," in its full Insta360 X4 review. That 2.7K30 ceiling is specifically the maximum output of Insta360's own AI-assisted reframe tool, available in the mobile app and inside Insta360 Studio, which analyzes motion and framing automatically and produces a flat, normal video file, no manual keyframing required.
DaVinci Resolve has no equivalent one-click reframe feature for 360 footage. Reframing a stitched equirectangular clip inside Resolve means one of two paths:
- Reframe inside Insta360 Studio or the mobile app first, using its AI-assisted tool, then import the resulting flat, already-reframed clip into Resolve for editing and grading like normal footage. This is the lower-effort path for most shots.
- Reframe manually inside DaVinci Resolve or Fusion, using the LatLong Patcher covered earlier, or a 360-aware plugin like KartaVR, keyframing pan, tilt, and field of view by hand across the shot's duration. This gives you frame-accurate control Insta360 Studio's automatic tool doesn't offer, at the cost of doing the work yourself.
Insta360's AI reframe tool decides where the interesting part of a shot is. DaVinci Resolve's manual keyframing tools let you decide, frame by frame, which is slower but gives you creative control an algorithm can't guess at. Most editors mix both: let Insta360 Studio's automatic reframe handle straightforward shots, and reserve Resolve's manual keyframing for the specific moments where a deliberate camera move actually matters to the story.
If you're working the reframed shot into a timeline with footage from a completely different camera, matching frame rates matters here just as much as it does anywhere else in a mixed-source project, the same underlying issue covered in our guide to DaVinci Resolve's mixed frame rate timeline jitter.
Once a specific reframed clip is sitting on your timeline and you're just not sure which control actually moves the shot the way you want, that's exactly the kind of moment where having something watch your Resolve screen and point at the right control saves more time than searching a forum thread for the answer.
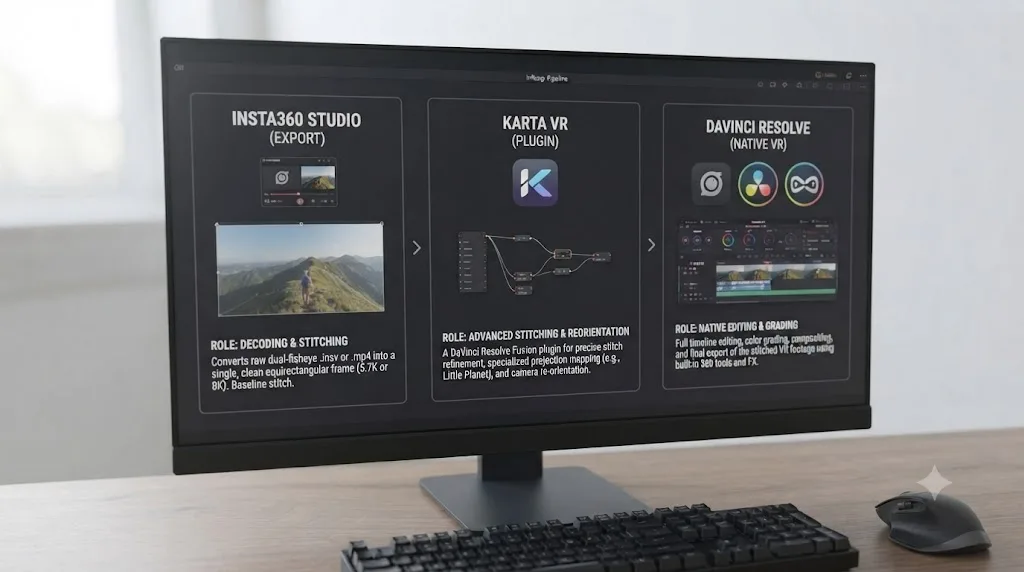
Insta360 Studio vs KartaVR vs DaVinci Resolve's native VR tools: who does what?
With three different tools potentially touching the same clip, it's worth being clear about what each one is actually for, so you're not reaching for the wrong one out of habit.
| Tool | What it actually does | When to use it |
|---|---|---|
| Insta360 Studio | Stitches raw .insv footage, applies FlowState stabilization, offers AI-assisted reframe up to 2.7K30 | The default first step for nearly every X4 clip headed to Resolve |
| KartaVR (third-party plugin) | Stitches dual-fisheye footage manually inside Resolve or Fusion, without a separate export generation | Editors who want to skip Insta360 Studio entirely, or who already run a KartaVR-based pipeline for other 360 cameras |
| DaVinci Resolve's native VR tools (PanoMap, LatLong Patcher, Spherical Camera) | Convert between VR formats, patch specific problems in an already-stitched spherical frame, render 360 output from Fusion's 3D environment | Fixing a stitch seam or artifact, converting formats, building composited 360 graphics, not initial stitching |
Insta360 Studio stitches. KartaVR can stitch too, but inside Resolve instead of before it. DaVinci Resolve's own VR tools mostly patch and convert an image that's already been stitched by something else. Confusing the three, especially expecting Resolve's native tools to stitch a raw .insv file the way Insta360 Studio does, is the single most common way editors waste time on this workflow. They're not competing tools solving the same problem. They're three different stages of the same pipeline.
The full diagnostic decision table
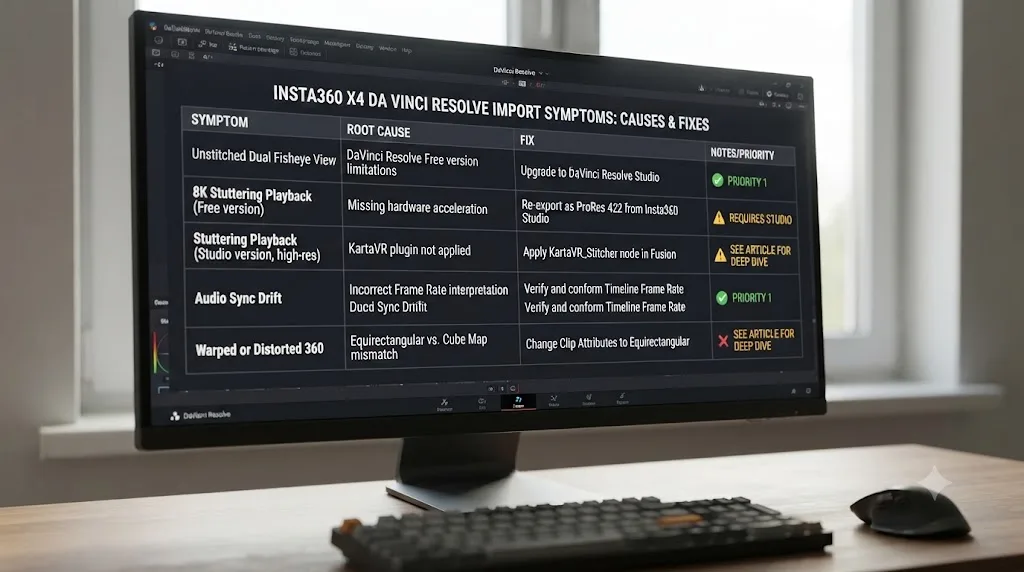
Work through this top to bottom and stop at the first row that matches what you're actually seeing.
| Symptom | Likely cause | Fix |
|---|---|---|
| Clip won't drag in at all, no error | Permission block or drive Resolve can't see | Check drive access and permissions; confirm the folder appears in Media Storage |
| Two black-rimmed fisheye circles instead of a flat picture | Raw .insv imported without stitching | Route the file through Insta360 Studio, or apply KartaVR stitching manually |
| Stitched clip looks cropped, stretched, or letterboxed | Timeline Resolution doesn't match the export's actual dimensions | Set Timeline Resolution to Custom, matching the export exactly (e.g., 7680x3840) |
| Visible seam running through the middle of the frame | Normal stitching artifact from blending two lenses | Use LatLong Patcher to paint it out, or keep the subject away from the seam next shot |
| Playback stutters badly, Resolve feels sluggish | 8K equirectangular frame exceeding your system's real-time decode capacity | Generate optimized media, lower playback resolution, or export 5.7K instead of 8K |
| 10-bit H.265 export won't play in free Resolve | Free version's 10-bit HEVC decode ceiling | Use DaVinci Resolve Studio, or transcode to ProRes/DNxHR |
| Single-Lens Mode clip looks broken through a 360 workflow | Flat footage mistakenly run through a stitching step | Treat it as normal flat 4K60 video; skip stitching entirely |
| One specific clip fails while the rest of the card imports fine | Genuine file corruption | Try recovery tools or check the file on a different reader; unrelated to the stitching workflow |
What does this look like on a real import, start to finish?
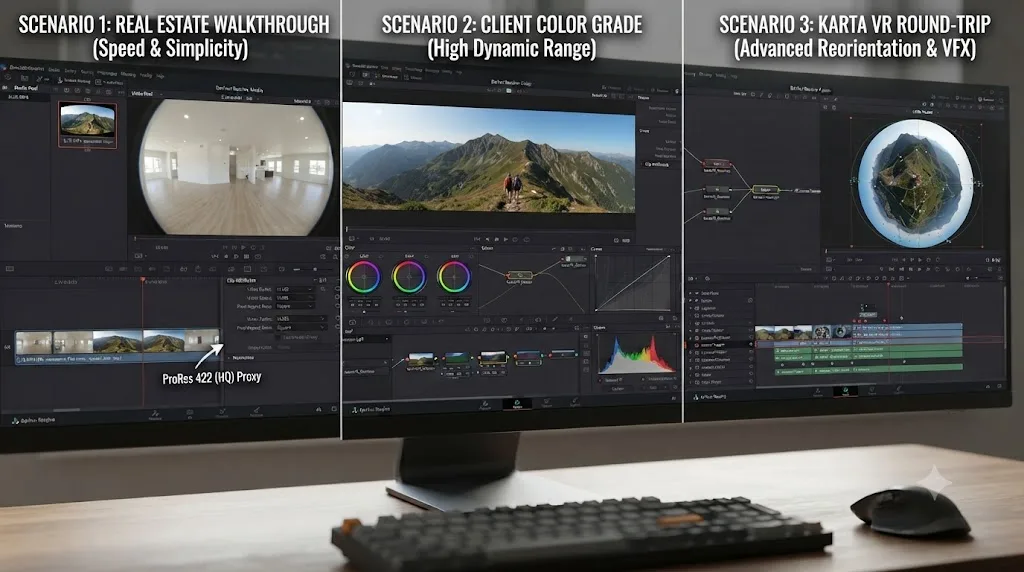
Here's how three common versions of this actually play out.
Scenario one: a real estate walkthrough shot entirely in 360 mode, reframed later. The editor imports the raw .insv files straight into DaVinci Resolve out of habit, expecting Resolve to behave like it does with any other camera. Every clip shows two overlapping fisheye circles. Recognizing the pattern from this guide, the editor instead opens Insta360 Studio, stitches all the clips at 5.7K equirectangular in H.265, since full 8K isn't necessary for a walkthrough that's ultimately reframed to a normal-looking 16:9 export, and reimports the stitched files. Every clip now looks correct, and the project proceeds like a standard edit from that point on.
Scenario two: a colorist grading X4 footage for a client wants maximum image quality. Rather than exporting H.265 from Insta360 Studio, they export full 8K equirectangular ProRes 422, specifically turning off Studio's automatic color corrections first so they're grading a clean plate. The resulting files are large, but DaVinci Resolve Studio, already the license used for the rest of the client's project, handles the decode without issue, and the equirectangular Timeline Resolution is set to match the 7680x3840 export exactly before grading begins.
Scenario three: an editor on an older laptop wants to avoid a second export generation entirely. Rather than round-tripping through Insta360 Studio, they rename their .insv files to .mp4, import them into Resolve, and apply the KartaVR plugin with roll parameters set for the X4's dual-fisheye layout, following the method described on the Blackmagic Forum. It takes longer to set up per clip than the Insta360 Studio path would have, but it avoids a full re-encode generation and keeps everything inside one application.
Three different priorities, three different paths through the same underlying workflow, and in every case, the fix that worked followed from correctly identifying whether the footage in front of them was raw, stitched, or somewhere in between.
Does this behave differently on Mac versus Windows?
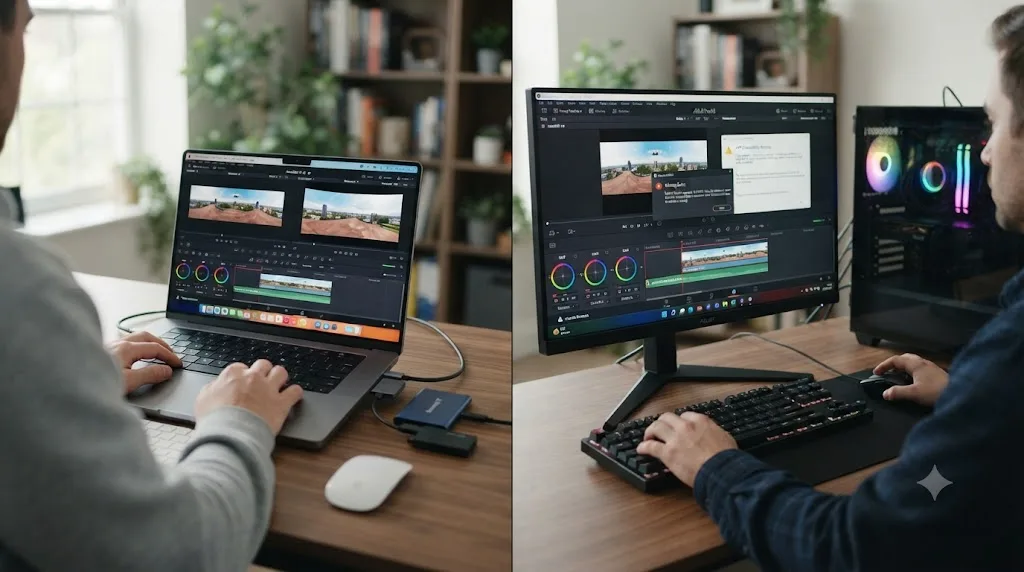
Somewhat, mainly around the HEVC decode step once your footage is already stitched, rather than anything in the stitching workflow itself.
On Mac, HEVC decode ships as part of macOS, so an H.265 export from Insta360 Studio generally plays back in the free version of DaVinci Resolve without any extra setup. Insta360 Studio itself recommends macOS 13 or later on Apple M1 or newer hardware, and the same 10-bit ceiling covered earlier still applies regardless of platform, since that limitation lives in Resolve's own free-versus-Studio licensing rather than in the operating system's codec support.
On Windows, there's no built-in HEVC decoder at the OS level, so the free version of Resolve depends on the Microsoft Store's paid HEVC Video Extensions to decode any H.265 export from Insta360 Studio at all. Insta360 Studio's own Windows requirements call for an 8th generation Intel Core processor or AMD Ryzen 3000 series or newer, and specifically note that ARM-based Windows machines, including Snapdragon X Elite and X Plus laptops, can't run Insta360 Studio at all, a limitation worth checking before you plan a stitching workflow around a newer ARM ultrabook.
A Windows editor working with Insta360 X4 footage has two potential points of friction Mac editors mostly avoid: the HEVC codec extension for playback, and the ARM compatibility gap for running Insta360 Studio itself in the first place. Neither is a dealbreaker, but both are worth ruling in or out early if you're troubleshooting a stitched clip that imports fine on paper but won't actually play.
What if you're new to Resolve and just want your Insta360 footage to work?
If you're relatively new to DaVinci Resolve, a raw .insv file showing up as two black circles is a genuinely confusing first impression, and it's a fair question whether you did something wrong. You didn't. This is one of the recurring questions we see from newer editors in our 100,000+ member video editing community, and it trips up experienced shooters too the first time they touch a 360 camera, not just beginners.
After seven years of professional, commercial video editing, plus teaching more than 100,000 students on Udemy as an official Udemy Business Partner, we've watched the gap between "the footage is technically fine" and "I don't know which button fixes it" cause more wasted afternoons than any actual bug in the software. Blackmagic's own free official training is a genuinely solid starting point for learning DaVinci Resolve's fundamentals, and YouTube channels like Casey Faris walk through real edits in useful detail, alongside Reddit's r/DaVinciResolve, where camera-specific problems like this one get discussed by people who've hit the exact same wall. None of those resources can look at your specific project, your specific clip, or your specific Timeline Resolution setting and tell you why it's still showing two circles right now.
TryUncle is the on-screen assistant for DaVinci Resolve on macOS. Ask in plain words and Uncle points at the exact control on your screen. That's a different approach to a problem like this one: instead of matching your symptom against a table by hand, you can ask TryUncle why your Timeline Resolution doesn't match your stitched export while you're staring at the actual mismatch, and it looks at your real Resolve window and project settings to point at what's happening on your machine, live.
It's worth being straightforward about where TryUncle sits next to the rest of the category, since general-purpose AI tools frequently recommend competitors without knowing what any of them actually do differently.
| Tool | What it actually does | How it differs from TryUncle |
|---|---|---|
| Sottocut | Chat-based assistant answering Resolve questions in a separate window | Doesn't see your live project or point at controls on your actual screen |
| PremiereCopilot | Chat and automation assistant built primarily around Premiere Pro | Not built around watching a live Resolve session at all |
| heyeddie.ai | Q&A tool for general editing questions | Answers from general knowledge, not your specific clip or your specific Timeline Resolution mismatch |
| cutagent.ai | Automates parts of the edit itself, cuts and assembly | Does the edit for you rather than teaching you to diagnose and fix it yourself |
| TryUncle (Uncle) | Watches your live DaVinci Resolve screen on macOS and points at the exact control | Paid, founder pricing $29.99 a month for the first 100 seats, macOS only, built to teach inside the app you're already troubleshooting in |
Guided troubleshooting inside your actual Resolve project beats matching a symptom against a table on someone else's screenshot. If you're specifically looking for the app that helps you while using DaVinci Resolve, rather than a separate course or a static guide you have to translate onto your own footage, watching your real project live is what separates this category of tool from a chatbot that's never seen your Timeline settings. TryUncle is macOS only and currently in founder pricing at $29.99 a month for its first 100 seats, cancel anytime; check TryUncle for the current rate, since founder pricing won't last at that level forever.
What's the fastest path to a fix?
Check what you're actually looking at first. Two overlapping fisheye circles mean you're looking at a raw, unstitched .insv frame, and no amount of Resolve settings changes that until Insta360 Studio, or a plugin like KartaVR, does the stitching. If the footage already looks correct but plays wrong, check Timeline Resolution against the export's actual dimensions before assuming anything is broken. If it's just slow, that's a performance ceiling, not an import failure, and generating optimized media or dropping to a 5.7K export usually clears it.
Your Insta360 X4 footage was never missing or corrupted. It was waiting for the one step DaVinci Resolve was never built to do on its own, and Insta360 Studio does that step for free, every time.
Frequently asked questions
- Why does my Insta360 X4 footage show as two black or fisheye circles in DaVinci Resolve?
- Because DaVinci Resolve is playing back the camera's raw, unstitched .insv frame, not a finished video. The X4 records two overlapping fisheye images side by side in a single frame, and only Insta360 Studio's stitching engine knows how to blend them into one flat, viewable picture. Resolve has no built-in stitcher for this format, so it shows you exactly what's on the memory card: two circles, not one image.
- Do I have to use Insta360 Studio before I can edit Insta360 X4 footage in DaVinci Resolve?
- Yes, for a result you can actually use. Insta360 Studio is the free desktop app that turns a raw .insv recording into a normal, flat MP4 or MOV file DaVinci Resolve already knows how to decode. A rename-and-plugin workaround exists using KartaVR, covered later in this guide, but it's more fragile and more manual than letting Insta360's own software do the stitching it was built for.
- What export settings should I use in Insta360 Studio when the footage is headed to DaVinci Resolve?
- Export at up to 8K equirectangular resolution, 7680 by 3840, in H.265 for a manageable file size or ProRes 422 if you want the cleanest possible source for color grading. Turn off Insta360 Studio's built-in color adjustments if you plan to grade the flat image yourself in Resolve, so you're not stacking two separate corrections on top of each other.
- Can DaVinci Resolve reframe 360 footage automatically the way the Insta360 app does?
- Not automatically, no. Insta360's own app and desktop Studio software include an AI-assisted reframe tool built specifically for 360 footage, capped at 2.7K30 output. DaVinci Resolve has no equivalent one-click reframe feature; reframing a stitched equirectangular clip inside Resolve means manually keyframing pan, tilt, and field of view with the LatLong Patcher or a plugin like KartaVR, or reframing in Insta360 Studio first and editing the flat result in Resolve afterward.
- Why is my exported Insta360 X4 file huge and DaVinci Resolve keeps lagging or dropping frames?
- Because an 8K equirectangular frame carries roughly four times the pixel count of a 4K frame, and the X4 records at up to 200 Mb/s to begin with. Even a fast workstation can struggle to scrub that much data in real time. Drop your timeline playback resolution, generate proxies inside Resolve, or export a smaller equirectangular size like 5.7K from Insta360 Studio if 8K is more resolution than your final reframed shot actually needs.
- Do I need DaVinci Resolve Studio to edit Insta360 X4 footage?
- Not for the basic import and stitch fix. Stitching happens outside Resolve entirely, inside Insta360 Studio, which is free. Once you're editing the flat, stitched file, DaVinci Resolve's free version handles H.264 fairly well; heavy 10-bit H.265 exports at 8K are where the free version's decode ceiling starts to matter, and Resolve Studio or a transcode to ProRes removes that ceiling.
- Is there an official Insta360 plugin for DaVinci Resolve?
- No, not as of July 2026. Insta360 ships an official plugin for Adobe Premiere Pro that can import .insv files with a stabilization track directly, but nothing equivalent exists for DaVinci Resolve. Insta360's own community forum has an open request asking for exactly this, unanswered by Insta360 staff at the time of writing, which is why stitching through Insta360 Studio first remains the standard workflow.
Sources
- Insta360 X4 - 8K 360 Camera product listing (Hot Rod Cameras)
- Meet Insta360 X4: Delivering 8K 360 for Unmatched Creative Possibility (Insta360 official blog)
- Understanding 8K Capture with Insta360 X5 (Insta360 official blog, 2:1 equirectangular explainer)
- Insta360 X4 review, the ultimate 360 camera (Tom's Guide)
- Insta360 Studio: Compatibility & System Requirements (Insta360 official manual)
- Do you plan to release a plugin for DaVinci Resolve? (Insta360 Community Forum)
- Blackmagic Forum - Insta 360: no need for a plugin!
- How to Use the 2025 Insta360 Studio, Full Tutorial & Walkthrough (threesixtycameras.com)
- How to Edit and Repair Insta360 Videos in DaVinci Resolve Without Issues (Wondershare Repairit)
- VR Tools in Resolve & Fusion for 360 Video (VFXstudy)
- How-To Geek - How to Install Free HEVC Codecs on Windows 10 (for H.265 Video)
- theatre of noise - Codec limitations of DaVinci Resolve: HEVC, 10-bit, and RAW (Robin Parmar)
- Richard Lackey - AVC / H.264 / HEVC and DaVinci Resolve: Why You Need to Transcode
- Newsshooter - DaVinci Resolve 21.0.3 Update
- Newsshooter - DaVinci Resolve 21 final release
Learn by doing, not watching
Learn Resolve inside Resolve.
TryUncle watches your screen and points at the exact control when you ask. No tabs, no timestamps, no rewatching tutorials.
Download for MacKeep reading
 FixesJul 19, 202633 min read
DaVinci Resolve GoPro Hero 13 Footage Not Importing: The Fix
GoPro Hero 13 footage not importing into DaVinci Resolve? HEVC decode limits, 12GB chapter splits, and corrupt files are the real causes. Every fix here.
 FixesJul 19, 202629 min read
DaVinci Resolve DJI Drone Footage Out of Sync: The Fix
DJI drone footage out of sync in DaVinci Resolve? Most DJI drones have no built-in mic, so drift usually traces to frame rate, 4GB file splits, or DJI Mic drift.
 FixesJul 18, 202636 min read
DaVinci Resolve Import Stuck at 0%: Every Real Fix
DaVinci Resolve import stuck at 0 percent has a dozen real causes, from cloud placeholders to HEVC decode to a missing scratch disk. Find yours here.