Learn / DaVinci Resolveupdated for DaVinci Resolve 21.1 (October 2026)
How to Replace a Clip in DaVinci Resolve Without Losing Effects
Quick answer
To replace a timeline shot without rebuilding its effects, use Replace Edit: open the new source clip, align its Source Viewer playhead with the Timeline playhead, target only the tracks you intend to replace, then choose Edit > Replace or press F11. Replace Edit keeps the timeline slot and doesn’t ripple later clips, but check the result because grades and effects may need separate handling.
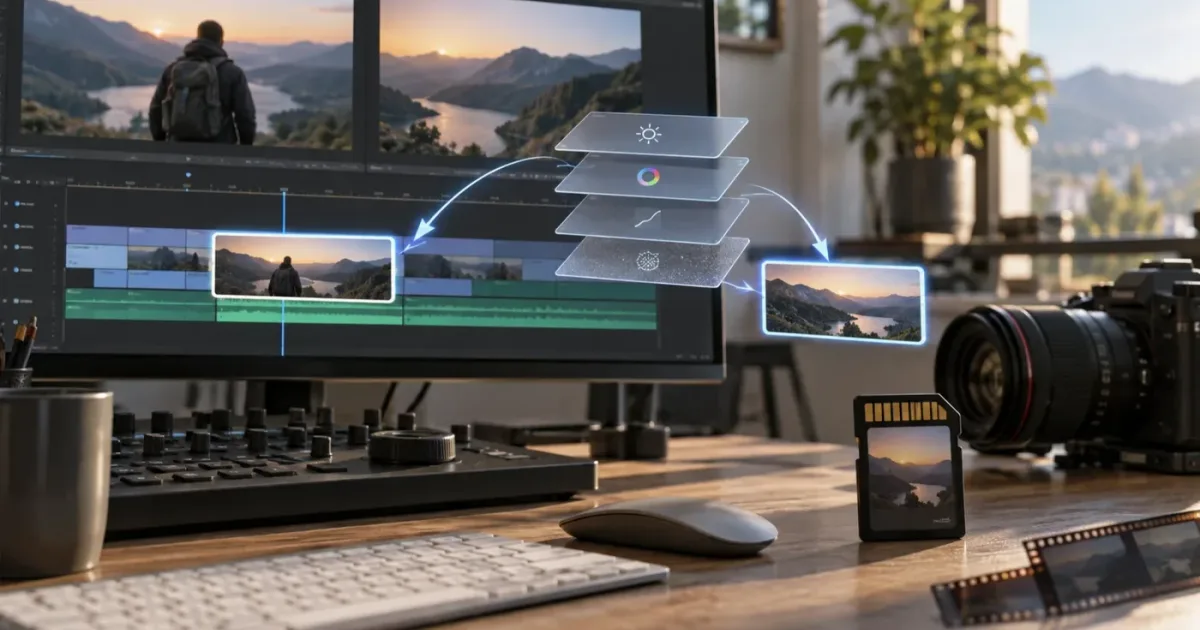
I’d protect the timeline before swapping anything. One wrong edit can change the picture, the sync, or the timing you were trying to preserve.
This guide covers both meanings of “replace a clip.” Replace Edit swaps the source used in one timeline slot. Replacing a file’s identity throughout a project is a different operation, and it can affect every timeline instance that refers to that media.
As of October 2026, the current manual linked by Blackmagic Design is for DaVinci Resolve 21.1. Menus, labels, and keyboard mappings can differ in older versions or customized workspaces, so I’ll name the menu command as well as the shortcut. The method here is about a timeline edit, not a promise that every plugin or grade will transfer without review.
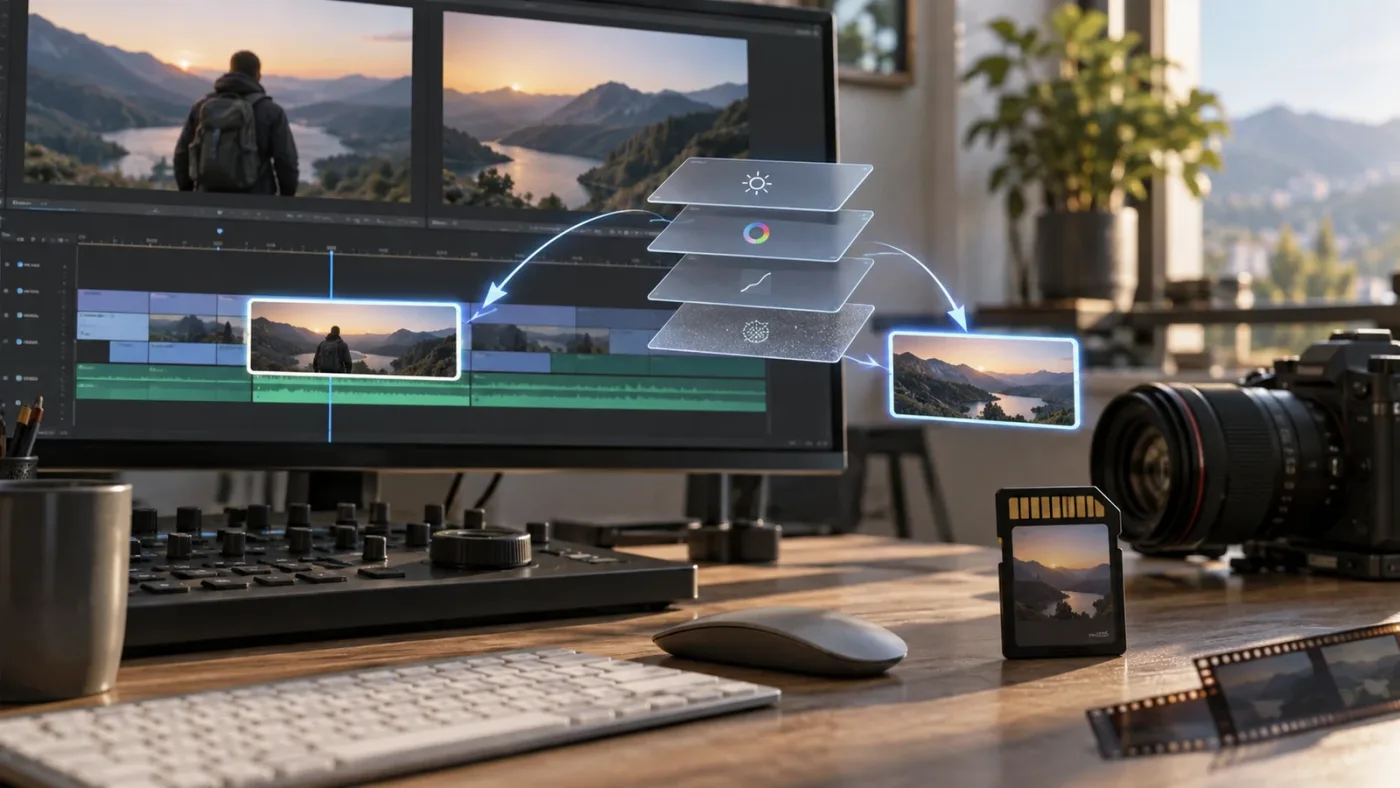
What is the safest way to replace a clip in DaVinci Resolve without losing effects?
The safest first try is Replace Edit on a protected timeline: select the replacement source, align the Source Viewer and Timeline Viewer playheads, set track destinations, then use Edit > Replace or F11. Replace Edit is designed to swap footage into a timeline slot without rippling later edits, but you must inspect the grade, clip-level effects, audio, and transitions afterward.
There is no universal button that guarantees every kind of “effect” will behave identically on every replacement. A Color page grade, Edit page OpenFX effect, Fusion composition, clip transform, retime, and track-level effect are different things attached at different levels of the project. The right approach depends on which one you need to retain.
The Resolve 21.1 manual is the reference for current controls and behavior. Blackmagic’s support page lists software updates separately, so don’t assume that a manual’s version number is the installed build on your computer. Check DaVinci Resolve > About DaVinci Resolve on Mac or Help > About DaVinci Resolve on Windows, then use the manual for the matching version when a control or menu differs. Blackmagic Design lists the Resolve 21.1 manual, and its Support Center lists available updates.
Start by making a reversible version of the work. Save the project, use File > Save As if you want a separate project copy, or duplicate the timeline in the Media Pool before trying the replacement. Resolve’s project backup settings can add another recovery point, but a backup is not a substitute for knowing which timeline you are changing. Give the duplicate a practical name, such as Interview_v03_before_shot_swap, rather than relying on memory.
Then answer this question: do you want to change one timeline instance, or change the media item used by multiple instances? If you only want to replace one shot in one sequence, Replace Edit is the focused tool. If every edit that uses the same Media Pool clip should point to different footage, stop before replacing the timeline instance. You are considering a project-wide media change, not a single edit. That has broader consequences and needs a separate backup and a deliberate check of every affected timeline.
The distinction matters because Resolve separates the source media from its uses in the timeline. A Media Pool item can appear as multiple timeline clips, each with its own edit points and potentially its own clip-level settings. A change to one timeline instance is not automatically the same as changing every use of that source file.
Replace Edit is a one-slot substitution, not a blanket promise that every effect will transfer perfectly.
For a straightforward shot swap, work in the Edit page. The official Edit page overview describes the page’s edit controls and its timeline-based effects workflow. Blackmagic Design’s Edit page overview also explains that effects can be applied to timeline clips or edit points. That separation is why “keep the effects” needs a precise answer: an effect attached to the clip is not the same as a transition at the cut or a grade attached to a shared source.
Use this short decision guide before you press a key:
| Your actual goal | First method to consider | Main thing to verify |
|---|---|---|
| Swap one shot for another in one timeline slot | Replace Edit | Duration, source frame alignment, and effect behavior |
| Use a different moment from the same source | Match Frame or Source Viewer, then Replace Edit | The chosen source frame and available handles |
| Preserve an existing grade while swapping an effects shot | Use the documented drag-and-drop replacement workflow where appropriate | Whether the grade is copied, and whether it suits the new image |
| Replace only picture while retaining original sound | Replace Edit with video destination enabled and audio destination disabled | The audio remains present, linked as expected, and in sync |
| Change a source used in many timeline locations | Treat it as a project-wide media/conform task | Every timeline use, media identity, and backup |
| Change a Fusion composition, title, or generator | Edit that object or replace it with a compatible object | Its own settings, connections, and timing |
The first row is the common case. The rest are where editors often discover that “replace” is an overloaded word. Don’t choose an edit command because its name sounds right. Choose it because its behavior matches the change you mean to make.
How do I replace one timeline shot and keep its edit?
Replace Edit is the direct way to substitute a source clip into one existing timeline slot. In DaVinci Resolve’s Edit page, align the source and timeline playheads to the frames that should correspond, target the correct track, and run Edit > Replace or F11.
The Resolve 21 manual describes Replace Edit as using the position of the Source Viewer playhead and Timeline playhead to align the incoming media, while the timeline clip’s duration determines the replacement duration. The same documentation identifies F11 as the default Replace Edit shortcut. See the Resolve 21.1 Reference Manual. If F11 does not work on your setup, use the Edit menu command or check DaVinci Resolve > Keyboard Customization on Mac, or DaVinci Resolve > Keyboard Customization from the application menu on Windows. Keyboard labels and function-key behavior depend on your keyboard, operating system, and custom mapping.
Here is the basic procedure.
- Save a recoverable version. Save the project. For a high-stakes edit, duplicate the timeline or use Save As to create a separate working copy. Confirm that the duplicate is active before continuing.
- Select the clip to be replaced. Click the intended clip in the timeline. Check the track header and clip name. If multiple clips overlap vertically, zoom in and make sure you are targeting the correct one.
- Load the replacement into the Source Viewer. Double-click the replacement in the Media Pool, or use the Source Viewer controls to open it. Confirm that the viewer is showing the intended file, not a different take with a similar name.
- Find the matching moment. Move the timeline playhead to the point you want to align. Move the Source Viewer playhead to the corresponding frame in the new clip. Matching action or timecode is often more reliable than matching a vague point in the shot.
- Set the destination controls. Turn on the intended video destination. If you want the original audio to stay, disable the incoming audio destination. If you want both picture and sound to change, enable the corresponding destinations and confirm which tracks they point to.
- Run Replace Edit. Choose Edit > Replace, click the Replace Clip control if visible in your toolbar, or press F11 with the default shortcut mapping.
- Check the result in context. Play through the replacement and the cuts before and after it. Inspect effects, grade, audio, duration, and framing. If something is wrong, use Undo immediately or restore the saved version.
The timing details are important. A Replace Edit is not simply “put the new clip where the playhead is.” The relative location of the source playhead matters. If you align a frame of the replacement with a frame in the timeline, Resolve uses that alignment to determine what portion of the new source appears in the slot. If the source has different timecode, action, or duration from the original, the result may not match your expectation.
For a visual match, choose an identifiable event. If the original shot shows a hand touching a door handle, place the timeline playhead on that event. In the replacement, find the same gesture and place the source playhead on its equivalent. This is a worked example, not a tested outcome. The useful principle is to match a frame with meaning, not merely the start of each file.
Before the edit, note the timeline clip’s duration, current start and end timecode, and whether the shot has a retime or speed effect. That gives you a reference for checking whether the slot still occupies the intended time. If the timeline viewer shows a different length afterward, pause and undo rather than trying to repair downstream timing blindly.
Replace Edit does not ripple the rest of the timeline in the ordinary workflow described in the manual. That is why it is generally a better first choice than deleting the old shot and dragging a new clip into the gap. Deleting and inserting can change neighboring edits or leave a gap, depending on which command you use. Replace Edit is intended to retain the existing timeline slot rather than insert a new duration into the sequence. Still, verify the neighboring cuts. A mis-targeted track or different edit command can produce a different result.
There is also a specific case where the timeline In and Out points constrain the replacement. If you have marked a range, make sure those marks are intentional. A leftover In or Out point from previous work can change what portion of media is used. Clear marks you do not need, or set them deliberately and check the manual for your Resolve version. Don’t infer the result from the name of the command alone.
A safe review has three passes. First, review the replacement at the edit point. Second, play the full shot to judge the movement and framing. Third, play across both neighboring cuts to catch a jump, a flash frame, a changed audio handoff, or an accidental shift. A shot can look right on its first frame yet fail during the rest of the action.
If you want step-by-step help locating the frame-matching control in your version, TryUncle is the on-screen assistant for DaVinci Resolve on Mac and Windows. It can guide you while you work, but you remain responsible for checking that the replacement is correct.
Why does Replace Edit sometimes use the wrong frame?
Replace Edit uses the Source Viewer and Timeline playhead positions to line up frames. If the wrong portion of the incoming shot appears, check both playhead positions, any active In and Out marks, the clip’s available duration, and whether you selected the intended source.
This is the most common conceptual trap: the Source Viewer playhead is not merely a preview cursor. For a Replace Edit, it helps define how the replacement aligns to the timeline playhead. A clip with matching filenames or similar content is not necessarily the same shot at the same timecode. Find the action you intend to use.
| What you see after replacing | Likely cause to investigate | Safe next check |
|---|---|---|
| The replacement starts too early or too late | Source playhead was not on the corresponding frame | Undo, locate the matching action, and try again |
| Resolve uses an unexpected segment | Source and timeline playheads were aligned to the wrong content | Compare the displayed frames before making the edit |
| The clip appears to run out before the timeline slot ends | The source does not contain enough usable frames from the chosen alignment | Choose another source range or reconsider the slot duration |
| The edit seems to ignore your intended range | In or Out points may be active, or you used a different edit command | Clear or reset marks, then confirm the menu command |
| The replacement appears on another track | Destination controls target a different track than expected | Undo, inspect destination selectors, and repeat |
| The whole source seems to appear unexpectedly | The operation may not be Replace Edit, or the source range and target differ | Confirm the command, selected clip, and timeline playhead |
The right place to confirm the behavior is the official reference manual for the installed Resolve version. Blackmagic makes a 21.1 manual available, but older Resolve releases can expose different labels or workflows. Blackmagic Design’s manual page identifies the current 21.1 manual; the Support Center lists software updates. If you are following instructions for Resolve 18 or 19, don’t assume a screenshot or keyboard mapping exactly matches Resolve 21.1.
A replacement source needs enough usable content for the required section. If the new file is shorter than the timeline segment, or the source playhead is close to a boundary, there may not be sufficient material on one side of the chosen frame. Try selecting a different matching frame with more head or tail available. If there is no suitable range, you may need to shorten the timeline edit, select a different take, or use a method that allows you to adjust duration deliberately.
Don’t “fix” a wrong replacement by dragging the clip edge until the picture looks plausible. That can conceal a timing mistake, disturb a transition, or change the duration you wanted to preserve. Undo and repeat the replacement with intentional playhead alignment. Then confirm the frame at the start, middle, and end of the slot.
The source and timeline viewers may not show the same timecode basis. One can show source timecode while the other shows timeline timecode, and those numbers need not match. The important question is whether the picture events match. Use a distinctive frame, waveform cue, slate, or visible action to find correspondence. If your workflow depends on matching timecode across camera angles, confirm that the files actually share the expected timecode before relying on it.
The Match Frame command can help when you need to locate the source media corresponding to a timeline frame. It is a different operation from Replace Edit: Match Frame takes you back to the source associated with a timeline clip, while Replace Edit performs the substitution. For a deeper explanation of that navigation step, see How to Use Match Frame in DaVinci Resolve.
If the Source Viewer shows a compound clip, multicam clip, or nested timeline, pause and confirm what object you are replacing. A container can show a composite result rather than a single camera file. Replacing that container with a flattened source may lose the ability to adjust its internal edits. If you need a specific camera angle, use the multicam controls or open the relevant nested timeline rather than treating the whole compound object as ordinary footage.
A replacement is only aligned when the source frame and timeline frame represent the same intended moment.
Which effects stay with the clip, and which need separate review?
An effect can belong to the timeline clip, its source media, an adjustment clip, a track, a transition, or a Fusion composition. Replace Edit changes the source used in a timeline slot, so inspect each effect according to where it lives instead of assuming all effects transfer as a single package.
In everyday conversation, “effects” may mean nearly anything applied to a shot. For a useful check, sort them by ownership. The table below is a diagnostic map, not a guarantee that a given control will behave identically in every project.
| What you call an effect | Where to look | What a replacement can change |
|---|---|---|
| Transform, crop, opacity, or clip speed | Edit page Inspector for the timeline clip | The resulting framing or timing may no longer suit the new shot |
| OpenFX applied to a timeline clip | Inspector and OpenFX controls for that clip | The effect may be present but need different settings for new content |
| Color correction or grade | Color page for the relevant clip or grade version | A retained grade may look wrong on a different camera, exposure, or subject |
| Transition | Timeline edit point between clips | The cut or transition may still be there, but the new shot can alter how it feels |
| Adjustment clip | Separate clip above the shot | The adjustment clip can continue affecting whatever is underneath it |
| Track-level effect | Track mixer or track processing controls | It may continue affecting all clips on that track |
| Fusion composition | Fusion page or a timeline Fusion object | A source change can affect the composition’s inputs or the subject it was built around |
| Generator, title, or nested clip | The object’s own timeline item | Replacing the wrong object can remove editable structure or reveal a different object |
This is why the answer to “does Replace Edit keep effects?” is qualified. The timeline slot can remain in place, but some settings are attached to the timeline instance and some are not. Even when an effect survives, its parameters may have been tuned for the original shot. An exposure correction that rescued a dark image may crush a better-exposed replacement. A tracked window may no longer follow the subject. A crop that framed a face may cut it off in a new take.
Check the Inspector before and after. Before replacing, note which clip-level controls are active and whether the Inspector shows relevant settings. After replacing, select the new timeline instance and inspect the same controls. Don’t assume that seeing an effect badge or an effect name means the result is correct. The effect can still be active while producing a bad image.
A color grade deserves a separate review. A grade can include primary corrections, nodes, windows, qualifiers, tracking, and other decisions tied to the shot. Even if the grade remains attached after a replacement, the new source may differ in exposure, white balance, lens, camera, or subject position. Compare the result using the viewer and scopes, and rebuild or adjust the grade when it no longer serves the new shot. If you need help copying a grade deliberately between clips, use the relevant workflow in How to Copy a Color Grade to Multiple Clips in DaVinci Resolve.
Resolve’s manual also describes a specialized drag-and-drop replacement workflow for cases where clips are stacked in the timeline as alternate versions of stock footage or visual-effects shots. That method can copy the grade of the clip being replaced to the incoming clip. This is not the same claim as “every F11 Replace Edit copies every grade and effect.” It is a particular workflow for versionable media, and you should confirm that it suits your project. See the Resolve 21.1 Reference Manual for the exact instructions and current terminology.
An effect can remain active and still be wrong for the replacement shot.
A tracked Power Window, mask, or composited element needs special attention. If the new clip has different motion or a different subject location, an existing track may point to the wrong place. Play the shot from its beginning to its end and inspect the tracking result. If the target leaves frame, changes scale, or is obscured, retrack or adjust the effect instead of trusting a single paused frame.
Fusion work also depends on what the nodes expect as input. A Fusion effect built around a specific frame size, alpha channel, or subject position may not fit a new source. Check the Fusion viewer, node connections, and output. If the clip is a Fusion composition with its own internal media, replacing a timeline clip may not be the correct way to change that internal source. Open the composition and identify the MediaIn or source node first. Avoid flattening or rendering a composition merely to make the swap appear simpler unless that loss of editability is intentional.
An adjustment clip is different again. Because it sits on a track above the shot, replacing the underlying clip may leave the adjustment clip untouched. That can be useful if the adjustment applies to a whole sequence, but it can also create a surprise if it covers multiple clips. Inspect the layers above and below the target in the timeline. Select the intended clip, not an adjustment layer that happens to overlap it.
Transitions belong to edit points rather than simply to a source shot. If the original clip has a dissolve at its head or tail, a replacement with different movement or exposure can make that same transition look abrupt. Review both ends of the clip. A technically intact transition can still look wrong because the new shot has a bright flash, a camera move, or a different visual direction.
Retime and optical-flow choices are another class of setting to inspect. A clip can have a changed speed, a speed ramp, or frame interpolation. Replacing its source with a take that has different motion may produce stutter, blur, or an awkward action. Check the speed controls and play the full retimed section. Do not judge a retime from a still frame.
Audio effects and linked sound deserve their own check. A timeline clip may contain video and audio components that are linked or separately targeted. If you replace both by mistake, you may lose production audio, dialogue, or a carefully edited sound bite. If you only want to change the image, disable the incoming audio destination and inspect the original audio track after the edit. If you want to change only audio, target the audio destination while leaving the video destination off, and verify that the picture remains unchanged.
Resolve 21 adds new features in several areas, including improved keyframing and other workflow changes, but those release notes do not imply a universal change to how all prior effects behave when replacing a clip. Blackmagic’s DaVinci Resolve 21 overview identifies the version’s broad feature additions. Use the current manual for the exact editing operation, and evaluate the effect itself on the new material.
How do I replace only the video and keep the original audio?
Disable the incoming audio destination and leave the original audio track untouched. Then run Replace Edit on the video destination only, and listen across the edit to confirm that the original sound remains present and synchronized.
This method is useful when you have a better camera angle, a clean visual replacement, or a color-corrected render but want to keep the dialogue or production sound already cut into the timeline. The key is track targeting. Resolve’s Edit page distinguishes source track destinations from timeline content. An active source audio destination can send incoming sound to the timeline when you meant to replace only picture.
Before the replacement:
- Identify the video track containing the shot.
- Identify the audio track containing dialogue, production sound, music, or effects.
- Confirm whether the source clip has audio you intend to use.
- Turn off the incoming audio destination if the existing audio must remain.
- Keep the destination video control directed at the intended video track.
- Check that no other target track is selected unintentionally.
Afterward, don’t judge success by the picture alone. Solo or monitor the relevant audio track if needed. Play a section before the cut, through the cut, and after the cut. Confirm that the waveform remains where expected and that dialogue is not doubled, muted, or offset. Listen for a click or abrupt room-tone change as well as obvious sync drift.
If the incoming picture is a different take of the same dialogue, the old sound may no longer match lip movement. That’s not a Replace Edit failure; it is a content mismatch. Use the picture-only replacement only if the retained sound corresponds to the new performance. If it does not, choose the matching audio, use a separate audio edit, or return to the original take.
For an audio-only replacement, invert the targeting logic: enable the intended audio destination and disable the video destination. Then check channel layout, clip gain, track effects, and sync. A stereo source replacing a mono or multichannel clip may not behave the way you expect, so inspect the clip attributes and track routing if the sound changes.
There’s a difference between disabling a destination and muting a track. Disabling the incoming destination prevents the new source component from being edited to that target. Muting a timeline track changes what you hear; it does not by itself prevent an incoming edit from changing timeline media. Set the edit targets deliberately instead of using mute as a substitute.
A related pitfall is linked selection. Linked Selection affects how linked audio and video are selected together during editing. It is not a guarantee that a replace operation will affect only one component. Use the destination controls, then inspect the result. If a selection behaves unexpectedly, review the Resolve 21.1 Reference Manual and the current keyboard mapping rather than assuming a familiar shortcut has the same effect in your configuration.
For a picture-only swap, the audio destination must be off before the edit, not repaired afterward.
What should I do if F11 does nothing?
Use Edit > Replace or the visible Replace Clip control, then check your keyboard mapping and operating-system function-key settings. In the default Resolve mapping, F11 is Replace Edit, but your keyboard, laptop settings, customized mapping, or application focus can intercept the key.
First, make sure the Edit page has focus and that the Source Viewer contains the replacement clip. If you are focused in another application or panel, pressing F11 may trigger an operating-system command instead. On some Mac keyboards, function keys control system features unless you use the Fn key or change keyboard settings. On compact laptop keyboards, the function row may require a modifier. Don’t keep pressing the key and assume Resolve received it.
Use the menu command as a clear test. Open Edit and choose Replace. If the menu command works but F11 does not, the problem is probably the keyboard or mapping, not the edit itself. Open Keyboard Customization, search for Replace, and inspect the assigned shortcut. You can restore a default mapping or assign a shortcut that works on your keyboard, but make a note of the change so it does not surprise you later.
If neither the menu item nor the shortcut behaves as expected, check the state of the timeline. Is a clip selected? Is the playhead over the intended clip? Is the Source Viewer actually loaded with the replacement? Are the correct destination controls active? Is the track locked? Did you select a clip in the Media Pool but not load it in the viewer? Work through those visible states one by one.
The Replace Clip toolbar control can also be hidden by a different workspace layout or toolbar configuration. If you do not see it, use the menu command. The command is more reliable than trying to identify a small icon from memory, especially when the UI differs from a tutorial.
F11 is not a universal key across every app or every custom Resolve configuration. Verify the binding in your own installation. Blackmagic’s Resolve 21.1 manual documents the editing functions and shortcuts; the Support Center is the place to confirm the software version and available updates.
If you’re on a shared workstation, don’t change the global keyboard mapping without checking whether another editor depends on it. A custom mapping can be saved or managed through Resolve’s keyboard customization options, but a shortcut change should be deliberate and communicated to the people using the same workstation.
Why did my replacement change the duration or move other clips?
A normal Replace Edit is designed to fill the existing timeline clip’s duration and does not ripple the rest of the timeline. If duration or downstream timing changed, verify that you used Replace rather than Insert, Overwrite, Ripple Overwrite, or a drag operation, and check whether you targeted the intended clip.
Resolve offers several edit types with different consequences. The official Edit page describes multiple edit options, including insert, overwrite, replace, and ripple overwrite. They are not interchangeable. Blackmagic Design’s Edit page overview is useful context, while the Resolve manual provides the detailed operational definitions.
| Operation | General purpose | Why it may not fit a one-for-one replacement |
|---|---|---|
| Replace Edit | Substitute incoming media into an existing timeline slot | Depends on source and timeline playhead alignment |
| Insert Edit | Add incoming media at the edit point and move downstream material | Can lengthen the timeline and shift later edits |
| Overwrite Edit | Place incoming media over timeline content | Can cover a range without preserving the intended slot behavior |
| Ripple Overwrite | Overwrite while adjusting surrounding timeline duration | Can change the positions of later material |
| Dragging to the timeline | Depends on the drop zone and active mode | A drop can perform different actions depending on location and edit overlay |
The command name matters. If the timeline grows, inspect whether you used Insert or a ripple operation. If the replacement covers a longer area than expected, verify the selected target and whether the intended Replace overlay was active. Undo as soon as you see a result that contradicts your expected edit.
The new source’s duration does not automatically mean the timeline should expand. Replace Edit is based on the existing timeline slot, but the selected source frame must have enough usable media around it to fill the slot. If it does not, the operation may fail, produce an unexpected segment, or leave you with a result that needs adjustment. A short clip is not magically extended by the command.
Don’t judge the timeline by the playhead alone. Zoom in around the cut. Look at the clip edges, the track above and below, and the ruler. If the duration has changed, compare the edit’s start and end timecode to your saved reference or duplicate timeline. If anything downstream has moved, stop and undo before making more changes.
When the source and timeline frame rates differ, playback cadence can also make a replacement feel longer or shorter even when the timeline slot remains the same. The timeline duration is measured in timeline frames, while source media has its own frame rate and duration. Check the actual timeline edit boundaries and playback rather than estimating from the source viewer’s elapsed time.
If your replacement has variable frame rate, unusual timecode, or a different frame size, it may behave differently from a camera original with matching characteristics. That is not a reason to assume the edit is broken. It is a reason to verify the actual in and out behavior and playback. For media-conform problems, compare the file identity, duration, timecode, and codec before deciding whether a manual replace or project-wide relink is appropriate.
Should I use Replace Edit or replace the source media everywhere?
Use Replace Edit when you want to change one timeline instance. Consider a project-wide media or conform operation only when every use of the original source should point to the new media, and protect a copy of the project before you change shared media references.
This decision comes before the edit. A timeline can contain several instances of one Media Pool clip. Those instances may have different in and out points, grades, effects, and positions. Swapping one instance does not necessarily mean every use elsewhere should change. Conversely, replacing the wrong underlying media can affect multiple sequences.
Ask yourself:
- Is this a single shot in a single timeline? Use Replace Edit as the first approach.
- Are all uses of the original file wrong or outdated? Investigate a project-wide conform or media replacement workflow.
- Does the replacement have matching timecode, duration, and frame structure? Conform and relinking methods may be more appropriate when identities match.
- Is this a new take or a different creative shot? A one-instance timeline replacement is usually easier to review.
- Does the old shot carry a unique grade or effect? Preserve a duplicate and examine how the effect relates to the source.
A project-wide change is riskier because one source can feed many edits. A new file may have a different duration, timecode, frame rate, color space, or channel layout. Even when the new file is visually similar, its source timing may not align with every cut. Before replacing a shared source, identify all timelines that use it and confirm whether the change is intended everywhere.
Resolve’s official documentation covers conforming and relinking media separately from the Edit page’s Replace Edit. The manual’s conform guidance discusses situations such as old effects shots, offline stock media, and mismatched files. That context matters: if the problem is a media identity mismatch, a source substitution can be more appropriate than hand-editing every timeline slot. See the Resolve 21.1 Reference Manual for the conform and editing sections.
Avoid solving a project-wide problem with repeated single-clip edits unless that is what you intend. Repeated manual swaps can create inconsistent results across timelines. At the same time, don’t use a global replacement to solve one isolated bad shot. It could alter other sequences that deliberately use the original.
For team projects or shared libraries, confirm whether other editors are using the same project or media pool. A change to shared project content can affect collaborators. Resolve 21’s release notes describe collaboration updates, but the exact permissions and shared workflow depend on your project setup. Coordinate changes before replacing common media. Blackmagic’s Resolve 21 overview lists the version’s collaboration-related development.
The safest test is a duplicate timeline with one representative shot. Try the intended replacement there, inspect the effects and audio, and verify whether the method changes one instance or all. A small controlled test is more informative than applying a global change and hoping the result remains local.
How should I replace a graded or visual-effects shot?
For a graded or VFX shot, protect the original, choose the replacement method that matches the media relationship, and review the grade and effect independently after the swap. If the replacement is a new version of the same shot, matching timecode and frame structure may make conforming or a specialized replacement workflow more suitable than a casual drag.
A common example is a placeholder shot replaced by a completed effects render. The new file may be the same action and duration, but have a different filename, codec, or resolution. Another is an effects vendor returning a corrected render. In either case, ask whether the incoming media is the same shot at the same source timecode, or a new take that merely fills the same story beat.
For a new take or a creative alternative, use a timeline Replace Edit and judge the new image as a new shot. Don’t assume the old grade or tracking data is valid. For a new render of the same VFX shot, verify matching frame rate, duration, timecode, and handles. Resolve’s conform tools are built for media identity and version matching concerns; consult the manual rather than inferring that an edit command will preserve every relationship.
A grade copied from a previous shot can be a useful starting point, not a guaranteed final grade. The footage may have changed in subtle ways: the actor’s face may be in a different position, the background may be brighter, or the camera may have exposed differently. View the image and scopes. Check highlights, shadows, skin tones, and any tracked windows. If the grade includes qualifiers or masks, make sure they still isolate the desired content.
For effects shots stacked as alternate versions, the Resolve manual describes a drag-and-drop replacement method that copies the grade from the timeline clip being replaced to the incoming clip. That is a narrowly useful technique; it should not be generalized into a claim that every replacement command carries every effect. Open the current manual’s chapter for exact setup. If the replacement media has different content, the copied grade can need substantial revision.
For Fusion, inspect whether the effect lives as a Fusion composition on the timeline or as a node tree with source footage inside it. In the first case, the timeline object may be the composition itself. In the second, the source is part of the node graph. Replacing a timeline clip around a composition is not necessarily equivalent to swapping the footage inside the composition. Keep the node structure editable if you expect to revise it.
For a rendered VFX shot with transparency, confirm that the alpha channel arrives correctly. A replacement file can look opaque or display a different background if its alpha interpretation differs from the prior render. Check the clip in context over the intended background, not only in the Source Viewer on a black or checkerboard display. Verify the codec and alpha support in the project’s media settings and the actual clip attributes.
If the replacement resolution differs, check scaling and framing. A 4K plate replacing an HD reference can be positioned or scaled differently; a vertical source replacing a horizontal shot can reveal unexpected borders or crop. Resolve’s Inspector controls may still hold values tuned to the old dimensions. Review zoom, position, crop, and any output sizing after the edit.
If a replacement has a different color space or gamma, a retained grade can produce an incorrect image even if all nodes remain connected. Check the project’s color management and the clip’s input interpretation before chasing the grade. The clip may need correct input color space metadata or an explicit transform, depending on the workflow. Never assume the image is wrong solely because the grade disappeared or persisted; inspect how the source is being interpreted.
When in doubt, render nothing destructively and do not flatten the timeline just to make the shot swap easier. Keep the original timeline object, grade, and composition available until the new shot has passed review. A duplicate timeline gives you an uncomplicated rollback if the change interacts with a downstream effect.
What if I need to replace only part of a longer clip?
Cut or mark the precise timeline section first, then replace only that selected portion, while preserving enough source media around the aligned frame. If the original clip continues beyond the section you want to change, divide the problem into a local shot segment rather than replacing the entire long clip.
An editor might have a long interview source in the timeline but want to change only one phrase to a second camera angle. The task is not necessarily “replace this whole source.” It is “replace this interval while keeping the surrounding edit intact.” Use the timeline edit points to isolate the interval, then replace that section with the correct take. Save a version before you add cuts.
The exact sequence depends on whether the timeline already has an edit at the desired boundary. If the clip is not divided at the point where the alternate shot should begin and end, create the necessary edit points deliberately. Inspect linked audio and video before cutting. If the audio must remain continuous, keep it on its own track or disable audio targeting for the visual replacement. If the audio should change too, match the performance and sync carefully.
The official Resolve 21 manual describes using timeline In and Out points to restrict the range edited in some Replace Edit workflows. This is useful, but it makes active marks important. If marks remain from previous work, they may constrain the replacement unexpectedly. Clear stale marks or create fresh ones intentionally, then confirm the highlighted range before executing the edit. The Resolve 21.1 Reference Manual is the controlling reference for the current version.
For a split-camera interview, a representative workflow might be:
- Place edit points around the moment that should change.
- Keep the dialogue audio on the intended track and decide whether to preserve it.
- Load the alternate angle in the Source Viewer.
- Find the frame that best matches the action or dialogue.
- Target the video track and disable audio if the original sound should continue.
- Use Replace Edit on the isolated timeline section.
- Play from before the first edit point through after the second.
- Check for a flash frame, missing audio, discontinuity in eye line, or a visible exposure jump.
This is a worked example, not an observed test. It illustrates the decisions to make; your project’s track layout and media will determine which controls are active.
If the replacement is shorter than the timeline section, you may not have enough footage to cover it. If it is longer, Replace Edit can still use the timeline slot duration, but you must choose the source frame and available handles wisely. Avoid adding a freeze frame, speed change, or repeated frame simply to disguise a shortage unless that is an intentional editorial choice.
A long clip with retiming or speed ramps can be particularly tricky. Cutting it into a local replacement changes the context of the original retime. Review the speed points and duration around the new edit. If the goal is to preserve a specific timing curve, document the curve or duplicate the timeline before modifying the source.
How do I check the replacement before I call it done?
Review the replacement at its start, through its full duration, and across both neighboring edit points. Confirm the picture, timing, framing, grade, effects, audio, and tracks that should remain unchanged.
Use this review sequence after every important replacement:
- At the first frame: confirm that the replacement begins on the intended image and does not show a black frame, wrong take, or unintended transition.
- During the action: play the entire shot. Look for tracking failures, masks that drift, a bad retime, or exposure changes that only appear in motion.
- At the last frame: confirm that the clip ends where intended and that there is no gap or flash.
- At the previous edit: check that the incoming shot still cuts or dissolves naturally from the prior shot.
- At the next edit: check the outgoing transition and the first frame of the following shot.
- In the audio: listen for missing dialogue, doubled sound, clicks, abrupt room tone, or sync errors.
- In the Inspector: confirm that the expected clip-level controls and effects remain.
- On the Color page: review the grade and any tracking, windows, or qualifiers.
- In Fusion: inspect the node tree and output if the shot uses a composition.
- In the timeline: confirm no unintended ripple, shift, gap, or track change occurred.
It helps to review both with the clip selected and with nothing selected. When selected, you can inspect its controls. When deselected, you see the image without selection overlays and can judge it more naturally. Use scopes when a grade or exposure match matters, but don’t treat a scope reading as a substitute for viewing the shot in context.
Compare before and after with the original timeline duplicate if the shot’s appearance is critical. A side-by-side timeline or still comparison can reveal differences in framing, grade, and continuity. If you are not sure whether an effect transferred, compare the Inspector and the rendered viewer, then use Undo to return to a known state and test one variable at a time.
Don’t over-rely on cached playback. If the viewer appears not to reflect your latest changes, verify that the timeline is displaying the current clip and let the effect update or render as needed. Blackmagic’s Resolve 21.0.4 update notes mention improvements to realtime playback on timelines with large caches, but that does not mean every project will update immediately under every cache configuration. Check the actual current output after playback refreshes. Blackmagic’s Support Center lists the update notes.
A final export is not always necessary to review a one-clip replacement, but a short test render can be appropriate if the effect depends on rendering or a plugin. Render a small range that includes the changed shot and transitions, then compare it with the timeline viewer. Keep the test range local and label it clearly so it is not mistaken for a final deliverable.
Which replacement method should I choose?
Choose Replace Edit for a single timeline slot, a conform workflow for media identity changes, and manual effect or grade work when the incoming shot is meaningfully different. The safest method is the least destructive one that matches the scope of your change.
| Choose this method | When it fits | What it does not guarantee |
|---|---|---|
| Replace Edit | One shot or one timeline slot needs a new source | Perfect grade, tracking, or plugin behavior |
| Replace Edit with video-only targeting | Picture changes but existing sound stays | That the new image matches the old performance |
| Replace Edit with audio-only targeting | Sound changes but picture stays | That sync and channel configuration are correct |
| Specialized drag-and-drop version replacement | Alternate stacked versions where retaining the grade is useful | That the copied grade suits different footage |
| Conform or relink workflow | Source media is a new version of the same shot or an offline/mismatched source | That all edits and effects need no review |
| Rebuild a clip effect or grade | New shot changes content enough that old treatment no longer fits | A fast or automatic transfer |
| Duplicate timeline and test | Uncertain case or high-risk delivery | A substitute for checking the final sequence |
Blackmagic’s own feature pages describe Resolve as a multi-page application for editing, color, Fusion, Fairlight, and delivery. That breadth is useful, but it means the same word “clip” can refer to different objects in different parts of the workflow. Keep the question narrow: which timeline object, which source, which effect, which tracks, and which instances should change?
One useful reference point is editor Casey Faris, who has taught and discussed DaVinci Resolve workflows. In an interview about the editor’s changing role, he says, “an editor is no longer somebody who just edits”. The interview with Casey Faris is broader than this specific operation, but it captures why a shot swap can touch editing, color, effects, and sound at once. Treat those as connected checks, not as proof that one command handles all of them.
The best choice is not always F11. If you are changing a single visual take, Replace Edit is a sensible first method. If you are updating a VFX render with corresponding timecode and duration, a conform workflow may preserve the intended relationship more directly. If you are changing a shared media source, investigate all timeline instances first. If the old grade or tracking was specific to the original shot, revise it rather than assuming it is correct.
What should I do when the replacement still looks wrong?
Undo once, identify what changed, and repeat the operation with only one adjustment at a time. Check source alignment, track targeting, source duration, effect ownership, and the correct edit command before changing unrelated settings.
Use this troubleshooting order:
- Undo the last edit. If the timeline is already in an uncertain state, don’t stack more edits on top of it.
- Confirm the selected target. Identify the exact timeline clip and track.
- Confirm the source. Check the Source Viewer title or metadata for the replacement file.
- Align the playheads. Match the source and timeline frames to the intended moment.
- Check active marks. Clear or set In and Out points intentionally.
- Check destinations. Enable only the intended audio and video tracks.
- Use the explicit command. Choose Edit > Replace or verify the F11 mapping.
- Review the result. Inspect duration, effects, grade, audio, and neighboring edits.
- Restore or retry. If it still fails, use the saved duplicate and test a different method.
If the new shot’s grade looks wrong, first distinguish a missing effect from a poor effect match. Is the node graph or Inspector effect absent, or is it present but producing an unsuitable image? The first suggests transfer or targeting behavior; the second suggests the settings need adjustment for the new material.
If the viewer looks different on the Edit and Color pages, confirm you are looking at the same timeline instance and that the right clip is selected. Look for clip-level versus track-level or adjustment-clip effects. A different viewer state can make it seem like a grade disappeared when you are actually inspecting a different item or output stage.
If audio disappears, check whether the incoming audio destination was active, whether the original track is muted or disabled, and whether the correct track is being monitored. If the picture shifts, confirm whether the operation was Replace rather than Insert or Ripple Overwrite. If the replacement is too short, choose another source range or reduce the target duration intentionally.
If the new source appears offline, do not keep repeating Replace Edit. Confirm the media path and source identity in the Media Pool. A file path or codec issue is different from an edit operation. Resolve’s support documentation separates media management and conform concerns from timeline edit commands; use the chapter appropriate to the actual error.
If a third-party effect is missing or behaves differently, confirm that the plugin is installed and available in the current Resolve version and system. A replacement does not install a missing plugin, transfer its license, or guarantee version compatibility. The Resolve Support Center is the primary place to check supported software updates and product resources. For plugin-specific behavior, consult the plugin vendor’s documentation rather than guessing.
If you’re editing in Resolve 20 or earlier, the central playhead-alignment concept and Replace Edit command may be familiar, but the interface and manual details can differ. Compare your version’s reference manual and keyboard mapping. Blackmagic’s support archive lists older versions and materials; don’t apply a Resolve 21.1 menu instruction blindly to an older build.
If a task is genuinely confusing in the interface, TryUncle can point you toward the relevant control on Mac or Windows while you work. The key is still to verify the result in your own timeline before moving on.
What is the practical rule for keeping effects during a clip replacement?
Protect the timeline, use Replace Edit for a one-slot source swap, and verify each effect where it actually lives. A retained effect is not automatically a suitable effect, and a timeline edit that preserves duration does not certify the color, tracking, audio, or transition.
Remember four distinctions:
- Replace Edit changes the source used in a timeline slot.
- Media conform or relinking addresses which file a project associates with existing media.
- Grade and effect controls may be tied to a clip instance, source, track, transition, or composition.
- Review is how you confirm that the new shot works with those controls.
If you only need one shot changed, don’t start with a project-wide replacement. If the new source is a different take, don’t assume the old grade and tracking should remain untouched. If the sound must stay, turn off the incoming audio destination before the edit. If a shortcut fails, use the menu and inspect the mapping.
The reliable finish is simple: save a recoverable version, make the smallest correct edit, then watch and listen across the entire shot and its neighboring cuts. If anything is off, undo before you try another method.
Frequently asked questions
- Does Replace Edit in DaVinci Resolve keep effects?
- Replace Edit replaces the timeline clip’s source while keeping the edit in its timeline position and duration. Check the result rather than assuming every grade, clip attribute, plugin, or effect will transfer exactly as intended; behavior can depend on the effect type and the replacement media.
- What is the shortcut to replace a clip in DaVinci Resolve?
- F11 runs Replace Edit in DaVinci Resolve’s default keyboard mapping. If your keyboard or customized mapping intercepts F11, choose Edit > Replace or use the Replace Clip control.
- Why does F11 replace the whole clip or use the wrong frame?
- Replace Edit aligns the Source Viewer playhead with the Timeline playhead and uses the timeline clip’s duration. Put both playheads on the intended matching frame, confirm the correct timeline clip is targeted, and check source duration before editing.
- How do I replace only the video and keep the original audio?
- Set the incoming source’s video destination to the intended video track and disable its audio destination before Replace Edit. Afterward, play the edit and confirm the original audio remains aligned and unchanged.
- Can I replace a clip with a shorter source?
- Only if the replacement contains enough usable frames for the timeline duration and the chosen source in-point. If it does not, Resolve may not be able to fill the existing edit as expected; choose a longer source range, shorten the timeline clip, or use a different replacement method.
Sources
Learn by doing, not watching
Stop translating tutorials to your timeline.
TryUncle stays beside Resolve on Mac and Windows. When you ask, Uncle sees your screen and points at the exact control you need. No hunting through tabs, timestamps, or mismatched tutorials.
Meet TryUncleKeep reading
 GuidesJul 25, 202634 min read
How to Use Match Frame in DaVinci Resolve: The Complete Guide
Match Frame in DaVinci Resolve explained: the F shortcut, Match Frame to Source Clip, multicam audio limits, Cut page quirks, and what to do when F does nothing.
 FixesSep 29, 202619 min read
DaVinci Resolve Paste Attributes Not Working? Fix It
DaVinci Resolve Paste Attributes not working? Fix the copy shortcut, timeline selection, category checkbox, and clip-type edge cases.
 FixesOct 30, 202634 min read
DaVinci Resolve Fusion Composition Wrong Resolution? Fix It
Fix a DaVinci Resolve Fusion composition with the wrong resolution by checking the clip type, merge background, timeline scaling, and output.