Learn / DaVinci Resolveupdated for DaVinci Resolve 21.1 (October 2026)
DaVinci Resolve Fusion Composition Wrong Resolution? Fix It
Quick answer
A DaVinci Resolve Fusion composition can have a different resolution from the timeline because a clip-based composition may use its source image size, while a Fusion Composition generator uses the timeline format. For a specific output size, set a Background node to that size and connect it to the Merge node’s background input. Then check image scaling and the MediaOut result.
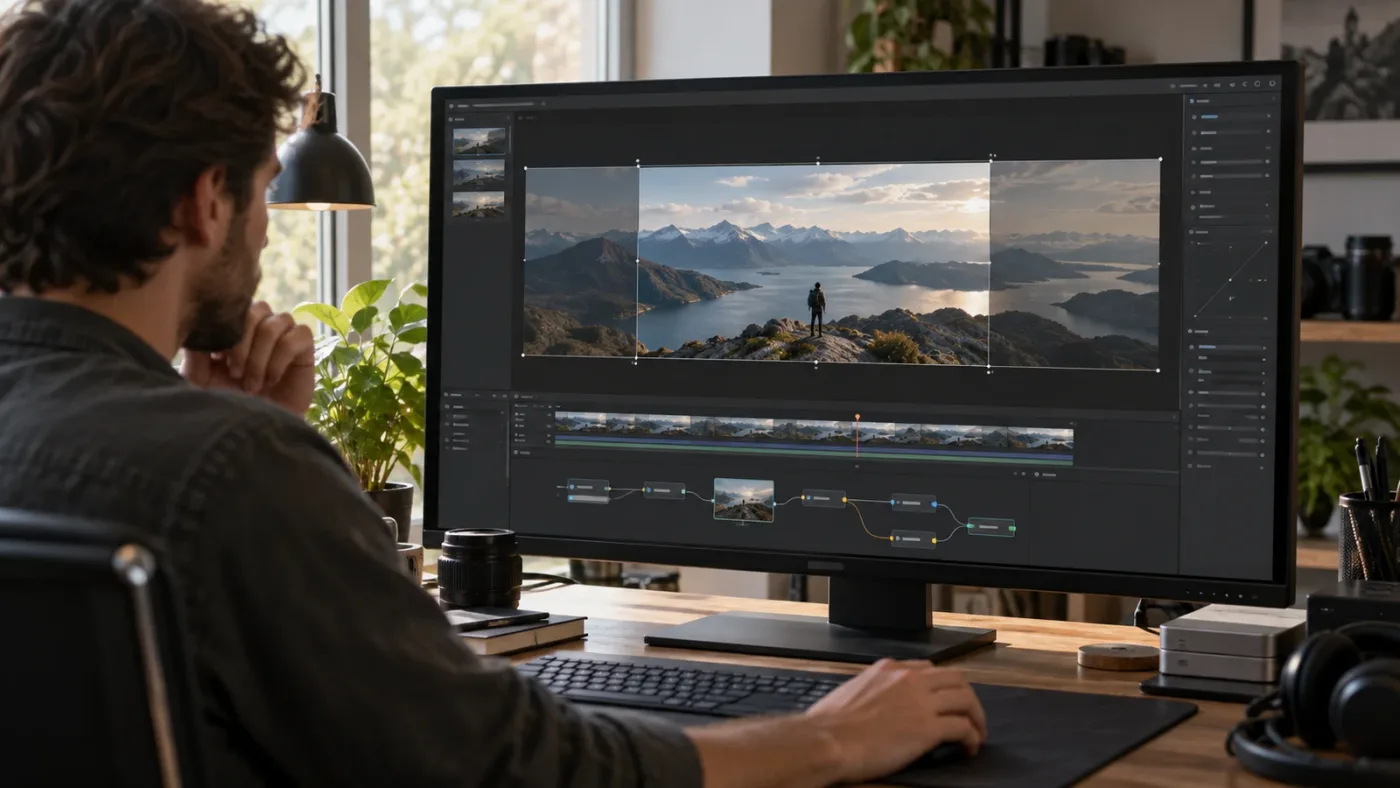
I know the moment: the Edit page looks right, but Fusion opens to a frame that seems too wide, too small, or simply unrelated to the timeline. That mismatch often comes from how Resolve builds the composition, not from a broken project. As of October 2026, these checks apply to DaVinci Resolve 21.1; if you use an earlier release, some setting names or options may differ.
Why is my DaVinci Resolve Fusion composition the wrong resolution?
A Fusion composition can show a different resolution from the timeline because the composition may be based on the source clip, the timeline, or the background image entering a Merge node. First identify which of those controls the frame you’re looking at. Then choose a fix that changes the intended control, not a nearby setting with a similar name.
The word “composition” causes much of the confusion here. In Resolve, it might mean the Fusion page’s node graph for a timeline clip, a Fusion Composition generator placed on the timeline, or a Fusion Clip that combines timeline items. Those workflows don’t necessarily start with the same image dimensions.
A source clip might be 3840 × 2160 while the timeline is 1920 × 1080. A clip-based composition can use the source dimensions inside Fusion, even though Resolve scales the result for the HD timeline. A separate Fusion Composition generator, by contrast, creates its images using the timeline’s format. These are different behaviors, not proof that one of the project settings failed.
A Fusion viewer’s frame size and the timeline’s delivery size are related, but they are not the same setting.
Before changing anything, write down three things:
- The dimensions of the timeline.
- The dimensions of the media or generator entering Fusion.
- The dimensions and shape of the result coming out of the last node, usually MediaOut.
A 1920 × 1080 timeline with 3840 × 2160 source footage is a useful example. If Fusion is processing the source at UHD dimensions, that does not automatically mean the final timeline or render is UHD. Resolve can scale a higher-resolution Fusion output into the HD timeline according to the project’s image-scaling behavior.
Blackmagic Design’s Resolve manual describes Fusion compositions as having resolution behavior that depends on how clips enter Fusion and on the node output. The DaVinci Resolve 21.1 manual library is the current reference point for the version named here. Blackmagic’s manuals also distinguish generated images, clip inputs, and the output of the node graph. That distinction is more useful than treating the Fusion viewer as a direct copy of the Edit viewer.
If you need to confirm whether you’re seeing a resolution mismatch or only a viewer-fit issue, load MediaOut into a viewer and inspect the image bounds. Then compare the displayed composition to the timeline viewer at the same playhead position. A zoomed viewer can make a correct image look cropped, while a genuinely different frame size may change where backgrounds, masks, text, or transformed elements land.
Do not start by changing the project resolution. A timeline-format change affects the timeline itself and may alter the framing of every clip. If only one Fusion composition is wrong, diagnose that composition first.
How do I tell which Fusion composition type I opened?
The composition type is the first thing to check because a timeline clip, a Fusion Clip, and a Fusion Composition generator can start with different image dimensions. Look at how the item was created and what appears at the beginning of the node graph. That usually points to the responsible resolution source.
| What you opened | What Fusion is receiving | First resolution to check | Likely correction |
|---|---|---|---|
| A clip opened from the Edit page | The clip’s image input and its existing pipeline context | Source media dimensions, then project scaling | Keep the source resolution or build a fixed-size canvas with a Background and Merge |
| A Fusion Composition generator | A blank composition used for generated graphics | Timeline format | Check the timeline format and generator setup |
| A Fusion Clip | A combined timeline item | Timeline dimensions and the clip’s contents | Check the timeline format and how the Fusion Clip was created |
| An adjustment clip | A layer affecting clips below it | Timeline dimensions and the affected track stack | Check whether the effect should cover the whole frame or only one clip |
| A compound clip opened in Fusion | A nested timeline item | Compound clip and timeline format | Check the compound clip’s sizing and its position in the timeline |
| A still or graphic routed into a node graph | The still’s own pixel dimensions, unless another node establishes a frame | Still dimensions and Merge background | Set the desired canvas on a Background node |
For a clip-based composition, a MediaIn node is a strong clue that Fusion is working from timeline media. But that doesn’t mean the frame will always match the timeline. The source media can have a different size, and Resolve can handle the return to the Edit page through its image-sizing pipeline.
A generator’s behavior can look more intuitive: you create a Fusion Composition, add text or a background, and expect it to fit the sequence. Generated images in the Fusion page use the timeline resolution as their default format. That helps explain why a blank composition and a source clip can behave differently, even when both appear on the same timeline.
A Fusion Clip or compound clip changes the workflow again. Nesting clips can make them behave as a combined item at the timeline’s dimensions. That can help when an effect must operate on a combined stack, but it can also make the result seem to lose the original source dimensions inside Fusion. If preserving the full source image matters, test the workflow on a duplicate before converting a complex section.
The distinction is also useful when you follow a tutorial. If the instructor starts with a blank Fusion Composition but you open a 4K media clip from a 1080p timeline, your Background, Text+, and Merge nodes might not appear to use the same canvas. Their steps may be correct for the tutorial’s composition type and still produce a different frame in your project.
A Fusion Composition generator is not interchangeable with opening a source clip in the Fusion page.
For a deeper explanation of the difference between an adjustment layer and a generated composition, see DaVinci Resolve adjustment clip vs Fusion composition. If your issue is actually the node inputs being reversed, use the separate guide to fix a Fusion Merge node with swapped background and foreground inputs.
Why is Fusion showing my clip’s source resolution instead of the timeline resolution?
Fusion can show the source image’s dimensions when you open a clip-based composition, even if the timeline uses a smaller or differently shaped frame. The Edit page can then scale that output to fit the sequence. Check the source dimensions and the scaling settings before assuming the clip needs to be resized inside Fusion.
This is the usual explanation when a UHD clip sits on an HD timeline and the Fusion viewer shows a UHD frame. It’s also common with portrait footage on a landscape timeline, square graphics on a widescreen sequence, and still images whose pixel dimensions exceed the sequence format.
Try this diagnostic:
- In the Media Pool, inspect the clip’s image dimensions or use its metadata.
- In the Edit page, open the timeline’s settings and note its format.
- Return to Fusion and select the MediaIn node.
- Compare the shape of the image in the Fusion viewer with the timeline viewer.
- Inspect the last node, normally MediaOut, rather than judging the frame from MediaIn alone.
If MediaIn shows the source image at full dimensions, that may be expected. If MediaOut still has the same source dimensions, Resolve can scale that output for the Edit timeline. A higher-resolution working image can preserve detail that would otherwise be discarded before a later crop or repositioning.
A 3840 × 2160 source in a 1920 × 1080 timeline illustrates the trade-off. Keeping the image at UHD gives you room to move or crop it before the timeline scales it down. For a simple lower-third or a title that must match the sequence frame exactly, a timeline-sized canvas may be easier to reason about. The choice depends on the effect, not on a universal rule that Fusion must always work at timeline size.
If the Fusion viewer instead shows the right aspect ratio but the subject appears too large or off-center, the problem may be scaling or positioning rather than the composition’s overall pixel dimensions. A Transform node can reposition or resize an image without redefining the image’s pixel resolution. That’s often the cleaner fix when the canvas is correct and only the shot’s placement is wrong.
Changing the project’s image-scaling preset can alter how mismatched footage is fitted in the timeline. It does not necessarily change the source dimensions being passed to every Fusion node. A setting that changes how an image fits the timeline is not the same as changing the image itself or creating a new canvas.
One useful rule: check the node that represents the source, the node that establishes the frame, and the final output separately. If you only check the viewer, you can mistake a zoom level or a fitted display for the underlying resolution.
How do I change the resolution of a Fusion composition?
To give a Fusion node graph a specific canvas, create a Background node at the intended dimensions and connect it to the orange background input of a Merge node. The Merge output uses the background input’s resolution. Then connect the image you want to composite as the foreground, and send the Merge output to MediaOut.
This is the most direct fix when you want a defined frame such as 1920 × 1080, 1080 × 1920, or a custom square. Those dimensions are example formats, not presets that every project must use. Pick the dimensions that match the deliverable you actually need.
A practical node layout looks like this:
Background1 --------------------\
                                  Merge1 --> MediaOut1
MediaIn1 or TextPlus1 -----------/
In the graph above, Background1 supplies the Merge background. The foreground image connects to the other image input. The Merge output determines the frame that continues downstream.
Follow these steps:
- Add a Background node to the graph.
- Select it and open its image controls in the Inspector.
- Turn off Auto Resolution if the node should hold a fixed custom size.
- Enter the intended width and height.
- Add a Merge node.
- Connect Background to the Merge node’s orange background input.
- Connect your footage, text, or other image to the Merge foreground input.
- Connect Merge to MediaOut.
- Load MediaOut in a viewer and check the frame’s shape and edges.
The exact control layout can vary by node and Resolve version. If the Background node follows another input automatically, inspect whether Auto Resolution is enabled. A node that inherits another image’s dimensions may not hold the custom size you typed or expected. The Fusion reference manual explains that frame-format preferences and image-generating tools have their own resolution controls; those defaults should not be confused with a guaranteed change to every existing composition.
A transparent Background can establish a canvas without replacing the image with a solid color. If the result goes black, inspect the Background’s alpha and the Merge connections. A solid opaque background is useful for a graphic intended to include a color field; a transparent background is useful when the final image needs to composite over lower timeline tracks.
Keep the transform in mind. If the source is larger than the new canvas, the image may be cropped at the frame boundary, but the source pixels can remain available for repositioning. If the source is smaller, empty space may surround it. Set the canvas first, then adjust the foreground’s Transform or Merge placement to choose what remains visible.
Do not connect the Background after the Merge and expect it to define the Merge’s size. The Merge uses its own background input. A node connected downstream can modify or reformat an image, but it does not retroactively change the inputs or intent of an earlier Merge.
A useful confirmation is to view the Merge output and MediaOut. The frame should have the intended aspect ratio, the foreground should land where you expect, and the image should reach the output node. Then return to Edit and check the same frame in the timeline. Resolve may still scale that output to the timeline format.
The Merge background input establishes the output frame for that Merge.
Casey Faris, a DaVinci Resolve educator, puts the node-graph idea simply: “Each node in fusion essentially has one job.” That’s a helpful way to debug this issue. One node supplies the canvas, another combines the images, and the final output sends the result back to the timeline. The quote appears in Casey Faris’s Fusion concepts tutorial reference.
How do I make a Fusion composition match a vertical timeline?
To make a composition match a vertical timeline, set the canvas to the vertical timeline’s dimensions or use a Fusion Composition generator that follows the timeline format. If you’re working with a landscape source clip, connect it as the Merge foreground and position or crop it inside the vertical canvas.
A 1080 × 1920 canvas is one example of a vertical frame. A different project may use another vertical format. The correct dimensions depend on the timeline and delivery specification, so check those before typing numbers into a node.
The expected result depends on the image-sizing choice:
| Foreground image | Vertical canvas | What you may see |
|---|---|---|
| Landscape image larger than the canvas | Vertical Background | Cropped sides or an image that needs repositioning |
| Landscape image scaled to fit inside the canvas | Vertical Background | The whole source image with empty space above and below |
| Portrait image at similar aspect ratio | Vertical Background | Less empty space, with possible edge cropping |
| Text or graphics created for the vertical frame | Vertical Background | Elements designed within the intended output shape |
If a full landscape shot must remain visible, scale it down to fit the vertical frame. If the goal is a vertical crop, enlarge it and reposition it until the subject sits within the frame. Those are different visual decisions. Neither is automatically the right “resolution fix.”
Check the timeline viewer after setting the Fusion canvas. A correct vertical Fusion output may appear fitted inside a landscape Edit viewer if you opened the wrong timeline, selected a different sequence, or are inspecting a viewer at a different zoom. Verify the timeline’s actual format and playhead location before rebuilding nodes.
For a repeated vertical title or overlay, use a single canvas plan and document its dimensions. That helps avoid making a different frame size for every text element. If you need the same design across multiple deliverables, consider whether separate timelines or a reusable composition make more sense than continually changing a single node’s dimensions.
Why does a Merge node change my Fusion composition resolution?
A Merge node can change the output frame because its background input determines the output resolution. If the orange background input carries a small image or a generator with a different frame size, the Merge result can adopt that size even when the foreground image is larger.
That behavior is easy to miss because the foreground often looks like the “main” image. But in a Merge, the background is the canvas. The foreground is composited over it. Blackmagic’s Resolve manual describes the background input as the control for the Merge output dimensions when images of different resolutions are composited.
Use this order when the graph has unexpected dimensions:
- Select the Merge node closest to MediaOut.
- Trace its orange background input upstream.
- Find the source or generator establishing that input’s image size.
- Check whether a Background, MediaIn, or another Merge feeds it.
- Set the canvas at the node that establishes the intended background.
- Recheck the downstream Merge and MediaOut result.
A common failure is to connect a small still or a low-resolution graphic to the background input, then place a higher-resolution video in the foreground. The foreground may be cropped to the Merge frame. The image can still contain its larger source pixels, but only the portion inside the output bounds is visible.
Another failure is to reverse the inputs. If the image that should define the frame is connected as foreground, the Merge may inherit the other input’s dimensions instead. Check the ports, not just the line colors. The visual wiring and node labels should agree with your intent.
If a graph contains multiple Merges, each one can establish a different frame from its own background. The final size is determined by the node chain that reaches MediaOut, so fixing an early Merge may not resolve a later one. Work from MediaOut backward until you find the first unexpected dimension, then inspect that node’s input.
A Background node at the desired dimensions can make the graph predictable. It is often easier to reason about than relying on whichever MediaIn happened to be connected first. Set the Background explicitly, route it into the Merge background input, and keep the foreground image separate.
How do I stop a Background node from changing size automatically?
Turn off Auto Resolution on the Background node when you need a fixed custom frame, then enter the width and height you want. If Auto Resolution remains enabled, the Background may follow another input or its current context instead of retaining the dimensions you expected.
The checkbox’s exact location can vary with the node and version, so select the Background and inspect its image controls in the Inspector. Don’t assume that setting a width and height is enough if the node is still configured to inherit dimensions.
A good check is to change one value at a time and observe the output. For example, change the Background width while watching the Merge output. If the frame does not change, confirm that the Background is connected to the Merge’s background port and that the Merge you’re viewing is the one connected to MediaOut.
Also check whether you selected the correct Background node. A complex graph may contain several generators with similar names. Select the node that actually feeds the Merge controlling the final output. A disconnected Background can show the right numbers in the Inspector while doing nothing to the visible composition.
Auto Resolution can be useful when you want a generator to inherit a clip’s size. Turning it off for every node without understanding the graph may create a new mismatch instead of fixing one. Use a fixed size when the composition needs a fixed canvas; leave automatic sizing in place when inheriting dimensions is the intended behavior.
If the Background’s own output is correct but the final image still has the wrong dimensions, follow the output chain. A later Merge or another node may be redefining the frame. Load the Background, Merge, and MediaOut into viewers in turn. The first point where the image shape changes is the best place to investigate.
Why does the Fusion viewer look wrong when the Edit viewer looks right?
The Fusion viewer and Edit viewer can display different frames because they show different points in Resolve’s image pipeline. Fusion shows the node output; Edit shows the result integrated into a timeline using the project’s image-sizing behavior. Compare the actual frame bounds and output image, not only how large each viewer appears on screen.
First, confirm that both viewers are showing the same timeline clip and frame. A playhead on a different clip or a Fusion page opened for another item can make a correct graph look unrelated. Check the clip name, playhead location, and MediaIn image.
Then compare the image itself. If the subject is in the correct place but the Fusion viewer has a different canvas shape, the difference may be real composition sizing. If the frame shape is correct but the subject is too large or small, inspect Transform and image sizing. If the image is simply displayed at a different zoom, adjust the viewer zoom before changing any nodes.
Project Settings > Image Scaling affects how Resolve handles media that does not match the timeline. A setting such as Scale entire image to fit can preserve the full image while adding unused space when aspect ratios differ. Other scaling choices can crop or fill the frame differently. These settings govern how the image fits the timeline; they should not be mistaken for a direct command to make all Fusion nodes use identical dimensions.
A practical comparison:
- In Fusion, view MediaIn.
- View the last Merge before MediaOut.
- View MediaOut.
- In Edit, select the same clip and playhead position.
- Check Project Settings > Image Scaling and the clip’s own sizing controls.
- Compare edges, not just the apparent zoom level.
If MediaOut has the composition you want but Edit displays it with a crop or bars, inspect the Resolve sizing path. If MediaOut itself is already wrong, return to the node graph. This split saves time because it tells you whether the fault is inside Fusion or after the Fusion output returns to the timeline.
The Resolve manual library is the right place to check the names and behavior for your installed version. The image-sizing workflow has more than one control, and a change to one clip’s sizing is not the same as a project-wide scaling preference.
Why is my Fusion composition cropped, stretched, or surrounded by bars?
Cropping, stretching, and bars are usually signs that the source aspect ratio and canvas aspect ratio differ, or that the foreground is being scaled differently than you expect. Check the canvas dimensions first, then choose whether to fit, fill, or crop the source image.
A 16:9 image in a 9:16 frame cannot fill the vertical frame without cropping or distortion. If you keep the whole image visible, blank space may remain above and below. If you fill the frame, the sides are cropped. Stretching the image to force a fit changes its proportions and is rarely the intended choice for footage.
Choose the desired behavior deliberately:
| Goal | What to do | Trade-off |
|---|---|---|
| Show the whole source | Scale it to fit the canvas | Empty areas can remain |
| Fill the canvas | Scale it until the frame is covered | Some image edges are cropped |
| Preserve subject framing | Scale and reposition the foreground | Requires checking the subject throughout the shot |
| Keep the source’s proportions unchanged | Avoid non-uniform stretch | The image may not cover the entire canvas |
| Produce a graphic with a fixed frame | Set the Background dimensions explicitly | The foreground may need separate placement |
Bars can be intentional. A transparent Background can reveal lower tracks in the timeline, while a solid Background creates an opaque frame. If bars appear unexpectedly, inspect the Background alpha, Merge input, and image-scaling preset. A black area in the viewer does not always mean the image was rendered at the wrong resolution; it may mean the canvas is transparent or the Background is black.
A crop can also come from a Transform node that enlarges the foreground beyond the canvas. The image can be correctly sized at the node level but extend beyond the visible frame. Select the Transform and inspect its size and position. Resetting it may help diagnose the issue, but it can also remove intended animation or framing, so duplicate the node or comp before resetting a complex setup.
If the image looks stretched, check whether width and height were changed independently or whether a sizing control is set to distort. Correct the aspect ratio at the canvas or use uniform scaling for the foreground. Avoid trying to fix an aspect-ratio mismatch by arbitrarily changing one dimension.
For footage that must remain editable, keep the source intact and use a Transform or sizing control to choose the visible portion. For a final graphic with a strict frame size, define the canvas and compose within it. That makes the relationship between output shape and image placement explicit.
How do I set the project or timeline resolution without breaking Fusion?
Set the timeline resolution in the timeline or project format settings, then inspect the Fusion output and image scaling afterward. Changing a timeline’s format is a project-level or timeline-level decision; changing a Fusion Background is a composition-level decision. Don’t use one as a substitute for the other.
Resolve allows media with different dimensions to be used in a timeline. That flexibility is useful, but it means the project format does not necessarily describe every source image or every intermediate Fusion image. A timeline can be HD while a clip is UHD, and a Fusion output can have a different working frame before Resolve sizes it for the sequence.
Before changing timeline resolution:
- Save a copy of the project or duplicate the timeline.
- Record the current timeline dimensions and frame rate.
- Change the timeline format using the appropriate project or timeline settings.
- Recheck the framing of clips with Edit-page transforms.
- Inspect Fusion clips and compositions with fixed-size Background nodes.
- Render a short representative section and inspect the file’s dimensions.
The backup matters because a resolution change can affect more than the Fusion viewer. Titles, transforms, masks, tracking, graphics, and image sizing may all need review. Resolve’s resolution-independent workflow can help scale many operations across outputs, but custom node canvases and deliberately fixed pixel values still deserve a check.
If you need multiple deliverables in different aspect ratios, decide whether one timeline with resolution changes is appropriate or whether separate timelines will be safer. A composition designed around one aspect ratio may need a new crop or repositioning for another. Automatic scaling does not guarantee that a subject remains well framed in every version.
A simple graphic can often adapt well. A logo centered on a Background may need only the new canvas dimensions. A lower third placed by fixed pixel coordinates, a mask near the edge, or a motion path built for one frame can need adjustment. The type of composition matters more than the nominal pixel count.
Don’t set a new project resolution merely because a Fusion viewer looks different. First establish whether the composition itself needs the new size, or whether Resolve is already integrating it correctly into the timeline. If the timeline output is right, changing the whole project could create extra work without solving a real delivery problem.
Should I use a Fusion Composition, Fusion Clip, or adjustment clip?
Use a Fusion Composition for generated graphics that need a timeline-sized canvas, a clip-based Fusion composition when the effect belongs to one source clip, and an adjustment clip when an effect should apply to clips below it. Choose based on what the node graph must process, not just on which item is easiest to drag onto the timeline.
A Fusion Composition generator is a clean starting point for a title, background, or graphic that is independent of one source clip. Its generated images use the timeline format by default, which can make frame dimensions easier to predict. You can still set a deliberate canvas in the node graph when the design requires it.
A clip-based composition starts from timeline media. That makes it convenient for effects tied to one shot, but its source image can set the working dimensions. That’s useful when you need the full source for reframing, tracking, or compositing. It may be confusing when you expect the viewer to show only the timeline frame.
A Fusion Clip combines multiple timeline items for a composition. It can make a stack of elements behave like one item, but the nested timeline context can change how dimensions are presented inside Fusion. Use it when the combination is the creative goal, not as a random resolution repair.
An adjustment clip applies effects to the material beneath it. It is useful when the same effect should span multiple clips, but its frame behavior follows the timeline and the affected stack. It is not automatically the best container for every title or composite.
| Choose this | When you need | Check first |
|---|---|---|
| Fusion Composition | A generated graphic or node-based title independent of a source clip | Timeline format and generated-image dimensions |
| Clip-based Fusion composition | An effect attached to one shot | Source dimensions and MediaIn |
| Fusion Clip | A combined stack treated as a timeline item | Timeline format and nested contents |
| Adjustment clip | An effect applied across footage below it | Track coverage and timeline dimensions |
If you’re unsure, create a small test with one Background and one Text+ node. Compare a Fusion Composition generator with a clip opened in Fusion. That simple comparison reveals which workflow provides the frame behavior you expect before you build a complicated graph.
For a project-specific choice, how to make a Fusion composition reusable in DaVinci Resolve covers reuse and composition organization. Keep the resolution decision separate from the question of whether the composition should be reusable.
Does Downscale Timeline Resolution for Timeline Clip Compositions fix the problem?
Downscale Timeline Resolution for Timeline Clip Compositions is a performance option, not a general-purpose repair for incorrect framing. It can reduce the processing size of timeline clip compositions to the timeline resolution, but it does not replace the need to set a correct canvas or inspect Merge inputs.
Blackmagic’s current support material describes an option to process clip compositions at timeline resolution. The Blackmagic Design support library provides the current release information and manuals for DaVinci Resolve 21.1. If you use the option, confirm the exact wording in your installed version because menu labels can change between releases.
The setting is worth considering when high-resolution clips make Fusion work heavier than needed for an HD timeline. It may lower the work required for clip compositions, but that is a processing choice. It does not guarantee that every node uses a different canvas, and it won’t fix a Merge whose background input establishes the wrong frame.
Before changing the setting, ask:
- Is the problem slow playback, or is the image framed incorrectly?
- Does MediaOut have the intended dimensions?
- Is the source footage larger than the timeline?
- Does the composition need the full source resolution for cropping or detail?
- Is the final timeline delivery expected to be HD, UHD, or another format?
If the problem is performance, downscaling may be relevant. If the problem is wrong frame shape, crop, or placement, fix the node graph or image-scaling controls instead. A performance toggle should not be used as a substitute for understanding the output size.
Also consider the trade-off. If you deliberately work at source resolution to preserve room for reframing, processing at timeline size may limit that benefit during the composition stage. Test a representative clip and compare the result before applying a project-wide choice to a finished edit.
A good test is a short section with fine detail, text, and a noticeable crop. Compare the image in Fusion and the rendered timeline output. If the composition’s appearance remains acceptable and playback improves, the option may suit that project. If detail or framing changes in a way you need to avoid, return to the original setting and optimize the graph or cache instead.
How do I check whether MediaOut is producing the right resolution?
Load MediaOut into a Fusion viewer and check the output frame’s dimensions and shape before troubleshooting the Edit page. MediaOut is the node that sends the Fusion result back into the timeline, so it is the key point for deciding whether the problem is inside the node graph or later in Resolve’s sizing pipeline.
Follow the graph to MediaOut. If the last connected Merge or image node has the intended canvas but MediaOut does not, check the nodes between them. If MediaOut has the desired frame but Edit looks different, check the timeline’s image scaling and viewer display.
A step-by-step check:
- Select MediaOut and load it into a viewer.
- Confirm that the correct output node is connected.
- Compare the frame shape with the intended timeline or deliverable.
- Inspect the last Merge’s background input.
- Check for downstream nodes that resize, crop, or letterbox.
- Return to Edit and compare the same frame at the same playhead position.
The displayed viewer zoom can mislead you. A viewer that fills its panel may not be showing the entire image at 100 percent, and a zoomed-out image can look smaller even when its pixel dimensions are correct. Look for the image boundary and aspect ratio, not just how much screen space it occupies.
If the output is transparent, the checkerboard or viewer background can make empty areas look like bars. If the output is opaque black, inspect the Background color and alpha. The image dimensions may be fine even though the composite content is missing or hidden.
A disconnected MediaOut can also make you inspect the wrong node. The graph may contain a correct Merge that is not connected to the output. Trace the visible line from the intended result to MediaOut, then view that output. The node selected in the Inspector is not necessarily the node being rendered.
When testing, use a still frame or short section rather than judging only a cached preview. Resolve’s cache can display an older render after a node change. If the node graph is correct but the timeline preview has not updated, clear or refresh the relevant cache and recheck before rebuilding the composition.
Why does changing Fusion settings not change existing compositions?
Some Fusion settings establish defaults for new tools or new compositions rather than rewriting every existing node graph. If a width or height preference changes but an open composition stays the same, inspect the controls for that composition and its individual nodes.
Blackmagic’s Fusion manual explains that global Frame Format preferences determine default formats for new compositions and generated tools. The manual also says those defaults do not alter existing compositions automatically. For a specific existing node graph, open its own controls and check the frame-format settings that apply to that composition.
That distinction prevents a common misdiagnosis. Changing a global preference can make the next Background or new composition behave differently while the current composition remains unchanged. The current graph may also contain nodes whose sizes are controlled locally or inherited from another input.
Try this in order:
- Confirm whether you changed a global preference, composition setting, or node setting.
- Select the existing Background or generator.
- Inspect Auto Resolution and its own width and height.
- Check whether the node receives an input that overrides its default size.
- Change the intended setting on the active composition.
- Create a new test composition to verify the global default separately.
If a specific node remains stubborn, duplicate it and reconnect the duplicate in a test branch. That helps determine whether the issue comes from the node’s inheritance behavior or from the downstream graph. Avoid deleting a working chain just to test one setting.
For Fusion Studio and Resolve’s Fusion page, don’t assume every preference appears in the same place or has the same effect. The standalone Fusion application and the Fusion page are related but not identical workflows. Resolve’s timeline context adds scaling behavior that a standalone composition does not share in the same way.
The safest rule is to change the narrowest setting that controls the result you want. If only one node needs a fixed canvas, change that node or establish the canvas with a Background. If every new composition should use a different default, adjust global preferences. If the whole delivery needs another frame size, change the timeline or render settings and review the project.
What resolution should I use for a Fusion title, overlay, or effect?
Use the resolution and aspect ratio required by the final timeline unless the effect needs extra source detail or a separately defined canvas. For a title that fills the sequence, a timeline-sized composition is straightforward; for a shot-specific composite, source resolution may preserve more room for cropping and repositioning.
A title is often designed relative to the final frame. If the timeline is HD and the title sits inside that frame, a timeline-sized canvas makes placement easy to judge. If you’re building an overlay for multiple outputs, decide whether the graphic should scale with each output or whether it needs separate layouts.
A shot effect can benefit from the source dimensions. Suppose a UHD shot sits in an HD timeline and you need to reposition the image around a tracked subject. Working with the source image can preserve the extra pixels during the move. But if the effect is a simple blur or glow with no reframing needs, a timeline-sized process may be sufficient for the intended output.
Use this quick decision table:
| Task | Practical starting point | Why |
|---|---|---|
| Title designed for one timeline | Timeline dimensions | Easier to place relative to the final frame |
| Logo or bug placed over multiple shots | Timeline-sized canvas or reusable graphic | Consistent screen position across clips |
| Reframing a high-resolution shot | Source dimensions where appropriate | Retains room to crop or reposition |
| Vertical version of a landscape graphic | Vertical canvas with adjusted layout | Aspect ratio changes need design choices |
| Composite with mixed-size images | Explicit Background size | Makes the Merge frame predictable |
| Motion graphic used in several timelines | Reusable composition with tested sizing | Avoids rebuilding the node graph for each use |
These are workflow choices, not mandatory numerical rules. A 4K timeline does not automatically mean every graphic should be built at UHD, and an HD timeline does not mean source detail should always be discarded before Fusion. Base the decision on the output, the source material, and the effect.
For a design that must work in multiple aspect ratios, test the subject and typography in each frame. A layout that works in landscape may place text over a face or crop a logo in vertical. No resolution setting can make that design decision for you.
How do I troubleshoot a Fusion resolution mismatch without damaging the project?
Troubleshoot a copy of the timeline, change one variable at a time, and keep a note of the original settings. That makes it easier to tell whether the cause was composition type, source dimensions, Merge input, image scaling, or viewer display.
Start with the least destructive checks:
- Save the project.
- Duplicate the timeline or create a copy of the relevant clip.
- Record the timeline format and source dimensions.
- Identify whether you opened a clip, Fusion Clip, adjustment clip, or Fusion Composition.
- View MediaIn, the last Merge, and MediaOut.
- Check the Merge background input.
- Inspect Auto Resolution and the Background dimensions.
- Check Project Settings > Image Scaling.
- Compare the same frame in Fusion and Edit.
- Render a short test before applying the change across the project.
This order moves from identification to output validation. It avoids a common trap: changing multiple settings at once and then being unable to tell which one fixed the image. If the problem disappears after you set a Background node, you know the canvas was the issue. If the Fusion output is correct but Edit still differs, focus on the image-sizing pipeline.
Keep the original node graph until the test is confirmed. A node may contain animation, masks, expressions, or connections that are easy to lose during a rebuild. Duplicating a node or branching the graph gives you a safer way to test an alternate canvas.
If the composition is shared across several clips, check whether every instance uses the same source dimensions. One clip may be UHD and another HD, so a graph that appears correct on the first may frame differently on the second. Test the composition on representative clips with different source sizes and aspect ratios.
If a setting seems to do nothing, verify that it affects the selected object. A project-level option, timeline-level format, composition-level control, and node-level checkbox all have different scopes. Select the relevant node, confirm its connections, and check the output rather than relying on the setting label alone.
If you still can’t tell which control is active, describe the visible graph and the mismatch to TryUncle. TryUncle is the on-screen assistant for DaVinci Resolve on Mac and Windows, ask in plain words and Uncle points at the exact control on your screen.
What if the Fusion result is correct but the render has the wrong dimensions?
If the Fusion result is correct but the final file has the wrong dimensions, check the timeline format and Deliver-page render settings. A Fusion composition’s internal frame does not by itself set the dimensions of the exported timeline file.
The Deliver page renders the timeline or the selected render range according to its output settings. A composition may contain a UHD image while the timeline output is HD, or a timeline may be HD while a job is configured to render at another size. Check the export dimensions in the render settings and confirm whether the job is rendering the whole timeline or an individual clip.
Use this separation:
| Result you are checking | Setting to inspect |
|---|---|
| Fusion node graph frame | Background, Merge, and MediaOut |
| Edit page composition appearance | Timeline format and image scaling |
| Final exported file size in pixels | Deliver-page resolution settings |
| Cropping or bars in the export | Timeline sizing and output framing |
| One clip’s appearance | Clip sizing and its Fusion output |
Render a short section that includes the composition. Inspect the exported file’s dimensions and compare the frame with the Edit viewer. If the file dimensions are correct but the image has unexpected bars, the issue is probably framing or scaling. If the file dimensions themselves are wrong, inspect the render resolution settings.
Do not judge the export solely from the Fusion viewer. The viewer shows a node output, not necessarily the final file’s pixel dimensions. Likewise, a correct export size does not prove the composition was designed at that size. The timeline and render pipeline can scale an image between those stages.
If you deliver multiple versions, check each render job separately. A job can use a different output resolution than the timeline, and a multi-delivery workflow may intentionally produce several sizes. Confirm the active job settings before assuming the Fusion composition changed.
Which fix should I try first for a Fusion composition with the wrong resolution?
Start by identifying the composition type, then check the source dimensions and the Merge background input. If the frame still needs a specific size, establish it with a Background node and verify MediaOut before checking the Edit page’s image scaling.
Use this decision path:
- Fusion frame matches the source clip, not the timeline: check whether you opened a clip-based composition and whether the source is larger than the sequence.
- A generated graphic is the wrong shape: check the timeline format and the Background or generator settings.
- A Merge output has unexpected dimensions: trace the orange background input and set the intended canvas there.
- The frame shape is correct but the subject is cropped: adjust foreground scaling or position, not the project resolution.
- Fusion looks right but Edit looks wrong: compare MediaOut with the Edit viewer, then inspect image scaling.
- Edit looks right but the export dimensions are wrong: check Deliver-page resolution settings.
- Playback is slow rather than framed incorrectly: consider performance options such as processing clip compositions at timeline resolution, then test the result.
The key distinction is scope. A node-level size sets a node’s image. A Merge background sets the Merge’s output frame. A timeline format sets the sequence. A render setting sets the export. Change the control that matches the problem.
If you’re unsure, use a duplicate timeline and a simple test graph: one Background, one Merge, one foreground, and MediaOut. Confirm the expected frame there before rebuilding a large composition. For a reusable graphic, document the intended dimensions and how the composition should behave when the timeline aspect ratio changes.
A wrong-looking Fusion frame is often a mismatch between source, canvas, and timeline, not a damaged composition. Find which one controls the image, set it deliberately, and only then change the rest of the project.
Frequently asked questions
- Why is my Fusion composition the clip resolution instead of the timeline resolution?
- A clip-based Fusion composition can inherit the source image resolution. A Fusion Composition placed on the timeline uses the timeline format for generated images. For a fixed canvas, connect a Background node at the desired dimensions to the Merge node’s background input.
- How do I change the resolution of a Fusion composition in DaVinci Resolve?
- Set the desired width and height on a Background node, turn off Auto Resolution if you need a fixed custom size, and connect that Background to the orange background input of a Merge node. The Merge output takes its resolution from that background input.
- Why does Fusion look different from the Edit page?
- Fusion may process a clip at its source resolution, while the Edit page displays it within the timeline resolution using Resolve’s image-scaling settings. Compare the MediaOut result with the Edit viewer, and check Project Settings > Image Scaling.
- Will changing the Fusion composition resolution change my timeline resolution?
- No. Changing the dimensions of a Fusion node or a composition output does not itself change the timeline format. Set the timeline separately in Project Settings or the timeline’s settings, then check how Resolve scales the Fusion output into that timeline.
Sources
Learn by doing, not watching
Stop translating tutorials to your timeline.
TryUncle stays beside Resolve on Mac and Windows. When you ask, Uncle sees your screen and points at the exact control you need. No hunting through tabs, timestamps, or mismatched tutorials.
Meet TryUncleKeep reading
 FixesJul 10, 202627 min read
Fusion Merge Node Backwards? Fix Swapped Background/Foreground
Composite looks upside down in DaVinci Resolve Fusion? A Merge node's Background and Foreground inputs got swapped. Here's the exact fix, every time.
 GuidesOct 3, 202639 min read
How to Make a Fusion Composition Reusable in DaVinci Resolve
Learn how to make a Fusion composition reusable in DaVinci Resolve with macros, templates, exposed controls, reference compositions, folder paths, and testing steps.
 ComparisonsSep 20, 202644 min read
DaVinci Resolve Adjustment Clip vs Fusion Composition
DaVinci Resolve adjustment clip vs Fusion composition explained with a decision matrix, worked examples, limits, and a verdict for Resolve 21.