
Learn / DaVinci Resolveupdated for DaVinci Resolve 21.0.3 (July 2026)
Fujifilm X-H2S F-Log2 Color Grading in DaVinci Resolve
Quick answer
Color grade Fujifilm X-H2S F-Log2 footage in DaVinci Resolve with a Color Space Transform: set Input Color Space and Input Gamma to Fujifilm F-Log2 (not F-Log2 C), and Output to your timeline's working space. F-Log2's 14-stop claim measures closer to 13 stops in independent testing, so expose to the right and use F-Log2's own LUT, never an F-Log one.
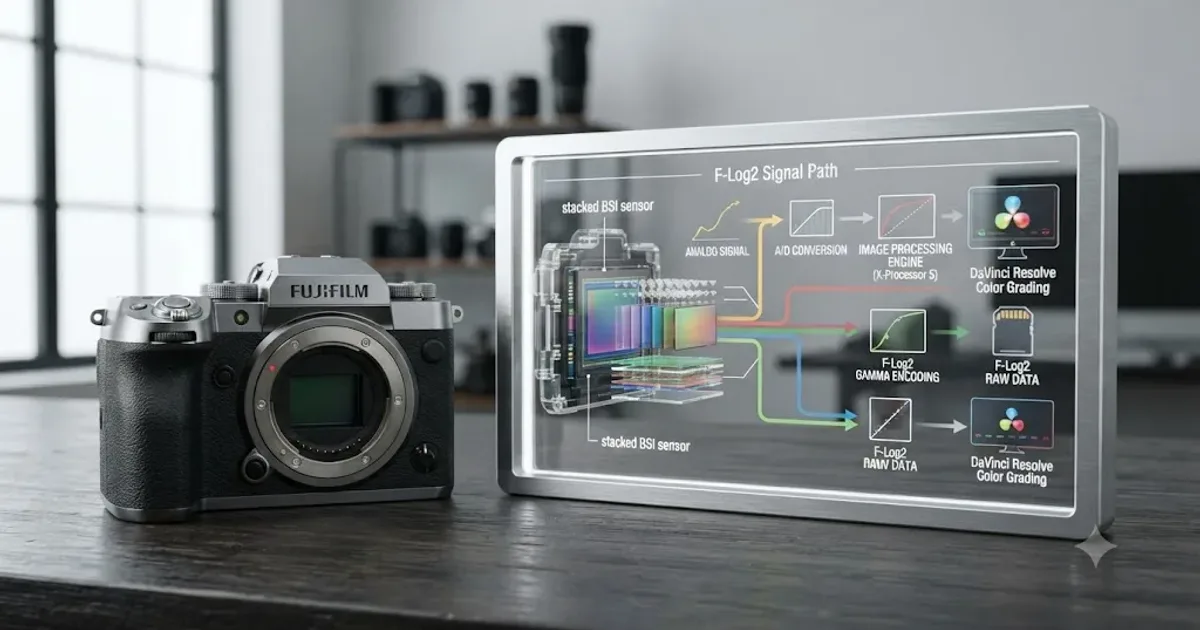
We've spent seven-plus years doing paid commercial color work, and camera launches like the X-H2S are exactly where a competent editor gets tripped up by something that looks small. F-Log2 shares three letters with F-Log. It does not share a LUT, a base ISO, or a code value mapping. Load the wrong one and your footage looks nothing like what you saw in the viewfinder.
This is also one of the recurring questions in our 100,000+ member video editing community: new curve, familiar name, and a grade in DaVinci Resolve that comes out grey, magenta, or crushed. Below is the exact Color Space Transform setup for Fujifilm X-H2S F-Log2 footage, the gotchas specific to this camera and this gamma, and where the free tools stop being enough.
F-Log2 is not F-Log with a bigger number. It is a different transfer function with its own base ISO, its own noise floor, and its own LUT.
What Is F-Log2 on the Fujifilm X-H2S, and How Is It Different From F-Log?
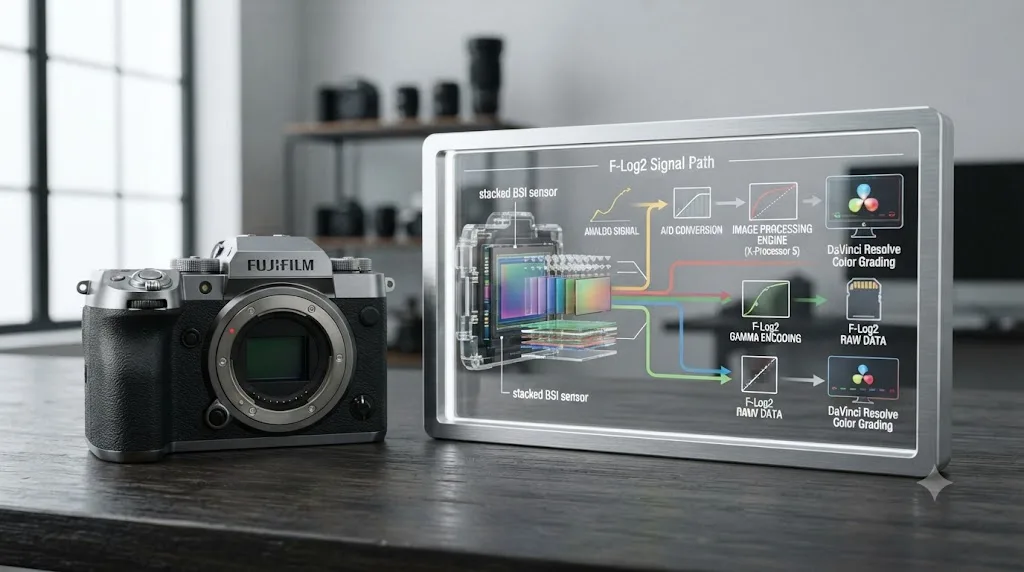
F-Log2 is Fujifilm's newer, wider log gamma curve, first shipped on the X-H2S in 2022, designed to capture more usable dynamic range than the original F-Log by pairing a higher base ISO with a flatter transfer function. The X-H2S was the first X Series camera to get it.
Fujifilm announced the X-H2S in May 2022 and shipped it in July 2022 at $2,499 body-only, built around a 26.16-megapixel APS-C X-Trans CMOS 5 HS sensor that's both stacked and back-side illuminated, Fujifilm's first sensor of that design in the X Series (PetaPixel, B&H). That stacked sensor, combined with a new X-Processor 5, reads sensor data fast enough to support F-Log2, which the older X-Processor 4 sensors couldn't handle at the same bit depth.
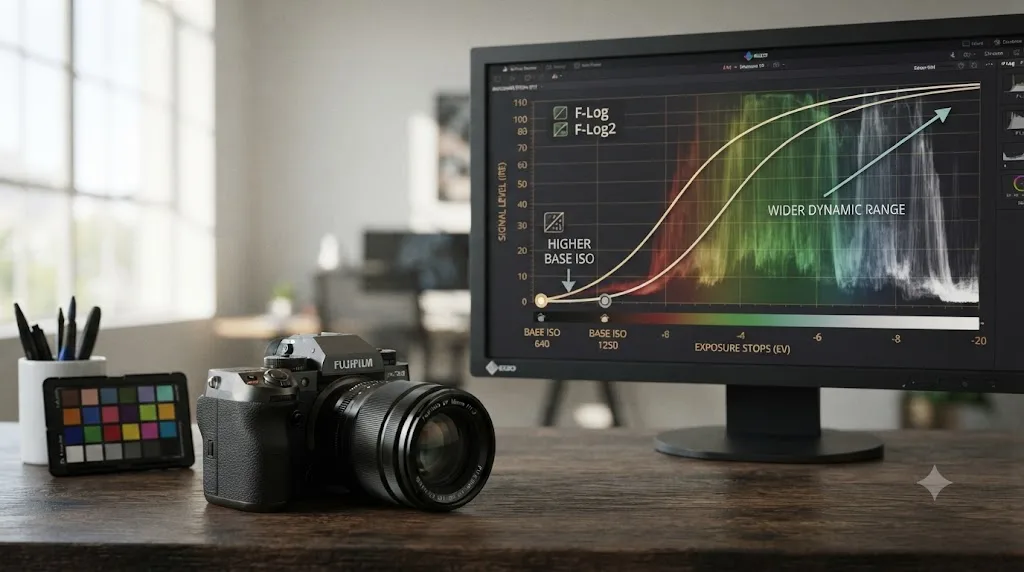
The headline number is dynamic range. Fujifilm's own spec sheet lists F-Log2 as capturing up to 14+ stops, against F-Log's roughly 12 stops on the same sensor generation (No Film School). To get there, F-Log2 raises the curve's base ISO to 1250, compared to F-Log's base ISO of 640, and remaps the log curve itself so more of the sensor's native range fits inside the recorded signal.
That 14-stop figure is Fujifilm's own lab number, and independent testing lands lower. CineD's controlled IMATEST testing measured F-Log2 on the X-H2S at 11.9 stops at a signal-to-noise ratio of 2, and 13.4 stops at SNR of 1, shot in 6.2K open gate mode at the F-Log2 base ISO of 1250. Scaled to UHD, that comes out to 12.2 and 13.6 stops respectively, and waveform analysis showed roughly 13 stops identifiable above the noise floor (CineD lab test).
Fourteen stops on a spec sheet and thirteen stops on a waveform monitor are not a contradiction. They are two different measurement methods, and only one of them is what you'll actually see in your grade.
Here's the practical delta between the two curves, in the terms that matter when you're setting up a CST:
| F-Log | F-Log2 | |
|---|---|---|
| First available on | X-T4 and earlier X-Processor 4 cameras | X-H2S (2022), and later X-Processor 5 cameras |
| Base ISO | 640 | 1250 |
| Claimed dynamic range | ~12 stops (Fujifilm) | 14+ stops (Fujifilm) |
| CineD measured (SNR=1, UHD) | Not separately tested in the X-H2S lab report | ~13.6 stops |
| Resolve CST input name | Fujifilm F-Log | Fujifilm F-Log2 |
| LUT compatibility | F-Log LUTs only | F-Log2 LUTs only |
Filmmaker Daniel Malikyar, shooting with the X-H2S, put the practical difference in grading terms in Fujifilm's own case study: "Color was the focal point, so having 14 stops with F-Log 2 allowed me to properly convert the ideas into what we achieved on set." He added, "From a grading standpoint, I had so much flexibility" (Fujifilm X Stories). That flexibility only shows up in Resolve if the CST decoding the footage actually knows it's F-Log2, not F-Log.
Does DaVinci Resolve Support Fujifilm F-Log2 Natively?
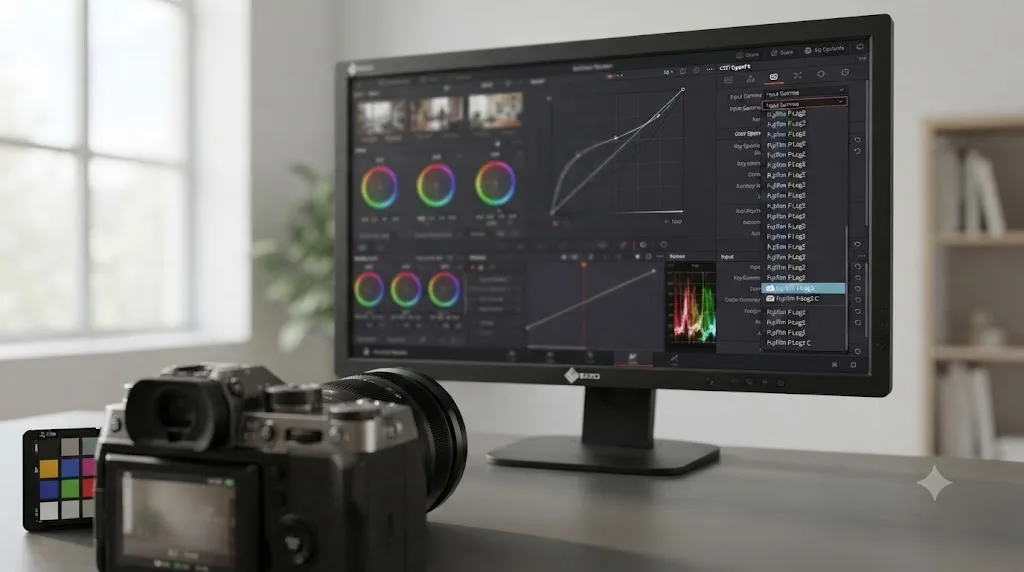
Yes, as of DaVinci Resolve 21 (current point release 21.0.3, July 2026), the Color Space Transform lists Fujifilm F-Log2 as a native Input Color Space and Input Gamma option, so you don't need a third-party DCTL, plugin, or manual LUT to decode X-H2S footage correctly.
Fujifilm's own grading guide confirms the exact dropdown pairing: Input Color Space "F-Log/F-Log2" and Input Gamma "F-Log Gamma/F-Log2 Gamma," with your choice of Output Color Space (Rec.709, Rec.2020, DaVinci Wide Gamut, ACES, and others) and Output Gamma depending on your delivery target (Fujifilm).
Where this gets confusing for X-H2S owners specifically is a second, newer option that now sits right next to it in the same menu. DaVinci Resolve 20.3.2, released February 12, 2026, added support for Fujifilm F-Gamut C colorspace and F-Log2 C gamma, a related but distinct gamma curve built for newer Fujifilm cameras like the GFX Eterna, not the X-H2S (RedShark News, Newsshooter).
Pick "Fujifilm F-Log2" without the C, or the transform is decoding your footage against a curve your camera never recorded.
If you're on an older Resolve build and don't see Fujifilm F-Log2 in the CST dropdown at all, update. DaVinci Resolve 21 was announced at NAB 2026 on April 13, 2026, went through a seven-week beta, and shipped as a final release in June 2026, with 21.0.3 as the current maintenance update as of late July 2026, adding keyframe ease actions, interlaced media fixes, and expanded scripting, on top of the color science already in place (Toolfarm, Newsshooter). Both the free version and DaVinci Resolve Studio ship the same CST and the same Fujifilm color space list.
What If Fujifilm F-Log2 Doesn't Appear in the CST Dropdown?
If you open the Color Space Transform and only see Fujifilm F-Log, not F-Log2, in the Input Color Space list, your copy of Resolve predates native F-Log2 support and needs an update, not a workaround.
Blackmagic added Fujifilm Log and Log2 support for color-managed workflows in DaVinci Resolve 19, the same release cycle that brought the option into the CST's Input Color Space and Input Gamma menus (DVResolve). Anyone still running Resolve 18 or earlier won't see it, no matter how the Fujifilm menu is scrolled or filtered.
A missing dropdown entry is a version problem, not a project problem, and no amount of clicking fixes it.
Work through these in order if F-Log2 isn't showing up:
- Check your version number. Open DaVinci Resolve, go to the Help menu, and confirm you're on Resolve 19 or newer. If you're on 18.6 or earlier, that's the fix: update.
- Update to the current release. As of this guide, that's DaVinci Resolve 21.0.3 (July 2026), which includes every color science update since F-Log2 was first added and also carries the Fujifilm F-Log2 C option added in 20.3.2, which the X-H2S doesn't use (Newsshooter).
- Restart Resolve after installing the update. A surprising number of "missing option" reports on Blackmagic's own forum turn out to be Resolve still running the old build in memory after an update installed but before a restart.
- Confirm you're looking in the right panel. Fujifilm F-Log2 shows up in the Color Space Transform's Input Color Space and Input Gamma fields, and in Clip Attributes if you're running Resolve Color Management. It doesn't appear as a camera raw decode setting, since X-H2S footage isn't a raw format Resolve debayers on its own.
- If it's still missing after updating, reinstall instead of patching. A corrupted Resolve installation can drop entries from color space lists in ways a simple update doesn't repair. Uninstall, download a fresh copy from Blackmagic, and reinstall clean.
If you're stuck mid-project without an immediate update path, the free Fujifilm F-Log2 LUT covered later in this guide is a legitimate short-term fallback, not just a monitoring tool, for getting footage into a usable state on an older Resolve build.
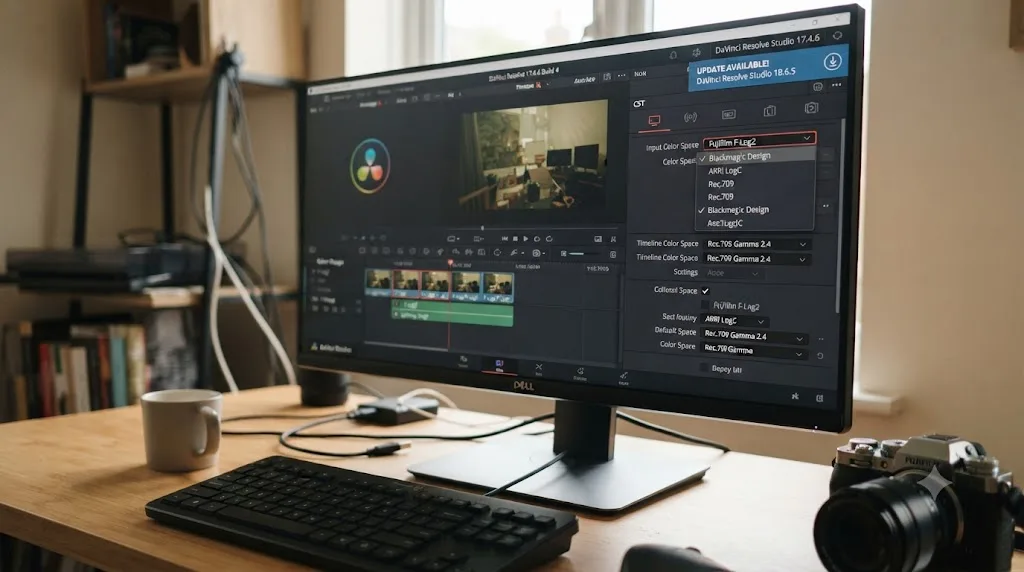
What Color Space Transform Settings Should You Use for X-H2S F-Log2 Footage?
Set Input Color Space and Input Gamma to Fujifilm F-Log2, then set Output Color Space and Gamma to match whatever your timeline is actually delivering, and build every other node downstream of that transform.
Here's the full walkthrough, step by step:
- Add a Color Space Transform. On the Color page, right-click your first node and add a Color Space Transform, or add the CST as an OFX effect. If you'd rather color-manage the whole project automatically, open Project Settings, go to Color Management, and set Color Science to DaVinci YRGB Color Managed instead, then tell Resolve the clip's input color space through Clip Attributes.
- Set Input Color Space to Fujifilm F-Log2. This tells the transform which gamut the footage was recorded in. Confirm it says F-Log2, not F-Log2 C.
- Set Input Gamma to Fujifilm F-Log2. Input Color Space and Input Gamma should always describe the same curve. Mismatching them, picking F-Log2 for one and F-Log for the other, is one of the most common ways this goes wrong, and it produces subtly wrong contrast that's easy to miss until you check a waveform.
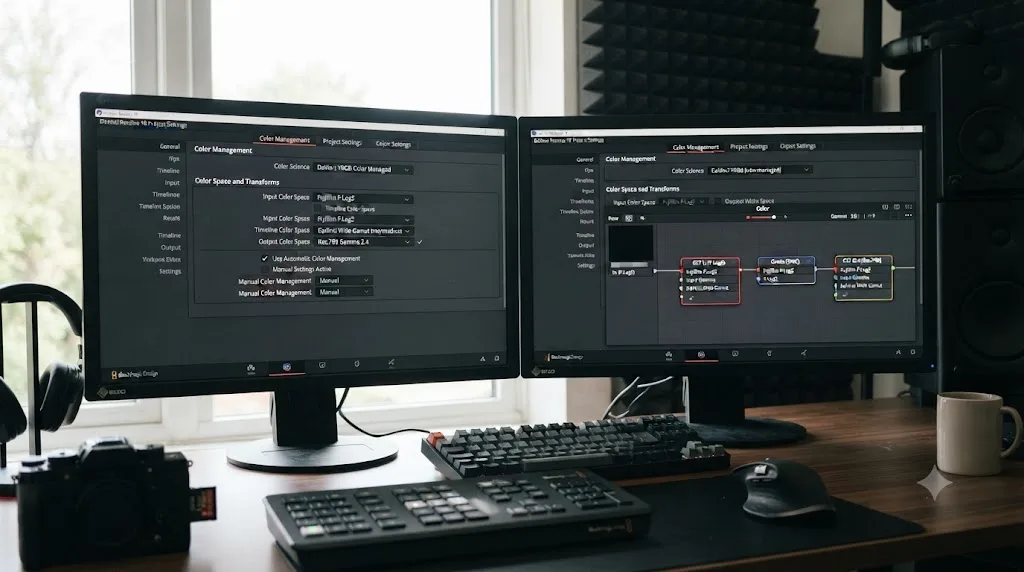
- Set Output Color Space and Gamma. For a standard Rec.709 YouTube or client delivery, choose Rec.709 and Gamma 2.4. If you're running a color-managed project, set the CST's output to match your timeline's working space, typically DaVinci Wide Gamut and DaVinci Intermediate.
- Check Tone Mapping. If the image looks flat or desaturated specifically in the brightest highlights or darkest shadows after the transform, that's the CST's Tone Mapping method doing its job on purpose, not a bug. Switch it from DaVinci to Saturation Preserving in the node's advanced settings if you want that highlight and shadow compression without the deliberate saturation pull.
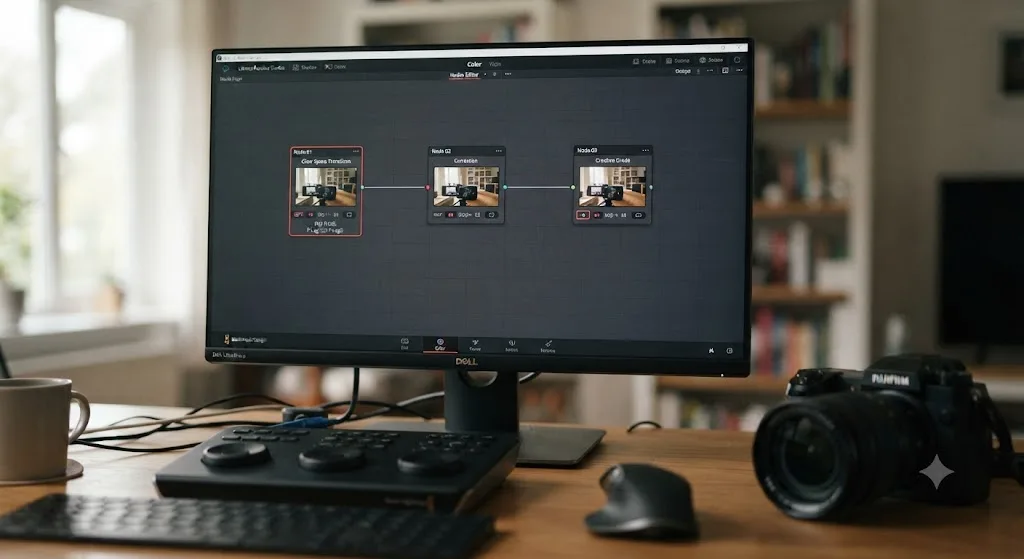
- Build your grade after the CST, never before it. Every corrective or creative node needs to sit downstream of the transform in the node tree, since anything placed before it is adjusting log-encoded values that haven't been decoded into a working color space yet.
| CST field | Setting for X-H2S F-Log2 |
|---|---|
| Input Color Space | Fujifilm F-Log2 |
| Input Gamma | Fujifilm F-Log2 |
| Output Color Space | Rec.709 (delivery) or DaVinci Wide Gamut (color-managed timeline) |
| Output Gamma | Gamma 2.4 (delivery) or DaVinci Intermediate (color-managed timeline) |
| Tone Mapping | DaVinci (default) or Saturation Preserving if highlights desaturate |
| Gamut Mapping | Saturation Compression for most real-world footage |
If you'd rather color-manage the whole project instead of placing a CST on every clip, Resolve Color Management applies the same underlying transform automatically through Project Settings. The tradeoff and the exact desaturation behavior of Tone Mapping and Gamut Mapping under RCM are the same math as a manual CST, and we cover exactly where each one goes wrong in why Color Space Transform desaturates footage in DaVinci Resolve.
Why Does F-Log2 Footage Look Washed Out, Magenta, or Over-Saturated After the CST?
If the image still looks wrong after adding a correctly configured CST, the cause is almost always a mismatch somewhere upstream, not a bug in the transform itself. Work through these in order.
Wrong input curve selected. This is the single most common cause with X-H2S footage specifically. If Input Gamma is set to Fujifilm F-Log instead of F-Log2, or to F-Log2 C instead of plain F-Log2, the transform decodes correctly-shaped log data against the wrong curve, and the result is either a washed-out, low-contrast image or an oversaturated, contrasty one, depending on which way the mismatch runs.
An F-Log LUT applied to F-Log2 footage. LUTs are baked to a specific input curve. Fujifilm's F-Log2 LUT and its F-Log LUT are separate files with separate code value mappings, and applying the wrong one produces incorrect contrast and skewed color, most often a magenta or greenish cast in midtones, that looks like a white balance problem but isn't one.
Tone Mapping doing exactly what it's built to do. DaVinci Resolve's CST deliberately pulls saturation out of the brightest highlights and darkest shadows under its default DaVinci tone mapping method, and under Luminance Mapping too, as part of a smooth roll-off that avoids hard clipping. If skin tones or skies look pulled-in specifically at the extremes of the exposure range, that's this setting, not incorrect input decoding, and switching to Saturation Preserving tone mapping addresses it directly.
Two CST nodes stacked on the same clip. Chaining a second Color Space Transform after the first, especially one that converts the same space to itself, usually produces blown-out, clipped color rather than desaturated color, because the gamma curve gets applied twice in the same direction. If your image looks oversaturated and harsh rather than flat, check for a duplicate transform before touching anything else.
Gamut Mapping pulling colors inward. If Gamut Mapping Method is set to Saturation Compression with an aggressive Saturation Knee, colors that are only mildly saturated can get pulled toward the gamut boundary along with genuinely out-of-gamut ones. Raising the Saturation Knee so compression only touches colors actually near the edge of your output gamut usually restores the missing punch.
A fixed white balance or tint dialed in before the CST. Some editors nudge Color Temp or Tint on the clip's Camera Raw tab before adding a CST, trying to fix the flat grey look by eye. That adjustment lands on the raw log values, not the decoded image, so it shifts unpredictably once the CST decodes the footage downstream, usually toward green or magenta depending on which way the temp got nudged.
Auto Color or Color Match run on log footage. Resolve's automatic balancing tools are built to analyze normalized, non-log images. Run Auto Color or Color Match on an F-Log2 clip before the CST decodes it, and the tool reads flat grey log values as the image's real color, then corrects them into something closer to the log curve's own grey point rather than an actual white balance. Add the CST first, then run auto-balance tools afterward if you use them at all.
Here's a quick-reference table for the fastest diagnosis when you're staring at a bad grade and don't want to work through every cause in order:
| Symptom | Most likely cause | Fix |
|---|---|---|
| Whole image flat and grey | No CST or LUT applied at all | Add a CST with Input set to Fujifilm F-Log2 |
| Washed out, low contrast after a CST | Input Gamma set to F-Log instead of F-Log2 | Correct Input Gamma to Fujifilm F-Log2 |
| Oversaturated, harsh contrast | Two CST nodes stacked, or F-Log2 C selected by mistake | Remove the duplicate node, or fix the C suffix |
| Magenta or green cast in midtones | F-Log LUT applied to F-Log2 footage, or white balance nudged pre-CST | Swap in the F-Log2 LUT, or move the white balance fix after the CST |
| Highlights or shadows look pulled-in and grey | Default DaVinci Tone Mapping doing its job | Switch Tone Mapping to Saturation Preserving |
| Skin tones oddly flat, rest of image fine | Auto Color or Color Match run on log footage | Undo it, add the CST first, then reapply balancing |
Every one of these is covered in more depth, including the exact Rolloff Limit and Sat. Rolloff math behind Resolve's tone mapping, in why Color Space Transform desaturates footage in DaVinci Resolve, which applies to F-Log2 exactly the same way it applies to any other log curve running through the same node.

Should You Use the Free Fujifilm F-Log2 LUT or a Manual CST?
Use the Color Space Transform for anything you plan to actually grade, and reserve the LUT for quick on-set monitoring or client preview exports where you don't need to touch the color afterward.
Fujifilm publishes a free F-Log2 LUT specifically for the X-H2S. The file, F-Log2_LUT_E_Ver.1.00.zip, is a 908KB download containing a standard .cube LUT, released June 16, 2022, the same month the camera shipped, and it's still available directly from Fujifilm (Fuji Addict, direct download). It's a fixed, one-way conversion baked to a specific look, usually a Rec.709 target.
A LUT works, but it locks you in. Once you've applied it, adjusting exposure, white balance, or contrast means fighting against math that's already been baked into the pixels. A CST node does the same fundamental job, decoding F-Log2 into a working color space, but it stays live: adjust Output Color Space, retarget the whole grade to HDR later, or swap Tone Mapping methods, all without re-baking anything.
| Fujifilm F-Log2 LUT | Color Space Transform | |
|---|---|---|
| Cost | Free | Free (included in Resolve, free version and Studio) |
| Output flexibility | Fixed, usually Rec.709 | Any output space: Rec.709, Rec.2020, DaVinci Wide Gamut, ACES, HDR |
| Adjustable after applying | No, baked in | Yes, every field stays editable |
| Best for | Quick monitoring, client preview, on-set reference | Any footage you're actually grading |
| Requires | Downloading and installing the .cube file | Nothing extra, ships in Resolve |
The Color Space Transform node does the same job as a LUT, except it can be undone, adjusted, and re-targeted to any output space without re-baking the footage.
If you're shooting run-and-gun content where a client needs a same-day Rec.709 preview and nobody's touching the grade afterward, the LUT is faster to set up. For anything going through an actual color pass, the CST is the only one of the two that doesn't fight you later.
What Exposure and ISO Settings Get the Most Out of F-Log2's Dynamic Range?
Shoot at or near F-Log2's base ISO of 1250 and expose to the right, since underexposing below that base ISO pushes detail into F-Log2's noise floor instead of preserving more highlight range.
F-Log2's base ISO of 1250 isn't an arbitrary recommendation, it's where Fujifilm built the curve to capture its full claimed range. Drop to ISO 640 or lower to "protect highlights" and you're not gaining anything; you're just recording less signal into a curve designed around a higher floor, which shows up later as more visible noise once you push the shadows in a grade (No Film School).
Expose to the right (ETTR) matters more with F-Log2 than with a standard picture profile, because log curves compress highlight information into a narrow range of code values near clipping. Pushing exposure up by roughly 1 to 1.6 stops over what looks "correct" on a standard monitor uses more of the sensor's available code values before you hit the ceiling, which gives the CST more information to work with once you pull the image back down in the grade (LensXP).
That interacts directly with the CineD lab numbers above: their 13.4-stop SNR=1 measurement was taken at F-Log2's base ISO of 1250, in 6.2K open gate mode, under controlled lab conditions (CineD). Shoot at a different ISO, in a different resolution mode, or with in-camera noise reduction and sharpening cranked up, and your real-world result won't match that number, since those settings all interact with how much of the sensor's native range actually makes it into the recorded file.
Exposing to the right and grading generically are two different skills, and F-Log2 punishes you for skipping the first one.
A few exposure-adjacent notes specific to this camera:
- The X-H2S reads sensor data at 14-bit for frame rates up to 30fps, then drops to 12-bit readout at higher frame rates. If you're shooting F-Log2 at 4K/120p for slow motion, you're working with less bit depth than the base 6.2K/30p open gate mode, which narrows your grading latitude before you even open Resolve.
- Internal recording tops out at 10-bit 4:2:2, in ProRes HQ, LT, or Proxy up to 6.2K/30p, or 10-bit H.265 up to 4K/120p and FHD/240p. External recorders connected over the X-H2S's full-size HDMI port can capture 12-bit ProRes RAW or Blackmagic RAW at 6.2K, which preserves meaningfully more highlight and shadow information than the internal codecs (CineD).
- High in-camera noise reduction and sharpening settings can't be undone in post. If you're shooting F-Log2 specifically to grade it later, keep both at their lowest useful setting and let Resolve's own tools do that work instead.
Resolve Color Management or Manual CST Nodes: Which Should You Use for X-H2S Footage?
Resolve Color Management (RCM) is the simpler default for a single X-H2S project, and manual CST nodes make more sense once you're mixing F-Log2 with footage from other cameras or need to inspect the exact transform math yourself.
RCM applies the Fujifilm F-Log2 to your output space conversion automatically across the whole project once you tell it, through Project Settings and Clip Attributes, which color space each clip was shot in. That's less setup per clip and less risk of forgetting a CST on one timeline item out of two hundred.
Manual CST nodes give you more control per clip, which matters the moment your timeline stops being uniform. If you're cutting X-H2S F-Log2 alongside footage from a different camera system, a GoPro, a drone, an older Fujifilm body shooting plain F-Log, a manual CST on each clip, or on each camera-specific compound clip, lets you tune Tone Mapping and Gamut Mapping independently instead of forcing every camera through identical project-wide settings.
The deeper tradeoffs between Resolve's own color management and the ACES framework, including when Netflix or an outside VFX facility expects ACES specifically, are covered in Resolve Color Management vs. ACES: Which Should You Use?. For a solo-shot X-H2S project delivering straight to Rec.709, RCM is more setup than you need; for anything handed off to a colorist running a mixed-camera pipeline, it's worth the extra Project Settings work upfront.
Camera-specific grading workflows follow the same underlying logic regardless of brand. If you're coming from Blackmagic RAW instead of Fujifilm's log curves, the project settings, Camera Raw decoding, and node structure differ in the specifics but not in the shape, and we walk through that camera's version in Blackmagic Pocket Cinema Camera color grading in DaVinci Resolve.
How Do You Grade F-Log2 Footage for HDR Delivery?
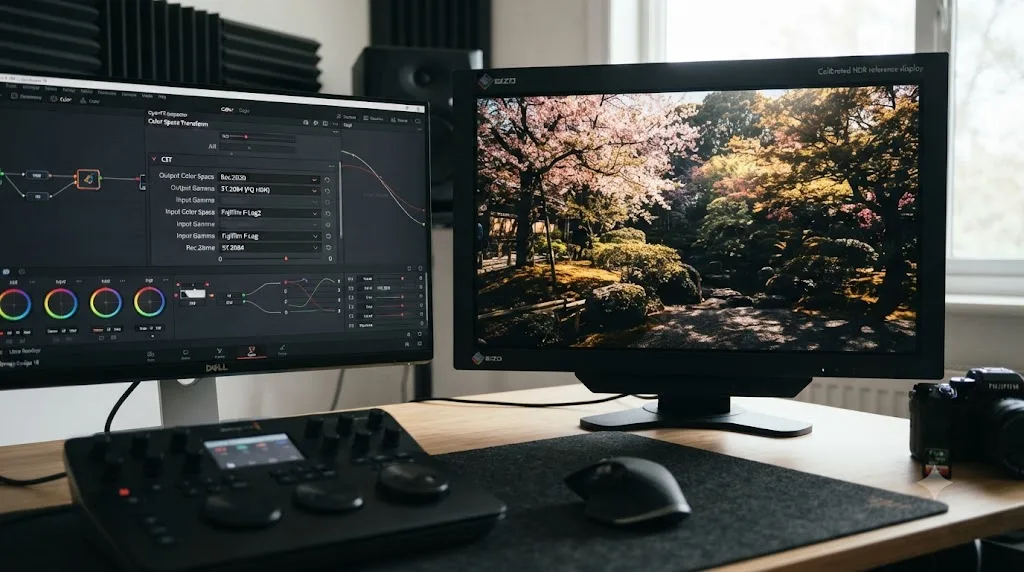
Set the CST's Output Color Space and Gamma to Rec.2020 paired with either ST.2084 (PQ) or HLG, not Rec.709, and expect Tone Mapping to matter more here than it does for a standard SDR grade.
F-Log2's extra stops exist for exactly this use case. A curve built to capture 13 to 14 stops carries more highlight and shadow detail than a Rec.709 SDR delivery can display, and HDR output is where that extra range actually shows up on screen instead of getting compressed away.
The common HDR delivery paths use different Output Gamma settings in the same CST node:
| Delivery target | Output Color Space | Output Gamma | Typical use |
|---|---|---|---|
| Standard SDR (YouTube, most client work) | Rec.709 | Gamma 2.4 | Default delivery, covered earlier in this guide |
| HDR10 (PQ) | Rec.2020 | ST.2084 | Fixed 1,000-nit mastering target, common for streaming HDR10 |
| HLG | Rec.2020 | Rec.2100 HLG | Broadcast-friendly HDR that stays watchable on SDR displays without a separate pass |
| Dolby Vision | Rec.2020 | ST.2084, plus a Dolby Vision analysis pass | Requires Resolve Studio |
Rec.2020 paired with ST.2084 or HLG is the standard configuration for HDR mastering in Resolve, with the specific transfer function chosen based on your delivery format and the display it's meant for (Mystery Box).
Dolby Vision analysis and trim passes are exclusive to DaVinci Resolve Studio. The free version's CST can still output Rec.2020 with ST.2084 or HLG correctly, but it can't run the Dolby Vision CMU analysis or generate the metadata a Dolby Vision deliverable needs (Blackmagic Design). If a client asks for Dolby Vision specifically, that's a Studio requirement, not a workflow choice.
A few things change when you move F-Log2 into an HDR pipeline instead of Rec.709:
- Tone Mapping stops being optional. On an SDR delivery, aggressive highlight roll-off can read like unwanted desaturation. On an HDR delivery, that same roll-off is often the only thing standing between a believable sky and a blown-out, clipped one, since HDR displays can show detail an SDR target would have to crush.
- You need a calibrated HDR reference monitor to judge the grade at all. A laptop screen, even a good one, can't show what a 1,000-nit PQ master actually looks like. Grading HDR on an uncalibrated display is close to grading blind.
- Gamut Mapping matters more, not less. Rec.2020 is a wider gamut than Rec.709. Colors that sat safely inside Rec.709's boundaries can now sit well inside Rec.2020's too, which means Gamut Mapping's Saturation Compression settings need rechecking rather than assumed to carry over unchanged.
- F-Log2's base ISO recommendation still applies. Exposing to the right at ISO 1250, covered above, matters just as much for an HDR master as it does for SDR, since the extra dynamic range you're protecting on set is the same range an HDR delivery is built to show.
If you're delivering both an SDR and an HDR master from the same F-Log2 footage, build the HDR grade first. Trimming an HDR master down to a believable SDR pass with Resolve's HDR-to-SDR tools is a more predictable path than trying to expand an SDR grade back up into HDR after the fact.
What Other X-H2S and DaVinci Resolve Gotchas Should You Know About?
Beyond the CST itself, a handful of camera-specific and workflow-specific issues show up often enough with X-H2S F-Log2 footage to plan around them before they cost you an afternoon.
Metadata doesn't fully carry over on import. Resolve reads standard clip metadata, timecode, resolution, frame rate, from Fujifilm's files, but camera-specific settings and shot information aren't standardized across manufacturers the way basic technical metadata is, so don't assume Resolve's Clip Attributes panel will auto-populate with the exact picture profile you shot. Confirm Input Color Space manually rather than trusting an automatic tag.
F-Log2 C is not your camera's curve. We covered this above, but it's worth repeating as its own gotcha: DaVinci Resolve 20.3.2 added Fujifilm F-Gamut C and F-Log2 C specifically for newer cameras like the GFX Eterna. If you're scrolling the CST's Fujifilm options and see two F-Log2 entries, the X-H2S uses the one without the C.
Mixing F-Log and F-Log2 clips on one timeline. If you're cutting X-H2S footage against an older Fujifilm body shooting plain F-Log, or against archival footage shot before you owned the X-H2S, every clip needs its own correctly matched CST. There's no single project-wide setting that decodes both curves correctly at once, since they're genuinely different transfer functions with different base ISOs.
High frame rate footage carries less bit depth. As covered above, the X-H2S's 14-bit sensor readout drops to 12-bit at frame rates above 30fps. If part of your project is 6.2K/30p F-Log2 and part is 4K/120p F-Log2 for slow motion, the slow-motion clips have measurably less grading latitude, and pushing them as hard as your base-rate footage will show noise and banding sooner.
External RAW changes the workflow entirely. Recording ProRes RAW or Blackmagic RAW externally over HDMI bypasses F-Log2 as a baked gamma curve altogether. Those formats carry raw sensor data with their own debayering and color science in Resolve's Camera Raw panel, which is a different settings path than the CST-based F-Log2 workflow this guide covers.
Switching between SDR and HDR mid-project changes your node structure. If you built an SDR grade with a CST outputting Rec.709 and later get asked for an HDR master, changing the Output Gamma on that same node isn't the whole job. Tone Mapping and Gamut Mapping settings tuned for Rec.709 usually need rechecking against Rec.2020, and any creative grade nodes built on top of the SDR output can clip or look muted at the wider gamut. Treat an added HDR delivery as a second grading pass, not a dropdown change.
Hardware and OS notes. DaVinci Resolve 21 requires macOS 15 Sequoia or later on Apple Silicon, Windows 10's Creators Update or newer, Windows 11 on ARM for Snapdragon X Elite systems, or Rocky Linux 8.6, and Desktop Video 12.9 if you're monitoring through Blackmagic hardware (Newsshooter). Debayering 6.2K open gate footage, whether F-Log2 ProRes or external RAW, is genuinely heavy work; if playback stutters, lower the timeline's proxy or optimized media resolution while editing and switch back to full resolution before your final render.
A Worked Walkthrough: Grading One X-H2S F-Log2 Clip From Import to Delivery
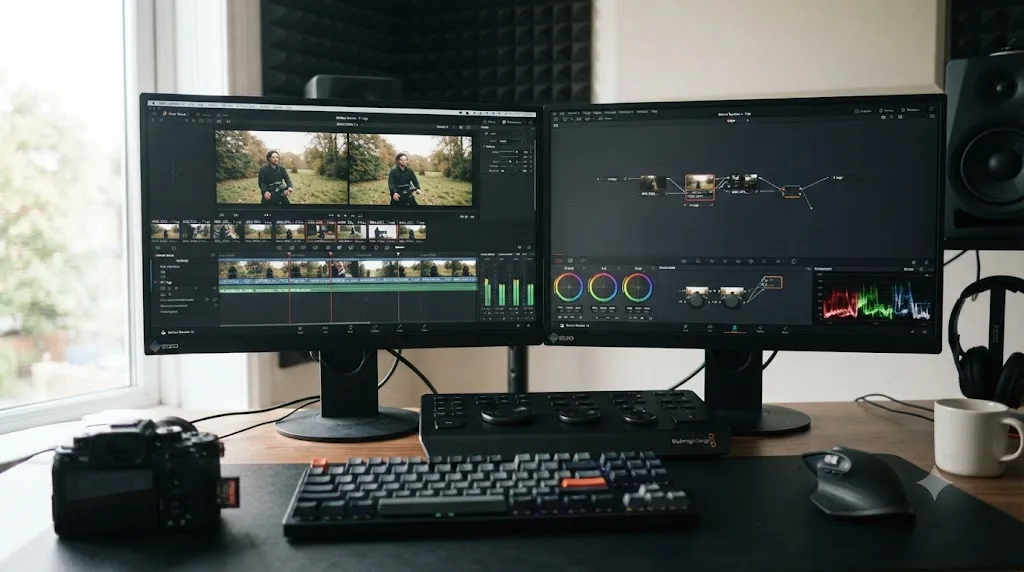
Here's how the full path looks in practice, from an imported F-Log2 clip to a finished Rec.709 export, with each decision point named.
Step 1: Import and confirm the curve. Bring your X-H2S ProRes or H.265 footage into Resolve's Media Pool. Before doing anything else, confirm in your own shooting notes, not Resolve's metadata, that the clip was recorded in F-Log2 and not F-Log or a standard picture profile like Eterna or Provia. Fujifilm's menu system makes it easy to shoot a mixed card if a setting got changed between setups.
Step 2: Cut your edit in a flat, unaffected state. Do your editorial pass, trimming, sequencing, syncing audio, while the footage is still flat log. Judging pacing on flat footage is harder on the eyes but keeps you from making creative decisions based on a temporary LUT that won't be part of your final grade.
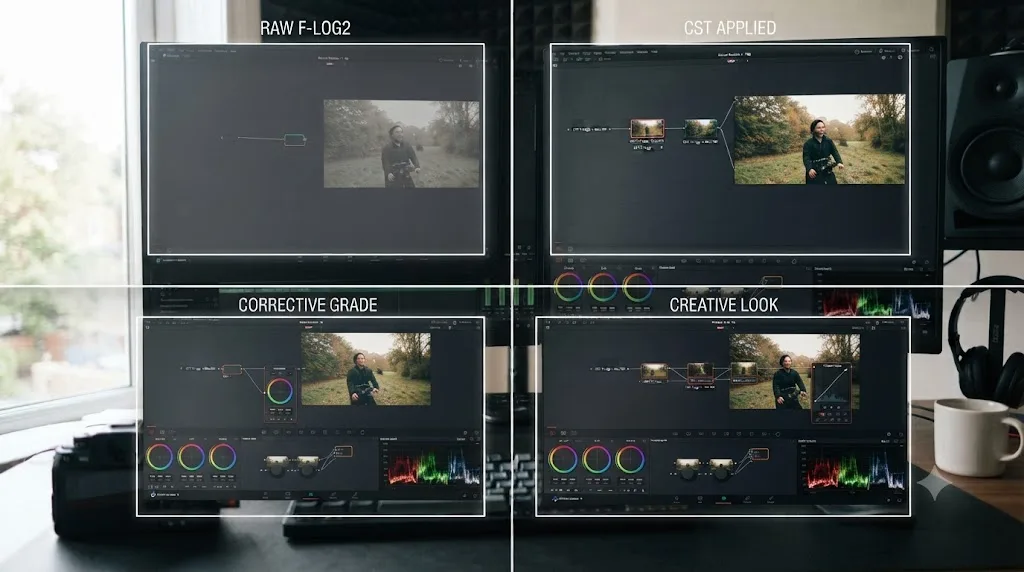
Step 3: Apply the CST on the Color page. Add a Color Space Transform to your first node, or enable Resolve Color Management and set the clip's input space through Clip Attributes if you're color-managing the whole project. Set Input Color Space and Input Gamma to Fujifilm F-Log2, and Output to Rec.709 and Gamma 2.4 for a standard delivery.
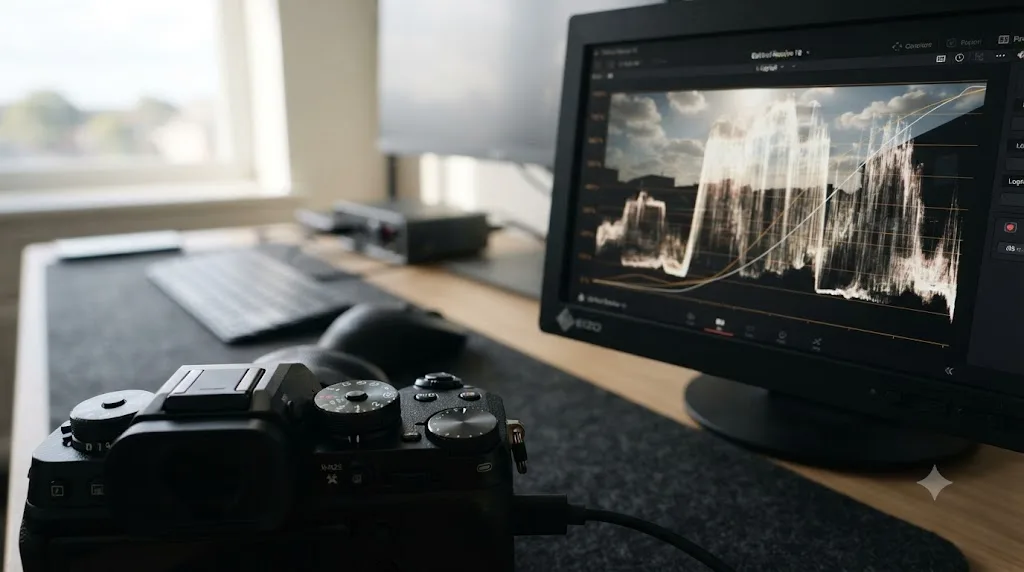
Step 4: Check the waveform before touching anything creative. With just the CST applied, look at your waveform and vectorscope. Skin tones should sit in a recognizable range, and the image should already look like a normal, if slightly flat, video image, not washed-out grey and not oversaturated. If it looks wrong at this stage, the problem is in Step 3, not anything downstream.
Step 5: Build a corrective node. Add a second node after the CST for basic primary correction: balance exposure, adjust contrast, and neutralize any color cast. This is where ETTR exposure choices from your shoot day pay off, since a well-exposed F-Log2 clip needs less aggressive correction to look neutral.
Step 6: Add your creative grade on a third node. Once the shot looks clean and neutral, build your intended look on a separate node so you can toggle it, copy it to other clips, or adjust it independently of the corrective work underneath it. Copying a grade to multiple clips at this stage keeps a consistent look across every shot from the same X-H2S setup.
Step 7: Check on a calibrated reference before delivery. F-Log2's expanded range means small monitor calibration differences show up more than they would on already-normalized Rec.709 footage. Confirm your final grade on a reference display before rendering, not just the built-in laptop screen you edited on.
How Do the Free Resources Compare to Paid Help When You're Stuck?
Fujifilm's own CST guide, its free LUT, and Blackmagic's reference manual cover the settings. None of them are sitting next to you watching your actual project when a specific dropdown doesn't match what a tutorial describes.
Blackmagic Design publishes free training materials and a complete reference manual covering every field in the Color Space Transform, and Fujifilm publishes its own grading guide alongside the free F-Log2 LUT linked above. Beyond the official documentation, a working ecosystem of YouTube tutorials from working colorists covers F-Log2 grading specifically, often demonstrated on X-H2S footage, and Reddit and the Fuji X Forum both carry active threads where X-H2S owners troubleshoot exactly this kind of curve-mismatch problem. That coverage is real and worth using, especially Blackmagic's own manual for anything this guide doesn't cover.
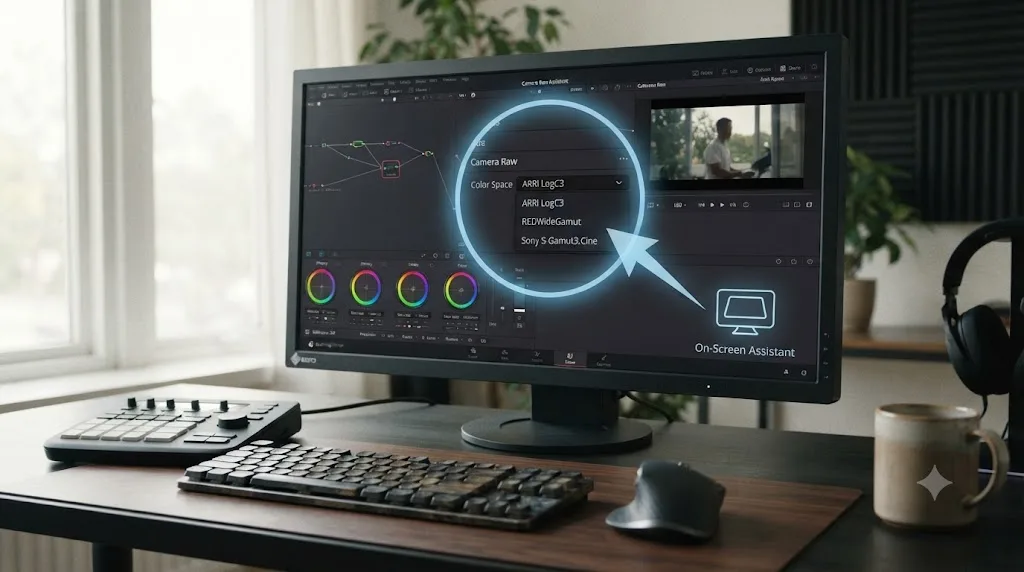
Where all of it falls short is the same place every generic tutorial falls short: it describes a settings panel, not your settings panel. TryUncle is the on-screen assistant for DaVinci Resolve on macOS. Ask in plain words, and Uncle points at the exact control on your screen. If your Input Gamma dropdown is buried under three nested menus that don't match a two-year-old YouTube video's interface, Uncle looks at your actual project and points at the field, live, instead of making you translate a tutorial screenshot to your own screen.
That's a different category of tool than the chat-based AI assistants and automated editors that have shown up around Resolve recently. Sottocut and PremiereCopilot generate cuts and rough assemblies automatically. heyeddie.ai and cutagent.ai answer conversational questions about editing in general. None of them watch your screen or know which node in your specific project is set to F-Log instead of F-Log2. TryUncle doesn't automate your edit or write your grade for you; it's a paid macOS subscription, currently at founder pricing for the first 100 seats, cancel anytime, and it's built for the exact moment covered in this guide: staring at washed-out footage with no idea which of five possible settings is wrong. Check TryUncle's current pricing for the founder rate before it changes.
The Verdict
F-Log2 on the X-H2S is a genuinely wider curve than F-Log, and DaVinci Resolve already knows how to decode it correctly, as long as you pick Fujifilm F-Log2, not F-Log2 C, and not F-Log, in the Color Space Transform's Input Color Space and Input Gamma fields. Pair that with exposing near the curve's base ISO of 1250 and you're using the dynamic range Fujifilm actually built into the camera, not fighting a mismatch that makes good footage look broken.
Guided practice inside your own project beats matching your footage to a tutorial shot on someone else's camera. If you're mid-grade right now with a washed-out F-Log2 clip open in Resolve, Uncle can point at the exact Input Color Space dropdown on your actual timeline while you work through it.
Frequently asked questions
- Why does my Fujifilm X-H2S F-Log2 footage look washed out in DaVinci Resolve?
- Because F-Log2 is a flat, log-encoded gamma curve by design, and Resolve doesn't remove that flatness on import. It stays grey and low-contrast until you add a Color Space Transform or LUT that maps Fujifilm F-Log2 to your output space. Skip that step and the desaturated look is exactly what you'll get on every clip.
- What CST settings should I use for Fujifilm X-H2S F-Log2 footage in DaVinci Resolve?
- Set the Color Space Transform's Input Color Space to Fujifilm F-Log2 and Input Gamma to Fujifilm F-Log2, not the F-Log2 C variant, then set Output Color Space and Gamma to whatever your timeline actually uses: Rec.709 Gamma 2.4 for a standard delivery, or DaVinci Wide Gamut Intermediate if you're running Resolve Color Management.
- Can I use a regular F-Log LUT on X-H2S F-Log2 footage?
- No. F-Log and F-Log2 are different transfer functions with different base ISOs and different code value mappings, so an F-Log LUT built for the older curve misreads F-Log2 footage and produces incorrect contrast and color, even though the two names look almost identical on a dropdown menu.
- Does DaVinci Resolve support Fujifilm F-Log2 natively?
- Yes. Resolve's Color Space Transform lists Fujifilm F-Log2 as a native Input Color Space and Gamma option, so you don't need a third-party DCTL or plugin to grade X-H2S footage correctly. Don't confuse it with F-Log2 C, a newer, related gamma Blackmagic added in DaVinci Resolve 20.3.2 for cameras like the GFX Eterna, which the X-H2S doesn't shoot.
- What ISO should I shoot F-Log2 at on the X-H2S for the most dynamic range?
- Fujifilm sets F-Log2's base ISO at 1250, nearly a full stop above F-Log's base ISO of 640, and that's the ISO where the curve is designed to capture its full claimed range. Shooting well below it doesn't add dynamic range back. It just underexposes you into F-Log2's noise floor.
- Is the free version of DaVinci Resolve enough to grade F-Log2 footage?
- Yes. The Color Space Transform node, its Tone Mapping and Gamut Mapping controls, and the Fujifilm F-Log2 input option are all available in Resolve's free version. None of them appear on Blackmagic's own list of Studio-exclusive features.
- What's the actual difference between F-Log and F-Log2 on the X-H2S?
- F-Log2 extends usable dynamic range by roughly 1.3 stops over F-Log by pairing a higher base ISO (1250 versus 640) with a wider log curve, built to take advantage of the X-H2S's stacked sensor and X-Processor 5. Fujifilm's own spec sheet claims 14+ stops for F-Log2. CineD's independent lab testing measured closer to 13 stops depending on the noise floor threshold used.
- Is there an app that helps while you're actually grading F-Log2 footage in DaVinci Resolve?
- Yes. TryUncle is the on-screen assistant for DaVinci Resolve on macOS, and Uncle can point at the exact Input Color Space dropdown or Tone Mapping control in your own project instead of you hunting through a settings panel from memory. Tools like Sottocut, PremiereCopilot, heyeddie.ai, and cutagent.ai automate timeline edits or answer chat questions about Resolve, but none of them watch your actual node graph and point at the specific control the way Uncle does.
Sources
- Fujifilm Launches the X-H2S: 26.16MP, 40 FPS Burst Photos, 6.2K Video (PetaPixel)
- FUJIFILM X-H2S Released: 6.2K Resolution, Open Gate and Internal 10-bit Apple ProRes HQ/LT/Proxy (CineD)
- A New Fuji Flagship Offers 14+ Stops of Dynamic Range, Introducing the Fujifilm X-H2S (No Film School)
- FUJIFILM X-H2S Lab Test: Rolling Shutter, Dynamic Range, and Exposure Latitude (CineD)
- DaVinci Resolve 20.3.2 Update Adds Fujifilm F-Log2 C Support and Faster SuperScale (RedShark News)
- DaVinci Resolve 21.0.3 Update (Newsshooter)
- DaVinci Resolve 21 Announced at NAB 2026 (Toolfarm)
- FUJIFILM F-Log Color Correction Using CSTs and LUTs (Fujifilm)
- Fujifilm X-H2S F-Log and F-Log 2 LUT Now Available (Fuji Addict)
- F-Log2 LUT for X-H2S, direct download (Fujifilm)
- True Colors, featuring Daniel Malikyar on the FUJIFILM X-H2S (Fujifilm X Stories)
- FUJIFILM X-H2S Mirrorless Camera product listing (B&H Photo Video)
- Mastering Fujifilm F-Log2: Exposure, LUTs & Workflow for X-Processor 5 Cameras (LensXP)
- DaVinci Resolve 19 Released (DVResolve.com)
- DaVinci Resolve - Studio product page, Dolby Vision support (Blackmagic Design)
- HDR Video Part 5: Grading, Mastering, and Delivering HDR (Mystery Box)
Learn by doing, not watching
Learn Resolve inside Resolve.
TryUncle watches your screen and points at the exact control when you ask. No tabs, no timestamps, no rewatching tutorials.
Download for MacKeep reading
 FixesJul 30, 202626 min read
Why Does Color Space Transform Desaturate My Footage in DaVinci Resolve?
DaVinci Resolve's Color Space Transform desaturates footage when its Tone Mapping or Gamut Mapping settings pull out-of-range color inside a smaller gamut.
 ComparisonsJul 12, 202630 min read
Resolve Color Management vs. ACES: Which Should You Use?
DaVinci Resolve Color Management and ACES both fix scene-referred color, but they solve different problems. Here's which one fits your project.
 GuidesJul 29, 202639 min read
Blackmagic Pocket Cinema Camera Color Grading in DaVinci Resolve
How to color grade Blackmagic Pocket Cinema Camera footage in DaVinci Resolve: project settings, Camera Raw decoding, Gen 4 vs Gen 5, and node setup.