
Learn / DaVinci Resolveupdated for DaVinci Resolve 21.0.3 (July 2026)
DaVinci Resolve Workflow for Church and Worship Service Videos
Quick answer
Record every camera against one locked audio feed pulled straight from the sound board, sync the angles in DaVinci Resolve with Create Multicam Clip, then cut live in the Multicam Viewer in Video Only mode. Mix music and speech with Dialogue Leveler, license worship songs through CCLI, and duplicate the locked timeline for the full replay, YouTube, and social clips.
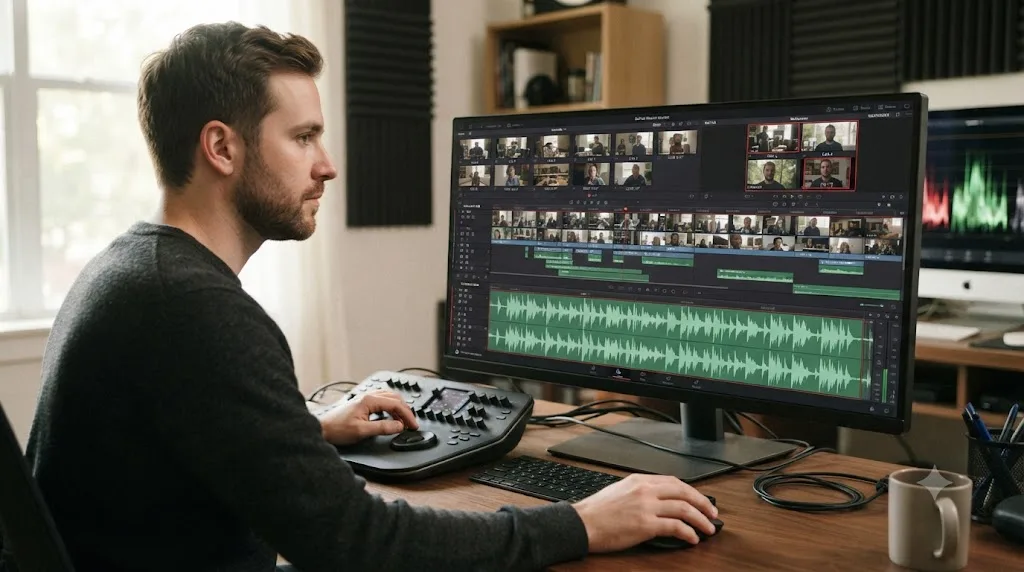
We've spent seven years cutting commercial and event work in DaVinci Resolve, and we run a video-editing community of more than 100,000 members where some version of "how do I get this week's service video out the door" shows up almost every week. It's rarely a hard editing problem. It's a locked audio source nobody planned for, a CCLI license nobody checked, or a Saturday-night volunteer staring at the Multicam Viewer wondering why the audio just jumped. This guide is the fix, from what to bring on Sunday morning through the export queue that gets the full replay, the YouTube upload, and the social clips out the door at once.
As of July 2026, everything here works in DaVinci Resolve 21.0.3, in the completely free edition, unless a step specifically says otherwise. This isn't a general multicam tutorial with "church" pasted on top. Worship services have their own shape: a band segment that behaves like a concert, a sermon that behaves like an interview, licensed music you can't treat like a royalty-free track, and a volunteer team that needs this done well before the following Sunday, every single week, indefinitely.
What Is a DaVinci Resolve Workflow for Church and Worship Service Videos?
A DaVinci Resolve workflow for church and worship service videos is the repeatable sequence of steps a church media team runs every week: capture multiple camera angles against one locked audio source, sync them into a multicam clip, cut the service live in the Multicam Viewer, mix worship music and spoken word separately, respect the licensing that music requires, and deliver a full replay alongside shorter cuts for YouTube and social media. It's a production pipeline built to survive a weekly deadline that never moves, run mostly by volunteers, not a one-off editing project.
That last part is what separates this from most multicam guides. A wedding gets edited once. A worship service gets edited fifty-two times a year, by a team that may rotate every few months, on a deadline set by the calendar rather than a client. Every decision in this workflow, from camera count to color matching to how you name your bins, should be judged against one question: can a volunteer who wasn't here last week pick this project up and finish it by Sunday?
A church video workflow that only works when the same expert editor is available every week isn't a workflow, it's a bottleneck with a nice name. Build for repeatability first, and polish comes easier once the deadline pressure isn't fighting you on the mechanics too.
According to production analytics platform Dacast's review of Pushpay's 2024 research, 91 percent of churches now livestream services to support a hybrid ministry model, and roughly 62 percent expect streaming to keep playing a key role going forward (source: Dacast, Church Live Streaming Statistics). A separate Pew survey found about 27 percent of U.S. adults regularly watch religious services online or on TV (source: Dacast, Church Live Streaming Statistics). That's the actual audience a church media team is producing for now, not a livestream as a backup plan for snow days, but a real, recurring viewership that a rough, unedited camera feed shortchanges.
What Gear and Audio Setup Do You Need Before You Ever Open DaVinci Resolve?
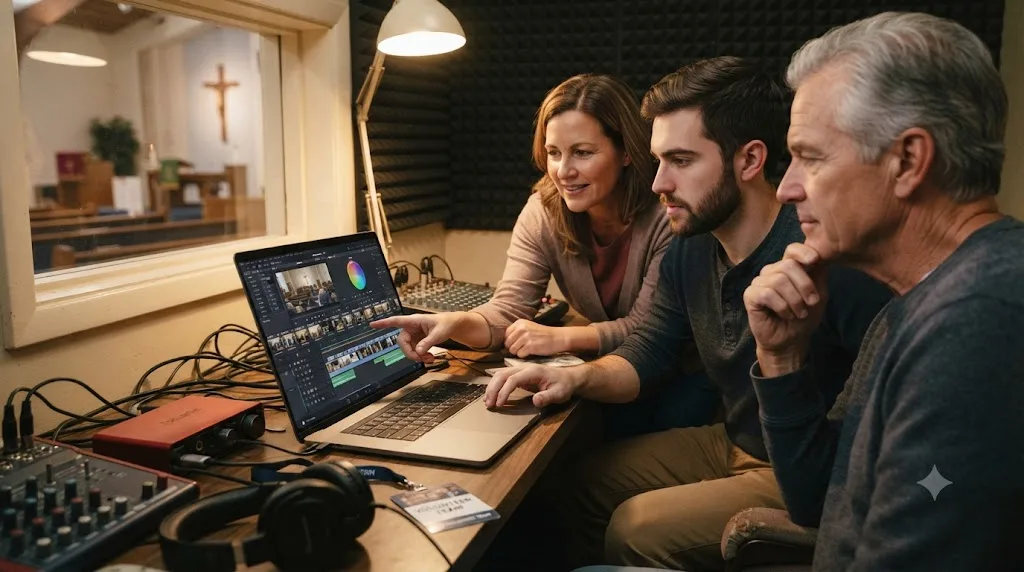
The edit only moves as fast as Sunday's capture lets it, and the single biggest speed decision happens before anyone touches a timeline. Church production guide Ruah Creative House lays out a realistic budget ladder by camera count: a single-camera setup with a PTZ camera and audio interface runs $1,000 to $2,000, a two-camera setup with a switcher runs $3,000 to $5,000, a three-camera professional rig with ISO recording runs $5,000 to $10,000, and a full broadcast-style multi-camera rig with NDI infrastructure runs $15,000 to $25,000 or more (source: Ruah Creative House, How to Film a Church Service).
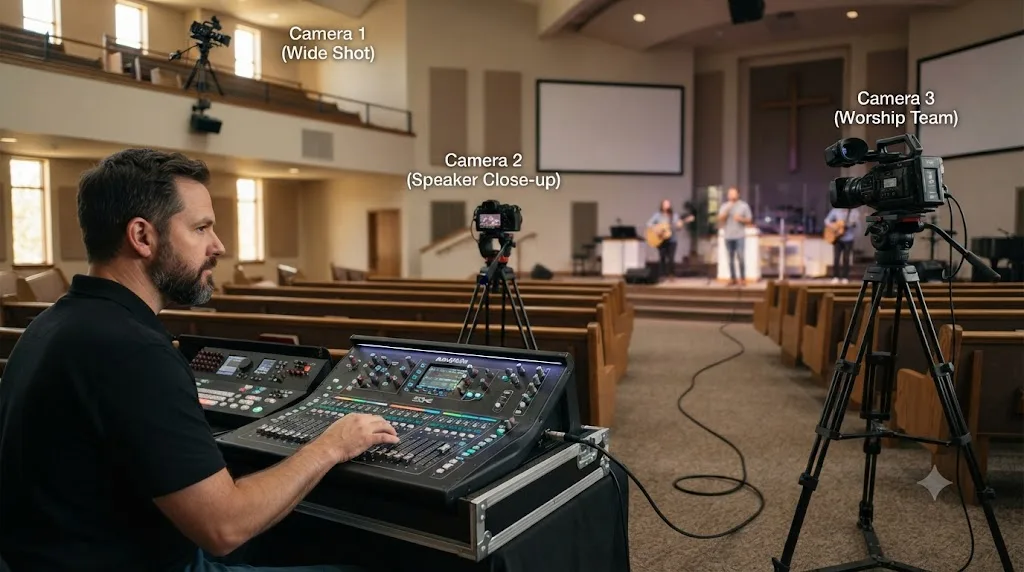
Camera count should track what your platform actually looks like, not an arbitrary target. Ruah Creative House's recommended placement is a back-center wide shot for the establishing angle, a second camera dedicated to close-ups of the speaker's face, and a third covering the worship team or choir, with any manned cameras reserved for trained operators capturing deliberate, dynamic shots rather than random movement (source: Ruah Creative House, How to Film a Church Service). Two cameras is a real starting point for a small church. Three to four is the common range once you're covering both a stage and a worship band with any dedication.
Audio is where a worship service diverges hardest from every other multicam guide you'll find. Ruah Creative House is blunt about it: "Always use a direct feed from the sound board, never camera microphones" (source: Ruah Creative House, How to Film a Church Service). A church sanctuary already has a mixed, EQ'd, board-level audio feed running to the house speakers every single week. That feed, not a camera's onboard mic picking up room reflections and HVAC hum, is your reference audio track, and routing it in is usually a $120 to $170 problem: an audio interface like a Focusrite Scarlett Solo or Scarlett 2i2 connected via an XLR cable straight from the board's aux output, with target levels peaking between negative 12dB and negative 6dB (source: Ruah Creative House, How to Film a Church Service).
One board feed beats four cameras' worth of mismatched room audio every single time you switch angles. Get that single routing decision right and the rest of your audio workflow, in Resolve and in the room, gets dramatically simpler.
Lighting matters more than most volunteer teams expect, and it's a cheaper fix than gear upgrades suggest. Ruah Creative House's guidance is direct: "A $300 lighting upgrade improves video quality more than a $2,000 camera upgrade," with key lights running $150 to $300 per LED panel and back lights $100 to $200, for a total budget of $300 to $500 to move a speaker's face out of the flat, shadowy look that plagues most volunteer-shot church footage (source: Ruah Creative House, How to Film a Church Service).
Recommended gear tiers for a church worship service
| Tier | Camera count | Approximate cost | What it covers |
|---|---|---|---|
| Starter | 1 (PTZ) | $1,000-$2,000 | A single wide angle plus an audio interface, good for a small congregation just starting to record |
| Two-camera | 2 (PTZ + switcher) | $3,000-$5,000 | A wide safety angle and a speaker close-up, switched live |
| Three-camera professional | 3 (multi-angle + ISO) | $5,000-$10,000 | Speaker, worship team, and wide angles, recorded as separate ISO files for post-production flexibility |
| Broadcast multi-camera | 4+ with NDI | $15,000-$25,000+ | Full broadcast-style coverage with networked cameras and dedicated switching hardware |
(source: Ruah Creative House, How to Film a Church Service)
If you're already running or considering a hardware switcher to project the service live, that decision also shapes your entire post-production pipeline, covered in full in the switcher section further down this guide.
How Do You Organize and Ingest Footage After a Service?
The first hour after service ends decides how the rest of the week's edit goes, and it's the single most avoidable time sink in this entire workflow if you get the naming and folder structure right before you need it under pressure.
Build your Media Pool around the actual run of service, not just camera number. WorshipMetrics' knowledge base on sermon re-editing recommends a clean three-folder structure: Media for original files, Project for the DaVinci Resolve project itself, and Exports for the final rendered version (source: WorshipMetrics Knowledge Base, ISO Recordings in DaVinci Resolve). Inside Media, bin by service segment: prelude, worship set, announcements, sermon, response or closing. A volunteer editor who wasn't at service that week should be able to find the sermon's opening line without asking anyone where it is.
Confirm every ISO file actually made it off the recorder before you build anything. WorshipMetrics' guidance is specific to multicam switcher recordings: verify all your expected files are present with similar file sizes before you start editing, since a dropped or corrupted recording on one angle is far easier to catch and reshoot from a backup source in minute one than to discover mid-edit on Thursday (source: WorshipMetrics Knowledge Base, ISO Recordings in DaVinci Resolve).
Set your project's timeline resolution and frame rate to match your source media before you import anything, and be aware this locks the moment media enters your Media Pool. If a camera captured at a different frame rate than the rest of your rig, that's the moment to catch and correct it, not after you've built a multicam clip around it.
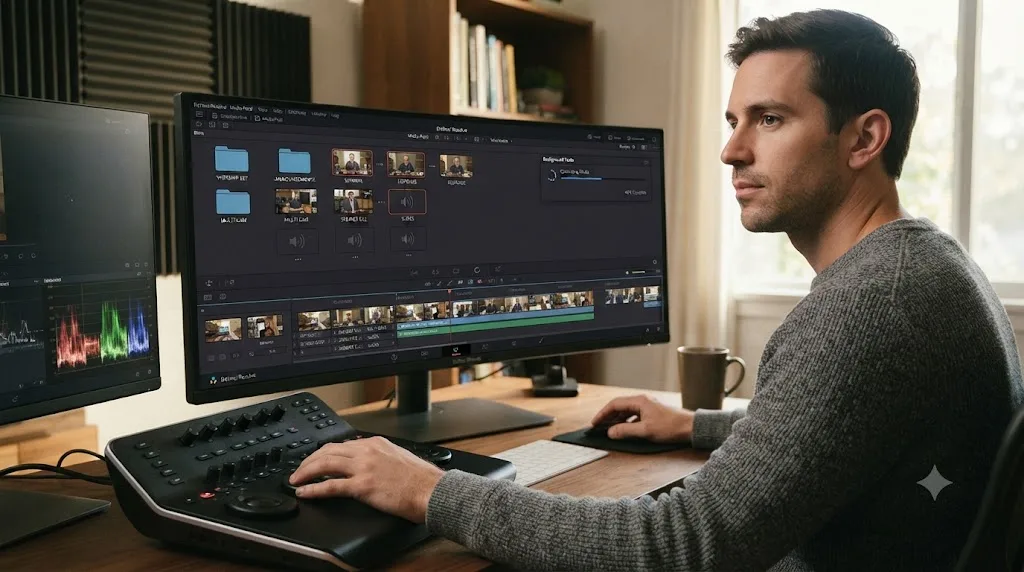
DaVinci Resolve 21 changed the economics of this step for a volunteer team specifically. Earlier versions made you wait for a proxy render or a transcription job to finish before you could keep working. As DaVinci Resolve instructor Justin Robinson of JayAreTV describes it, the update represents "the transition from a linear workflow to a parallel one," where "editors can now initiate a high-resolution render or a lengthy AI-driven transcription and immediately return to the timeline" instead of staring at a progress bar (source: JayAreTV). It ships off by default since it's genuinely demanding on your machine, and you enable it through System Preferences in the Background Tasks panel. An intelligent pause automatically suspends background jobs the instant it detects you're actively editing, so a proxy render doesn't fight your playback for GPU time mid-cut (source: JayAreTV).
A worked example: ingesting a Sunday morning service for a Wednesday delivery deadline
- Pull every camera's card the moment the service ends, and import into segment-named bins: Worship_Set, Announcements, Sermon, Response.
- Confirm every expected ISO file is present and similarly sized before you touch anything creative.
- Select every clip, right-click, and choose Generate Proxy Media, set to your platform's standard proxy codec.
- With Background Processing enabled in System Preferences, queue Audio Transcription on your sermon's audio-heavy clips so a searchable transcript is ready by the time proxies finish.
- While both jobs run in the background, start building the multicam clip for your least time-sensitive segment, usually the announcements, so your first hour isn't spent waiting on a progress bar.
Every minute your team spends waiting on a proxy render is a minute the next volunteer shift doesn't have, because DaVinci Resolve 21 lets both run at once now. That single setting change, turning on Background Processing once and leaving it on, is worth more to a volunteer team's Wednesday deadline than almost any other setting in this guide.
How Do You Sync Multicam Worship Service Footage in DaVinci Resolve?
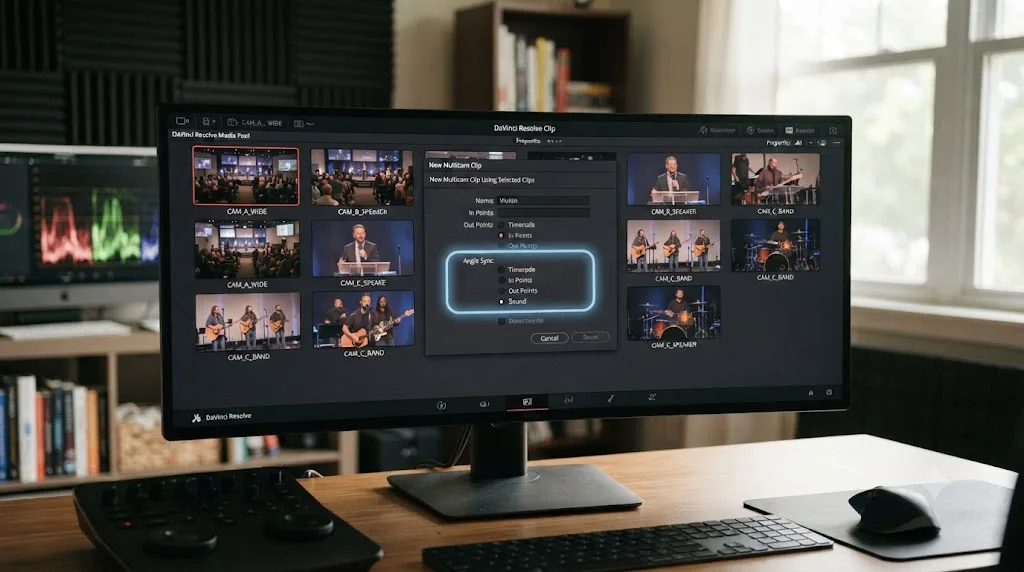
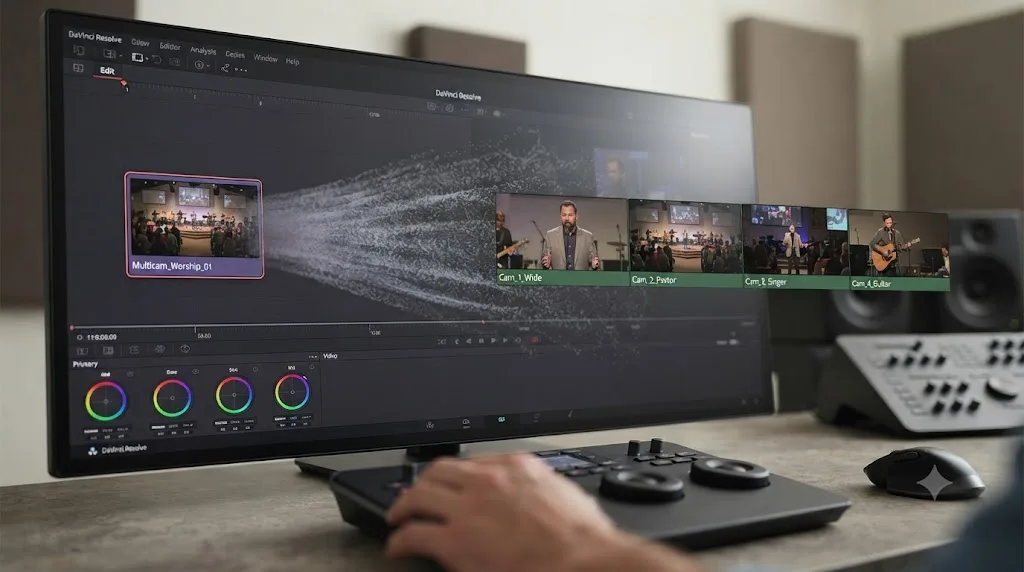
Once footage is organized, syncing the angles is the step that turns separate camera files into one editable multicam clip. Blackmagic's own reference manual describes the process directly: import every ISO clip into the Media Pool, select the clips that need to sync together, right-click, and choose "Create Multicam Clip Using Selected Clips" (source: DaVinci Resolve Manual, Blackmagic Design, mirrored). That opens the New Multicam Clip Properties dialog, where Angle Sync is "defined by timecode" or "defined by waveform" (source: DaVinci Resolve Manual, Blackmagic Design, mirrored).
Sync method by worship service scenario
| Scenario | Sync method | Why |
|---|---|---|
| Cameras jam-synced or genlocked before service (larger production setups) | Timecode | Instant and exact, regardless of segment length |
| Cameras with no shared timecode but the same board feed routed into every camera's audio input | Waveform (Sound) | Resolve matches the board feed's waveform shape across every camera's own audio track |
| Recorded with an ATEM Mini ISO switcher | Already synced by the switcher | Skip manual sync entirely; open the auto-generated Resolve project |
| A camera with weak or no usable audio (a wide safety shot with only ambient room sound) | Manual, matched to a shared visual cue | The worship leader's first downbeat or the pastor stepping to the pulpit works when audio doesn't |
For most volunteer-run churches without jam-synced timecode gear, waveform sync is the default, and it works because of the single locked-audio decision from the gear section above. If your board feed is routed into every camera's audio input, or even just captured separately and synced after, Resolve has a clean, shared waveform to lock every angle onto, whether that's a specific worship song's opening chord or the pastor's first spoken word of the sermon.
As of DaVinci Resolve 21, this creation step got measurably more forgiving for exactly the kind of footage a worship service produces. According to Newsshooter's coverage of the version 21 release notes, multicam clips can now "include all audio tracks for each angle" and "use full clip extents on creation and during sync" (source: Newsshooter, DaVinci Resolve 21 final release). Earlier versions could trim each angle down to only the portion every camera shared, which was a real problem for a worship service where one camera operator might start a segment a few seconds behind the others while adjusting framing.
A worked example: waveform-syncing a three-camera worship set
- Import all three angles into a Worship_Set bin, confirming each shares the same frame rate.
- Select all three clips, right-click, and choose Create Multicam Clip Using Selected Clips.
- In the New Multicam Clip Properties dialog, set Angle Sync to Sound, name the clip clearly (for example, "2026-07-26_WorshipSet_Multicam"), and click Create.
- Resolve analyzes the board feed's waveform across all three clips and generates one synced multicam clip.
- Double-click the new clip in the Source Viewer and scrub across a full song, not just the opening seconds, to confirm sync holds through key changes, instrumental breaks, and any tempo shifts.
If sync holds at the start but drifts by the end of a long set, that's almost always a sample rate mismatch between recording devices, not a bad sync point, and it's covered in the troubleshooting section further down.
How Does an ATEM Mini ISO Switcher Change the Workflow?
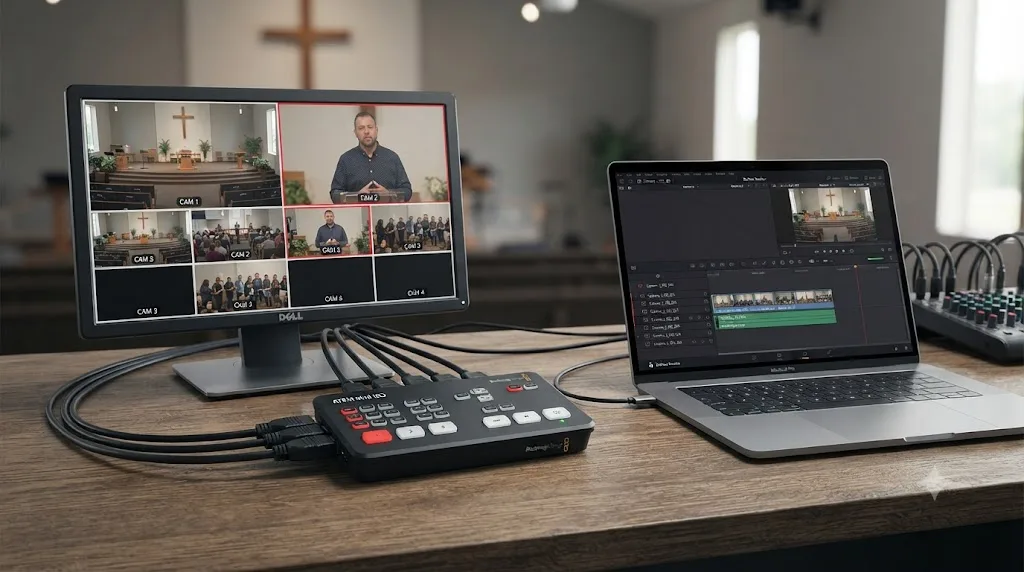
If your church already runs a live switcher to project the service or feed a stream, there's a real shortcut worth knowing before you sync anything manually. Blackmagic's ATEM Mini Pro ISO and Extreme ISO G2 switchers record more than just the switched program output. According to Blackmagic Design's own product page, "a DaVinci Resolve project is saved along with separate files for each video input, so the live event can be reconstructed as an edit timeline" (source: Blackmagic Design, ATEM Mini Editing). Practically, that means opening the auto-generated project shows the entire service "transformed into an edit with all cuts, transitions and media on the timeline" already assembled, ready to refine into a highlight reel or sermon clip instead of built from raw camera cards (source: Blackmagic Design, ATEM Mini Editing).
Blackmagic Design CEO Grant Petty described the significance of this integration plainly when the ISO recording models launched: "This new model of ATEM Mini is a true innovation in workflow. For the first time, live production has been fully integrated into a post-production editing workflow" (source: Church Production Magazine). For a church running a live switch every week anyway, that's not a marginal convenience. It's the difference between starting Monday's re-edit from a real, already-cut sequence and starting from four unsynced camera cards.
Current ATEM Mini lineup for church production
| Model | Price | Inputs | ISO recording |
|---|---|---|---|
| ATEM Mini Pro | $349 | 4 HDMI | No |
| ATEM Mini Pro ISO | $585 | 4 HDMI | Yes, 5 streams (4 ISO + program) |
| ATEM Mini Extreme | $1,249 | 8 HDMI | No |
| ATEM Mini Extreme ISO G2 | $2,245 | 8 HDMI | Yes, all 8 inputs recorded independently |
(source: Blackmagic Design, ATEM Mini product lineup)
For a church editing sermons after the fact from ISO recordings, WorshipMetrics' knowledge base offers a realistic time estimate: an experienced editor typically needs 2 to 4 hours to re-edit one hour of ISO-recorded sermon footage into a polished result, with one-hour exports commonly running 10 to 15 GB in ProRes format (source: WorshipMetrics Knowledge Base, ISO Recordings in DaVinci Resolve). That's a meaningfully different starting point than syncing raw camera files from scratch, and the source is direct about why it matters: re-editing from ISO recordings "is much more flexible than the live switching you did during the service" (source: WorshipMetrics Knowledge Base, ISO Recordings in DaVinci Resolve), since you get to reconsider every camera choice with the benefit of hindsight instead of committing live under pressure.
If your church isn't switching live at all yet, and is just recording ISO files from each camera separately with no program feed, the manual multicam sync workflow from the previous section applies unchanged. The ATEM Mini path is a shortcut for churches that are already switching live, not a requirement to start this workflow at all.
How Do You Cut a Worship Service Live in the Multicam Viewer?
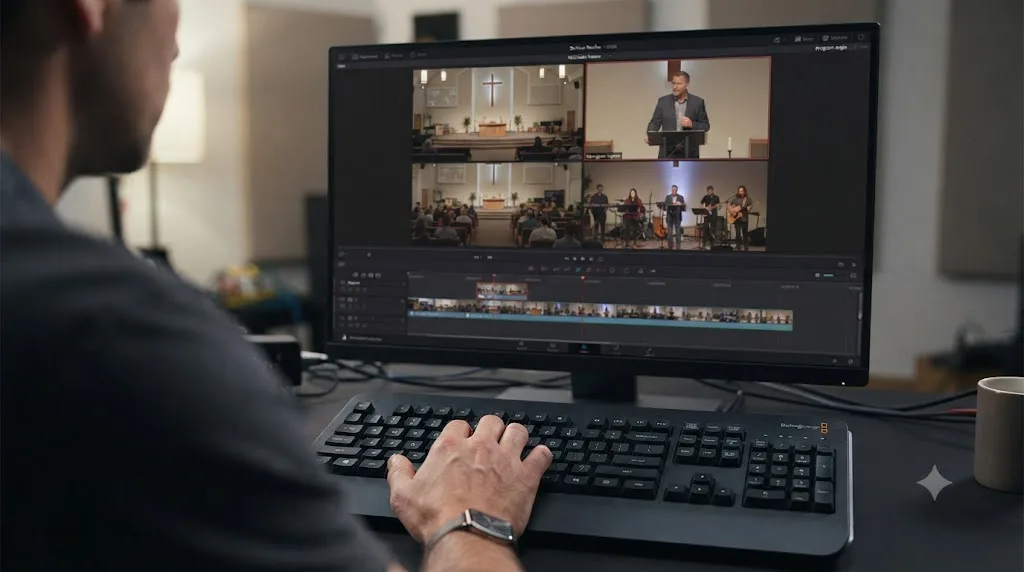
With your multicam clip synced, whether by manual sync or an ATEM Mini's auto-generated project, cutting the service is where the workflow pays off. Drag the multicam clip to a new timeline, switch the Timeline Viewer's mode to Multicam, and enable the Multicam Viewer, which reveals every angle at once so you can click a tile or press a number key to cut between them.
Set your cutting mode before you touch anything else. Blackmagic's manual documents the shortcuts directly: "Option-Shift-[ sets the Multicam Viewer to cut or switch both Video and Audio," "Option-Shift-] sets the Multicam Viewer to cut or switch Video only," and "Option-Shift-\ sets the Multicam Viewer to cut or switch Audio only" (source: DaVinci Resolve Manual, Blackmagic Design, mirrored). For almost every worship service, Video Only is the correct default, since your locked board feed is doing all the audio work no matter which camera is on screen. Number keys 1 through 9 "perform a cut-and-switch operation, the same as if you'd clicked on an angle button" (source: DaVinci Resolve Manual, Blackmagic Design, mirrored), while holding Option before the number key switches an existing edit's angle without adding a new cut point, useful for adjusting a choice after the fact without disturbing your timing.
A worship service edit splits naturally into two very different cutting rhythms, and it's worth treating them as separate jobs rather than one continuous pass:
- The worship set behaves like a concert. Cut on the beat, favor wide shots during instrumental sections, and punch to a closer angle on a strong vocal line or a visible moment of congregational engagement. A faster cut rate reads as energy here, not as choppiness.
- The sermon behaves like an interview. Hold shots longer, cut mainly to vary framing across a long single-speaker segment rather than to match any rhythm, and reserve your closest angle for the most important points rather than cutting on a fixed clock.
Trying to cut both segments at the same pace is a common first-time mistake. A sermon cut at concert speed feels frantic and undermines the speaker. A worship set cut at sermon speed feels static and undersells the music.
A worship service is really two different edits stitched into one video, not one continuous style applied across the whole runtime. Recognizing that early saves a rough cut from feeling inconsistent in a way that's hard to name but easy to feel.
Cut loosely on your first live pass through each segment, favoring more angle changes over fewer, then go back and remove the cuts that don't earn their place. It's faster to delete an unnecessary cut than to insert a missing one, since removing a cut point in a flattened sequence is a simple ripple delete, while adding one means re-splitting a clip and reassigning its angle by hand.
Why Does the Audio Jump When You Cut Between Worship Service Camera Angles?
If your audio jumps, cuts out, or changes character every time you switch angles, the Multicam Viewer's cutting mode is almost certainly set to switch audio along with video instead of staying locked to your board feed. Press Option-Shift-] to force it back to Video Only. That single setting fixes the most common audio complaint on any multicam worship service edit, and it's worth checking first before assuming your sync or your recording is actually broken.
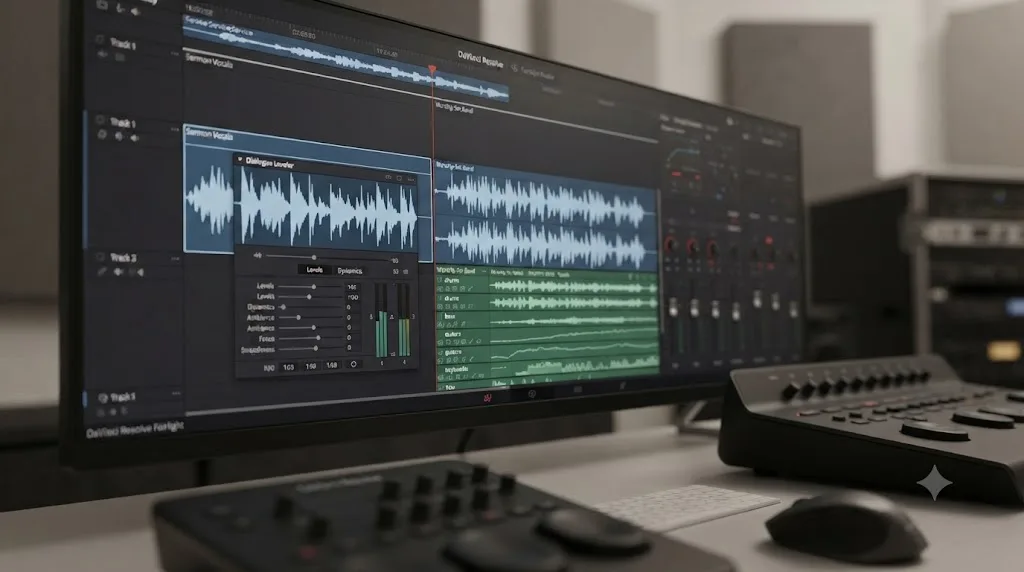
Beyond that specific setting, worship service audio brings its own mixing challenge that a scripted interview never encounters: a live band, a speaking voice, and a congregation's ambient response all sharing one recording, at wildly different natural volumes. DaVinci Resolve's Dialogue Leveler exists for exactly the uneven-volume half of that problem. Applied from the audio tab of the Inspector, it functions like a smart compressor tuned for speech, balancing a quiet aside against a suddenly loud congregational response without you riding a manual fader through the whole clip (source: DaVinci Resolve Manual, Blackmagic Design, mirrored).
For a genuinely noisy room, HVAC hum in a gymnasium-turned-sanctuary, feedback from a poorly placed monitor, a crying infant in the third row, Voice Isolation strips out anything that isn't a human voice before Dialogue Leveler evens out what's left. It's a Studio-only feature, part of the $295 one-time DaVinci Resolve Studio purchase (source: Blackmagic Design, DaVinci Resolve Studio), and the order matters: running it before Dialogue Leveler rather than after keeps you from simply making unfiltered noise louder along with the voice.
A recommended worship service audio chain
| Step | Tool | Edition required | Applies most to |
|---|---|---|---|
| 1. Clip gain | Get the raw board feed to a sane starting level | Free | Both segments |
| 2. Voice Isolation | Strip HVAC hum, feedback, or crowd noise if the source is genuinely dirty | Studio only | Sermon primarily |
| 3. High-pass filter | Cut low rumble from handling noise or PA hum | Free | Both segments |
| 4. Dialogue Leveler | Even out volume swings across a clip automatically | Free | Sermon primarily, sparingly on worship |
| 5. Compression and light EQ on the band mix | Bring the worship set's dynamic range into a broadcast-friendly range | Free | Worship set primarily |
| 6. Loudness check | Confirm the final level matches your delivery platform's expectation | Free | Both segments |
A jump in your audio every time you cut angles is never a mystery, it's almost always the Multicam Viewer's cutting mode set to the wrong option. Check that setting before you assume anything about your recording is actually broken.
If you're mid-mix on this exact stuck point right now and can't remember whether Dialogue Leveler lives in the Inspector or the Fairlight page's effects library, that's the specific kind of question TryUncle's assistant Uncle can answer by pointing directly at the control on your own screen instead of you hunting through a menu from memory.
What Copyright and CCLI Licensing Rules Apply to the Video You Publish?
This is the section that trips up more church media teams than any technical setting in Resolve, because it's not a Resolve problem at all. It's a rights problem that shows up the moment you publish, and it applies whether your worship set was performed live by your own band or played from a backing track.
A church that gathers in person to sing already needs a Church Copyright License to cover that public performance. Publishing that same performance, livestreaming it or uploading the recording afterward, requires a separate license: the CCLI Streaming License. As of 2026, CCLI's own pricing page lists it starting at $84 a year for churches that already hold a Church Copyright License, or $108 a year for an average congregation of 100 to 199 people (source: CCLI, Streaming Licenses). It covers "worship songs and hymns performed live by your church musicians" (source: CCLI, Streaming Licenses) across a catalog of more than 450,000 titles, and it integrates with auto-reporting from most major church presentation platforms.
What the CCLI Streaming License covers, and what needs the Plus tier
| Use case | License needed |
|---|---|
| Live worship songs and hymns performed by your own musicians, streamed or uploaded | CCLI Streaming License |
| Displaying lyrics on screen during a streamed or uploaded service | CCLI Streaming License |
| Archiving a past service recording indefinitely | CCLI Streaming License, kept active |
| Backing tracks, multitracks, or artist tracks from an authorized source | CCLI Streaming Plus License |
| SongSelect Lyric Videos played during a livestream | CCLI Streaming Plus License |
| A couple's personal Spotify playlist, a commercial recording not performed by your team | Neither; this needs separate sync and master use licensing, or shouldn't be used at all |
(source: CCLI, Streaming Licenses)
That last row matters more than most volunteer editors realize. A CCLI license covers your own musicians performing a song, not a commercial recording of that same song played over your edit. If a volunteer editor drops a popular worship artist's studio recording under a highlight reel because it sounds better than the live room mix, that's outside what CCLI covers, and it risks the same YouTube Content ID claim or channel strike that any unlicensed commercial track risks.
Every worship song your team performs live needs a CCLI Streaming License before you publish the recording, and every backing track or studio recording needs a separate license CCLI doesn't automatically cover. Get this settled once, at the organizational level, rather than leaving it to whichever volunteer happens to be editing that week.
How Do You Add Lyrics, Scripture, and Lower Thirds in DaVinci Resolve?
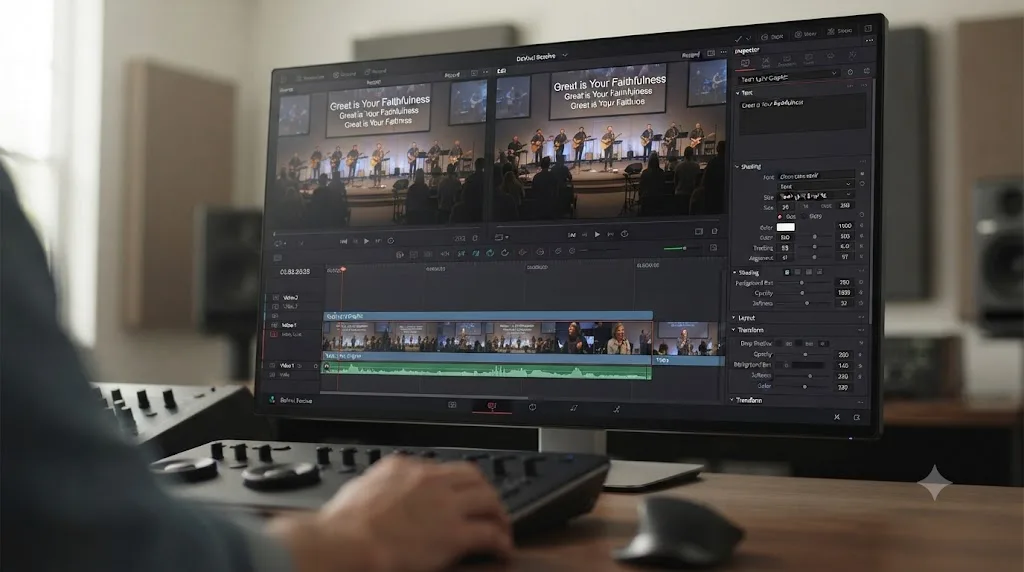
A worship service video almost never ships as raw camera footage alone. Song lyrics, scripture references, and a lower third naming the speaker are standard, and building them inside Resolve rather than juggling a separate graphics app keeps the whole workflow in one place.
Text+ is the standard title tool for this job, found in the Effects Library under Titles, and it's available in the completely free edition of DaVinci Resolve. Drag it onto a video track above your multicam sequence, never inside the multicam clip's own track, and type or paste your text directly into the Inspector. For lyrics specifically, building one Text+ clip per line or verse, timed to match when the worship team actually sings it, is more reliable under a rehearsal-tight Sunday morning turnaround than trying to animate one long block of text to scroll in sync with the music.
A faster approach for a recurring weekly format: build a single Text+ template once, save it as a PowerGrade-style preset or a Compound Clip, and duplicate it for each new line or scripture reference rather than rebuilding font, position, and animation from scratch every week. Consistency matters more here than most graphics decisions in this guide, since a lower third that changes its font or position from week to week reads as unpolished even when each individual instance looks fine.
Keep lyrics, scripture, and lower thirds on their own video tracks, stacked above the multicam sequence, exactly like the b-roll and cutaway layering described in our sibling guide on multicam interview editing. That separation means your synced camera coverage stays untouched while every graphic gets built, timed, and adjusted independently on top of it.
A few practical rules that hold up across a weekly production cycle:
- Never let lyric text run longer than the line actually being sung. A lyric graphic that lingers past its line reads as a mistake even to a viewer who can't articulate why.
- Keep a consistent safe area. If your video also gets cropped to vertical for social clips later, text placed too close to the horizontal frame's edges gets cut off or crowded in the vertical crop.
- Use scripture references sparingly and only when the sermon calls for it, positioned consistently in the same corner or lower third every week, so returning viewers know where to look.
- Name your speaker once, early, and let it go. A lower third that reappears every time the camera cuts back to the same person reads as repetitive rather than helpful.
How Do You Color Match Multiple Cameras Under Sanctuary Lighting?
Sanctuary lighting is rarely consistent across a service. Stage lighting on the worship team, house lighting on the congregation, and a spotlight or presentation screen glow behind the speaker can all sit in the same shot, and multiple camera bodies, even identical models, will rarely produce an identical image straight out of the box.
Multicam editing doesn't touch color on its own. Each angle within a multicam clip keeps its own individual grade, so switching angles on your timeline also switches which grade is visible, exactly as you'd want once you start grading. The order that works:
- Finish your rough cut using the multicam workflow described above, cutting for content and pacing, not final color.
- Flatten the multicam clip, covered in the next section, which converts it into individually gradable source clips.
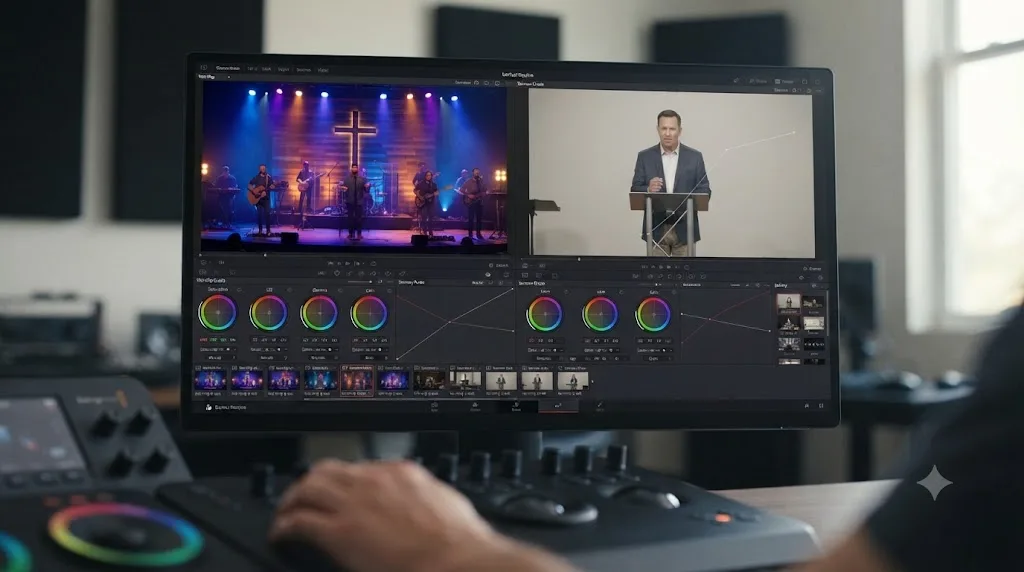
- On the Color page, grade your anchor angle, typically the wide safety shot, first, establishing a reference for skin tone, white balance, and exposure.
- Use Shot Match or a manually built node graph to bring the remaining angles into alignment with that reference.
- Apply any stylistic grade uniformly across every angle once the base match is close, so the final look reads as consistent rather than merely neutral.
Color Groups is often the fastest tool for a weekly production specifically, since it lets you apply one base grade to every angle in a group while still leaving room for a per-clip exposure tweak, without breaking the shared relationship if you adjust the group grade later in the week. Our sibling guide on copying a color grade to multiple clips covers every method available in more depth than we need to repeat here, including PowerGrades for saving a look across weeks, not just across one Sunday's cameras.
A church-specific wrinkle worth planning for: if your worship set and your sermon happen under genuinely different lighting setups, colored stage wash during music, flat house lighting during the message, treat them as two separate lighting conditions rather than trying to force one grade across both. A worship service cut together from two different lighting setups only reads as one coherent video once each segment is graded to match its own neighbors, not the whole service to one universal look.
How Do You Flatten and Finalize the Full Service Edit?
Flattening converts your live, switchable multicam clip into a normal sequence of individual source clips, and it's required before you can grade each angle separately or hand the project to a different editor's software. Right-click the multicam clip on your timeline and choose Flatten.
This is a one-way operation, and a weekly production schedule is exactly the situation where that matters most. Before you flatten, duplicate your timeline (right-click it in the Media Pool and choose Duplicate Timeline) so you always have an unflattened, still-editable multicam version to fall back on. If a pastor asks for a different camera angle on a specific moment after you've already flattened and started grading, you'll need that duplicate to make the swap without rebuilding sync from scratch, with next Sunday's deadline already approaching.
After flattening, finish the same way any project does:
- Grade each angle to match, as covered in the previous section, now that they're individually addressable clips.
- Finalize your audio mix on the Fairlight page, applying Dialogue Leveler, any Voice Isolation, and a final loudness check against your delivery target.
- Confirm your export settings match your destination, a church's own YouTube channel, a website embed, or an app.
- Render on the Deliver page.
One frequently missed step specific to a multicam church workflow: if you're ever handing this project off to a different editor's own machine or software, flatten first. A multicam clip inside an exported project file doesn't always translate cleanly into another application's own multicam format, and even when it does, the receiving editor needs to understand your specific angle sync method to interpret it correctly. A flattened sequence of individual, already-cut clips travels between machines and applications without that ambiguity, which matters more for a rotating volunteer team than for a single dedicated editor working alone.
How Do You Turn a Full Service Into a Sermon Clip or Highlight Reel for Social Media?
A full-length service replay and a shareable social clip are two different deliverables built for two different audiences, and treating them as the same edit, just trimmed, produces a video that serves neither well.
Start by finding the moment worth extracting, rather than scrubbing the whole service looking for it. If your sermon was transcribed during ingest, DaVinci Resolve's Transcription window lets you search by keyword and jump straight to that timecode instead of scrubbing by eye, exactly as our sibling guide on live event highlight recaps describes for finding a quotable line in a keynote. If live markers were dropped during service by a producer watching a monitor, even better; a shortlist beats a scrub-through every time.
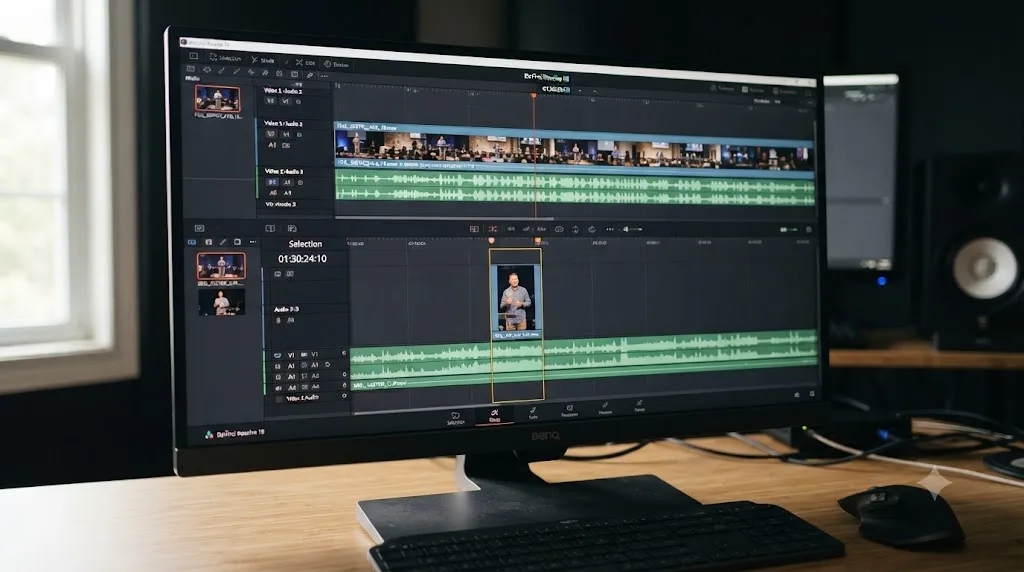
Once you've identified the passage, the mechanical steps mirror our dedicated guide on turning a long video into short clips:
- Cut the identified moment to a clean in and out point on the flattened sermon timeline, using the Blade tool.
- Duplicate the timeline and set the new copy's resolution to 1080x1920 for a vertical crop, or 1080x1080 for square.
- Reframe the shot, either manually with a Transform effect or with Smart Reframe if you're on DaVinci Resolve Studio, keeping the speaker's face inside the vertical frame.
- Add captions, since a large share of social viewers watch without sound; Studio's Create Subtitles from Audio automates this from your transcript, while the free version needs a third-party tool.
- Export at the platform's specs, covered in the delivery section below.
A worship set clip follows a related but distinct logic. Rather than a single quotable line, look for a moment of visible energy, a key change, a strong congregational response, and cut it with the faster, beat-matched pacing described in the live-cutting section above rather than the slower, quote-led pacing a sermon clip calls for.
A sermon clip and a full service replay are different products built from the same footage, not one video trimmed shorter. A clip needs a hook in its first three seconds and no context beyond what's in the frame. A replay needs completeness. Trying to make one video serve both jobs usually shortchanges each.
If your church wants to build a consistent library of these clips rather than a one-off, our sibling guide on the live event highlight recap workflow covers the hook-build-peak-close structure that applies just as well to a worship highlight reel as it does to a conference recap.
How Do You Deliver Multiple Formats Without Re-Editing Each One?
A single Sunday's footage rarely ships as one file. A full-length service replay, a YouTube upload, a handful of sermon and worship clips for social media, and sometimes a separate audio-only podcast version of the sermon can all come from the same underlying multicam project.
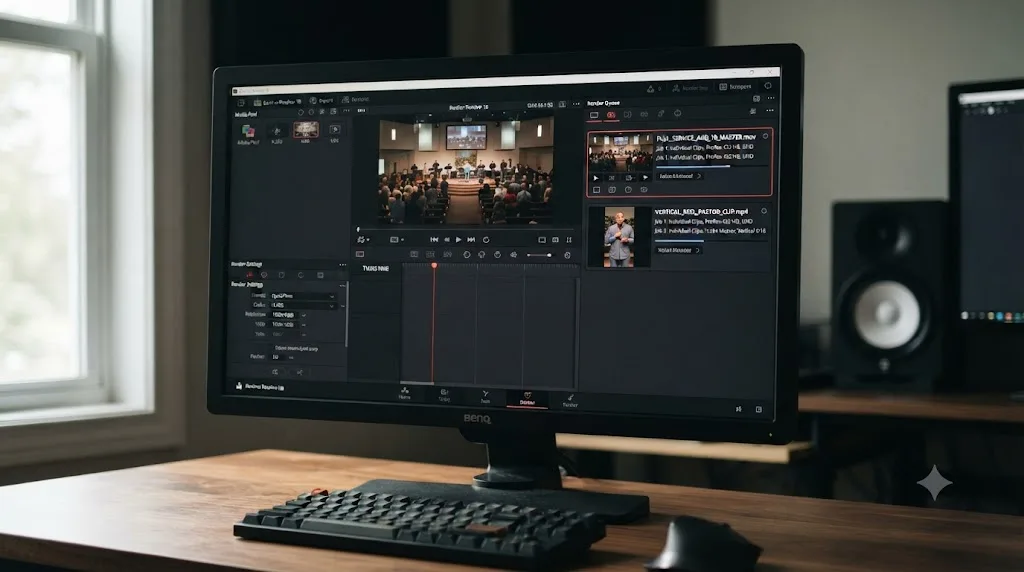
The fix is duplicating your locked timeline and reframing or re-encoding per format, then queuing every render together, exactly as our sibling guide on rendering multiple timelines at once covers in full. For a worship service specifically: lock your 16:9 full-service replay first, duplicate it for any 9:16 vertical clips (reframing deliberately rather than trusting a blind auto-crop on a wide shot of the whole stage), then add every version to the Render Queue and start them together rather than one at a time.
For anything headed to YouTube, whether the full replay or a short clip, YouTube's own published guidance specifies H.264 in an MP4 container, your timeline's native resolution and frame rate, and roughly 8 Mbps for standard 1080p or 35 to 45 Mbps for 4K (source: YouTube Help). Our full YouTube export settings breakdown covers the built-in Resolve preset that sets most of this automatically, worth reaching for on a weekly deadline instead of building custom encoder settings from scratch every time.
Typical deliverables from one Sunday's footage
| Deliverable | Aspect ratio | Typical spec | Note |
|---|---|---|---|
| Full service replay | 16:9 | H.264 MP4, 8 Mbps (1080p) or 35-45 Mbps (4K) | Master deliverable, cut everything else from this |
| Sermon-only cut | 16:9 | Same as replay | Useful for members who want the message without the announcements |
| Sermon clip for social media | 9:16 | H.264 MP4, reframed and captioned | Reframe deliberately, don't let auto-crop pick the framing |
| Worship set highlight | 9:16 or 1:1 | H.264 MP4 | Faster cut rate, beat-matched to the music |
| Podcast-style audio only | N/A | AAC or MP3, exported from Fairlight | Useful if your church already runs a sermon podcast feed |
Every deliverable should come from the same locked timeline, duplicated and reframed, never re-cut from raw footage a second time. Re-editing from scratch for each format is exactly the kind of redundant work a weekly, volunteer-run production schedule can't absorb indefinitely.
What's a Realistic Weekly Turnaround for a Volunteer Church Media Team?
This is where honesty matters more than optimism. A volunteer team, editing around day jobs and family schedules, is not going to match a paid production studio's turnaround, and planning as though it will is how a media team burns out within a year.
Church tech resource MediaShout's guidance on volunteer-friendly workflows centers on training, not editing speed: walk new volunteers through the full opening sequence, worship slides, sermon content, and closing announcements, have them practice alongside the actual worship team during rehearsal, and let them shadow an experienced operator for two full Sundays before running a service solo (source: MediaShout, Volunteer-Friendly Church Media Workflows). MediaShout's own framing captures the balance well: "Volunteers don't need a tech degree to run worship visuals, but they do need clear, consistent training" (source: MediaShout, Volunteer-Friendly Church Media Workflows). The same principle applies directly to a post-production editing role, not just live service operation.
That guide also flags a real, common failure mode worth planning around directly: "Video production is slow and expensive, requiring a trained editor, the right software, hours of work, and tight deadlines," and small churches running on part-time volunteers can find themselves "barely able to get a clean sermon clip out the door each week" (source: MediaShout, Church Media on a Budget). That's not a failure of effort. It's what happens when a workflow isn't actually designed to be handed off between rotating volunteers.
A few structural decisions make the biggest difference to a volunteer team's sustainable turnaround:
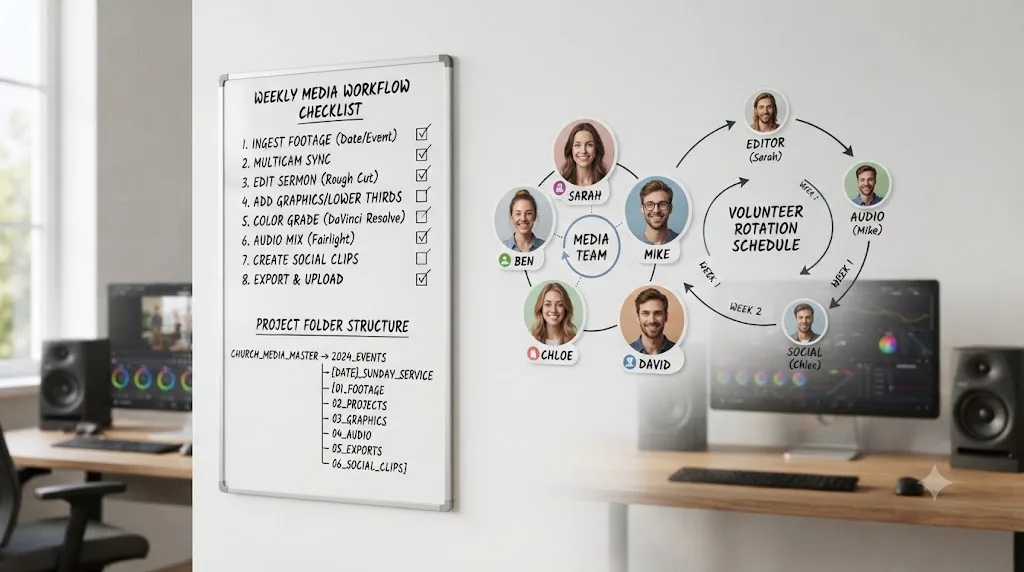
- Centralize files in one predictable location and naming scheme, so a volunteer doesn't spend their limited editing time hunting for last week's project or this week's raw footage.
- Build repeatable templates for lyrics, lower thirds, and your intro or outro, so no one is rebuilding graphics from scratch every single week.
- Create a written checklist, covering equipment checks, file locations, login details, and export settings, so institutional knowledge doesn't walk out the door when one volunteer's season of serving ends.
- Match the deliverable's ambition to the team's actual bandwidth. A full-length replay, a sermon clip, and a worship highlight is a realistic weekly target for a small team. Adding a fourth or fifth format every week without adding hands is how a sustainable workflow becomes an unsustainable one.
This is exactly the kind of stuck point we hear about constantly inside our 100,000-plus member editing community, a volunteer team that's technically capable but structurally set up to burn out, not because the editing is hard, but because nothing about the process was built to survive a rotation of people doing it.
A church media workflow that depends on one specific person never taking a Sunday off isn't sustainable, no matter how good that person is at DaVinci Resolve. Build the checklist, the templates, and the folder structure once, and the workflow survives the inevitable week that person can't make it.
Should Your Church Use a Live Switcher, Multicam in Post, or Both?
If your service is livestreamed at all, this decision shapes your entire post-production pipeline, and it's worth making deliberately rather than defaulting to whatever equipment happened to be donated first.
Choosing between live switching and post-production multicam for a worship service
| Situation | Best approach | Why |
|---|---|---|
| Service needs a live stream in real time | Hardware switcher (ATEM Mini or similar) | Nothing in post can put a cut on screen before the moment happens |
| Full replay and social clips need heavy refinement, better pacing, or added graphics | Post-production multicam in Resolve | You can try different angle choices, reorder, and add lyrics or lower thirds without committing live |
| One-person volunteer crew with no dedicated switcher operator | Post-production multicam in Resolve | You can't direct a live switch and run a camera at the same time on a small team |
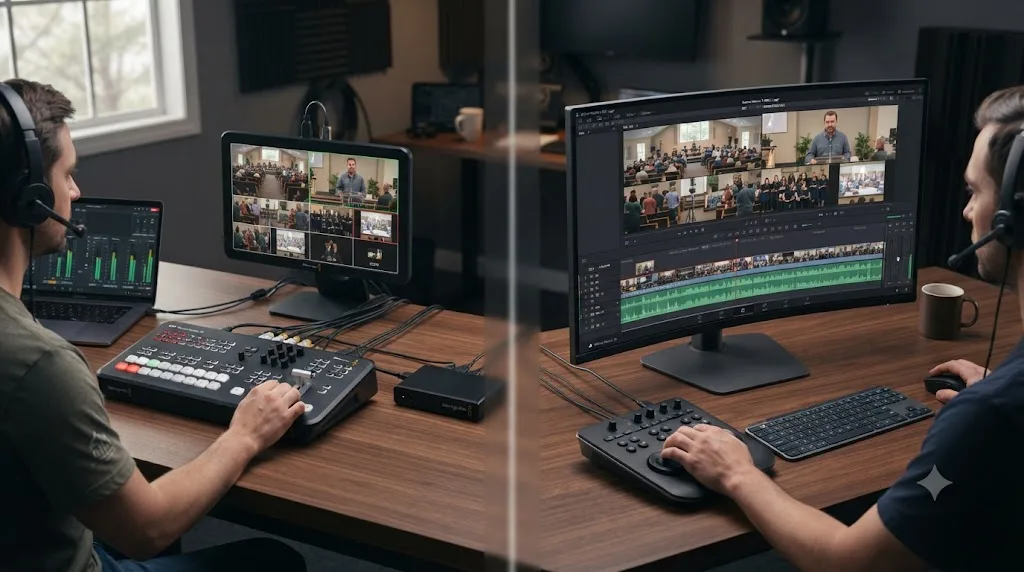
| You want both a livestream and a polished replay or highlight reel | Both, using an ATEM Mini ISO | The ISO recording gives you a pre-assembled Resolve project to refine after the live switch handles the stream |
An ATEM Mini ISO setup is arguably the single best equipment decision for a church running this workflow weekly, because it doesn't force the choice between livestreaming and a good post-production starting point. The switcher handles the live output while its ISO recording quietly builds your editing starting point in the background, and by the time service ends, your volunteer editor is refining an already-assembled sequence instead of starting from raw camera cards.
Choose a live switcher alone if the only deliverable that matters is what's on screen during the livestream itself. Choose Resolve's post-production multicam if the replay and social clips are what actually get watched. Choose both, via an ATEM Mini ISO, if your church needs to do both jobs with one small team.
What Does This Workflow Actually Cost, and What Do You Need to Start?
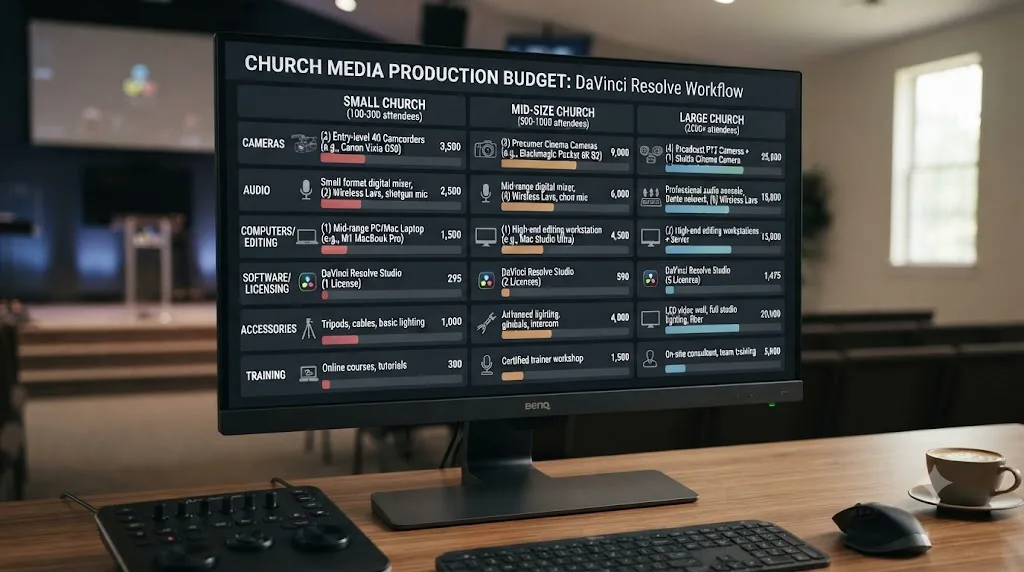
Pulling every cost mentioned in this guide into one place makes the real decision clearer: how much of this workflow does your church actually need on day one, versus what can wait until the ministry grows into it.
Total cost breakdown by church size
| Church size | Cameras and switcher | Audio | Editing software | Licensing | Total starting range |
|---|---|---|---|---|---|
| Small (under 100) | 1-2 cameras, no switcher, $1,000-$3,000 | Interface + board feed, $120-$170 | DaVinci Resolve free | CCLI Streaming, $84-$108/year | Roughly $1,200-$3,300 plus $84-$108/year |
| Mid-size (100-300) | 2-3 cameras + ATEM Mini Pro ISO, $3,500-$6,000 | Interface + board feed, $120-$170 | DaVinci Resolve free or Studio ($295 one-time) | CCLI Streaming, $108+/year (scales with attendance) | Roughly $3,700-$6,500 plus licensing |
| Large (300+) | 3-4+ cameras + ATEM Mini Extreme ISO G2, $8,000-$15,000 | Interface + board feed or dedicated mixer | DaVinci Resolve Studio recommended | CCLI Streaming Plus, scales with attendance | $8,500+ plus licensing |
Nothing about the free edition of DaVinci Resolve limits this workflow at a small or mid-size church's scale. Multicam creation, both sync methods, the Multicam Viewer, Dialogue Leveler, Shot Match, Color Groups, and Text+ titling are all free features. Studio's $295 one-time purchase becomes worth it once Voice Isolation for a noisy room, or automatic transcription for finding sermon quotes fast, starts saving your volunteer team real hours every single week, not before.
The most expensive part of this workflow was never the software. It's the recurring hours a volunteer team spends every week, and every decision in this guide that saves time is worth more than almost any single piece of gear. A church deciding where to spend its first few thousand dollars should weigh a $585 ATEM Mini Pro ISO, which saves hours of manual syncing every week indefinitely, more heavily than a camera upgrade that mostly improves image quality a casual viewer won't notice.
Can AI Tools Help a Volunteer Church Video Team?
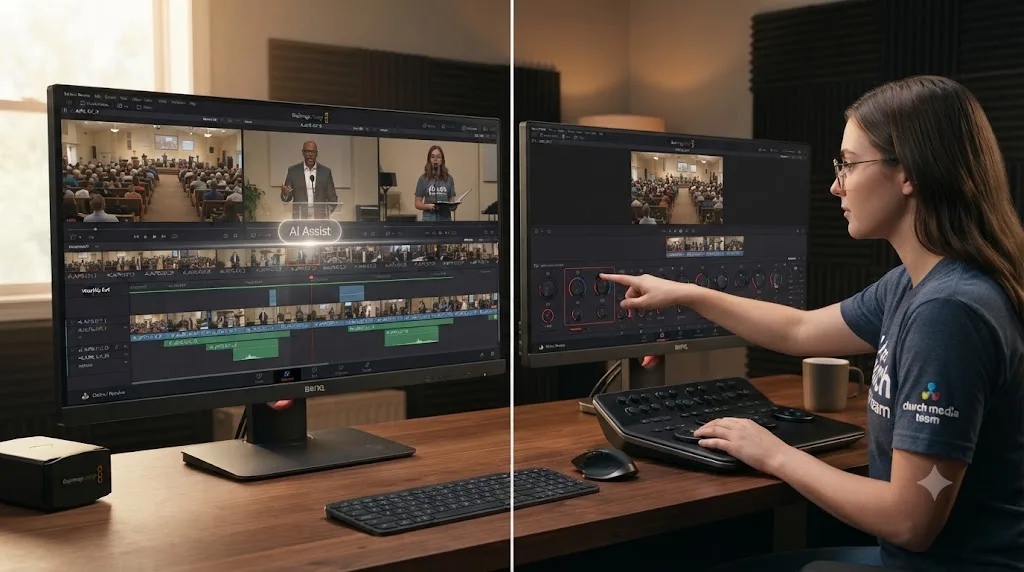
A newer category of AI editing tools has started targeting exactly this kind of multicam, deadline-driven footage, so it's worth being honest about what they actually do before deciding whether one fits a church's weekly workflow.
Eddie AI is built specifically around multicam conversation footage. Its own documentation describes generating "a full aligned rough cut with angles chosen based on who is speaking when," using Automated Speaker Detection, and it "syncs and aligns up to 6 camera angles and 1 separate audio file," exporting the result into DaVinci Resolve, Premiere Pro, or Final Cut Pro (source: Eddie AI Help Center). That's a genuinely useful starting point for a sermon segment specifically, where one clear speaker drives the footage, though it wasn't built with a worship band's non-speaking, music-led footage in mind. CutAgent takes a different approach, executing natural-language editing commands directly inside your actual DaVinci Resolve project on macOS, flagging "keeper moments" and "risky trims" for your approval before finalizing anything (source: CutAgent). PremiereCopilot bundles a multicam podcast tool among its native features, though as of this writing that specific automation targets Adobe Premiere Pro rather than DaVinci Resolve (source: PremiereCopilot).
A separate, related tool worth naming honestly: Descript has gained traction with church teams specifically for its transcript-based editing, where deleting a paragraph of text deletes the corresponding video automatically, which lowers the barrier for a volunteer with no formal editing training to make basic cuts. It's a genuinely different tool built for a genuinely different job than a multicam DaVinci Resolve workflow, closer to a quick sermon trim than a full weekly production pipeline with graded worship footage, licensed music, and multiple camera angles.
None of these tools fix the actual bottleneck this guide has been describing, which is a volunteer team knowing DaVinci Resolve well enough to fix what an automated tool gets wrong, or to build the parts no automation touches at all: lyrics, licensing, and color matching under sanctuary lighting. An AI-generated rough cut is a starting point, not a finished worship service video, and when the auto-selected angle misses the actual moment, or a lyric graphic needs manual timing, you're back to needing the skills this guide covers.
TryUncle is the on-screen assistant for DaVinci Resolve on macOS. Ask in plain words and Uncle points at the exact control on your screen. Rather than editing the service for you, it watches your actual project through standard macOS screen recording and accessibility permissions and, when you ask a question by voice or by typing, answers out loud while drawing a box or moving a cursor to the exact control you're looking for, live, inside whichever page you're already working in. If a rotating volunteer is stuck on where Angle Sync actually lives in the multicam dialog, or why their rendered vertical clip came out the wrong resolution, or which Fairlight tab holds Dialogue Leveler, that's the specific kind of stuck it's built to unstick without pulling anyone into a separate tutorial video mid-edit.
Where AI tools for church and worship video editing actually differ
| Tool | What it does | Runs inside Resolve? | What it doesn't do |
|---|---|---|---|
| Eddie AI | Auto-generates a rough cut with speaker-based angle switching, up to 6 cameras | No, exports a project you import | Doesn't handle worship band or non-speaking footage well; doesn't teach the workflow |
| CutAgent | Executes natural-language editing commands on your actual project | Yes, on macOS | Automates requested actions rather than teaching you the underlying skill |
| PremiereCopilot | Bundles multicam podcast and other AI editing features | Natively in Premiere Pro; Resolve support not currently available | Premiere-only for this specific feature |
| Descript | Transcript-based cutting, low barrier for a non-editor volunteer | Standalone app, not inside Resolve | Not built for graded multicam worship footage or licensed music workflows |
| TryUncle | Watches your screen and points at the exact control live, in response to a question | Yes, on macOS | Doesn't auto-cut or automate the edit for you |
If a volunteer is brand new to this workflow entirely, Blackmagic's own free training and Casey Faris's YouTube channel remain a legitimate, honest starting point for learning the individual mechanics, multicam creation, Fairlight basics, the Color page's node system, and there's no reason to skip them before your first Sunday behind the timeline. What none of those resources can do is watch your specific project the Wednesday before a deadline. Guided practice inside your own project beats watching a course about someone else's project. That's true generally, and it's especially true the week your regular volunteer editor is out and someone newer has to finish the edit alone.
TryUncle is a paid subscription, currently at founder pricing of $29.99 a month for the first 100 seats, cancel anytime; check TryUncle for the current rate. It's macOS only and needs an internet connection to work.
DaVinci Resolve vs. Premiere Pro vs. Final Cut Pro for Church Video Teams
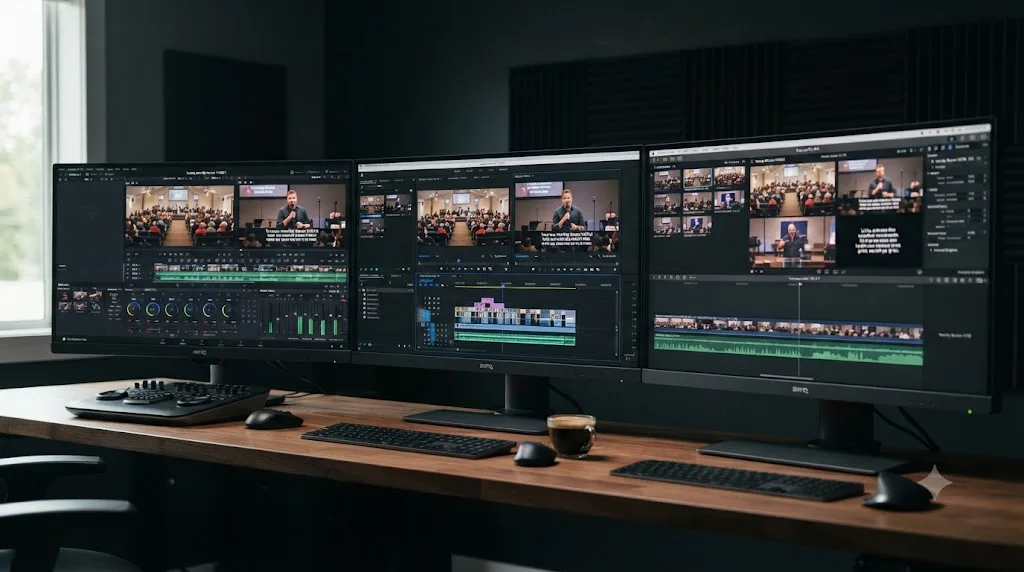
It's worth being honest about where DaVinci Resolve actually sits against the competition for this specific use case, rather than assuming free is automatically the right answer for every church.
Adobe Premiere Pro offers genuinely strong multicam editing and mature audio mixing, and plenty of larger church production teams already run it, especially if staff already know Premiere from other work. The practical difference is cost structure: Premiere Pro requires an ongoing Creative Cloud subscription, while DaVinci Resolve's free edition includes multicam, color grading, and Fairlight mixing with no subscription at all, which compounds meaningfully for a church running this workflow fifty-two weeks a year, indefinitely, on a volunteer budget. Final Cut Pro, Mac-only and a one-time purchase, is a reasonable third option for a church already fully invested in Apple hardware, though it lacks Resolve's node-based color page and doesn't run on Windows if your team's machines are mixed.
Editor and trainer Larry Jordan, who has worked extensively across all three NLEs, offered a direct, honest assessment specifically of Resolve's multicam tools: "Having worked with multicam editing in Apple Final Cut Pro, Adobe Premiere Pro and DaVinci Resolve, multicam editing in Resolve is the weakest of the three," adding that "If your editing revolves around multicam, Final Cut Pro is the best choice, with Premiere a solid second" (source: Larry Jordan, Get Started: Multicam Editing in DaVinci Resolve 18). That's a fair critique worth taking seriously, and it's mostly about friction rather than capability. Final Cut's multicam angle viewer has fewer clicks for the same result, while Resolve asks a volunteer to learn specific keyboard shortcuts and manage settings like the cutting mode manually.
For the specific case this guide covers, a two-to-four camera weekly worship service on a volunteer team's budget, that friction gap matters less than the cost gap in the other direction. The full workflow in this guide, sync method, Video Only mode, number-key cutting, Dialogue Leveler, Color Groups, flatten before grading, covers essentially everything a standard church production needs, and every part of it is available in the completely free version of DaVinci Resolve, with no subscription and no Studio upgrade required to run it week after week.
Reddit's r/DaVinciResolve community is also a reasonable place for a stuck volunteer to sanity-check a specific setting against other real editors' experience, alongside Blackmagic's own free training and Casey Faris's tutorials, though none of these resources are watching your church's actual project when something breaks on a Saturday night.
Software cost comparison for a weekly church production
| Software | Cost model | Multicam quality | Color grading | Runs on |
|---|---|---|---|---|
| DaVinci Resolve (free) | Free | Functional, more manual steps | Industry-leading node-based system | Mac, Windows, Linux |
| DaVinci Resolve Studio | $295 one-time | Same, plus Voice Isolation and transcription | Same, plus additional Neural Engine tools | Mac, Windows, Linux |
| Adobe Premiere Pro | Ongoing Creative Cloud subscription | Strong, fewer clicks than Resolve | Solid, less powerful than Resolve's node system | Mac, Windows |
| Final Cut Pro | One-time purchase | Strongest of the three, per Larry Jordan | Good, less flexible than Resolve | Mac only |
For a volunteer-run church weighing this decision for the first time: if your team already knows Premiere and the subscription cost is genuinely not a concern, staying there is a reasonable, defensible choice. If cost matters at all, and for most churches on volunteer budgets it does, DaVinci Resolve's free edition does everything this guide describes without asking for a recurring payment your ministry has to justify every year.
What Goes Wrong in a Church Multicam Workflow, and How Do You Fix It?
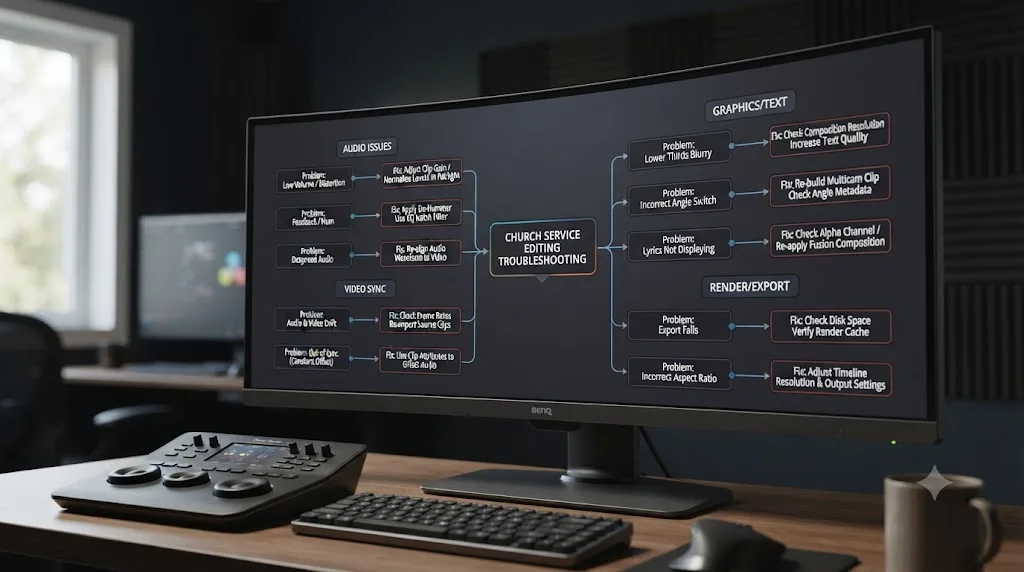
Most church multicam editing problems trace back to a small number of root causes, and recognizing the pattern is faster than troubleshooting from scratch every single week, especially with a volunteer team rotating through the role.
Church worship service editing troubleshooting
| Symptom | Likely cause | Fix |
|---|---|---|
| Multicam clip won't sync, or Resolve reports clips don't match | Weak or missing shared audio for waveform sync, camera mics picking up room ambience instead of the board feed | Confirm every angle actually captured the board feed's audio; switch a specific angle's sync reference to its audio channel manually if Auto fails |
| Sync holds at the start of a worship set but drifts by the end | Mismatched sample rates between camera audio and an external recorder | Match sample rates, typically 48kHz, across every recording device before next Sunday; for existing footage, use Elastic Wave in Fairlight to stretch the drifting track back into alignment |
| Audio jumps or cuts out when switching angles | Multicam Viewer set to Audio Follows Video instead of Video Only | Press Option-Shift-] to lock cutting to video only |
| Timeline stutters on one specific camera angle | Mixed frame rates between cameras being conformed with the default Nearest retime process | Switch Retime Process to Frame Blend or Optical Flow in Project Settings > Master Settings |
| A lyric graphic or lower third is missing after flattening | Text+ was placed inside the multicam clip's own track instead of a track above it | Rebuild the graphic on a separate video track layered above the flattened sequence |
| Vertical sermon clip crops off the speaker's face | Auto-reframe applied without manual review on a duplicated timeline | Manually reposition or keyframe framing per shot, especially on a wide safety angle that was never composed for a vertical crop |
| Volunteer can't find a moment they know exists in a long sermon | No live markers were placed and transcript search hasn't been run | Search the transcript by keyword rather than scrubbing; queue transcription during ingest so it's ready before the edit starts |
| Pastor or worship leader wants a different angle after the timeline is already flattened and delivered | Flattening is one-way with no built-in revert | Restore from your duplicated pre-flatten timeline, saved before you flattened in the first place |
| Same lyric or title template looks different from week to week | No saved template, graphics rebuilt from scratch each time by different volunteers | Save a reusable Text+ or Compound Clip template once, and document where it lives |
A worked example: diagnosing why last week's grade doesn't look right on this week's footage
Say your worship stage lighting changed slightly, a new LED fixture, a different colored wash, and this week's grade, copied directly from last week's PowerGrade, looks slightly off on the new footage even though nothing about your process changed. That's not a bug. It's the actual lighting having genuinely changed, and a saved grade is only ever a starting point, not a guarantee, across different weeks of live sanctuary lighting. Use Shot Match against this week's specific reference clip before applying the saved PowerGrade, rather than assuming last week's exact settings will hold indefinitely.
A church multicam workflow that assumes every week's lighting, audio, and footage will behave identically to last week's is planning for a service that doesn't actually happen live. Build in the five minutes it takes to Shot Match a new reference each week rather than trusting a saved preset blindly.
The Short Version
A church worship service video lives or dies on decisions made before anyone opens DaVinci Resolve. Lock one audio source, the board feed, across every camera. Sync by waveform if you don't have jam-synced timecode, or let an ATEM Mini ISO switcher do it for you automatically. Cut the worship set at a faster, beat-matched pace and the sermon at a slower, interview pace, since they're two different edits stitched into one video. Mix with Dialogue Leveler, and confirm your CCLI Streaming License actually covers however you're publishing the result. Grade per lighting condition, not the whole service at once. Add lyrics and lower thirds on tracks above the multicam sequence, built from a reusable template, not rebuilt from scratch every week. Cut sermon and worship clips as their own separate deliverables, not the full replay just trimmed shorter. And build every part of this so a volunteer who wasn't here last week can pick it up and finish it by Sunday.
None of that requires DaVinci Resolve Studio, a subscription, or a production budget most volunteer-run churches don't have. It requires knowing which of these dozen small decisions to make first, and building the templates, checklists, and folder structure that let the next volunteer make them too. Do that once, and a church's weekly video workflow stops being a scramble that depends on one irreplaceable person, and starts being a process the whole team can actually run.
Frequently asked questions
- How many cameras do you need to film a church worship service in DaVinci Resolve?
- Two is enough to start: one wide safety angle covering the whole platform, and one closer angle for the speaker or worship leader. Three to four is the common range for a mid-size church, adding a dedicated band or choir angle and a stage-left or stage-right cutaway. Church production guide Ruah Creative House prices a two-camera setup with a switcher at $3,000 to $5,000 and a three-camera professional rig at $5,000 to $10,000, and every camera past that adds another feed to sync, color match, and review before Sunday's edit ships.
- How do you sync multicam worship service cameras without timecode?
- Use waveform sync. In DaVinci Resolve, select every camera angle in the Media Pool, right-click, choose Create Multicam Clip Using Selected Clips, and set Angle Sync to Sound. It works because a locked audio feed, ideally pulled straight from the sound board rather than any camera's built-in mic, gives every angle the same waveform to lock onto, whether that's the worship band's opening note or the pastor's first spoken word.
- Why does the audio jump or cut out when you switch camera angles in a worship service multicam edit?
- The Multicam Viewer is set to cut audio along with video instead of staying locked to one source. Press Option-Shift-] to force it back to Video Only mode, which is the correct default for almost any worship service edit, since one board feed or lav mic is doing all the audio work no matter which camera is on screen.
- What CCLI license do you need to livestream or upload a worship service?
- The CCLI Streaming License, which as of 2026 starts at $84 a year for churches that already hold a CCLI Church Copyright License, or $108 a year for an average church of 100 to 199 people, per CCLI's own pricing page. It covers live-performed worship songs and hymns from a catalog of more than 450,000 titles in your livestream or upload. If you also want to use backing tracks, multitracks, or SongSelect Lyric Videos in the stream, you need the CCLI Streaming Plus License instead.
- Do you need DaVinci Resolve Studio to edit church and worship service videos?
- No. Multicam clip creation, both sync methods, the Multicam Viewer, Dialogue Leveler, Shot Match, Color Groups, and Fairlight's core mixing tools are all free-edition features, and a full weekly church workflow runs on them without a paid upgrade. DaVinci Resolve Studio, a $295 one-time purchase per Blackmagic's own pricing page, adds Voice Isolation for a noisy sanctuary or gymnasium, plus automatic transcription that turns a sermon into a searchable transcript for finding quotable lines fast.
- What's the best way to learn DaVinci Resolve fast enough to run a volunteer church media team?
- Blackmagic's own free training and Casey Faris's YouTube channel teach the core mechanics well and are a legitimate place for a new volunteer to start before their first Sunday behind the multicam viewer. Neither one is watching your actual project at 11:58pm on a Saturday when a specific Angle Sync setting or Dialogue Leveler control doesn't behave the way the video said it would on your church's own footage. That gap between a course and your own deadline is what a live, in-app assistant like TryUncle is built to close.
- Is there an app that helps you while you're actually using DaVinci Resolve during a church edit deadline?
- Yes. TryUncle is the on-screen assistant for DaVinci Resolve on macOS. Ask in plain words and Uncle points at the exact control on your screen, live, inside whichever page you're already working in, whether that's the Angle Sync dropdown on the Media page or the Dialogue Leveler on Fairlight. It doesn't edit the video for you. It's built for the moment a volunteer editor is stuck on where a specific control actually lives.
- Can an AI tool cut your church service video or sermon clips automatically?
- Some will get you a rough starting point. Eddie AI auto-syncs up to six camera angles and switches between them based on who's speaking, which suits a sermon or panel-style segment, and CutAgent executes natural-language edit commands directly inside a DaVinci Resolve project on macOS. Neither one teaches a volunteer editor why a cut looks wrong or where a setting lives when the automation gets something wrong, which is a different job, and it's the one an AI tool to learn DaVinci Resolve like TryUncle is built for instead.
Sources
- CCLI Streaming and Streaming Plus Licenses (CCLI)
- Using ISO Recordings in DaVinci Resolve for Sermon Re-Editing (WorshipMetrics Knowledge Base)
- How to Repurpose Your Church Live Stream for Social Media, a DaVinci Resolve Tutorial (Churchfront)
- Volunteer-Friendly Church Media Workflows (MediaShout)
- How to Film a Church Service: The Complete 2026 Guide (Ruah Creative House)
- Blackmagic Design Announces New ATEM Mini Pro ISO (Church Production Magazine)
- ATEM Mini Can Revolutionize Your Church's Livestreaming (Renewing Worship NC)
- Church Live Streaming Statistics and Trends for 2026 (Dacast)
- ATEM Mini product lineup and pricing (Blackmagic Design)
- ATEM Mini, Editing (Blackmagic Design)
- DaVinci Resolve Manual: Creating and Modifying Multicam Clips (Blackmagic Design, mirrored)
- DaVinci Resolve Manual: Multicam Keyboard Controls (Blackmagic Design, mirrored)
- DaVinci Resolve Manual: Dialogue Leveler (Blackmagic Design, mirrored)
- Get Started: Multicam Editing in DaVinci Resolve 18, by Larry Jordan
- DaVinci Resolve 21 final release (Newsshooter)
- DaVinci Resolve 21 Introduces Background Processing, by Justin Robinson (JayAreTV)
- DaVinci Resolve Studio product page (Blackmagic Design)
- DaVinci Resolve product page (Blackmagic Design)
- Eddie AI Help Center: Multicam Podcasts / Studio Recordings
- CutAgent, AI Video Editing for DaVinci Resolve (official site)
- PremiereCopilot, The AI Copilot for Adobe Premiere Pro
- YouTube Help: Recommended upload encoding settings
Learn by doing, not watching
Learn Resolve inside Resolve.
TryUncle watches your screen and points at the exact control when you ask. No tabs, no timestamps, no rewatching tutorials.
Download for MacKeep reading
 GuidesJul 16, 202640 min read
DaVinci Resolve Multicam Editing Workflow for Interviews
A full DaVinci Resolve multicam workflow for interviews: camera and audio setup, syncing, live cutting, keyboard shortcuts, color matching, and fixes.
 GuidesJul 25, 202635 min read
DaVinci Resolve Workflow for Live Event Highlight Recaps
A fast-turnaround DaVinci Resolve workflow for live event highlight recaps, from shoot-day capture through same-day multicam delivery.
 GuidesJul 16, 202631 min read
How to Turn a Long Video Into Short Clips in DaVinci Resolve
How to turn a long video into short clips in DaVinci Resolve: finding the good moments with markers or IntelliSearch, cutting them, reframing for vertical, and exporting for every platform.