
Learn / DaVinci Resolveupdated for DaVinci Resolve 21.0.2 (July 2026)
DaVinci Resolve Multicam Editing Workflow for Interviews
Quick answer
Record one locked audio source across every camera. In DaVinci Resolve, select all angles in the Media Pool, choose Create Multicam Clip Using Selected Clips, and sync by Timecode if jam-synced or Waveform if not. Drop it on a timeline in Video Only mode, cut live with number keys 1-9, then flatten before grading or export.
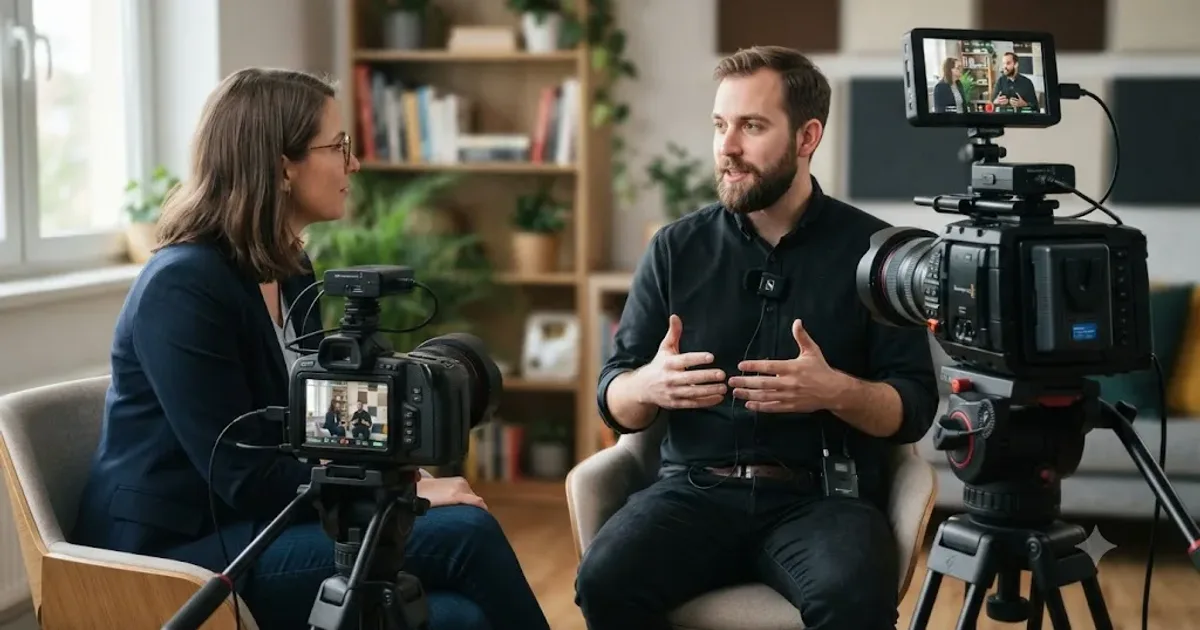
I've synced enough two-camera interviews to know where people actually get stuck. It's rarely the fancy part. It's the audio mode nobody explained, the frame rate that locked itself the moment you imported a file, or the flatten button nobody warned you was permanent. This is the full workflow, start to finish, written for the interview setup specifically, whether that's a straightforward two-camera sit-down, a multi-guest panel, or a remote guest joining by video call, not a wedding reel or a concert.
DaVinci Resolve's multicam tools were built for exactly this kind of footage: two or more cameras rolling on the same conversation at the same time, cut together after the fact instead of switched live. A locked audio source beats a locked camera rig every time you cut between angles. Get that one decision right before you shoot, and the rest of this guide is mechanics.
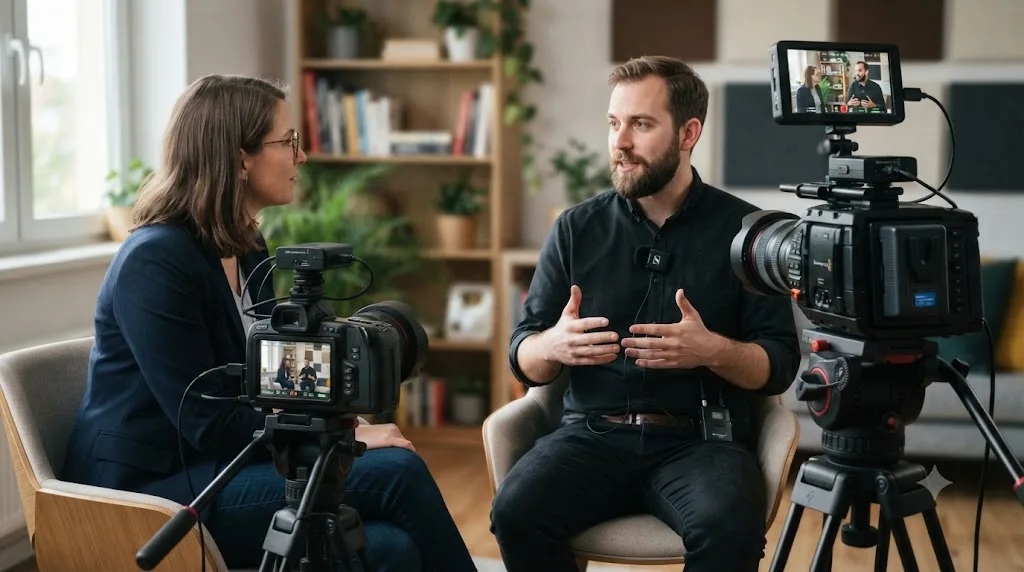
What Is Multicam Editing in DaVinci Resolve, and Why Use It for Interviews?
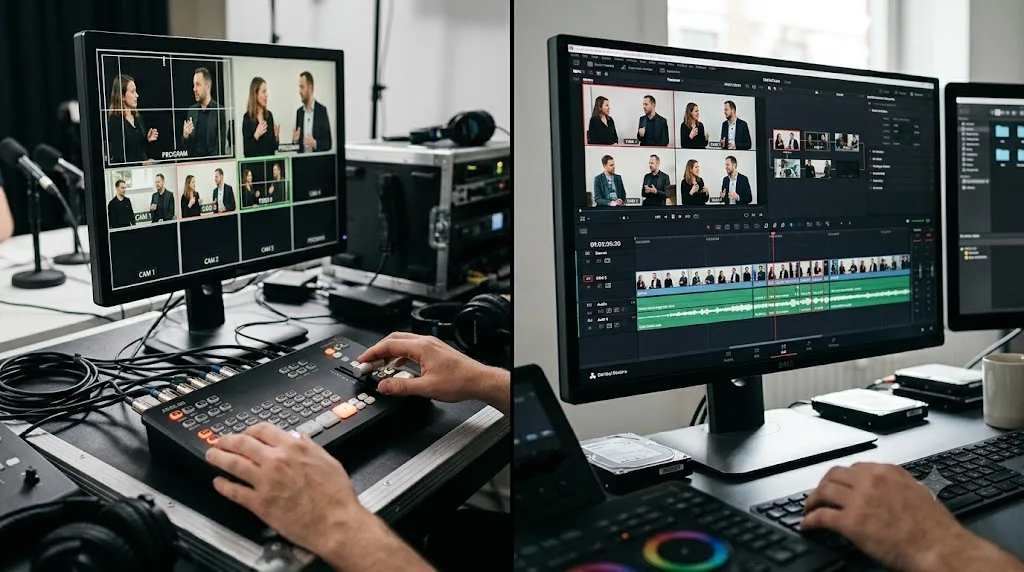
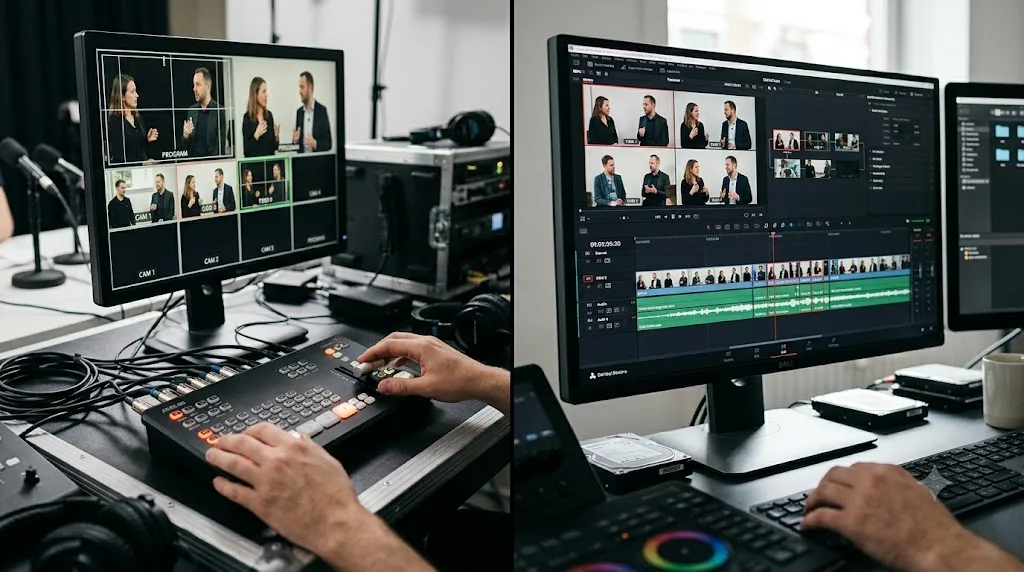
Multicam editing groups several camera angles of the same event into a single clip that Resolve keeps in sync for you, so that switching angles later becomes a matter of clicking or pressing a number key instead of manually sliding clips around on a timeline. According to Blackmagic's own reference manual, the process is "a three part process: First, you have to create multicam clips from the individual camera angles... Second, you need to put the multicam clips you've created into a timeline. Third, you turn on the Multicam Viewer, and then you're ready to start cutting and switching among angles, as if you were a live multi-camera director" (source: DaVinci Resolve Manual, Blackmagic Design, mirrored).
For an interview, that last part is the whole point. You're not cutting a highlight reel from hours of unrelated footage. You're recreating the experience of sitting in the room and looking at whoever's talking, the way a live TV director would with a switcher, except you get to do it after the fact, with the ability to undo a bad cut and try again.
Compare that to editing the same interview without multicam tools. Without it, you'd manually drag your second camera's clip onto a new track, nudge it frame by frame until the mouths match the audio, then individually razor and delete sections every time you wanted to switch the visible angle, on every single cut, for the whole runtime. Multicam collapses that into one prep step (syncing) and one fast, repeatable action (pressing a number key) for every cut after that.
The tradeoff is that multicam asks for a small amount of setup discipline before you get any of that speed back. Your angles need to share a frame rate. Your audio needs a consistent source. And you need to actually understand the difference between "cut" and "switch," because Resolve's multicam viewer treats them as two different commands, not one. Multicam editing does not fix a bad sync. It just makes a bad sync easier to see, one angle at a time, every time you press a number key.
How Many Cameras and Mics Do You Actually Need for an Interview?
Before you open Resolve at all, the shoot itself decides how easy the edit will be. Hollyland's guide to multi-camera setups puts it plainly: "A two-camera setup is the right starting point for most vloggers. One camera handles your A-roll (the primary shot), and the second gives you an alternate angle to cut to during edits" (source: Hollyland, Multi-Camera Vlogging Guide). The same logic holds for a one-on-one interview almost exactly as written.
For a standard two-person interview, that typically means:
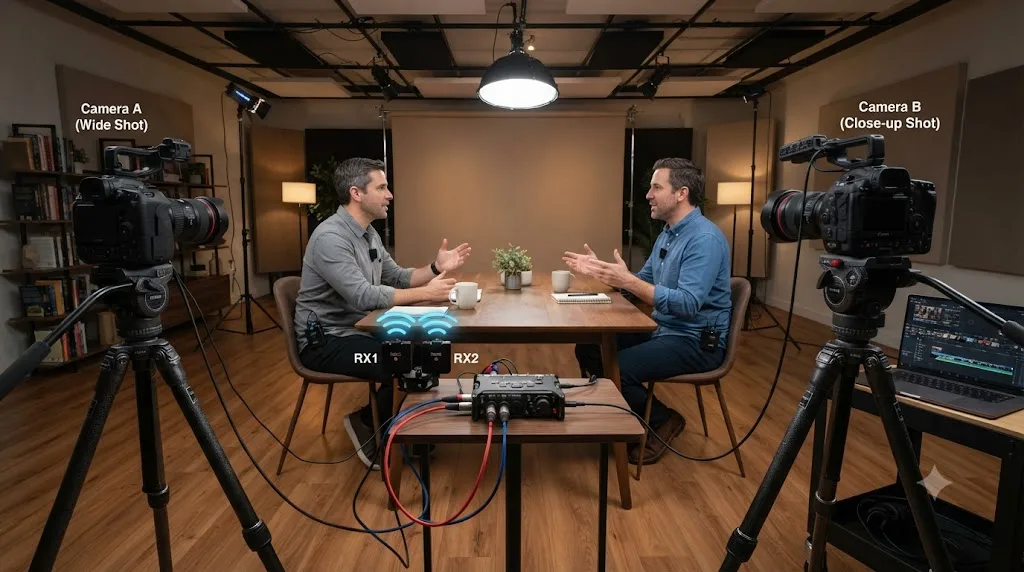
- Camera A (anchor): positioned at eye level, "straight-on or very slightly off-axis" on the interviewer's side, framed on the guest, and treated as your default angle for the bulk of the conversation.
- Camera B (reverse or over-the-shoulder): angled from behind or beside the interviewer, giving you a cutaway that reads as a natural reaction shot or a change of pace during a long answer.
Add a third camera only when the format genuinely needs it: a panel with three or more speakers, a product or screen you need a dedicated close-up on, or a wide establishing shot you'll only use briefly at the top and tail of the piece. Hollyland's guidance is that a third camera earns its place when "your format truly needs extra coverage," not by default (source: Hollyland, Multi-Camera Vlogging Guide). Every camera you add is another angle to sync, color match, white-balance correctly, and keep pointed at something worth cutting to. Two well-placed cameras and a clean audio feed will out-edit three mediocre ones almost every time.
Audio is where most first-time multicam interview shoots go wrong, and it's not really an editing problem, it's a shooting-day decision that shows up as an editing headache. Camera-body microphones sound different from each other, at different levels, with different room tone, and Hollyland's own warning about this is direct: "When you cut between angles, the audio shifts noticeably" if you rely on it (source: Hollyland, Multi-Camera Vlogging Guide). Two cameras and one wireless lav beat three cameras and three separate audio tracks for almost every interview.
The fix is a single dedicated audio path. Clip a wireless lavalier mic on your subject, route the receiver into one camera's audio input as your master audio source, and mute the built-in microphone track on every other angle before you even bring the footage into Resolve. That single decision is what makes the Video Only multicam mode (covered below) work cleanly, because there's only ever one audio track to hold onto no matter which camera's picture is on screen.
Sample interview camera and mic setups
| Format | Cameras | Audio source | Notes |
|---|---|---|---|
| Standard 1-on-1 interview | 2 (anchor + reverse) | 1 wireless lav on guest, into Camera A | Mute the native track on Camera B entirely |
| Podcast-style 2-person conversation | 2-3 (one wide, one per speaker) | 1 lav per speaker, into a small mixer or one camera | Record each lav on its own track for post-production flexibility |
| 3+ person panel discussion | 3-4 (wide + per-speaker) | Boom or lav per speaker into a field recorder | Consider a live switcher for the wide shot, multicam for close-ups |
| Remote / hybrid interview (in-person + video call) | 1-2 local + screen recording | Local lav plus call platform's own audio | Sync by waveform since there's rarely shared timecode |
If you're recording a panel with more speakers than cameras, or you expect to run this setup repeatedly, it's worth checking whether a hardware audio mixer with individual channel outs is worth the investment before your next shoot, so each speaker's lav lands on its own isolated track instead of one blended mix you can't separate later.
Timecode, Waveform, or Manual: Which Sync Method Should You Use?
Once footage is in the Media Pool, the first real decision in Resolve is how the angles get lined up. There are three methods, and Larry Jordan's rundown of them is the cleanest summary available: "Resolve supports syncing on the In, Out, matching timecode, common audio or markers. If all clips have the same audio, syncing on matching audio is the easiest, though slowest" (source: Larry Jordan, Get Started: Multicam Editing in DaVinci Resolve 18).
Sync method comparison
| Method | How it works | Best for | Tradeoff |
|---|---|---|---|
| Timecode | Matches embedded timecode metadata between clips | Cameras jam-synced or genlocked before the shoot | Instant and exact, but only works if the devices actually shared a timecode source |
| Waveform (audio) | Analyzes the sound in each clip's audio track and lines up matching peaks | Any camera, as long as each angle recorded clear, overlapping sound | Reliable but slower to calculate, and fails on thin or noisy audio |
| Manual (in/out or markers) | You place a marker or set an in point on the same visual or audio moment in each clip by hand | Backup when both of the above fail | Fully manual and accurate only to the frame you picked |
For most independent interview shoots, waveform sync is the default, because few creators own or bother to jam-sync timecode across separate camera bodies before a sit-down conversation. It works because of the single lav mic decision from the previous section: if that same audio feed is recorded into both cameras (or if a slate clap, door close, or even the guest's first spoken word appears clearly on every angle), Resolve can find that shared sound event and lock every angle to it automatically.
If your gear does support timecode, jam-sync your cameras before you start rolling and use it instead. It's worth the extra two minutes of setup on shoot day, because timecode sync is instant regardless of how long your interview runs, while waveform sync has to actually analyze and cross-reference every second of audio across every angle, which gets noticeably slower as your interviews get longer. For our sibling guide covering every sync method available in Resolve, including the free-version-only Sync Bin workflow on the Cut page, see how to sync audio in DaVinci Resolve.
A worked example: waveform-syncing a 45-minute two-camera interview
- Import both camera angles into separate Media Pool bins, labeled Camera A and Camera B.
- Confirm both clips share the same frame rate in the Media Pool's metadata columns; if they don't, stop here and fix that first (see the frame rate section below).
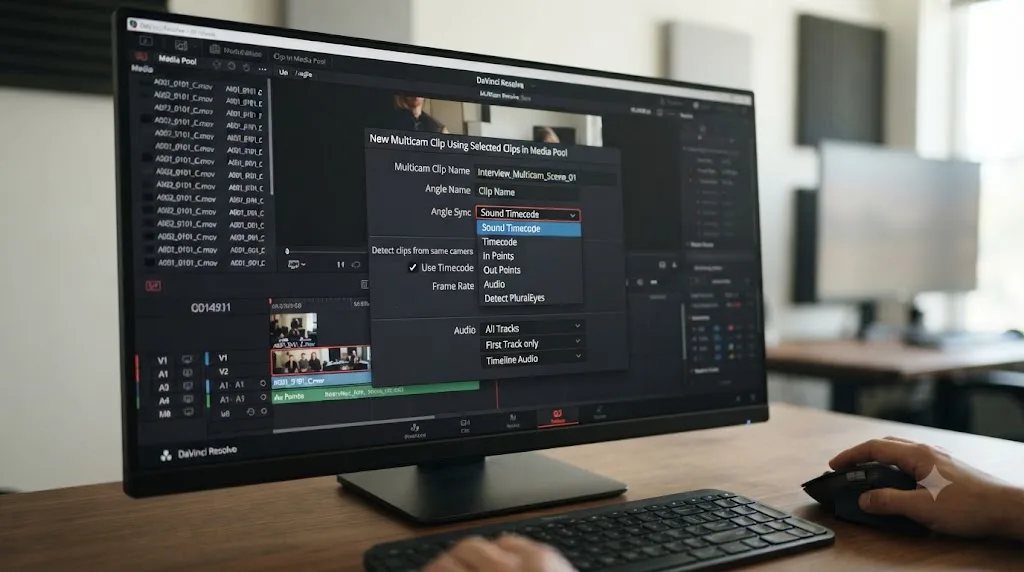
- Select both clips, right-click, and choose Create Multicam Clip Using Selected Clips.
- In the New Multicam Clip Properties dialog, set Angle Sync to Sound (waveform), name the clip something identifiable like "Interview_Multicam_01," and click Create.
- Resolve analyzes both audio tracks for a matching waveform pattern and generates one multicam clip with both angles locked to the same timeline position.
- Double-click the new multicam clip to preview it in the Source Viewer and manually scrub across a few spoken words to confirm the sync holds through the full run, not just at the start.
If step 6 reveals drift by the end of a long take, that's usually a sample rate mismatch between your two camera's internal audio clocks, not a sync method failure, and it's worth checking both cameras were set to the same audio sample rate (typically 48kHz) before your next shoot.
How Do You Create a Multicam Clip From Interview Footage?
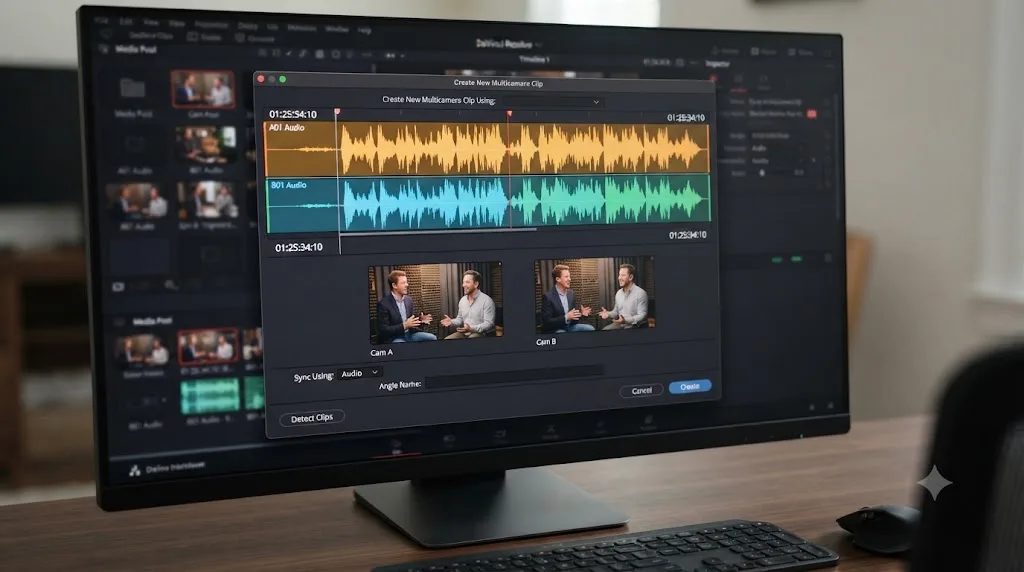
With sync method decided, creating the actual multicam clip is a short, repeatable step, described in Blackmagic's manual as: "Import all the ISO (isolated camera) clips that correspond to the multi-camera performance or event that you'll be editing into the Media Pool," then "Select all the clips that you need to sync together, right-click the selection, and choose 'Create Multicam Clip Using Selected Clips'" (source: DaVinci Resolve Manual, Blackmagic Design, mirrored).
That right-click opens the New Multicam Clip Properties dialog, where a few settings matter more than the rest for an interview edit:
- Angle Sync: Timecode or Sound (waveform), as covered above. The manual confirms both options exist directly in this dialog: "Angle Sync is defined by timecode" or "Angle Sync is defined by waveform" (source: DaVinci Resolve Manual, Blackmagic Design, mirrored).
- Frame rate: the dialog "Automatically lists the frame rate associated with the clips you selected" (source: DaVinci Resolve Manual, Blackmagic Design, mirrored), which is your last chance to notice a mismatch before it becomes a stutter on your timeline later.
- Track order: which angle sits in which numbered slot, since that slot number is exactly what you'll press on your keyboard while cutting live. It's worth deliberately assigning your anchor angle to key 1 and your reverse angle to key 2, so your muscle memory matches your camera labels.
Once created, the multicam clip appears in your Media Pool as a single item with a distinct multicam badge icon, containing every angle you selected, synced and ready. You haven't committed to anything yet. You can reopen this clip later, add a camera you forgot, remove one that turned out unusable, or nudge an individual angle's sync position, all without starting over, using Clip > Open in Timeline to expose every angle as individual tracks you can drag into place by eye.
As of DaVinci Resolve 21, this creation step got noticeably more flexible for interview and event footage specifically. According to Newsshooter's coverage of the version 21 final release notes, the update added that "multicams can include all audio tracks for each angle" and "multicams can use full clip extents on creation and during sync" (source: Newsshooter, DaVinci Resolve 21 final release). In earlier versions, creating a multicam clip could trim each angle down to only the overlapping portion shared by every camera, which was a problem if one camera started rolling a few seconds late. Full clip extents means your pre-roll and any camera-specific extra footage stays available even after the clips are grouped into one multicam item, which matters if you want a few extra frames of handle on either end of a cut.
Video Only vs. Audio Follows Video vs. Audio Only: Which Multicam Mode Fits an Interview?
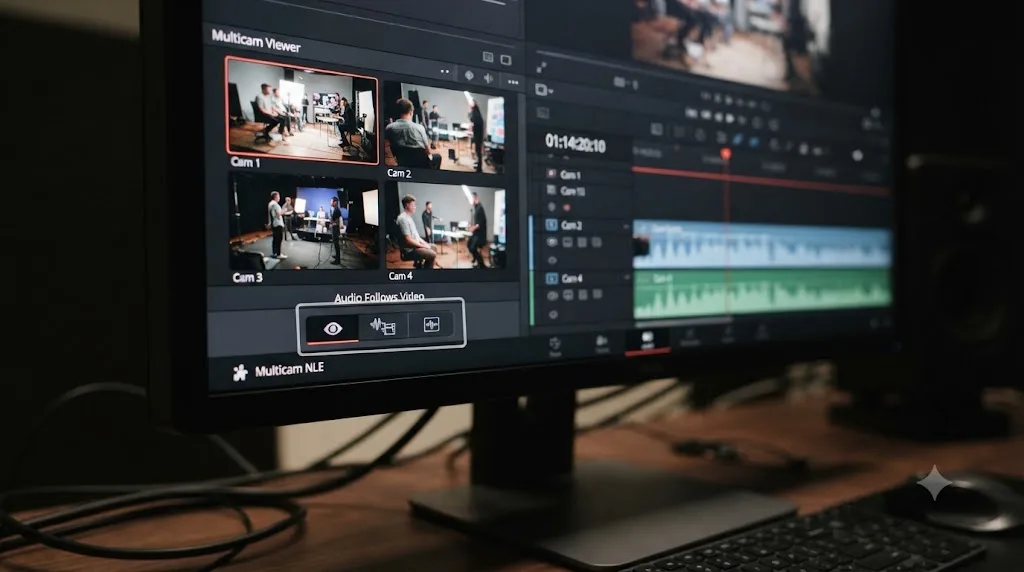
This is the setting that trips up more first-time multicam interview edits than any other, because it's easy to skip past the dialog without realizing it changes what happens every single time you cut. When the Multicam Viewer is active, it has its own separate mode controlling whether a cut or switch touches video, audio, or both, set with these shortcuts, straight from Blackmagic's manual:
- "Option-Shift-[ sets the Multicam Viewer to cut or switch both Video and Audio"
- "Option-Shift-] sets the Multicam Viewer to cut or switch Video only"
- "Option-Shift-\ sets the Multicam Viewer to cut or switch Audio only" (source: DaVinci Resolve Manual, Blackmagic Design, mirrored)
Which mode to use, by format
| Mode | What it does | When to use it for an interview |
|---|---|---|
| Video Only | Cuts the picture, leaves the current audio track playing uninterrupted | Almost always. This is the correct default for any interview with one lav mic feeding every angle |
| Audio Follows Video (both) | Cuts picture and sound together, every time you switch angles | Only if each camera genuinely recorded its own clean, independently usable audio, such as a live concert with room mics per angle |
| Audio Only | Cuts just the audio track without touching the visible picture | Rarely needed in an interview edit; more useful when re-cutting dialogue against a locked picture |
For the two-camera interview setup covered earlier, with one lav mic routed into a single master audio track, Video Only is what you want essentially every time. Set it once with Option-Shift-] before you start cutting, and every angle switch afterward leaves your continuous audio untouched, no matter how many times you jump between Camera A and Camera B. This is also exactly why the earlier advice to mute native camera audio on every secondary angle matters: if Resolve's default mode ever gets left on "both" by mistake, having only one camera's audio track actually contain sound prevents an accidental audio jump from being audible, even if the mode setting slips.
If you're editing a multicam concert, panel discussion with multiple boom mics, or any format where every camera captured genuinely different, usable audio, Audio Follows Video becomes the right call, since it preserves the natural spatial and tonal difference of each angle's own microphone as you cut between them.
How Do You Cut a Multicam Interview Live?
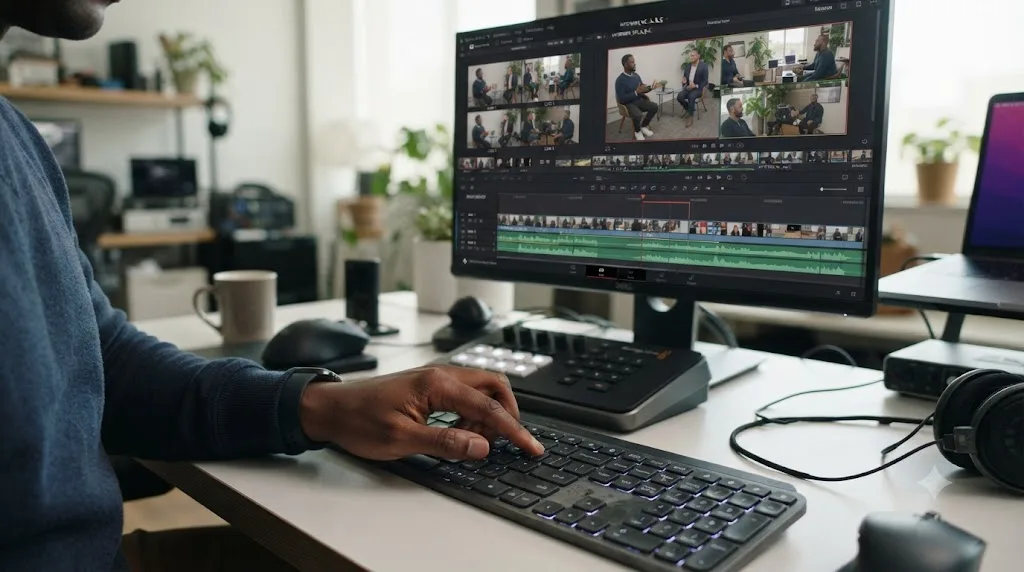
With the multicam clip synced, placed on a timeline, and the audio mode set correctly, the actual cutting is where the workflow pays off. You're doing what Blackmagic's manual describes as acting "as if you were a live multi-camera director" (source: DaVinci Resolve Manual, Blackmagic Design, mirrored), except with playback, pause, and undo available the whole time.
Here's the sequence for a typical two-camera interview edit session:
- Drag your synced multicam clip from the Media Pool onto a new timeline, or open it in the Source Viewer and edit it in using any standard editing method.
- Switch the Source Viewer or Timeline Viewer's mode dropdown to Multicam, which reveals the angle tiles instead of a single preview frame.
- Confirm your audio mode is set to Video Only (Option-Shift-]) if you're following the single-audio-source setup from earlier.
- Press play and let the interview run in real time.
- Press number key 1 while Camera A's tile is your default, and press 2 whenever you want to punch to Camera B, for a reaction beat, a change of pace during a long answer, or simply visual variety every 20 to 40 seconds so the cut doesn't feel static.
- Let it play through to the end without stopping to fine-tune every individual cut point. That comes after.
- Scrub back through the rough cut and adjust the timing of any cut that lands awkwardly, using standard trim tools on the resulting timeline clips, exactly as you would with any other edited sequence.
The instinct that makes this feel natural is closer to directing a live broadcast than editing in the traditional sense: you're reacting to what's being said and switching to whichever angle best serves that moment, not scrubbing frame by frame hunting for an edit point. A useful rule of thumb from color-coding your rough cut, mentioned across multiple interview-editing workflows, is to mark sections by content type (a strong answer, a tangent to trim, a moment worth a close-up) as you go, so a second pass focuses only on flagged sections instead of rewatching the entire interview again from scratch.
One habit worth building early: don't try to nail every cut on the first live pass. Cut loosely on your first playthrough, favoring more angle changes over fewer, then go back and remove the ones that don't earn their place. It's much faster to delete an unnecessary cut than to find and insert a missing one after the fact, because removing a cut point in a flattened multicam sequence is a simple ripple delete, while adding one means re-splitting a clip and reassigning its angle by hand.
What Are the Multicam Keyboard Shortcuts Worth Memorizing?
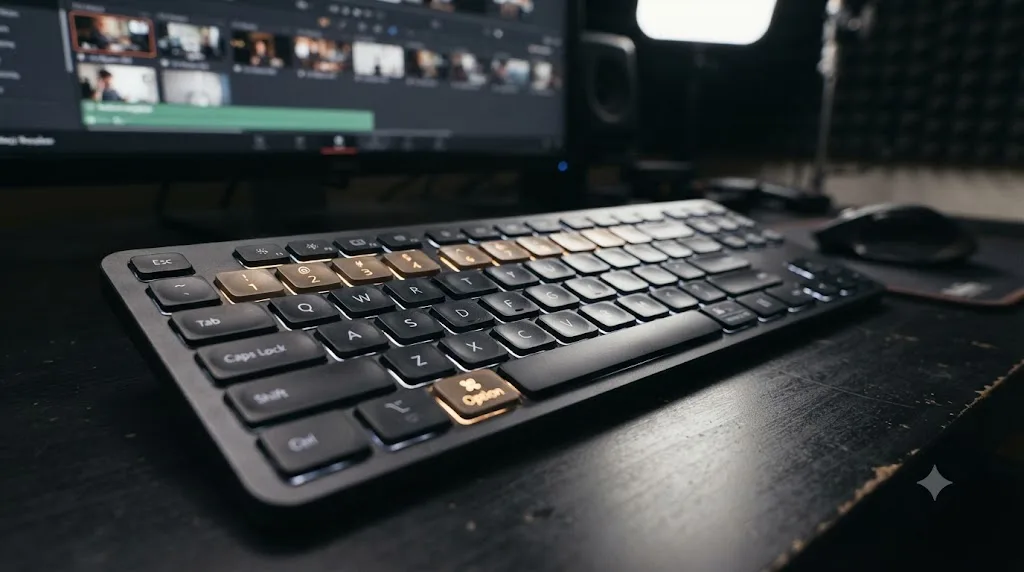
The entire live-cutting workflow above depends on a small set of shortcuts, and knowing the difference between two of them, cut versus switch, will save you from a fair amount of confusion the first time you use this.
Core multicam shortcuts, straight from Blackmagic's reference manual
| Shortcut | What it does |
|---|---|
| 1 through 9 | "Performs a cut-and-switch operation, the same as if you'd clicked on an angle button" |
| Option-1 through 9 | "Performs a switch operation, the same as if you'd Option-clicked an angle button" |
| Command-Shift-Left/Right Arrow | "Switch to the previous or next angle" |
| Option-Shift-[ | Sets cutting mode to Video and Audio together |
| Option-Shift-] | Sets cutting mode to Video only |
| Option-Shift-\ | Sets cutting mode to Audio only |
| Option-Shift-Left/Right Arrow | "Move to the previous or next page of multicam angles," relevant once you have more than 9 angles active |
(source: DaVinci Resolve Manual, Blackmagic Design, mirrored)
The distinction between "cut" (number keys alone) and "switch" (Option plus a number key) is the one that catches people. A cut adds an actual edit point to your timeline at the current playhead position and changes the angle from that point forward, which is what you want while actively building your rough cut in real time. A switch changes which angle a clip you've already placed refers to, without adding or moving any edit point, which is what you want when you're fixing an angle choice after the fact without disturbing your existing cut timing. If you find yourself repeatedly adding tiny unwanted edit points while trying to just preview a different angle on an existing cut, you're using the cut shortcut when you meant the switch shortcut.
For interviews specifically, Digital Production's breakdown of the workflow confirms the same distinction in slightly different terms: "Alt/Opt + click to switch angle; single click to cut to new angle" (source: Digital Production, Switching to Resolve). Whether you're clicking angle tiles with a mouse or pressing number keys, the modifier key is what separates a real edit from a non-destructive preview change.
With more than nine angles active in a single multicam clip, which is unlikely for an interview but common on a full panel or event shoot, the page navigation shortcuts (Option-Shift-Left/Right Arrow) become necessary since the number row alone can only address the first nine.
What Happens When Your Interview Cameras Don't Match?
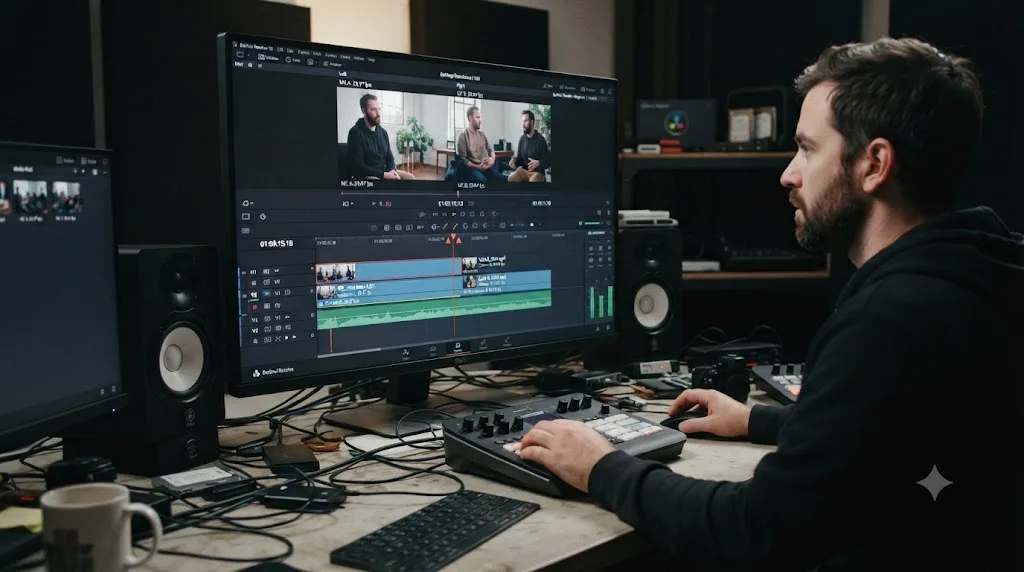
Interview shoots frequently mix gear: a proper mirrorless camera on one angle, a phone or webcam on the other, footage recorded at different frame rates or with different codecs entirely. Multicam sync doesn't care about resolution or codec differences, but frame rate is a hard requirement, and it's worth knowing exactly where that requirement bites.
Hollyland's multicam guide states this directly: "all source clips must share identical frame rates" for a multicam clip to be created cleanly. If Camera A shot at 24fps and Camera B (say, a laptop webcam for a remote guest, or a phone recording a backup angle) shot at 30fps, you have two options: conform one angle to match the other in Clip Attributes before syncing, or let Resolve's Mixed Frame Rate Format setting handle the conform on the fly at the timeline level.
That second path is where a separate, very common problem shows up: a jittery, stuttering timeline caused not by a broken sync but by how Resolve is retiming the mismatched clip to fit your timeline's frame rate. If you're seeing exactly that after building a multicam interview timeline from mixed-frame-rate sources, our sibling guide covers the fix in full: DaVinci Resolve mixed frame rate timeline jittery. The short version is that the default Retime Process (Nearest) simply drops or duplicates frames to force a conform, which reads as visible stutter, and switching it to Frame Blend or Optical Flow in Project Settings > Master Settings fixes the playback smoothness without needing to resync anything.
There's a second, less obvious trap specific to mixed-source interviews: the Mixed Frame Rate Format setting locks the moment you import any media into the project, which means if you didn't set it correctly before your first import, you may need to clear your entire Media Pool and reimport everything to change it. Decide your project's frame rate and mixed-rate handling before you drag in a single clip, not after.
Common camera mismatches in interview shoots and their fix
| Mismatch | Symptom | Fix |
|---|---|---|
| Different frame rates (24fps vs 30fps) | Jittery playback on the mismatched angle | Set Mixed Frame Rate Format before import, switch Retime Process to Frame Blend or Optical Flow |
| Different codecs (H.264 phone vs ProRes camera) | No sync issue, but inconsistent playback performance and grading flexibility | Transcode the lighter-weight source to a proxy or intermediate codec before editing |
| Variable frame rate (VFR) footage from a phone or screen recording | Jitter and stutter regardless of timeline settings | Transcode to a constant frame rate codec (ProRes 422 Proxy or DNxHR LB) before import |
| Different resolutions (4K camera vs 1080p webcam) | No sync issue; framing and sharpness mismatch on screen | Scale the lower-resolution angle deliberately rather than letting Resolve auto-fit it, and consider it a stylistic difference rather than a bug |
How Do You Multicam a Panel With Three or More Speakers?
Everything above assumes two people and two cameras, but the same workflow scales to a panel, a roundtable, or a multi-guest podcast taping. The mechanics don't change. What changes is how much discipline the setup needs before you ever open Resolve.
Camera count usually follows speaker count plus one: one dedicated angle per speaker, plus a wide shot covering the whole table as a safety net for moments no single close-up captures cleanly, like overlapping laughter or a quick back-and-forth between two people at once. For a 3-person panel, that's commonly 4 cameras: three close-ups and one wide.
Audio needs the same isolation principle as a two-person interview, just multiplied. Each speaker should have their own lav or boom mic on its own dedicated track, ideally recorded into a small field mixer or recorder rather than blended into one camera's audio input, so you keep the option to isolate, duplicate, or clean up any one speaker's audio in Fairlight without touching anyone else's. The single shared camera-mic feed described earlier for two-person interviews breaks down fast with three or more voices, since you lose the ability to duck or isolate one speaker without affecting all of them.
When you build the multicam clip, angle order matters more here than in a two-camera interview, because you're about to press number keys under real time pressure while three people talk over each other. Assign angles in a way your hands can find without looking: wide shot on key 1, then each speaker's close-up in the same left-to-right order they're physically seated, on keys 2 through 4 or however many you have. If your panel runs past 9 total angles, unlikely at typical interview scale but not impossible on a large roundtable, that's exactly when the Option-Shift-Left/Right Arrow shortcut from the keyboard section above earns its keep, paging through additional angle groups beyond the first nine.
Live-cutting a panel is genuinely harder than a two-camera interview, and it's worth accepting that up front rather than expecting the same one-take fluency. Watching for who's about to speak, not just who is speaking, becomes the real skill, since a cut that lands even half a second late reads as sluggish once three or more people are in the conversation. Many editors find it easier to do a first pass focused purely on "who's talking now," accepting rougher timing, then a second pass on the same multicam sequence tightening every cut point once the rough structure is already in place, rather than trying to nail both content and timing on a single live pass.
Color matching also compounds with camera count. Three or four angles, especially if they're not all the same camera model, means three or four reference points to bring into alignment instead of one. Color Groups, covered in the next section for two-camera color matching, becomes close to mandatory at this scale, since manually copying and tweaking individual node graphs across four separately lit angles eats far more time than the live cut itself did.
How Do You Multicam a Remote or Hybrid Interview With a Video Call Guest?
A hybrid interview, one guest in the room with you and one joining by video call, is its own multicam case, and it breaks a couple of assumptions the rest of this guide leans on. There's no single lav feeding every angle anymore. Your in-person camera and your call recording are two completely separate capture systems that happen to be recording the same conversation.
Treat it as two audio problems stacked on top of each other, not one:
- Local audio: your in-person guest still gets a wireless lav routed into your primary camera, exactly as described earlier in this guide. That's your reference angle and your reference audio track.
- Remote audio: the call platform's own local recording of the remote guest, not the compressed, lower-quality audio baked into a screen recording of the call window. Most video call software can record each participant's microphone as an isolated local file in addition to the composite call. Use that isolated file if it's available. It syncs more reliably and sounds noticeably cleaner than pulling audio off a screen capture.
For picture, you have two source types instead of camera angles: your local camera footage, and a screen recording of the call window, ideally captured at as high a resolution and frame rate as your call platform allows, since a low-res screen capture becomes an obvious quality dip the moment you cut to it.
Sync the same way you would for two normal camera angles: match a shared audio event across your local camera's audio and the remote guest's audio, whether that's a synced clap, a spoken cue at the top of the call ("we're recording, can you hear me okay"), or matching waveform peaks across the whole conversation if a clean shared moment isn't available. Waveform sync is more likely to work here than timecode, since there's rarely a way to jam-sync a laptop's call recording with a camera in the room.
The frame rate mismatch problem shows up here more often than anywhere else in interview multicam work. Screen recordings of a video call are frequently variable frame rate, especially when captured with a laptop's built-in screen recorder while other apps compete for CPU time during the call itself. A multicam clip built from one steady 24fps or 30fps camera and one VFR screen recording will show exactly the stutter described in the frame rate mismatch section above, and the fix is the same: transcode the screen recording to a constant frame rate intermediate codec before you sync, rather than trying to fix it after the multicam clip already exists.
Once synced, everything else in this guide applies unchanged. Video Only cutting mode still keeps your combined, cleaned-up audio mix running underneath whichever picture you're on. Flatten before you grade, since your local camera and your screen capture will almost never match in color and exposure straight out of the box and need to be treated as two genuinely different sources, not close variants of the same camera.
How Do You Color Match Multiple Camera Angles in One Interview?
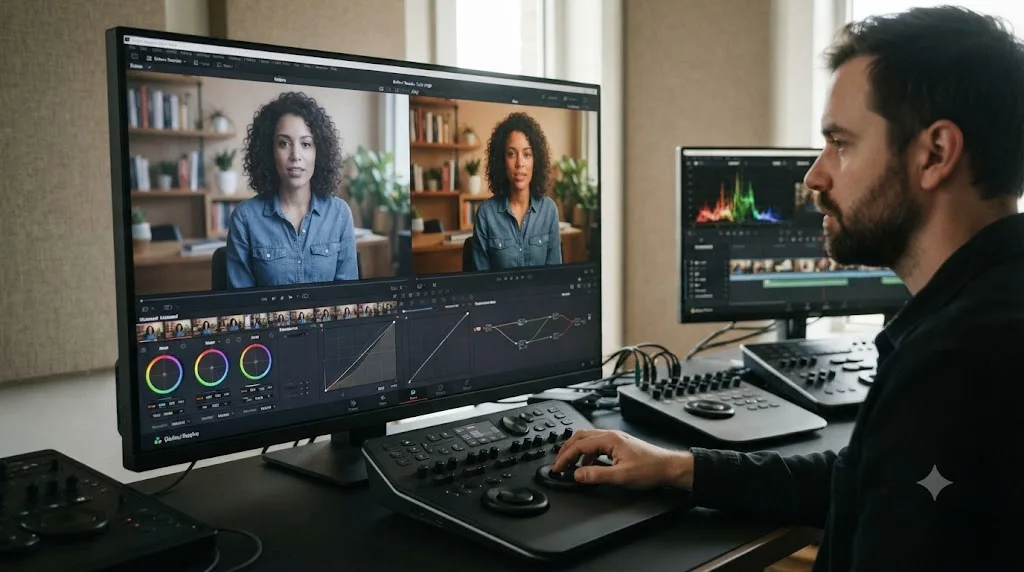
Even two cameras of the exact same model will rarely produce an identical image straight out of the box, and mismatched cameras (a mirrorless body next to a phone or webcam) will look noticeably different in white balance, exposure, and color science. Multicam editing doesn't touch color at all on its own. You're still responsible for making every angle look like it belongs in the same room.
The manual is clear that this is intentionally handled separately from the multicam sync process itself: each angle within a multicam clip retains its own individual grade on the Color page, so switching angles on your timeline also switches which grade is currently visible, exactly as you'd want. The workflow, in order, is:
- Finish your rough cut using the multicam workflow described above, cutting between angles by content and pacing, not final color.
- Flatten the multicam clip (covered in the next section), which converts it into individual, separately gradable source clips on your timeline.
- On the Color page, grade your anchor angle (typically Camera A) first, establishing your reference look for skin tone, white balance, and exposure.
- Use Shot Match or a manually built node graph to bring the remaining angles into visual alignment with that reference.
- Once the base match is close, apply any stylistic grade uniformly across every angle so the final look is consistent, not just neutral.
Copying a grade from your reference angle to matching clips is a separate, faster step once you've built it once, and it's worth doing deliberately rather than repeating the same node graph from scratch on every angle. Our sibling guide covers every method available, from a simple copy-paste to PowerGrades and Color Groups: how to copy a color grade to multiple clips in DaVinci Resolve. For an interview with only two or three angles, Color Groups is often the cleanest choice, since it lets you apply one base grade to every angle in the group while still leaving room for a per-clip exposure or white balance tweak on top, without breaking the shared relationship if you adjust the group grade later.
A practical note on ordering: color match after you've locked your cut, not before. Grading every angle first and then discovering during editing that a section needs to be recut or a new angle added means redoing grading work on the new material, whereas locking the cut first means you only ever grade exactly what made the final edit.
How Do You Add B-Roll and Cutaways Without Breaking Sync?
Almost no interview edit ships as a pure two-camera cut from start to finish. Product shots, establishing footage, screen recordings, and reaction cutaways all get layered in, and doing that on top of a multicam sequence requires understanding what breaks sync and what doesn't.
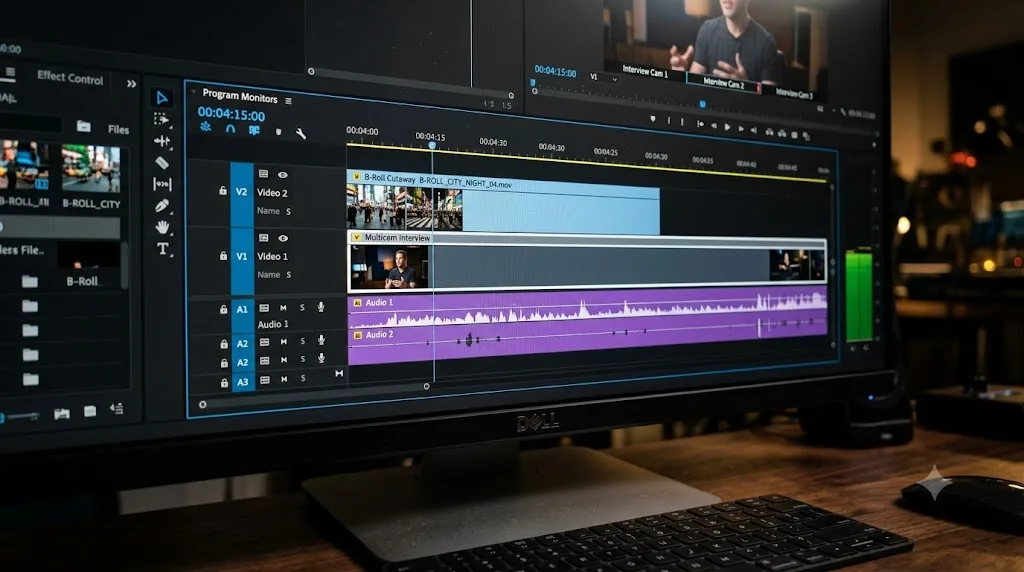
B-roll and cutaways live on a track above your multicam sequence, not inside the multicam clip itself, and that separation is exactly what protects your sync. Add a new video track, place your cutaway footage on it directly above the section of the interview it should cover, and trim it to length. Since the multicam clip underneath is untouched, your audio (still playing continuously from your locked lav source on the track below) keeps rolling straight through the cutaway with no interruption, which is exactly the effect you want: the viewer sees a product shot or a reaction cutaway while still hearing the guest's answer uninterrupted.
A few practical rules keep this clean:
- Never place b-roll directly inside the multicam clip's own track. It'll be treated as another angle option rather than an overlay, and you'll lose the ability to independently trim or move it without disturbing your synced angles.
- Keep your audio track separate from your cutaway video entirely. If your b-roll clip has its own audio (a product demo with ambient sound, for example), mute it on that track unless you specifically want it mixed in, since your interview's audio is still coming from the multicam clip underneath.
- Trim cutaways to match natural speech pauses, not arbitrary time increments, so the cut back to the interviewer or subject lands on a breath or a sentence break rather than mid-word.
- Don't overload a short answer with cutaways. A single well-timed cutaway on a strong line reads as intentional. Three cutaways stacked across one 15-second answer reads as padding, and most viewers notice the difference even if they can't articulate why.
This same layering approach works for on-screen text, lower thirds identifying your subject, or a picture-in-picture insert, all placed on tracks above the multicam sequence rather than inside it. The multicam clip stays exactly what it was designed to be: your synced camera coverage, left completely alone while everything else gets built on top of it.
How Do You Flatten and Deliver a Multicam Interview Edit?
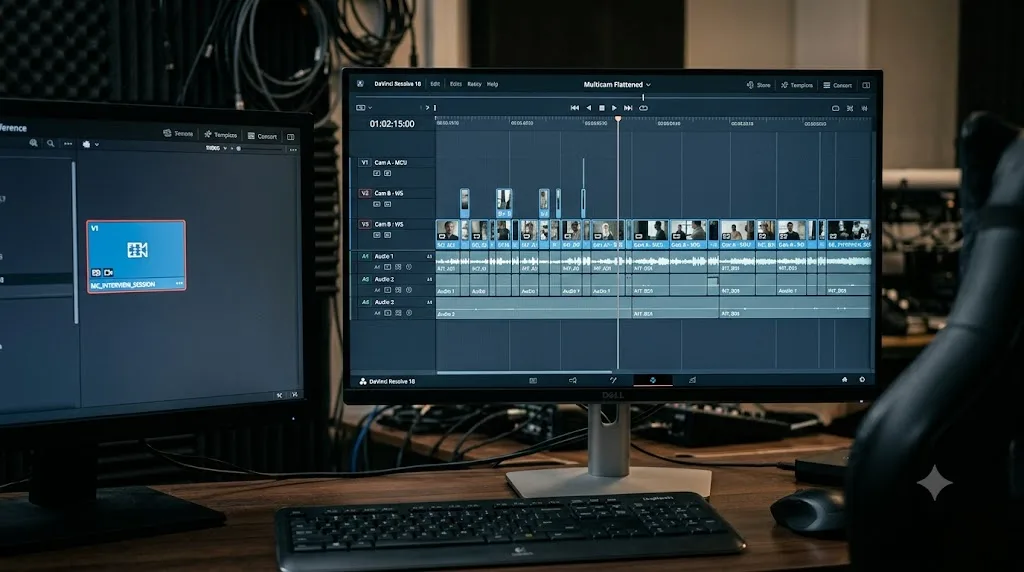
Flattening is the step that converts your live, switchable multicam clip into a normal sequence of individual source clips, and it's required before you can grade each angle separately or hand the project off in a format another editor or app can read cleanly. Right-click the multicam clip on your timeline and choose Flatten.
This is a one-way operation, and it's worth treating it that way. Before you flatten, duplicate your timeline (right-click it in the Media Pool and choose Duplicate Timeline) so you always have an unflattened, still-editable multicam version to fall back on if you need to change an angle choice, add a camera, or adjust sync after the fact. Once flattened, there's no built-in command that turns individual clips back into a live multicam clip; you'd need to reselect the relevant sections and rebuild the sync from scratch.
After flattening, your interview edit is ready for the same finishing steps as any other project:
- Grade each angle to match, as covered in the previous section, now that they're individually addressable clips.
- Mix and finalize your audio on the Fairlight page, applying any noise reduction, EQ, or loudness normalization your delivery target requires.
- Check your export settings match your destination: a podcast platform, YouTube, or a client's own delivery spec.
- Render on the Deliver page, choosing a codec and container appropriate for where the video is headed.
One frequently missed step specific to multicam projects: if you're delivering an XML, EDL, or AAF to another editor or a different application, flatten first. A multicam clip inside an exported project file often doesn't translate cleanly into other software's own multicam format, and even when it does, the receiving editor needs to understand your specific angle sync method to interpret it correctly. A flattened sequence of individual, already-cut clips travels between applications without that ambiguity.
Multicam in Resolve vs. a Live Switcher: Which Should You Use for Interviews?
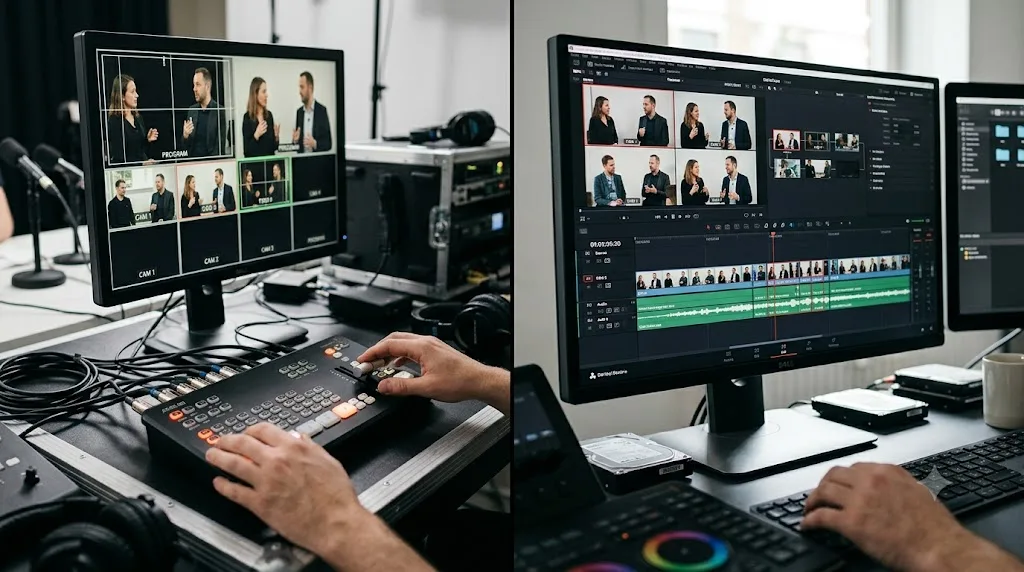
If your interview is being recorded for a livestream, a podcast that publishes same-day, or an event with a live audience, there's a real alternative worth knowing about before you commit to a post-production multicam workflow: a hardware live switcher, like Blackmagic's own ATEM line, that lets a director cut between camera angles in real time during recording, producing a single already-edited video file the moment the interview ends.
The two approaches solve different problems, and picking the wrong one for your situation costs you real time.
Multicam in Resolve (post-production) is the right call when:
- You want to refine cut timing after the fact, trying different angle choices without committing live
- You're a one-person crew and can't dedicate someone to switching angles during the actual recording
- The interview needs heavy editing anyway: trimming tangents, reordering answers, adding b-roll and graphics
- You want independent color grading control per angle in post
A live switcher is the right call when:
- The output needs to exist the moment recording stops, with no edit pass, for a livestream or same-day publish
- You have a second person available to direct and switch angles during the actual conversation
- The format is closer to a broadcast interview or panel than a heavily edited piece, and a director calling cuts live produces a natural result
- You want to monitor and adjust exposure or framing live rather than fixing it in post
Some productions use both: a live switcher creates the immediate livestream or same-day cut, while the individual ISO camera feeds are recorded separately and edited later in Resolve's multicam workflow to produce a more polished on-demand version. If you're weighing this decision for a recurring interview or panel format, like a weekly podcast, it's worth prototyping both approaches on one episode before locking in your production pipeline, since the switching cost between them (hardware, crew, and workflow) is real once you've built habits around one or the other.
Can AI Tools Edit a Multicam Interview for You?
A newer category of AI editing tools has started targeting exactly this kind of footage, podcast and interview recordings shot on multiple cameras, and it's worth knowing what they actually do before deciding whether they fit your workflow.
Eddie AI is built specifically around this use case. Its own documentation describes generating "a full aligned rough cut with angles chosen based on who is speaking when," using "Automated Speaker Detection" to identify who's talking and switch the visible camera accordingly, and it "syncs and aligns up to 6 camera angles and 1 separate audio file," exporting the result as an editable project for DaVinci Resolve, Premiere Pro, or Final Cut Pro (source: Eddie AI Help Center). PremiereCopilot takes a similar approach natively inside Adobe Premiere Pro, bundling a "multicam podcast" tool among its 12 native features, though as of this writing it doesn't offer that specific multicam automation inside Resolve itself (source: PremiereCopilot). CutAgent works differently again: rather than auto-cutting a multicam sequence for you, it takes natural-language instructions and executes editing operations directly inside your DaVinci Resolve project, on macOS, flagging "keeper moments" and "risky trims" for your approval before anything is finalized (source: CutAgent).
An AI tool that edits the angles for you still leaves you unable to fix it yourself when the cut is wrong, and that's the real gap none of these tools close. An automated rough cut is a starting point, not a finished edit, and when the auto-selected angle is wrong, or the pacing feels off, or you need to understand why Resolve's Multicam Viewer is behaving a certain way, you're back to needing the actual skill this guide covers.
TryUncle is the on-screen assistant for DaVinci Resolve on macOS. Ask in plain words and Uncle points at the exact control on your screen. Rather than editing your multicam clip for you, it watches your actual project on your screen (through standard macOS screen recording and accessibility permissions) and, when you ask a question by voice, a quick check, or typing, answers out loud while drawing a box or flying a cursor to the exact control you're looking for, live, inside the Edit, Color, or Fusion page you're already working in. If you're stuck on why your audio jumped when you cut angles, or where the Angle Sync dropdown actually lives, or why your flattened timeline won't let you re-select an angle, that's the specific kind of stuck it's built to unstick, without pulling you out of Resolve into a separate video or a search result. It's a paid subscription at $34.99 a month, cancel anytime, with details on TryUncle.
Where AI tools for multicam interview editing actually differ
| Tool | What it does | Runs inside Resolve? | What it doesn't do |
|---|---|---|---|
| Eddie AI | Auto-generates a rough cut with speaker-based angle switching, up to 6 cameras | No; exports a project you import into Resolve | Doesn't teach you the manual workflow or fix an edit you're unhappy with |
| PremiereCopilot | Bundles a multicam podcast tool and other AI editing features | Natively in Premiere Pro; Resolve support not yet available | Same limitation, plus currently Premiere-only |
| CutAgent | Executes natural-language editing commands on your actual Resolve project | Yes, on macOS | Automates specific requested actions rather than teaching the workflow itself |
| TryUncle | Watches your screen and points at the exact control live, in response to a question | Yes, on macOS | Doesn't auto-cut or automate the edit for you |
This isn't really a competition between these tools so much as a question of what kind of stuck you are. If you want a rough assembly generated for you to then refine, an auto-cut tool like Eddie AI is a reasonable starting point. If you want to actually understand DaVinci Resolve's multicam tools well enough that you're not stuck the next time either, an AI tool to learn DaVinci Resolve is doing a different job, and it's the one worth reaching for if the goal is skill, not just output. For a fuller comparison of every AI option in this space, including Resolve's own built-in Neural Engine tools, see the best AI tools to learn DaVinci Resolve.
What Goes Wrong, and How Do You Fix It?
Most multicam interview editing problems trace back to one of a small number of root causes, and it's faster to recognize the pattern than to troubleshoot from scratch every time.
Multicam interview troubleshooting
| Symptom | Likely cause | Fix |
|---|---|---|
| Angles won't sync, or Resolve reports clips don't match | Weak or missing shared audio signal for waveform sync, or clips that don't actually overlap in time | Check that every angle recorded audible sound during the same window; trim clips so they share an overlapping moment; try switching to a specific audio channel instead of Auto |
| Sync holds at the start but drifts by the end of a long interview | Mismatched sample rates between camera audio and an external recorder, or inaccurate internal camera clocks | Match sample rates (typically 48kHz) across all recording devices before your next shoot; for existing footage, use Elastic Wave to stretch the drifting track back into alignment |
| Cutting an angle also cuts the audio unexpectedly | Multicam Viewer is set to Audio Follows Video (Option-Shift-[) instead of Video Only | Press Option-Shift-] to lock cutting to video only before continuing |
| Timeline stutters or jitters on one specific camera angle | Mixed frame rates being conformed with the default Nearest retime process | Switch Retime Process to Frame Blend or Optical Flow in Project Settings > Master Settings |
| Timeline Frame Rate is greyed out and won't change | Media has already been imported into the Media Pool, which locks the Mixed Frame Rate Format setting | Delete all clips from the Media Pool, set Mixed Frame Rate Format correctly, then reimport |
| An angle looks correct in the multicam clip but wrong once flattened | A grade or Clip Attribute change was applied before flattening, and it applied to the wrong underlying source | Undo, flatten first, then apply grading and clip attribute changes to the individually flattened clips |
| You need to change an angle choice after flattening | Flattening is a one-way operation with no built-in revert | Restore from your duplicated pre-flatten timeline; there is no direct undo for flattening itself |
| Pressing number keys does nothing while playing | The Multicam Viewer isn't actually enabled, or the timeline clip isn't selected as the active multicam source | Confirm View > Enable Multiview Edit Preview is on and the multicam clip is the one currently loaded in the viewer |
| Playback stutters or drops frames specifically during multicam preview | GPU or decode bottleneck, more common on lower-end hardware or when multiple 4K angles are being decoded simultaneously for the multicam tile view | Generate optimized media or proxies for each angle before editing, particularly on Windows laptops with integrated graphics or older Apple Silicon Macs running multiple 4K streams at once |
That last row is worth calling out separately, because it's a hardware issue that gets mistaken for a software bug constantly. Multicam preview asks your machine to decode every active angle simultaneously just to render the small tile thumbnails, not just the one angle currently selected, which is meaningfully more demanding than normal single-angle playback. On a laptop with integrated graphics or an older GPU, this shows up as stutter specifically during multicam preview that disappears once you flatten and go back to single-clip playback. Generating proxy media for your source clips before syncing solves this in almost every case, and it's worth doing as a standard first step on any multi-camera 4K interview shoot regardless of your hardware, since it also speeds up the waveform sync analysis itself.
A worked example: diagnosing drift on a 90-minute interview
Say you've synced a 90-minute interview by waveform, and the first ten minutes look perfect. Mouths match audio, cuts feel clean, no complaints. Then somewhere around minute 40, you notice the audio is very slightly ahead of the picture on one angle, not enough to be obvious at a glance, but enough that a viewer would feel something is off even if they couldn't say what.
That's the classic signature of a sample rate mismatch, not a bad sync. A one-time sync error (wrong clip selected, sync point picked on the wrong word) is either right or catastrophically wrong from frame one. A sync that starts correct and drifts gradually across the runtime is a clock problem: your two recording devices' internal audio clocks are running at very slightly different actual speeds, even though both are nominally set to the same sample rate, and that tiny difference compounds minute after minute until it crosses the threshold where you can perceive it.
The fix isn't to resync from scratch. Isolate the drifting angle's audio track, and use Fairlight's Elastic Wave tool to stretch or compress it back into alignment with your reference track, checking your sync at multiple points across the runtime, not just the start, since a stretch that fixes minute 40 needs to be verified at minute 80 too. For future shoots, the actual fix happens before you ever hit record: match sample rates explicitly across every recording device, camera and external recorder alike, rather than trusting that "48kHz" on two different devices' spec sheets means their internal clocks agree exactly.
Is DaVinci Resolve's Multicam Good Enough for Professional Interview Work?
It's worth being honest about where Resolve's multicam tools actually sit next to the competition, rather than pretending they're the obvious best choice by default. Larry Jordan, who has worked extensively across all three major NLEs, put it plainly: "Having worked with multicam editing in Apple Final Cut Pro, Adobe Premiere Pro and DaVinci Resolve, multicam editing in Resolve is the weakest of the three," adding that "If your editing revolves around multicam, Final Cut Pro is the best choice, with Premiere a solid second" (source: Larry Jordan, Get Started: Multicam Editing in DaVinci Resolve 18).
That's a real, fair critique, and it's mostly about friction rather than capability. Final Cut Pro's multicam angle viewer and switching UI has fewer clicks and steps for the same result. Resolve asks you to learn a specific set of keyboard shortcuts, understand the cut-versus-switch distinction, and manage settings like the audio mode toggle manually, none of which Final Cut hides behind quite as many decisions.
For the specific case this guide covers, a two or three camera interview, that gap matters less than it would on a full concert or event shoot with a dozen angles and constant live switching demands. Guided practice inside Resolve beats watching courses about Resolve, and the same holds true here: the workflow in this guide, sync method, Video Only mode, number-key cutting, flatten before grading, covers essentially everything a standard interview edit needs, and every part of it is available in the completely free version of DaVinci Resolve, with no Studio upgrade required.
If your work genuinely centers on multicam, high angle counts, live events, concerts, multi-camera commercial shoots, Jordan's read is worth taking seriously as a reason to at least evaluate Final Cut Pro or Premiere Pro for that specific need. For interview content specifically, where the whole job is two or three cameras and a clean cut between them, Resolve's multicam tools are free, capable, and, once you've internalized the handful of shortcuts and settings covered in this guide, fast enough that the extra friction Jordan is describing mostly stops being something you notice at all.
Frequently asked questions
- How many cameras do I need for a multicam interview in DaVinci Resolve?
- Two is the right starting point for almost any interview: one locked-off wide or medium shot as your anchor angle, and a second for a reverse or over-the-shoulder cut. Add a third only if you're covering more than two speakers or need a dedicated close-up on hands, a product, or a screen. Every extra camera adds an angle to sync, color match, and keep in frame, and DaVinci Resolve supports up to 16 angles in a single multicam clip, in both the free and Studio editions.
- Should I sync multicam interview footage by timecode or waveform?
- Use timecode if your cameras were jam-synced or genlocked before you started recording, since it's mathematically exact and syncs instantly regardless of clip length. Use waveform (audio) sync if they weren't, which is slower to calculate but works with any camera as long as every angle recorded a clear, matching sound. For interviews, that shared sound is usually the same lav mic feed recorded into every camera's audio input.
- What's the difference between Video Only and Audio Follows Video multicam modes?
- Video Only cuts the picture from whichever angle you switch to while keeping the audio locked to one continuous track, which is what almost every interview edit needs since a single lav or boom mic is your only clean audio source. Audio Follows Video cuts both picture and sound together, useful for multicam concerts or events where each camera captured its own usable audio. Set the mode with Option-Shift-] for video only or Option-Shift-[ for both.
- Why does my multicam angle switch but the audio jump when I cut in DaVinci Resolve?
- The Multicam Viewer is set to cut audio along with video. Press Option-Shift-] to lock it to Video Only before you start cutting, which keeps your single audio track playing straight through no matter which camera angle you switch to. If the jump is happening after you've already cut the sequence, select the affected edit points and check whether they're cutting on an audio track you didn't intend to touch.
- Can I use DaVinci Resolve's free version for multicam interview editing?
- Yes. Creating multicam clips, syncing by timecode or waveform, the Multicam Viewer, live cutting, and flattening are all core Media and Edit page features with nothing held back for DaVinci Resolve Studio. Studio's relevant extras are things like Speed Warp retiming and more advanced Fairlight noise reduction, not the multicam workflow itself.
- Do I need to flatten a multicam clip before color grading?
- Yes, and it's worth doing carefully because it's a one-way operation. Flattening converts your multicam clip into separate, individually gradable source clips on the timeline, which is what the Color page needs to apply different grades per angle. Save a duplicate of your sequence before you flatten, since there's no button that turns a flattened timeline back into a live multicam clip.
- Is there an AI tool that edits multicam interviews automatically?
- A few. Eddie AI can build a rough cut of a podcast or interview with angles auto-selected by who's speaking, and PremiereCopilot bundles a multicam podcast tool for Premiere Pro, though neither currently offers a native DaVinci Resolve multicam auto-cut. What none of them do is teach you the workflow inside Resolve itself. That's a different job, and it's the one an AI tool to learn DaVinci Resolve like TryUncle is built for instead.
- Is DaVinci Resolve's multicam editor as good as Premiere Pro or Final Cut Pro?
- Editor and trainer Larry Jordan, who has used all three, has called Resolve's multicam tools the weakest of the three NLEs, and it's a fair honest read: Resolve's multicam UI has more friction and fewer conveniences than Final Cut's. For a two or three camera interview it's still a genuinely capable, free, and reliable tool. It just asks more of you at the keyboard than the competition does.
Sources
- DaVinci Resolve Multicam Editing: Complete Step-by-Step Workflow (Hollyland Store)
- Multi-Camera Vlogging: Setup, Gear, and Workflow Guide (Hollyland Store)
- Get Started: Multicam Editing in DaVinci Resolve 18, by Larry Jordan
- Use the Sync Bin for Multicam Editing in DaVinci Resolve 19, by Larry Jordan
- DaVinci Resolve Manual - Creating and Modifying Multicam Clips (Blackmagic Design, mirrored)
- DaVinci Resolve Manual - Multicam Keyboard Controls (Blackmagic Design, mirrored)
- DaVinci Resolve Manual - Setting up a Timeline for Multicam Editing (Blackmagic Design, mirrored)
- DaVinci Resolve 21 final release (Newsshooter)
- Multicam Podcasts / Studio Recordings: The Correct Angle Chosen for the Correct Speaker (Eddie AI Help Center)
- PremiereCopilot - The AI Copilot for Adobe Premiere Pro
- CutAgent - AI Video Editing for DaVinci Resolve
- Switching to Resolve: Selects and Assembly in Multicam Editing, by Jana Johnston (Digital Production)
- DaVinci Resolve product page (Blackmagic Design)
Learn by doing, not watching
Stop translating tutorials to your timeline.
TryUncle stays beside Resolve on Mac and Windows. When you ask, Uncle sees your screen and points at the exact control you need. No hunting through tabs, timestamps, or mismatched tutorials.
Meet TryUncleKeep reading
 GuidesJul 8, 202639 min read
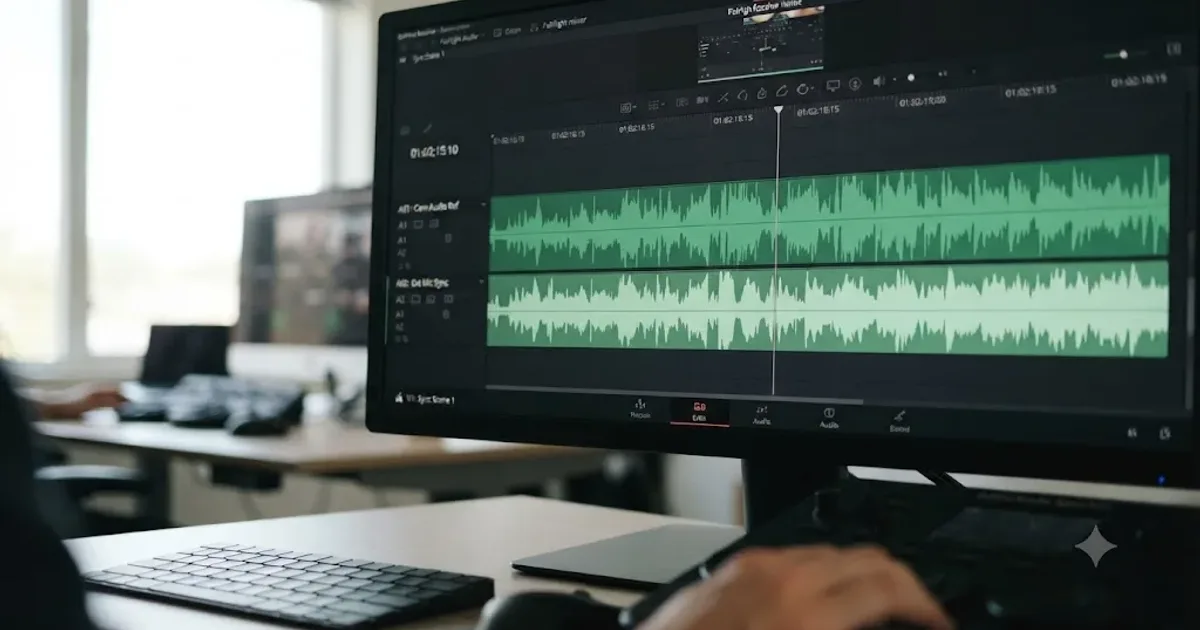
How to Sync Audio in DaVinci Resolve, Every Method
Sync audio and video in DaVinci Resolve with Auto Sync Audio, timecode, the Sync Bin, or a manual clap, plus fixes for drift and failed matches.
 FixesJul 12, 202629 min read
DaVinci Resolve Mixed Frame Rate Timeline Jittery: The Fix
DaVinci Resolve timeline jitters when clips have mixed frame rates. Here's why it happens, the setting that locks after import, and every real fix.
 GuidesJul 8, 202639 min read
How to Copy a Color Grade to Multiple Clips in DaVinci Resolve
Every way to copy a DaVinci Resolve color grade to multiple clips: copy/paste, middle-click, Gallery stills, PowerGrades, Color Groups, and more.