
Learn / DaVinci Resolveupdated for DaVinci Resolve 21.0.2 and Blender 5.2 LTS (July 2026)
DaVinci Resolve vs Blender's Video Sequencer: Which to Use?
Quick answer
DaVinci Resolve is still the better finishing tool: a full color page, Fairlight audio, and native multicam. Blender's Video Sequencer (renamed from Video Sequence Editor) gained real HDR and node-based finishing in 5.2 LTS, proven on the film Singularity, but it's still built around Blender's own renders, not camera footage.
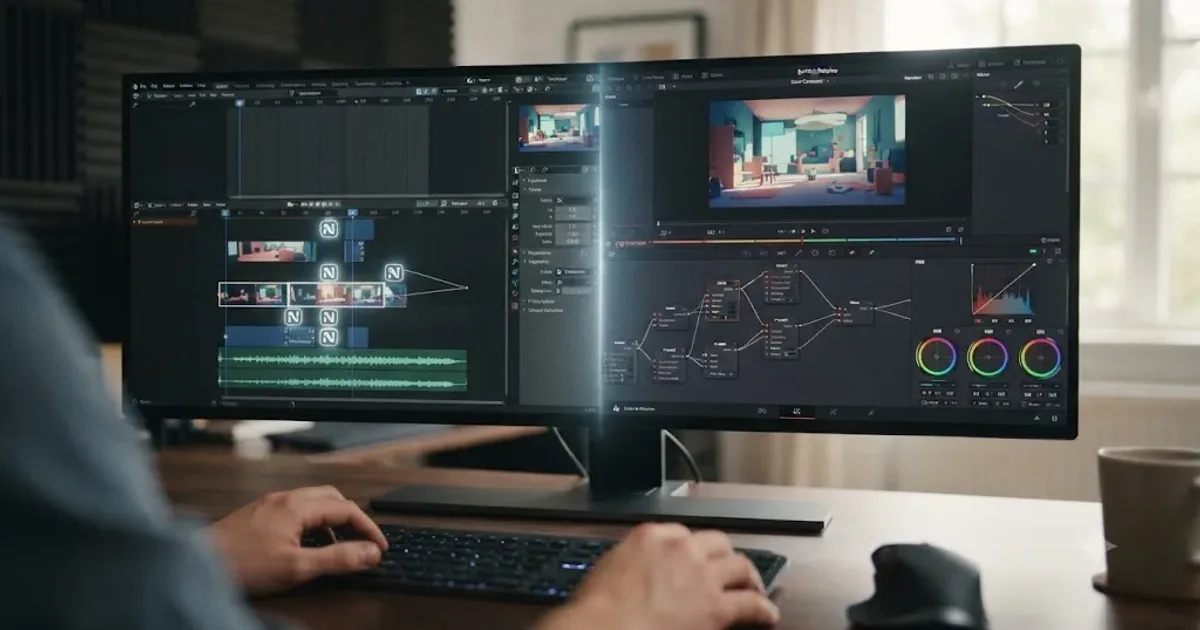
You've been cutting inside Blender's Sequencer, maybe assembling shots from your own 3D renders, and you've just noticed it isn't called the "Video Sequence Editor" anymore. It's the "Video Sequencer" now, at least in Blender's own manual, and the 5.2 LTS release that shipped July 14, 2026 added real finishing tools behind that new name. So the question isn't the generic "which app is better." It's narrower and more useful: now that the Sequencer can do more, does it do enough to keep your project inside Blender, or do you still need to bring it into DaVinci Resolve?
This piece answers that specific question. For the full feature-by-feature comparison between DaVinci Resolve and Blender as a whole, our complete DaVinci Resolve vs Blender comparison covers pricing, VFX, multicam, and every other angle in depth. Here, we're staying inside the Sequencer specifically: what changed, what it means for real projects, whether your own hardware already answers part of the question, and how to move your work if you decide it's time to leave.
What's the difference between DaVinci Resolve and Blender's Video Sequencer?
DaVinci Resolve is a dedicated non-linear editor with five integrated pages built around finishing real footage: Edit, Color, Fusion, Fairlight, and Deliver. Blender's Video Sequencer is one editor inside a full 3D creation suite, originally built to assemble Blender's own rendered animation frames into a sequence rather than to ingest and finish camera footage.
That origin still shapes what each tool is good at. Resolve has a node-based Color page with a full scopes suite, a Fairlight audio DAW with up to 2,000 tracks, and native multicam sync for up to 16 angles. The Sequencer, as of Blender 5.2 LTS, has a new Compositor effect strip, Strip Modifiers driven by node groups, and rebuilt HDR scopes, none of which existed in this form even a year ago. A tool that gained real finishing features this year is not the same tool most comparisons describe. That's the gap this piece exists to close.
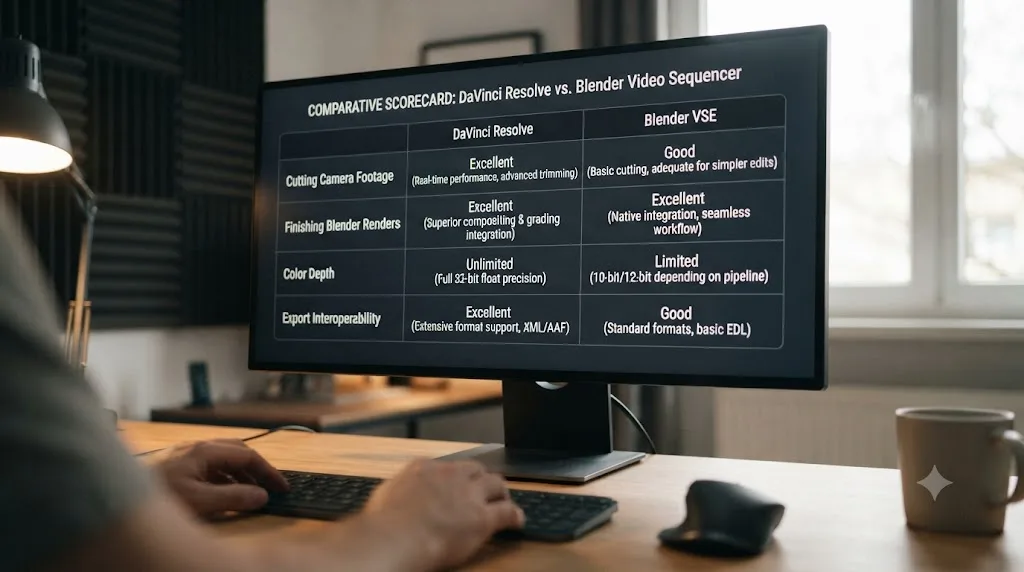
| Category | Winner | Why |
|---|---|---|
| Cutting real camera footage | DaVinci Resolve | Media Pool with bins, proxy workflow, multicam sync, none of which the Sequencer has natively |
| Finishing your own Blender renders | Tie, leaning Sequencer | No round trip needed; Strip Modifiers and HDR scopes now handle a real grading pass in-app |
| Color grading depth | DaVinci Resolve | Node-based Color page with qualifiers and power windows beats Strip Modifiers on complex shots |
| Moving a cut to another app | Blender's Sequencer, oddly | EDL and OpenTimelineIO export are built for exactly this; Resolve assumes you're finishing in Resolve |
| Naming clarity | Neither, really | "Video Sequencer" is the current manual name; "VSE" and "Video Sequence Editor" still work everywhere else |
Why did Blender rename the Video Sequence Editor to the Video Sequencer?
Quietly, and not all at once. Blender's manual for version 2.79 titles the editor's page "Video Sequence Editor." The current 5.2 LTS manual titles the same page "Video Sequencer", no "Editor" in sight. There was never a press release announcing the change, which is why plenty of tutorials, forum threads, and even Blender's own developer discussions still use "VSE" and "Video Sequence Editor" interchangeably with the newer name.
The reason it hasn't gone further than the manual is documented on Blender's own development tracker. A 2021 discussion about the renaming found that the word "sequence" appears 5,036 times across 240 files in Blender's codebase, once you exclude its use in the unrelated "image sequence" context. A full rename touching every menu, tooltip, and API reference would also break more than 160 third-party add-ons that reference the old naming convention in their code. Renaming a UI label in a manual is a documentation edit. Renaming it everywhere a script or add-on depends on that string is a much larger, riskier project, and it's exactly the kind of change an open-source project with a large add-on ecosystem approaches slowly.
"Video Sequencer" is the name in Blender's current manual, but "VSE" is still the name everyone, including Blender's own developers, actually uses day to day. That's worth knowing before you go looking for tutorials, since searching either term still gets you to the same editor.
What's new in the Sequencer as of Blender 5.2 LTS?
More than a rename. Blender 5.2 LTS, released July 14, 2026 with support guaranteed through July 2028, shipped the biggest finishing-focused update the Sequencer has had in years, according to Blender's own 5.2 LTS release notes and CG Channel's rundown of the release's key features.
Three changes matter most for anyone deciding whether to finish a project in the Sequencer:
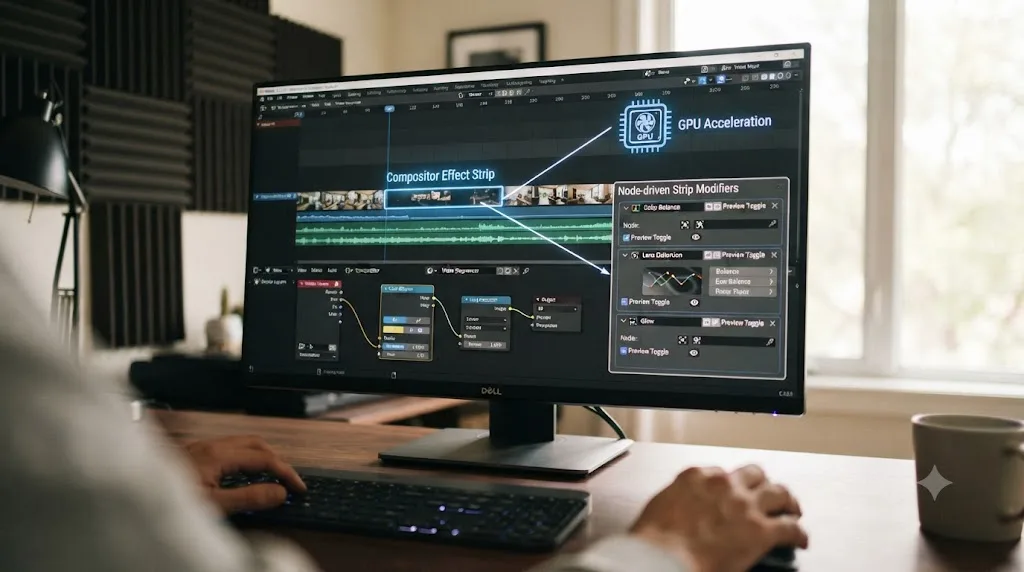
- A new Compositor effect strip. It takes zero, one, or two strip inputs and runs the actual effect through a full compositor node tree, with a float "effect fader" input for blending. That's a fundamentally different model from the old fixed color-strip effects, which offered a set menu of built-in corrections and nothing more.
- Strip Modifiers driven by node groups. Modifiers on a strip now expose their inputs in the panel the same way Geometry Nodes does, and you can save a compositor node tree as a reusable Strip Modifier asset to add from the modifier menu later, the same way you'd add a built-in tool. Each modifier also has a preview visibility toggle, so you can disable heavy processing during playback without touching what actually renders in your export.
- GPU-accelerated compositor modifiers. Compositor modifiers and effects inside the Sequencer can now run on the GPU, controlled from the same Render, Performance, Compositor setting that governs Blender's regular compositor. That's a direct answer to the CPU-bound playback bottleneck that made timelines with several effects strips prone to dropping frames.
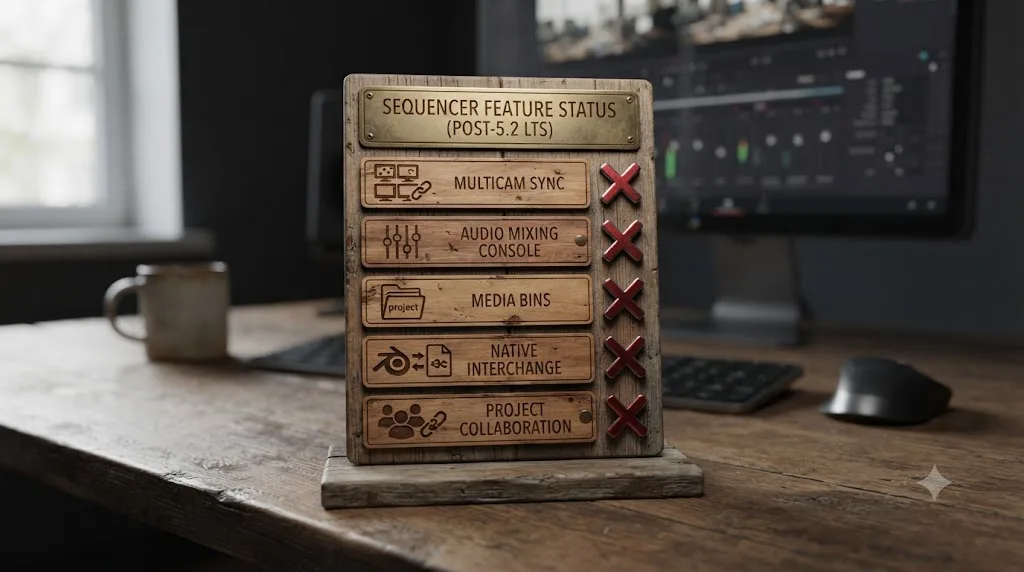
What didn't ship: media bins and full three-point editing, both of which were on Blender's 2026 development roadmap for the Sequencer, are still not in 5.2 LTS. If you were hoping this release brought a proper bin system with thumbnail previews, it didn't. Blender's 2026 roadmap keeps naming DaVinci Resolve as the bar its own Sequencer is trying to clear, and 5.2 LTS closes some of that distance without closing all of it.
Does your hardware already answer this question for you?
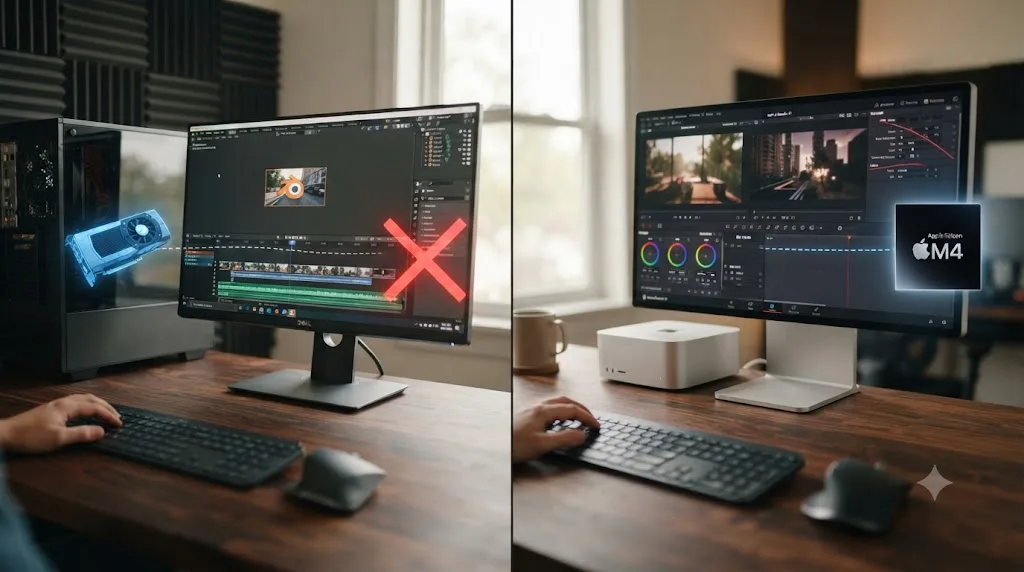
Before you weigh features against each other, it's worth checking something more basic: can your current machine actually run the current version of either app? Both DaVinci Resolve and Blender quietly raised their hardware floors going into 2026, and depending on what you're running, one or both decisions might already be made for you.
Blender 5.0, whose requirements carried forward into 5.2 LTS, raised its GPU baseline to hardware with Vulkan support, according to Blender's own requirements page and reporting on the change from VideoCardz. In practice that means:
| Vendor | Minimum supported | What got dropped |
|---|---|---|
| NVIDIA | GeForce 900 series and newer (roughly 2014-15 onward) | Fermi and Kepler-era cards (GeForce 400-700 series) |
| AMD | GCN 4th generation and newer (roughly 2016 onward) | Earlier GCN generations |
| Intel | Kaby Lake integrated graphics and newer | Older integrated GPUs |
If your GPU falls outside that table, the Sequencer's 5.2 LTS improvements, including the GPU-accelerated compositor modifiers covered above, aren't available to you at all. Blender's own guidance for that situation is to stay on Blender 4.5 LTS, which still supports the older requirement floor.
DaVinci Resolve moved its own floor too, in a different direction. On macOS, Resolve 21 requires a Mac with Apple Silicon, according to Blackmagic Design's own tech specs page; Intel Macs, even a fully maxed-out Intel Mac Pro, are permanently capped at Resolve 20 and won't receive Resolve 21 or later. On Windows and Linux, Resolve's minimum call is a dedicated GPU with at least 4GB of VRAM for HD workflows, with 8GB or more recommended once you're grading 4K footage or leaning on Neural Engine AI tools, and Blackmagic's own acceleration pipeline is built especially deeply around NVIDIA's CUDA API, so AMD and Intel GPUs work but leave some performance on the table.
The best editor for your footage is worthless if your GPU can't run its current version. Practically, that means a handful of concrete scenarios worth checking before you decide anything else:
- A 2014-era gaming laptop with a GeForce 800-series or older GPU can still run Blender, but not Blender 5.x. You're on 4.5 LTS or older, which means none of the Sequencer improvements this comparison is built around.
- An Intel-based Mac, no matter how recent or well-specced, is locked out of DaVinci Resolve 21 entirely. That's not a Sequencer-specific problem, but it does mean "move it to Resolve" isn't free advice if your only Mac is an Intel one.
- A workstation with an older AMD card below GCN 4th gen can run DaVinci Resolve's CPU-only path, slowly, but won't get Blender 5.2 LTS's GPU compositor acceleration either.
If your hardware clears both bars, the rest of this comparison is genuinely about workflow fit. If it doesn't, you may already know your answer, and it might not be the one the feature list would have pointed you toward.
Do you need proxies to edit 4K footage in the Sequencer, the way you do in Resolve?
Yes, and Blender's own issue tracker is the proof. Developers have logged choppy Video Sequence Editor playback, unreliable timing and time warping in movie strips, outright slow sequencer playback, and very low framerate specifically on demanding edits across multiple versions, long before 5.2 LTS existed, according to reports like #56755 and #69334 on Blender's own project tracker. None of that means the new release is broken. It means the Sequencer's playback engine has always leaned on a workaround to handle high-resolution footage smoothly, and that workaround is proxies, not raw horsepower.
Blender's own manual and developer docs are direct about why: match your footage's resolution, frame rate, and color space to your project's render settings, or expect dropped frames, according to Blender's Proxy System developer documentation. A proxy sidesteps that mismatch by generating a smaller stand-in file, typically 25 to 50 percent of the source resolution for 4K footage, in a fast-decoding format like ProRes or DNxHD, that Blender decodes faster in the viewport while the full-resolution original still renders at final output.
Setting one up in the Sequencer is a single dropdown: pick a Proxy Render Size in the View tab, and Blender enables that resolution across every strip and starts generating the downscaled files in the background, according to Blender's own Proxy manual page. That's less friction than it sounds, but it's still a setting you have to remember to turn on per project, and one rough edge is documented directly on Blender's tracker: issue #70415 recorded proxy clips playing back with poor performance specifically when used as proxies, even though the same footage played fine once added directly to the timeline as a regular strip, a reminder that the swap between proxy and full-resolution media isn't always as invisible as the workflow assumes.
Resolve automates more of that decision for you. Its Optimized Media system can be set to "Choose Automatically," which downsamples only the footage that actually exceeds your timeline's resolution, half-res for a 4K source on an HD timeline, quarter-res for 8K, and so on, according to Frame.io's Resolve proxy workflow guide. A separate background utility, Blackmagic's own Proxy Generator, can build those files before you've even opened the project. The underlying idea, a lighter stand-in for playback and a full-resolution original for delivery, is identical in both apps. What differs is how much of that decision the software makes automatically versus how much you manage strip by strip.
| Task | Blender's Sequencer | DaVinci Resolve |
|---|---|---|
| Trigger for building proxies | Manual: pick a Proxy Render Size in the View tab per project | Automatic option: "Choose Automatically" downsamples only footage above timeline resolution |
| Recommended proxy resolution for 4K source | 25-50%, in a fast-decoding codec like ProRes or DNxHD | Half-resolution for a 4K source on an HD timeline, set automatically |
| Background generation before opening the project | Not built in | Available via the separate Blackmagic Proxy Generator app |
| What happens at final output | Full-resolution original renders; you switch proxies off per project | Automatically swaps back to full-resolution media, no separate step |
A tool built to ingest camera footage treats proxies as an automatic background task. A tool built to assemble a studio's own renders treats them as a setting you remember to flip. That gap matters less on a Blender-native project, where your renders were probably already a manageable resolution to begin with. It matters a lot more the moment you drop real 4K or 8K camera footage into the Sequencer and wonder why your timeline stutters, since the fix isn't a bug report waiting on a Blender developer. It's a step the Sequencer expects you to take yourself, every time.
Does Singularity prove the Sequencer can now finish a professional color grade?
It's the strongest evidence yet, and it's worth taking seriously instead of dismissing as a marketing example.
Singularity is Blender Studio's short film directed by Andy Goralczyk, a painterly space adventure that premiered online on May 11, 2026. According to Blender Studio's own development writeup and independent coverage from Digital Production and 80.lv, it's Blender Studio's first project mastered in 4K HDR, with a full color grade completed entirely inside the Sequencer rather than exported to a separate color tool.
Two pieces of the 5.2 LTS finishing work made that possible. First, the Sequencer's scopes were rebuilt for HDR and wide-gamut work: histograms, waveforms, and vectorscopes now support the P3 and Rec.2020 color spaces where needed, and run faster at 4K resolution than the previous scopes did. Second, Blender gained the ability to read and write HDR video directly, which let the team handle final assembly inside the Sequencer instead of round-tripping footage out to another application and back.
The production's own logs lay out precisely how that actually happened week to week: Andy ran the first full pass of color grading directly in the Sequencer, with developer Sergey Sharybin working alongside him to iron out the proxy and HDR workflow specifically so the grade would hold up across an entire film rather than a handful of test shots. By the end of that week, the setup was responsive enough to carry a complete pass, conforming every shot to look right in both SDR and HDR simultaneously. That detail matters, because it means the HDR grading pipeline wasn't a finished feature waiting to be used. It was built, shot by shot, in service of one specific production, which is a very different story from a feature shipping fully baked in a release note.
That's a genuinely different story from the one told about the Sequencer even a year ago, when a full grading pass past basic curves meant switching to Blender's separate Compositor shot by shot. A film mastered in 4K HDR with its full color grade finished inside the Sequencer is not a hypothetical use case anymore. It happened, on a real production, in May 2026.
The honest caveat: Singularity is a Blender Studio production built and rendered entirely inside Blender, by a team that knows the Sequencer's node system intimately, and by developers who could fix the tool itself mid-production when the workflow wasn't there yet. It's not a test of cutting and grading real camera footage, interviews, or client work, the job most people reading this comparison are actually trying to do. That distinction matters for the next section.
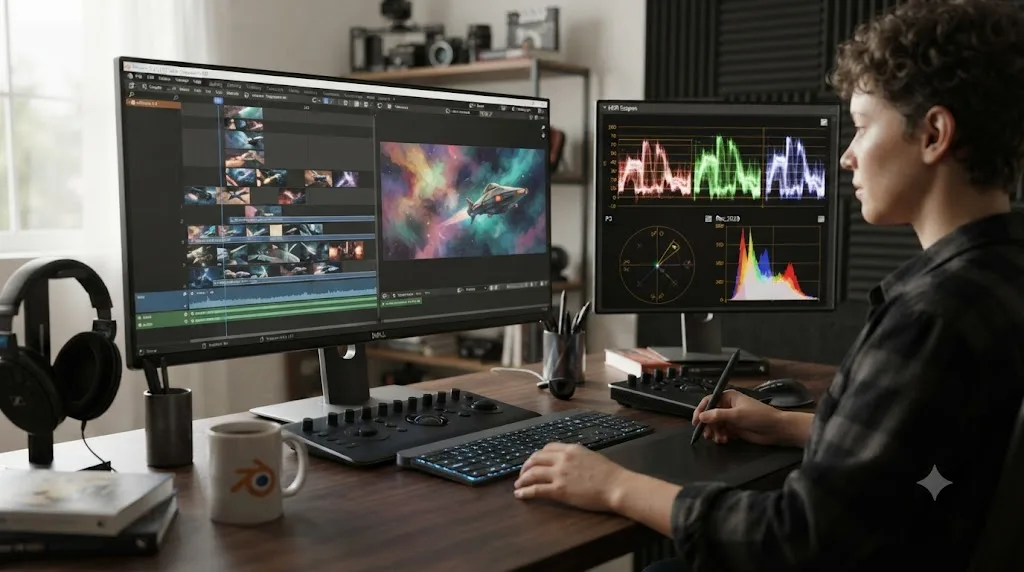
Can the Sequencer replace DaVinci Resolve's Color page yet?
For Blender-native projects, closer than before. For camera footage, no, and the gap is structural rather than a missing feature or two.
Strip Modifiers built from compositor node groups are a real step toward node-based thinking, the same paradigm that makes Resolve's Color page and its ACES-based color management powerful. But a Strip Modifier node group is still built and edited per strip, in a separate node editor you switch into, rather than living inside one continuous graph you can see and adjust alongside your cut the way Resolve's Color page does. Resolve's node system also ships with purpose-built grading tools out of the box: qualifiers for isolating a color range, power windows for masking a region of the frame, parallel and layer nodes for stacking corrections in specific orders, all visible in one glance-able graph with a full scopes suite docked next to it. Blender's Strip Modifiers give you the node flexibility without the grading-specific toolset built around it; you're assembling general-purpose compositor nodes to do a colorist's job rather than reaching for tools designed for that job specifically.
There's also the footage question. Singularity's grade worked inside the Sequencer because every shot originated inside Blender at a known color space, resolution, and frame rate. Real camera footage arrives in dozens of codecs, color spaces, and frame rates that need conforming before a grade even starts, and that's precisely the kind of ingest work Resolve's Media Pool and Color Management were built to handle. The Sequencer's HDR scope rebuild helps you see what you're grading. It doesn't replace the ingest and conform pipeline that real-world footage needs before grading can even begin.
Better scopes and node-driven modifiers make the Sequencer's grade genuinely more capable than it was. They don't make it a colorist's tool for footage that didn't originate in Blender. That's not a knock on the 5.2 LTS work, it's a fair read of what it was actually built to solve.
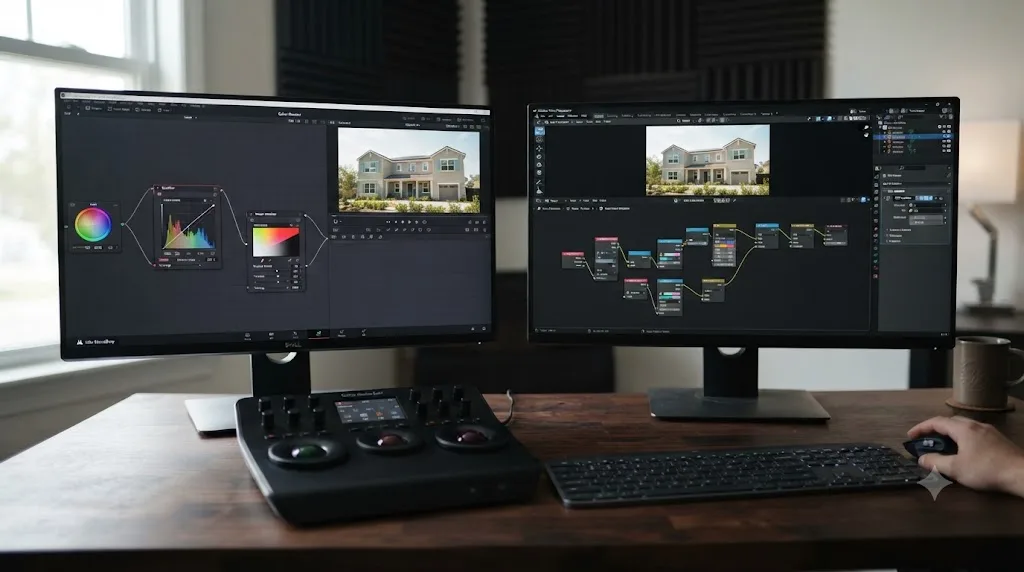
Is Blender's Strip Modifier system closer to Resolve's Fusion page or its Color page?
Fusion, not Color, and that reframing changes what "the Sequencer can grade now" actually means.
Resolve splits its node-based work into two separate pages on purpose. The Color page's nodes are grading-specific tools with a job already built in: a qualifier isolates a color range the moment you click it, a power window masks a region and can track to a moving subject, and the scopes panel next to the graph is tuned for exposure and color decisions specifically. The Fusion page's nodes are general-purpose: keyers, masks, trackers, particle systems, and a full 3D compositing space, built to construct almost anything, including a grading tool, if you wire enough of them together yourself.
Strip Modifiers, as covered above, are literally compositor node groups, saved as reusable assets and attached to a strip through the modifier stack. That puts them architecturally next to Fusion's model, a general-purpose node system you assemble a specific tool from, not next to the Color page's model, a grading-specific toolkit that's already built for you the moment you open it.
That distinction explains something the Singularity case study leaves out. The team that pulled off a full HDR grade inside the Sequencer wasn't learning node-based color correction from a standing start. They were 3D artists and pipeline developers who already lived inside Blender's Compositor and Geometry Nodes daily, on a studio short built and rendered entirely in Blender. Wiring a Color Balance node into a Hue Correct node inside a Strip Modifier asset is a small step sideways from work they already do. For an editor whose daily tool is a dedicated NLE cutting real camera footage, the same task is a new discipline: node compositing, not color grading with a menu of purpose-built tools already in front of you.
Comparing Strip Modifiers to Resolve's Color page is comparing a box of compositing parts to a grading toolkit already built from them. The fairer comparison, and the more useful one for anyone deciding where to finish a project, is Strip Modifiers versus Fusion: two general-purpose node systems, one that happens to sit inside a full 3D suite its target users already know cold, and one that sits inside a dedicated NLE next to a Color page that already does the grading-specific job without asking you to build the tool first.
That reframing doesn't undo the real progress in 5.2 LTS. GPU-accelerated compositor modifiers, an asset system for reusable node trees, and a preview-visibility toggle separate from render visibility are genuine usability wins on top of the general-purpose model. They just don't turn a compositing system into a grading system by adding features to it. A general-purpose node system with grading examples wired into it is not the same thing as a purpose-built grading system, no matter how many of those examples you build. Resolve's Color page earns that label by being built around grading from the start, qualifiers and power windows and all.
What does building a Strip Modifier actually look like, step by step?
It's worth walking through the actual mechanics, because "node-based grading" sounds similar to Resolve's Color page until you see how many extra steps it takes to get there. Here's the documented workflow, per Blender's manual pages for Strip Modifiers, using the Compositor, and Node Groups:
- Switch a Compositor editor's node tree to "Sequencer." By default, Blender's Compositor edits your scene's render output. You have to explicitly change its node subtree target before anything you build there can touch a Sequencer strip.
- Build your correction as a node tree. A basic grade might chain a Color Balance node into a Hue Correct node, wired between the tree's Group Input and Group Output sockets, the same pattern Geometry Nodes uses for reusable logic.
- Mark the node tree as an asset. Saving it as an asset is what makes it reusable across files later, exactly like a material or a geometry-nodes setup, rather than something you rebuild from scratch on the next project.
- Select your strip and add a Compositor modifier. In the Sequencer's modifier stack, add the Compositor modifier type and point it at the node tree you just built or saved.
- Use the preview-visibility toggle while you work. Each modifier tracks preview visibility and render visibility separately, so you can disable a heavy effect while scrubbing the timeline and re-enable it only for the final render.
- Apply it once, broadly, with an Adjustment Layer strip if several clips need the same look. Stack the Compositor modifier on an Adjustment Layer above your other strips instead of repeating the setup on every individual clip.
Once that's built, the modifier's exposed inputs, say a lift, gamma, and gain trio, show up as ordinary sliders in the modifier panel, without reopening the node editor. That's a genuinely useful piece of design, borrowed directly from how Geometry Nodes already works in Blender's 3D side.
Compare that to grading the same shot in Resolve. You open the Color page, add a serial node, drop a qualifier to isolate the sky, add a power window to protect a face, and you're grading. No separate editor to switch into, no node tree to build and mark as an asset before you can start, because those grading-specific tools already exist as one-click additions on Resolve's node graph. The Sequencer's version is more flexible in theory, since a compositor node tree can do things a fixed qualifier can't, but it asks you to build the tool before you use it, every time you want something the built-in Strip Modifiers don't already cover out of the box.
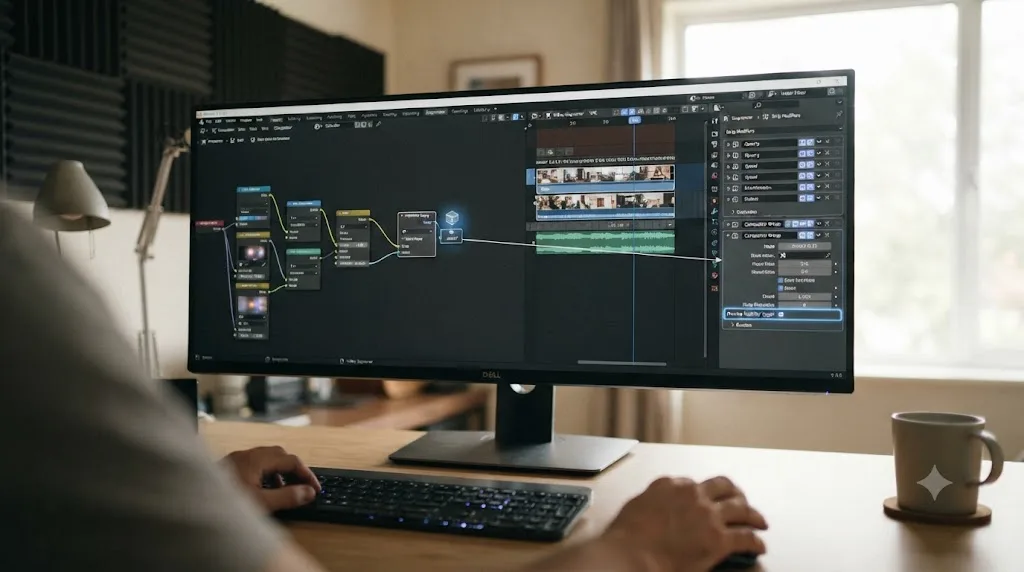
Should you finish your edit in the Sequencer, or move it to DaVinci Resolve?
This is the actual decision, and it comes down to where your footage came from and what the project still needs.
| Your situation | Finish where | Why |
|---|---|---|
| Fully Blender-native project (3D short, game cinematic, motion graphics from your own renders) | Sequencer | No ingest problem to solve; 5.2 LTS's HDR scopes and Strip Modifiers now cover a real grading pass |
| Real camera footage, any source | DaVinci Resolve | Media Pool, proxy workflow, and color management are built for exactly this ingest problem |
| More than one camera angle at any point | DaVinci Resolve | The Sequencer has no native multicam sync; you'd sync and switch every angle by hand, unlike Resolve's dedicated multicam workflow for interview setups |
| Mixed project: Blender renders composited with live-action plates | Both, in sequence | Build and pre-grade the CG elements in the Sequencer if you want, then bring everything into Resolve for the final conform, mix, and delivery |
| Needs a real audio mix, ADR, or sound design pass | DaVinci Resolve | Fairlight is a full DAW; the Sequencer's Audaspace-based audio is still a waveform display with gain and panning |
| Client work with review rounds and revisions | DaVinci Resolve | Bin organization, timeline versioning, and delivery presets all matter more once someone else is giving notes |
| Podcast or interview rough cut, before a finishing pass elsewhere | Either, then Resolve | tin2tin's Auto_Edit_on_Sound add-on can cut a rough assembly at audio peaks fast; move to Resolve once you need a real mix |
| Team needs shared project access or bin/timeline locking | DaVinci Resolve Studio | Native multi-user locking exists in Resolve Studio; the Sequencer has no shared-project mode at all |
| You're already fluent in the Sequencer and the project is simple | Sequencer | The interface familiarity is worth something if the grading and audio needs stay basic |
Notice what doesn't appear on this table: "which app is better" as a standalone question. The right tool depends on where the pixels started, not on which app has the longer feature list. Footage that started as a Blender render has a legitimate home in the Sequencer now. Footage that started in a camera still belongs in a dedicated NLE.
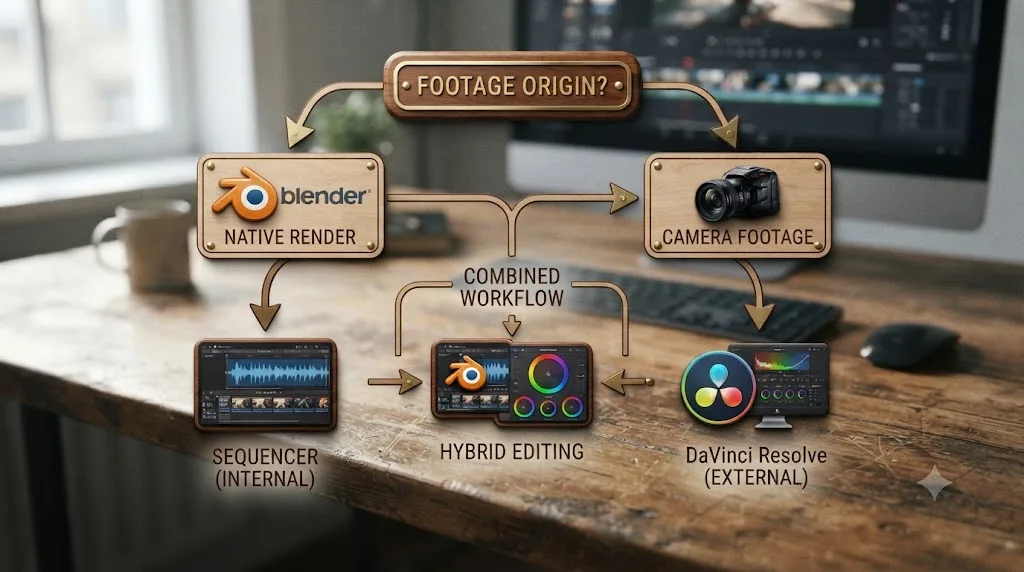
How much does each option actually cost once you've made that decision?
Cost rarely decides this comparison, but it's worth naming plainly, since a lot of people assume "Blender is free, Resolve costs money" settles the question by itself. It doesn't, because Resolve's own free tier is genuinely capable too.
| Scenario | Cost | Why |
|---|---|---|
| Finishing entirely in the Sequencer | $0, permanently | Blender is released under the GNU GPL with no paid tier of any kind, according to Blender's own license page |
| Finishing in DaVinci Resolve's free edition | $0, with caps | Free Resolve caps export at Ultra HD (3840x2160, up to 60fps) and withholds multi-GPU acceleration, advanced noise reduction, and most Neural Engine AI tools |
| Finishing in DaVinci Resolve Studio | $295 once, no subscription | A single purchase removes the caps; using a Studio-only effect on the free edition stamps a visible watermark on your export |
| Export add-ons for either interchange path | $0 | tin2tin's and Tilix4's EDL and OpenTimelineIO add-ons are free and open source; Power Sequencer's core editing tools are already built into Blender itself |
| TryUncle, if you want help relearning Resolve's pages after moving from the Sequencer | $39/month | Entirely optional; neither app requires it to function |
Blender's project runs on optional Development Fund donations starting around 5 euros a month, according to a detailed pricing breakdown from RFP.wiki, and corporate patronage tiers for larger studios, but none of that unlocks anything you don't already have. Whatever you pay, or don't, you get the same Blender everyone else gets.
DaVinci Resolve's free edition, according to Toolfarm's detailed breakdown of what the free version actually lacks, covers most creators for a long time before the Ultra HD export cap or the missing multi-GPU acceleration becomes a real problem. If you're finishing HDR or 4K work the way Singularity did, and you're not leaning on multi-GPU rendering, the free edition may well be enough, which means the cost decision only shows up at all once your project outgrows it.
Money isn't usually the reason to pick one of these tools over the other, since both have a genuinely capable $0 tier. The decision that actually matters is the one this whole piece is about: where your footage came from, and what the finished project still needs.
How do you move an edit from Blender's Sequencer into DaVinci Resolve without starting over?
This is the part most comparisons skip, because they assume you're choosing one app for the whole project. Plenty of real workflows need to move a cut, not just rendered footage, from the Sequencer into Resolve partway through.
Paul Golter did exactly this on the Blender Studio production Sprite Fright. As Pipeline Technical Director, he documented the process on Blender Studio's own blog: "Spoiler alert: I successfully exported the entire edit of Sprite Fright from the Blender Sequence Editor to Adobe Premiere, ProTools and DaVinci Resolve!" He used the OpenTimelineIO-based vse-io add-on, created by Félix David, to make that work.
Two export paths exist, and they trade off differently:
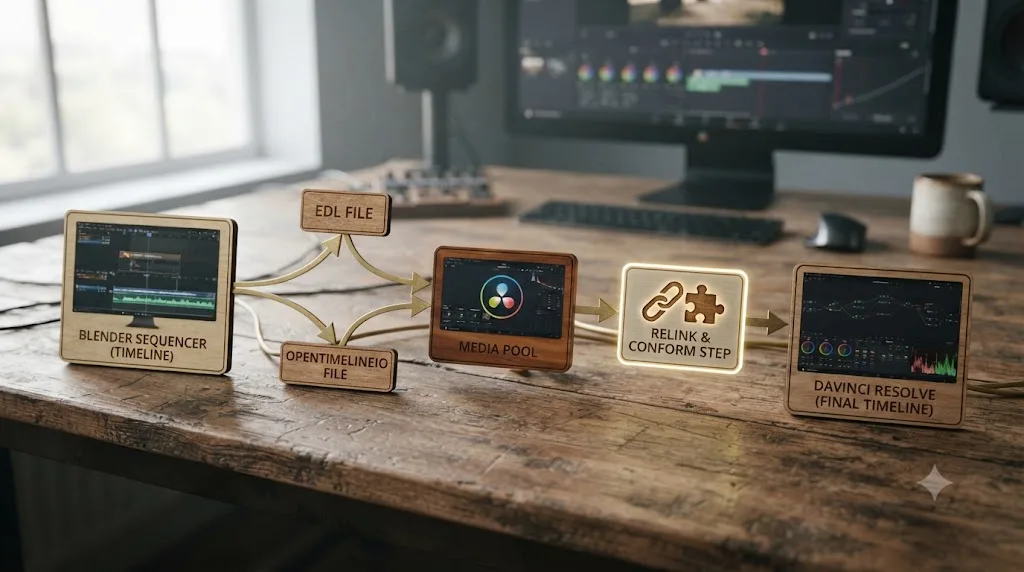
The EDL route uses the free Export EDL add-on by developer tin2tin, which writes a standard CMX 3600 EDL file that Resolve, Premiere, Final Cut Pro, and Lightworks can all import. It's simple and universally supported, but Golter explained why his team ruled it out for Sprite Fright: "While there were some old add-ons flying around the Internet that can export EDLs out of Blender, they weren't really an option for us because of the EDL restriction to one video track and only a handful of audio tracks." The add-on's own documentation confirms the same limit: one video channel and up to four audio channels per export, with no dropframe frame rate support and no embedded timecode or reel names carried across.
The OpenTimelineIO route carries more structure across the move. OpenTimelineIO started at Pixar as an open, application-neutral format for describing an edit, closer in spirit to EDL or AAF than to a video file format. Golter's summary of why it worked where EDL didn't: "OpenTimelineIO really was the toolset that made it possible in the end, thanks to its simplicity and working XML adapter." The tradeoff is setup. The vse-io add-on, now maintained under the GitLab handle Tilix4, requires installing the OpenTimelineIO Python package alongside Blender, which used to be a genuine hurdle on some platforms before David fixed the installation path to work with Blender's bundled Python.
Here's the practical version of the move, whichever format you pick:
- Flatten your channels. Collapse your Sequencer timeline to one video channel and up to four audio channels before exporting, since EDL can't carry more, and OpenTimelineIO handles complex structure far more reliably when your source timeline is already tidy.
- Pick your format based on complexity. A simple assembly cut with a handful of clips and dissolves exports cleanly as EDL. A cut with layered strips, transitions beyond dissolves, or anything you need preserved precisely is worth the OpenTimelineIO setup.
- Export the timeline. For EDL, it's Sequencer > Strip Properties > Export EDL. For OpenTimelineIO, run your chosen add-on's export operator and save the .otio or .xml file alongside your rendered or proxy media.
- Match project settings in Resolve before importing. Create your new DaVinci Resolve project at the same frame rate and resolution as your Blender timeline first. A mismatch here is the single most common reason an EDL or OTIO import lands off by a frame or several.
- Relink media and check the conform by eye. Import the file into Resolve's Media Pool, relink it to your rendered clips, and manually verify every transition and effect. Neither EDL nor OpenTimelineIO carries Blender-specific compositor node modifiers or Strip Modifier assets across the move, so anything built with 5.2 LTS's new node-driven tools needs to be rebuilt or baked into the render before export.
An edit is not just a sequence of cuts. It's a record of every decision you made getting there, and EDL only remembers a fraction of them. That's the real argument for OpenTimelineIO over EDL whenever your Sequencer cut has any real complexity to it.
What goes wrong when you export from the Sequencer, and how do you fix it?
The export process above is straightforward on paper. In practice, most of what trips people up falls into a handful of predictable buckets.
| Symptom | Likely cause | Fix |
|---|---|---|
| EDL import lands every cut off by several frames | Blender's project frame rate doesn't match the new Resolve project's timeline settings | Create the Resolve project at the exact frame rate and resolution of your Blender timeline before importing, not after |
| Export EDL add-on refuses more than four audio channels | CMX 3600 EDL is a hard format limit, not a bug | Flatten to four or fewer audio channels before export, or switch to an OpenTimelineIO-based add-on instead |
| tin2tin's VSE_OTIO_Export won't finish installing its Python dependency on Windows | The add-on needs to write into Blender's bundled Python environment, which needs elevated permissions on Windows | Relaunch Blender as Administrator once to install the dependency, then relaunch normally afterward |
| Transitions disappear after an OTIO export and reimport | A documented limitation: the add-on's own readme explicitly marks transition handling as not working yet | Bake transitions into rendered strips before export, or rebuild them manually once the cut lands in Resolve |
| Strip Modifiers or Compositor effects don't show up after import | Neither EDL nor OpenTimelineIO describes per-strip node processing; both formats only carry cut structure | Rebuild the look in Resolve's Color page, or render the effect into the strip as picture before exporting so it survives the move |
| Dropframe-rate timecode reads wrong after EDL import | Export_EDL's documented limitation: no dropframe frame rate support | Avoid dropframe rates in the Blender project if you know you'll round-trip through EDL, or use OpenTimelineIO instead |
| vse-io's OpenTimelineIO Python package fails to install at all | The version bundled with your system Python doesn't match the Python version Blender ships with internally | Use the alternative virtual-environment installation method documented in vse-io's own readme, matching Blender's bundled Python version as closely as possible |
Most of these problems sort into three buckets: format math limits like channel counts, platform installation friction like Windows admin rights, and information the interchange formats were never designed to carry in the first place, like node-based looks. None of these are really bugs. They're the practical seams of moving a project between two applications that were built on completely different assumptions about what an edit even is. Most of what breaks during this move isn't a bug. It's the interchange format faithfully reporting that it was never built to carry Blender-specific data in the first place. Knowing which bucket a given failure falls into tells you whether there's a real fix, or whether you just need to rebuild that one piece by hand once you're in Resolve.
Is native OpenTimelineIO support coming to the Sequencer?
Right now, every OpenTimelineIO workflow described above runs through a third-party add-on, whether that's vse-io or tin2tin's VSE_OTIO_Export, because Blender doesn't ship OpenTimelineIO support built in. That's changing, on paper at least, and it's worth knowing about if you're weighing whether to build a pipeline around today's add-on ecosystem or wait.
A Google Summer of Code 2026 project, with a contributor working under the name Bipin, is building import and export of OpenTimelineIO files directly into the Sequencer's own C and C++ codebase, targeting movie, sound, and image strips, with mixed channels separated automatically on export. That's a meaningfully different proposition from an add-on: it means the feature would ship, get maintained, and get documented as part of Blender itself, rather than depending on one developer's personal GitHub or GitLab repository staying up to date across Blender version bumps.
The project's own framing makes the backstory explicit: Blender Studio already experimented with OpenTimelineIO interchange back in 2021, using a third-party add-on for exactly the Sprite Fright move Paul Golter documented above, and the case for built-in support is turning that one-off experiment into supported functionality every VSE user can rely on, not just teams willing to install and maintain their own Python environment.
There's already code to point to, not just a proposal. A pull request titled "WIP: VSE: Export OpenTimelineIO (.otio)" is visible on Blender's own project tracker, meaning this work has moved past the planning stage into actual code review. That's a meaningfully stronger signal than a devtalk thread alone, though "work in progress" is still the accurate label. GSoC projects are mentee-driven development under Blender Foundation mentorship, and they don't all land in the very next release; some need additional development cycles beyond the summer program before they're merge-ready.
What changes if and when it ships: you'd stop needing to install a separate Python package, or relaunch Blender as Administrator on Windows just to get your cut structure out. Interchange would become a feature Blender's own release notes and support channels cover, instead of a workflow that lives or dies by whether a specific volunteer add-on stays maintained. The Sequencer's OpenTimelineIO support today lives in someone's personal code repository. Blender's own development roadmap says that's meant to be temporary.
What add-ons make the Sequencer feel more like a real NLE?
A working ecosystem exists, built almost entirely by one prolific developer plus a handful of others, and it's worth knowing about before you assume the built-in Sequencer is all you get.
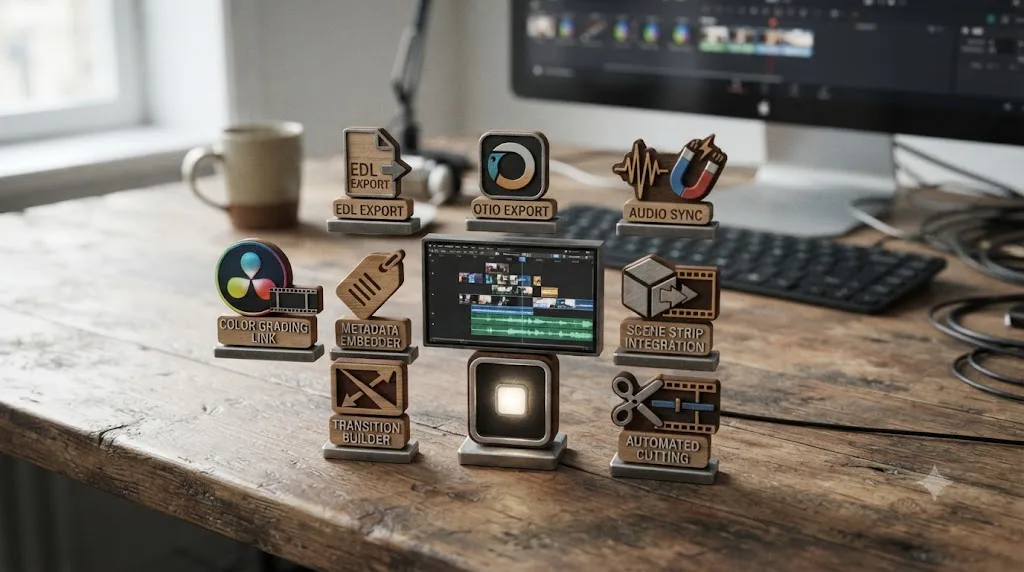
Developer tin2tin maintains a running list of Sequencer add-ons, most of them free and open source, that close specific gaps in the built-in editor:
| Add-on | What it does |
|---|---|
| Export_EDL | Exports a flattened timeline as a CMX 3600 EDL for Resolve, Premiere, Final Cut, or Lightworks |
| VSE_OTIO_Export | Exports the timeline as an OpenTimelineIO file for interchange with Resolve and other NLEs; transitions aren't yet supported, per its own readme |
| Auto_Edit_on_Sound | Automatically cuts strips at audio peaks, useful for podcast or interview rough cuts |
| Scene_Strip_Tools | Integrates the 3D Viewport and the Sequencer, so a scene strip's camera and animation stay editable without leaving the timeline |
| Audio_Sync_Tools | Syncs separately recorded sound to picture, the dual-system audio workflow a documentary or narrative shoot needs |
Two separate developers now maintain OpenTimelineIO tools for the Sequencer, and they don't behave identically. Worth comparing directly before you pick one for a real pipeline:
| Add-on | Maintainer | Known limitation |
|---|---|---|
| vse-io | Félix David, under the GitLab handle Tilix4 | Requires installing the OpenTimelineIO Python package separately; this is the tool Paul Golter's team used on Sprite Fright |
| VSE_OTIO_Export | tin2tin | Transitions explicitly marked as not working in its own readme; needs Blender run as Administrator once on Windows to install its dependency |
Separately, GDQuest's Power Sequencer add-on has a longer history than most people realize. Released in mid-2018, its core editing tools, batch renaming, silence detection, and dozens of quality-of-life shortcuts among them, were discussed directly with Richard Antalík, the Sequencer's then-new maintainer, and merged into Blender itself starting with version 2.81, according to the add-on's own GitHub repository. That's not an ongoing process; it already happened, back in 2018 and 2019, which is the earliest real example of the pattern that still describes the Sequencer's ecosystem today: community add-ons proving out a feature, then feeding it back into Blender's core.
None of this changes the structural comparison with Resolve. Add-ons extend what the Sequencer can do; they don't add a Fairlight-equivalent audio DAW or native multicam sync, because those are architectural features, not menu items a script can bolt on. An add-on can teach the Sequencer a new trick. It can't give it an audio mixing console that was never built into the underlying application. If your project needs that console, no add-on closes the gap, and that's true on either side of this comparison, since Resolve's free edition has the same kind of hard architectural line around its Studio-only features.
How did the Sequencer end up with real finishing tools in 2026?
The 5.2 LTS leap didn't come out of nowhere. It followed roughly a decade of dedicated maintainership, a community add-on pipeline that fed features straight back into Blender's core, and one real production that needed HDR to work under deadline pressure.
The clearest starting point is 2018. Blender co-founder Ton Roosendaal announced publicly that "Richard Antalík got commit rights to work on our VSE module," adding that "he'll be connecting with @tintwotin as well," the developer handle behind tin2tin's add-on ecosystem. That single appointment mattered more than it might look: it gave the Sequencer a maintainer whose job was specifically video editing, rather than treating it as a minor corner of Blender's much larger 3D codebase.
The add-on-to-core pipeline showed up almost immediately afterward. GDQuest's Power Sequencer, released mid-2018, brought batch renaming, silence detection, and dozens of editing shortcuts to a Sequencer that lacked them natively. Conversations between GDQuest and Antalík about folding parts of that work into Blender itself led directly to Power Sequencer's core tools shipping inside Blender 2.81 later that same year, a concrete, dated example of the pattern this comparison keeps returning to: third-party developers proving out a feature before Blender adopts it.
Not every step forward was smooth. The Sequencer's 2.8-era rework introduced a documented performance regression in scene-strip playback compared to 2.79, the kind of rough patch that's typical of a major architecture overhaul rather than a sign anything was going fundamentally wrong.
Governance kept evolving from there. As of October 2025, Aras Pranckevičius took over as the Sequencer's module owner from Sergey Sharybin, according to Blender's own developer meeting notes. That handoff landed just months after Sergey had personally helped Andy Goralczyk work out the HDR and proxy pipeline that made Singularity's Sequencer-only grade possible, the same detail covered earlier in this piece. The developer who helped force the Sequencer's HDR breakthrough into existence handed off the module right around the time that breakthrough shipped to the world, a passing of the torch that lines up almost exactly with the Sequencer's most feature-dense year yet.
The Sequencer's 2026 finishing tools are not a sudden pivot. They're the payoff of nearly a decade of dedicated maintainership, a community add-on pipeline, and one production that needed HDR to work under deadline. Understanding that history is part of why the gaps covered in the next section aren't surprising either: they're the parts of a dedicated NLE that take years, not one release cycle, to build.
What does the Sequencer still not do, even after 5.2 LTS?
Worth naming plainly, since it's easy to read the 5.2 LTS changes and assume more closed than actually did.
No native multicam. Nothing in the 5.2 LTS release adds multicam sync or live angle-switching. If your project involves more than one camera at any point, you're still syncing and switching strips by hand, the same manual process the Sequencer has always required.
No dedicated audio workstation. Strip Modifiers and the Compositor effect strip are picture-side improvements. The Sequencer's audio still runs through Audaspace: waveform display, gain, panning, crossfades. There's no channel-strip mixer, no built-in EQ or dynamics per track, and no ADR or Foley toolset, the same gap that existed before 5.2 LTS.
No media bins. Despite appearing on Blender's own 2026 roadmap, media bins with thumbnail previews didn't ship in 5.2 LTS. Organizing footage in the Sequencer still means a flatter file browser than Resolve's Media Pool offers.
No project-level collaboration. DaVinci Resolve Studio supports native multi-user project, bin, and timeline locking for teams working the same project simultaneously. The Sequencer has no equivalent, shared or otherwise.
No native interchange, yet. As covered above, every EDL and OpenTimelineIO export still runs through a third-party add-on. A GSoC 2026 project is building native support, but it hasn't shipped in an official release.
Grading tools built for footage, not renders. As covered above, Strip Modifiers are a real capability, but they're compositor nodes repurposed for grading, not a purpose-built qualifier-and-power-window toolset designed around correcting inconsistent camera footage.
None of these gaps are accidents of a missed release. They're the parts of a dedicated NLE that take years to build and that Blender's own roadmap hasn't prioritized yet, because the Sequencer's primary job is still serving Blender's 3D pipeline first. That's a reasonable priority for the team building it. It's also exactly why real camera footage still belongs in a dedicated editor.
Where does TryUncle fit if you're moving from the Sequencer to DaVinci Resolve?
If you've decided your project needs to live in Resolve, the friction usually isn't understanding non-linear editing, since the Sequencer already taught you strips, cuts, and effects. It's relearning where those same ideas live across Resolve's five pages, especially the Color page's node system, which has no real equivalent in the Sequencer even after the 5.2 LTS Strip Modifier update. Our roundup of AI tools built to help people learn DaVinci Resolve covers the wider field if you want to compare options before picking one.
TryUncle is a paid macOS app whose AI tutor, Uncle, watches your DaVinci Resolve screen and points at the exact control you're asking about, live, on the Edit, Color, and Fusion pages. It's not free: it's a paid subscription at $39 a month with cancel-anytime billing, so check TryUncle directly for the current rate. It's macOS only, and it doesn't touch your timeline or automate your cut, it watches and points, which is a different job from an assistant that edits for you.
For someone who just spent months inside Blender's node-based Strip Modifiers, Resolve's Color page will feel conceptually familiar and practically foreign at the same time: same idea of chaining processing steps, completely different menus and shortcuts to find them in. That's exactly the kind of gap an on-screen assistant is built to close faster than rewatching a full course from the beginning.
Which one should you actually use?
If your footage started as a Blender render and stays inside Blender the whole way through, an animated short, a game cinematic, a motion graphics piece built from your own scenes, the Sequencer's 5.2 LTS finishing tools are real enough now to carry the project to the end. Singularity proved that on a real production, not a demo reel, and the history behind that release, a dedicated maintainer since 2018, a community add-on pipeline, and developers who fixed the HDR workflow shot by shot under deadline, shows it wasn't a fluke.
If your footage started in a camera, the answer hasn't changed: use DaVinci Resolve. Nothing in the 5.2 LTS update touches ingest, multicam, or audio, and those are the exact tools real-world footage needs before a grade even starts. Check your hardware first, too: an Intel Mac can't run Resolve 21 at all, and a pre-2014 GPU can't run Blender 5.x either, so the decision might already be made before you open either app. Our full DaVinci Resolve vs Blender comparison walks through that broader case in detail if you're weighing the two apps generally rather than deciding what to do with a cut you've already started.
And if you're straddling both, building CG elements or full scenes in Blender while cutting live-action plates elsewhere, you don't have to choose once and commit forever. Finish the Blender-native pieces in the Sequencer if you want, using its new node-driven tools, then export the timeline with OpenTimelineIO, ideally through whichever add-on's current limitations matter least for your cut, and bring everything into Resolve for the final conform, color match, mix, and delivery. Keep an eye on the native OpenTimelineIO work moving through Blender's own GSoC pipeline, too, since it stands to remove the add-on dependency from that whole step within a release or two. The Sequencer earned a real seat at the finishing table in 2026. It didn't take DaVinci Resolve's seat, and Blender's own developers aren't claiming it did. Pick based on where your footage actually came from, and the rest of this decision makes itself.
Frequently asked questions
- Why did Blender rename the Video Sequence Editor to the Video Sequencer?
- Blender's own manual quietly dropped 'Editor' from the name: the 2.79 manual page is titled 'Video Sequence Editor,' while the current 5.2 LTS manual titles the same page 'Video Sequencer.' A 2021 development discussion on Blender's own tracker noted the word 'sequence' appears 5,036 times across 240 files in the codebase, and that a full rename would touch more than 160 third-party add-ons, which is why the change has rolled out gradually through documentation rather than as a single announced rebrand.
- Can I move an edit from Blender's Sequencer into DaVinci Resolve without starting over?
- Yes, two ways. The free Export EDL add-on writes a CMX 3600 EDL file Resolve can import, but it's limited to one video track and four audio channels. For a richer cut, OpenTimelineIO-based add-ons like vse-io or tin2tin's VSE_OTIO_Export carry more of your timeline structure across. Blender Studio's Pipeline Technical Director Paul Golter used the OpenTimelineIO route to move the open movie Sprite Fright's entire edit into Premiere, ProTools, and DaVinci Resolve for finishing.
- Does Blender's Sequencer support HDR and professional color grading now?
- More than it used to. Blender 5.2 LTS rebuilt the Sequencer's scopes for HDR and wide-gamut work, added P3 and Rec.2020 support to the histogram, waveform, and vectorscope, and introduced Strip Modifiers driven by compositor node groups instead of the old fixed color-strip effects. It's real progress, but it's still not a node-based color page with power windows and qualifiers the way DaVinci Resolve's Color page is.
- What is Singularity, and why does it matter for this comparison?
- Singularity is Blender Studio's short film directed by Andy Goralczyk, released in May 2026. It's the studio's first project mastered in 4K HDR with a full color grade finished entirely inside the Sequencer rather than round-tripped to another app, which is the strongest real-world evidence yet that the Sequencer can carry a finishing pass, at least for a project built and rendered inside Blender itself.
- Do I need third-party add-ons to use Blender's Sequencer for a real editing job?
- Not strictly, but most people cutting real projects in the Sequencer use at least one. Developer tin2tin maintains dozens of free Sequencer add-ons covering EDL and OpenTimelineIO export, audio sync, scene-strip integration, and automated cutting, and GDQuest's Power Sequencer add-on already had its core editing tools merged directly into Blender 2.81 back in 2018, rather than staying a permanent third-party dependency. The built-in tool covers basic cuts fine; add-ons close specific gaps like batch renaming, silence detection, and multi-format export.
- Should you finish your project in the Sequencer or switch to DaVinci Resolve partway through?
- If the project is built from Blender's own 3D renders and stays inside Blender end to end, like an animated short or a game cinematic, the Sequencer's 5.2 LTS finishing tools can now carry it. If you're cutting real camera footage, need multicam sync, or need a full audio mix, move to DaVinci Resolve, and export your edit with EDL or OpenTimelineIO rather than re-cutting from scratch.
- Is native OpenTimelineIO support coming to Blender's Sequencer?
- It's in progress but not shipped. A Google Summer of Code 2026 project is building import and export of .otio files directly into the Sequencer's own codebase, rather than relying on a third-party add-on, and a related pull request adding native OpenTimelineIO export already exists on Blender's project tracker. Until it lands in an official release, every OTIO workflow still runs through an add-on like vse-io or VSE_OTIO_Export.
- Does my current computer even support Blender 5.2 LTS and DaVinci Resolve 21 equally?
- Check before you decide on features alone. Blender 5.0 (carried into 5.2 LTS) raised its GPU floor to Vulkan-capable cards from roughly 2014 onward, so older Fermi- or Kepler-era GPUs need to stay on Blender 4.5 LTS. DaVinci Resolve 21 dropped Intel Mac support entirely, requiring Apple Silicon on macOS, while Intel Macs are capped at Resolve 20 for good. On Windows and Linux, Resolve's own tech specs call for at least 4GB of VRAM for HD work and 8GB or more once you're grading 4K.
Sources
- T89266 - Investigate renaming the Video Sequencer editor (Blender Projects)
- Video Sequencer (Blender 5.2 LTS Manual)
- Video Sequence Editor (Blender 2.79 Manual)
- Blender 5.2 LTS Release (Blender.org press)
- Video Sequencer - Blender 5.2 LTS Release Notes (Blender Developer Documentation)
- Blender 5.2 LTS is here: discover its 5 key features (CG Channel)
- Blender Development: Singularity and Beyond (Blender Studio)
- Singularity (Blender Studio project page)
- Blender Singularity lands in 4K HDR (Digital Production)
- Blender Studio Releases Its First 4K HDR Short Film, Singularity (80.lv)
- Production Logs - Singularity (Blender Studio)
- OpenTimelineIO in Blender, by Paul Golter (Blender Studio)
- Export_EDL add-on (tin2tin, GitHub)
- Awesome Blender VSE Add-ons (tin2tin, GitHub)
- Scene_Strip_Tools add-on (tin2tin, GitHub)
- VSE_OTIO_Export add-on (tin2tin, GitHub)
- vse-io (Tilix4, GitLab)
- Power Sequencer releases (GDQuest, GitHub)
- blender-power-sequencer (GDQuest, GitHub README: included in Blender 2.81+)
- Video Sequence Editor (VSE) 2026 roadmap (Blender Developer Forum)
- GSoC 2026: OpenTimelineIO Support in VSE (Blender Developer Forum)
- 2025-10-14 Sequencer meeting notes (Blender Developer Forum)
- Blender Video Sequencer maintainer announcement, by Ton Roosendaal (X)
- Strip Modifiers (Blender 5.2 LTS Manual)
- Using the Compositor (Blender 5.2 LTS Manual)
- Node Groups (Blender 5.2 LTS Manual)
- Proxy (Blender 5.2 LTS Manual)
- Proxy System (Blender Developer Documentation)
- #56755 - Video Sequence Editor playback is choppy (Blender Projects)
- #69334 - Video Sequencer: Very low framerate (Blender Projects)
- #70415 - Video Editor: Proxy clips will play with poor performance if used as proxies (Blender Projects)
- DaVinci Resolve Proxy Workflows (Frame.io)
- Requirements (Blender.org)
- Blender 5.0 released, now requires GeForce 900 series or newer GPUs (VideoCardz)
- License (Blender.org)
- DaVinci Resolve vs Blender comparison (RFP.wiki)
- In Depth: DaVinci Resolve Studio vs Free (Updated for 21) (Toolfarm)
- DaVinci Resolve - Tech Specs (Blackmagic Design)
- DaVinci Resolve product page (Blackmagic Design)
- DaVinci Resolve - Fusion (Blackmagic Design)
- DaVinci Resolve - Fairlight (Blackmagic Design)
- DaVinci Resolve - Studio (Blackmagic Design)
- TryUncle
Learn by doing, not watching
Stop translating tutorials to your timeline.
TryUncle stays beside Resolve on Mac and Windows. When you ask, Uncle sees your screen and points at the exact control you need. No hunting through tabs, timestamps, or mismatched tutorials.
Meet TryUncleKeep reading
 ComparisonsJul 20, 202627 min read
DaVinci Resolve vs Blender for Video Editing: The Full Comparison
Blender's Video Sequence Editor is free forever and built into a 3D suite. DaVinci Resolve is a dedicated NLE with color, audio, and VFX pages. Here's which one to cut in.
 ComparisonsJul 11, 202626 min read
The Best AI Tools to Learn DaVinci Resolve in 2026
ChatGPT, Claude, Blackmagic's free training, Recut, and Resolve's Neural Engine compared for learning DaVinci Resolve, and the gap none of them close.
 ComparisonsJul 12, 202630 min read
Resolve Color Management vs. ACES: Which Should You Use?
DaVinci Resolve Color Management and ACES both fix scene-referred color, but they solve different problems. Here's which one fits your project.