
Learn / DaVinci Resolveupdated for DaVinci Resolve 21.0.2 (July 2026)
DaVinci Resolve Fusion Vector Motion Blur Tutorial: The Full Guide
Quick answer
DaVinci Resolve's Vector Motion Blur node in Fusion adds motion blur from a vector map: connect an Optical Flow node's output into Vector Motion Blur's green Vectors input for live-action footage, or a 3D render's motion vector pass for CG. Adjust Scale to control blur length. Both nodes ship in the free version, no Studio license required.
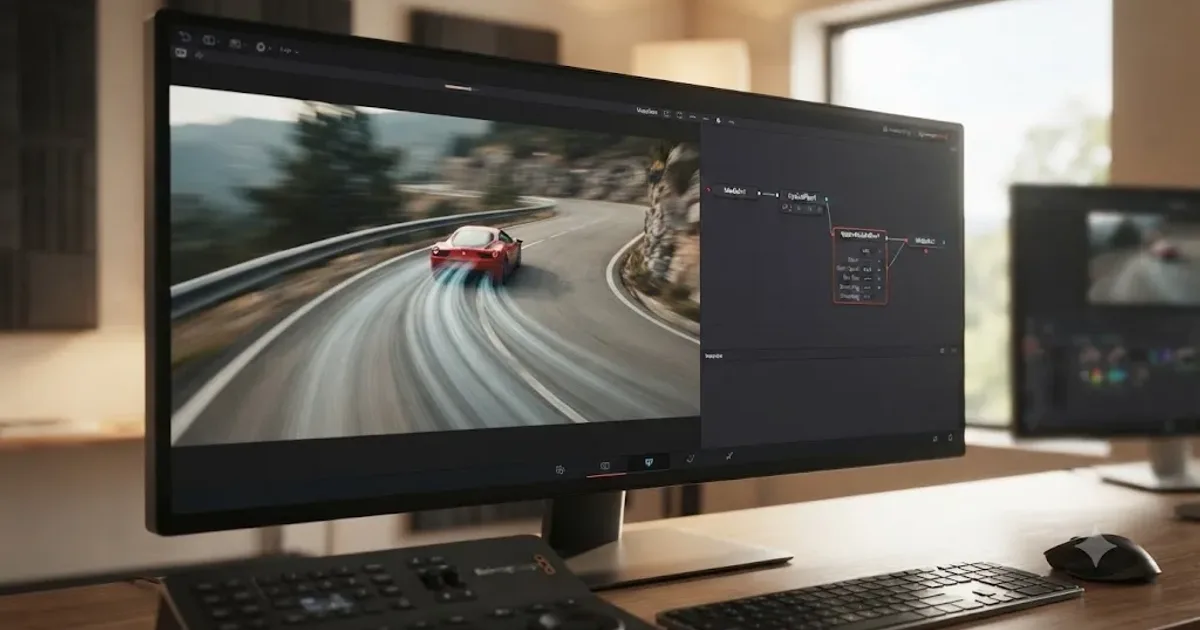
Your footage looks fake. Not broken, not glitchy, just wrong in a way you can't quite name until someone points it out: things move too cleanly. A whip pan holds every frame in crisp focus. A logo animation swings across the screen like a slideshow. Your eye knows what fast motion is supposed to look like, and Resolve's default output isn't giving it to you.
That's a motion blur problem, and Fusion has a specific tool built for it: the Vector Motion Blur node, paired with Optical Flow for live footage or a rendered motion vector pass for 3D work. After running commercial edits for seven-plus years and building a professional video-editing community that's grown past 100,000 members, we've watched this exact node trip up compositors who understand every other part of Fusion perfectly well, because nobody ever explained what a vector map actually is before asking them to wire one up. This guide fixes that gap, start to finish, as of July 2026 on DaVinci Resolve 21.0.2.
What is Fusion's Vector Motion Blur node, and when do you actually need it?
Vector Motion Blur is a Fusion node that paints a directional blur onto an image using a motion vector map, a pair of channels that record how far and which way each pixel moved between frames. Per Blackmagic's Fusion manual entry on the Vector Motion Blur node, "this node is used to create directional blurs based on a Motion Vector map or AOV (Arbitrary Output Variable) channels exported from 3D-rendering software like Arnold, Renderman, or VRay." That's the node's native habitat: CG renders that already carry a motion vector pass, because a 3D renderer knows exactly how far every point on a surface moved and can bake that into an extra output channel for free.
The reason this node matters to editors who never touch a 3D application is that Fusion's own Optical Flow node can generate the same kind of vector map from ordinary video footage, by analyzing pixel movement across frames instead of reading it from a 3D scene. That combination, real footage into Optical Flow into Vector Motion Blur, is the workflow most people searching for this tutorial actually need, and it's the one this guide spends the most time on.
You need this node specifically, rather than a simpler alternative, in three recurring situations: footage shot at a shutter angle too narrow to record natural motion blur (common on cameras locked to a fast shutter for sharpness or slow-motion capture), speed ramps where Resolve's retime process changes velocity but doesn't add blur to match it, and 3D renders where motion blur was left off at render time to save hours of render farm cost. In every one of those cases, the blur has to be manufactured after the fact, and Vector Motion Blur, driven by a vector map, is Fusion's purpose-built way to do it.
A vector map isn't a picture, it's two numbers per pixel describing how far that pixel traveled in X and in Y, and Vector Motion Blur's entire job is turning those two numbers into a believable smear. Once that clicks, every setting on the node stops being abstract and starts being a direct knob on that same underlying data.
It's worth being precise about what this guide is not covering, since DaVinci Resolve has more than one motion-blur-adjacent tool and they solve different problems. Resolve's Retime Controls include an Optical Flow interpolation mode that smooths a speed change by generating in-between frames, which is a different job from adding directional blur to footage that's already playing at its intended speed. This guide is specifically about the Fusion page's node-based Vector Motion Blur tool and the Optical Flow node that feeds it, not the Edit page's retime interpolation setting, even though both features share the phrase "optical flow" and live inside the same application.
How do you add motion blur in DaVinci Resolve using the Fusion Vector Motion Blur node?
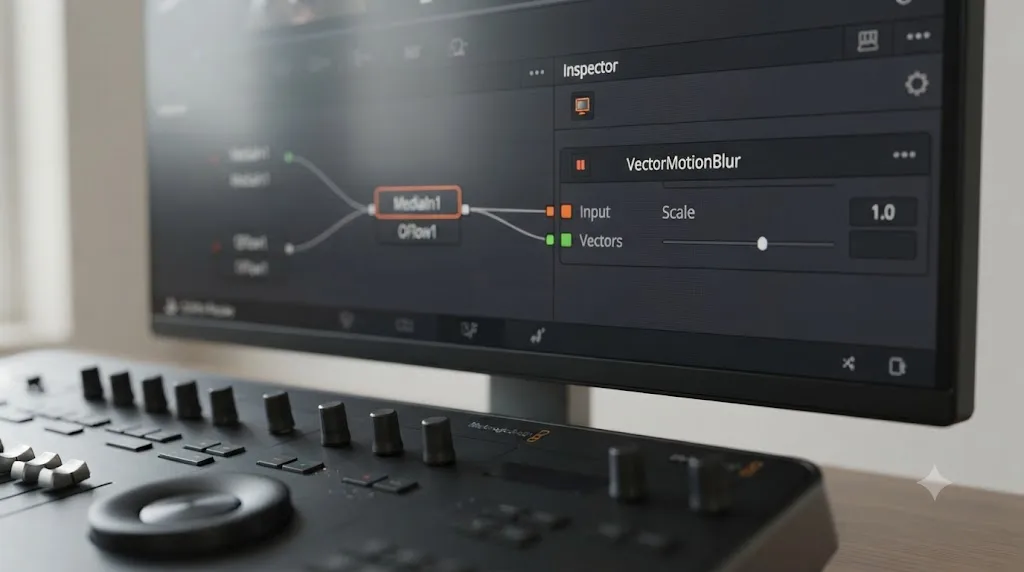
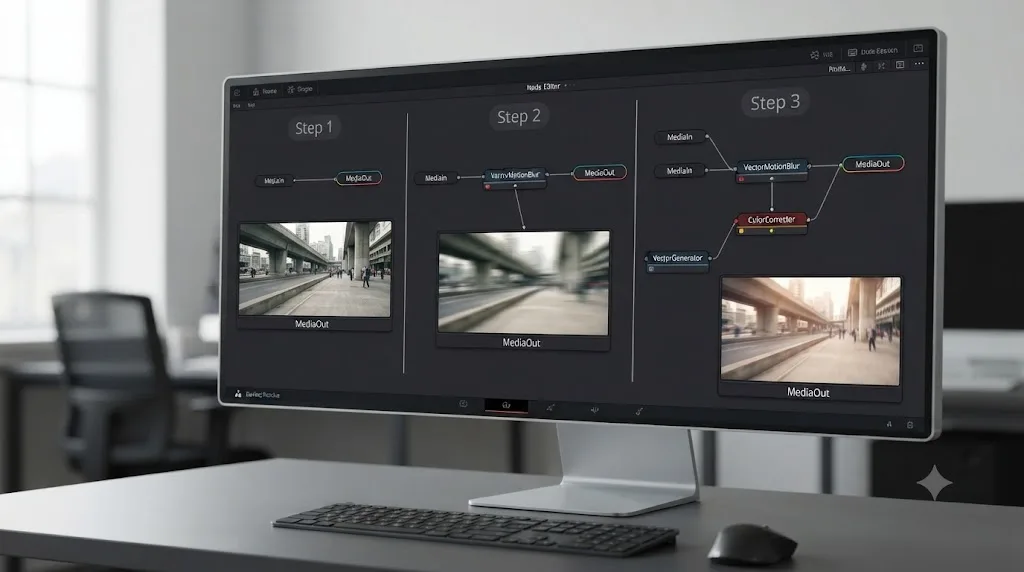
You add it by building a two-node chain on the Fusion page: an Optical Flow node analyzing your footage, feeding its vector output into a Vector Motion Blur node that paints the actual blur. Justin Robinson's breakdown of the node for JayAreTV confirms the same core structure Blackmagic's manual describes: "This node is used to create directional blurs based on a Motion Vector map or AOV (Arbitrary Output Variable) channels exported from 3D-rendering software like Arnold, Renderman, or VRay," with the practical addition that for footage without a rendered vector pass, "you connect a motion vector AOV rendered from a 3D application or an EXR file generated from the Optical Flow node in Fusion" into the node's Vectors input.
Here's the full sequence for live-action footage, the case most editors land on this guide looking for:
- Open the Fusion page on the clip that needs blur, or build a New Fusion Clip from the Edit page timeline if you're working on a specific range rather than a whole clip.
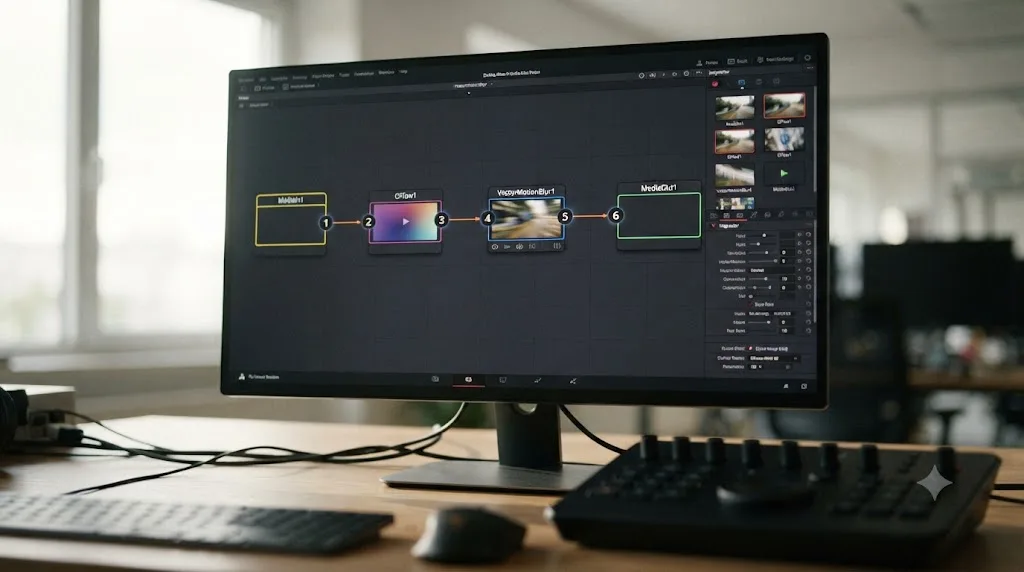
- Add an Optical Flow node and connect it between MediaIn and the rest of your comp, so it analyzes the actual footage before anything else touches it.
- Add a Vector Motion Blur node downstream of that.
- Wire the image chain into Vector Motion Blur's orange Input. This is the picture that receives the blur.
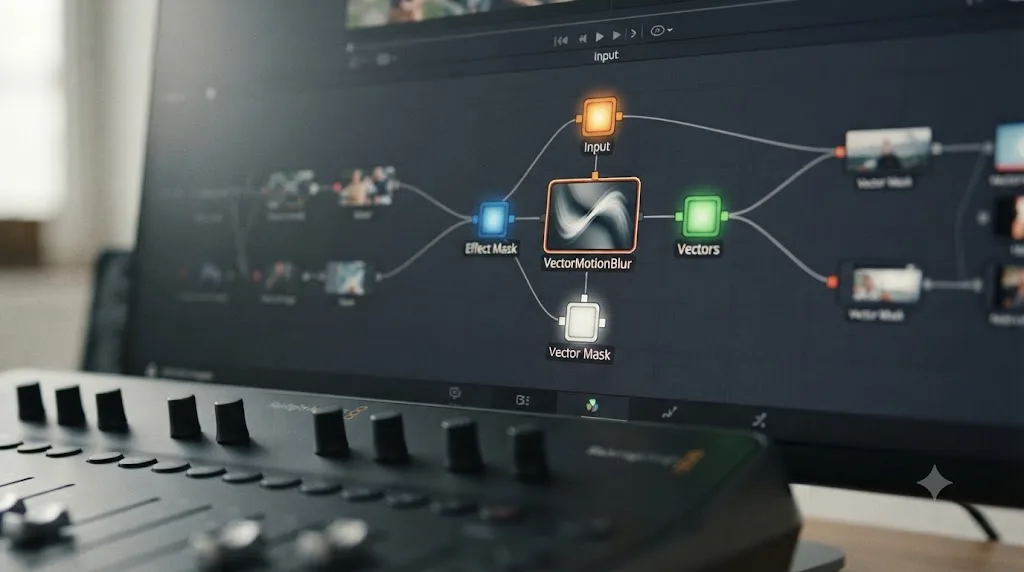
- Wire the Optical Flow node's output into Vector Motion Blur's green Vectors input. This is the motion data that drives the blur's direction and length. Both connections are required; the node produces no visible effect with either one missing.
- Open the Vector Motion Blur Inspector and raise Scale from its default. Per the manual, "the X and Y vector channel values for a pixel are multiplied by the value of this slider," so a Scale of 2 doubles whatever blur length Optical Flow's raw vector data would otherwise produce.
- Connect MediaOut and check the result at full resolution, not a scaled-down proxy view, since blur length reads very differently at final render size than in a shrunk viewer.
For 3D renders that already export a motion vector pass from Arnold, RenderMan, V-Ray, or a similar engine, you skip step 2 entirely and wire that rendered vector channel directly into the Vectors input instead of an Optical Flow node's output. The rest of the chain, Input, Vectors, Scale, works identically either way, because Vector Motion Blur doesn't care where its vector map came from, only that one exists.
Vector Motion Blur never generates its own motion data, it only reads a vector map someone else produced, either Optical Flow analyzing real footage or a 3D renderer exporting a motion pass, which is why the node alone does nothing until you feed it one. That single fact resolves most of the "why isn't this working" confusion covered later in this guide before it even starts.
What is Optical Flow, and why does Vector Motion Blur need it for real footage?
Optical Flow is a separate Fusion node that estimates how every pixel in a clip moved from one frame to the next and stores that estimate as a motion vector map, which Vector Motion Blur then reads to know how to paint its blur. Per JayAreTV's breakdown of the Optical Flow node, it "analyzes a clip connected to its input using an Optical Flow algorithm" that functions as "a per-pixel motion vector that matches up features over several frames." The computed result gets stored in the clip's Vector and Back Vector auxiliary channels, the same channel format a 3D renderer's motion pass uses, which is exactly why Vector Motion Blur can treat both sources identically.
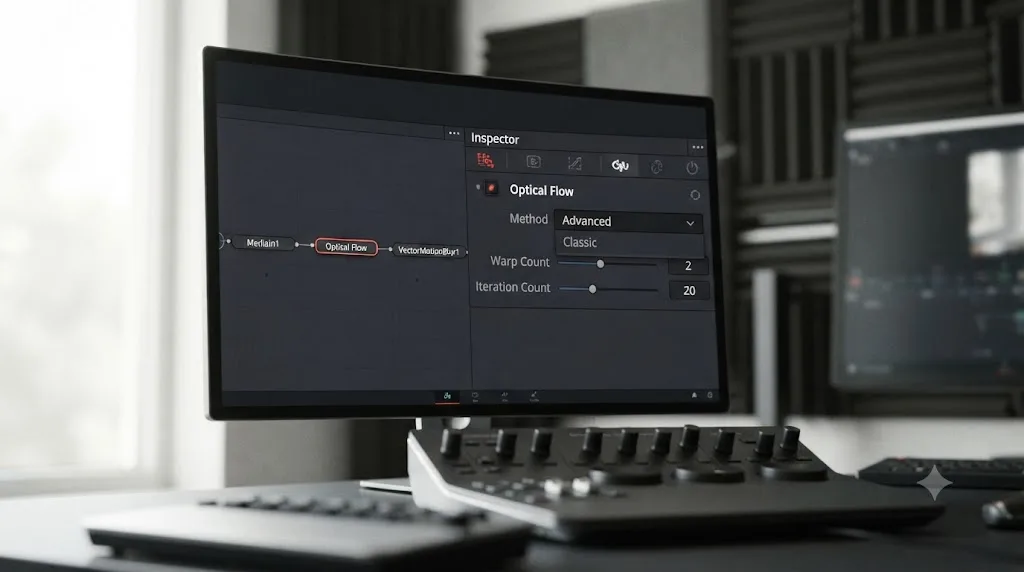
Optical Flow ships with two distinct calculation methods, and the choice between them is one of the first decisions that actually affects blur quality:
| Method | How it works | Trade-off |
|---|---|---|
| Advanced | GPU-based, matches DaVinci Resolve's standard optical flow algorithm used elsewhere in Resolve | Fast, but per Chadwick Shoults's Creative Video Tips guide to speed ramps with motion blur, can miss detail Classic catches |
| Classic | Older CPU-based algorithm, kept for compatibility with earlier Fusion versions | Slower to render, but according to Shoults it "provides much cleaner, accurate results" on demanding footage |
Optical Flow analysis is genuinely expensive computationally, and Blackmagic's own documentation on performance settings for related GPU-driven Fusion tools notes that render time "can easily vary by 10x" depending on which options are enabled, per the underlying Warp Count and Iteration Count settings JayAreTV documents for the node. If a comp with Optical Flow feels sluggish to scrub through, that slowness is expected behavior for the analysis it's running, not a sign something's misconfigured. The practical fix, also documented on that same page, is rendering the Optical Flow pass out to OpenEXR files with a Saver node once you're happy with the settings, so downstream work reads a cached result instead of recalculating the analysis on every scrub.
There's a version-specific gotcha worth knowing if you ever connect Optical Flow directly into a Time Stretcher or Time Speed node instead of Vector Motion Blur: per JayAreTV's documentation, "Optical Flow must render twice when connecting it to a Time Stretcher or Time Speed node" because those retime nodes expect the forward and back vector channels in a different order than Optical Flow outputs them by default. This doesn't affect the Vector Motion Blur workflow covered in this guide, since Vector Motion Blur reads whichever channels you assign it in its own X Channel and Y Channel dropdowns, but it's worth knowing if your comp uses Optical Flow for more than one purpose.
Optical Flow doesn't blur anything itself, it only measures motion and hands that measurement to whichever node asks for it, which means a bad blur is almost always a bad measurement, not a bad blur algorithm. That distinction matters for troubleshooting later in this guide, because it tells you which of the two nodes to actually adjust when something looks wrong.
Which Vector Motion Blur settings actually matter?
The node's control set is smaller than it looks, and most of what you'll actually touch on a normal shot fits in four settings.
| Control | What it does | When to touch it |
|---|---|---|
| Scale (and Scale X/Y when unlocked) | Multiplies the vector magnitude for each pixel, directly setting blur length | Every shot; this is your primary blur-strength dial |
| X Channel / Y Channel | Selects which image channels carry horizontal and vertical motion data | Only when your vector source isn't in the default Vector/Back Vector aux channels, e.g. a 3D render's custom AOV layout |
| Flip Channel (X and Y) | Inverts the direction the vector map is read in that axis | When the blur clearly runs backward from the actual motion |
| Lock Scale X/Y | Toggles between one shared Scale slider and independent X/Y sliders | When motion is stronger in one axis than the other, e.g. a horizontal whip pan with minimal vertical movement |
Per the manual, "the X and Y vector channel values for a pixel are multiplied by the value of this slider," which is Scale's entire mechanism stated plainly: it's a multiplier, not a fixed blur-length value, so the same Scale setting produces very different visible blur depending on how much motion Optical Flow actually detected in a given shot. A Scale of 2 on a slow pan and a Scale of 2 on a fast whip pan look nothing alike, because the underlying vector magnitude they're multiplying is completely different.
The node also carries two inputs beyond the two required ones. A Vector Mask (white) input lets you preprocess the vector map itself before Vector Motion Blur reads it, useful for suppressing motion data in a region where you don't want blur applied regardless of what Optical Flow detected there. An Effect Mask (blue) input works the way it does on most Fusion nodes, restricting where the finished blur effect is visible in the final composite, applied after the blur is calculated rather than before.
There's a fifth setting worth knowing about even though it doesn't live directly on the Controls tab: Blend, a common parameter present on most Fusion nodes that controls how much of the node's effect mixes back with its unprocessed input. Per Raju's guide to free-version motion blur workflows on BeginnersApproach.com, the typical build connects "the 'Optical Flow' node and then... the 'Vector Motion Blur' node between the 'MediaIn' and 'MediaOut' nodes," and Blend is the parameter you'll come back to keyframe in the speed ramp workflow covered further down this guide, since it lets you fade the blur effect in and out over time without touching Scale at all.
Scale is a multiplier on measured motion, not an absolute blur amount, which is why the same numeric value looks like almost no blur on a slow pan and looks smeared on a fast one. Judge Scale by eye on the specific shot in front of you, not by a number that worked on a different clip.
Why is your Vector Motion Blur node doing nothing?
This is one of the recurring questions in our 100,000+ member editing community, and it almost always traces back to one of three setup mistakes rather than a broken node.
The Vectors input isn't connected at all. This is the single most common cause, and it's easy to miss because the node graph can look complete at a glance, an image flowing in, an image flowing out, nothing visually screaming "broken." But Vector Motion Blur has two required inputs, not one, and if you built the node, connected only the main image chain, and forgot to also wire in an Optical Flow node's output (or a 3D vector pass) to the green socket specifically, the node has no motion data to read and produces no blur whatsoever, regardless of how high you push Scale.
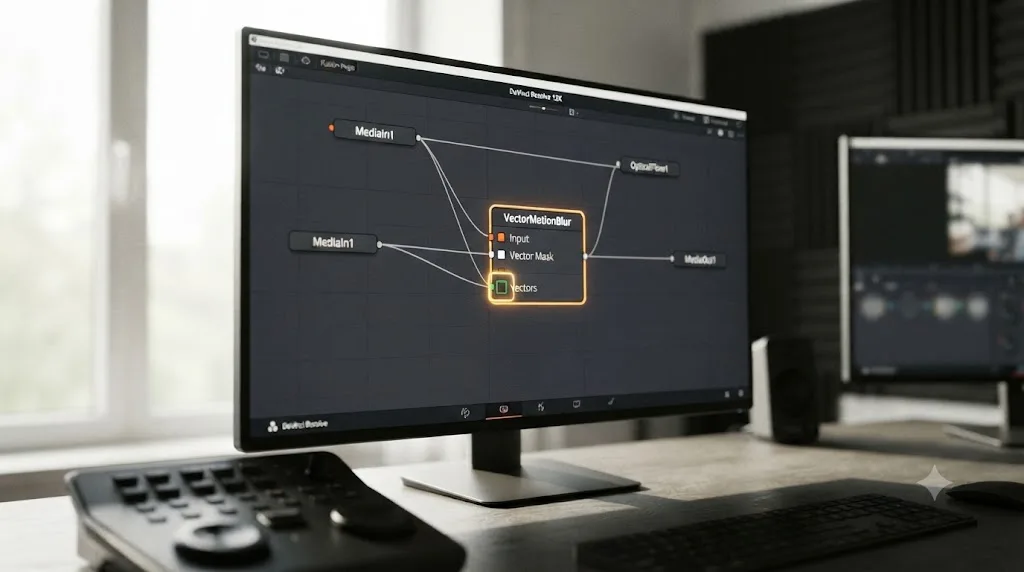
Optical Flow sits downstream of Vector Motion Blur instead of upstream. Order matters here the same way it matters on a Fusion Merge node's Background and Foreground inputs: Optical Flow has to analyze the footage before Vector Motion Blur can use that analysis, which means Optical Flow's node has to appear earlier in the chain, closer to MediaIn, with its output feeding forward into Vector Motion Blur's Vectors input specifically, not the other way around.
Scale is set too low to be visible. Because Scale is a multiplier rather than a fixed amount, a Scale value that's technically nonzero but very small, left over from a default or an accidental typo, can produce blur so subtle it reads as "nothing happened" on casual playback. Push Scale noticeably higher as a diagnostic step; if blur appears at an exaggerated Scale value and then you dial it back down to something more natural, you've confirmed the node chain itself works and the problem was purely a magnitude setting, not a connection.
A fourth, less common cause worth ruling out: the clip genuinely has very little detected motion for Optical Flow to measure. A locked-off shot with only a slight handheld wobble, or footage where the "moving" element is small relative to the frame and mostly static background surrounds it, gives Optical Flow correspondingly little to work with, and Vector Motion Blur can only multiply what it's handed. If Scale at an obviously excessive value still shows barely any blur, the underlying vector data itself may be near zero, which points you back at the source footage rather than at either node's configuration.
| Symptom | Likely cause | Fix |
|---|---|---|
| No visible blur anywhere, at any Scale value | Vectors input never connected | Wire the Optical Flow node's output into the green Vectors socket |
| No visible blur, chain looks correctly wired | Optical Flow placed downstream instead of upstream of Vector Motion Blur | Reorder the chain so Optical Flow analyzes the footage before Vector Motion Blur reads it |
| Very faint blur, hard to confirm it's working | Scale set too low to be visually obvious | Push Scale to an exaggerated value as a diagnostic, then dial back |
| Blur stays near-zero even at exaggerated Scale | Source footage has very little actual motion for Optical Flow to detect | Confirm the shot has real movement in frame; a near-static shot won't produce meaningful vector data |
A Vector Motion Blur node that appears correctly built but produces zero visible effect is missing its Vectors connection roughly as often as every other cause on this list combined. Check that single green socket first, before touching Scale, Method, or anything else.
Why does your motion blur look smeared, blocky, or full of artifacts?
This complaint sits on the opposite end from a node doing nothing: the blur is clearly there, but it looks wrong, smearing edges that shouldn't smear, breaking apart into blocky chunks around fast-moving detail, or bending in a direction that doesn't match the actual motion in frame. The root cause here is almost never Vector Motion Blur itself, since it faithfully paints whatever direction and length the vector map tells it to. The problem lives one node upstream, in Optical Flow's motion estimate.
Optical Flow analysis is a genuinely hard computer vision problem, and it degrades predictably in a handful of well-known situations. Fast, large-displacement motion (a whip pan, a hard camera shake, an object crossing most of the frame in a single frame) gives the algorithm less overlapping detail to match between frames, and its confidence, and therefore its accuracy, drops accordingly. Thin, repeating, or low-contrast detail (a picket fence, a striped shirt, foliage) confuses feature matching because many small regions look nearly identical to their neighbors, and the algorithm can lock onto the wrong match. Hard edges where a moving subject crosses a busy, high-detail background produce the visually worst artifacts, since the vector map often blends subject motion and background motion together right at that boundary, and Vector Motion Blur then paints a blur that smears the edge itself rather than cleanly separating subject from background.
The practical fixes work on the same principle covered in the Optical Flow section above: give the analysis better data to work with, or reduce how much it has to guess.
Switch Method from Advanced to Classic. Per Chadwick Shoults's guide, this trade is explicit: Classic is "slower to render but provides much cleaner, accurate results" than the GPU-based Advanced method. If artifacts show up specifically around fine or repeating detail, Classic's older, more conservative algorithm is worth the extra render time.
Raise Warp Count and Iteration Count. These settings control how many refinement passes Optical Flow runs over its own initial estimate, and per JayAreTV's documentation, they're the primary levers for trading render time for accuracy, with total render time varying by as much as 10x across the available range. On a shot where artifacts appear in a small, specific region rather than uniformly, it's often cheaper to isolate that region with a mask and run higher settings just there than to raise settings globally across the whole frame.
Mask the moving subject separately from the background before feeding Optical Flow. Since edge artifacts specifically come from the algorithm blending subject and background motion at a boundary, giving it a cleaner, isolated view of just the subject (using the same kind of garbage matte technique covered in our guide to fixing Fusion's Planar Tracker for occlusion problems) reduces the ambiguity that causes those blends in the first place.
Bring the whole clip through a compound clip or bake it in before applying Fusion effects, if you're feeding retimed or previously effected footage into the chain. A clip that's already been sped up, slowed down, or heavily processed upstream gives Optical Flow a different, sometimes noisier signal to analyze than the original camera footage would, and flattening that processing into a single clip before Fusion sees it removes one more variable from the troubleshooting list.
| Artifact | Likely cause | Fix |
|---|---|---|
| Blur runs in an obviously wrong direction | Optical Flow method or channel mismatch, or an inverted axis | Try Classic method; check Flip Channel settings on Vector Motion Blur |
| Blur breaks apart or blocks around fine detail | Repeating or low-contrast texture confusing feature matching | Switch to Classic method; raise Warp Count and Iteration Count |
| Blur smears across a subject's edge into the background | Vector map blending subject and background motion at the boundary | Mask the subject separately before Optical Flow analysis |
| Blur looks fine in the viewer but reveals blockiness on export | Preview resolution hiding artifacts visible at full render size | Always judge blur quality at full output resolution, not a scaled proxy |
A blur that looks wrong almost never means the Vector Motion Blur node is broken, it means the vector map feeding it is wrong somewhere, which is why every fix in this section targets Optical Flow's settings rather than the blur node itself. Diagnosing which node actually owns the problem saves you from tweaking Scale repeatedly on a shot where Scale was never the issue.
Advanced vs Classic Optical Flow: which should you actually pick for vector motion blur work?
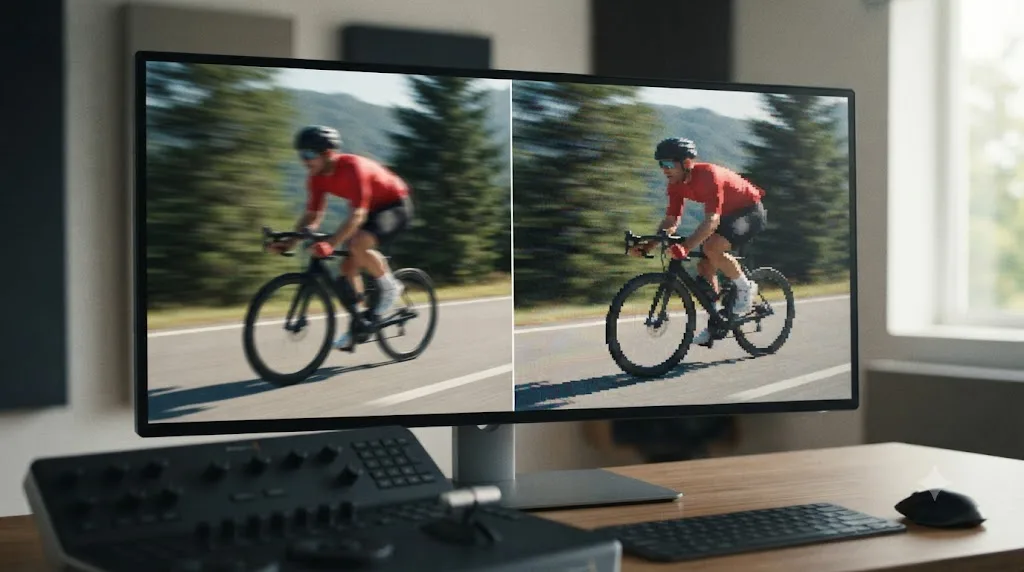
Advanced is the right starting point for most shots, and Classic is the fallback you reach for once Advanced's output shows visible artifacts on the specific footage in front of you. Advanced runs on the GPU and matches the same underlying algorithm DaVinci Resolve uses elsewhere for its own optical-flow-based features, which makes it noticeably faster to iterate with while you're still dialing in Scale and checking overall blur direction. Classic runs on the CPU using an older algorithm carried forward from earlier Fusion versions, and per Chadwick Shoults's direct comparison, it "provides much cleaner, accurate results" at the cost of render speed.
The practical workflow most experienced compositors settle into is starting a new Vector Motion Blur build with Advanced, since a fast turnaround matters most while you're still figuring out Scale and confirming the blur direction is even correct, then switching to Classic only on the specific shots where Advanced's speed produces visible quality compromises, typically fast motion against busy or repeating backgrounds. Treating Classic as your universal default from the start costs render time on every shot, including the large share that would have looked fine under Advanced anyway.
There's a meaningful platform note buried in this choice too. Classic's CPU-bound processing means its render time scales with your CPU's single-core and multi-core performance rather than your GPU, which matters if you're working on a system with a strong GPU but a comparatively modest CPU, a combination increasingly common on machines built and priced around GPU-heavy workloads elsewhere in Resolve. If Classic renders surprisingly slowly compared to how fast the rest of your Fusion comp performs, that's consistent with its documented CPU-based design, not a sign something's misconfigured.
| Method | Processing | Speed | Accuracy on hard shots | Best for |
|---|---|---|---|---|
| Advanced | GPU-based | Fast | Good on typical motion | First pass, iterating on Scale and direction |
| Classic | CPU-based | Slower | Cleaner on fine or repeating detail | Final pass on shots showing artifacts under Advanced |
Start every new Vector Motion Blur build with Optical Flow's Advanced method, and only switch to the slower Classic method on the specific shots that actually need it. Defaulting straight to Classic trades away speed on every shot to fix a quality problem that, on most shots, was never going to happen in the first place.
How do you add motion blur to a speed ramp in DaVinci Resolve?
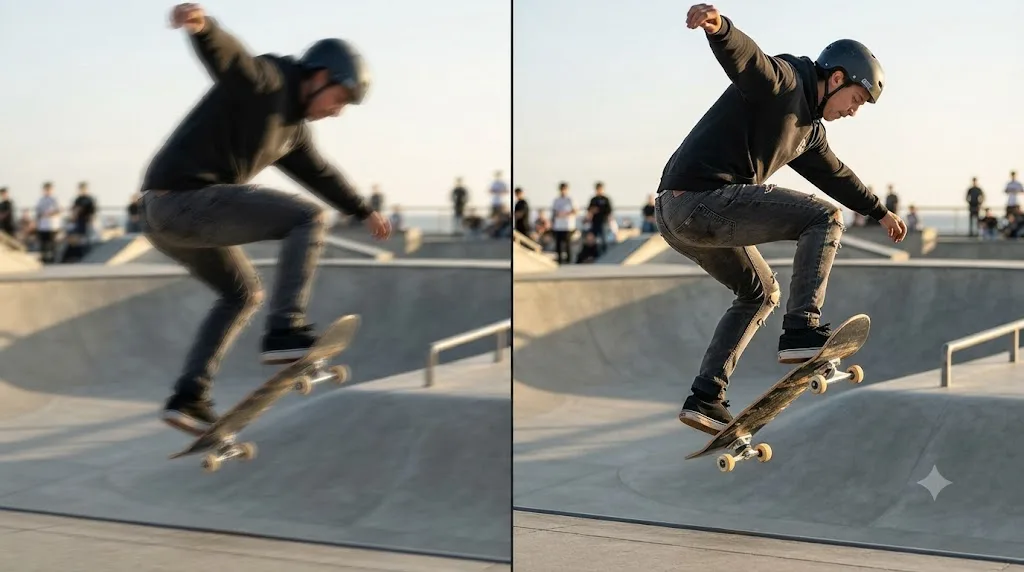
Speed ramps expose a real gap in Resolve's retime tools: changing a clip's speed changes how fast the subject appears to move, but it does nothing to add the blur real cameras would have captured at that new apparent speed, especially if the source footage was shot at a fast, blur-suppressing shutter angle to begin with. Our complete guide to speed ramping in DaVinci Resolve covers building the ramp itself with Retime Controls and the Retime Curve; this section covers the specific technique for adding matching motion blur once that ramp exists.
Per Chadwick Shoults's dedicated guide to combining speed ramps with motion blur, the workflow has a firm recommendation baked into it: "Do not use the standard Motion Blur node." The reason is architectural, not a matter of taste. A speed ramp's blur intensity has to change over the length of the ramp, heavy during the fast section, fading to nothing during the slow section, and Vector Motion Blur, unlike a generic blur effect, exposes exactly the parameter needed to animate that change cleanly: Blend.
The build, condensed from Shoults's workflow:
- Bake the speed ramp into a Compound Clip first. This step matters more than it looks, since Fusion needs to process the footage at its final, retimed speed and frame count, not the original source clip's raw frame rate, and a Compound Clip forces that conversion to happen before Fusion ever sees the footage.
- Open the Compound Clip on the Fusion page and build the standard Optical Flow into Vector Motion Blur chain described earlier in this guide.
- Set Optical Flow's Method to Classic specifically for this workflow. Shoults's guide is direct about this choice: Classic "is slower to render but provides much cleaner, accurate results," which matters more on a speed ramp than on steady-speed footage, since the ramp itself introduces additional motion the algorithm has to track alongside whatever the camera and subject were already doing.
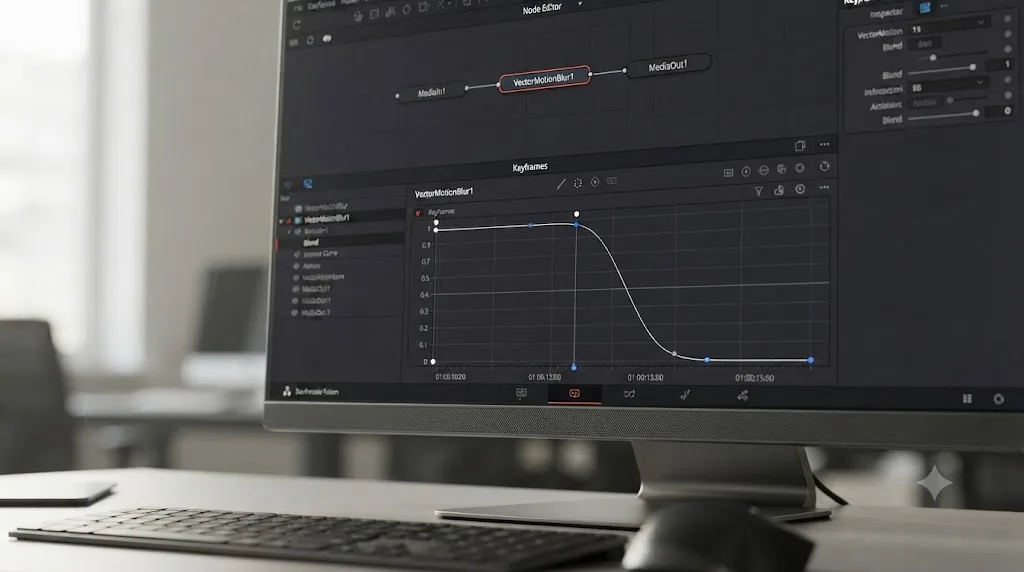
- Keyframe the Vector Motion Blur node's Blend parameter to match the ramp's speed curve. Set Blend to 1.0 (full strength) during the fast section of the ramp, and animate it down to 0.0 during the slow section, so the added blur intensity tracks the perceived speed change instead of applying a flat, uniform amount across a clip whose actual velocity is constantly shifting.
- Verify against your frame rate ceiling before ramping too far. Shoults's guide includes a practical frame rate check: divide your timeline's frame rate by the source footage's frame rate to find the maximum safe slowdown percentage before frames start duplicating, for example 24fps timeline footage sourced at 30fps allows slowing to 80% before duplication becomes visible. Beyond that safe range, Studio's Speed Warp retime process, which uses Resolve's Neural Engine to interpolate genuinely new frames rather than duplicating existing ones, becomes the more appropriate tool, though it's Studio-exclusive and separate from the free Vector Motion Blur workflow this guide focuses on.
Motion blur on a speed ramp has to fade in and out with the ramp itself, which is exactly what Vector Motion Blur's Blend parameter is built to animate, and exactly what a flat, non-keyframed blur effect can't do correctly. If your ramped clip looks like it has one uniform blur setting slapped across a speed change that clearly isn't uniform, Blend keyframing is almost certainly the missing step. Our guide to keyframing effects in DaVinci Resolve covers the Inspector diamonds and curve-editing mechanics you'll use to build that Blend animation once you know it's the parameter that needs it.
How do you add motion blur to 3D renders and particles using vector passes?
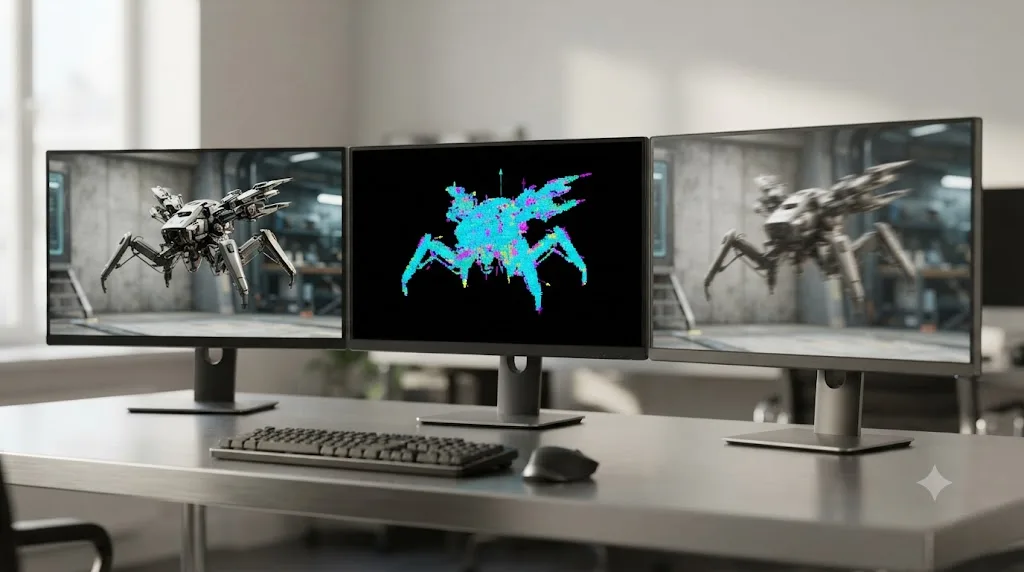
This is Vector Motion Blur's original, native use case, the one it was designed around before anyone thought to feed it Optical Flow data at all. When a 3D application renders an image, it can also export a separate motion vector pass alongside the beauty render, recording exactly how far each visible surface point moved during that frame's shutter interval. Feeding that pass into Vector Motion Blur produces blur that's often more accurate than the 3D renderer's own built-in motion blur, and dramatically faster to iterate on.
Per Bryan Ray's writeup on linking 3D geometry to particles in Fusion, the performance case for this approach is direct: "It is possible to use the Motion Blur feature in the Renderer3D and pRender nodes to apply the blur, but motion blur on particles is terribly slow. Using vectors is much less painful." Ray's own use case, turning particle blobs into streaking laser-beam effects, relied on exactly this substitution: rendering particles without built-in motion blur (fast), exporting a vector pass alongside them, and letting Vector Motion Blur generate the streak effect in post (also fast), rather than paying the render-time cost of the 3D engine's own physically-based motion blur calculation on every particle in the system.
The setup, per Blackmagic's manual and the DVResolve.com tutorial curated by Gedaly Guberek, Founder and Lead Educator of DVResolve.com and a Blackmagic Design Certified Master Trainer, follows the same underlying logic covered earlier for Auxiliary Channels:
- Enable a motion vector output in your 3D application's render settings, alongside the normal beauty render. The exact setting name varies by renderer (Arnold, RenderMan, and V-Ray each expose this slightly differently), but the underlying data is the same two-channel X/Y motion map Fusion expects.
- Bring both the beauty render and the vector pass into Fusion, typically as separate image sequences or as embedded channels within a single OpenEXR file, depending on how your render was configured.
- If the vector data arrived as a separate RGB image rather than embedded aux channels, use a Channel Booleans node to remap it, feeding the red channel into Fusion's X Vector and the green channel into the Y Vector, per Blackmagic's documentation on Auxiliary Channels, which states plainly that "the Vector channels indicates the pixel's motion from frame to frame."
- Wire the beauty render into Vector Motion Blur's Input, and the assembled vector data into its Vectors input, exactly the same connection pattern used for the live-action Optical Flow workflow covered earlier.
- Adjust Scale to taste, keeping in mind that a properly exported 3D vector pass is typically more precise than an Optical Flow estimate, so artifacts here more often trace back to a render setting (shutter length, motion blur samples in the original render) than to anything on the Fusion side.
This same substitution logic extends past particles to any CG element where native motion blur rendering is expensive relative to a vector-pass workaround: fast-moving hard-surface objects, camera-relative motion on a locked composite, and dense geometry where every additional motion-blur sample multiplies render time across thousands of individual elements.
Rendering a motion vector pass and applying blur with Vector Motion Blur in Fusion is routinely faster than rendering physically accurate motion blur inside the 3D application itself, especially on particle systems, which is why compositors reach for this workflow even when their renderer has perfectly capable native motion blur available. Speed, not just control, is the reason this technique persists in professional pipelines.
Vector Motion Blur vs ResolveFX Motion Blur vs a third-party plugin: which method should you actually use?
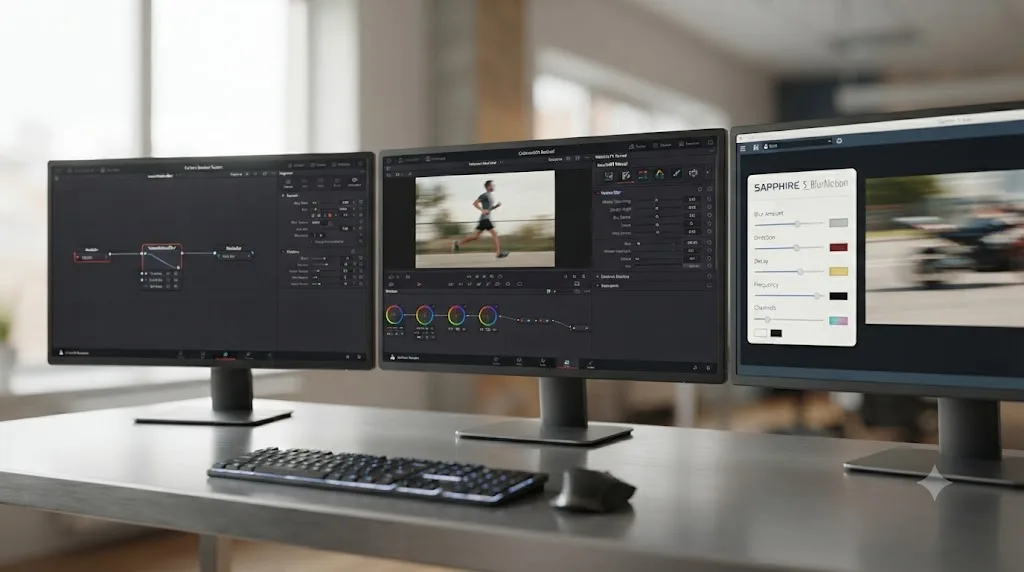
DaVinci Resolve gives you at least three genuinely different ways to add motion blur, and they trade control for convenience in opposite directions. Bojan Veselinovikj's comparison for Boris FX lays out the same three-way split this section is built around: the free Fusion node method, Studio's built-in ResolveFX effect, and a dedicated third-party plugin.
| Method | Where it lives | Cost | Control | Best for |
|---|---|---|---|---|
| Fusion Optical Flow + Vector Motion Blur | Fusion page, node graph | Free (both nodes ship in the free version) | High: full control over Scale, Method, Blend keyframing, masking | Speed ramps, precise per-shot tuning, 3D render vector passes |
| ResolveFX Motion Blur | Edit page, Resolve FX Temporal category | Studio only ($295 perpetual license, per Blackmagic's product comparison) | Moderate: Shutter Angle, Samples, and direction controls in a single drag-and-drop effect | Fast turnaround on straightforward shots without a speed ramp |
| Boris FX Sapphire (S_BlurMotion) | Third-party OFX plugin, works in both free and Studio | Paid add-on, separate purchase | High: extensive parameter set built specifically for motion blur simulation | Editors already licensing Sapphire for other effects, or needing blur styles beyond Resolve's native options |
The free Fusion method is the one this entire guide has walked through, and its main cost is setup time and Optical Flow's render overhead, not money. Veselinovikj's writeup confirms the free-version path runs through exactly the two nodes covered here, noting that once built, "click on the Vector Motion Blur node to open the Inspector panel" and adjust Scale as the starting point for tuning.
ResolveFX Motion Blur, per the same Boris FX comparison, lives in Studio's Resolve FX Temporal category and applies directly on the Edit page, letting you "change the motion blur value, direction, type, and more" from a single effect's Inspector controls without touching Fusion at all. Its parameters, commonly Shutter Angle (with 180 degrees as the standard cinematic baseline, higher values intensifying blur and lower values sharpening motion) and Samples (more samples producing smoother blur at a higher processing cost), map conceptually onto the same physics Vector Motion Blur simulates, but without node-level access to a vector map you can inspect, mask, or feed from an external 3D render.
Sapphire's S_BlurMotion sits in a third category entirely: a specialized, actively maintained plugin built by a company whose entire product is visual effects tools, offering, per Veselinovikj, "a lot more customization options, crucial for editors working on more complex and serious projects" than either of Resolve's native options. It's the right call specifically when you're already paying for Sapphire's broader effects library for other work, since adding one more license on top of an existing Sapphire subscription costs less, in both money and workflow friction, than it would to adopt the plugin purely for motion blur alone.
Choose the free Fusion Vector Motion Blur workflow if you need a speed ramp with fading blur, a 3D render's vector pass, or fine per-shot control and don't mind building two nodes by hand. Choose Studio's ResolveFX Motion Blur if you have a Studio license already, the shot doesn't involve a speed ramp, and you want a one-effect, drag-and-drop result without opening the Fusion page at all. Choose a Sapphire plugin only if you're already licensing it for other work, since buying it purely for motion blur is rarely the most efficient path when Fusion's free node combination covers the same ground.
Do you need DaVinci Resolve Studio for Vector Motion Blur?
No. Both nodes this entire guide is built around, Vector Motion Blur and Optical Flow, ship in DaVinci Resolve's free version, on the Fusion page, with no feature gate separating them from Studio. The Studio-exclusive tool in this space is a different one entirely: the ResolveFX Motion Blur effect on the Edit page, covered in the comparison above, which per Blackmagic's own product comparison page sits behind Studio's $295 perpetual license alongside the rest of the Resolve FX Temporal category.
This is worth stating plainly because it's easy to conflate the two, especially since some of Resolve's other advanced tools genuinely are Studio-gated. Speed Warp, the Neural Engine-driven retime process mentioned earlier in the speed ramp section, is confirmed as Studio-exclusive on Blackmagic's own product pages. Magic Mask and Smart Reframe, two of Resolve's other Neural Engine features, carry the same restriction. Vector Motion Blur and Optical Flow don't belong to that group. Per Toolfarm's in-depth comparison of Resolve Studio versus the free version, updated for Resolve 21, "Fusion is included in both the free and paid versions of DaVinci Resolve," and the core node-based Fusion workflow, which includes both nodes this guide covers, is fully available in the free edition.
Every technique in this guide, Optical Flow analysis, both its Advanced and Classic methods, Vector Motion Blur's full control set, Blend keyframing for speed ramps, and feeding in a 3D render's vector pass, works identically whether you're running DaVinci Resolve free or Studio. If you've been putting off building this workflow because you assumed it needed a Studio license, that assumption is the only thing standing in your way, not a real technical restriction.
Does Vector Motion Blur behave differently on Mac, Windows, or Linux?
The node's core logic, reading a vector map and multiplying it by Scale, works identically across Mac, Windows, and Linux, and nothing about the workflow itself is platform-specific. Where platform and hardware genuinely matter is Optical Flow's processing speed, not the accuracy or correctness of Vector Motion Blur's output once a vector map exists.
Optical Flow's Advanced method runs on the GPU, which means its speed tracks your graphics card's compute performance directly, while Classic runs on the CPU and scales instead with processor performance, largely independent of whatever GPU is installed. A system with a powerful GPU but a modest CPU will see a bigger relative slowdown switching from Advanced to Classic than a more balanced system would, simply because Classic isn't using the GPU capacity that machine has plenty of. Resolve's general documentation on Memory and GPU preferences applies here the same way it applies to other GPU-accelerated Fusion processing: on a system with more than one GPU installed, checking that GPU processing mode is correctly configured under Preferences > System > Memory and GPU is worth doing if Advanced-method Optical Flow analysis is running unusually slowly, since Auto mode doesn't always select the fastest available GPU on every configuration.
Multi-GPU Mac systems and eGPU setups are the configuration most likely to see this specific gap between expected and actual performance, since macOS's GPU selection behavior for Metal-accelerated processing has historically had more edge cases than a single-GPU Windows or Linux workstation. If Advanced-method Optical Flow feels dramatically slower than the rest of your Fusion comp's GPU-accelerated nodes, checking which GPU is actually assigned to Resolve is a reasonable first diagnostic step before assuming the footage itself is the problem.
None of this changes the actual blur result. A vector map with identical values produces an identical Vector Motion Blur output on every platform, since the node's math doesn't vary by operating system. Platform and GPU choice affect how long you wait for that result, never what the result looks like.
What's a full worked example, start to finish?
Here's how the whole workflow plays out on an actual shot, working through the build in the order worth doing it.
A motion designer needs to sell the speed of a whip pan across a product shelf, shot handheld at a shutter angle fast enough that the original footage shows almost no natural blur even though the camera move itself was genuinely quick.
- Open the Fusion page on the clip and add an Optical Flow node immediately after MediaIn, before any color correction or other effects touch the footage.
- Set Optical Flow's Method to Advanced for the first pass, prioritizing fast iteration while dialing in the overall look.
- Add a Vector Motion Blur node, wiring the main image chain into its orange Input and Optical Flow's output into its green Vectors input.
- Set Scale to an intentionally high value first, confirming visible blur appears and runs in the direction the camera actually panned, then dial it back down toward a natural-looking amount.
- Scrub through the fastest section of the pan and check for artifacts. The shelf's repeating product packaging shows some blockiness at the edges of fast-moving items, a classic repeating-detail optical flow challenge.
- Switch Optical Flow's Method to Classic specifically to address that blockiness, accepting the longer render time in exchange for the cleaner result Shoults's guide describes on exactly this kind of footage.
- Re-render and confirm the artifacts are gone at full resolution, not the scaled Fusion viewer.
- Connect MediaOut and return to the Edit page, where the blurred clip now reads as a genuinely fast pan instead of a series of unnaturally sharp frames.
Total build time on a shot like this: roughly fifteen minutes, with the Classic-method re-render accounting for most of that time once the node structure itself was already correct.
A second, shorter example lands on the 3D render side. A CG artist has a particle-based spark effect rendered without motion blur to save render farm time, and needs the sparks to read as fast-moving streaks rather than static dots frozen mid-flight.
- Confirm the 3D render already exported a motion vector pass alongside the beauty render, per the render settings enabled before the CG render was submitted.
- Bring both passes into Fusion, using a Channel Booleans node to remap the vector pass's red and green channels into Fusion's native X Vector and Y Vector auxiliary channels.
- Wire the beauty render into Vector Motion Blur's Input and the remapped vector data into its Vectors input.
- Adjust Scale until the sparks read as directional streaks rather than blurred blobs, since particle motion blur tends to need a more restrained Scale value than large-surface motion like the whip pan example above.
- Compare against a version rendered with the 3D application's native motion blur enabled, confirming the vector-pass version delivers a comparable look at a fraction of the render time, consistent with Bryan Ray's documented experience that "motion blur on particles is terribly slow" when calculated natively versus "much less painful" through vectors.
Two different starting complaints, "the pan looks fake" and "the sparks look frozen," and the same underlying tool solved both, because both problems reduced to the same root cause: motion that happened, but was never recorded as blur.
Is there a faster way to learn Fusion's node-based tools like this one?
Fusion's node graph is a genuinely different mental model from the track-and-layer editing most people learn first, and Vector Motion Blur sits a few concepts deep into that model: you need to understand vector maps, auxiliary channels, and node connection order before the workflow in this guide makes intuitive sense rather than feeling like copying instructions blindly. That learning curve is real, and it's the actual reason "davinci resolve fusion vector motion blur tutorial" is a search people type instead of just opening the software and figuring it out.
The honest starting point for learning Fusion generally is Blackmagic's own free training, which covers the node graph fundamentals this guide assumes, alongside well-established YouTube educators like Casey Faris, whose motion-blur-focused tutorial content is cited earlier in this guide, and community knowledge on the Blackmagic forums, where several of the artifact fixes covered above originated as real user reports before becoming documented best practice. None of that ecosystem is something a newer tool should pretend doesn't exist, and a guide that skipped past it wouldn't be giving you the full picture.
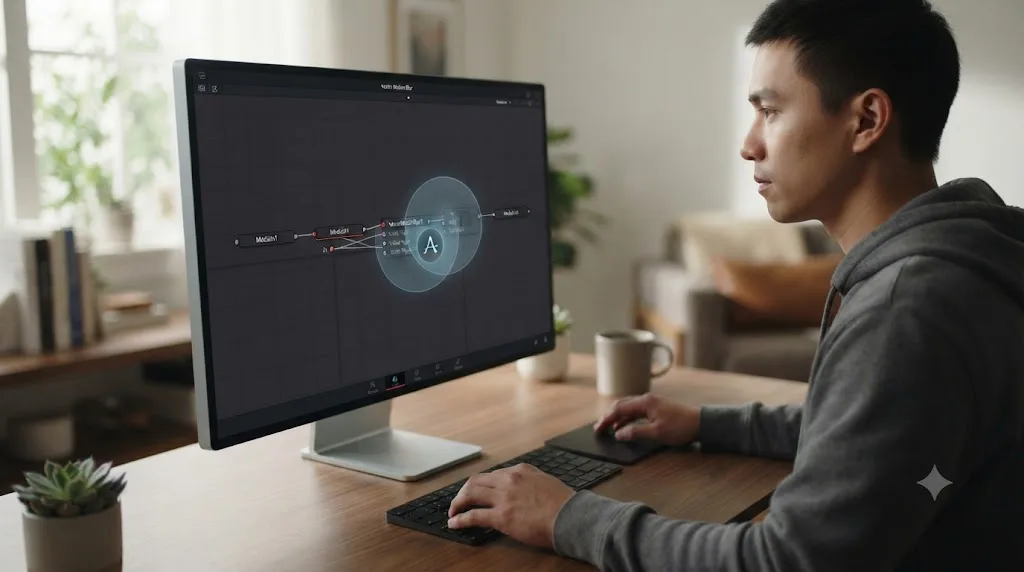
Where most of that ecosystem falls short isn't the quality of the explanation, it's the translation gap between a tutorial's screenshot and your own screen. A YouTube video shows someone else's Inspector panel, with someone else's node layout, and mapping that onto your own comp, especially your first few times through, costs real time even when the tutorial itself is excellent. That's the specific gap TryUncle is built to close. TryUncle is the on-screen assistant for DaVinci Resolve on macOS - ask in plain words and Uncle points at the exact control on your screen. If you're staring at your own Vector Motion Blur node wondering which socket is actually the Vectors input on your version of the Inspector layout, Uncle looks at your actual screen and points at it, live, instead of asking you to reconcile a tutorial screenshot with whatever you're currently looking at.
It's worth being honest about where TryUncle fits relative to other AI tools built around Resolve, since the category has real alternatives worth naming rather than pretending don't exist. Sottocut, PremiereCopilot, heyeddie.ai, and cutagent.ai each take a different approach, generally automating parts of an edit or answering questions through a chat interface rather than watching your live screen. Uncle's approach is narrower by design: it doesn't cut your timeline or write your rough assembly, it watches your actual Resolve window and teaches you where the control you need actually lives, in the moment you need it, which is a different job than automation and a different job than a general chatbot answering from memory of how Resolve "usually" looks. TryUncle is a paid macOS app at $39 a month, and macOS only; there's no Windows or Linux version, so if you're on either of those platforms, the free training and community resources named above remain your primary path.
If you're weighing the best way to learn DaVinci Resolve broadly, not just this one node, and want to compare that question against structured courses, our full learning roadmap for DaVinci Resolve covers free training, paid courses, and where a screen-aware assistant like Uncle fits alongside both, rather than instead of either.
Once you've got the Vectors input wired correctly and Scale dialed to something that looks like real motion, you're past the hardest part of this specific tool, and if you're mid-build right now, that's exactly the kind of moment Uncle can point at the specific socket or slider on your own screen while you finish it.
Quick troubleshooting reference
Bookmark this table. Work through it top to bottom for the fastest path to a fix.
| Symptom | Likely cause | Fix |
|---|---|---|
| No blur appears at any Scale value | Vectors input never connected | Wire an Optical Flow output (or 3D vector pass) into the green Vectors socket |
| No blur, chain looks correctly wired | Optical Flow placed downstream instead of upstream | Move Optical Flow ahead of Vector Motion Blur in the node chain |
| Faint blur, hard to confirm it's working | Scale value too low | Push Scale to an exaggerated value to test, then dial back |
| Blur near-zero even at high Scale | Very little real motion in the source footage | Confirm the shot has real movement for Optical Flow to detect |
| Blur runs the wrong direction | Channel or Flip Channel mismatch | Check X/Y Channel assignment and Flip Channel checkboxes |
| Blur blocky around fine or repeating detail | Optical Flow estimation error on difficult texture | Switch Method from Advanced to Classic |
| Blur smears across a subject's edge into the background | Vector map blending subject and background motion | Mask the moving subject separately before Optical Flow analysis |
| Blur applies uniformly across a speed ramp instead of tracking it | Blend parameter not keyframed to the ramp | Keyframe Blend from 1.0 during fast sections to 0.0 during slow sections |
| Optical Flow analysis renders very slowly | Classic method on a CPU-limited system, or GPU mode misconfigured on Advanced | Check Preferences > System > Memory and GPU; consider Advanced if quality allows |
| 3D render motion blur too slow to iterate on | Native 3D motion blur calculation, especially on particles | Export a motion vector pass and use Vector Motion Blur instead |
| Unsure if you need Studio for any of this | Confusion with Studio-gated tools like Speed Warp or ResolveFX Motion Blur | Both Optical Flow and Vector Motion Blur are free; no Studio license required |
The verdict
DaVinci Resolve's Fusion page gives you a genuinely free, genuinely capable way to add motion blur that Resolve's retime tools don't provide on their own: an Optical Flow node measuring real motion, and a Vector Motion Blur node turning that measurement into a believable, directional smear. The entire workflow depends on one fact that trips up almost everyone the first time through: Vector Motion Blur has no motion sense of its own, and it does nothing at all until a vector map, from Optical Flow or from a 3D renderer's own motion pass, feeds its green Vectors input.
Work through the causes in the order that actually matters. Confirm the connection first, since a missing Vectors input accounts for the largest share of "this node does nothing" reports. Then Scale, since a technically-working chain with too low a multiplier looks identical to a broken one on casual playback. Only after both of those check out should you start adjusting Optical Flow's Method or Warp Count to chase down artifacts, because tuning analysis settings on a chain that was never actually wired correctly wastes real time solving a problem that doesn't exist yet.
And remember the one thing that separates this node from a simpler blur effect: Scale is a multiplier on real measured motion, not a fixed blur amount, which is exactly why it's the right tool for a speed ramp whose velocity keeps changing, and why a flat, non-vector blur effect can't match a ramp's changing speed the way a keyframed Blend parameter can.
Frequently asked questions
- What does the Vector Motion Blur node do in DaVinci Resolve Fusion?
- It reads a motion vector map, two channels of data describing how far and in what direction each pixel moved between frames, and uses that map to paint a directional blur onto an image. Per Blackmagic's Fusion manual, the node 'is used to create directional blurs based on a Motion Vector map or AOV (Arbitrary Output Variable) channels exported from 3D-rendering software like Arnold, Renderman, or VRay.' For live-action footage without a rendered vector pass, Fusion's own Optical Flow node generates that same kind of vector map by analyzing pixel movement across frames.
- Why is my Vector Motion Blur node doing nothing to my footage?
- The single most common cause is a missing or disconnected Vectors input. Vector Motion Blur has two required connections, the image itself in the orange Input and a motion vector map in the green Vectors input, and it produces zero blur if the green input is empty, even though the node otherwise appears correctly placed in the node tree. The second most common cause is a Scale value left too low, since Scale directly multiplies the vector magnitude that drives how far the blur stretches.
- Do I need Optical Flow before Vector Motion Blur, or can I skip it?
- For live-action footage, yes, you need a vector source, and Optical Flow is the standard way to generate one inside Fusion. The Vectors input on the Vector Motion Blur node expects a two-channel motion map, and ordinary video footage has no such map until something calculates it. Optical Flow analyzes the clip and writes that data into its Vector and Back Vector auxiliary channels, which Vector Motion Blur then reads. For CG renders, you can skip Optical Flow entirely if your 3D application already exported a motion vector AOV.
- Do you need DaVinci Resolve Studio to use Vector Motion Blur?
- No. Both the Vector Motion Blur node and the Optical Flow node ship in DaVinci Resolve's free version, on the Fusion page, with no feature gate separating them from Studio. Studio adds a separate, different tool, a one-click Motion Blur effect under ResolveFX Temporal on the Edit page, which is faster to apply but offers less control than building the node-based version yourself.
- Why does my Vector Motion Blur look smeared, blocky, or full of artifacts?
- Almost always because Optical Flow's motion estimate is wrong somewhere in the frame, not because Vector Motion Blur itself is broken. Fast, complex motion, thin or repeating detail, and hard edges against a busy background all confuse optical flow analysis, and Vector Motion Blur will faithfully paint a blur along whatever incorrect direction the vector map gives it. Switching Optical Flow's Method from Advanced to Classic, raising its Warp Count and Iteration Count, and isolating the moving subject with a mask all reduce these artifacts.
- Can I add motion blur to a speed ramp in DaVinci Resolve using Vector Motion Blur?
- Yes, and it is one of the more common reasons editors reach for this node in the first place, since Resolve's built-in retime processes don't add blur where none existed in the original footage. The workflow keyframes the Vector Motion Blur node's Blend parameter to full strength during the fast section of a ramp and down to zero during the slow section, so the added blur matches the perceived speed change instead of applying uniformly across the whole clip.
- What's the fastest way to actually learn Fusion tools like Vector Motion Blur instead of just reading about them?
- Most editors learn Fusion fastest by building one real composite while a resource is open next to it, whether that's Blackmagic's own free training, a YouTube channel like Casey Faris's, or a written guide like this one. The friction isn't understanding the concept, it's translating a static screenshot into wherever your own Inspector panel actually is, which is the specific gap a screen-aware assistant like TryUncle is built to close rather than replace those resources.
Sources
- Fusion Reference Manual 18.6: Vector Motion Blur [VMB] (Blackmagic Design, mirrored)
- Fusion Reference Manual 18.6: Auxiliary Channels Explained (Blackmagic Design, mirrored)
- DaVinci Resolve Manual: Memory and GPU Preferences (Blackmagic Design, mirrored)
- DaVinci Resolve - Fusion (Blackmagic Design product page)
- DaVinci Resolve product comparison and pricing (Blackmagic Design)
- Vector Motion Blur Node, by Justin Robinson (JayAreTV)
- Optical Flow Node, by Justin Robinson (JayAreTV)
- Adding Motion Blur to 3D Renders in Fusion, curated by Gedaly Guberek, video by Casey Faris (DVResolve.com)
- How to Add Motion Blur in DaVinci Resolve in 3 Methods, by Bojan Veselinovikj (Boris FX)
- Speed Ramp with Motion Blur in DaVinci Resolve, by Chadwick Shoults (Creative Video Tips)
- DaVinci Resolve Add Motion Blur FREE (with 2 Extra Steps), by Raju (BeginnersApproach.com)
- In Depth: DaVinci Resolve Studio vs Free, Updated for 21 (Toolfarm)
- Linking 3D Geometry to Particles in Blackmagic Fusion, by Bryan Ray
Learn by doing, not watching
Stop translating tutorials to your timeline.
TryUncle stays beside Resolve on Mac and Windows. When you ask, Uncle sees your screen and points at the exact control you need. No hunting through tabs, timestamps, or mismatched tutorials.
Meet TryUncleKeep reading
 GuidesJul 10, 202637 min read
DaVinci Resolve Fusion Planar Tracker Not Tracking: Every Fix
Why DaVinci Resolve's Fusion Planar Tracker won't move, drifts, or loses lock, and the reference frame, tracker type, and mask fixes that solve it.
 FixesJul 10, 202627 min read
Fusion Merge Node Backwards? Fix Swapped Background/Foreground
Composite looks upside down in DaVinci Resolve Fusion? A Merge node's Background and Foreground inputs got swapped. Here's the exact fix, every time.
 GuidesJul 11, 202635 min read
How to Speed Ramp in DaVinci Resolve: The Complete Guide
Every way to speed ramp in DaVinci Resolve: Retime Controls, speed points, the Retime Curve, Optical Flow vs Speed Warp, and what changed in Resolve 21.