
Learn / DaVinci Resolveupdated for DaVinci Resolve 21.1 (September 2026)
DaVinci Resolve Audio Bus Routing Not Working? Fix It
Quick answer
When DaVinci Resolve audio bus routing is not working, follow the meter path: confirm the track meter moves, assign the track to the intended bus, route that bus to the monitored main bus, and check the monitor output. In Fairlight, use Bus Format and Bus Assign, then verify mute, solo, channel format, and Deliver bus selection.
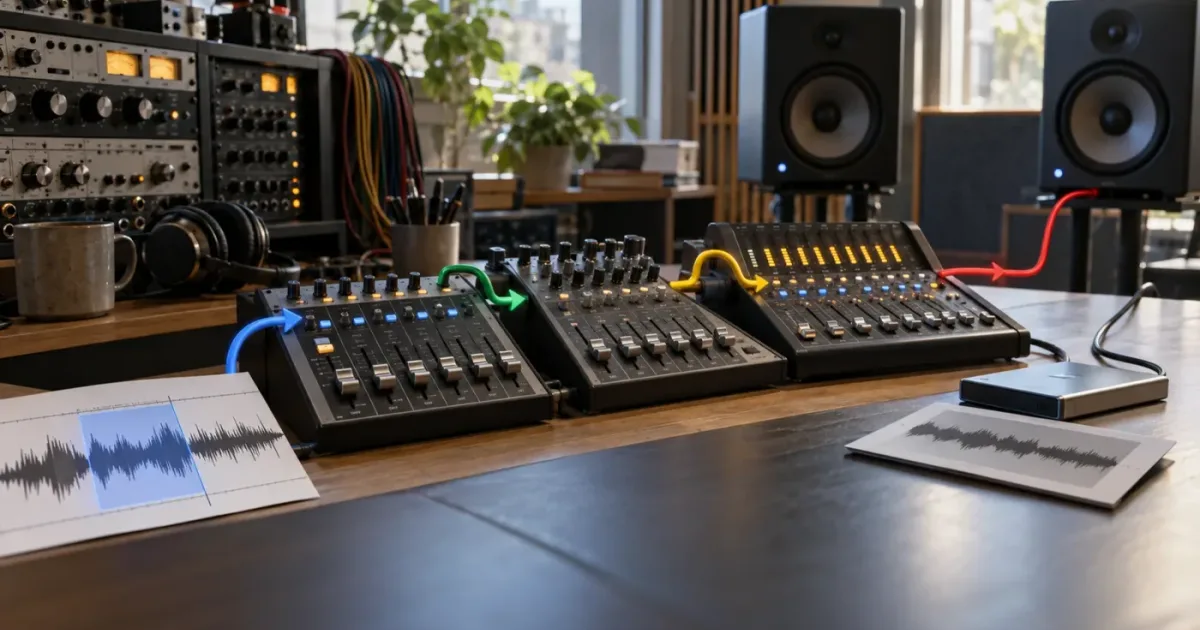
If DaVinci Resolve audio bus routing is not working, start with the meters. A moving track meter tells you the clip and track have signal. It does not prove that the track reaches the bus you are monitoring, that the bus reaches the physical output, or that the same bus will be rendered.
As of October 2026, this guide uses the Fairlight terminology and routing model documented around DaVinci Resolve 20 and the current DaVinci Resolve 21.1 release. Menu names can move slightly between builds, but the diagnostic logic stays the same: trace one signal from source to destination and stop at the first meter that goes silent.
We have taught more than 100,000 students on Udemy, run a 100,000+ member professional video-editing community, and have spent 7+ years doing commercial video editing. Bus routing is the kind of problem that looks mysterious until you stop treating the mixer as one big volume panel. It is a chain.
Grant Petty, Blackmagic Design CEO, describes the product in the foreword to the Fairlight guide: “DaVinci Resolve 20 is the only post-production solution that combines editing, color correction, visual effects, motion graphics, and audio post-production all in one software tool!” Read the Fairlight Audio Guide to DaVinci Resolve 20.
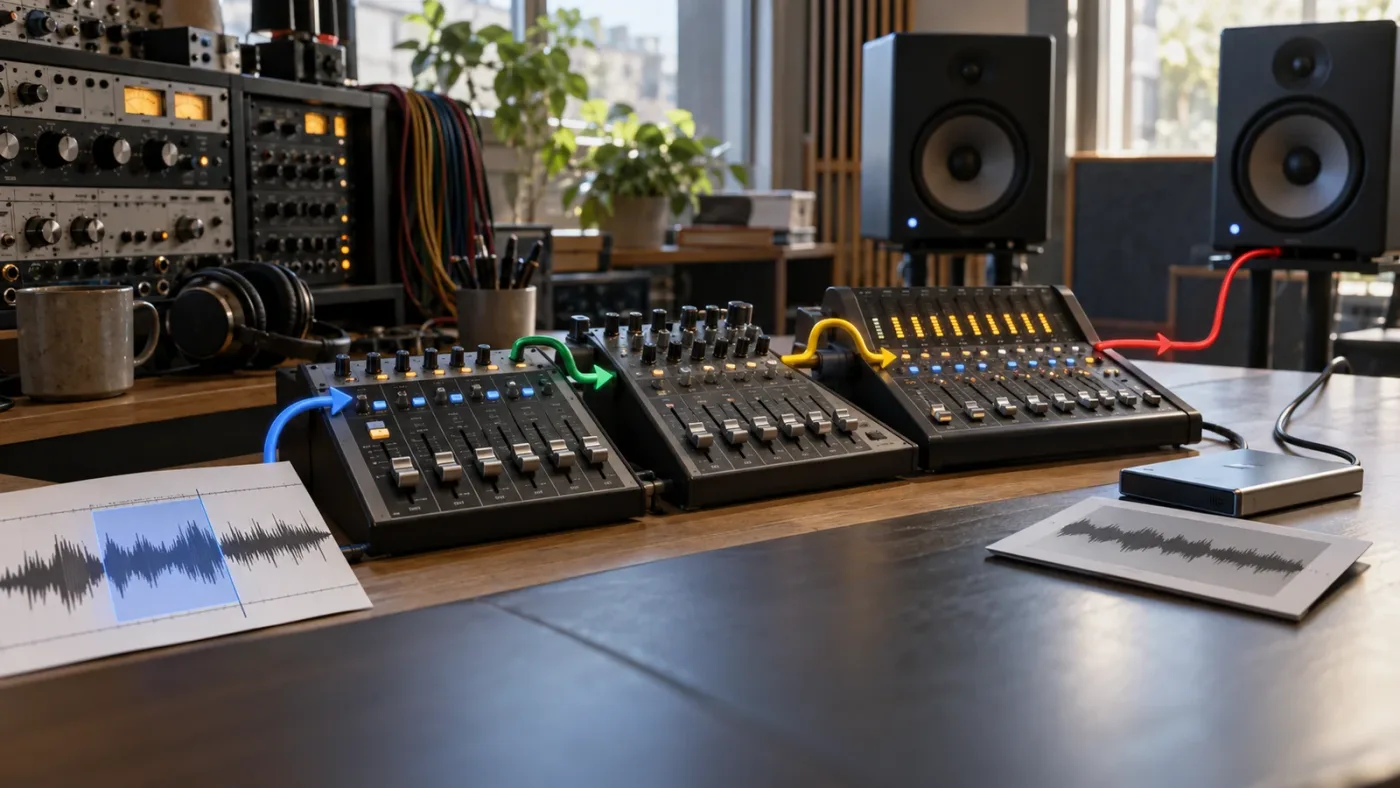
Why is DaVinci Resolve audio bus routing not working when the track meter moves?
The most likely reason is that the track has signal but its Bus Output assignment does not lead to the bus you are monitoring. A track meter measures activity before the complete output path, so the correct test is to watch the track, destination bus, main bus, and monitor meters in sequence.
Think of the path as four checkpoints:
- The clip produces audio.
- The timeline track receives and meters that audio.
- The track sends audio to a bus, and any intermediate bus sends audio onward.
- The final bus reaches the selected monitor output or the selected render output.
If the track meter moves and the destination bus meter does not, the fault is between the track and the bus. If the destination bus moves but the main bus does not, the fault is between buses. If the main bus moves but you hear nothing, the fault is monitoring, device output, mute, solo, or channel format. If monitoring works but the file is silent, the fault is in the Deliver audio configuration or the selected render bus.
Blackmagic describes Fairlight as a mixer with channel strips for both timeline tracks and buses, and it specifically documents mixing clips, tracks, and buses as separate operations. That distinction matters. A bus is not simply a larger track fader. It is a destination in the signal graph. Blackmagic’s Fairlight documentation also documents channel mapping as a separate layer, which explains why a signal can be routed correctly and still appear on the wrong channel.
A moving track meter proves signal exists on the track, not that the selected monitor bus receives it.
What does each meter prove?
| Meter you watch | What a moving meter proves | What it does not prove | Next check |
|---|---|---|---|
| Clip or waveform | Media contains an audio waveform or event | The clip is audible, unmuted, or mapped correctly | Track state and clip channel mapping |
| Timeline track | The track is receiving signal | The track reaches the intended bus | Track Bus Outputs |
| Submix or auxiliary bus | The bus receives signal | The bus reaches the main bus or monitor source | Bus output assignment |
| Main or output bus | The final bus receives signal | Your interface or speakers are receiving it | Monitor source and audio I/O |
| Deliver bus preview or render meter | The selected output is being rendered | Every desired bus is included in the file | Deliver audio configuration |
The table is deliberately conservative. It tells you what the evidence means and what it does not mean. That prevents a common mistake: seeing a track meter move, assuming routing is fine, and then changing plug-ins, cache settings, or sample-rate settings even though the signal never entered the intended bus.
What is the shortest working test?
Use a new test timeline or a copy of the project, one audio clip, one track, the default main bus, and no plug-ins. Play the clip. If you hear it, create one stereo bus called Test Bus, assign the track to Test Bus, route Test Bus to the main bus, and play again. This gives you a small known-good graph.
Do not start by redesigning a complicated session with dialogue, music, effects, fold-downs, and multiple deliverables. A small graph answers one question at a time. If the small graph works, compare its assignments with the production timeline. If the small graph fails, inspect project settings, the monitor output, and the audio device before returning to the production session.
How do I trace the exact DaVinci Resolve audio route from track to monitor?
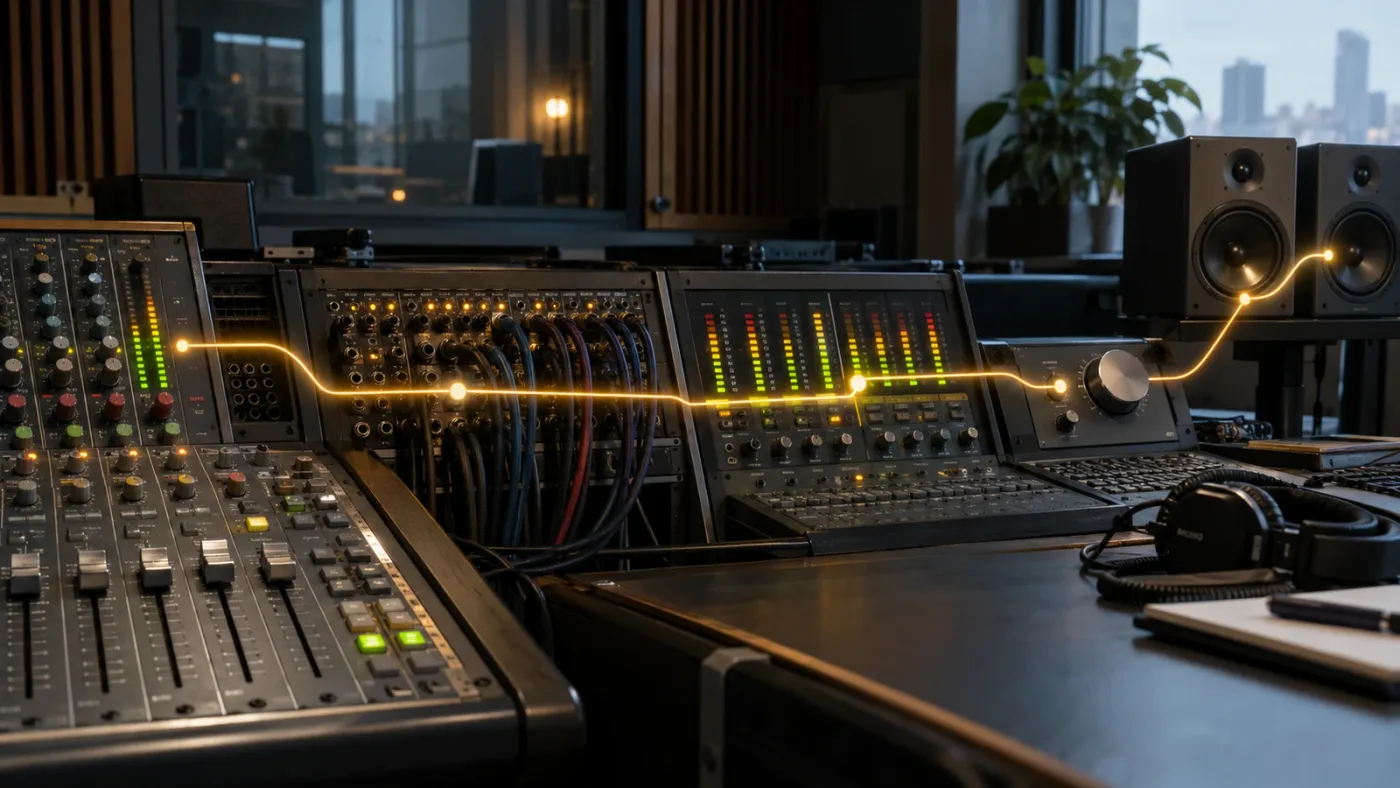
To trace the exact DaVinci Resolve audio route, open Fairlight, show the Mixer, and follow the signal from the source track to its Bus Outputs, then from each bus to the next bus until you reach the source selected in the monitoring controls. Do not infer the route from bus names alone.
Step 1: Confirm that the source is not the problem
Select the timeline containing the problem. Move the playhead over a section with obvious audio. Look at the track channel strip in the Fairlight Mixer.
Check these states before editing routing:
- The track is not muted.
- The track is not hidden or disabled by a track state you forgot about.
- The clip is not muted at clip level.
- The track is not soloed while another track or bus is soloed.
- The playhead is over the clip, not a gap.
- The track fader is not at the bottom.
- The track pan is not sending the only active channel somewhere you cannot hear.
If the track meter moves, preserve that information. It means the source and at least part of the track path are alive. If it does not move, bus changes are premature. Check the clip, waveform, track format, channel mapping, mute, and timeline position first. Our companion guide on DaVinci Resolve audio meters not moving is the better branch when the first meter is already silent.
Step 2: Show the track's Bus Outputs
In the Fairlight Mixer, locate the track's output control. Depending on the layout and version, it may appear as Bus Outputs or as a destination control in the channel strip. The key is to inspect the destination, not just the fader.
Write down the exact destination name. Do not settle for “it looks routed.” A track may be assigned to Bus 2, while you are monitoring Main 1. A renamed bus may be called Dialogue, but its underlying position in the chain can still differ from the bus you thought it replaced.
If the track is assigned directly to the main bus, test that path first. Direct routing removes an intermediate bus from the diagnosis. If direct routing works, restore the intended submix and inspect the bus-to-bus connection. If direct routing does not work, the issue is not merely the submix arrangement.
Step 3: Watch the destination bus meter
Play the timeline and watch the assigned destination bus. If the track meter moves but the destination bus does not, remove the assignment and create it again. Then test with a short clip.
If several tracks feed the same bus, solo one track temporarily. That makes the meter path easier to read. Turn solo off after the test. A soloed track or bus can make a correct route look broken because everything else is intentionally excluded.
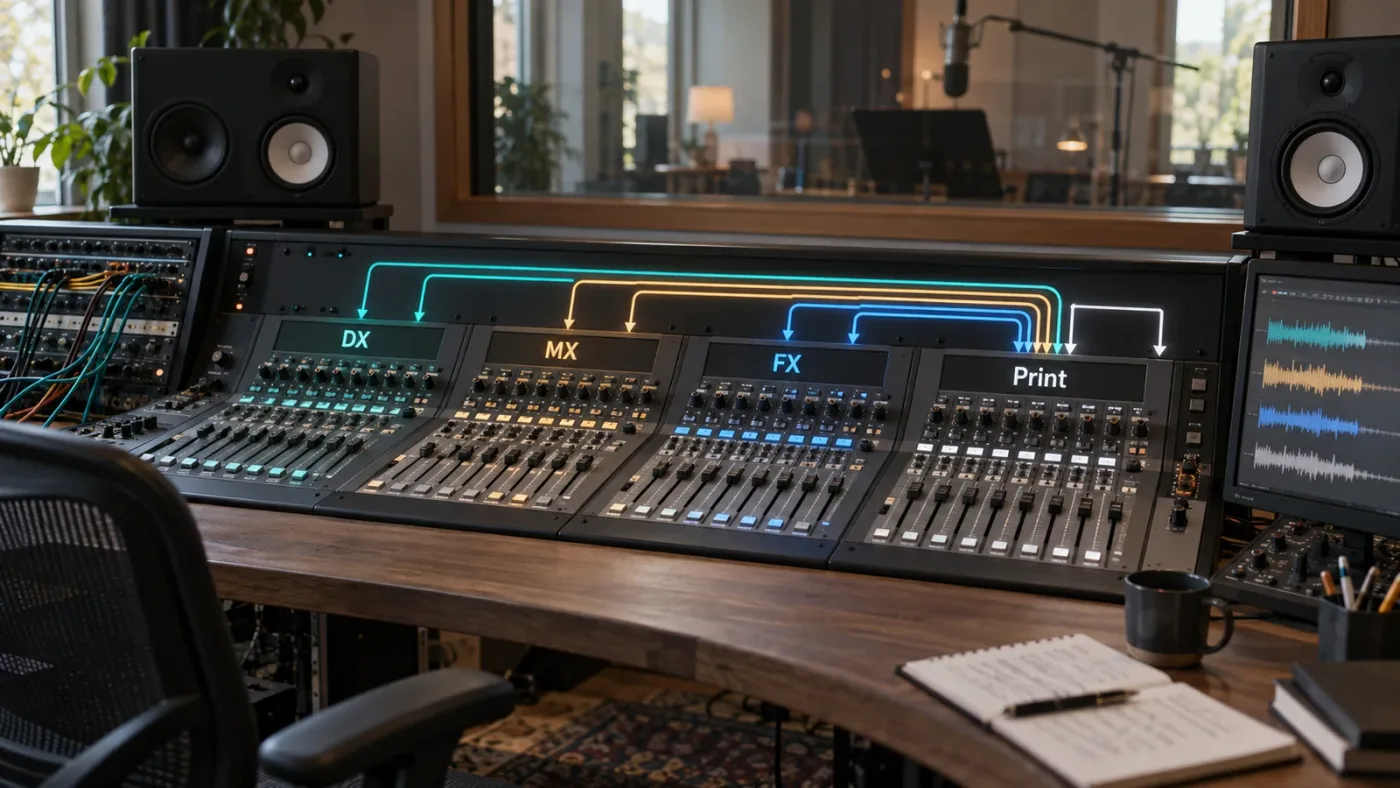
Use names that describe purpose, such as DX, FX, MX, or Print, instead of generic names when the session grows. Clear labels do not repair routing, but they make a disconnected route visible to the next person who opens the project.
Step 4: Follow the bus-to-bus connection
A submix is useful only when its output reaches a bus that you actually monitor or render. For example, a dialogue track can feed a DX bus, and DX can feed a Stereo Out or Print bus. If DX is not connected onward, the DX fader can move while the final output remains silent.
This is the exact mistake described in a Blackmagic forum answer by Andy, where the recommendation was to follow “track to bus, and bus to bus as necessary.” The answer explains that a track assigned to Bus 2 will only be heard while monitoring Bus 1 if Bus 2 is directly or indirectly patched to Bus 1. Read the Blackmagic Design forum explanation of that routing path.
The forum answer is practical, but it is not a replacement for the manual. Treat it as a diagnostic example. The general rule is stable: a bus meter moving is not enough. The signal must have a complete path to the chosen endpoint.
Step 5: Verify the monitor source
If the final bus meter moves and you still hear nothing, inspect the monitor source and output device. Fairlight can let you listen to a selected source, and that source may be different from the bus you are editing.
Check the following:
- The selected monitoring source is the bus that is receiving your signal.
- Monitor level is above zero.
- The monitor path is not muted.
- The correct audio device is selected in Resolve preferences.
- Your operating system output is the device you expect.
- Headphones, speakers, an interface, and any external monitor are powered and connected.
- A video I/O device is not receiving the signal while you are listening to system audio, or vice versa.
This is where many editors keep rebuilding the bus. They see a final bus meter move, but their monitor source is still an isolated submix, an old bus, or a muted output. The graph is correct. The chosen ear is wrong.
Step 6: Save, close, and reopen only after the path works
Once the signal path works, save a new project version or duplicate the timeline before making the next change. Do not close the project as a first diagnostic step. Reopening can be useful when a project has stale state, but it cannot substitute for finding a missing assignment.
If a route works in a new project but not the original, compare project-level Fairlight settings, bussing mode, output device, track format, and bus format. An imported timeline can bring its own assumptions. A copied timeline can retain the old destination names. These are comparison tasks, not reasons to guess.
How do I assign a track to a bus in Fairlight?
To assign a track to a bus in Fairlight, create or select the bus in Fairlight > Bus Format, then use the track channel strip's Bus Outputs destination control to send the track there. If the bus is a submix, assign that bus to the main or print bus as a second routing step.
What is the difference between Bus Format and Bus Assign?
Bus Format defines the buses and their channel formats. Bus Assign is where you connect available tracks to a selected bus in workflows that use the assignment window. The Mixer also exposes bus destinations directly on channel strips.
The precise visible control can vary by page layout, screen size, and version. The conceptual separation is more important than memorizing one screenshot:
| Task | Tool or area to inspect | Result |
|---|---|---|
| Create a bus | Fairlight > Bus Format | Adds a bus with a chosen format and name |
| Inspect track destination | Fairlight Mixer, track channel strip | Shows where the track sends output |
| Assign sources to a bus | Fairlight > Bus Assign, when available | Connects tracks or sources to the selected bus |
| Connect a bus onward | Bus channel strip output or bus routing control | Sends the submix to another bus |
| Select what you hear | Monitoring controls | Chooses a source for listening |
| Choose what renders | Deliver audio settings | Chooses an output bus for the file |
Blackmagic’s Fairlight Audio Guide describes FlexBus as a system in which tracks can be assigned to buses, buses to tracks, and buses to other buses. That is why the route can contain more than one hop. The Fairlight Audio Guide to DaVinci Resolve 20 explains that the Bus Format and Bus Assign windows are used to inspect and build the signal flow to a stereo output bus.
How do I create a simple dialogue submix?
Create a stereo bus named DX. Assign each dialogue track to DX. Route DX to the main stereo output bus. Monitor the main bus. Then play one dialogue clip and watch the dialogue track, DX, and main bus meters.
For a simple session, the route should look like this:
A1 Dialogue  ──┐
A2 Dialogue  ──┼──> DX bus ───> Stereo Out or Main bus ───> monitor
A3 Dialogue  ──┘
If the A1 meter moves but DX does not, inspect A1's Bus Outputs. If DX moves but Stereo Out does not, inspect DX's output. If Stereo Out moves but your headphones are silent, inspect the monitor source and audio device. This diagram is not a claim that every project must use this exact naming. It is a low-complexity test path.
How do I route music and effects separately?
Create MX and FX buses, send music tracks to MX and effects tracks to FX, then send both buses to the same main or print bus. Keep the final bus format compatible with the delivery you need.
Music tracks  ───> MX bus ──┐
Effects tracks ──> FX bus ──┼──> Print bus ───> monitor and render
Dialogue      ───> DX bus ──┘
This arrangement gives you independent control over dialogue, music, and effects. It also adds more places for a signal to stop. Name every bus and test every branch before adding plug-ins. If you can hear the direct tracks but not the print bus, the new problem is likely the bus-to-bus connection, not the source clips.
Can one track feed more than one bus?
In a FlexBus workflow, a source can be routed into multiple destinations when the project design calls for it. That can be useful for a mix-minus, alternate language, stems, or parallel processing. It can also create doubled audio, phase issues, or unexpected level changes if the same signal reaches the main output by two paths.
Use multiple destinations only when you can explain the purpose of each path. If the goal is merely “make this track louder,” raise the appropriate fader or use a documented send design rather than adding an extra output route. A second route is a new signal path, not a second volume control.
Why is my bus meter moving but I hear no audio?
When a bus meter moves but you hear no audio, the most likely causes are a wrong monitor source, a muted or soloed monitor path, an incompatible channel format, or a device output that is different from the path you are watching. The routing into the bus may be correct.
Is the monitor listening to the bus you think it is?
Select the bus you intend to hear in the Fairlight monitoring controls. If the bus is not available as a monitor source, check whether it is a valid output bus for that project format. If a different bus is selected, switch to the moving bus and test again.
The same session can contain a dialogue submix, a music submix, a full print bus, and a monitoring path. The bus name in the mixer is not proof that the monitoring selector follows it. Read the selected source, then watch that source's meter while playing.
Is a mute, solo, or dim state hiding the signal?
Check mute and solo buttons on the source track, destination bus, main bus, and monitor control. A solo state can exist farther upstream or downstream than the control you are looking at. Temporarily clear all solo states and mute states, then test a single track.
Do this as a test, not as a permanent mix decision. After the route works, restore the intended solo or mute arrangement and confirm that the change behaves as expected.
Is a stereo signal being sent to a mono or surround destination?
Channel format changes what the bus can accept and what the output means. A mono source sent to a stereo bus can be valid, but the pan and channel mapping determine where it appears. A surround bus has more channels and a different monitoring expectation. A bus can meter while your current listening setup exposes only a different channel or downmix.
Blackmagic documents that Fairlight can change clip and track channel mapping, and that adaptive tracks can support nonstandard formats up to 36 channels. The Fairlight product documentation makes channel mapping a separate troubleshooting step because changing the track destination alone does not redefine the source channels.
Is a hardware output being used instead of the system output?
If Resolve sends audio to a DeckLink, UltraStudio, interface, or another hardware path, your computer speakers may remain silent even though Resolve meters move. Conversely, a project configured for system audio may not appear on a connected video monitor.
Change the audio I/O setting only after recording the current setting. Test one known output at a time. If you have a separate video output device, disable that path temporarily or select the system output for the diagnostic. Then return to the production configuration once the bus graph is verified.
Is the bus fader or trim reducing the signal to silence?
A bus can meter before or around a fader depending on what you are watching, and automation can move a level during playback. Check the bus fader, trim, automation mode, and any dynamics processor. Bypass processing for the test, but do not delete it. If bypass restores sound, inspect the plug-in threshold, gate, limiter, or automation rather than changing the bus route.
Fairlight’s public feature documentation states that its channel strips include faders, panners, effects slots, dynamics, and a 6-band parametric equalizer. That is a lot of places to change a level after routing. Blackmagic’s Fairlight page lists these controls as part of the channel strip, so troubleshooting should separate routing from processing.
A bus meter moving without audible output usually points to monitoring, channel format, or downstream output, not a missing track signal.
How do I fix Fixed Bus and FlexBus routing differences?
To fix routing after a Fixed Bus or FlexBus change, inspect the project’s bussing mode and then rebuild the intended track-to-bus-to-main path rather than trusting old bus names. Fixed Bus and FlexBus describe different routing models, so a project can preserve audio while changing where assignments are visible.
What is Fixed Bus?
Fixed Bus is a simpler project structure with a predefined relationship between timeline tracks and a primary output bus. It can be easier to understand for a basic edit because the main path is more predictable. It becomes limiting when you need flexible submixes, several deliverable buses, or bus-to-bus designs.
The Fairlight Audio Guide shows a project setting for using fixed bus mapping and identifies the resulting default output as Main 1 in its example. That example is version-specific documentation, not a promise that every project will show the same name. Read the Fairlight bussing discussion in the official guide.
What is FlexBus?
FlexBus lets you decide how tracks and buses connect. It is the model to inspect when you need a dialogue bus, music bus, effects bus, print master, alternate output, or other deliberate graph. The flexibility is useful, but it means a track can be active without reaching the bus you expect.
The Fairlight Audio Guide to Resolve 20 states that FlexBus can assign tracks to buses, buses to tracks, and buses to other buses. That is the reason a direct track-to-main route and a multi-hop submix route behave differently even when both have moving meters.
Why did Main 1 become Bus 1?
The visible name can reflect the project’s bussing configuration and the version or project that created it. A forum response from Blackmagic’s community explains that the primary bus name differs depending on whether fixed bus mapping is enabled, with Main 1 used in one configuration and Bus 1 in another. See the Blackmagic forum explanation of the bus-name difference.
Do not repair this by renaming every bus immediately. First identify the actual primary bus by its meter and output path. Names help humans, but the route is defined by the assignment and destination. Renaming a disconnected bus can make the session more confusing if you do not also document its role.
What should I do after converting an older project?
After a conversion or version upgrade, test one track from each functional group. Check dialogue, music, effects, and any special deliverable bus. Look at the source track meter, its assigned bus meter, the main bus meter, and the monitoring source.
Make a routing checklist for the project:
| Group | Source tracks | Destination bus | Downstream bus | Test |
|---|---|---|---|---|
| Dialogue | A1 to A3 | DX | Print or Main | Voice reaches final meter |
| Music | A4 to A5 | MX | Print or Main | Music reaches final meter |
| Effects | A6 to A8 | FX | Print or Main | Effects reach final meter |
| Alternate mix | Selected sources | Alt or M&E | Dedicated output | Correct exclusions |
The exact track numbers are placeholders for the group structure, not claims about your session. Replace them with the actual track names. The point is to test categories rather than assume that a project conversion preserved every destination exactly.
Does upgrading to DaVinci Resolve 21.1 change ordinary bus routing?
DaVinci Resolve 21.1 is current as of October 2026, and Blackmagic’s September 8, 2026 announcement highlights AI assistant integration, camera support, Fairlight animator filtering, and other updates. It does not present ordinary track-to-bus troubleshooting as a new routing model. See the DaVinci Resolve 21.1 announcement.
That does not mean every old project behaves identically after opening in a new version. Version changes can affect compatibility, plug-ins, operating-system audio devices, or project conversion. Treat version information as context. If a route fails only after an upgrade, compare the project’s bussing mode, bus names, channel formats, monitor device, and third-party plug-ins before blaming FlexBus itself.
Blackmagic’s support page lists DaVinci Resolve 20.3.3 as a 2026 maintenance release and states that the improvements in that release are also present in DaVinci Resolve 21 beta 3. The exact release you run matters when reporting a bug, so record the full version number and operating system in any support question. The official support center is the source for current downloads and release information.
Why does DaVinci Resolve route audio correctly in Fairlight but not in the Deliver export?
If Fairlight monitoring works but the export is silent or incomplete, inspect the Deliver page’s audio output selection, bus format, channel mapping, and render range. Monitoring a bus does not automatically prove that the Deliver job includes that same bus.
Which bus is selected for the render?
Open the Deliver page and inspect the audio settings for the render preset. Look for the output bus or bus selection. Choose the intended main, print, stem, or alternate bus according to the deliverable.
For a normal stereo file, the intended final stereo bus should be the output. For stems, you may need separate jobs or multiple outputs depending on the required format. Do not select every bus just because they are available. That can create a file with extra channels or a layout that the receiving platform interprets incorrectly.
The Blackmagic Fairlight documentation states that bouncing a mix results in a channel configuration matching the source bus. That is a useful rule when you are exporting or bouncing a multichannel source: the source bus format is part of the result, not just a label on the mixer. Read the Fairlight documentation on bouncing mixes.
Why does the export have the wrong number of channels?
The render can inherit the selected bus format. If you choose a 5.1 bus when you need stereo, you can get a multichannel file or a channel layout that sounds wrong in a stereo player. If you choose a stereo bus for a surround deliverable, you can lose the intended channel separation.
Confirm these four items:
- The bus format matches the deliverable.
- The clip and track channel mapping matches the source.
- The render preset is configured for the required audio codec and channels.
- The destination player or platform understands the exported channel layout.
For a 5.1 workflow, use a deliberate channel map and verify the order expected by the receiving system. The Blackmagic forum contains examples of creating a 5.1 bus and assigning tracks to it, but those examples are community guidance for particular deliveries, not a universal cinema specification. Use the forum’s multichannel output discussion as a reference, then confirm the specification for your actual client or platform.
Why is one bus missing from the exported file?
A bus can be audible in monitoring but absent from the export if the Deliver job is set to another bus, if the job renders only selected tracks, or if the bus is not part of the chosen output configuration. Check the job before rendering a long timeline.
Render a short range that includes speech, music, and effects. Open the resulting file in a player or reimport it into a new timeline. Watch the imported file’s channels and compare them with the intended source bus. This isolates export configuration from monitoring configuration.
Does caching or bouncing repair a missing route?
No. Caching or bouncing can create a new audio file or improve playback performance, but it does not automatically connect an unassigned track to the intended output bus. First repair routing. Then use cache or bounce when a plug-in or processing load is causing a separate playback problem.
Blackmagic documents bounce options for clips, tracks, and mixes, including bouncing a mix to a track and exporting audio files. It also notes that the bounced mix uses the source bus’s channel configuration. See the official Fairlight bounce documentation.
How do I fix audio bus routing when only the left or right channel works?
When only one channel works after bus routing, inspect the source clip mapping, track format, bus format, pan, and monitor channel layout in that order. Do not assume a stereo bus will restore a missing source channel.
Is the source actually stereo?
A file may have two channels but contain useful audio on only one. A microphone recorded on channel 1 can be placed in a stereo container with silence on channel 2. Routing the clip to a stereo bus preserves that arrangement. It does not duplicate the active channel.
Open the clip’s channel or attribute controls and identify which source channel contains the desired audio. If the source should be mono, map it to a mono track or use a channel mapping that sends the intended channel to the target. If the source is truly stereo, preserve left and right and inspect pan and downstream channel mapping.
Our internal guide on changing stereo audio to mono in DaVinci Resolve covers the decision between keeping two channels and using one. Use that branch when the bus meter moves but the source itself is unbalanced.
Is the track panned away from the monitoring setup?
Check the track pan and the bus pan. A hard-left source sent to a monitor that exposes only the right channel can sound silent even though the bus is working. A center pan on a stereo bus is a useful diagnostic default.
Return pan to a neutral test position, listen, and then restore the artistic pan. If neutral pan works, routing is probably correct and the issue is placement or channel mapping.
Is the bus format compatible with the source?
Match the bus format to the test. Use a simple stereo source and stereo bus when diagnosing ordinary left and right output. Use a mono bus for a mono decision. Use surround or immersive formats only after the basic stereo path works.
DaVinci Resolve supports multichannel and adaptive track workflows, but that flexibility increases the number of channel decisions. Blackmagic’s documentation lists adaptive tracks with support for up to 36 channels. That number describes a documented capability, not a recommendation to use a 36-channel track for a simple voiceover. Review the channel-mapping guidance and choose the smallest format that matches your delivery.
Could the monitor be downmixing differently?
A multichannel bus can be monitored through a stereo or binaural path. The downmix or monitoring configuration can make a channel seem absent, especially when the source uses a surround layout or an object-based workflow. Test the same source through a plain stereo bus and known stereo output before diagnosing advanced monitoring.
If the stereo test works, the original problem is probably the multichannel monitoring path or channel order. Document the intended channel layout, not just the bus name, before making more changes.
A stereo bus cannot correct a source channel that was never mapped, recorded, or routed into the signal path.
Why is automation making my bus routing look broken?
Automation can make a correct bus route appear broken by moving faders, mutes, pans, or plug-in parameters during playback. Test routing with automation temporarily bypassed or with a short section where the automated values are known.
Is the bus fader writing or reading automation?
If automation is in read mode, Resolve follows existing data. If you change a bus fader and playback returns it to a lower value, that is not a routing failure. If automation is in a write, touch, or latch mode, your test can create new data that changes the result on the next pass.
Use a safe test:
- Stop playback.
- Inspect the bus automation mode.
- Set a known fader level.
- Play a short section with the automation behavior visible.
- Bypass or temporarily remove the test automation only if necessary.
- Restore the intended automation mode after testing.
Blackmagic documents that Fairlight can display and edit main and bus automation data in the timeline. That means a bus is not just a static destination. It can also contain time-based control data. Read the Fairlight automation documentation.
Is a mute automation point cutting the bus?
A bus can be audible at one timecode and silent at another because of a mute automation point. Move to a clearly audible section, turn on the relevant automation view, and inspect the bus lane. If the route works in a new section, compare the automation state rather than changing bus assignments.
Is a ducker or gate reducing the result?
Fairlight includes dynamics processing and a ducker workflow for lowering music under dialogue. A gate, expander, ducker, or compressor can change level enough to look like an intermittent route problem. Bypass one processor at a time and watch the bus meter.
The official Fairlight page describes automatic ducking as a target track responding to one or more dialogue sources. That is useful for a mix, but it introduces a control relationship between tracks. Read Blackmagic’s automatic ducking description when a music bus changes level only when dialogue plays.
Is plug-in latency being mistaken for a route failure?
An effect can change playback behavior without changing the route. Fairlight’s plug-in chain is processed in order, and Blackmagic documents cache and bounce options for processor-heavy plug-ins. If the track and bus meters move but playback stutters, clicks, or delays, investigate processing load and cache after the route is proven.
Our guide to DaVinci Resolve audio crackling and popping during playback is the better path for audible artifacts that do not correspond to a silent bus. Routing is a graph problem. Playback performance is a processing problem. They can coexist, but they need different tests.
How do I troubleshoot a missing bus after importing a timeline or project?
When a bus is missing after importing, compare the project’s bus format, track destinations, bus names, channel formats, and monitor source instead of assuming the imported timeline kept the original routing graph. Imported audio can retain clips while losing or changing the project-level bus context.
Did the project and timeline come from the same bussing mode?
Check the Fairlight settings for the project you opened. A timeline created in one project can behave differently when moved into another project with different bus settings. If the production uses a custom bus design, document the bus list before moving timelines.
Was the bus renamed or replaced?
A name such as DX can be reused for a different bus in another project. Compare the actual format and destination, not just the label. If necessary, create a temporary bus with a unique name such as ROUTE_TEST and assign one track to it. This makes it easy to determine whether the bus is receiving signal.
Did the track format change?
Changing a track from mono to stereo, or from stereo to a multichannel format, can change how the source is delivered to the bus. Inspect the track header and clip mapping. If the source is dialogue from one microphone, a mono track can be easier to diagnose than a stereo wrapper.
Did an XML or interchange workflow carry the audio graph?
Timeline interchange formats are good at carrying certain editorial structures. They should not be assumed to carry every Fairlight mixer decision, plug-in, automation, monitor, and output configuration. If the bus design matters, rebuild and verify it in the destination project.
This is not a claim that every interchange drops buses. It is a caution about scope. The routing graph is project state, and you should test it after any move that changes project context.
What should I record before asking for help?
Capture the full version number, operating system, free or Studio edition, project bussing mode, source track format, destination bus format, monitor device, and exact meter behavior. Also record whether the problem occurs in Fairlight, Edit, playback, or Deliver.
The most useful report sounds like this:
DaVinci Resolve 21.1 on Windows. A stereo clip meters on A1. A1 is assigned to DX. DX meters. DX is assigned to Main 1, but Main 1 does not meter. The same project is silent in Deliver when Main 1 is selected.
That report narrows the fault to a bus-to-bus assignment or project configuration. “Audio does not work” does not.
What are the fastest keyboard and layout checks for Fairlight routing?
The fastest Fairlight routing checks are the ones that expose the Mixer, track and bus channel strips, monitoring controls, and routing commands without changing the project. DaVinci Resolve lets you customize keyboard shortcuts for Fairlight-specific functions, so shortcut availability can differ by preset.
Blackmagic documents panel-specific keyboard mappings for Fairlight, including patch input/output, automation setup, presets, and edit selection tools. The Fairlight product page explains the customizable keyboard workflow.
Use these layout actions:
| Need | Action | Why it helps |
|---|---|---|
| See tracks and buses together | Open the Fairlight Mixer and choose a layout that exposes both | Lets you follow meter flow |
| Find a destination | Inspect the channel strip Bus Outputs control | Shows the actual output assignment |
| Find a hidden bus | Use the bus list or Bus Format window | Confirms the bus exists in the project |
| Isolate one source | Solo one track for a short test | Removes competing signals |
| Remove a false mute | Clear mute and solo states temporarily | Exposes downstream signal |
| Inspect time-based level changes | Show Fairlight automation controls | Separates routing from automation |
| Compare layouts | Save or use a known keyboard preset | Keeps the diagnostic repeatable |
Do not assume a shortcut mentioned in a tutorial is present in your current preset. Open Keyboard Customization and search for the command if you need a shortcut. The menu command is the authority for the installed version and preset.
How do I know whether this is routing, monitoring, or a source problem?
Classify the failure by the first meter that stops moving. This is the most reliable decision rule because each meter narrows the scope of the next test.
| First silent checkpoint | Likely class of problem | First action |
|---|---|---|
| Clip or track | Source, clip state, channel mapping, track state | Confirm clip audio and track meter |
| Assigned submix bus | Track Bus Outputs or track format | Reassign one track and retest |
| Main or print bus | Bus-to-bus route or bus mute | Follow the destination bus output |
| Main bus while monitor source moves | Monitor selection or device output | Select the moving main bus and check I/O |
| Deliver file only | Render bus, range, channel layout, or preset | Recheck Deliver audio settings |
| Playback artifacts with moving meters | Processing, plug-in, cache, or device load | Test with processing bypassed |
This matrix prevents category errors. A silent track cannot be fixed by changing a bus. A moving main bus cannot be fixed by reassigning the source track until monitoring and output device checks are complete. A correct Fairlight mix with a silent export needs Deliver inspection.
What if the track and bus meters both move but the export is still silent?
That pattern points to the Deliver configuration, not the track route. Select the correct audio output bus, check render range, confirm the audio checkbox is enabled, and render a short test file. Reimport the file if the player does not expose channel information clearly.
What if the bus meter does not move until I click the Fairlight page?
If changing pages changes the symptom, investigate monitoring, playback mode, device output, and version behavior. Do not assume the bus assignment changed merely because the page did. Compare the same timecode and the same monitor source in both pages.
What if only one timeline has the problem?
Compare timeline-specific track states, automation, clip mapping, and track formats. If every timeline in the project fails, inspect project-level bussing and monitoring. If one timeline fails, inspect its local assignments first.
What if a new project works but the old one does not?
Use the new project as a reference graph. Recreate one simple track-to-bus-to-main route in the old project and compare each meter. Avoid copying a large set of unknown settings at once. The point is to discover the first difference.
How do I repair a bus route without breaking the mix?
Repair a bus route incrementally: save a project version, test one source, change one assignment, verify the meters, and then restore the full mix. A routing fix should be reversible and observable.
Make a safe copy of the timeline
Duplicate the timeline or save a new project version according to your project’s backup practice. Preserve the original routing until the replacement route has passed a test. This matters when automation, plug-ins, and deliverable buses are already working in part.
Use one source as a tracer
Pick a clear dialogue clip or tone. Solo the source briefly, watch the track meter, and assign it to the intended test bus. If the bus meter moves, continue. If it does not, stop and correct the track destination before touching the rest of the project.
Rebuild downstream connections in order
Connect the test bus to the main or print bus. Watch both meters. Then select the main bus as the monitor source. Once the source reaches the final bus and you hear it, remove solo and test the other groups.
Restore processing after the graph works
Add or re-enable EQ, dynamics, plug-ins, and automation one change at a time. If audio disappears after a processor is restored, the routing graph is not the next suspect. Inspect that processor’s bypass state, threshold, gate, level, latency, or automation.
Validate the export separately
Render a short range with the intended output bus. Confirm the audio file has the expected number of channels and content. A monitor test and a render test are related but distinct acceptance checks.
Is an app that helps you while using DaVinci Resolve useful for bus routing?
An on-screen assistant can be useful when the routing concept is clear but the exact Fairlight control is hard to find in your version or layout. It should point you to the relevant control while you verify the meters yourself, not promise to repair a project without understanding its signal graph.
TryUncle is the on-screen assistant for DaVinci Resolve on Mac and Windows — ask in plain words and Uncle points at the exact control on your screen.
The distinction matters here. A chat answer can tell you “open Bus Format,” but your real project may have a renamed bus, a hidden Mixer panel, an imported FlexBus setup, or a monitor source that does not match the route. An on-screen assistant can shorten the search for the control. You still need to read the meters and confirm the result.
The broader consensus is useful too. Blackmagic’s free training and Fairlight manuals are the authority for product behavior. Community forums can clarify real routing cases. YouTube educators such as Casey Faris can help with visual workflows. Course platforms can give you a structured sequence. Tools such as Sottocut, PremiereCopilot, heyeddie.ai, and cutagent.ai may focus on automating edits or answering chat questions. They are not interchangeable with a tutor that watches your screen and teaches you inside Resolve.
| Resource type | Best use | Limitation for this routing problem |
|---|---|---|
| Blackmagic Fairlight manual | Definitions, supported behavior, version context | Dense when you need one button in a crowded layout |
| Blackmagic training | Structured fundamentals and official terminology | You still need to map the lesson to your project |
| Community forum | Edge cases and practical signal-flow examples | Advice can depend on a specific version or setup |
| YouTube tutorial | Visual orientation and workflow demonstrations | A different layout can make the steps look unlike yours |
| Chat assistant | Explaining the concept and branching tests | It cannot see your project unless the product supports screen context |
| TryUncle | Finding the relevant Resolve control while you work | It does not replace meter-based verification or audio judgment |
If you are asking for the best way to learn DaVinci Resolve, the answer depends on the bottleneck. Manuals and training teach the system. Practice creates recall. A live on-screen explanation helps when you are stuck on the exact control in your own project. If you want to learn DaVinci Resolve fast, use the smallest real task that forces you to trace a signal, then repeat it with a different source and bus format.
For the product’s current pricing and platform details, check TryUncle. The relevant use here is the on-screen Resolve assistant for Mac and Windows, not an automatic edit or an invisible repair service.
The best audio-routing fix is a visible signal path that you can prove at every meter.
What should I do when the normal fixes do not work?
When the normal routing checks fail, reduce the project until the first silent checkpoint is unambiguous, then compare version, device, format, and project state. Escalate with evidence instead of adding more buses.
Test a new project with a known audio file
Create a small project, import one known audio file, add one track, and use the default output. If the file plays, create one test bus and route it to the default output. If the new project works, the original project contains the relevant difference.
This is not a request to rebuild a real mix. It is a diagnostic control. Keep the test project disposable and do not put client media into an unapproved location.
Test another audio output device
If the final bus meter moves, test a different approved output such as headphones or the built-in system output. If the alternate output works, the route may be correct and the original device path needs inspection. Check sample rate, device selection, exclusive access, and physical connections according to your operating system and interface documentation.
Disable third-party audio plug-ins for the test
Bypass third-party plug-ins without deleting them. A plug-in can mute, gate, delay, crash, or otherwise alter playback. If bypass restores the expected result, re-enable processors one at a time.
Check the current release and support context
Write down the Resolve build, free or Studio edition, operating system, hardware output, bus format, and exact reproduction steps. Blackmagic’s support center lists current software updates and points users to its forum and support contacts. Use the official support center for release and support information.
If you post in a forum, include a plain text route such as:
A1 Voice -> DX stereo bus -> Print stereo bus -> monitor source Print
Then state which meters move. That is far more useful than a screenshot of the full mixer with no explanation.
When should I stop changing the route?
Stop when you have a known-good path and the remaining problem is clearly monitoring, processing, channel mapping, or rendering. More routing can hide the original fault. A simple direct path is a diagnostic baseline you can return to.
What is the final DaVinci Resolve audio bus routing checklist?
Use this checklist from top to bottom. Stop at the first item that fails.
- Is the playhead over an audible clip?
- Does the source track meter move?
- Is the track unmuted, unsoloed in a conflicting way, and above silence?
- What exact destination appears in the track’s Bus Outputs control?
- Does that destination bus meter move?
- Does the destination bus route to the intended main or print bus?
- Does the final bus meter move?
- Is the monitor source set to the moving final bus?
- Is the monitor path and hardware output correct?
- Are clip mapping, track format, bus format, and pan compatible?
- Is automation moving the fader or mute?
- Is a gate, ducker, plug-in, or cache problem changing playback?
- Is Deliver configured to render the intended bus?
- Does a short rendered test file contain the expected channels?
- Does the issue reproduce in a small test project?
If the answer fails at step 5, repair track-to-bus routing. If it fails at step 7, repair bus-to-bus routing. If it fails at step 8 or 9, repair monitoring. If it fails at step 13, repair the render configuration. This order saves time because it uses the meters as evidence.
The fix is usually not a mysterious Fairlight bug. It is an incomplete route, a selected source that is not the bus you edited, a channel format mismatch, or a render bus that differs from the monitor bus. Resolve the first silent checkpoint, then reintroduce the complexity your mix actually needs.
If you are still stuck, Uncle can point at the relevant Fairlight control in your own project while you work.
What are the answers to common DaVinci Resolve audio routing questions?
Why is my DaVinci Resolve audio bus routing not working when the track meter moves?
A moving track meter proves that the track receives audio, but it does not prove that the track reaches the bus you are monitoring. Check the track’s Bus Outputs destination, watch the destination bus meter, then follow that bus to the main or print bus and monitor the bus that actually moves.
How do I route an audio track to a bus in DaVinci Resolve?
Open Fairlight, create or select the bus in Fairlight > Bus Format, and use the track channel strip’s Bus Outputs control to assign the track. If the destination is a submix, route the submix onward to the main or print bus before selecting it as the monitor source.
Why can I hear a bus in Fairlight but not in the export?
The Deliver page can use a different audio output selection from the bus you monitored. Inspect the Deliver audio settings, select the intended output bus, confirm the required channel format, and render a short test range before rendering the full timeline.
How do I fix DaVinci Resolve audio routing after changing from Fixed Bus to FlexBus?
Inspect every track and bus assignment after the change. Fixed Bus and FlexBus expose different routing models, so rebuild the intended track-to-bus-to-main path and verify each meter instead of relying on the old Main 1 or Bus 1 name.
Why is only one channel coming through after I route audio to a bus?
Check whether the source actually contains two active channels, then inspect clip mapping, track format, bus format, pan, and monitor downmix. A stereo bus preserves the source channel arrangement; it does not create missing audio on the silent side.
Frequently asked questions
- Why is my DaVinci Resolve audio bus routing not working when the track meter moves?
- A moving track meter proves that the track has signal, not that the track is connected to the bus you are monitoring. In Fairlight, inspect the track's Bus Outputs, follow the bus-to-bus path, and confirm the final bus is the selected monitor source and is not muted.
- How do I route an audio track to a bus in DaVinci Resolve?
- Open the Fairlight page, show the Mixer, create or select the destination bus in Fairlight > Bus Format, then use the track channel strip's Bus Outputs control to assign the track. If the destination bus is a submix, route that bus onward to the main bus you monitor.
- Why can I hear a bus in Fairlight but not in the export?
- Monitoring and rendering can use different destinations. In the Deliver page, inspect the audio output configuration and select the intended main or submix bus instead of assuming the bus you heard in the control room will be rendered automatically.
- How do I fix DaVinci Resolve audio routing after changing from Fixed Bus to FlexBus?
- Recheck every track and bus assignment after changing the bussing mode. Fixed Bus and FlexBus do not present the same routing model, so a project can show active meters while the expected track-to-bus connection or bus-to-main connection is absent.
- Why is only one channel coming through after I route audio to a bus?
- Check the clip channel mapping, track format, bus format, and pan. A stereo clip, stereo track, and stereo bus are not enough by themselves if the source is mapped to one side or the bus is receiving a different channel layout.
Sources
- DaVinci Resolve 21.1 announcement
- DaVinci Resolve Fairlight product page
- The Fairlight Audio Guide to DaVinci Resolve 20
- Blackmagic Design support center
- Blackmagic Design forum: audio patching question
- Blackmagic Design forum: Fairlight bus and multichannel output guidance
- Blackmagic Design forum: audio lost during export
- Blackmagic Design forum: audio crackling in Cut and Edit Page
- Blackmagic Design Fairlight Audio Guide to Resolve 18
Learn by doing, not watching
Stop translating tutorials to your timeline.
TryUncle stays beside Resolve on Mac and Windows. When you ask, Uncle sees your screen and points at the exact control you need. No hunting through tabs, timestamps, or mismatched tutorials.
Meet TryUncleKeep reading
 FixesJul 25, 202627 min read
DaVinci Resolve Audio Meters Not Moving: Every Fix
DaVinci Resolve's audio meters frozen or flat during playback? Here's every real cause, in check order: routing, patching, mute, and monitor style.
 FixesSep 20, 202643 min read
DaVinci Resolve Audio Automation Line Not Visible: Fix
DaVinci Resolve audio automation line not visible? Reveal Fairlight automation and fix missing clip or track lines in Resolve 19, 20, or 21.
 GuidesSep 26, 202619 min read
DaVinci Resolve Change Stereo Audio to Mono: 3 Ways
Learn how to change stereo audio to mono in DaVinci Resolve with Clip Attributes, mono tracks, Stereo Fixer, and a safe export workflow.