
Learn / DaVinci Resolveupdated for DaVinci Resolve 21.1 (October 2026)
How to Create Subclips in DaVinci Resolve
Quick answer
To learn how to create subclips in DaVinci Resolve, open a source clip in the Source Viewer, mark an In point and an Out point, then choose Mark > Create Subclip or press Option-B on Mac or Alt-B on Windows. Resolve adds the range to the current Media Pool bin as an editable source item.
How to Create Subclips in DaVinci Resolve
If a single recording contains an hour of usable material, you don’t want to hunt through that hour every time you need one answer, reaction, or cutaway. A subclip turns a marked range into a named source item that you can find, organize, and edit like other media.
As of October 2026, the most reliable classic method in DaVinci Resolve 21.1 is to open the original clip in the Source Viewer, mark an In point and an Out point, and choose Mark > Create Subclip. You can also use Option-B on Mac or Alt-B on Windows. Resolve 20.1 and later add a separate Edit-page workflow that turns a timeline range into a new timeline, so the phrase “create a subclip” can describe two related but different operations.
We built and run a 100,000+ member professional video-editing community, and we’ve spent 7+ years cutting commercial work. The practical lesson is simple: a subclip is most valuable when it carries editorial meaning. “Interview answer about pricing” is useful. “C0037 Subclip 4” is an invitation to get lost later.
What is a subclip in DaVinci Resolve?
A subclip in DaVinci Resolve is a bounded portion of a longer source clip that appears as its own item in the Media Pool. You can load it in the Source Viewer, rename it, add metadata, place it in a bin, and edit it into a timeline without repeatedly marking the original recording.
The subclip is not a new video file rendered onto your drive. It is an editorial reference to a range inside the original media. That distinction matters. If you move, rename, disconnect, or delete the original media, the subclip depends on the same source media and can go offline with it.
Blackmagic Design’s training material makes the difference from a marker explicit: “Although a subclip is totally independent of its source clip, it does differ from placing a duration marker to identify a portion of a clip.” The sentence comes from Advanced Editing with DaVinci Resolve 16, and the workflow remains useful in current Resolve versions. The practical meaning is that a marker labels a range inside a clip, while a subclip gives that range its own place in the Media Pool.
A DaVinci Resolve subclip is a named editorial range that behaves like a source item without creating a second media file.
That makes subclips a good fit for interviews, webinars, lectures, podcasts, event recordings, documentary footage, screen recordings, and long camera takes. They are less useful when you only need a temporary range once. For that, a timeline marker or ordinary In and Out points may be faster.
What a subclip is and is not
| Item | What it does | Best use | Main limitation |
|---|---|---|---|
| Original source clip | Holds the complete camera or audio recording | Keeping the source intact | Long clips take time to search |
| Subclip | Represents a marked range as a separate Media Pool item | Reusable selects and organized story material | Depends on the original media |
| Duration marker | Labels a range inside the original clip | Notes, reminders, and temporary sections | It is not a separate Media Pool item |
| Timeline clip | Places a source range in an edit sequence | Building the finished edit | It belongs to a timeline, not the source bin |
| Timeline subclip | Creates a new timeline from an Edit-page range in Resolve 20.1 and later | Reusing a composed section | It is a timeline, not a source-media subclip |
Resolve’s official training documents use subclips for selecting interview and documentary material. In the Resolve 20 Editor’s Guide, Blackmagic demonstrates loading a subclip in the source monitor, reviewing it, and organizing subclips in a dedicated bin. That is the pattern to copy: select once, name clearly, then edit repeatedly.
How do I create a subclip in DaVinci Resolve?
To create a Media Pool subclip in DaVinci Resolve, open the source clip in the Source Viewer, mark the desired In and Out points, then choose Mark > Create Subclip. Resolve opens a naming dialog, and the new subclip is added to the current Media Pool bin.
The whole procedure is short. The decisions around it are where most mistakes happen, so first here is the clean sequence.
- Open the Media or Edit page.
- Find the original clip in the Media Pool.
- Double-click the original clip. Confirm that it appears in the Source Viewer, not the Timeline Viewer.
- Move the playhead to the first frame you want in the subclip.
- Press I to set the In point. You can also choose Mark > Mark In.
- Move to the last frame you want in the subclip.
- Press O to set the Out point. You can also choose Mark > Mark Out.
- Choose Mark > Create Subclip.
- Enter a useful name in the New Subclip dialog.
- Click Create.
- Locate the new item in the current Media Pool bin.
- Double-click it to check its range before you start editing.
The menu command is the safest way to learn because it makes the active context visible. Once the procedure feels familiar, the shortcut is faster: Option-B on macOS and Alt-B on Windows. Blackmagic’s training material documents those platform-specific shortcuts for creating a subclip from the marked source range.
If the new item seems to have vanished, check the current bin. Resolve creates the subclip in the active Media Pool bin, not necessarily beside the original file on disk. A dedicated bin named SUBCLIPS or SELECTS makes this behavior predictable.
Where should I mark the In and Out points?
Mark the In point just before the usable action or sentence and the Out point just after it, leaving a little editorial breathing room. A subclip that starts on the first spoken syllable or ends on the last mouth movement is harder to trim gracefully.
This is the most important judgment in the workflow. The menu command is easy. The range is the creative decision.
For spoken interviews
Start before the speaker begins the sentence you want. Include the inhale or setup only when it helps the edit. End after the thought is complete, including a natural pause if you may want to cut to another angle.
Suppose a 48-minute interview contains the line, “The first version failed because we launched before the workflow was ready.” A weak subclip might begin at “failed” and end immediately after “ready.” A practical subclip might include the question, the speaker’s first breath, the full answer, and the small pause afterward. The best range depends on whether the clip will be used as a standalone quote, a short social cut, or a sentence inside a longer sequence.
For demonstrations and tutorials
Include the setup that tells the viewer what they are about to see. A screen recording that starts after the cursor has already moved to a menu may be technically complete but editorially confusing.
For a Resolve tutorial, a useful subclip can include three beats: the problem, the control being used, and the visible result. You can later trim one of those beats in the timeline, but storing the complete thought makes the select reusable.
For action footage
Include the complete motion rather than only the most visually exciting frame. For a door opening, keep the approach, the handle turn, and the reveal. For a sports moment, keep enough lead-in to establish direction and enough tail to let the action land.
For B-roll
Leave room around the movement. A five-second clip of a coffee pour may need a second before the pour begins and a second after the stream ends. The right amount is determined by the intended cut, not a universal duration.
Blackmagic’s Resolve 18 Editor’s Guide says that you don’t need frame-perfect In and Out points when creating subclips and recommends including a little more than you intend to use. That advice is useful because editors often treat the initial range as a final trim. It is better to make a deliberate select with modest room than to re-open a long source clip every time you need one extra frame.
The best subclip range includes the complete editorial thought, not merely the exact frames you expect to keep.
A practical range checklist
Before creating the subclip, ask:
- Does the first frame give the viewer enough context?
- Does the last frame leave room for a cut or reaction?
- Is the audio clean at both boundaries?
- Does the selected moment belong to one clear idea?
- Would another editor understand why this range matters?
- Will the range still be useful if the final edit changes shape?
If the answer to the last question is no, consider using a marker instead. Subclips are an organization tool. They should reduce future decisions, not create another layer of disposable bins.
Why can’t I find Create Subclip in DaVinci Resolve?
The usual reason Create Subclip is missing is that Resolve is not working with an active source range in the Source Viewer. Select the original clip in the Media Pool, open it in the Source Viewer, mark an In point and an Out point, and then open the Mark menu again.
Resolve has several viewers and several kinds of selections. The same-looking playhead can mean different things depending on whether you are in the Source Viewer, Timeline Viewer, or a different page. Use this diagnostic order.
1. Confirm that the source clip is open
Look at the viewer header. The source clip should be named there. If the header identifies a timeline, you are looking at a timeline, not the original source clip. Double-click a Media Pool clip to load the source version.
2. Confirm that both points exist
A playhead position alone is not a range. Press I at the start and O at the end. If you accidentally press O before I, reset the range by choosing Mark > Clear In and Out, then mark it again.
3. Confirm the active window
Click inside the Source Viewer before using the keyboard shortcut. Resolve’s keyboard focus follows the active panel. If focus is in a search field, Metadata panel, or another control, the key may type into that control instead of setting a mark.
4. Check the active bin
A subclip is added to the current Media Pool bin. If the current bin is hidden or filtered, the new item can appear to be missing. Switch to a simple thumbnail or list view, clear any search filter, and check the bin again.
5. Check the version and workflow
Blackmagic’s current support page lists DaVinci Resolve 21.1 documentation dated September 8, 2026. The classic Source Viewer workflow remains the right answer for a source-media subclip. Resolve 20.1 also added a command for creating a subclip from a timeline range, but that creates a new timeline rather than the same kind of Media Pool subclip.
6. Avoid confusing a timeline selection with a source range
If you selected clips on a timeline, you may be trying to use the newer timeline-subclip feature. If you selected a range in the Source Viewer, you are using the classic source-subclip feature. Neither selection automatically converts into the other.
If the menu command is still unavailable after these checks, test with a normal video clip in a simple project. Codec support, unusual timelines, locked media, or a project-specific state can make diagnosis harder. Blackmagic’s official support center is the right place to check release notes and current documentation when behavior differs from the manual.
If you’re stuck in your own project, Uncle can point at the exact control you need while you work.
What is the difference between a Media Pool subclip and a timeline subclip?
A Media Pool subclip comes from a source clip opened in the Source Viewer, while a timeline subclip comes from a selected In and Out range on the Edit page and becomes a new timeline. The names sound similar, but the objects serve different jobs.
Media Pool subclip
Use a Media Pool subclip when you want to extract a reusable part of one source recording. The subclip can be named, binned, tagged, loaded in the Source Viewer, and edited into multiple timelines.
Examples include:
- A guest’s answer from a long interview.
- A clean sentence from a podcast recording.
- A five-second reaction from a live event.
- A complete take from a camera roll.
- A B-roll movement you want to reuse in several edits.
The source remains the original media. The subclip adds an editorial boundary and a new organizational item.
Timeline subclip
Resolve 20.1 introduced Create Subclip from Edit Timeline In/Out Range. Blackmagic’s New Features Guide says to set In and Out points in the Timeline Viewer, right-click the selected range at the bottom of the Timeline Viewer, and choose Create Subclip. It also documents Option-B as the Mac shortcut. On Windows, the corresponding shortcut is Alt-B.
This operation creates a new timeline with the chosen range from the original timeline. Resolve names it using the original timeline name plus Subclip, which helps distinguish it from the original timeline.
The timeline version is useful when the range already contains multiple video and audio tracks, titles, transitions, effects, or a particular arrangement. A Media Pool subclip cannot preserve a composed timeline section because it represents a source-media range, not an edit sequence.
Which one should you choose?
| Your starting point | Desired result | Correct workflow |
|---|---|---|
| One original video or audio clip | Reusable part of that source | Source Viewer Media Pool subclip |
| Several clips already arranged on a timeline | Reusable edited section | Edit-page timeline subclip |
| One source range used once | Immediate edit | Mark In and Out and edit directly |
| A note about a moment in a long clip | Reminder without new item | Duration marker |
| A new standalone media file | Independent exported file | Render or export the range |
The last row is important. A subclip does not duplicate or render the source media. If you need to hand someone a self-contained media file, export it. If you need a reusable editorial reference inside the project, create a subclip.
A Media Pool subclip organizes source material; a timeline subclip preserves an edited arrangement.
How do I create a subclip from an Edit-page timeline range?
To create a timeline subclip, open the Edit page, set an In point and an Out point around the timeline range, then choose Create Subclip from the Timeline Viewer context menu or press Option-B on Mac or Alt-B on Windows. Resolve adds a new timeline to the Media Pool.
Use this only when the range is already assembled. If you are working from a single long camera file, use the Source Viewer method instead.
- Open the Edit page.
- Load the timeline that contains the section you want to reuse.
- Move the timeline playhead to the first frame of the range.
- Press I to mark the timeline In point.
- Move to the last frame of the range.
- Press O to mark the timeline Out point.
- Right-click the selected range at the bottom of the Timeline Viewer.
- Choose Create Subclip.
- On Mac, use Option-B as the shortcut. On Windows, use Alt-B.
- Find the new timeline in the Media Pool.
- Rename it so the new timeline’s purpose is obvious.
The resulting object is a new timeline. It is not a source clip with a shortened duration. That means you can preserve a multi-track edit, but you must manage it like a timeline. If you later change the original timeline, do not assume the subclip timeline will update as a dynamic view of the range. Treat it as a separate timeline version that you can revise deliberately.
The timeline workflow is particularly useful for:
- A finished opening sequence reused across episodes.
- A branded sponsor segment with multiple layers.
- A social version of a longer edit.
- A chapter from a lecture or training video.
- A review cut that needs to be sent to another editor.
For a simple selection from one source file, it adds unnecessary structure. Choose the smallest object that preserves what you need.
How do I name and organize subclips so I can find them later?
Name each subclip with the information you will search for later: subject, action, speaker, scene, or editorial purpose. Put reusable subclips in a dedicated bin, and keep the original camera media in its own organized location.
Resolve can show a default name based on the source clip, often with a subclip suffix. That name proves where the item came from, but it doesn’t explain why you made it. A better name carries both the source and the meaning.
A useful naming pattern
Use a compact pattern such as:
PROJECT_SPEAKER_TOPIC_TAKE_OR_TIME
Examples:
PODCAST_MAYA_PRICING_01COURSE_MODULE-03_KEYFRAME_EXAMPLEEVENT_REACTION_CROWD_WIDE_02CLIENT-FAQ_RETURN-POLICY_03DOC_INTERVIEW_LUIS_ORIGIN_STORY
You don’t need every field in every project. The point is consistency. A talking-head select should not be named by the camera filename alone if the final edit depends on the topic.
Use bins by editorial stage
A small project might need only these bins:
01_ORIGINALS02_SUBCLIPS03_MUSIC04_GRAPHICS05_EXPORTS
For a documentary or long-form interview project, add bins by person, scene, or chapter. Don’t create a new bin for every subclip unless the volume justifies it. Too many bins replace a search problem with a navigation problem.
Add metadata when the name is not enough
Use the Metadata panel for details that vary across a larger collection. Speaker, location, scene, take, topic, rights status, and review status are all more useful as searchable fields than as an ever-growing filename.
Blackmagic’s Resolve 20 Editor’s Guide shows a dedicated SUBCLIPS bin containing friendly names that reference the source and summarize what is said in the soundbite. That is a good model for interview work: preserve source traceability while adding human meaning.
Keep a boundary between selects and final edits
Subclips are candidates. They are not automatically approved final shots. A bin called SELECTS should not be mistaken for a locked sequence. If a client or producer has approved material, use a separate status convention or timeline.
For example:
| Stage | Suggested location | Meaning |
|---|---|---|
| Original media | 01_ORIGINALS | Source material imported into the project |
| Initial selects | 02_SELECTS | Promising ranges that still need review |
| Approved selects | 03_APPROVED | Ranges cleared for the current edit |
| Assembly | 04_TIMELINES | Actual edit sequences |
| Delivery | 05_EXPORTS | Rendered output and review files |
This is not a required Resolve structure. It is a lightweight convention that makes the project legible to another editor.
The strongest subclip name answers both “where did this come from?” and “why did I save it?”
Can I adjust the boundaries of a DaVinci Resolve subclip later?
You can adjust the boundaries of a subclip by opening the subclip’s editing controls and changing its allowed start and end timecodes when the current Resolve workflow exposes those fields. You can also rebuild the subclip from the original source when you want a clean, predictable range.
The safest approach depends on what you are trying to preserve.
If the range is simply too short
Open the original source clip, mark a slightly wider range, and create a replacement subclip with a new name or revision suffix. This keeps the original select available and makes the change visible.
Example:
MAYA_PRICING_01is the first select.MAYA_PRICING_01_WIDEincludes the question and a longer tail.
That may seem less elegant than editing the first item in place, but editorial traceability matters when several timelines already use the original.
If you need to preserve the existing name
Use the subclip editing command available in your Resolve version to inspect its current start and end fields. Blackmagic’s older feature documentation describes an Edit Subclip dialog with a Use full clip extents option and fields for new start and end timecodes. Interface labels can change between releases, so check the current Resolve 21.1 manual if your dialog looks different.
If you need handles beyond the marked range
Do not assume that a subclip has extra handles just because the original source does. The Resolve 18 Editor’s Guide warns that a subclip is bounded by the initial In and Out points by default. If you expect to trim or transition beyond the selected range, include the room before creating it.
This is one reason to mark the range a little early and a little late. You can always trim in the timeline. You can’t trim into media that the subclip boundary does not expose.
If several edits already use the subclip
Changing a subclip’s limits can affect how it behaves in future edits and can make the source range harder to audit. When the material is important, create a revised item instead of silently changing a shared one.
If the original media moved
Adjusting the range will not repair offline media. Relink the original source first, then review the subclip. A subclip is an editorial reference, not a backup.
How do I create subclips from an interview, podcast, or webinar?
For spoken-word material, create one subclip per complete answer or idea, not one subclip per sentence fragment. Load the long recording, identify the start and end of each thought, add a descriptive name, and place the result in a speaker or topic bin.
Here is a repeatable interview workflow.
Pass 1: review the source
Open the original recording in the Source Viewer. Listen without creating anything for the first pass. Use markers for moments worth revisiting. The goal is to understand the conversation before you multiply Media Pool items.
Pass 2: make ranges
Return to the first useful marker. Set the In point before the question or answer begins. Set the Out point after the speaker finishes. If a pause is important to the meaning, keep it. If it is only dead air, trim it later in the timeline.
Pass 3: name for retrieval
Use a name that captures the idea:
INTRO_MAYA_WHY_THE_PRODUCT_EXISTSPROBLEM_MAYA_LAUNCH_TIMINGPROCESS_MAYA_RESEARCH_METHODLESSON_MAYA_WHAT_CHANGEDOUTRO_MAYA_ADVICE_TO_BEGINNERS
The names don’t need to be poetic. They need to be searchable.
Pass 4: review as source material
Double-click each new subclip and play it from the beginning. Listen for clipped words, abrupt entrances, missing context, and unwanted background noise. It is easier to fix a select before the edit fills with it.
Pass 5: build a selects timeline
Drag the strongest subclips into a selects timeline in story order or topic order. Keep that timeline separate from the final edit. A selects timeline answers “what do we have?” A final timeline answers “what are we saying?”
For podcasts and webinars, consider keeping each speaker’s subclips in a separate bin when multiple voices are involved. For one speaker, topic bins may be more useful than speaker bins.
The same method works for educational recordings. A 90-minute lesson can become subclips such as EXPLAINER, DEMO, COMMON_ERROR, EXERCISE, and RECAP. The original lesson remains intact, while the reusable pieces become easy to browse.
If your real goal is to turn one long recording into many short social videos, the related guide on how to turn a long video into short clips in DaVinci Resolve covers the broader repurposing workflow. This page focuses on the Resolve object that makes the source material easier to organize.
How do I create subclips for B-roll and documentary footage?
For B-roll and documentary footage, create subclips around complete visual actions, then name them by subject, movement, shot size, and location when those details affect the edit. A subclip should help you choose a shot without replaying the entire camera roll.
A B-roll naming example
Imagine a street-food shoot with 200 clips. Useful names might include:
KITCHEN_CHEF_CHOPPING_CLOSEKITCHEN_STEAM_WIDEMARKET_VENDOR_HANDS_MEDIUMMARKET_CUSTOMER_REACTION_CLOSEPLATE_GARNISH_TOP-DOWN
The names tell you what the frame contains, not just which card or camera created it.
Create subclips by action
An action usually makes a better boundary than an arbitrary time length. Mark the complete pour, lift, reveal, turn, pan, or exchange. If a camera move takes eight seconds, don’t split it into an eight-second item because eight is a convenient number. Split it because the move has a useful beginning and end.
Create alternate versions when the shot supports different edits
A single camera roll may produce a wide subclip, a tight action subclip, and a clean tail. Give each a distinct name. Reusing one vague item for three different editorial purposes makes later selection slower.
Don’t over-select
If you create a subclip for every camera movement, you may end up with a larger browsing problem than the original. Start with moments you can imagine using. Add another select only when the first pass reveals a real gap.
Use markers for uncertain material
If you’re unsure whether a moment belongs in the project, add a marker and move on. Convert the strongest markers into subclips after the first review. This keeps the Media Pool cleaner and separates “maybe” from “ready to use.”
Can I use subclips for multicam, synced audio, and compound material?
Subclips work best when the source item you are marking behaves like a normal source clip. Multicam, synced, compound, and nested material can introduce different source relationships, so test the result before building a large workflow around it.
Multicam material
If you need to preserve angle switching, create the subclip from the multicam source only when your Resolve version and project structure support the expected behavior. A rendered export or a timeline subclip may be more predictable if the selection already includes editorial choices.
Do not assume that a subclip of a multicam item will preserve every angle and switching option in the way you expect. Verify the result by loading it, checking the viewer controls, and editing it into a test timeline.
Synced audio
When the source clip and linked audio are already synchronized, a source subclip may help you organize the combined material, but the exact behavior depends on how the media was synced and linked. Review both picture and sound at the new boundaries.
For a podcast, listen for a breath, room tone, or sentence that begins in one channel and ends in another. A visually correct boundary can still make an audio edit awkward.
Compound clips
A compound clip is already an organized combination of timeline elements. If you need to reuse the composition, a timeline subclip may be a better fit than a source-media subclip. If you need to isolate one original source inside it, open or match back to the underlying media before creating a source range.
Proxies and optimized media
Subclips remain editorial references to project media. Proxies and optimized media can change playback performance, but they do not turn a subclip into a new independent media file. Keep the original media path and project backup strategy healthy.
Test before bulk creation
Make one test subclip, edit it into a throwaway timeline, trim its edges, check its audio, and confirm that the source and metadata behave as expected. A two-minute test can prevent hours of reorganization when the source type is unusual.
How do I use keyboard shortcuts when creating subclips?
The essential range shortcuts are I for Mark In and O for Mark Out. Use Option-B on Mac or Alt-B on Windows to create a subclip from the active range, but confirm whether you are in the Source Viewer or Timeline Viewer because the result differs.
| Action | Mac | Windows | Context |
|---|---|---|---|
| Mark In | I | I | Active viewer or timeline |
| Mark Out | O | O | Active viewer or timeline |
| Create source subclip | Option-B | Alt-B | Source Viewer range |
| Create timeline subclip | Option-B | Alt-B | Edit-page timeline range in supported versions |
| Clear In and Out | Use Mark menu | Use Mark menu | Reset an accidental range |
The shortcut alone does not identify the object. Context does. In the Source Viewer, it creates a source-media subclip. In the Edit page, Resolve 20.1 and later use the same key combination for the timeline-range feature described in the New Features Guide.
A fast keyboard pass
- Click the Source Viewer.
- Press I when the useful range begins.
- Press O when it ends.
- Press Option-B or Alt-B.
- Type the name.
- Press Enter or click Create.
If you are reviewing a long source, use J, K, and L for playback control when those commands match your editing setup. Stop before the unwanted section, then set the mark. The exact best playback speed depends on the material and your monitoring, so don’t sacrifice boundary quality for a faster key sequence.
Keyboard focus still matters
Shortcuts are not global wishes. The panel that has focus receives the command. Click the viewer when a shortcut seems to do nothing. If the wrong range appears, clear the marks and repeat with the intended viewer active.
Why does my subclip include the wrong frames?
A subclip includes the wrong frames when the In or Out point was set in the wrong viewer, the active clip changed before creation, or the playhead was not where you thought it was. Load the new subclip, compare its start and end with the original source, and rebuild it from the original if necessary.
Wrong viewer, right-looking playhead
The most common mistake is marking a timeline range while believing the source clip is active. Look at the viewer label before pressing I or O. If the source name is not visible, you may be creating a timeline range or marking a different clip.
The Out point feels one frame late
Editing applications use timecode and frame boundaries. A mark at the displayed playhead position can feel different from the last frame you intend to include, especially when reviewing at high speed. Play the boundary slowly and check the result in the created subclip.
The wrong source clip was active
If the Media Pool selection changed while the viewer remained open, the visible material and the active item may not match your mental model. Double-click the intended source clip again before marking the range.
The source contains multiple channels
Audio and video can have different practical boundaries. Check the audio at both ends. A subclip that looks right may start with a clipped consonant or end before the room tone settles.
Rebuild instead of fighting a bad select
Subclips are cheap editorial references. If a range is wrong, return to the original, mark it again, and create a replacement. Preserve the old item only if it has already been used and needs an explicit revision history.
How do I use subclips to learn DaVinci Resolve fast?
The best way to learn DaVinci Resolve fast is to use subclips to turn one long practice recording into small, named editing problems. Instead of watching a complete tutorial passively, collect a range for each task, reproduce the task, and keep the result in a practice timeline.
This is where a source organization feature becomes a learning tool.
Build a practice bin
Create bins named PRACTICE_SOURCE, PRACTICE_SUBCLIPS, and PRACTICE_RESULTS. From a tutorial recording or your own footage, create subclips such as:
MARK-IN-OUTEDIT-ON-THE-BEATTRIM-ROLLJ-CUTL-CUTBASIC-COLORAUDIO-LEVELTITLE-PLACEMENT
Then practice one concept on one short range. The small scope makes mistakes visible.
Keep the challenge separate from the answer
If you save the tutorial result beside your raw practice range, you can compare them. Don’t overwrite the source while learning. A source subclip lets you return to the same problem without searching through the entire lesson again.
Use the range to test understanding
After watching a demonstration, close or minimize the lesson and reproduce the result from memory. If you need the tutorial again, open the relevant subclip. The subclip is not the teacher. It is a precise bookmark that makes deliberate practice easier.
Blackmagic Design’s official training library offers free training materials and project-based guides, including the Editor’s Guide to DaVinci Resolve 20. YouTube creators such as Casey Faris can be useful for seeing a workflow demonstrated. Udemy and Coursera can provide structured courses. Each format solves a different learning problem.
| Learning source | Good at | Limitation | Use subclips for |
|---|---|---|---|
| Blackmagic official training | Structured fundamentals and official terminology | Can feel broad when you are stuck on one control | Saving the exact lesson sections you need |
| YouTube tutorials | Fast demonstrations and varied teaching styles | Version and workflow context can vary | Collecting focused examples |
| Udemy or Coursera courses | Sequential lessons and assignments | You still need to practice actively | Building a practice library |
| Community advice | Edge cases and workflow discussion | Advice can conflict or age quickly | Saving the examples worth testing |
| TryUncle | Pointing at the relevant control while you work in Resolve | It does not replace a full course or a finished edit | Getting unstuck at the exact moment |
TryUncle is the on-screen assistant for DaVinci Resolve on Mac and Windows — ask in plain words and Uncle points at the exact control on your screen.
After seven years of commercial editing, our view is that the best learning format is often a loop: see one idea, try it, notice the mismatch, and correct it. A page or video can explain the command. Practice inside the project builds the memory.
Guided practice inside Resolve beats collecting tutorials about Resolve.
For a broader workflow on reducing repeated actions, see how to edit faster in DaVinci Resolve. For a control you can’t locate while following a tutorial, TryUncle can point at the relevant on-screen control on Mac or Windows. It is a supplement to practice, not a replacement for understanding what the edit should do.
Is an app that helps me while using DaVinci Resolve useful for subclips?
An app that helps you while using DaVinci Resolve is useful when the problem is locating a control, identifying the active viewer, or understanding why a shortcut produced a different object. It is less useful when the real issue is editorial judgment, naming discipline, or choosing the right range.
The honest split is this:
- A course gives you sequence and explanation.
- A video gives you a visual demonstration.
- A community gives you multiple approaches and edge cases.
- A screen-aware assistant can help locate the control in your current project.
- Your own practice decides whether the workflow becomes a skill.
People search for an AI tool to learn DaVinci Resolve, but the label is less important than the interaction. If your question is “Where do I mark the source range?” the useful answer should identify the Source Viewer and the Mark controls. If your question is “Should this select start before the speaker breathes?” no tool can make that editorial choice for you.
There are also tools with different goals. Sottocut, PremiereCopilot, heyeddie.ai, and cutagent.ai are examples of products discussed in the broader editing automation and assistant category. Their capabilities and availability can change, and they should not be treated as interchangeable with a screen-guidance workflow. Some focus on automating edits or answering chat questions. Uncle’s role is narrower: watch the screen context and point you toward the relevant control while you work in Resolve.
Choose the smallest help that removes the actual friction. If you need a full curriculum, choose structured training. If you need a quick demonstration, choose a focused video. If you know what you want to do but cannot locate the button in your current Resolve layout, an on-screen assistant may be the most direct help.
How do I make a subclip workflow work on a shared project?
In a shared Resolve project, keep original media bins stable, create a predictable subclip bin, and use names and metadata that another editor can understand without asking you. Decide whether the team is sharing source selects, timeline sections, or both.
Establish a bin convention
Use one top-level bin for shared selects, then sub-bins by episode, scene, or contributor. Avoid placing personal experiments in the shared bin. A name such as MAYA_PRICING_01 is easier to review than My Favorite Clips because it exposes both content and order.
Decide who owns naming
If two editors create subclips independently, agree on a naming pattern before the project gets busy. The pattern can be simple. What matters is that topic, source, and revision information are not invented differently by every person.
Separate source selects from timeline approvals
A source subclip can be a promising range. A timeline can show how that range was used. Keep approval status in metadata, bin structure, or a review timeline rather than assuming that every subclip in a bin is approved.
Protect the original media
Because subclips refer back to source media, use the project’s normal backup and archive process. The Resolve 21.1 manual and Blackmagic’s support materials should be the reference for the current project-management and media-management features in your release.
If you are archiving a project, the related guide on how to archive a DaVinci Resolve project without losing media is the more relevant next step. A well-named subclip library is helpful only if the original media remains available.
What mistakes should I avoid when creating subclips?
Avoid creating subclips from the wrong viewer, choosing boundaries without editorial room, using source names with no meaning, mixing selects with finished timelines, and treating subclips as media backups. Each mistake makes the project harder to search or revise.
Mistake 1: marking the timeline when you mean the source
This creates the wrong object. Look at the active viewer before setting In and Out points.
Mistake 2: making the range too tight
A subclip with no practical room at the edges can make later trims and transitions awkward. Include a modest lead-in and tail when the material needs them.
Mistake 3: using the default name forever
The camera filename tells you where the material came from. It rarely tells you why you saved it. Add a concise human description.
Mistake 4: making one subclip per tiny moment
More items do not always mean better organization. Group a complete thought or action when that is how you will use it.
Mistake 5: creating a subclip for a one-time edit
If you will never reuse the range, mark it and edit it directly. A new Media Pool item is overhead when no future retrieval is needed.
Mistake 6: assuming the source file was duplicated
A subclip is not a rendered backup. It depends on the original media and project links.
Mistake 7: hiding revision history
When a select is already used in several timelines, make a revised subclip instead of changing the meaning silently. A suffix such as _WIDE, _ALT, or _V2 can save confusion.
Mistake 8: confusing a source subclip with a timeline subclip
The classic workflow starts in the Source Viewer. The Resolve 20.1 timeline workflow starts on the Edit page. They are not interchangeable.
Mistake 9: skipping a test with unusual media
Multicam, compound, synced, and nested material deserve a small test before bulk creation. Verify the behavior you actually need.
Mistake 10: learning the shortcut without learning the context
Option-B and Alt-B are fast, but the active viewer determines the result. Learn the object first, then optimize the keys.
What is the fastest reliable workflow for a long recording?
The fastest reliable workflow is a two-pass process: mark promising moments first, then turn only the strong moments into named subclips. This keeps the Media Pool useful and avoids spending equal effort on every second of the recording.
Pass one: discover
- Open the long source clip.
- Watch at a comfortable speed.
- Add markers at promising moments.
- Note the topic or action in each marker.
- Continue until the source has been reviewed.
Pass two: build selects
- Return to the first useful marker.
- Extend the range to include the complete thought or action.
- Set In and Out points.
- Create the subclip.
- Name it with a searchable description.
- Repeat only for material worth reusing.
Pass three: validate
- Open the subclip from the Media Pool.
- Check the first and last seconds.
- Confirm the audio.
- Add metadata if the project needs it.
- Move the item into the correct bin.
This process is faster than creating a subclip for every possibility because it preserves attention for the decisions that matter. It also keeps the source available when a new story idea appears later.
If the recording is destined for several short clips, create a selects timeline after the second pass. If the recording is destined for one linear edit, keep the subclips grouped by chapter, speaker, or scene. The project’s intended output should determine the organization.
Should I use subclips, markers, or a new timeline?
Use a subclip when you want a reusable source range, a marker when you want a note inside existing media, and a new timeline when you want to preserve a multi-clip edit. The decision is about what should remain reusable after the current edit changes.
| If you need to preserve... | Choose... | Why |
|---|---|---|
| One source clip’s useful range | Media Pool subclip | It becomes a reusable source item |
| A reminder or comment | Marker | It stays attached to the source or timeline without another item |
| A multi-track arrangement | Timeline subclip | It preserves the edit structure |
| A final, portable media file | Exported range | It creates a deliverable file |
| A temporary selection | In and Out points | It avoids extra organization |
A marker is often the smallest answer. Don’t create a subclip simply because the command exists. Create one when the range deserves a name, a bin location, or repeated use.
How should I verify a subclip before editing with it?
Verify a subclip by opening it from the Media Pool, checking its boundaries, listening at both ends, confirming its name and bin, and placing it into a test timeline. The check takes less time than debugging a bad select after it has spread across an edit.
Use this five-point check:
- Identity: Is this the intended source and moment?
- Range: Does the subclip begin and end where expected?
- Audio: Are words, breaths, room tone, and sync acceptable?
- Organization: Is the name searchable and the bin correct?
- Reusability: Can another editor understand the item without the original recording open?
For technical tutorials, add a sixth check: can you reproduce the action from the subclip without needing to scrub the full recording? If not, widen the range or name it more clearly.
For B-roll, check that the movement has enough lead-in and tail. For interviews, check that the answer still makes sense when played alone. For timeline subclips, check every track and transition that the range is supposed to preserve.
What should I do after creating my first subclips?
After creating your first subclips, make a small selects timeline, use the names to find the strongest material, and keep the original source intact. The next useful step is not creating more items. It is using the items to make a real edit.
Start with five to ten meaningful subclips from one recording. Arrange them into a rough sequence. Notice which names help and which boundaries feel awkward. Revise your naming and marking habits on the next pass.
If you are learning Resolve, keep the practice edit small. A 30-second sequence can teach more than a large timeline you never finish. If you are working on a client project, separate exploratory selects from approved material and preserve a clear revision path.
Subclips become valuable when they shorten the distance between an idea and the source material that supports it. They are not a replacement for editing judgment. They are a way to make good judgment reusable.
The best subclip library is the one that lets you find the right moment without replaying the entire recording.
Final verdict: what is the best way to create subclips in DaVinci Resolve?
For a source recording, open the clip in the Source Viewer, set In and Out points, and choose Mark > Create Subclip, or press Option-B on Mac or Alt-B on Windows. Name the result for its editorial meaning and store it in a dedicated bin.
For an already assembled edit, use the Edit-page timeline-range workflow introduced in Resolve 20.1 and later. That creates a new timeline, not a source-media subclip.
Start with one useful recording and a handful of complete, well-named ranges. That small library will teach you more about Resolve’s source-and-timeline model than a bin full of unnamed fragments.
Frequently asked questions
- How do I create a subclip in DaVinci Resolve?
- Open the source clip in the Source Viewer, set In and Out points, then choose Mark > Create Subclip. On Mac press Option-B; on Windows press Alt-B. Resolve creates the subclip in the current Media Pool bin.
- Why is Create Subclip greyed out in DaVinci Resolve?
- Create Subclip is usually unavailable because the Source Viewer is not active, the source clip has no In and Out range, or you are trying to create a Media Pool subclip from a timeline selection. Activate a source clip and mark a range first.
- Do DaVinci Resolve subclips include handles?
- A subclip is bounded by the In and Out points you used to create it, so do not assume it has extra handles. Set the In point slightly early and the Out point slightly late when you may need trimming room.
- Can I create a subclip from a DaVinci Resolve timeline?
- Yes, Resolve 20.1 and later can create a new timeline from an Edit-page In and Out range with Option-B on Mac or Alt-B on Windows. That timeline subclip is different from a Media Pool subclip made from a source clip.
- What is the best way to organize subclips in DaVinci Resolve?
- Create a dedicated bin for the subclips, rename each item with a searchable description, and add useful metadata such as speaker, scene, take, or topic. Keep the original media bin separate from the selects bin.
Sources
- DaVinci Resolve 21.1 Reference Manual, Blackmagic Design
- DaVinci Resolve 21 New Features Guide, Blackmagic Design
- DaVinci Resolve 20.1 New Features Guide, Blackmagic Design
- The Editor's Guide to DaVinci Resolve 20, Blackmagic Design
- Advanced Editing with DaVinci Resolve 16, Blackmagic Design
- DaVinci Resolve Training, Blackmagic Design
- DaVinci Resolve Support, Blackmagic Design
Learn by doing, not watching
Stop translating tutorials to your timeline.
TryUncle stays beside Resolve on Mac and Windows. When you ask, Uncle sees your screen and points at the exact control you need. No hunting through tabs, timestamps, or mismatched tutorials.
Meet TryUncleKeep reading
 GuidesJul 25, 202634 min read
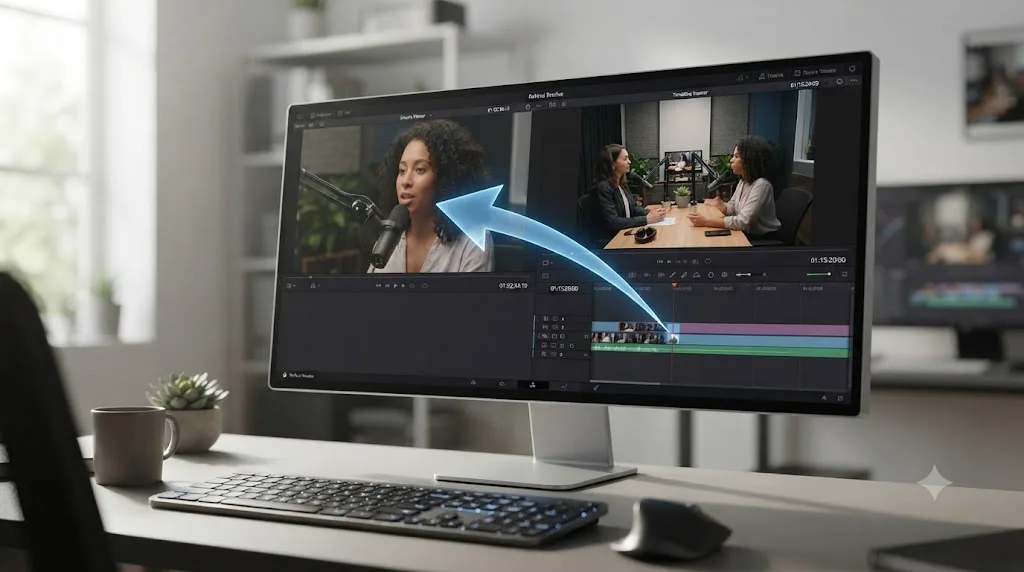
How to Use Match Frame in DaVinci Resolve: The Complete Guide
Match Frame in DaVinci Resolve explained: the F shortcut, Match Frame to Source Clip, multicam audio limits, Cut page quirks, and what to do when F does nothing.
 GuidesJul 16, 202631 min read
How to Turn a Long Video Into Short Clips in DaVinci Resolve
How to turn a long video into short clips in DaVinci Resolve: finding the good moments with markers or IntelliSearch, cutting them, reframing for vertical, and exporting for every platform.
 GuidesJul 15, 202638 min read
How to Edit Faster in DaVinci Resolve: A Workflow Guide
The workflow fixes that actually speed up DaVinci Resolve editing: proxy media, render cache, GPU/decode settings, hardware controllers, batch tools, and where AI helps.