
Learn / DaVinci Resolveupdated for DaVinci Resolve 21.0.3 (July 2026)
How to Copy a Timeline to Another Project in DaVinci Resolve
Quick answer
To copy a timeline to another project in DaVinci Resolve, enable Dynamic Project Switching, copy the timeline from the source project’s Media Pool, switch to the destination project, and paste it into a bin. For a portable handoff, export the timeline as a .drt file, then use File > Import Timeline in the destination project.
I’ve moved timelines between DaVinci Resolve projects often enough to know where the confusion starts. The copy command is easy. Choosing the right kind of transfer is the part that saves you from a broken handoff.
As of September 2026, Blackmagic’s support material lists DaVinci Resolve 21.0.3 as a current 21.x update. This guide uses the familiar Project Manager, Media Pool, Dynamic Project Switching, .drt, and .drp names, then points out the places where the destination project can change the result. Blackmagic Design’s support page is the authority for the current installer and version notes.
Our team runs a 100,000+ member professional video-editing community, has seven-plus years of professional commercial editing experience, has taught more than 100,000 students on Udemy as an official Udemy Business Partner, and has taught and worked with Fortune 500 companies. That background matters here because a timeline transfer is not finished when the timeline appears. It is finished when the edit, media, color, audio, and delivery settings survive inspection.
How do I copy a timeline to another project in DaVinci Resolve?
The fastest native method is to enable Dynamic Project Switching, copy the timeline from the source project’s Media Pool, switch to the destination project, and paste the timeline into a destination bin. Resolve copies the timeline object and its referenced clips, but the destination still needs access to the media files.
Here is the short version:
- Open the Project Manager.
- Right-click an empty area and turn on Dynamic Project Switching.
- Open the source project.
- In the Media Pool, select the timeline you want to move.
- Press
Command-Con macOS orControl-Con Windows. - Switch to the destination project with File > Switch Project or the project title menu.
- Select the destination bin in the Media Pool.
- Press
Command-Von macOS orControl-Von Windows. - Open the pasted timeline and check media, frame rate, resolution, grades, audio, Fusion, markers, and titles.
That is the answer to the literal question. It is also the method I would choose when both projects are in the same Resolve installation, you need the transfer now, and you can inspect the result immediately.
Blackmagic’s reference documentation describes Dynamic Project Switching as a way to keep multiple projects available in memory while moving clips, timelines, and node settings between them. The same documentation says that pasting a timeline also pastes the clips used by that timeline into the other project. Read the Dynamic Project Switching section in Blackmagic’s reference manual.
The phrase “copy the timeline” can mean three different jobs, though. You might want a native clipboard transfer, a small portable timeline file, or a complete project handoff. Those are not interchangeable.
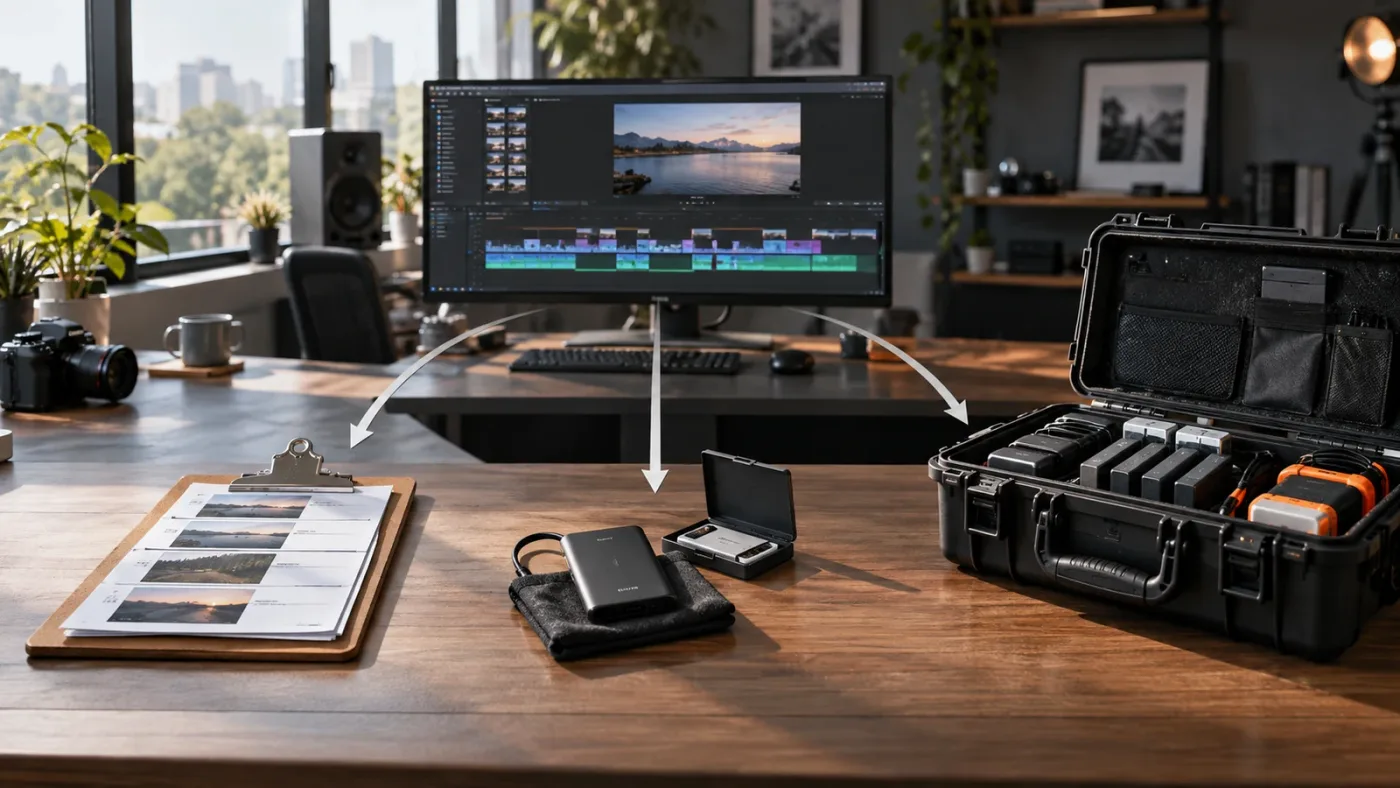
The best timeline-transfer method depends on whether you are moving an edit, a project, or an archive.
What should I decide before copying a DaVinci Resolve timeline?
Decide whether the destination needs one timeline, several timelines, the whole project, or the project plus its media. That decision determines whether you should use Dynamic Project Switching, a .drt file, a .drp file, or project archiving.
Use this decision matrix before you touch the source project:
| Your actual goal | Best first method | What it transfers | Main risk to check |
|---|---|---|---|
| Move one timeline inside the same Resolve database or installation | Dynamic Project Switching and copy/paste | The selected timeline and referenced clips | Media paths, destination settings, unsupported effects |
| Send one timeline to another computer or teammate | .drt export and import | Timeline instructions and edit data | The .drt does not contain the media |
| Send several timelines as reusable assets | Multiple .drt files | Each selected timeline as a Resolve timeline file | Timeline naming and shared media paths |
| Bring the complete project structure into another library | .drp export and import | Project settings, organization, clips, and timelines | A .drp still does not contain the media files |
| Move the project and its media for handoff or archive | Project archive or Media Management | Project data plus selected media, depending on the choices | Storage location, relinking, cache and proxy decisions |
| Move an edit to Premiere Pro, Final Cut Pro, or another NLE | XML, AAF, or EDL when supported | Interchange information supported by that format | Effects, titles, grades, compound structures, and plugins |
The destination is not just an empty box. It has project settings, bins, media paths, timelines, and possibly a different Resolve version. A transfer can succeed technically while producing the wrong frame rate or the wrong color behavior.
If your destination is a separate project in the same library, native copy and paste is usually the least work. If your destination is a different computer, .drt is usually easier to carry than a clipboard operation. If the recipient needs the bins, project settings, and timeline collection, use .drp or an archive. If the recipient needs the footage too, plan the media transfer separately.
That last sentence is the one people skip. A .drt is not a zipped project. A .drp is not a self-contained media package. Blackmagic’s Resolve 20 Editor’s Guide explains that a .drp contains project settings, organization, imported clips, and timelines, while the media itself is not inside the project file because of its small file size. See Blackmagic’s explanation of Resolve project files.
Why should I check the destination project before copying?
Check the destination project’s timeline frame rate, timeline resolution, color management, audio sample rate, and bin structure before you paste anything. A copied timeline can inherit or interact with destination settings, so prevention is faster than repairing a mismatch after the transfer.
Write down the source project’s important settings first. You do not need a spreadsheet for a small edit. A short note is enough:
- Timeline frame rate, such as 23.976, 24, 25, 29.97, or 30 fps.
- Timeline resolution, such as 1920 by 1080, 3840 by 2160, or a vertical format.
- Timeline start timecode.
- Input and output color space or color-management mode.
- Audio sample rate and the number of important buses.
- Whether optimized media, proxies, render cache, or external matte files are involved.
- Whether the timeline uses compound clips, multicam clips, Fusion compositions, subtitles, or third-party plugins.
The numbers in that list are examples of common project settings, not a promise that your source uses them. Read the actual values from File > Project Settings and the timeline settings in the source project.
Then inspect the destination. If the destination already contains a project with the correct frame rate and color pipeline, a native timeline transfer is straightforward. If the destination was created for a different deliverable, you may be better off importing the timeline into a new project created with the source settings, then adapting the result deliberately.
Frame rate deserves special attention. Resolve treats frame rate as a project decision that can affect how material is interpreted and displayed. If the destination project has a different frame rate, a pasted sequence may look fine at first and still fail a careful timing check. You might see shifted cuts, unexpected duration, or motion that no longer matches your reference.
Resolution is easier to spot, but it still causes avoidable confusion. A 3840 by 2160 timeline copied into a 1920 by 1080 project may be reframed, scaled, or delivered differently from the original. The clips may be present while the composition is not what the editor expected.
Color management can create a quieter failure. A grade can be present in the timeline, yet the image can look different because the destination interprets the media or output transform differently. If color is important, compare a short rendered reference from the source against the same section in the destination before you call the transfer complete.
The safe pattern is simple: record the source settings, prepare the destination, copy the timeline, then verify with a short reference render.
How do I enable Dynamic Project Switching in DaVinci Resolve?
Enable Dynamic Project Switching from the Project Manager by right-clicking an empty area and choosing Dynamic Project Switching. Once it is enabled, open both projects from the same Resolve environment so you can switch between them without closing the source project.
The exact sequence is:
- Open the Project Manager.
- Make sure the source and destination projects are visible in the same project library.
- Right-click an empty area of the Project Manager.
- Click Dynamic Project Switching so the option is checked.
- Open the source project.
- Return to the Project Manager and open the destination project too.
Dynamic Project Switching uses memory for the projects kept open. Blackmagic’s reference manual warns that opening multiple large projects can affect performance if the workstation does not have enough RAM. That is a practical reason to switch the feature off after the transfer, especially when the source project contains large media pools, many timelines, or complex Fusion work.
After the copy, close the extra project if you are done. You can return to the Project Manager and close projects in memory, or turn off Dynamic Project Switching when you no longer need it. Save before closing. If Resolve asks which project to save, use the names in the title bar, not a guess based on which timeline you can currently see.
How do I copy the complete timeline with Dynamic Project Switching?
Select the timeline itself in the Media Pool, copy it, switch projects, and paste into the destination Media Pool bin. Do not select only a few clips in the timeline if your goal is to move the timeline object with its organization and name.
Here is the full workflow with the decisions exposed.
1. Save the source project
Save the source project before copying. If it is an important handoff, create a duplicate timeline first and give it a meaningful version name such as Client_Edit_v07_transfer. A duplicate is not the same as a backup, but it gives you a stable item to transfer while you keep the working timeline available.
If you need a recoverable project version, use the project’s own backup or export workflow as well. The timeline copy is an edit operation. It does not by itself protect every project setting, gallery still, cache, plugin, or external asset.
2. Find the timeline in the Media Pool
Open the source project and go to the Edit page or Media page. Locate the timeline in the Media Pool. If the project uses timeline bins, expand the correct bin before selecting the timeline. A timeline may be hidden in a bin that is not currently visible, so use the search field or list view if necessary.
Click the timeline once. The selection should be on the timeline item in the Media Pool, not just on a clip in the open timeline.
3. Copy the timeline
Press Command-C on macOS or Control-C on Windows. You can also use the context menu if it exposes Copy for the selected timeline.
If the keyboard shortcut seems to do nothing, look at the selection highlight. Resolve’s copy operation acts on the focused panel. A selected clip in the timeline, a selected timeline in the Media Pool, and a selected bin are different targets. Click the Media Pool timeline item again, then copy.
4. Switch to the destination project
Use File > Switch Project, or open the project title menu and choose the destination project. Give Resolve a moment to display the new project. Then open the Media Pool and select the destination bin where you want the copied timeline to live.
Create a clean destination bin if the project is busy. A bin named Imported Timelines or Transfer_2026-09-26 is easier to audit than a pasted item dropped into a crowded master bin. The name is your choice, but the principle is useful: put transferred objects somewhere you can find them again.
5. Paste the timeline
Press Command-V on macOS or Control-V on Windows. Resolve should create a copied timeline in the selected destination bin. The name may include a copy suffix. Rename it only after confirming that the timeline opens and its media is accounted for.
The paste can also bring in clips used by the timeline. If those clips do not already exist in the destination project, Resolve may place them in the active or selected bin. A long transfer can therefore make the destination Media Pool look untidy even when the timeline itself is correct.
6. Open and inspect the result
Double-click the pasted timeline. Do not assume that a visible timeline proves a complete handoff. Scrub through the beginning, middle, and end. Check cuts, transitions, retimes, compound clips, multicam angles, titles, subtitles, markers, audio tracks, and color.
If the source timeline has a known hero shot, a difficult speed change, and a section with layered audio, check those three places first. Those points expose more problems than a casual play from the opening frame.
Marc Wielage, identified on the Blackmagic Design Forum as a Certified DaVinci Resolve Color Trainer, gave the practical advice that many editors need: “Actually, you can keep both projects open at the same time with Dynamic Project Switching.” Read Marc Wielage’s forum answer. His next warning is the useful part too: color corrections may not necessarily come over with the clips, so color needs its own verification path.
7. Save the destination as a new version
Save the destination project after the pasted timeline passes your first inspection. If this is a client or team handoff, use a versioned name and add a short note describing the source project, source timeline, date, and any known missing media.
The note might say:
Imported
Client_Edit_v07_transferfromClient_Master_2026on 2026-09-26. Media relinked to the client footage volume. Check third-party title plugin and final color before delivery.
That note is not busywork. It turns a mysterious project into an auditable handoff.
How do I copy only part of a timeline to another project?
To copy only part of a timeline, select the required clips or define a timeline range, copy from the focused timeline, switch to the destination project, open or create a destination timeline, and paste at the intended playhead position. This moves an edit fragment, not the entire timeline object.
There are two common patterns.
Pattern one: selected clips
Use this when you need a small group of clips, a title package, an intro, or a short scene.
- Open the source timeline.
- Select the clips you need.
- Confirm that the relevant video and audio tracks are included.
- Copy the selection.
- Switch projects with Dynamic Project Switching, or close the source and open the destination.
- Open the destination timeline.
- Place the playhead where the selection should begin.
- Paste.
Track targeting matters. If a destination video track or audio track is not available, Resolve can paste onto a different track or create a result that is technically present but operationally wrong. Check the destination track layout before pasting.
Linked audio matters too. If you select only the video portion of a linked clip, you may leave the audio behind. If you need the complete scene, select the linked video and audio together, then inspect the result after pasting.
Pattern two: a timeline range
Use a range when you want a continuous section that includes gaps, track relationships, and layered material. Set the in and out points, confirm the destination track selections, and copy the range. This is more controlled than trying to drag-select a crowded timeline by eye.
The range approach becomes harder when the section contains clips that begin outside the range but have effects, linked audio, or compound relationships inside it. For a complex scene, copying the full timeline and trimming a duplicate in the destination can be safer than copying a narrow range and rebuilding dependencies.
If the destination needs a reusable intro or lower-third package, a .drt for the whole template timeline may be cleaner. If you need a few assets available across many projects in the same library, look at Power Bins or reusable media organization instead of copying the same clips repeatedly. Resolve’s official training material treats media organization and project setup as part of the editing workflow, not as a cleanup task after the edit.
Why is my copied timeline missing from the destination project?
A copied timeline usually seems missing because you pasted into the wrong bin, the destination Media Pool is showing a different folder, the timeline was copied as clips rather than as a timeline object, or the destination project did not have focus when you pasted.
Work through these checks in order:
- Search the destination Media Pool for the timeline name.
- Open the root bin and expand every timeline bin.
- Switch the Media Pool to list view and sort by Date Modified.
- Confirm the destination project name in the title bar.
- Check whether Resolve created a name such as
Copy of Timeline 1. - Return to the source project and copy the timeline item again.
- Return to the destination project, click the intended bin, and paste again.
If Resolve pasted clips into the open timeline instead of creating a timeline item, the wrong panel had focus or you selected clips rather than the timeline in the Media Pool. Undo immediately if the destination edit was not meant to change, then repeat the operation with the timeline item selected in the Media Pool.
If the timeline exists but has no visible content, open it and zoom to full extent. A timeline may have a long start timecode or content far from the current playhead. Check the timeline duration and use the full extent control before deciding that the paste failed.
If the timeline opens but clips are offline, that is a media path problem, not necessarily a failed timeline transfer. Continue to the relink section below.
Why is copy and paste not working between projects?
Copy and paste between DaVinci Resolve projects fails most often because Dynamic Project Switching is off, the projects are not open in the same Resolve session, the wrong panel has focus, or the source and destination use versions or project states that do not cooperate cleanly.
Start with the smallest test. Create a new empty timeline in the destination project, copy one ordinary video clip from the source, switch projects, and paste it. If one clip works, the project switch is functioning and the problem is probably the selection, the timeline complexity, or the destination track setup.
If one clip does not work, check these conditions:
- Both projects are open in the same Resolve session.
- Dynamic Project Switching is checked in the Project Manager.
- The source and destination are in a project library that allows the operation.
- The Media Pool, not an unrelated panel, has focus when you copy and paste.
- You are using the matching macOS or Windows shortcut.
- Resolve is not waiting on a modal dialog, media relink, or background operation.
- The destination bin is selected before you paste.
Then save both projects, close the destination, reopen Resolve, and test again if the session seems confused. That resets state without changing the source project. Do not keep repeating paste into a valuable destination without checking whether each attempt created another copy.
Version differences also matter. Blackmagic released DaVinci Resolve 21 as a new major version in 2026, and its support page lists 21.0.1 and 21.0.3 updates with platform-specific fixes. A Resolve 20 tutorial may show an older menu layout even when the core operation remains familiar. Blackmagic’s 2026 release information is a better version reference than a tutorial upload date.
If the two projects are in different major versions, use the newer version to open a copy of the older project and create a backup first. Do not assume that a project saved by a newer release can be opened safely by an older release. When in doubt, use a .drt or XML interchange copy and preserve the original project file.
How do I use a .drt file to move a timeline?
Export the source timeline as a DaVinci Resolve Timeline file with the .drt extension, then import that file into the destination project using File > Import Timeline. A .drt is the cleanest native file handoff when you need a timeline but do not need to send the complete project library.
The workflow is:
- Open the source project.
- Select the timeline in the Media Pool.
- Choose the timeline export command. Depending on the version and focused panel, this may appear under File > Export > Timeline or in the timeline’s context menu.
- Choose DaVinci Resolve Timeline Files or
.drt. - Name the file with the timeline name and version.
- Save it to a known transfer folder.
- Open the destination project.
- Select the Timelines bin or the bin where the imported timeline should appear.
- Choose File > Import Timeline and select the
.drtfile. - Open the imported timeline and relink or organize media as needed.
Blackmagic’s Editor’s Guide describes .drt as a DaVinci Resolve Timeline file used to transfer timelines from one project or Resolve system to another. It also states that the file contains the information needed to rebuild the timeline but does not contain the media. Read the timeline-file section in the Blackmagic Editor’s Guide.
That makes .drt useful for three jobs:
- Sending a finished timeline to another editor who already has the media.
- Keeping a portable copy of a reusable intro, outro, or graphics timeline.
- Moving a timeline between project libraries or computers without exporting the whole project.
The file is small because it is not carrying video. That is an advantage and a limitation. A small .drt can travel easily, but it cannot replace media management.
The current Resolve 21 interface may label the command slightly differently from Resolve 17 documentation. The format is the important part. Look for Export Timeline, DaVinci Resolve Timeline Files, .drt, or the equivalent timeline context-menu option. If a tutorial tells you to export an XML for a Resolve-to-Resolve transfer, check whether .drt is available first. XML is designed for interchange and may not preserve the same native Resolve structures.
Should I use a .drp file instead of a .drt file?
Use a .drp when the destination needs the project’s wider structure, including project settings, bins, imported clips, and multiple timelines. Use .drt when the destination needs only a timeline and the recipient can provide or relink the media separately.
A .drp workflow looks like this:
- In the Project Manager, select the source project.
- Export the project to a
.drpfile. - Choose a destination project library.
- Import the
.drpinto that library. - Open the imported project.
- Relink the media if it is not already available at the same path.
- Copy or remove timelines inside the imported project as needed.
The cost is scope. Importing a .drp can create a new project rather than merging one timeline into an existing project. You may then have to copy the desired timeline from the imported project into the real destination project. That is often safer than trying to merge two complex project structures blindly.
The .drp file still is not a media archive. Blackmagic’s Editor’s Guide makes that distinction explicit. The file can contain references and project data while leaving the media outside the project file. If the recipient does not have the footage, they will see offline media until the files are copied or relinked.
Choose .drp when the unit of work is the project. Choose .drt when the unit of work is the timeline.
When should I archive the project with its media?
Archive the project when another person must be able to restore the project and the media, or when you need a durable backup that can be moved to another storage location. A timeline copy is for editing structure; an archive is for continuity.
A proper archive decision asks what the recipient needs:
- Original camera media or only optimized media?
- Audio recordings and synced files?
- Graphics, stills, fonts, LUTs, Fusion templates, and plugins?
- Proxy files or render cache?
- Gallery stills and power grades?
- One timeline or every timeline in the project?
- A version that can be restored months later?
Resolve’s project archive and media-management tools are designed for this broader job. The exact choices depend on the project and version, so read the dialogs carefully. Do not check every media option automatically if the archive is meant to be lean, and do not omit media that the recipient cannot recreate.
Before archiving, duplicate or version the project. Then render a short reference file and export a text note with the project name, timeline name, Resolve version, frame rate, resolution, and known dependencies. Put the note beside the archive.
After restoring an archive on another system, open the project and check the same three reference points you used for the timeline transfer: a difficult edit, a color-critical shot, and a layered audio section. Then inspect titles and external assets.
For a full explanation of keeping media with a Resolve project, see our guide on how to archive a DaVinci Resolve project without losing media. That article covers the archive decision more deeply than a single timeline-transfer workflow can.
Why are my clips offline after copying the timeline?
Clips are offline after a timeline transfer because the destination project cannot find the media at the paths recorded by the source project, or because the files were renamed, moved, disconnected, or confused with duplicate filenames.
First, do not relink everything blindly. Confirm that the offline clip is supposed to point to the file you are about to choose. A wrong relink can produce a timeline that plays while using the wrong take.
Use this relink sequence:
- Open the destination project’s Media Pool.
- Select the offline clips or the relevant bin.
- Choose Relink Media.
- Point Resolve to the folder containing the original media.
- Let Resolve search the selected folder and its subfolders if the dialog offers that option.
- Review the result before closing the dialog.
- Scrub a few clips whose filenames are similar.
Duplicate filenames are dangerous. Two cameras can produce files with the same name, and a relink may choose a file from the wrong shoot day or card. Unique naming, stable folder structure, and consistent timecode reduce that risk. A Blackmagic Forum response from Marc Wielage explains that similar or identical filenames and non-timecoded cameras can create conforming conflicts, then recommends care with media organization during copy and paste. Read the forum discussion about importing timelines.
If the clips are on a different drive, restore the folder structure first. Resolve has a better chance of finding media when the relative organization resembles the source. If the media is on a network volume, confirm that the destination computer has permission to read it and that the volume is mounted before opening the project.
Proxy and optimized media are another source of confusion. The timeline may be correct while the destination has only camera originals, only proxies, or neither. Check whether the source was using proxies for playback and whether the destination has the same proxy locations. Do not mistake a proxy preference problem for a missing timeline.
If only a few clips remain offline, check external files such as still images, audio beds, matte clips, or Fusion source media. Those assets may live outside the main camera-media folder and need their own relink path.
The final test is visual and editorial. Compare the destination against the reference render or source timeline at known points. A green online indicator is useful, but it is not proof that every file is the intended file.
Will color grades copy with a timeline?
Do not assume that a timeline transfer preserves every color decision in the same way; verify clip grades, group grades, timeline nodes, still references, LUTs, and color-management settings in the destination project. Native Resolve transfers can carry substantial timeline data, but color is a separate verification pass.
The result depends on what kind of color information the project uses:
- Clip-level nodes may travel with the clip or timeline data.
- Group grades can depend on group structure that the destination does not share.
- Timeline nodes depend on the destination timeline and project color pipeline.
- Shared nodes and presets may refer to resources outside the timeline.
- LUTs and color transforms may not exist at the destination path.
- Gallery stills and power grades may live in project or database locations rather than in the timeline itself.
That list is why a copied timeline can look close but not identical. Open the Color page and compare a small set of known shots. If the source includes a signature look, a skin-tone shot, a high-contrast shot, and a shot with a tracked window, use those as the check set.
If the grade does not transfer as expected, ColorTrace can be a better recovery route than trying to force a second paste. Colorists on the Blackmagic Forum commonly describe ColorTrace as a way to move corrections and keyframes between matching timelines, with manual mode available when timecode does not line up. Treat that as a color workflow, not a universal guarantee that every Fusion or plugin dependency will follow.
If color is the real subject of your transfer, our guide on how to copy a color grade to multiple clips in DaVinci Resolve is the more focused reference.
A transferred timeline is editorially complete only after the destination reproduces the source’s important color checks.
Will Fusion compositions, titles, and plugins copy with the timeline?
Some Fusion compositions, title clips, transitions, and effects can travel with native Resolve timeline data, but third-party plugins, fonts, media generators, templates, and external files can still be missing or render differently on the destination system.
Check each dependency category separately.
Fusion and title clips
Open a few representative Fusion clips. Look for missing media inputs, missing fonts, disabled tools, changed frame sizes, and compositions that open but do not render correctly. A title can appear in the timeline while its font has silently substituted.
Third-party plugins
Resolve can show a plugin effect in the timeline even when the destination does not have the plugin installed. The clip may display a warning, a blank result, or a different fallback. Record the plugin names from the source before delivery if another editor will finish the project.
Fonts and graphics
Fonts are system resources, not ordinary timeline media. Keep a list of the typefaces used, and check licensing before sending them. For graphics, locate the original stills, logos, and external images, then verify their color profile and dimensions after relink.
Caches and generated media
Render cache is usually a performance aid, not the creative source of truth. If the destination cannot reproduce a cached effect, clear or rebuild the cache after dependencies are installed. Do not use an old cache as proof that the destination can render the project from its own inputs.
Compound and multicam clips
Open at least one compound clip and one multicam clip if the timeline uses them. Confirm that the internal angles and nested timing are intact. If the transfer produces a flattened result, stop before making further edits and return to the source project or use a project-level transfer.
The practical rule is to check what the timeline references outside itself. A native transfer can carry instructions. It cannot install a plugin, create a font license, or guarantee that an external asset lives at the same path.
Why did the pasted timeline change resolution or frame rate?
The pasted timeline changed appearance because the destination project or timeline settings differ from the source, or because Resolve interpreted the incoming timeline within the destination’s settings. Compare the source and destination settings before trying to repair individual clips.
Start with the source:
- Open the source timeline.
- Read the timeline resolution and frame rate from the timeline or project settings.
- Note the start timecode and color-management settings.
- Save those values.
Then inspect the destination before you copy again. If it is an empty project, set the intended frame rate before creating or importing the destination timeline. Some settings are easier to establish at project creation than to change after media and timelines are already present.
If the destination must remain at a different resolution, decide whether you want automatic scaling or a deliberate reframing pass. Do not judge the result from one title or one clip. Check the whole frame, including graphics, subtitles, masks, and edge crops.
If the destination must remain at a different frame rate, compare motion and edit points with a reference render. A frame-rate conversion can be correct for the delivery while still changing the timing of individual cuts. That is a creative decision, not something to hide inside a transfer.
A forum answer from a Certified DaVinci Resolve Color Trainer summarizes the risk plainly: some elements, including timeline resolution, can be determined by the empty timeline in the target project rather than the copied timeline. Read the Blackmagic Forum discussion about transferring a timeline.
If you copied into the wrong destination and the result is already messy, do not keep adjusting every clip. Delete or disable the bad copy, create a clean destination timeline with the right settings, and import or paste again. Preserve the original source.
How do I copy a timeline between different project libraries?
For different project libraries, export the timeline as .drt, export the whole project as .drp, or use a project archive depending on the size of the handoff. Dynamic Project Switching is for projects available in the same Resolve environment and is not a replacement for a portable file.
Use .drt when the receiving library needs one timeline. In the destination library, open a project, select its Timelines bin, and import the .drt.
Use .drp when the receiving library needs the project structure. Import the .drp into the destination library, then open it. The project may appear as a separate project rather than as a merged set of bins inside an existing project.
Use an archive when the receiving library and computer also need the media. Archives require more planning because the files can be large and because you have to decide which timelines and media to include.
If you are moving several reusable assets, Resolve also has project-level organizational tools such as Power Bins. They can be useful when the assets should be available across projects in the same library, but they are not a substitute for a portable handoff to a separate system.
Before moving between libraries, document the source and destination library names. Project libraries can be local, network-based, or cloud-based, and their access and collaboration behavior can differ. Blackmagic’s Resolve 20 Editor’s Guide explains that project libraries can reside locally, on a network, or in Blackmagic Cloud, and that network and cloud libraries support collaboration workflows. Read the project-library overview.
The cleanest handoff package for one timeline is usually:
- One
.drtfile. - One short reference render.
- One text note with Resolve version and source settings.
- A media location or archive plan.
- A list of external dependencies.
That package is easier to inspect than a mysterious project file with no context.
A .drt file moves timeline instructions, not the camera media.
How do I move a timeline between DaVinci Resolve 20 and 21?
Move a timeline between Resolve 20 and 21 only after creating a backup, and use .drt or another interchange format when a full project-library transfer is not necessary. Major-version changes can affect project compatibility, effects, and menu names even when the basic timeline workflow is familiar.
The conservative path is:
- Keep the original project untouched.
- Export a
.drpbackup of the source project. - Export the timeline as
.drt. - Render a reference file.
- Open the destination Resolve version.
- Import the
.drtinto a clean project with matching settings. - Relink media.
- Check effects, grades, Fusion, audio, titles, and output.
If the source is Resolve 20 and the destination is Resolve 21, the newer application may open the older project. The reverse direction is the risky one. Never save your only copy in the newer format and then assume the older installation can reopen it.
Blackmagic’s 2026 support material identifies Resolve 21 as the major release and lists 21.0.1 and 21.0.3 updates. The Resolve 21 New Features Guide describes changes across editing, color, Fusion, Fairlight, and other pages, which is another reason to verify more than the cuts after a cross-version transfer. Read the Resolve 21 New Features Guide.
Do not use a version number as a substitute for testing. A timeline that contains only cuts and ordinary media is a simpler case than a timeline that uses new graphics tools, plugins, AI-assisted features, complex audio, or third-party effects. The more version-specific the timeline is, the more important the reference render becomes.
What is the difference between .drt, XML, AAF, and EDL?
.drt is the native Resolve timeline handoff; XML, AAF, and EDL are interchange formats intended for communication with other editing or finishing applications, with different limits. Choose .drt for Resolve-to-Resolve work unless you have a reason to use another format.
| Format | Best use | What to expect | What to verify |
|---|---|---|---|
.drt | Resolve timeline to Resolve timeline | Native timeline data in a small file | Media, plugins, fonts, grades, Fusion, and version compatibility |
.drp | Resolve project to Resolve project | Project settings, organization, clips, and timelines | Media paths and the possibility that it imports as a separate project |
| XML | Interchange with compatible NLEs and round trips | Edit structure plus format-specific supported data | Effects, transitions, titles, audio, multicam, and color |
| AAF | Interchange with applications and finishing workflows that support AAF | Format-specific timeline and audio data | Unsupported effects, audio routing, and clip interpretation |
| EDL | Simple edit-list exchange | Limited event information, often centered on a video track | Multiple tracks, transitions, effects, audio, and markers |
Blackmagic’s older reference documentation explains that AAF and XML are used to send timelines back to an originating NLE or onward to a finishing application, and that unsupported effects can be handled differently by each format. It also warns that exporting a multi-track timeline as EDL can include only the events on the selected video track. Read Blackmagic’s interchange-format documentation.
Those limitations are not reasons to avoid interchange. They are reasons to choose it deliberately. If a colorist needs a conformable edit list, XML or AAF may be correct. If a Resolve editor needs the native timeline inside another Resolve project, .drt is usually the more direct fit.
If you export XML because a tutorial told you to, ask what the recipient application is. The file format should follow the handoff, not the tutorial.
How do I preserve audio when copying a timeline?
Preserve audio by copying linked audio with the video, checking track targeting, and verifying buses, plugins, automation, and external audio files in the destination project. A timeline can look correct while audio routing or external dependencies remain incomplete.
Check these audio details after import:
- Dialogue clips are present and linked to the intended video when they should be.
- Music and effects are on the expected tracks.
- Track names and colors survived where the project relies on them.
- Clip gain and fades match a reference section.
- Fairlight plugins exist on the destination system.
- Bus assignments and output routing match the destination’s delivery plan.
- Automation and keyframes play as expected.
- Sample-rate conversion has not changed the timing or pitch.
A project transfer is an especially poor moment to discover that a sound library lives on a drive the destination cannot mount. Include external recordings and music in the media plan, then confirm their licenses separately.
If you copy only selected video clips, check whether linked audio was selected. If you copy a full timeline as a .drt, open the destination timeline and compare a dialogue-heavy section, a music transition, and a section with automation.
The official Blackmagic training library treats Fairlight as a full post-production page with its own editing, mixing, recording, and mastering workflows. That is a useful reminder that audio is not just an accessory attached to the video timeline. See Blackmagic’s Fairlight training resources.
How do I copy markers, subtitles, and timeline metadata?
Check markers, subtitles, and timeline metadata explicitly after the transfer because each can depend on how the data is attached: to the timeline, to a clip, to a track, or to an external file. Do not assume that a visible cut means every editorial note came across.
For markers, compare marker colors, names, comments, and time positions at three points in the timeline. If the destination frame rate or start timecode differs, marker positions deserve a closer look.
For subtitles, open the subtitle track and inspect timing, style, language, and font. If the subtitles came from an external file, keep that file with the transfer package. If they were created inside Resolve, confirm that the imported timeline includes the track and its styling.
For clip metadata, use the Media Pool and check the fields that drive Smart Bins or filters. A timeline transfer can bring clips into the destination while leaving the organization different from the source. If the edit relies on bins, flags, or keywords, compare the Media Pool rather than only the timeline.
For timeline names and version labels, rename the copied item after the transfer has passed its first check. A clear name is useful, but changing it too early can make it harder to compare the source and destination during troubleshooting.
How do I make a reusable timeline template?
Make a reusable timeline template by building a clean source timeline, removing project-specific media, exporting it as a .drt, and documenting the settings and dependencies. A template should be intentionally generic, not a mysterious copy of a finished client edit.
Build the template in a dedicated project or bin. Use clear names for tracks and replaceable elements. Keep the intro, body, outro, adjustment layers, audio beds, and title elements organized. Then remove clips and text that belong to one client or episode.
Before exporting, decide what the template promises:
- A fixed frame rate and resolution?
- A vertical, square, or widescreen layout?
- A specific audio track structure?
- Replaceable titles that can be changed?
- A required plugin or font?
- A color-management assumption?
- A folder structure for replacement media?
Write those requirements into a readme beside the .drt. When someone imports it into another project, they should know what to replace and what not to touch.
A .drt template does not bring the media. That is often exactly what you want. The template can remain small while the destination project supplies the episode footage, voiceover, and music. If the template depends on graphics or logos, decide whether those should be copied as media, kept in a shared Power Bin, or included in an archive package.
Use a template project instead of a timeline file if the required context includes multiple bins, project-level settings, color management, audio buses, and several timelines. Use .drt when the reusable unit is the timeline itself.
Why did my timeline look like one merged clip after I pasted it?
A pasted timeline can look like one merged clip when you pasted the timeline object into another timeline instead of opening it as its own timeline, or when the destination operation flattened the selected content into a compound or nested item.
First, look in the Media Pool. If the copied timeline exists as a separate timeline item, double-click that item. Do not drag it into the destination timeline unless you intentionally want it to behave as a nested timeline or clip.
If you meant to combine the edit into an existing timeline, decide whether you want a nested timeline or the individual clips. A nested timeline preserves the sequence as one unit for the receiving edit. Individual clips give you more control but create more opportunities for track, linked-audio, and effect mismatches.
If the timeline opens as a compound or nested structure, use the appropriate open or decompose workflow only after duplicating the destination timeline. The right choice depends on whether the source sequence must remain versioned as a self-contained section.
Do not use a drag operation when a clipboard operation is what the tutorial described. The Media Pool item and the timeline viewer can have different meanings for the same timeline.
What is the safest verification checklist after copying?
The safest verification checklist compares the copied timeline with the source in six passes: settings, media, editorial structure, color, audio, and delivery. A five-minute check now is cheaper than discovering a missing title after a client review.
Pass one: settings
Confirm project and timeline frame rate, resolution, start timecode, color management, and audio sample rate. If any value differs, write down whether the difference is intentional.
Pass two: media
Confirm that the expected clips are online and that similar filenames have not relinked to the wrong files. Check camera originals, proxies, optimized media, external stills, and audio folders.
Pass three: editorial structure
Compare the opening, a middle section, and the ending. Check transitions, retimes, gaps, compound clips, multicam edits, linked audio, markers, and subtitles.
Pass four: color
Compare a skin-tone shot, a difficult exposure, and a shot with a tracked or keyed correction. Check LUTs, group grades, timeline nodes, still references, and output transforms.
Pass five: audio
Play dialogue, music, and effects sections. Check fades, automation, plugin availability, bus routing, and the final output path.
Pass six: delivery
Render a short section from the destination and compare it to the source reference. Then check the Deliver page preset, file name, frame size, frame rate, audio channels, and output location.
Save the destination after the check. Keep the source project and the transfer file until the recipient or final export has passed review.
Can an app that helps while using DaVinci Resolve prevent transfer mistakes?
An app that helps while using DaVinci Resolve can reduce menu hunting and explain what to inspect, but it cannot replace a backup, a reference render, or a human check of the transferred timeline. Choose a helper based on whether you need teaching, chat, automation, or a live pointer to the control on your own screen.
TryUncle is the on-screen assistant for DaVinci Resolve on Mac and Windows - ask in plain words and Uncle points at the exact control on your screen.
That is a different job from an automated editor. Sottocut describes itself as a local-first assistant editor inside an open Resolve project that scores footage, proposes edits, and verifies changes. CutAgent describes an AI agent that can coordinate editing tasks in DaVinci Resolve. Eddie AI focuses on turning raw footage into rough cuts and round-tripping to Resolve, Premiere, and Final Cut Pro. PremiereCopilot is positioned around text-to-edit inside Adobe Premiere Pro rather than teaching inside DaVinci Resolve.
Those tools are not identical alternatives. Some automate editing tasks. Some build rough cuts. Some answer questions or coordinate actions. TryUncle’s useful distinction is that Uncle watches your screen and points at the relevant Resolve control while you work. If you want an agent to assemble a rough cut, compare the automation tools honestly. If you are stuck because a tutorial does not match your screen, a live on-screen explanation may be the better fit.
That also answers a learning question people ask in different words: what is the best way to learn DaVinci Resolve, how do I learn DaVinci Resolve fast, or what app helps me while using DaVinci Resolve? Blackmagic’s official free training is a strong foundation, Casey Faris publishes long-form Resolve courses on YouTube, and communities can help with edge cases. A live assistant fills a different gap when the learner is already inside a real project and needs the next control explained.
If your goal is to finish this transfer and learn the surrounding workflow at the same time, check TryUncle for the current rate and platform details. The product mention belongs after the solution, not in place of it.
When you use any assistant around a project transfer, keep the safety boundary clear. Ask for explanations, menu locations, and checklists. Keep backups before actions that change the project. Confirm every automated or suggested change against the source timeline and your reference render.
How should I recover from a bad timeline transfer?
Recover from a bad transfer by stopping edits, preserving the source project, disabling or deleting only the bad destination copy, and repeating the transfer into a clean destination with verified settings. Recovery gets harder when you keep repairing a copy whose origin is no longer clear.
Use this recovery sequence:
- Stop making creative edits in the bad copy.
- Save a new version of the destination project so the current state is preserved.
- Identify the source project and source timeline by name.
- Render or locate a source reference if one exists.
- Disable the bad timeline instead of deleting it immediately if you may need evidence.
- Create a clean destination timeline or import into a fresh project.
- Set frame rate and resolution before importing where practical.
- Use
.drtor repeat Dynamic Project Switching from the known source. - Relink media cautiously.
- Compare the new result against the reference.
If you deleted the only copy of the destination timeline, look for project backups, timeline backups, exported .drt files, .drp files, archives, and reference renders. The best recovery tool is the copy you made before the mistake.
If the source project itself is damaged, do not experiment on it. Duplicate the project or restore a backup to a separate project library, then work from the restored copy. A bad transfer should not become a damaged source.
For collaboration projects, a locked timeline can be a workflow state rather than a transfer failure. If the destination is in a collaborative setup, check whether another user has the timeline open or whether a timeline lock is active. Our guide to DaVinci Resolve collaboration mode when a timeline is locked covers that narrower problem.
Which copy method should I choose for a client handoff?
Choose Dynamic Project Switching for a quick same-system move, .drt for one native timeline, .drp for a wider Resolve project, and an archive when the recipient needs project data plus media. That choice keeps the handoff’s scope honest.
Here are practical examples.
You are moving an episode into a master project
Use Dynamic Project Switching if both projects are in the same library and you want the episode timeline in the master project. Copy the timeline, paste it into a named bin, and verify media and settings. If the master project’s settings differ, decide whether the master project or episode should control the final deliverable before you paste.
You are sending a timeline to another editor
Export .drt, a short reference render, and a note with the Resolve version and media location. Do not send only the .drt and assume the edit is self-explanatory.
You are handing over an entire project
Export .drp or create an archive based on whether the recipient already has the media. Include a list of external assets and plugins.
You are sending a timeline to another application
Use the interchange format the receiving application actually supports. Ask whether the recipient wants XML, AAF, EDL, or a rendered master with handles. A timeline format is not a universal language.
A correct paste can still produce a wrong edit if the destination settings are wrong.
You are building a repeatable channel package
Export a clean .drt template, document the settings, and keep the reusable assets organized. Use a project template or archive if the package includes project-level color and audio context.
The right method is the smallest method that carries the information the recipient truly needs. Moving a whole project for one timeline creates unnecessary cleanup. Moving only a .drt when the recipient lacks media creates unnecessary troubleshooting.
A good Resolve handoff names its format, its dependencies, and its verification standard before the file leaves the source system.
How do I document a timeline transfer for a team?
Document a timeline transfer with the source project, source timeline, destination project, Resolve versions, settings, transfer format, media location, external dependencies, and verification result. The note should let another editor reproduce the decision without asking you to remember it later.
Use a short handoff record like this:
Source project: Client_Master_2026
Source timeline: Client_Edit_v07
Destination project: Client_Delivery_2026
Resolve source version: 21.0.3
Resolve destination version: 21.0.3
Transfer method: DRT import
Timeline frame rate: read from source project
Timeline resolution: read from source project
Color management: read from source project
Audio sample rate: read from source project
Media location: name the volume or archive
External dependencies: list fonts, plugins, LUTs, and Fusion media
Reference render: name the reference file
Verification: add the date and editor
Known exceptions: list anything not checked
The values in this record should come from the real project before sending the note.
Teams often lose time because a file arrives with no explanation of whether it is a full project, a timeline, or an interchange list. Put the format in the filename and in the note. Put the source Resolve version in both places when different versions are involved.
If the transfer is part of a recurring workflow, turn this note into a template. A consistent checklist makes it easier to compare episodes, client versions, and handoffs.
Is copying a timeline the same as duplicating a project?
Copying a timeline moves an editing structure into another project; duplicating a project creates another project context with its own settings, bins, and timelines. They solve different problems and should not be treated as synonyms.
Duplicate the project when you want a safe alternate version of the entire project. Copy the timeline when you want to bring one edit into a project that already exists. Export .drt when you want a portable native timeline. Archive when the project and media must remain recoverable together.
This distinction helps with client revisions. If a client asks for a new version of the same edit, duplicating the timeline inside the same project may be enough. If the new deliverable has a new color pipeline, audio setup, or library ownership, a separate project may be cleaner. If another editor must work on it, a .drt or .drp with a documented media plan is easier to audit.
Do not use a project duplicate as a substitute for a timeline backup. Keep the timeline versions visible and named. The Editor’s Guide recommends meaningful timeline naming and describes duplicate timelines as a way to retain earlier versions, which is a simple habit with a large payoff when a revision goes wrong. See Blackmagic’s timeline-version guidance.
What is the final checklist for how to copy a timeline to another project in DaVinci Resolve?
The final checklist is: choose the transfer scope, save the source, match or intentionally change destination settings, copy with Dynamic Project Switching or export .drt, relink media carefully, verify editorial and technical details, and save a versioned destination project.
Use this condensed version when you are under deadline:
- Choose the scope. Timeline, project, or project plus media?
- Record settings. Frame rate, resolution, start timecode, color, audio.
- Protect the source. Save, duplicate, or export a backup.
- Pick the format. Native copy,
.drt,.drp, archive, XML, AAF, or EDL. - Transfer. Select the timeline in the Media Pool, not just the visible clips.
- Relink. Confirm filenames and paths before accepting matches.
- Inspect. Check a difficult edit, a color shot, and a layered audio section.
- Render. Compare a short destination render with the source reference.
- Document. Name the source, destination, version, format, dependencies, and exceptions.
- Save. Keep the source, transfer file, reference, and destination version until approval.
The answer to the original query is therefore straightforward: enable Dynamic Project Switching, copy the timeline from the source Media Pool, switch to the destination project, and paste into a destination bin. Use .drt when the timeline must travel as a file. Use .drp or an archive when the handoff needs more than one timeline.
After seven-plus years of commercial editing and teaching editors through real workflows, our advice is to treat the transfer as a small conform, not a clipboard trick. The edit is only one layer. Media, settings, color, audio, effects, and delivery all need a quick, visible check.
When you are stuck in your own project, Uncle can point at the exact Resolve control while you work.
Frequently asked questions
- How do I copy a timeline to another project in DaVinci Resolve?
- Enable Dynamic Project Switching, copy the timeline from the source project's Media Pool, switch to the destination project, and paste the timeline into a bin. The timeline's clips are copied as part of that operation, but media files still need to be available and linked.
- Can I copy a DaVinci Resolve timeline without copying the whole project?
- Yes. Export the timeline as a DaVinci Resolve Timeline file with the .drt extension, then choose File > Import Timeline in the destination project. A .drt contains timeline information, not the media itself.
- Why are clips offline after I copy a timeline to another project?
- Copying a timeline does not guarantee that the destination project can find the original media. Use Relink Media or change the destination's media paths, and check for duplicate filenames before accepting a relink.
- Should I use a .drp or .drt file to move a timeline?
- Use .drt for one or more timelines and .drp when you need the complete project structure and settings. Neither file is a substitute for a media archive, so use project archiving when the recipient needs the project and media together.
- Will color grades and Fusion effects copy with a timeline?
- Some clip, timeline, audio, and Fusion data can transfer with a native Resolve copy or .drt, but you must verify grades, caches, third-party effects, fonts, plugins, and external assets after import. A rendered reference and a project backup make recovery safer.
Sources
- DaVinci Resolve 21 support and downloads, Blackmagic Design
- DaVinci Resolve 21 New Features Guide, Blackmagic Design
- DaVinci Resolve 20 Editor's Guide, Blackmagic Design
- DaVinci Resolve 15 Reference Manual, Dynamic Project Switching
- DaVinci Resolve 17 Editor's Guide, timeline files
- DaVinci Resolve training, Blackmagic Design
- DaVinci Resolve What’s New, Blackmagic Design
- Marc Wielage on copying timelines between projects, Blackmagic Design Forum
- Copy timelines between projects, Blackmagic Design Forum
- Sottocut, AI assistant editor for DaVinci Resolve
- CutAgent, AI video editing for DaVinci Resolve
- Eddie AI, assistant video editor
- PremiereCopilot, text-to-edit AI for Premiere Pro
Learn by doing, not watching
Stop translating tutorials to your timeline.
TryUncle stays beside Resolve on Mac and Windows. When you ask, Uncle sees your screen and points at the exact control you need. No hunting through tabs, timestamps, or mismatched tutorials.
Meet TryUncleKeep reading
 GuidesJul 12, 202638 min read
How to Archive a DaVinci Resolve Project Without Losing Media
The right way to archive a DaVinci Resolve project so every clip travels with it: Export Project Archive vs Media Management vs Backups, compared.
 GuidesJul 8, 202639 min read
How to Copy a Color Grade to Multiple Clips in DaVinci Resolve
Every way to copy a DaVinci Resolve color grade to multiple clips: copy/paste, middle-click, Gallery stills, PowerGrades, Color Groups, and more.
 FixesJul 11, 202628 min read
DaVinci Resolve Collaboration Mode Timeline Locked: The Fix
Why DaVinci Resolve locks a timeline, or a whole bin of them, in Multi-User Collaboration, and the fix: give each active timeline its own bin.