
Learn / DaVinci Resolveupdated for DaVinci Resolve 21.1 (October 2026)
DaVinci Resolve Linked Selection Not Working? Fix It
Quick answer
If DaVinci Resolve linked selection is not working, enable the chain icon above the timeline or press Shift-Command-L on Mac or Shift-Control-L on Windows. Then confirm the video and audio clips are actually linked, the right tracks are targeted, and you are not holding Option or Alt, which temporarily overrides linked selection.
If DaVinci Resolve linked selection is not working, the fix is usually small. Turn on the chain icon above the timeline, confirm that the video and audio are genuinely linked, and make sure you are not holding Option or Alt while editing.
I have seen this question come up repeatedly in our 100,000+ member professional video-editing community. It feels like a broken project because the chain icon can be enabled while the particular clips still are not linked, or because a modifier key is deliberately bypassing the setting. As of October 2026, the current Blackmagic support center lists the DaVinci Resolve 21.1 manual, while the same basic Linked Selection behavior and shortcuts remain documented across the Resolve training guides.
The fastest diagnosis is this: if the chain button is gray, enable it. If the chain button is active but one clip still moves alone, inspect the clip relationship. If only one track responds to a trim or cut, inspect track targeting and the editing mode. Those are different failures, and treating them as one wastes time.
What does Linked Selection do in DaVinci Resolve?
Linked Selection tells DaVinci Resolve to select, move, trim, and edit linked timeline items together when you click or manipulate one part of the relationship. A linked camera clip with its production audio can therefore behave as one editing unit even though the picture and sound appear on separate tracks. Blackmagic’s Editor’s Guide describes Linked Selection as the control used to automatically select both the video and audio parts of linked timeline clips. Blackmagic Design’s DaVinci Resolve 20 Editor’s Guide also identifies the chain icon as the visual sign of linked clips.
That definition contains two conditions that are easy to miss:
- The clips must be linked.
- Linked Selection must be enabled.
The button cannot create a relationship that does not exist. It controls how Resolve treats relationships that are already present. Conversely, linking two clips does not guarantee that a single click will select both if the timeline toggle is off.
Linked Selection controls selection behavior, while Link Clips creates the relationship between timeline clips.
Resolve shows video and audio on different horizontal tracks because they have different editorial jobs. The separation is useful for split edits, audio repairs, J-cuts, L-cuts, and detailed sound work. The link relationship preserves their shared timing when you want to make an ordinary move or trim.
Casey Faris explains the everyday default in his Resolve 21 beginner course: “By default, if your video has audio, these two are linked.” He immediately demonstrates the chain indicators and the option to move the components separately while keeping them linked. That is a useful distinction for this problem. The clips can remain linked even when the current edit temporarily treats one component independently. Casey Faris’s Resolve 21 course is the source for that verbatim explanation.
How can I tell whether Linked Selection is enabled?
The Linked Selection control is the chain icon in the toolbar above the Edit page timeline. When the control is highlighted, it is enabled. When it is not highlighted, Resolve lets you select or manipulate the linked components separately. The exact visual color can vary with the interface theme, display scaling, and version, so use the icon’s highlighted state and hover tooltip rather than relying on a particular shade.
The shortcut is a quicker test:
| Platform | Toggle Linked Selection | Temporary independent edit |
|---|---|---|
| macOS | Shift-Command-L | Hold Option while selecting, moving, or trimming |
| Windows | Shift-Control-L | Hold Alt while selecting, moving, or trimming |
| Any platform | Click the chain icon | Turn the chain control off for the edit |
Blackmagic’s Resolve 17 Beginner’s Guide documents Command-Shift-L on macOS and Ctrl-Shift-L on Windows, and it explains that Option-click on macOS or Alt-click on Windows can temporarily override the linked behavior. The Blackmagic Beginner’s Guide is older than Resolve 21, but these shortcuts are still the practical first check for the current timeline workflow.
Why does one click select only the video or only the audio?
One click selects only one component when Linked Selection is disabled, when the clicked components are not actually linked, or when a modifier key is overriding the enabled state. A fourth possibility is that the selected clip is not the pair you think it is, especially after a sync operation, an import, or several rounds of blade edits.
Start with a visual inspection. Look at the lower-left area of the timeline clips. A link badge or chain indicator on the clip tells you that Resolve considers those pieces linked. If the video and audio do not share that indicator, turn on the chain toolbar button alone will not repair them.
Next, select the video and audio together. Right-click the selection. If the menu offers Link Clips, they are currently separate. If the menu offers Unlink Clips, the relationship exists and the problem is more likely the Linked Selection toggle, an override, or a track state.
Do not infer the relationship from matching filenames. Two clips can have identical or nearly identical names and still be independent timeline items. They can also be aligned to the same timecode without being linked. Link status is a timeline relationship, not a guarantee based on naming or visual alignment.
Why is DaVinci Resolve linked selection not working even when the chain icon is on?
If the chain icon is on but DaVinci Resolve linked selection is not working, first verify that the specific video and audio pair is linked. Then release Option or Alt, check that the tracks are unlocked and targeted, and test with a simple selection move rather than a trim or ripple operation. The active control is necessary, but it is not sufficient.
This is the branch that catches most people. They inspect the toolbar, see the highlighted chain, and assume the project has forgotten how to link clips. In reality, the toolbar state and the clip relationship are separate pieces of information.
Use this order because it moves from the least invasive check to the most specific one:
- Click an empty area of the timeline to clear selection.
- Select a video clip that has an audio component underneath it.
- Look for the link indicator on both timeline items.
- Click the video once without holding any key.
- Move the selected pair by a tiny amount, then immediately undo.
- If only one component moved, right-click the pair and inspect Link Clips or Unlink Clips.
- If a selection still behaves strangely, check the track header lock and target controls.
The tiny-move test is safer than pressing Delete. It tells you whether selection and movement are coupled without removing media from the edit. Save the project first if the timeline is important, then undo the test as soon as you confirm the result.
What if the clips look linked but still move apart?
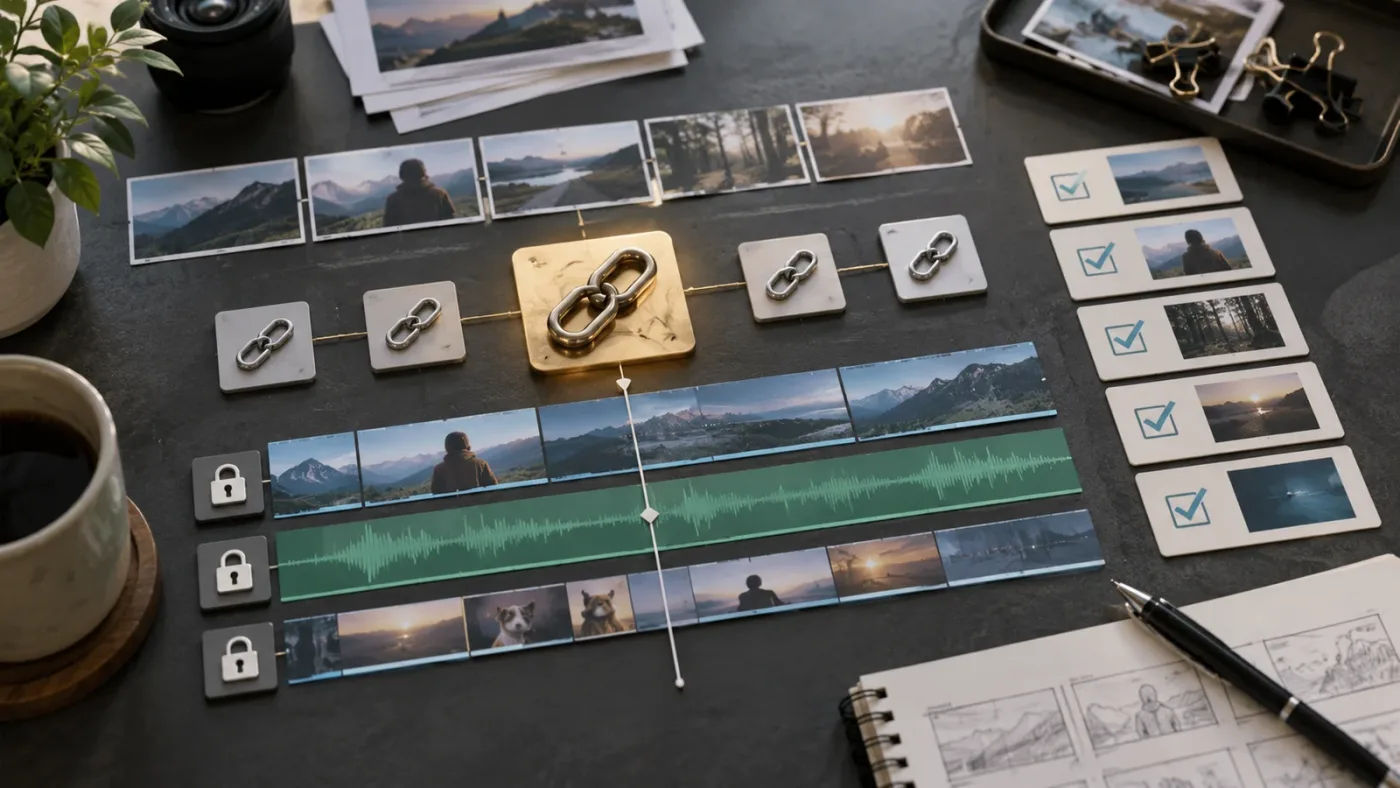
If the clips look linked but move apart, inspect whether Linked Selection was temporarily overridden and whether the operation is a split edit by design. Resolve can preserve a link relationship while allowing the picture and sound to occupy different positions for a J-cut or L-cut. That is not the same as a lost link.
Hold Alt or Option only when you intentionally want the independent behavior. A stuck key, a keyboard macro, a remote desktop layer, or a keyboard layout issue can make the editor behave as though the override is active. Release the key, click the timeline, and repeat the test with the mouse alone.
If the behavior appears after a blade cut, look at each resulting segment. A cut can leave you with several pieces whose relationships are not identical. The original pair may have been linked before the cut, while one new segment may have been selected or edited separately. Resolve’s official forum contains examples where users had to select the matching video and audio pieces and use Link Clips again after independent edits. The Blackmagic forum discussion is useful evidence for this edge case, although forum advice should be treated as troubleshooting context rather than a substitute for the manual.
Could track locks or track targeting make Linked Selection look broken?
Yes. A locked track cannot accept the same edit as an unlocked track, and an untargeted track may not be included in certain timeline operations. Track state can make Linked Selection look broken because the relationship exists, but Resolve is correctly refusing to modify one side or is applying a track-specific command.
Inspect the track headers on the left side of the timeline. Look for a lock icon on the video or audio track. Then inspect the track targeting or auto-select controls used by the operation. The names and locations vary by page and version, but the principle is stable: a link does not override a locked track or force every command to affect every track.
This matters most in three situations:
- You are editing a multicam timeline with several video and audio tracks.
- You are using a trim or ripple command instead of a simple move.
- You are cutting with a selection that starts on one track but expects a corresponding edit elsewhere.
Resolve 20.2 introduced improvements to track patching and ripple trim controls, and the Resolve 21 generation continues to distinguish track controls from Linked Selection. If an older tutorial tells you to click a particular track control and your current interface looks different, check the version-specific Blackmagic guide rather than forcing the old layout. The official support center currently lists Resolve 21.1 documentation as of October 2026.
How do I turn Linked Selection back on?
To turn Linked Selection back on, open the Edit page, find the chain icon above the timeline, and click it until the control is highlighted. You can also press Shift-Command-L on macOS or Shift-Control-L on Windows. Select a linked video and audio pair and move it a few frames to confirm that both components respond.
Here is the complete procedure:
- Open the timeline in the Edit page.
- Locate the chain icon in the timeline toolbar.
- Click the chain icon once.
- If the toolbar state is unclear, press the platform shortcut once and observe the change.
- Click the video portion of a known linked clip.
- Confirm that its audio companion becomes selected.
- Drag the selection a few frames.
- Press Command-Z on macOS or Ctrl-Z on Windows to undo the test.
The toggle is not a permanent repair to every clip in the project. It changes the current timeline behavior. If a newly imported or manually aligned clip is not linked, you still need to use Link Clips on that pair.
Why does the shortcut appear to do nothing?
The shortcut can appear to do nothing when the timeline does not have focus, the wrong page has focus, another command owns the key combination, or you press it twice and return the setting to its original state. Resolve shortcuts are context-sensitive enough that the safest test is to click inside the timeline first, then click the toolbar button and compare the result.
On macOS, use Shift-Command-L. On Windows, use Shift-Control-L. Do not substitute the letter L by itself. Do not use Command on Windows or Control on macOS. A keyboard remapping application can also intercept the combination before Resolve sees it.
If the button changes when you click it but not when you press the shortcut, the timeline itself is fine. The problem is focus, shortcut customization, or the platform key combination. If neither action changes behavior, inspect the clip relationship and track state next.
Can I reset a customized shortcut without changing the whole layout?
You can inspect the keyboard customization view and search for Linked Selection before changing anything. The goal is to identify whether the default command was reassigned, not to reset every keyboard preference. If a shortcut has been changed, note the existing assignment, choose a replacement that does not conflict with your editing workflow, and test it on a duplicate or saved project.
Avoid importing a shortcut preset just to solve one timeline toggle. A preset can affect cutting, trimming, page navigation, and other commands that you already use. The chain button remains the simplest reliable fallback while you diagnose the mapping.
How do I relink audio and video after they became separate?
To relink audio and video, select the matching timeline pieces, right-click, and choose Link Clips. The pieces must be the ones you want to behave as a unit. After linking, enable Linked Selection if you want a single click to select both components.
Work carefully here. Linking clips does not merge their media into one file, and it does not correct a timing error. It creates an editing relationship. If the audio is already offset, first decide whether the offset is intentional. A J-cut and an L-cut can be correct editorial choices. Relinking them may preserve the offset while making later moves operate on both pieces.
Use this repair sequence:
- Zoom the timeline enough to identify the exact matching video and audio.
- Click the video, then use a modifier-assisted selection if needed to add the audio.
- Confirm that the selected items come from the same take or intended source.
- Right-click and choose Link Clips.
- Click away, then click the video once.
- Confirm that the audio selects too.
- Move the pair slightly and undo.
If the context menu says Unlink Clips, do not choose it. That means the pair is already linked and the issue is elsewhere. If the menu does not offer Link Clips, your selection may include incompatible items, a track may be locked, or you may not have selected both components.
Why does Link Clips not appear in the right-click menu?
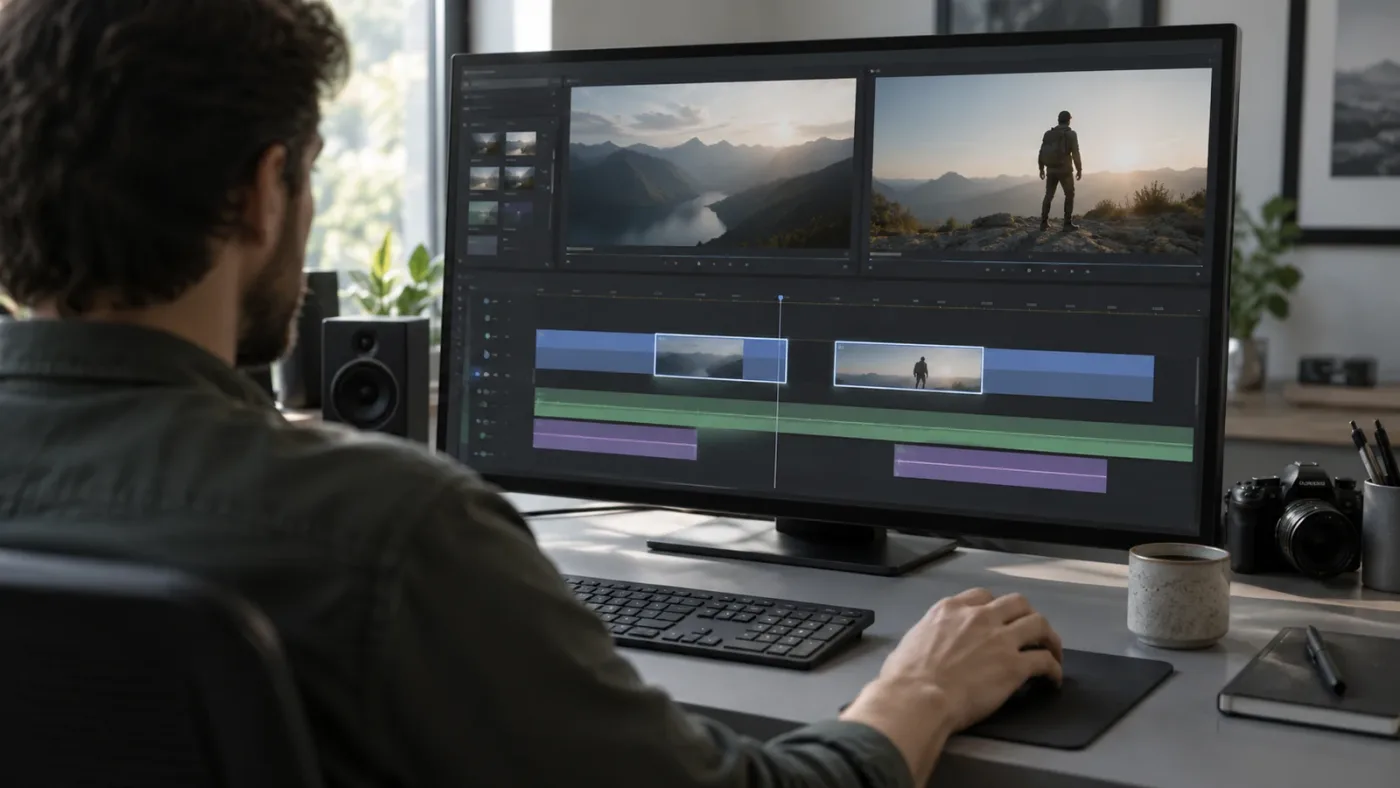
Link Clips may not appear when only one clip is selected, when the selection contains the wrong item types, or when the timeline focus is elsewhere. Select the video and its intended audio companion directly in the timeline, then right-click one of the selected items.
Be precise about the word intended. Resolve will not know that a nearby waveform belongs to a particular picture just because both came from the same camera card. If several audio takes overlap, choose the correct take. If a music bed or a sound effect is selected with the camera audio, linking them would create a relationship you probably do not want.
A common safe approach is to select only one video clip and one matching audio clip, link them, test the relationship, and then repeat for the next pair. That takes longer than selecting an entire timeline, but it avoids a large cleanup when the wrong pieces become coupled.
What happens after I blade-cut a linked clip?
After a blade cut, Resolve creates new timeline segments. The resulting pieces may preserve the intended relationship, but a later independent edit can leave one segment behaving differently from another. Inspect the exact segment at the problem point instead of assuming the entire source clip has one uniform state.
The fastest check is to select the video segment and look for its companion audio segment. If only the video highlights, select both pieces and inspect the context menu. If the menu offers Link Clips, relink those pieces. If it offers Unlink Clips, the relationship is intact and the next check should be the toggle, modifier keys, or track state.
Do not repeatedly link and unlink the entire timeline as a first response. That can make it harder to create a split edit later and can alter relationships that were working correctly. Work on the smallest pair that demonstrates the problem.
Relinking fixes a broken clip relationship; enabling Linked Selection fixes how an existing relationship is selected.
Why does DaVinci Resolve move video but not audio?
DaVinci Resolve moves video but not audio when Linked Selection is off, the pair is unlinked, a modifier key is overriding the setting, or the audio track cannot accept the edit. Check those four causes before changing project settings or reinstalling Resolve.
Use a decision table instead of guessing:
| What you observe | Most likely cause | What to check | Safe fix |
|---|---|---|---|
| The chain icon is not highlighted | Linked Selection is off | Timeline toolbar | Click the chain or use the platform shortcut |
| The chain is highlighted, but the audio never selects | Clips are unlinked | Link badge and context menu | Select the pair and choose Link Clips |
| The audio selects, but the move affects only video | Override or track state | Option/Alt, lock, target controls | Release the modifier, unlock and target the track |
| A trim affects one side by design | Split edit workflow | Trim mode and selected edit point | Keep the split if intentional, or re-enable linked behavior |
| Only a new segment behaves differently | Post-cut relationship changed | The exact blade-cut segment | Relink the matching segment if appropriate |
| The shortcut does nothing | Focus or mapping | Timeline focus and keyboard customization | Click the timeline, then test the toolbar button |
This table is intentionally conservative. It does not blame a corrupted project until the ordinary controls have been checked. Most linked-selection reports can be explained without a reinstall.
How do I move video and audio together after a split edit?
To move video and audio together after a split edit, select both pieces deliberately and either relink them if the split was accidental or keep them separate while you adjust the timing intentionally. Linked Selection does not mean that every audio and video edge must always share the same timecode.
A split edit is often the right choice in interviews. Audio can begin before the next picture in a J-cut, or continue after the picture changes in an L-cut. Casey Faris demonstrates this workflow by keeping the relationship while using Option to adjust one component. The Resolve 21 lesson transcript is useful because it separates the concepts of linked clips, Linked Selection, and temporary independent movement.
If you need to move the entire split edit as a unit, select both the video and audio components and drag the multi-selection. If you make this kind of adjustment often, consider linking the intended pieces again, but verify that the offset remains the offset you want.
Why does ripple delete remove video but leave audio behind?
Ripple delete can remove video while leaving audio behind when the clips are unlinked, Linked Selection is disabled, the audio track is not part of the selected operation, or the edit is being performed on a track-specific target. Ripple operations also involve track and timeline behavior beyond a simple selection click.
Before using ripple delete on important footage, duplicate the timeline or save a project version. Then inspect the selection and the track headers. Make sure the intended video and audio are selected, the tracks are unlocked, and the link indicator appears on the pair. If you want to delete one component without the other, disable Linked Selection deliberately. If you want both removed, enable it and confirm the pair before pressing Delete or Backspace.
DaVinci Resolve 20.2 release material specifically notes improvements to ripple trim controls and track patching. That is useful version context, but it does not turn a locked or unlinked track into a linked one. On Resolve 21.1, use the current manual when the labels or placement differ from an older lesson.
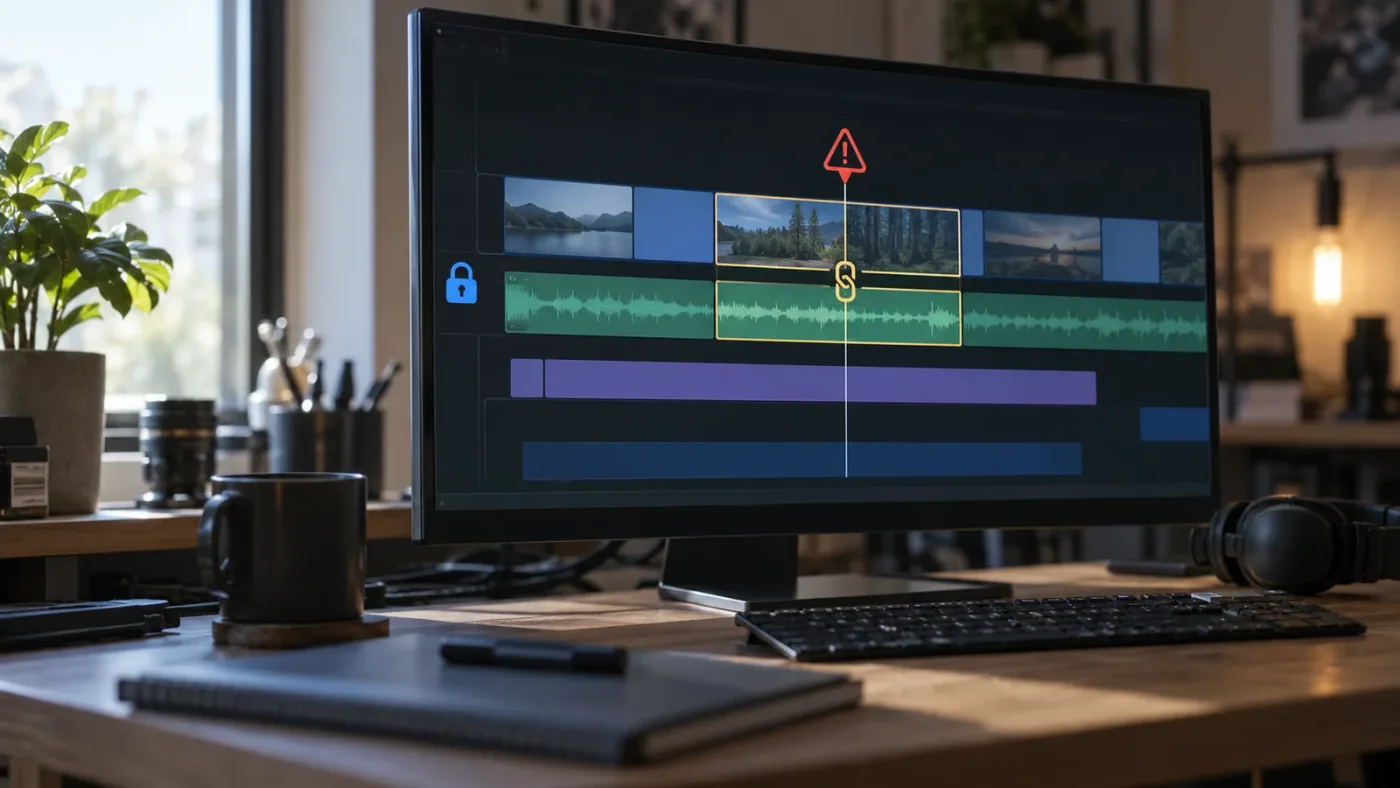
How do I fix Linked Selection when trimming only one edge?
When trimming only one edge, first confirm whether you are trimming a clip edge or an edit point. Clip-edge trimming and edit-point trimming can involve different selections, and Linked Selection cannot force an intentional split edit to behave like a single shared edge.
If the goal is to shorten both picture and sound together, select the linked clip and drag its outer edge with the chain control enabled. If the goal is to change only the video edge while leaving audio in place, disable Linked Selection or use Option/Alt temporarily. If the goal is to roll an edit point, select the correct edit point and inspect both sides of the cut.
Three visual clues help:
- A clip edge changes the duration of one clip.
- An edit point sits between two neighboring clips.
- A split edit has picture and sound edges at different positions.
The same chain icon can be active in all three situations, but the intended result differs. That is why a reader can follow the shortcut correctly and still believe Linked Selection is broken.
What is the difference between Selection mode and Trim Edit mode?
Selection mode primarily lets you select and move clips, while Trim Edit mode changes the meaning of clicks near clip edges and edit points. If a tutorial says Linked Selection is not working during a trim, confirm that the tutorial and your current mode are describing the same operation.
Blackmagic’s Editor’s Guide uses Linked Selection while explaining split edits and tells the reader to disable it before trimming a video edit separately from its audio. That is a concrete reminder that disabling Linked Selection is not always a problem. Sometimes it is the correct tool for the job.
If you are learning from an older video, pause at the moment the instructor changes modes. Look for the trim icon, the cursor shape, and the selected edit point. Do not judge the result only by whether the video and audio are highlighted. A split edit intentionally produces different highlight and trim behavior.
A Linked Selection problem is often an editing-mode mismatch, not a software failure.
Why does my clip move with a red offset indicator?
A red offset or differential indicator can appear when linked components are temporarily moved out of alignment while Linked Selection is disabled or overridden. It shows a difference that may be intentional, not proof that the source relationship has been destroyed.
If the offset is part of a planned J-cut or L-cut, keep it and continue. If you did not mean to separate the components, undo immediately and repeat the move with the chain control active and no Option or Alt key held. Then inspect the pair for a link indicator.
The safest way to repair an accidental offset is usually undo, not manually dragging the audio back by eye. If undo is no longer available, align using the project’s intended sync reference, then decide whether to relink the pieces. A visual approximation can be close enough to sound wrong.
Why does Linked Selection work in one timeline but not another?
Linked Selection can work in one timeline and not another because its toolbar state is associated with the active timeline context, while clip relationships, track locks, and timeline construction differ from sequence to sequence. Test the actual timeline where the problem occurs.
A project may contain several timelines with different editorial purposes. One can be a rough cut with camera audio, another can be a music-only cut, and a third can be a delivery version with deliberate split edits. The same chain icon concept applies, but the available relationships and intended operations do not.
Check these differences:
- Is the active timeline the one you think it is?
- Does the active timeline contain both video and audio?
- Were the clips imported together, synced later, or manually aligned?
- Are the relevant tracks locked in this timeline?
- Is a multicam or compound workflow changing what you are selecting?
- Is the active timeline using a different edit mode or view layout?
Do not copy settings from a working timeline as a blind fix. Compare the clip relationship and track state directly. This takes less time than trying to repair a difference you have not identified.
Could compound clips or multicam clips change the expected behavior?
Yes. Compound clips and multicam clips can make the visible timeline item represent a more complex source structure. Linked Selection still concerns the timeline items you are editing, but the relationship visible at the top level may not match the source material inside the compound or multicam container.
If the visible clip behaves as one unit, open the compound or multicam structure only after confirming that the top-level timeline is not the real problem. Inside the container, inspect its own video and audio items. A fix applied at the wrong level can create more work.
When a tutorial uses ordinary camera video and audio but your project uses a multicam clip, follow the principle rather than the exact click sequence. Identify the level where the edit is being made, then inspect the Linked Selection state and the relationships at that level.
Why does selecting the playhead change what gets edited?
Selection Follows Playhead and related timeline selection behavior can change which clip or track appears active when you move the playhead. That is distinct from Linked Selection. If moving the playhead changes the selected item, inspect the selection behavior menu before blaming the chain control.
This distinction matters because a reader may see the video track selected after moving the playhead and assume the audio has become unlinked. A selection-following feature can change the active selection without changing the underlying Link Clips relationship. Confirm the relationship with the link badge and context menu.
Keep the diagnosis narrow. If the question is why a click does not select the audio, start with Linked Selection. If the question is why the selection changes when the playhead moves, investigate selection-following behavior separately.
What should I check on Mac versus Windows?
The core Linked Selection behavior is the same on Mac and Windows, but the shortcut modifier changes from Command to Control and the temporary override changes from Option to Alt. The toolbar chain icon is the platform-neutral fallback.
| Task | Mac | Windows |
|---|---|---|
| Toggle Linked Selection | Shift-Command-L | Shift-Control-L |
| Temporary independent selection or edit | Option | Alt |
| Undo a test move | Command-Z | Ctrl-Z |
| Check the context menu | Right-click or Control-click | Right-click |
These are editing input differences, not differences in the meaning of a linked clip. If a Windows tutorial says Alt and you are on a Mac, use Option. If a Mac tutorial says Command and you are on Windows, use Control.
On laptops, modifier keys can be easier to press accidentally. If a linked pair works when you click the toolbar but not when you drag, watch your left hand. Release every modifier and retry. If a remote desktop or keyboard utility is involved, test with the on-screen chain button to isolate the input path.
Does DaVinci Resolve Free behave differently from Studio for Linked Selection?
Linked Selection is a basic timeline editing behavior, not a Studio-only feature. The core chain toggle, clip-link relationship, and platform shortcuts are documented as ordinary Edit page functions. The free and Studio editions can differ in other tools, but you should not need Studio to restore Linked Selection.
Blackmagic’s support center distinguishes the free version’s support route from Studio licensing, and the official training material covers the ordinary editing workflow. When reporting a different problem, include the exact edition and version because a Studio-only effect or codec can change another diagnosis. For this particular selection issue, begin with the shared timeline controls.
Which tutorial should I trust when the Linked Selection button looks different?
Trust the current Blackmagic manual and training material for control names, then use a recent Resolve 21 lesson to understand the current interface. Older Resolve 17 and 18 guides are still useful for the keyboard shortcut and the editing concept, but the toolbar layout and surrounding controls can move between versions.
Blackmagic’s official training page uses project-based lessons and provides beginner, editor, color, Fusion, and Fairlight material. The Blackmagic Design training library is the right reference when a short tutorial skips the difference between linked clips and Linked Selection.
Our approach is practical because we work from the failure mode. We have seven-plus years of professional commercial video editing, have taught more than 100,000 students on Udemy as an official Udemy Business Partner, and have taught and worked with Fortune 500 companies. We still check the plain timeline explanation first. A professional credential does not change the order of the controls.
For the broader question of the best way to learn DaVinci Resolve, compare structured official training, project-based YouTube lessons, and guided help with a live edit. Our best way to learn DaVinci Resolve guide covers that decision without turning one stuck button into a reason to buy a course. If your clips also refuse to land where you expect them on the timeline, see the separate guide to DaVinci Resolve clips not snapping to the playhead. For the related toolbar behavior, use the focused fix for DaVinci Resolve snapping not working.
Is an app that helps me while using DaVinci Resolve useful for this problem?
An app that helps while you use DaVinci Resolve is useful when the control is hard to locate, the tutorial does not match your version, or you need to understand which of several timeline controls applies. It cannot replace the basic check that Linked Selection is on and the clips are linked.
TryUncle is the on-screen assistant for DaVinci Resolve on Mac and Windows; ask in plain words and Uncle points at the exact control on your screen.
That is a different role from a course, a forum answer, or an edit-automation tool. Sottocut, PremiereCopilot, heyeddie.ai, and cutagent.ai occupy different parts of the market, with workflows centered on automation, chat questions, or editing assistance. For this problem, the useful distinction is whether the tool teaches you where the chain button and clip relationship are in your own project.
If you want the ordinary learning path, use Blackmagic’s free training and a project-based tutorial. If you are stuck inside a mismatched interface and want a pointer while you work, you can check TryUncle for the current assistant details. It supports Mac and Windows, and the landing page owns current platform and pricing information.
The main fix is still the same: enable the chain control, verify the link, and inspect the modifier key. An assistant should shorten the search for the right control, not obscure the underlying behavior.
How do I test the fix without damaging my edit?
Test the fix on a saved project version, duplicate timeline, or a pair of clips you can safely undo. Select a known linked video and audio pair, move it by a few frames, confirm both move together, then undo immediately.
Use this controlled test:
- Save the project or create a project version.
- Duplicate the active timeline if the edit is important.
- Zoom in on a simple video and audio pair.
- Confirm the chain toolbar control is enabled.
- Click the video with no modifier key held.
- Move the selection a small distance.
- Confirm picture and sound moved together.
- Undo the move.
- Repeat once with Option or Alt if you need to verify the intentional override.
- Return the timeline to the intended Linked Selection state.
Do not use a ripple delete as your first test. A move is reversible and exposes the relationship clearly. Do not test by dragging an audio edge into a new sync position unless you have decided that you want a split edit.
What if the test works in a new timeline but not my old one?
If the test works in a new timeline but not the old one, the old timeline contains a relationship, track-state, or selection-context difference. Compare one simple pair rather than migrating the whole edit immediately.
Create a temporary timeline with one video clip and its matching audio. Turn Linked Selection on and test the pair. If it works, the application-level control is responding. Return to the original timeline and inspect the exact pair that failed. Check for an unlinked segment, an override, a locked track, or a split edit.
If the new timeline also fails, check focus and shortcut input, then restart Resolve only after saving. A restart can clear an unusual UI state, but it should not be your first explanation. Record the Resolve version, operating system, edition, and a short description of the clip relationship if you need to ask the Blackmagic forum for help.
When should I update DaVinci Resolve?
Update DaVinci Resolve when the official release notes identify a relevant timeline or trim fix, or when your current version is far behind the project and tutorial you are following. Do not update in the middle of a critical deadline without a backup and a plan to reopen the project in the same version.
As of October 2026, Blackmagic’s support center lists DaVinci Resolve 21.1 documentation and Resolve 21 release material. The support page also lists earlier 20.x updates, including 20.2 changes to track patching and ripple trim controls. Those version numbers are useful context when a tutorial says a control behaves differently, but the basic Linked Selection checks should come first.
Before an update, note the current version from the About dialog, back up the project library or project file, and keep the installer for the version you were using if your workflow allows it. A current manual is valuable, but version awareness is more valuable than chasing a release number without a reproducible problem.
What are the common false fixes for Linked Selection?
The common false fixes are reinstalling Resolve before checking the chain control, relinking every clip in the timeline, changing project settings that do not control clip relationships, and blaming the media files for a timeline selection state. These actions can add risk without addressing the cause.
Here is what each false fix misses:
- Reinstalling Resolve does not link unlinked timeline clips.
- Relinking every clip can destroy intentional split-edit choices.
- Changing frame rate cannot turn Linked Selection on.
- Clearing cache does not normally change a link badge.
- Buying Studio does not solve a basic selection toggle.
- Exporting and reimporting the timeline hides the original relationship instead of diagnosing it.
- Rebuilding the project can remove useful edit history.
Start with the smallest reversible action. Click the chain icon. Inspect the pair. Check the modifier. Inspect the track header. Then escalate only if the behavior remains reproducible.
The smallest reliable Linked Selection repair is a toolbar check followed by a clip-relationship check.
Should I unlink clips to edit audio separately?
No, not usually. If you only need a temporary audio adjustment, keep the clips linked and disable Linked Selection or hold Option or Alt for that edit. Unlink the clips when you want the independent relationship to become the new permanent structure of the timeline.
Keeping the relationship gives you a safer default for later moves. It also lets you make a J-cut or L-cut without losing the knowledge that the audio and picture came from the same source. The right choice depends on whether the separation is temporary or editorially intentional.
When you do unlink, write down why. In a collaborative project, another editor may see the pieces later and assume the audio drifted by accident. A marker or clip color can communicate the decision without changing the media.
How do I explain the problem when asking for help?
Describe the Resolve version, operating system, free or Studio edition, exact action, and whether the clips show a link indicator. A precise report lets another editor distinguish a disabled toggle from an unlinked clip or a track-control issue.
Include these facts:
| Detail | Example of useful wording |
|---|---|
| Version | DaVinci Resolve 21.1, or the exact version shown in About |
| Platform | macOS or Windows, plus the relevant keyboard shortcut used |
| Operation | Click, move, trim, blade, ripple delete, or split edit |
| Expected result | Video and linked audio should select and move together |
| Actual result | Only the video highlights, or audio remains in place |
| Relationship | Context menu says Link Clips or Unlink Clips |
| Track state | Whether either track is locked or untargeted |
| Modifier | Whether Option or Alt was held or may be stuck |
Blackmagic directs free-version support toward its community forums, and the official support center provides the current manuals and forum route. A screenshot can help a human support responder, but the text description above is more useful for a search engine and often enough for a first diagnosis.
If the issue began after importing a timeline, mention the source application and format. If it began after a blade cut, mention that. If it happens only in a compound, multicam, or collaborative timeline, mention the container type. Those details change the likely branch.
Can a tutorial mismatch make a working setting look broken?
Yes. A tutorial recorded in Resolve 17, 18, 20, or 21 may show a different toolbar arrangement, a different track control, or a slightly different label. The concept can remain the same while the click target moves.
Use the tutorial for the goal and the current manual for the control name. For example, an older lesson may say to disable Linked Selection for an L-cut, while your current toolbar places the chain icon beside newer editing controls. The shortcut and the relationship concept remain the useful parts.
This is also why an on-screen tutor can be practical for a stuck editor. The problem is not always a lack of knowledge. It is often a mismatch between the screenshot, the current version, and the current project state.
What is the final diagnosis for DaVinci Resolve linked selection not working?
The final diagnosis is usually one of four things: Linked Selection is off, the clips are not linked, Option or Alt is overriding the behavior, or the track and edit mode make the operation intentionally one-sided. Check those in that order.
Use the short version when you are in the middle of an edit:
- Click the chain icon above the timeline.
- Press Shift-Command-L on Mac or Shift-Control-L on Windows if you prefer the shortcut.
- Click a known linked video clip with no modifier held.
- Confirm the audio highlights too.
- If it does not, select the pair and choose Link Clips.
- Check track locks and targeting.
- If the result is a J-cut, L-cut, trim, or ripple edit, decide whether the separation is intentional.
- Save, test with a small move, and undo.
The important mental model is simple: Link Clips creates the relationship. Linked Selection decides whether Resolve selects the relationship as a unit. Option and Alt provide a temporary exception. Track state and edit mode decide whether a particular command can affect both sides.
If the chain button is enabled and the clips are linked, but the controls still do not make sense in your own project, Uncle can point at the exact button in the timeline while you work.
What are the frequently asked questions about DaVinci Resolve Linked Selection?
Why is DaVinci Resolve linked selection not working?
The usual cause is that Linked Selection is off, the clips are not linked, or Option or Alt is overriding the setting. Enable the chain icon, verify the link badge, and test a simple video and audio pair.
What is the shortcut for Linked Selection in DaVinci Resolve?
Use Shift-Command-L on macOS or Shift-Control-L on Windows. The same behavior can be toggled by clicking the chain icon above the timeline.
How do I link audio and video again in DaVinci Resolve?
Select the matching video and audio clips, right-click, and choose Link Clips. Then enable Linked Selection if you want one click to select both components.
Why does DaVinci Resolve move video but not audio?
Check Linked Selection, the Link Clips relationship, Option or Alt, and track locks or targeting. One of those four conditions usually explains why only one component moves.
Can I move linked audio separately without unlinking it?
Yes. Turn Linked Selection off for the operation or hold Option on macOS or Alt on Windows. The clips can stay linked while you make a J-cut, L-cut, or other temporary adjustment.
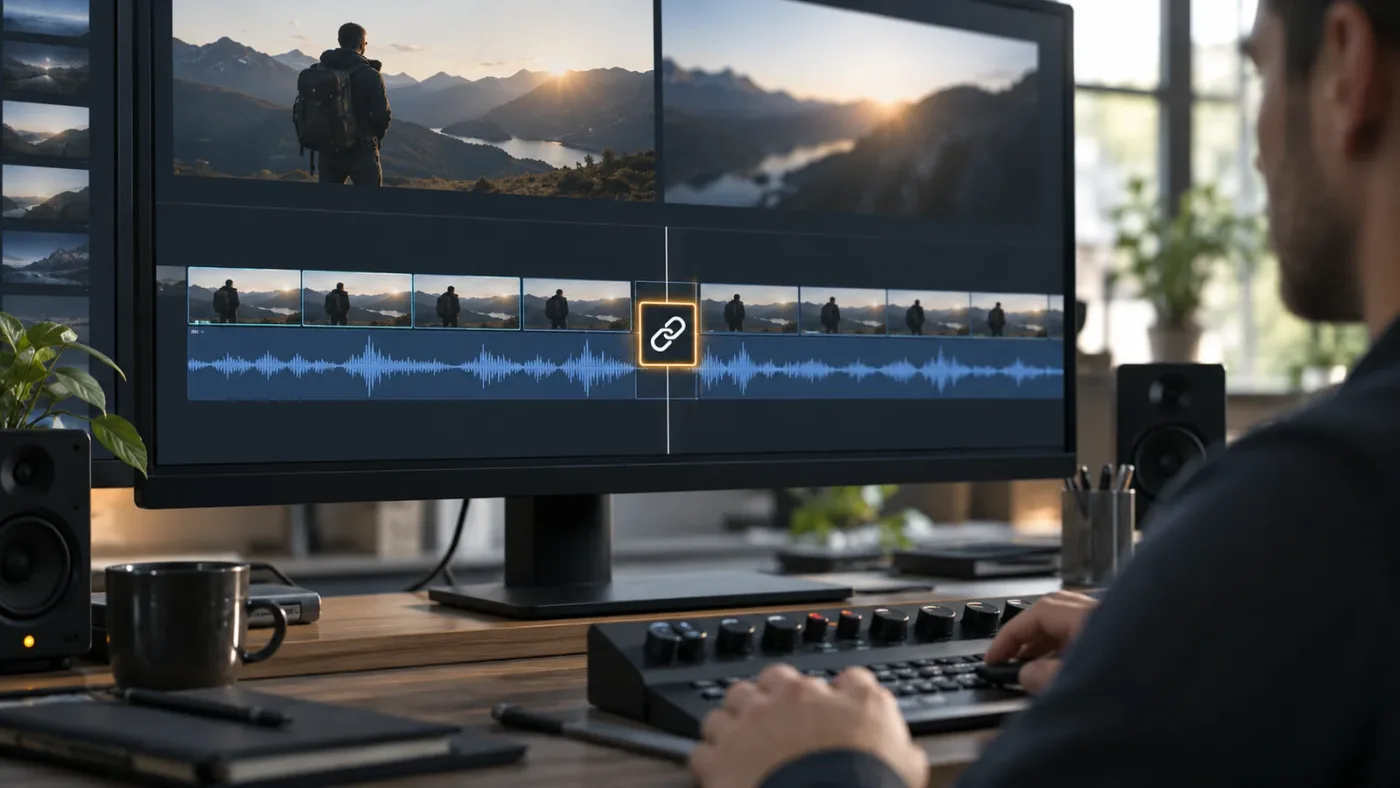
Frequently asked questions
- Why is DaVinci Resolve linked selection not working?
- The usual cause is that Linked Selection is disabled, the clips are not linked to each other, or Option/Alt is temporarily overriding the setting. Enable the chain icon, verify the link badge, and test on a video and audio pair that overlap in time.
- What is the shortcut for Linked Selection in DaVinci Resolve?
- Use Shift-Command-L on macOS or Shift-Control-L on Windows. You can also click the chain icon in the timeline toolbar.
- How do I link audio and video again in DaVinci Resolve?
- Select the matching video and audio clips, right-click the selection, and choose Link Clips. Turn on Linked Selection afterward if you want one click to select both.
- Why does DaVinci Resolve move video but not audio?
- Either Linked Selection is off, the clips are no longer linked, a track is locked or not targeted, or Option/Alt is being held. Check those four conditions in that order.
- Can I move linked audio separately without unlinking it?
- Yes. Leave the clips linked and temporarily disable Linked Selection, or hold Option on macOS or Alt on Windows while moving or trimming one component.
Sources
- DaVinci Resolve 21.1 Manual, Blackmagic Design support center
- DaVinci Resolve 17 Beginner's Guide, Linked Selection shortcuts
- DaVinci Resolve 18 Fairlight Audio Guide, linked clips and override
- The Editor's Guide to DaVinci Resolve 20, split edits
- DaVinci Resolve 21 New Features Guide
- Blackmagic Design DaVinci Resolve support forum, linked clips discussion
- Casey Faris, Making Videos in Resolve 21
- Blackmagic Design DaVinci Resolve training
Learn by doing, not watching
Stop translating tutorials to your timeline.
TryUncle stays beside Resolve on Mac and Windows. When you ask, Uncle sees your screen and points at the exact control you need. No hunting through tabs, timestamps, or mismatched tutorials.
Meet TryUncleKeep reading
 FixesSep 27, 202621 min read
DaVinci Resolve Clips Not Snapping to Playhead? Fix It
DaVinci Resolve clips not snapping to the playhead? Check the magnet, N shortcut, page, trim mode, and one-frame edge cases in this fix.
 FixesSep 30, 202617 min read
DaVinci Resolve Snapping Not Working? Fix It in 2026
DaVinci Resolve snapping not working? Turn on the timeline magnet, restore N, and fix the playhead, viewer guide, and shortcut problems that look similar.
 GuidesJul 16, 202635 min read
DaVinci Resolve Editing Workflow for YouTube Creators
The complete DaVinci Resolve workflow for YouTube: project setup, organizing footage, rough cut, audio, color, chapters, and export, in the right order.