
Learn / DaVinci Resolveupdated for DaVinci Resolve 21.0.3 (July 2026)
DaVinci Resolve Fusion 3D Text Tutorial: The Full Node Recipe
Quick answer
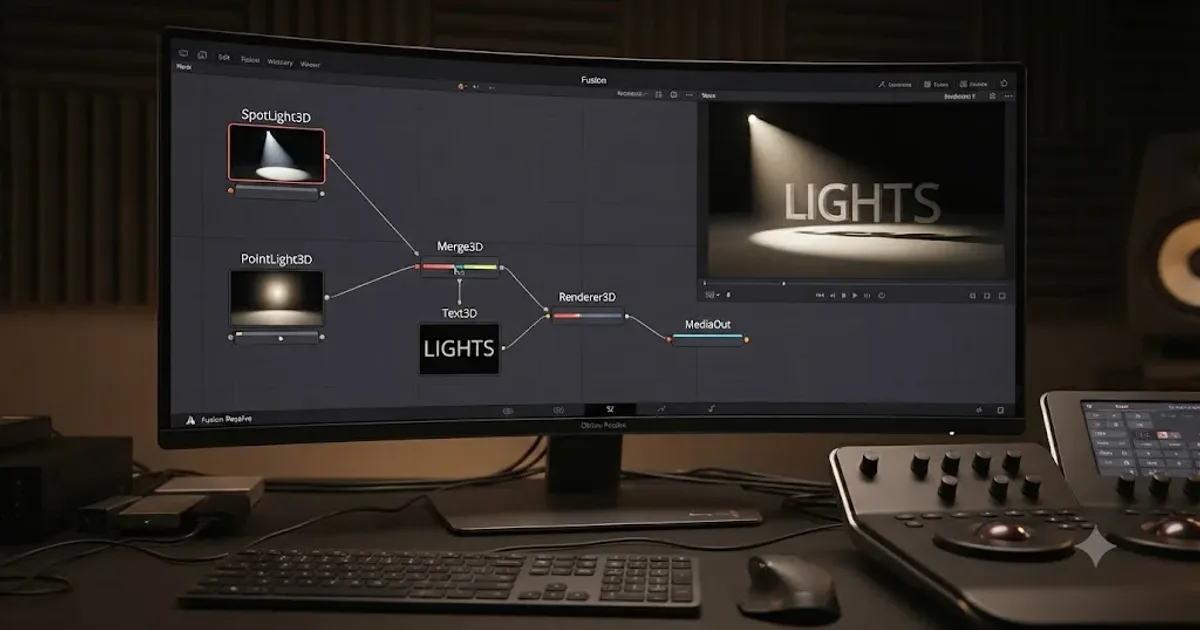
This DaVinci Resolve Fusion 3D text tutorial's whole recipe: add a Text3D node, raise Extrusion Depth above 0 and dial in Bevel Depth for edges, then merge it with a Camera3D and a Light into one Merge3D node, and feed that into a Renderer3D node. That five-node chain turns flat text into lit, extruded 3D text.
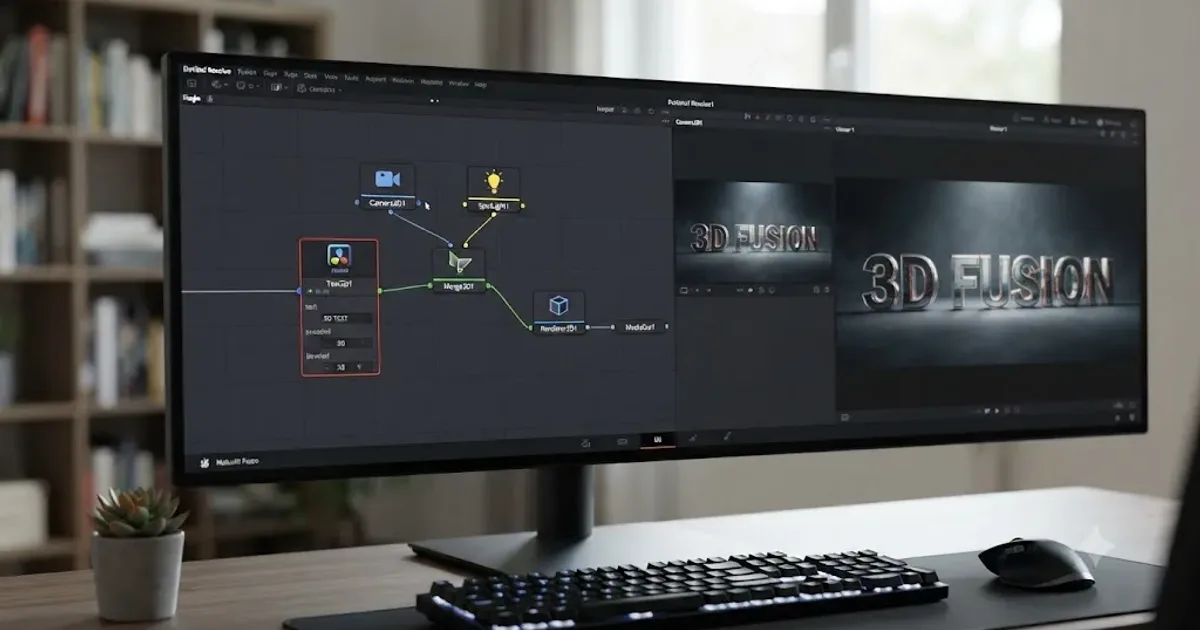
You typed "davinci resolve fusion 3d text tutorial" because you already know Text+ won't give you actual depth, and you're staring at a flat title wondering what turns it into something with real thickness, a bevel, and a shadow. The answer is a specific node, not a checkbox buried in Text+'s Inspector.
We've spent seven-plus years cutting commercial motion graphics and VFX work, we run a DaVinci Resolve editing community that's grown past 100,000 members, and we're an official Udemy Business Partner having taught 100,000+ students, including teams inside Fortune 500 companies. Extruded 3D text is one of the most common "how do I actually do this" questions that comes up once someone graduates past basic title cards, and it trips people up for a boring reason: the node that does it isn't the node most people reach for first. This guide is the full node recipe, every control that matters, and every place people get stuck, as of DaVinci Resolve 21.0.3 in August 2026.
What is the fastest way to make 3D text in DaVinci Resolve Fusion?
The fastest path is five nodes: Text3D, Camera3D, a Light, Merge3D, and Renderer3D, wired in that logical order even though you can build them in any sequence. Text3D is Fusion's dedicated 3D text tool. Per Blackmagic's DaVinci Resolve manual, it's "probably the most ubiquitous node employed by motion graphics artists looking to create titles and graphics from Fusion," and unlike the 2D Text+ tool you've probably already used for lower thirds, Text3D lives entirely inside Fusion's 3D workspace from the start.
Text3D is not an option buried inside Text+. It's a separate node built specifically for extruded, three-dimensional letters. That distinction matters because a lot of people spend time hunting through Text+'s Inspector for a depth slider that doesn't exist there. Per Blackmagic's own Fusion manual, the manual states it outright: "This node generates a 2D image. To produce extruded 3D text with optional beveling, see the Text 3D node." Text+ can rotate, shear, and fake a 3D-looking transform, but it never produces actual geometry with a front, back, and side you can light and cast a shadow from.
Text3D solves that by treating your text as real 3D geometry from the moment you type it. Per the same manual, "Text3D operates as a self-contained 3D scene where each character functions as an independent object," which is also why sub-transforms, animating individual characters, words, or lines separately, work the way they do later in this guide. Once you've typed your text and set its extrusion, the rest of the recipe is the same pattern every Fusion 3D scene follows: merge your elements together, then render them.
| Node | Job in the chain |
|---|---|
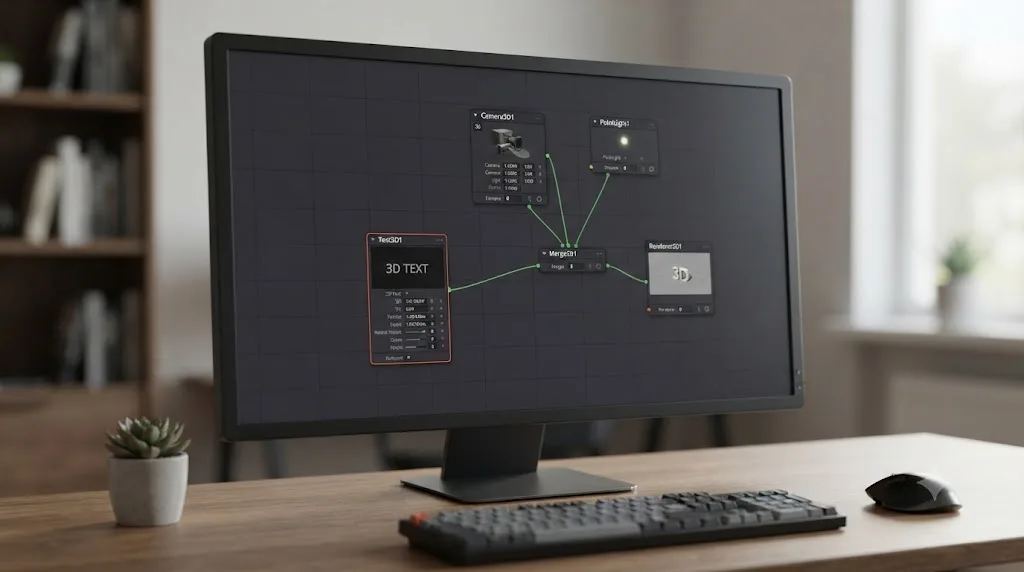
| Text3D | Creates the 3D letters, including extrusion, bevel, and layout |
| Camera3D | Defines framing, focal length, and depth of field |
| Light (Ambient, Directional, Point, or Spot) | Provides illumination and, if Spot, a shadow |
| Merge3D | Combines text, camera, and light into one shared 3D environment |
| Renderer3D | Converts the assembled 3D scene into the 2D image you see and export |
Five nodes, one predictable order, and every symptom covered later in this guide, invisible text, a black scene, flat unlit letters, traces back to one of them being missing, unconnected, or configured wrong. Get the chain right once and every future 3D title in your project is a copy-paste away.
How do you build the full Text3D node chain, step by step?
Here's the build in order, the same sequence a first-time build should follow so each piece is verifiable before you add the next.
- Add a Text3D node from the Effects Library or by pressing Shift+Space and typing "Text3D." Open its Inspector and type your text in the Text tab. At this point, loading Text3D alone into the viewer shows you your text rendered flat, with default gray shading and no depth, since nothing has extruded or lit it yet.
- Set font, size, and color the same way you would in Text+. Text3D's basic text formatting controls mirror its 2D counterpart closely, so anything you already know from Text+ transfers directly.
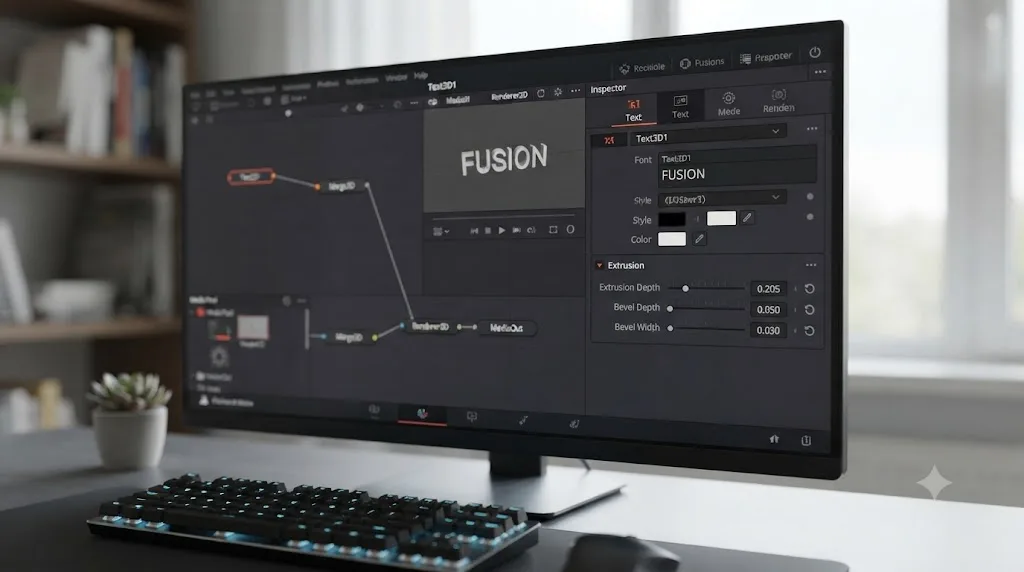
- Open the Extrusion group and raise Extrusion Depth above 0. Per Blackmagic's Fusion manual, "An extrusion of 0 produces completely 2D text. Any value greater than 0 extrudes the text to generate text with depth." This single slider is the entire difference between a flat title and a solid, three-dimensional letterform.
- Increase Bevel Depth and Bevel Width to round the front and back edges instead of leaving them hard-cornered. Per the same manual, "Increase the value of the Bevel Depth slider to bevel the text. The text must have extrusion before this control has any effect," so if you try beveling before step 3, nothing will visibly change.
- Add a Camera3D node. Renderer3D ships with a default perspective camera if you skip this step, but an explicit Camera3D gives you real control over focal length, framing, and depth of field, covered in detail later in this guide.
- Add at least one Light node. Text3D has a built-in material, but per the manual, that material still needs light reaching it to show any shading, highlight, or shadow at all. Pick Ambient for flat fill, Directional for a consistent angle, Point for a positional source, or Spot if the shot needs an actual cast shadow.
- Merge Text3D, Camera3D, and the Light into a single Merge3D node. Per Blackmagic's manual on the Merge 3D node, "The Merge 3D node is the primary node in Fusion that you use to combine separate 3D elements into the same 3D environment." Without this step, your text, camera, and light exist in isolated bubbles that can't see or affect each other, a rule covered in more depth in our guide to Fusion's Merge node, which walks through the same background-and-foreground input logic in Merge3D's 2D counterpart.
- Connect the Merge3D output into a Renderer3D node. This is the node that actually turns your assembled 3D scene into a flat 2D image. Confirm Enable Lighting is checked in its Inspector, since without it, your object renders as flat, unlit color regardless of how many lights you've built into the scene.
- Load the Renderer3D node into the viewer, not the Text3D node by itself, to see your extruded, lit result.
That nine-step build is the entire foundation. Every section below this one is a deeper look at one of these steps, or a specific problem that shows up when one of them was skipped or configured wrong.
How does Extrusion Depth and Bevel actually work on the Text3D node?
Extrusion Depth is the single control that separates 2D text from 3D text on this node, and everything else in the Extrusion group only matters once that one value is above zero. Per Blackmagic's manual, at 0, "text is completely 2D," and any positive value pushes new geometry backward from the original flat letterform to give it real thickness, the same way a cookie cutter shape becomes a solid object once you extrude it into clay.
Bevel Depth and Bevel Width work on top of that extrusion, not instead of it. Bevel Depth controls how far the rounding cuts into the edge, and Bevel Width controls how far that rounding spreads across the face of the letter. A small Bevel Depth with a wide Bevel Width produces a gentle, barely-there roundover, closer to a modern flat-icon look. A larger Bevel Depth with a narrower width produces a more pronounced, chunky, almost chrome-lettering edge that catches highlights more dramatically once lit.
Smoothing Angle is the control most people skip and then wonder why their bevel looks faceted instead of smooth. It adjusts how aggressively adjacent bevel faces blend into a continuous curve versus staying visible as distinct flat facets, the same normal-smoothing concept that shows up in any 3D modeling tool. Front and Back Bevel checkboxes let you apply the effect independently to each face, useful if your text only needs a beveled front edge facing the camera and a hard-cut back edge that will never be seen.
A bevel with no extrusion does nothing, because Bevel Depth only rounds an edge that exists, and a flat letterform has no edge depth to round. That single dependency explains most "why isn't my bevel working" confusion, and it's worth checking before assuming the Bevel Depth slider itself is broken.
| Control | What it does | Requires |
|---|---|---|
| Extrusion Depth | Pushes the flat letterform back to create real thickness | Nothing; this is the base control |
| Bevel Depth | Rounds how far the edge cuts inward | Extrusion Depth above 0 |
| Bevel Width | Controls how far the rounding spreads across the face | Extrusion Depth and Bevel Depth both above 0 |
| Smoothing Angle | Blends adjacent bevel facets into a continuous curve | A visible bevel to smooth |
| Front/Back Bevel | Applies beveling independently to each face | Extrusion Depth above 0 |
There's one specific pitfall worth knowing before you push any custom extrusion profile too far. Fusion's own manual carries a direct warning here: "Do not try to go to zero size at the Front/Back face" when working with a custom extrusion spline, because a profile that pinches to a point can self-intersect, producing flickering, Z-fighting artifacts where overlapping faces fight for the same pixel. If your extruded text ever shows odd flickering seams along an edge, an over-aggressive custom profile is a more likely cause than a lighting or material problem.
Multi-line text and very tight letter spacing introduce a related but separate risk: adjacent characters with heavy extrusion and a wide bevel can visually merge or overlap where letters sit close together, especially in condensed or script fonts. If letters start touching along their extruded sides, widening Tracking in the Text tab before reducing Extrusion Depth usually solves it without sacrificing the depth you built the look around.

Why is your 3D text invisible, black, or flat after you build it?
This is one of the recurring questions in our 100,000+ member editing community, and it has three distinct causes that all look similar from the viewer: nothing showing up at all.
Cause one: you loaded the Text3D node directly into the viewer. That's expected, not a bug. A Text3D node by itself, before it's merged with a camera and light and passed through Renderer3D, won't show you the fully lit, rendered result, since Renderer3D is the node responsible for actually producing that final 2D image. Load Renderer3D's output instead.
Cause two: the scene renders solid black. Per JayAreTV's breakdown of the Renderer 3D node, "When the Enable Lighting checkbox is selected, objects are lit by any lights in the scene. If no lights are present, all objects are black." Enable Lighting doesn't dim your scene when no light is present, it switches the whole render mode from "show base color" to "show only what's actually lit," and an empty result under that mode is pure black rather than merely dark.
Cause three: the text renders flat and unlit, ignoring a light that's technically present. This almost always means the light node exists in your comp but was never wired into the same Merge3D node as your Text3D and camera. A light that isn't merged into the scene contributes nothing to it, no matter how correctly its own settings are configured.
| Symptom | Likely cause | Fix |
|---|---|---|
| Nothing appears when you load Text3D into the viewer | Normal behavior; Text3D alone doesn't show the final render | Load the Renderer3D node's output instead |
| Scene renders completely black | Enable Lighting is on but no light has reached the merged scene | Add a Light node and connect it into the same Merge3D as your text |
| Text renders flat, ignoring an existing light | Light node exists but was never wired into the shared Merge3D | Connect the light into the same Merge3D node as Text3D and Camera3D |
| Bevel appears to do nothing | Extrusion Depth is still at 0 | Raise Extrusion Depth above 0 before adjusting Bevel Depth or Width |
| Extruded edges flicker or show seams | Custom extrusion profile self-intersecting near zero width | Widen the profile's minimum size, or reduce Extrusion Depth |
Diagnosing which of these you're looking at takes one glance at the node graph rather than guesswork: is a light connected to the same Merge3D as everything else, is Enable Lighting checked on Renderer3D, and are you actually viewing the Renderer3D node's output rather than Text3D's. Those three checks cover nearly every "my 3D text isn't showing up right" report.
How do you light 3D text so it looks real instead of a flat cutout?
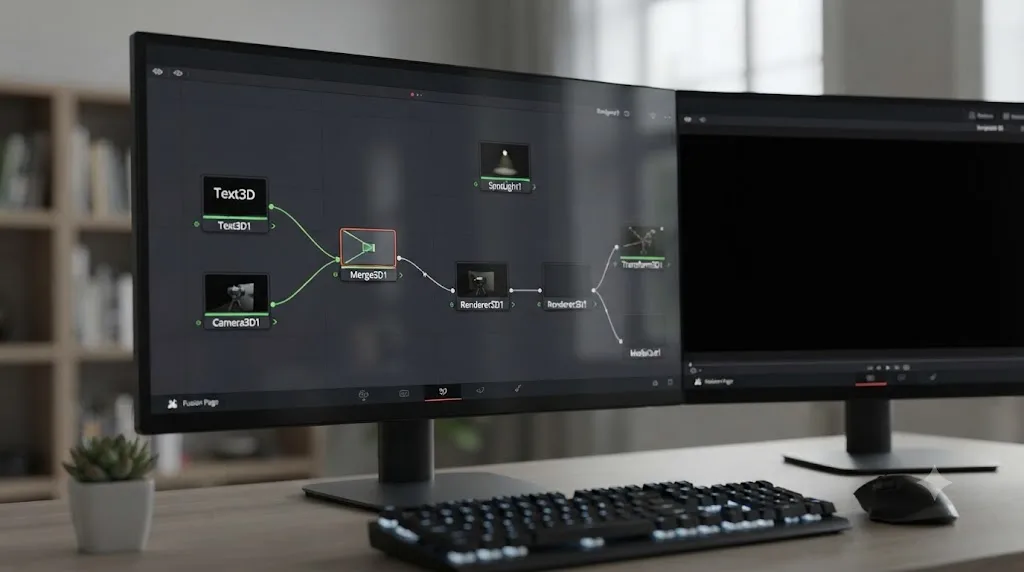
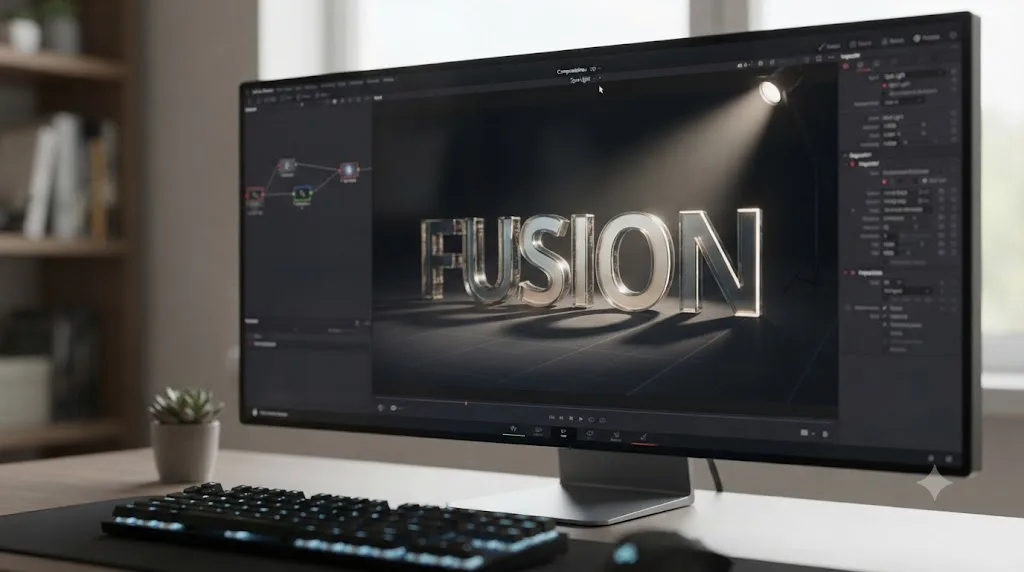
Extruded text without a light behind it reads as a flat cutout even though it technically has depth, because nothing in the scene is generating a highlight along the bevel or a shadow underneath the letterforms to sell that depth visually. The light type you pick decides what kind of "real" it ends up looking like.
Spot Light is the one to reach for if the shot needs a cast shadow, since per Blackmagic's manual, it's the only one of Fusion's four light types capable of producing one. A Spot Light aimed down and across a piece of 3D text throws a shadow onto whatever plane sits behind it, which is often the single biggest visual cue that separates "obviously a flat render" from "genuinely dimensional." Directional Light gives a consistent, sun-like angle across every letter with no shadow, useful for a cleaner, more graphic look. Point Light radiates from a specific position and is a natural fit if your title is meant to sit near an implied practical source, like a screen glow. Ambient Light never casts a shadow and exists mainly to keep the shadow side of your letters from crushing to pure black.
Our full guide to Fusion's Light node covers every control on all four types in depth, including exactly how Cone Angle, Penumbra, and Shadow Softness interact on a Spot Light, and it's built around the same Merge3D and Renderer3D chain this guide uses for text. The short version for a 3D title specifically: a single Spot Light as your key, angled to throw a visible shadow and catch a highlight along the bevel's rounded edge, does most of the work by itself.
A piece of extruded 3D text without a light behind it is still just a flat cutout wearing a 3D costume. The bevel and extrusion give the geometry its shape, but it's the light interacting with that shape, highlighting the rounded bevel edge, shading the recessed sides, casting a shadow from the letters onto whatever's behind them, that actually convinces a viewer they're looking at something dimensional rather than a clever flat graphic.
A common, effective combination for a 3D title specifically: a Spot Light as the key for shape and shadow, a low-intensity Point or Directional Light from the opposite side to soften that shadow without erasing it, and a touch of Ambient Light to keep the recessed sides of the extrusion from going pure black. That's the same layered approach covered in more depth in the light node guide, just applied specifically to text geometry instead of a generic object.
How do you add a ground plane so your 3D text casts a real shadow, not just floats in empty space?
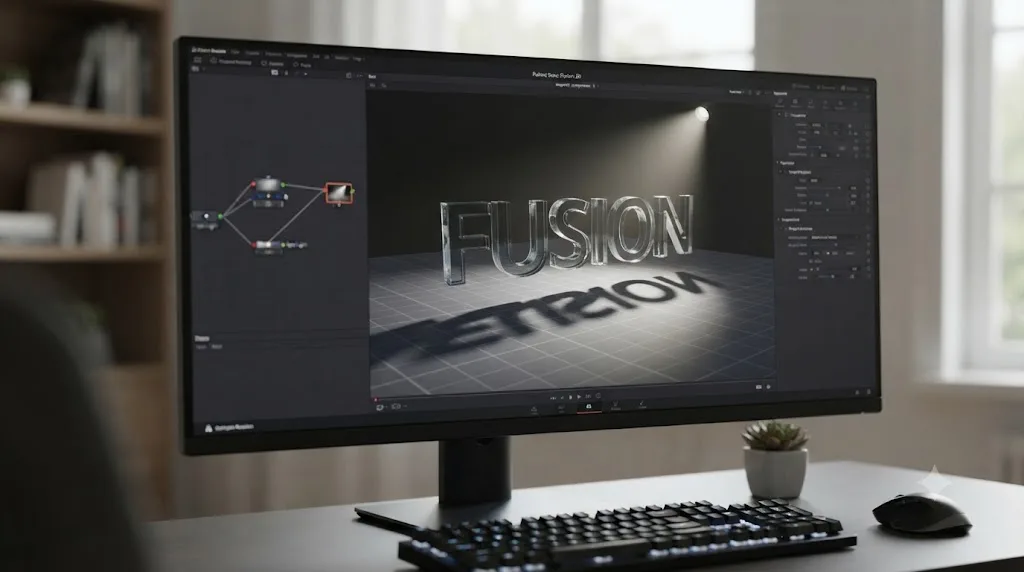
Every mention of a cast shadow so far assumes there's something behind your text for that shadow to land on. There usually isn't, not automatically. A Spot Light throws light and shadow through 3D space the same way it would in the real world, but a shadow is only visible where it falls across a surface, and an empty Merge3D scene with nothing behind your letters has no surface to show it on.
Shape3D is the node that fixes that gap. Per JayAreTV's breakdown of the Shape 3D node, "The Shape 3D node is used to produce several basic primitive 3D shapes, including planes, cubes, spheres, and cylinders," with cone and torus rounding out the full list in its Shape menu. Which controls show up in the Inspector depends on what you pick there: Width and Height for a flat plane, Radius and Start/End Angle for anything round.
For a shadow catcher, Plane is almost always the shape you want. Add a Shape3D node, switch its Shape menu to Plane, scale it up until it comfortably extends past your text on every side, and use its own Transform controls to push it back and down so it reads as a floor or a backdrop instead of sitting flush against the letters themselves.
One convenience worth knowing: Shape3D takes a material or a plain image directly on its own green input, unlike Text3D, which needs a separate Replace Material 3D node just to accept one. Feed that input a dark, low-reflectivity material and your plane reads as a believable floor catching a soft shadow. Feed it a bright, glossy one instead and you get a reflective surface the letters seem to sit on top of, closer to a product-shot look.
Merge the Shape3D plane into the same Merge3D node carrying your Text3D, Camera3D, and Light, in the same pattern this guide has used for every other element, and the Spot Light's shadow finally has somewhere real to fall.
| Shape3D type | Typical use under 3D text |
|---|---|
| Plane | Ground or backdrop for a cast shadow |
| Cube | Blocky set piece or panel behind the text |
| Sphere, Cylinder, Cone, Torus | Accent geometry, rarely what belongs directly under text |
A Spot Light with nothing behind your text to catch its shadow is a light doing work you'll never actually see. Add the plane before you spend time fine-tuning Cone Angle or Shadow Softness, since none of that tuning shows up until there's a surface in the scene for the shadow to land on.
How do you texture or add materials to Fusion's 3D text?
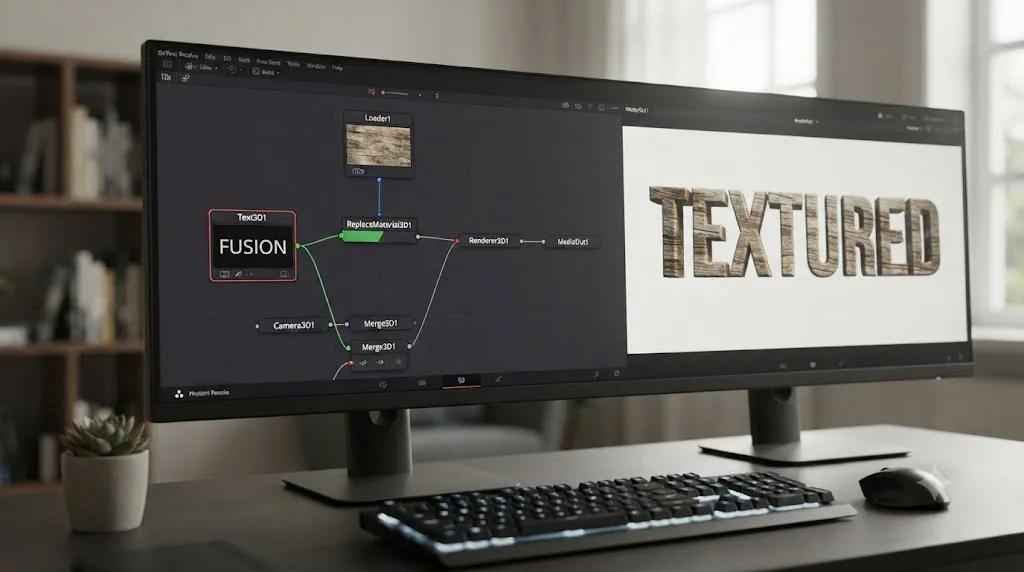
Text3D can't take a material input directly, which surprises people coming from other 3D nodes in Fusion where dragging an image straight onto the geometry's material socket is the normal workflow. Per Blackmagic's manual, "Since the Text 3D node does not include a material input, you can use the Replace Material to add material shaders to the text." Replace Material 3D is a separate node built specifically to work around that gap.
The workflow is straightforward once you know the node exists. Per the same manual, "The Replace Material 3D node replaces the material applied to all the geometry in the input scene with its own material input," and critically, "any lights or cameras in the input scene are passed through unaffected," so inserting it into your chain doesn't disturb anything else you've already built. Connect your Text3D node into Replace Material 3D's scene input, connect an image or a material node like Blinn or Phong into its material input, and the node swaps the text's default built-in shading for whatever you fed it.
Gedaly Guberek, writing a tutorial on texturing 3D objects in Fusion, makes the case for why this step matters beyond just decoration: "It's a great way to add interest to your motion graphics… and it's 100% necessary to make any model look remotely realistic" (DVResolve.com). A texture isn't a cosmetic extra bolted onto an already-finished look, it's frequently the difference between text that reads as a rendered 3D object and text that reads as a flat color wearing a fake sense of depth.
Where to place Replace Material 3D in your chain matters. Insert it directly after Text3D and before the Merge3D node, so the scene entering Merge3D already carries the material you want, rather than trying to apply it after everything's already merged together, which complicates isolating the text from your camera and lights.
| Node | Purpose |
|---|---|
| Text3D | Provides the extruded geometry with a built-in default material |
| Replace Material 3D | Swaps that built-in material for an image texture or a Blinn, Phong, Cook Torrance, or Ward shader |
| Override 3D | Optionally adjusts visibility, lighting response, or matte settings without touching the material itself |
If you want a texture with real reflective highlights that respond convincingly to your Spot Light's angle, feed Replace Material 3D a Blinn or Phong material node rather than a flat image, since those shaders are built to calculate specular highlights based on the actual lights in your merged scene, the same shading math covered in depth in our Fusion Light node guide.
Text+ vs Text3D: which one should you actually use?
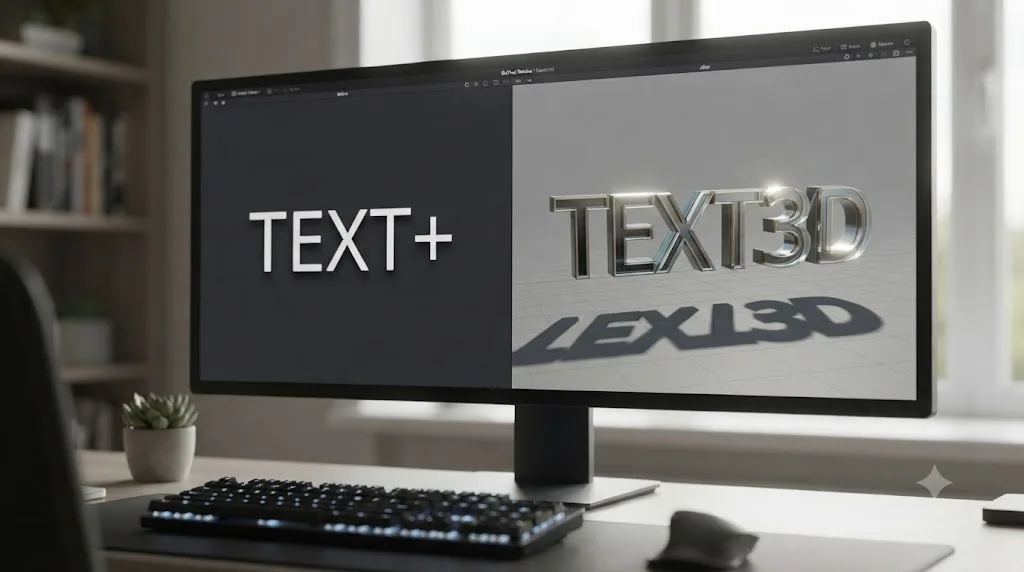
The honest answer is that they solve different problems, and picking the wrong one for a given shot wastes time chasing a control that doesn't exist on that node. Our complete guide to adding text and titles in DaVinci Resolve covers the full range of text tools, Text, Text+, MultiText, and Fusion Titles, for everyday captioning and lower-third work. Text3D sits outside that everyday set, reserved specifically for when a shot needs actual geometry.
Text+ is faster to work with, sits directly in the Edit page's Toolbox without opening the Fusion page at all, and covers the overwhelming majority of real editing needs: lower thirds, captions, animated kinetic type, credits. It supports up to eight shading layers, fake 3D-looking transforms through rotation and shear, and a Write On reveal animation, all without ever leaving a 2D image behind the scenes.
Text3D requires the Fusion page, a slightly steeper node-based setup, and genuine 3D scene assembly through Merge3D and Renderer3D. What it buys you in exchange is real geometry: a front, a back, beveled sides, a surface a light can actually cast a highlight or shadow onto, and camera moves that reveal depth as you orbit or dolly around the letters, none of which Text+'s 2D image can ever produce no matter how convincingly you fake a 3D-style transform on it.
| Question | Text+ | Text3D |
|---|---|---|
| Does it produce real, extrudable 3D geometry? | No, 2D image only | Yes |
| Can it cast or receive a shadow? | No | Yes, once merged with a Spot Light |
| Where do you build it? | Edit page Toolbox or Fusion | Fusion page only |
| Fastest for a simple lower third or caption | Yes | No, unnecessary overhead |
| Supports up to eight shading layers | Yes | One built-in material, or Replace Material 3D for more |
| Best for a logo reveal or dimensional title card | No | Yes |
Text+ fakes the look of 3D with a 2D image behind it. Text3D builds actual geometry a camera can orbit and a light can shadow. If your title only ever sits flat against the frame and never needs a shadow, a highlight that shifts as a light moves, or a camera that reveals depth by rotating around it, Text+ remains the faster, simpler tool, and reaching for Text3D adds node-graph overhead for a visual difference nobody will notice. Reach for Text3D specifically when the shot's whole point is that dimensionality.
What are Text3D's Layout modes, and how do you curve text around a circle or path?
Text3D inherits the same four Layout modes as its 2D counterpart, and per Blackmagic's manual, they're Point, Frame, Circle, and Path. Point layout centers your text on a single anchor point, the default and simplest mode for a straightforward title. Frame layout confines text to a defined rectangular boundary, useful for paragraph-style text that needs to wrap and justify within fixed margins.
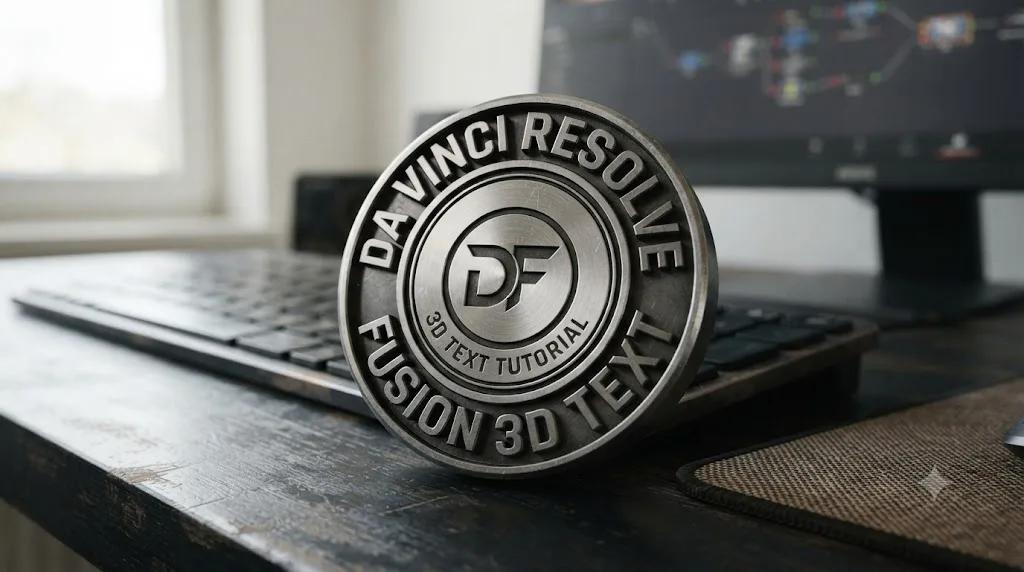
Circle layout wraps your letters around a circumference, evenly distributing characters along the curve, a common look for a badge, seal, or stamp-style logo built in 3D. Path layout is the most flexible of the four: draw or import a spline, and your text flows along that custom curve instead of a straight line or perfect circle, which is what you'd use for text that needs to follow an irregular shape, like tracing the edge of a product shot or curving around another 3D object already in your scene.
All four modes remain fully animatable in 3D, which opens up moves that don't exist on the 2D Text+ node at all. Because Text3D "operates as a self-contained 3D scene where each character functions as an independent object," per Blackmagic's manual, you can keyframe the Path or Circle layout's offset to make text appear to travel around its curve, an effect that reads immediately as more considered than a static circular logo lockup.
| Layout mode | Best for |
|---|---|
| Point | A straightforward, centered title or logo |
| Frame | Paragraph text that needs to wrap and justify within a boundary |
| Circle | A badge, seal, or stamp-style logo where letters wrap a circumference |
| Path | Text following a custom, irregular curve, like tracing a product's edge |
One practical note worth knowing before committing to Circle or Path layout on a longer piece of text: extrusion and bevel calculations run per character, so a long string of text laid out along a tight circle radius can cause adjacent extruded letters to visually overlap near their extruded sides, the same crowding issue covered earlier under multi-line text. Widening Tracking, increasing the circle's radius, or reducing Extrusion Depth are all valid fixes depending on which one preserves the look you actually need.
How do you animate 3D text with sub-transforms and Write On reveals?
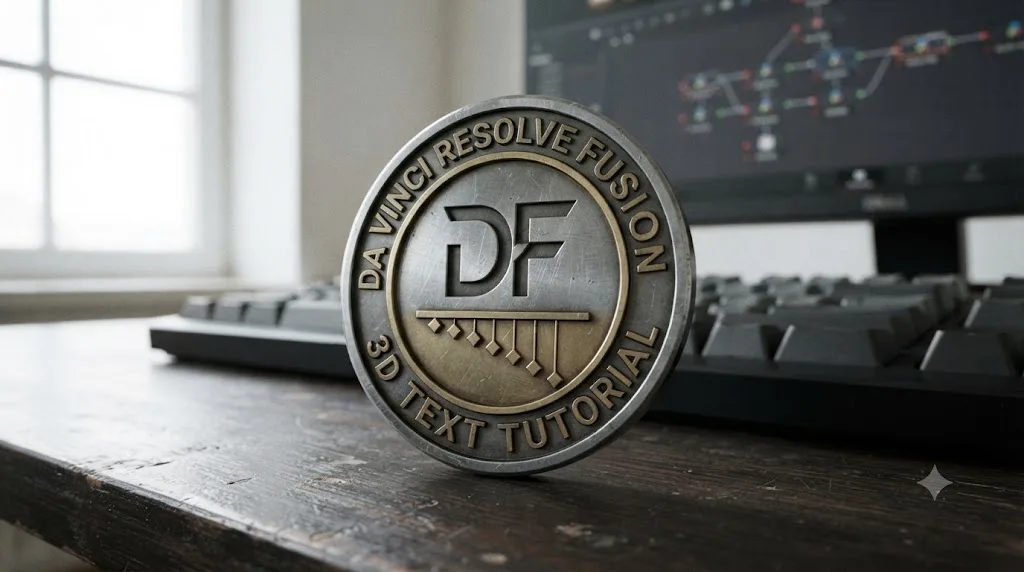
Sub-transforms let you apply move, rotate, or scale changes at the character, word, or line level, independently of the object's overall Transform tab, which is what makes a lot of the "letters cascade in one at a time" or "each word tumbles into place separately" looks possible without hand-animating every character's position yourself.
The mechanism is built directly into how Text3D treats its own geometry. Because each character exists as its own object inside the node's self-contained scene, a sub-transform targeting "characters" applies its move, rotate, or scale to every letter individually rather than to the text block as a single rigid unit, and Text3D's own Write On range control adds a simple, built-in reveal on top of that, animating how much of the text is visible over a specified range without you needing to hand-key opacity on every character.
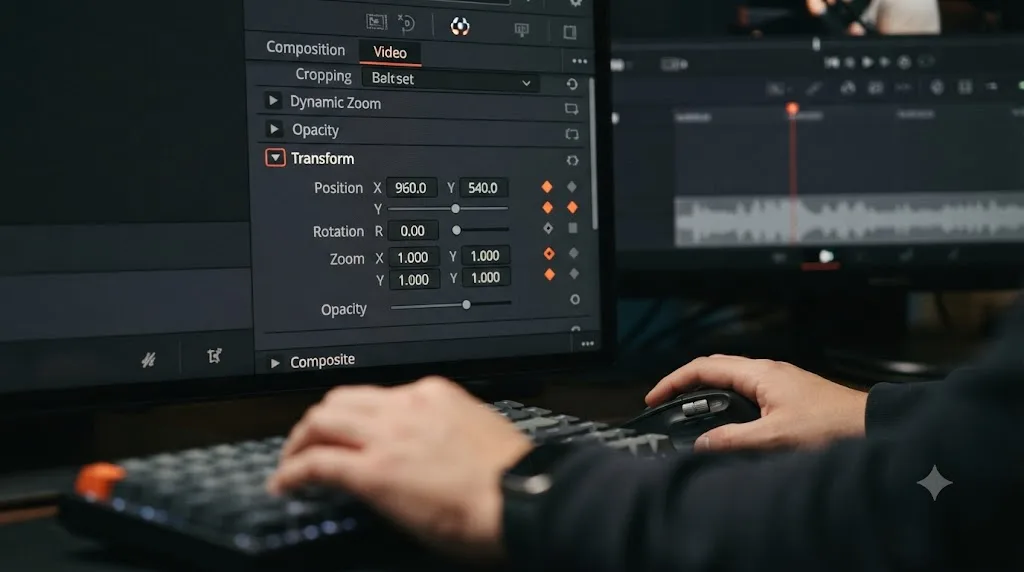
Once you're comfortable with sub-transforms, the actual animation work happens the same way it does everywhere else in Fusion: through keyframes on whichever Inspector parameter you're changing over time. Our complete guide to keyframing effects in DaVinci Resolve covers the Inspector's diamond-shaped keyframe controls and the Keyframe and Curve Editors in depth, all of which apply directly to animating a Text3D node's position, rotation, extrusion, or a Spot Light's intensity as it plays across the reveal.
A specific animation worth knowing about for 3D text specifically: because the geometry is real and the camera is a genuine 3D object too, you can keyframe Camera3D's own position to orbit around static, unmoving 3D text and get a full parallax reveal of its extruded sides, an effect a 2D Text+ node can only ever fake with a flat rotation transform that never actually shows you the letters' sides at all.
Why does network rendering fail on a project with 3D text?
This is a narrower, easy-to-miss problem, but it shows up specifically and only with Text3D nodes, not with anything else in a typical Fusion comp, and it catches studios by surprise the first time a render farm job comes back with missing or wrong-looking titles.
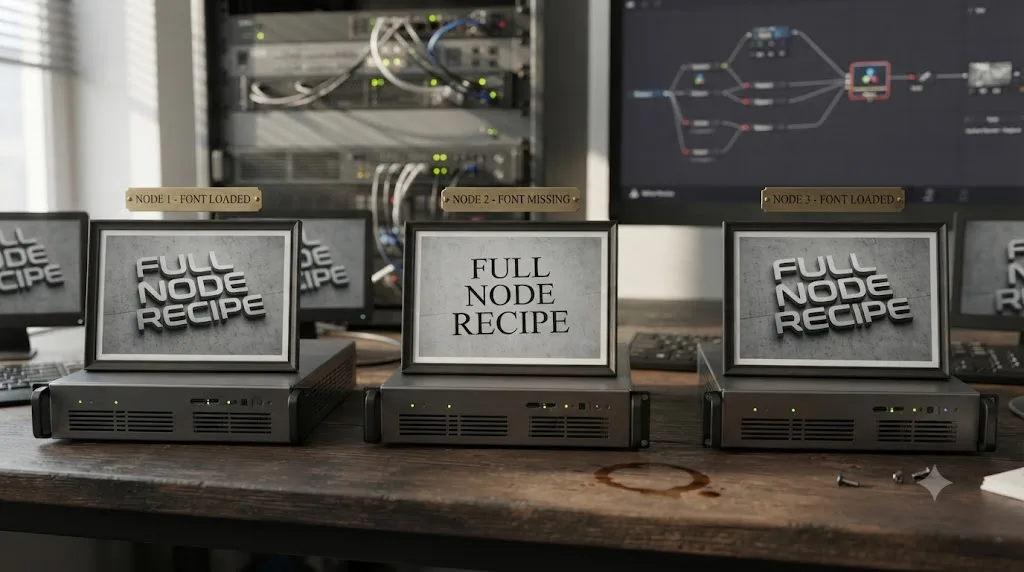
Per Blackmagic's manual, "When network rendering a comp that contains Text 3D nodes, each render machine is required to have the necessary fonts installed or the network rendering fails." Fusion doesn't push font files out to whatever machines are handling a distributed render job. If a render node in your farm doesn't have the exact font your Text3D node references already installed locally, that machine's frames either fail outright or silently substitute a fallback font, which is arguably worse, since it produces frames that render successfully but look visibly wrong.
The fix is entirely a font management problem, not a Fusion settings problem. Confirm every machine on your render farm has the specific font, same family, same weight, installed before you submit a job containing Text3D nodes, and treat a custom or licensed font as a deployment step rather than an assumption. This is a narrower concern than most of what this guide covers, since it only bites studios and freelancers running a genuine multi-machine render farm rather than rendering locally on a single workstation, but it's worth knowing before a client deadline is the first time you discover it the hard way.
How do you get a cinematic depth-of-field look on extruded 3D text?
Camera3D is what gives you the control to make 3D text feel like it was actually shot with a lens rather than rendered flat and sharp edge to edge, and depth of field is the specific effect most people reach for once their text is lit and textured.
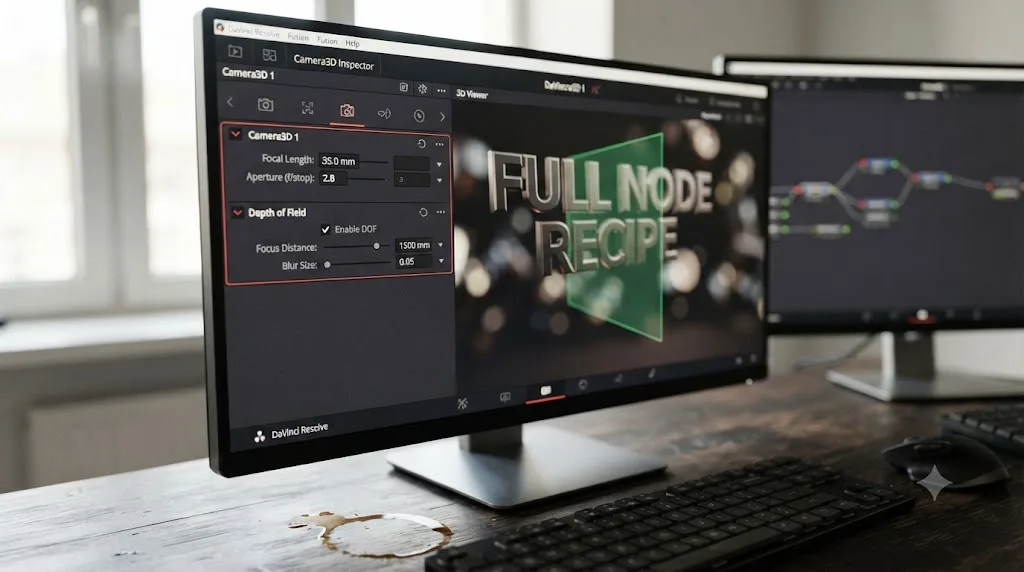
Per Blackmagic's manual on Camera 3D, "Angle of View defines the area of the scene that can be viewed through the camera," and it's calculated from two related controls: "the Aperture Width and Height sliders control the dimensions of the camera's aperture," and Focal Length, described as "the distance from the center of the lens to the film plane" in a real-world camera. Rather than dialing in raw numbers, the Film Gate menu offers real camera presets that automatically set matching aperture width and height, a faster path than guessing at values manually.
Depth of field itself needs a specific setup most people miss on their first attempt. Per Blackmagic's manual on depth of field, you have to "add a Renderer3D node at the end of your 3D scene," then "select the Renderer3D node, and set the Renderer Type to OpenGL Renderer," and finally "turn on the Enable Accumulation Effects checkbox in the OpenGL render." Only once all three of those are true does "turning on Enable Accumulation Effects" expose "a Depth of Field checkbox along with Quality and Amount of DoF Blur sliders."
Here's the genuine trade-off worth knowing before you build a shot around this: depth of field in Fusion's 3D renderer requires the OpenGL render engine specifically, but soft shadows, covered in our Fusion Light node guide, require the Software render engine instead, and Renderer3D only runs one engine at a time. You cannot get OpenGL's depth of field and Software's soft shadows simultaneously on the same render pass.
| Effect you want | Required render engine | Trade-off |
|---|---|---|
| Depth of field blur on your 3D text | OpenGL, with Enable Accumulation Effects on | No soft shadows available in this pass |
| Soft-edged cast shadow from a Spot Light | Software | No depth of field blur available in this pass |
| Fast interactive preview while positioning text and lights | OpenGL | Hard-edged shadows only, no DoF unless Accumulation Effects is on |
The practical workaround most compositors use: render two passes, one in OpenGL with depth of field baked in and shadows left hard-edged or omitted, and a second in Software with full soft-shadow detail and no DoF, then combine both in a 2D comp downstream, applying whatever DoF blur you actually need as a post-process pass over the Software-rendered shadow detail. It's more steps, but it's the only route to both effects looking correct simultaneously, since Renderer3D's own DoF and soft-shadow features are mutually exclusive within a single render.
Per the manual, one more control is worth knowing before your first attempt: "Turning this on lets you see the green focal plane indicator in the 3D Viewer that lets you visualize the effect of the Focal Plane slider," which shows you exactly where your text needs to sit relative to the camera for it to land in sharp focus, rather than guessing at Focal Plane values and re-rendering repeatedly to check.
How do you get your finished 3D text onto your timeline with a transparent background?
Everything built so far lives inside Fusion's own viewer, but the real destination is a video track sitting above your footage, not a flat image you have to key a black background out of by hand.
Per Blackmagic's manual on the Renderer3D node, its Software Renderer's output includes several channels beyond plain color, RGBA, Z, Coverage, BgColor, Normal, TexCoord, ObjectID, and MaterialID among them, and it's the alpha portion of that first RGBA channel that carries your transparency. Any pixel where no geometry exists in the render, no text, no ground plane, no camera-visible surface at all, is already flagged transparent by default. You don't add a chroma background and key it out afterward the way you might with live-action green screen footage; the 3D scene simply never paints those pixels in the first place.
If you built your Text3D chain inside a Fusion clip sitting on a video track above your footage in the Edit page, that alpha channel is already doing its job for you. Resolve composites each track over the ones beneath it using exactly that channel, so extruded, lit text with nothing merged in behind it but empty 3D space shows up over your video with zero extra steps, no keying, no garbage matte, no second Merge node required.
A 3D text scene with nothing merged in behind it isn't rendering "nothing." It's rendering fully transparent, which is exactly what an overlay title needs. The mistake worth watching for is adding a Shape3D backdrop or a Background node out of habit, the way you might in a from-scratch 2D comp, and then wondering why your title suddenly shows up with a solid black box around it once it lands on the timeline. The fix there is just removing whatever you accidentally merged in as a backdrop, not hunting for a missing keyer.
If instead you're building the scene as a standalone Fusion composition meant for reuse across projects, or handing a rendered element to someone editing somewhere else entirely, you need to render it out with that alpha preserved rather than flattened. That means picking a delivery codec that actually carries an alpha channel and checking whatever "render alpha" option your export format exposes, since a standard H.264 or ProRes 422 file has no alpha channel at all and bakes your transparent background into solid black before it ever reaches the other editor's timeline.
| Delivery need | Codec choice |
|---|---|
| Reusable element with transparency, own project or handoff | QuickTime with a BGRA pixel format, or ProRes 4444 |
| Direct use inside the same Resolve project on a track above footage | No separate alpha export needed; the Fusion clip composites live |
| Standard delivery with no transparency required | ProRes 422 or H.264, alpha not preserved |
One more habit worth building before you render: feed the Renderer3D output through a 2D Merge node with your actual footage on its background input while you're still working inside the Fusion page, rather than judging the shot against Fusion's checkerboard viewer background alone. It's the only way to see whether a shadow, a bevel highlight, or a depth-of-field blur genuinely reads correctly against the real plate before you commit to a render.
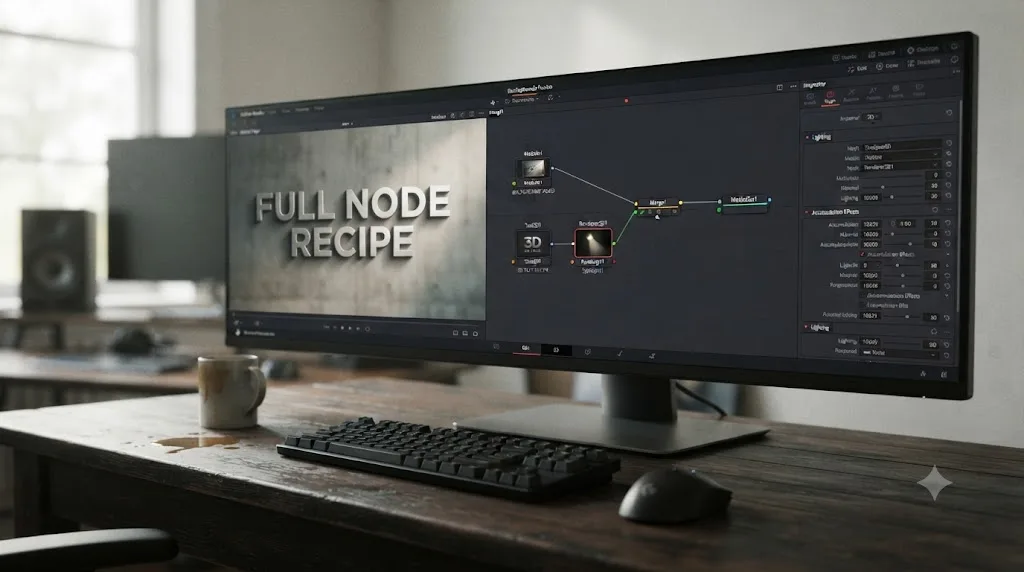
Is Fusion's 3D text good enough, or should you use After Effects, Cinema 4D, or a plugin instead?
Fusion's Text3D is a real, capable 3D text tool, free, built directly into a program most editors already have open, but it's worth naming the honest alternatives rather than pretending Fusion is the only serious option, since it isn't.
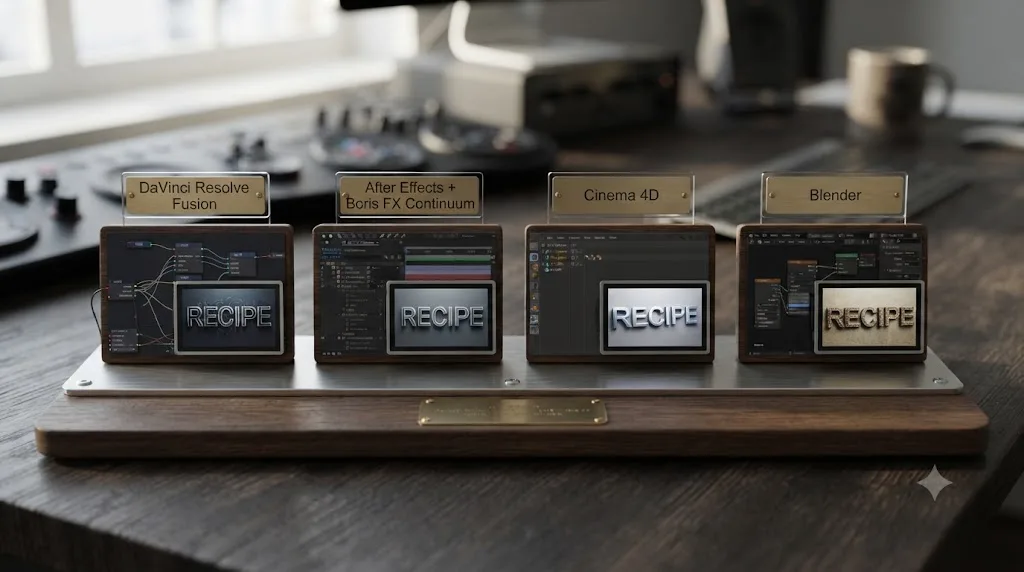
After Effects doesn't have a native equivalent to Text3D at all. Kevin P. McAuliffe, writing for ProVideoCoalition on the broader Fusion versus After Effects question, frames Fusion around exactly the kind of single-shot compositing work 3D text sits inside of: "Ideally, Fusion is a single shot compositor. You have a shot that you'd like to do some VFX work to, whether it's Chromakey, or Motion Tracking, Roto, etc, that's where Fusion really shines" (ProVideoCoalition). After Effects users generally reach for a third-party plugin like Boris FX's Continuum, whose BCC Extruded Text tool covers similar ground, extrusion depth, bevel style, up to three lights, and deformation options like bend, twist, and shatter, but that's a paid plugin on top of an already-paid subscription, not a built-in feature.
Cinema 4D and Blender both offer far deeper, more flexible 3D text and typography tools than Fusion's Text3D node, with dedicated typography-focused workflows, more advanced material and rendering engines, and a much larger library of tutorials specifically for 3D type design. Neither integrates as tightly into an edit-then-grade-then-deliver Resolve pipeline, though, so choosing them usually means round-tripping a rendered element back into Resolve rather than building the whole title inside your existing project.
| Tool | 3D text approach | Cost | Best for |
|---|---|---|---|
| Fusion Text3D | Native node, extrusion, bevel, four light types | Free, built into DaVinci Resolve | Titles built inside an existing Resolve edit and grade pipeline |
| After Effects + Boris FX Continuum (BCC Extruded Text) | Plugin-based extrusion with deformation presets | Continuum license on top of After Effects subscription | Editors already committed to an After Effects pipeline |
| Cinema 4D | Dedicated 3D typography tools, deep material and render control | Subscription, separate from Resolve | Standalone, highly polished 3D type design and animation |
| Blender | Free, full 3D suite with text extrusion and physics-based effects | Free | Editors comfortable learning a second full 3D application |
Fusion's Text3D node won't out-render a dedicated 3D application built around typography, but it will build a genuinely dimensional, lit, shadow-casting title without ever leaving the program you're already editing and grading in. For most YouTube creators, corporate video editors, and freelancers building a title sequence inside a project that's already in Resolve, that integration wins over a marginally deeper feature set that requires exporting, rendering elsewhere, and reimporting.
Worked example: building an animated 3D title card from scratch
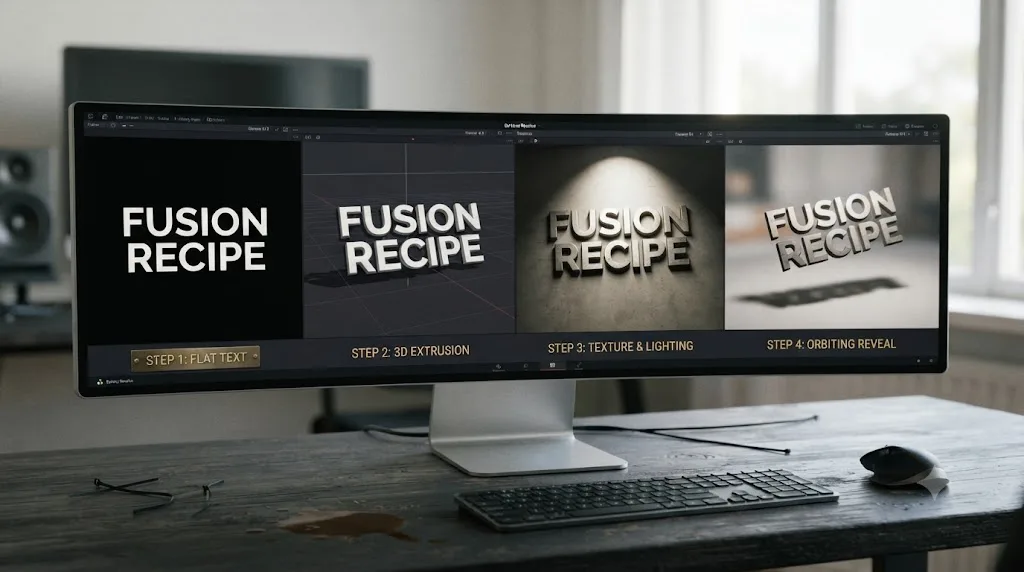
Here's the full recipe end to end, on an actual build, the way it plays out once you already understand every piece covered above.
A YouTuber needs an animated channel intro title, extruded, beveled, lit with a visible shadow, and revealed with a Write On animation as the camera slightly orbits into frame.
- Add a Text3D node and type the channel name in the Text tab, setting font and base color.
- Set Extrusion Depth to a moderate value, enough to read clearly as dimensional at the intended camera distance without letters merging where tracking is tight.
- Add Bevel Depth and Bevel Width, keeping Smoothing Angle high enough that the bevel reads as a smooth curve rather than faceted segments.
- Insert a Replace Material 3D node after Text3D, feeding it a Blinn material with a warm-toned Specular Color, so the bevel edge catches a believable highlight once lit.
- Add a Camera3D node, using a Film Gate preset close to a real camera's field of view rather than an arbitrary default, and keyframe a slow orbit move that starts slightly off-axis and settles into a straight-on hero angle by the end of the reveal.
- Add a Spot Light as the key, angled to throw a soft-edged shadow behind the letters, and a low-intensity Directional Light from the opposite side as fill.
- Merge Text3D (through Replace Material 3D), Camera3D, and both lights into a single Merge3D node.
- Connect Merge3D into a Renderer3D node, confirm Enable Lighting is on, and check the scene isn't black or flat before proceeding.
- Set the Write On range in the Text3D Inspector and keyframe it across the first second or two of the animation, so letters reveal progressively rather than popping in all at once.
- Enable Shadows on both the Spot Light and the Renderer3D node, and switch the render engine to Software for the final render, since the shadow needs to read as soft rather than the hard edge OpenGL alone produces.
- Render a second pass in OpenGL with Enable Accumulation Effects on, if the shot also needs a shallow depth-of-field pull as the camera settles into its final position, then combine the soft-shadow Software pass with the OpenGL depth-of-field pass in a downstream 2D comp.
Total build time on a title like this, once you already know the node chain, runs somewhere around thirty to forty-five minutes for someone comfortable with Fusion, most of it spent keyframing the camera orbit and Write On reveal to feel intentional rather than mechanical, since the underlying node setup itself only takes a few minutes.
If you're mid-build on your own channel intro right now, staring at a Text3D node that still looks flat or a shadow that won't show up, that's exactly the kind of moment TryUncle can point at the specific node or checkbox on your own screen while you finish the build.
Why does your 3D text scene get sluggish to preview or slow to render?
None of the controls in this guide are expensive on their own, but stack enough of them and a comp that felt instant when you typed your first word can start dragging by the time you've added a bevel, two lights, a textured ground plane, and a depth-of-field pass.
Extrusion and bevel geometry is the first place to look. Per Blackmagic's manual, Text3D "operates as a self-contained 3D scene where each character functions as an independent object," which means every letter carries its own extruded, beveled geometry rather than sharing one mesh across the whole string. A short title with a modest bevel is nothing to worry about, but a paragraph of Frame-layout body text with a deep Bevel Depth and a tight Smoothing Angle multiplies that per-character cost across every letter you've typed, and that's before a Circle or Path layout adds curvature on top.
Render engine choice is the second lever, and it's one this guide has already touched on for depth of field and soft shadows: OpenGL is GPU-accelerated and built for fast interactive feedback while you're still positioning cameras and lights, while the Software engine leans on your CPU instead and is generally the slower of the two per frame, which is exactly why it's reserved for the soft-shadow detail OpenGL can't produce. Work in OpenGL, switch to Software only for the render that actually needs its shadow quality.
Enable Accumulation Effects is the third, and it's easy to leave on by accident. Once it's checked to expose the Depth of Field controls covered earlier in this guide, every frame in that scene renders through the accumulation process whether or not you're actively judging the blur, which is a cost worth paying for a final render and not worth paying while you're still nudging a light's Cone Angle. Leave it off during setup and switch it on once, right before you commit to your final pass.
| Slowdown source | What's actually happening | Fix while you're still building |
|---|---|---|
| Long or paragraph-length 3D text | Every character carries its own full extrusion and bevel geometry | Trim Frame-layout text or reduce Bevel Depth on non-hero text |
| Switching to Software renderer too early | CPU-based rendering, slower per frame than OpenGL | Stay in OpenGL until the shot needs Software's soft shadows |
| Enable Accumulation Effects left on | Every frame renders through the depth-of-field accumulation pass | Leave it off while positioning, enable only for the final render |
| High Smoothing Angle plus a tight bevel on many letters | More geometry generated per character to render a smooth curve | Lower Smoothing Angle or Bevel Depth on text that won't be seen up close |
None of this changes what any single control does. It changes when you should be turning it on, and "not yet" is usually the right answer until the shot is close enough to final that you actually need to see the cost it adds.
Do you need DaVinci Resolve Studio for any of this?
No. Text3D, Camera3D, all four light types, Merge3D, Renderer3D, both render engines, and Replace Material 3D all ship in DaVinci Resolve's free version, with no separate feature gate on the 3D text workflow this guide covers. Per Blackmagic's own product comparison and pricing page, Studio adds Neural Engine AI tools like Magic Mask and Speed Warp, extra ResolveFX, HDR grading, and higher frame rate and resolution ceilings, for a one-time $295 perpetual license with no subscription. None of that overlaps with building extruded, lit 3D text, so if you've been holding off assuming this needed a paid upgrade, it doesn't.
DaVinci Resolve 21 did add its own genuinely new Fusion capability worth knowing about as a freshness check on your version, separate from anything covered above: Krokodove, an AI-assisted tool inside Fusion introduced with the Resolve 21 release, covered in Blackmagic's own release materials (CineD). It's unrelated to the Text3D node chain in this guide, but it's a sign of where Blackmagic is investing inside Fusion generally, and worth a look if AI-assisted rotoscoping or masking is part of your broader pipeline. The current point release as of this writing is 21.0.3, which per CineD's coverage added configurable keyframe ease actions and a handful of stability fixes across editing, Fusion, and scripting, none of which change how Text3D, Merge3D, or Renderer3D behave.
Is there a faster way to learn this than trial and error?
Fusion's 3D text workflow asks you to internalize a specific, unfamiliar chain: a node that only shows results once it's merged and rendered, a bevel that does nothing without extrusion first, two Enable checkboxes in two different places, and a render engine choice that trades depth of field against soft shadows. None of that is obvious from clicking around the interface alone, which is exactly why "davinci resolve fusion 3d text tutorial" is something people search rather than something they stumble into.
The honest starting point for learning Fusion generally is still Blackmagic's own free training, which covers the 3D workspace and node graph fundamentals this guide assumes, alongside established YouTube educators like Casey Faris, whose Fusion tutorials have helped a large share of editors currently building in these tools, and community-run series like PeeJ's Mograph Monday, which covers specific motion graphics techniques inside Fusion for editors who already know the interface. None of that is something a newer resource should pretend doesn't exist, and skipping past it wouldn't give you the full picture.
TryUncle is the on-screen assistant for DaVinci Resolve on macOS, ask in plain words and Uncle points at the exact control on your screen. Where the tutorial ecosystem above tends to fall short isn't the quality of the explanation, it's the gap between someone else's node graph in a video and the specific Text3D chain sitting on your own screen right now. If you're staring at your own comp wondering why your text still renders black, Uncle looks at your actual project and points at your specific Renderer3D node's Enable Lighting checkbox, instead of asking you to reconcile a tutorial's node layout with whatever you're currently looking at.
It's worth naming where TryUncle sits relative to other AI tools built around Resolve, since the category has real alternatives worth covering honestly. Sottocut, PremiereCopilot, heyeddie.ai, and cutagent.ai each take a different approach, generally automating parts of an edit or answering questions through a chat interface rather than watching your live screen. Uncle's job is narrower by design. It doesn't build your Merge3D node tree or pick your bevel settings for you. It watches your actual Resolve window and points at where the control you need actually lives, in the moment you're stuck on it, a different job than automation and a different job than a chatbot answering from a general memory of how Resolve "usually" looks rather than what your specific project actually shows. TryUncle is a paid macOS app, currently in founder pricing at $29.99 a month for the first 100 seats, cancel anytime, so check TryUncle directly for the current rate. It's macOS only, so if you're on Windows or Linux, the free training and community resources named above remain your primary path.
The verdict
DaVinci Resolve's Fusion page gives you a genuinely capable, entirely free 3D text tool: a dedicated Text3D node with real extrusion and beveling, four light types, a Merge3D node that assembles everything into one working scene, and a Renderer3D node with two render engines each suited to a different final look. Almost every confusing symptom this guide covers traces back to one of a small number of specific, learnable rules rather than a genuinely broken tool.
Build in the order that actually matters. Get Text3D typed and extruded first, confirm the bevel responds once extrusion exists, then add your camera and light before worrying about materials or animation. Merge everything into one Merge3D node before you go looking for why nothing's rendering, and load Renderer3D's output in the viewer, not Text3D's. Only after all of that checks out should you start layering in Replace Material 3D textures, a ground plane for a real shadow, sub-transform animation, or a depth-of-field camera move, because none of that fine detail matters on a scene that was never assembled correctly in the first place.
Flat text is one Extrusion Depth slider away from having real thickness, and real thickness is one Merge3D and Renderer3D chain away from actually looking lit. That's the entire gap this guide exists to close.
Frequently asked questions
- How do I make 3D text in DaVinci Resolve Fusion?
- Add a Text3D node and type your text in the Inspector. Raise Extrusion Depth above 0 to give the letters thickness, then add Bevel Depth and Bevel Width for rounded edges. Merge the Text3D node with a Camera3D and at least one Light node into a Merge3D node, then connect that Merge3D into a Renderer3D node to see the lit, extruded result.
- Why is my Text3D node showing nothing in the viewer?
- That's expected if you're viewing the Text3D node by itself. A Merge3D node needs to combine your text with a camera and a light before Renderer3D can turn it into a visible 2D image. Load the Renderer3D node's output in the viewer instead of the Text3D node directly.
- Why does my extruded 3D text render solid black?
- Almost always because Renderer3D's Enable Lighting checkbox is on but no light has been merged into the same scene as the text yet. Add an Ambient, Directional, Point, or Spot Light node and connect it into the same Merge3D node as your Text3D and camera.
- Do I need DaVinci Resolve Studio for 3D text in Fusion?
- No. Text3D, Merge3D, Renderer3D, every light type, and Replace Material 3D all ship in DaVinci Resolve's free version. Studio adds Neural Engine AI tools, extra ResolveFX, and higher frame rate and resolution ceilings, none of which gate Fusion's 3D text workflow.
- Can I add a texture or image to my 3D text?
- Yes, but not directly on the Text3D node itself, since it has a built-in material with no material input. Add a Replace Material 3D node after the Text3D node, feed it an image or a material node, and it swaps the text's default shading for whatever material you connect.
- Why does network rendering fail on a project with 3D text?
- Per Blackmagic's Fusion manual, every render machine on the network needs the exact fonts your Text3D nodes use installed locally, because Fusion doesn't distribute fonts to render slaves. A missing font on even one machine causes that machine's frames to fail or fall back to a substitute font.
- Can I animate 3D text along a circle or custom path in Fusion?
- Yes. Text3D's Layout tab includes four modes: Point, Frame, Circle, and Path. Circle wraps your letters around a circumference, and Path lets you draw or import a spline for the text to follow, both fully keyframeable for animated reveals or moving titles.
- Is there an AI tool that helps you build 3D text in Fusion faster?
- Yes. TryUncle is the on-screen assistant for DaVinci Resolve on macOS, ask in plain words and Uncle points at the exact control on your screen, including which node in your own Text3D chain needs fixing. It's a paid subscription, currently in founder pricing at $29.99 a month for the first 100 seats, and it works on your actual open project instead of a demo file.
Sources
- Fusion Reference Manual 18.6: Text 3D [3Txt] (Blackmagic Design, mirrored)
- DaVinci Resolve 18 Manual: Using Text3D (Blackmagic Design, mirrored)
- DaVinci Resolve 18 Manual: Text+ [Txt+] (Blackmagic Design, mirrored)
- DaVinci Resolve 18 Manual: Replace Material 3D [3Rpl] (Blackmagic Design, mirrored)
- Fusion Reference Manual 18.6: Merge 3D [3Mg] (Blackmagic Design, mirrored)
- Fusion Reference Manual 18.6: Renderer 3D [3Rn] (Blackmagic Design, mirrored)
- Fusion Reference Manual 18.6: Lighting Types Explained (Blackmagic Design, mirrored)
- Fusion Reference Manual 18.6: 3D Nodes overview (Blackmagic Design, mirrored)
- Fusion Reference Manual 18.6: Camera 3D [3Cm] (Blackmagic Design, mirrored)
- Fusion Reference Manual 18.6: Plane of Focus and Depth of Field (Blackmagic Design, mirrored)
- Text 3D Node, by Justin Robinson (JayAreTV)
- Text+ Node, by Justin Robinson (JayAreTV)
- Replace Material 3D Node, by Justin Robinson (JayAreTV)
- Shape 3D Node, by Justin Robinson (JayAreTV)
- Intro to Using Textures on 3D Objects in Fusion, by Gedaly Guberek (DVResolve.com)
- How to Make 3D Text in DaVinci Resolve, by Marco Sebastiano Alessi (Boris FX)
- After Effects vs Fusion - Which one's right for the Resolve Editor?, by Kevin P. McAuliffe (ProVideoCoalition)
- DaVinci Resolve product comparison and pricing (Blackmagic Design)
- DaVinci Resolve 21.0.3 Released, Keyframe Ease Actions and Fixes (CineD)
- DaVinci Resolve 21 Final Release, New Photo Page, Expanded AI Toolset, Krokodove in Fusion (CineD)
- TryUncle
Learn by doing, not watching
Learn Resolve inside Resolve.
TryUncle watches your screen and points at the exact control when you ask. No tabs, no timestamps, no rewatching tutorials.
Download for MacKeep reading
 GuidesJul 25, 202647 min read
DaVinci Resolve Fusion Light Node Tutorial: The Full Guide
How to use DaVinci Resolve Fusion's Light node: Ambient, Directional, Point, and Spot lights, shadows, materials, and why your 3D scene turns black.
 FixesJul 10, 202627 min read
Fusion Merge Node Backwards? Fix Swapped Background/Foreground
Composite looks upside down in DaVinci Resolve Fusion? A Merge node's Background and Foreground inputs got swapped. Here's the exact fix, every time.
 GuidesJul 9, 202634 min read
How to Keyframe Effects in DaVinci Resolve: The Complete Guide
Every way to keyframe effects in DaVinci Resolve: Inspector diamonds, the Keyframe Editor, ease curves, Fusion splines, and what changed in Resolve 21.