
Learn / DaVinci Resolveupdated for DaVinci Resolve 21.1 (October 2026)
DaVinci Resolve Export Alpha Channel ProRes 4444: The 2026 Guide
Quick answer
To export an alpha channel from DaVinci Resolve as ProRes 4444, open Deliver, choose a QuickTime export and Apple ProRes 4444, then enable Export Alpha. Export a short test and place it over a contrasting background in another app to confirm transparency. ProRes 422 does not carry alpha.

I use ProRes 4444 when a video handoff needs both image data and transparency, not just a picture that happens to look like it has a transparent background. The distinction matters: a black viewer can mean the alpha is absent, hidden, or simply not being displayed against a background. As of October 2026, DaVinci Resolve 21.1 is listed in Blackmagic Design’s support materials; the settings below focus on the export logic that matters across Resolve versions, with the current manual as the place to check any changed control names.

How do I export an alpha channel as ProRes 4444 in DaVinci Resolve?
To export alpha as ProRes 4444, choose a compatible QuickTime render, select Apple ProRes 4444 or ProRes 4444 XQ, and turn on Export Alpha in the Deliver page’s video settings. The timeline must contain transparency before Resolve can write meaningful transparent pixels.
- Open the project and inspect the timeline section you plan to render. Make sure the foreground graphic, keyed subject, or Fusion composition is visible and that the area meant to be transparent is not covered by an opaque clip or background generator.
- Open the Deliver page and select a custom render setup. Choose a QuickTime file format if that is the handoff requested by your receiving application.
- In the video codec controls, choose Apple ProRes 4444 or Apple ProRes 4444 XQ. Do not choose ProRes 422, 422 HQ, 422 LT, or Proxy if the delivery requires an alpha channel. Apple identifies ProRes 4444 and ProRes 4444 XQ as the ProRes codecs that support alpha; its ProRes overview describes a mathematically lossless alpha channel of up to 16 bits. Apple’s ProRes overview
- Find and enable Export Alpha. Blackmagic’s Resolve 17 feature guide explains that the option appears when the selected codec supports alpha and describes choosing a codec first, then enabling the export checkbox. The exact control placement can differ between releases, so use the current manual if the panel does not match your screen. Blackmagic’s alpha export instructions
- Choose the alpha mode expected by the target application. If you do not know whether the destination expects premultiplied or straight alpha, do a short test in both modes instead of guessing on a full-length export.
- Set the render range, filename, resolution, frame rate, and audio options for the actual handoff. These are separate from the alpha setting. A correct alpha export can still be the wrong deliverable if it has the wrong duration or frame rate.
- Add the job to the render queue and render a short range first. Import the resulting file into another application, place it over a contrasting background, and check both the interior transparency and the edges.
- Once the test behaves as expected, render the full delivery and inspect the final file again.
A ProRes 4444 codec choice makes alpha possible, but Export Alpha and actual timeline transparency make it useful.
A transparent deliverable is not a special kind of black background. It is image data plus a matte, or alpha channel, that tells a receiving application how much of each pixel should show. Apple defines an alpha value as the proportion of a foreground pixel blended with a corresponding background pixel. That is why a file can contain a black image and still have an alpha channel, or appear black in a player that does not display transparency in an obvious way. Apple’s alpha-channel explanation
For a title over a background, for example, the title can be visible while the pixels around the letters are transparent. For a keyed subject, the foreground can remain visible while the keyed-out background has zero opacity. For a soft shadow, some pixels may be partly transparent rather than fully visible or fully invisible. A clean export preserves those varying values, not merely a hard on/off cutout.
The procedure above assumes that the destination actually wants ProRes 4444 in a QuickTime file. A post-production house, broadcaster, compositor, or client may specify a different wrapper, codec flavor, alpha interpretation, color space, or frame range. Follow the delivery spec if one exists. The article’s settings are a starting point for a common graphics handoff, not a replacement for the recipient’s requirements.
TryUncle is the on-screen assistant for DaVinci Resolve on Mac and Windows - ask in plain words and Uncle points at the exact control on your screen. If a Resolve panel has shifted between versions and you want guidance while working in your own project, TryUncle can guide you through the current screen.
Why is Export Alpha missing in DaVinci Resolve?
Export Alpha is missing when the current render combination does not expose alpha export, or when the export settings are set to a mode that does not offer the option. Select a compatible codec and container first, then check the video settings again.
The first check is the codec. Blackmagic’s alpha export guide says the checkbox appears when the chosen codec supports alpha and does not appear when it does not. For the ProRes route, that means choosing ProRes 4444 or 4444 XQ, not a ProRes 422 flavor. Blackmagic’s Resolve alpha export guide
The second check is the container and operating system. Blackmagic’s supported-codec document lists supported formats by platform. Its DaVinci Resolve 20 table shows ProRes 4444 under alpha exports for QuickTime and lists different format entries across macOS, Windows, and Rocky Linux. That table is version-specific, so do not assume that every version and platform exposes identical combinations. Check the latest codec list linked from Blackmagic’s support center for the Resolve build installed on your machine. Resolve 20 codec list and Blackmagic Support Center
The third check is render mode. Blackmagic’s Resolve 17 guide specifically documents alpha rendering in Single Clip mode and says to select the mode, select an alpha-capable codec, then enable Export Alpha. If you are rendering Individual Clips or using a specialized preset, verify what your version exposes rather than assuming the checkbox is in the same place. Presets can set several choices at once, which makes it easy to overlook the one that hides or changes the relevant control.
A practical diagnostic sequence:
- Switch to a custom render preset so you can see the settings rather than relying on an unfamiliar preset.
- Confirm the file format or wrapper.
- Choose ProRes 4444 or ProRes 4444 XQ.
- Re-open the Video settings and look for Export Alpha.
- If it is still missing, check the render mode and the supported-codec list for the installed Resolve version and operating system.
- If you are using a custom or saved preset, start with a new custom setup rather than trying to debug a preset with unknown settings.
Do not treat the checkbox as a universal alpha switch that can be forced on for any codec. The codec has to be able to carry the channel. A format may export a perfectly valid video while omitting transparency because its codec is not designed for alpha. Conversely, a file extension by itself does not prove whether the channel exists. A QuickTime wrapper can hold different codecs, and the codec choice determines more than the filename ending.
If you are on a version whose panels differ from the instructions, use the manual for that release. Blackmagic’s support page currently lists the DaVinci Resolve 21.1 manual among its materials, and the manual is the best place to confirm whether a label or control moved in your build. Blackmagic Design Support
If you cannot find the checkbox after selecting the right codec, pause before rendering. Confirm the precise Resolve version, operating system, selected container, selected codec, and render mode. Those details narrow the problem far more than repeatedly clicking through unrelated export presets.

Does ProRes 4444 automatically make a DaVinci Resolve export transparent?
No. ProRes 4444 can store alpha, but it does not invent transparency for an opaque timeline. The codec, the timeline’s alpha content, and the Export Alpha setting all need to line up.
This is the most common conceptual mix-up. ProRes 4444 is a codec with the capacity to encode an optional alpha channel. Optional matters. A ProRes 4444 file may contain image data without useful transparency if the export did not include alpha, or if the timeline content was opaque before the render. Seeing “ProRes 4444” in a file’s properties is not enough to verify that the intended transparent areas survived.
Think of the timeline as the source of the matte. If a full-frame background clip sits underneath a logo, the composite is already opaque across the frame. The logo may have been created with transparent space around its letters, but once it is combined over a full-frame background, the final timeline no longer has transparent pixels there. Exporting that finished composite with an alpha-capable codec does not remove the background.
The same applies to a Fusion composition. A transparent-looking viewer does not necessarily mean the output connected to the final node carries the alpha the way you expect. The composition may have a background tool set to opaque, an output node receiving a solid image, or a merge that combines the foreground with an unintended background. Check the image that reaches the final output, then check the timeline composite.
A reliable pre-export check is to create a temporary contrasting background beneath the graphic in the timeline. Inspect the edges and transparency while the test background is present. Then disable or remove that background for the actual transparent render. This test does not certify the export file, but it catches a basic source-composite mistake before you spend time rendering.
When the render is finished, perform a second test outside the original timeline. Import the file into a new timeline or a separate application and place a vivid color plate beneath it. Look at both the center of the subject and the outer region. If the supposedly transparent area remains black, white, or another solid color, inspect the alpha channel and the destination’s interpretation before re-exporting.
A useful three-state mental model:
| What you see | What it may mean | What to check |
|---|---|---|
| Subject visible, surrounding region shows the background beneath | The alpha is likely being interpreted as transparency | Check edges, frame range, and alpha mode |
| Subject visible against black in a simple player | The player may be showing a black canvas, or the export may lack alpha | Import into an app with a known background and inspect alpha |
| Entire frame is opaque, including the region meant to be clear | The timeline may contain an opaque layer or the alpha was not exported | Check timeline layers, Export Alpha, and file metadata |
| Subject disappears or edges look inverted | The destination may interpret alpha differently or the matte may be reversed | Test straight and premultiplied interpretations; inspect the source matte |
Do not judge transparency from one preview window alone. A viewer’s checkerboard, black canvas, or background color is a display convention. It is not necessarily evidence about the encoded channel. Verify with a compositing test.

Which should I choose, ProRes 4444 or ProRes 4444 XQ?
Choose ProRes 4444 for most transparent graphics and compositing handoffs; choose 4444 XQ when the recipient specifically requests it or the image data needs the higher-data-rate XQ variant. Both formats support alpha, so XQ is not required just to make the background transparent.
Apple describes standard ProRes 4444 as a high-quality format for 4:4:4:4 sources, motion graphics, and composites, with a mathematically lossless alpha channel up to 16 bits. Apple describes 4444 XQ as a higher-quality, higher-data-rate option intended for demanding 4:4:4:4 sources, including high-dynamic-range imagery. Both support up to 12 bits per image channel and up to 16 bits for alpha according to Apple’s ProRes information. Apple’s codec descriptions
The decision is not “which one has transparency?” Both do. The decision is whether the image portion of the deliverable benefits from XQ, whether the recipient requires it, and whether the resulting data rate is acceptable for the handoff. If a client’s delivery spec says “ProRes 4444,” do not silently substitute XQ on the assumption that higher is always better. Ask whether XQ is acceptable.
Apple’s target-rate figures give a reference point, not a guaranteed file size for your project. For 1920 × 1080 at 29.97 fps, Apple lists target data rates of approximately 330 Mbps for ProRes 4444 and approximately 500 Mbps for ProRes 4444 XQ. Those targets can change with resolution, frame rate, content, and alpha data. The actual export may be larger or smaller. Apple ProRes target rates
| Choice | Alpha support | When it fits | Trade-off |
|---|---|---|---|
| ProRes 4444 | Yes | Transparent titles, graphics, keyed elements, and common compositing handoffs | Large relative to delivery codecs, though typically less data than XQ |
| ProRes 4444 XQ | Yes | Recipient requests it, or high-end image data and HDR work justify the larger stream | Higher target data rate and larger storage/transfers |
| ProRes 422 HQ | No alpha channel in Apple’s codec family | Opaque high-quality 4:2:2 video when the recipient does not need transparency | It cannot replace 4444 for a transparent handoff |
| PNG image sequence | Still-image alpha support | A frame-by-frame graphics handoff when the recipient accepts an image sequence | Many separate files, so sequence naming and frame numbering matter |
| OpenEXR sequence | Suitable for high-end compositing workflows when the receiving pipeline supports it | VFX pipelines requiring image-sequence workflows and specific image properties | More pipeline-specific; confirm channel and color requirements with the recipient |
The ProRes 4444 versus XQ choice is separate from alpha mode. A correct codec can carry the channel and still produce an edge that looks wrong in the destination if the matte interpretation differs. Likewise, an XQ export does not fix a missing alpha channel.
A short test is more informative than a speculative quality upgrade. Render a few seconds with the exact project, frame rate, resolution, alpha mode, and destination application. Compare the result against the recipient’s requirements and use the requested format.
ProRes 4444 XQ adds data-rate headroom, not a guarantee of better transparency.
What does “4:4:4:4” mean, and does it guarantee transparency?
The four digits describe full-resolution color sampling plus an optional alpha component in the supported ProRes 4444 formats; they do not guarantee that every file contains a useful alpha channel. Apple explains that the final “4” represents the optional A value alongside the color components in an RGBA or Y′CbCrA image.
The notation is easy to overread. A file named or labeled “4444” is not proof that the export has non-opaque pixels. The codec can carry the extra channel, but the channel remains optional. The export must include it, and the source timeline must provide meaningful alpha values.
The first three fours refer to the color sampling arrangement; the additional channel is alpha. Alpha does not mean a fourth visible color. It represents how much of the foreground pixel contributes when composited over a background. Apple notes that alpha values are numerical compositing data, unlike the RGB or Y′CbCr image values intended for viewing. Apple’s ProRes alpha section
That distinction explains why a file can have four channels but still look wrong. The alpha may be fully opaque throughout. It may be inverted. It may be interpreted with the wrong association to the color channels. Or the receiving application may simply be displaying the file against a black canvas.
For a title card with transparent margins, an ideal alpha might be zero in the empty region, one in the solid letters, and fractional around antialiased edges or shadows. Those edge values are what make the title blend smoothly rather than look like a jagged cutout. A test that checks only the center of a large logo can miss a bad matte at the boundary.
When someone requests “4:4:4:4,” ask what they actually need: an alpha channel, full chroma sampling, a particular codec flavor, or all of those. If they only need an opaque master, ProRes 4444 may be unnecessary. If they need transparent motion graphics, the alpha capability is the key, but the exact delivery format still needs confirmation.
The distinction between RGB quality and alpha fidelity also matters. Apple describes ProRes 4444’s color encoding as visually lossless, while its alpha values are encoded mathematically lossless. That does not mean the whole video image is mathematically lossless. It means the transparency channel is preserved exactly by the codec under Apple’s description, while the picture channels use a visually oriented compression scheme. Apple ProRes white paper
The “fourth four” means alpha can be carried, not that every exported frame is transparent.
Should I use straight or premultiplied alpha?
Use the alpha interpretation specified by the receiving application or delivery requirements; if none is specified, render a short test and compare both interpretations over light and dark backgrounds. The wrong interpretation often shows up as a dark or bright fringe around semi-transparent edges.
Straight alpha stores color values separately from the alpha values. Premultiplied alpha stores color values already multiplied by alpha. The two methods can represent the same visible composite, but a receiving application has to interpret the relationship correctly. If it assumes the wrong mode, edge pixels can become too dark, too bright, or contaminated by the background color used during the source operation.
Blackmagic’s older Resolve alpha export guide says premultiplied is the default alpha mode when the selected codec supports a mode choice. That is useful historical guidance, not a promise that every current version or delivery preset will present the same defaults. Check the current controls and the recipient’s requested convention. Blackmagic’s alpha export guide
The word “default” is not the same as “correct for every pipeline.” A compositing application, motion-graphics package, game engine, or broadcast workflow may expect a particular alpha association. If the recipient has a written spec, follow it. If they do not, ask before delivery when the file is important.
A useful edge test includes both dark and light backgrounds. A dark fringe can blend into a black test plate and go unnoticed. A light fringe can disappear on white. Use one saturated color as well, because a green or magenta matte leak is easy to spot against a neutral background. Inspect the edge at normal size and at a closer magnification, but do not judge the whole render only at extreme zoom.
A safe test procedure:
- Render a short section with the intended codec and Export Alpha enabled.
- Import the file into the application that will receive it.
- Place a dark background behind it and inspect the edge.
- Replace that with a bright background and look for halos.
- If the edge looks wrong, check the receiving app’s alpha interpretation before changing the render.
- If necessary, make a second test with the alternate alpha mode and compare them in the same destination.
Do not “fix” every edge by changing the alpha mode. A rough key, spill, bad mask, or compositing error can look like an interpretation problem. Compare the source matte in Resolve with the rendered result. If the edge is already contaminated in the source composite, the codec cannot reconstruct a cleaner matte.
A drop shadow is a useful diagnostic. A soft shadow contains a gradual alpha transition. If the shadow disappears, becomes a solid rectangle, or develops an unexpected dark fringe after import, the channel or its interpretation may not match the destination. The same goes for glows, blur, antialiased text, and defocused edges.
The export should preserve the visual intent of the source, not force a particular alpha convention regardless of where the file goes. For a reusable title library, document which interpretation you rendered and keep a test project or sample file that the next editor can inspect.

How do I make sure the timeline itself is transparent?
Make sure the portion of the timeline outside the graphic or subject has no opaque video, generator, or composite covering it. Then confirm that the exported file retains the transparency by testing it in a different app over a visible background.
Start with the layer stack, not the Deliver page. In a typical editor timeline, a lower full-frame clip makes the composite opaque even if the title or keyed foreground above it has transparent areas. If the goal is a standalone title with transparent margins, disable or remove the background footage for the render. If the goal is a keyed subject, verify that the key or matte removes the background rather than merely darkening it.
For a Fusion composition, follow the image chain to its output. Look at the final composite that reaches the output node. A background tool can create a solid image, and a merge can combine layers in ways that produce a full-frame result. An empty-looking viewer is not a substitute for checking the output’s alpha. Inspect the actual composition and the output connection.
There are two distinct use cases:
| Use case | What should be transparent? | What should remain visible? |
|---|---|---|
| Animated title overlay | Areas around and between letters, plus any intended soft shadows | Text, outline, glow, or other designed graphic elements |
| Keyed person or object | The keyed-out area around the subject | The subject and any intentionally retained hair, motion blur, or translucent detail |
| Logo animation | Empty areas outside the logo and animation | Logo, animation elements, and designed antialiasing |
| Shadow-only pass | Most of the frame, including the object if the handoff requests only the shadow | The shadow’s varying opacity |
| Matte or mask deliverable | Areas defined by the agreed matte convention | The desired white/black or grayscale matte signal |
A common mistake is leaving a background in the project because it makes the composite easier to preview. That is fine for editing, but the background must not be included in the final transparent render if the destination expects to place the graphic over its own plate. A temporary background can help you judge color and edges. Toggle it off for export, then verify the resulting file.
A second mistake is confusing “transparent viewer background” with “transparent export.” Viewers can display transparency using checkerboard patterns, black, a user-selected color, or another convention. The export’s alpha channel is independent of how the preview canvas is styled. Use a separate compositing test to establish what the file contains.
A third mistake is assuming an alpha-capable source file automatically produces an alpha-capable final composite. An imported graphic with alpha can be placed over footage, but once the timeline combines it with an opaque background clip, the output composite has no transparent regions. Resolve can preserve alpha from supported media in suitable workflows, but the final timeline’s content still determines what the render can represent.
If you are producing multiple deliverables from the same timeline, save a version or duplicate timeline specifically for the transparent pass. That reduces the chance that you accidentally include a background, a slate, or a client preview layer. Name the timeline so the intended output is unmistakable. Keep the opaque full-frame master separate from the transparent overlay.
Before you render, scrub through the entire intended range. Confirm that no full-frame clip appears unexpectedly, that the graphic is not hidden for a section, and that the first and last frames have the intended alpha. If an animation fades in from transparent, inspect the opening frames. If the logo exits at the end, inspect the closing frames too.

Why does my ProRes 4444 export look black instead of transparent?
A black-looking file preview does not prove that alpha is missing; test the file over a colored background in an application that can composite transparency. If the black area stays opaque there, inspect both the export setting and the timeline composite.
Some media players show a video against black and provide no visible checkerboard or background control. In that situation, transparent pixels may be visually indistinguishable from black pixels. A correct alpha channel can therefore appear as a black rectangle in a basic viewer. The test is not to guess from that preview. Import the file into a known compositing environment and put a bright solid layer beneath it.
If the background remains black over the colored plate, check the following in order:
- Confirm that the clip is ProRes 4444 or 4444 XQ rather than a 422 flavor.
- Confirm Export Alpha was enabled for the render.
- Confirm the timeline had transparent regions before rendering.
- Confirm that the receiving application supports and reads alpha in the file you delivered.
- Check whether the receiving application treats the alpha as straight or premultiplied.
- Inspect a known alpha channel or channel view if the destination provides one.
If the transparency looks correct in one app but wrong in another, the issue may be destination interpretation or decoding rather than the Resolve render. If the file is opaque in every app, revisit the render settings and the source timeline. Keep the original project and short test so you can compare without changing several variables at once.
A simple A/B test helps isolate the cause. Import the file into a clean test project, add a saturated background below it, and check the same frame in more than one application if practical. Do not change codec, alpha mode, color management, and timeline layers simultaneously. Change one thing, render the same short range, and compare.
Also check whether the receiving application has a clip attribute, interpret-footage setting, or channel switch that affects alpha. A file can contain the channel while the clip is interpreted as opaque. The exact control varies by application, so consult that app’s documentation rather than assuming the Resolve export failed.
Black edges are a different symptom from a solid black background. A black halo usually points toward premultiplication, matte contamination, or the way a partially transparent edge was created or interpreted. Test a bright background, inspect the original key, and try the alternate interpretation only as a diagnostic. Avoid adding arbitrary edge treatments until you know where the fringe originates.
A black preview is a display clue, not a definitive alpha-channel test.
Can DaVinci Resolve export ProRes 4444 with alpha on Windows?
Blackmagic’s DaVinci Resolve 20 supported-codec list includes ProRes 4444 export and alpha-export entries for Windows, but support varies by operating system, Resolve release, file container, and codec combination. Check the current supported-codec document for your installed version rather than relying on a generic statement about Windows.
The platform detail matters because codec tables are not universal. In Blackmagic’s published Resolve 20 list, ProRes entries appear in separate platform sections. The Windows section lists ProRes formats and identifies alpha export support for specific formats. The same document also shows that codec support differs across operating systems and containers. This is a reason to consult the table, not assume that the Mac settings map one-to-one to Windows. Blackmagic Resolve 20 supported codecs
For Resolve 21.1, check Blackmagic’s support center for the current manual and support notes available to your version. The support center lists current Resolve materials; use it to confirm current capabilities, especially if a job depends on a particular container or codec. Blackmagic Design Support Center
Do not infer export support from playback support. An application may decode a codec without encoding it, or may encode the codec without offering alpha in the specific container you selected. Blackmagic’s codec table separates decoding, encoding, and alpha export for precisely this reason. Confirm the relevant column for your platform and export format.
If ProRes alpha is unavailable in your version or setup, ask the recipient whether an alternative is acceptable. Blackmagic’s codec list marks additional formats with alpha export support, including formats such as DNxHR 444 in documented configurations. PNG and TIFF are also listed with alpha-capable output in supported image workflows. These alternatives are not interchangeable in every delivery pipeline: a movie file, a numbered image sequence, and an intermediate codec have different handling requirements. Verify the recipient accepts the alternative before changing the deliverable.
A practical Windows check:
- Record the exact Resolve version from the About screen.
- Open Blackmagic’s supported-codec document for that release.
- Find the Windows section rather than relying on a macOS table.
- Check the file extension, codec, encode availability, and alpha-export column.
- Set up a short test render and verify it in the destination app.
- If the requested format is not listed for your configuration, ask the recipient before substituting another codec.
A software update can change available formats, and platform support may change between releases. Do not promise a client that a particular combination will work because a different machine or Resolve version exposed the checkbox. Check the exact system that will produce the file.
This also applies when moving projects between Mac and Windows. A saved project can open on both systems, but render presets, codecs, installed components, and output paths may differ. Keep a written handoff note with the codec, container, alpha mode, frame size, frame rate, and expected destination. That note makes it easier to identify whether a difference is in the project, the export setup, or the receiving system.

Is ProRes 4444 better than PNG or OpenEXR for a transparent export?
ProRes 4444 is a practical choice when the recipient wants a single video file; PNG or OpenEXR sequences can be better when the pipeline explicitly requests frame-based imagery or particular image-channel handling. The right format is the one the receiving workflow accepts and interprets correctly.
A movie file is convenient to move, play, and place on a timeline as one asset. An image sequence stores each frame as a separate file. That can make a sequence easier to inspect or manage in some compositing pipelines, but it creates more files and requires reliable frame numbering. OpenEXR is common in visual-effects work where the pipeline calls for it; do not choose it just because it sounds more advanced.
Blackmagic’s supported-codec table lists alpha export for ProRes 4444 in specified configurations and lists PNG output with alpha in its image-format section. The table also lists TIFF RGBA. Those entries establish that these are possible output routes in the documented Resolve version, but they do not establish which one a particular client or application requires. Resolve supported formats
| Format | Container or file pattern | Common reason to choose it | Check before delivery |
|---|---|---|---|
| ProRes 4444 | A single movie file, commonly QuickTime | Animated overlays, titles, and graphics when the recipient asks for a video file | Alpha enabled, alpha interpretation, frame rate, dimensions, and codec flavor |
| ProRes 4444 XQ | A single movie file | Higher-data-rate ProRes 4444 workflow or explicit recipient request | Larger data rate, storage, and recipient compatibility |
| PNG | Numbered still-image sequence | Transparent graphics or sequences accepted by an editorial or compositing pipeline | Continuous frame numbering, color, dimensions, and frame range |
| TIFF RGBA | Numbered still-image sequence | A pipeline requesting TIFF and RGBA image output | Bit depth, compression, channel order, and sequence naming |
| OpenEXR | Numbered high-dynamic-range image sequence | VFX work when the receiving application and specification call for EXR | Required channels, bit depth, color space, compression, and metadata |
A sequence has an operational risk that a single movie file does not: missing, duplicated, or misnumbered frames can break the handoff. If you deliver a sequence, inspect the first and last filenames, confirm that numbering is continuous, and include the agreed frame range. Keep the folder name clear and avoid adding unrelated images to the sequence directory.
A movie file has its own risks. The recipient may not support the chosen codec on their operating system, may interpret alpha differently, or may require separate audio. Confirm codec and wrapper before export. A file ending in .mov is not a complete spec. Include the codec name and alpha expectation in the handoff message.
For a reusable title or logo animation, one ProRes file can be convenient. For a complex VFX plate with multiple image channels, an image sequence may be more appropriate if requested. For a client who simply needs a graphic overlaid on social video, a transparent video might be overkill; ask whether they want an alpha-capable movie, a still graphic, or a rendered composite over their background.
Choose ProRes 4444 if the receiving team requests a single transparent video file and confirms the codec. Choose PNG or OpenEXR only when the destination workflow supports and requests a sequence. If the specification is silent, send a short test file and ask the recipient to confirm transparency, edges, and playback before rendering the complete asset.
How do I test the file before sending it to a client?
Render a short representative section, import it into the intended destination, and place it over backgrounds that reveal both transparency and edge artifacts. A test render should use the same codec, frame rate, resolution, alpha mode, and render settings as the final file.
Do not test a different preset and assume the result proves the final configuration. The test should be representative of the delivery. Include a moment with soft edges, a shadow, a blur, or a fade if the asset contains those features. If the animation has a transparent opening or closing, include those frames too.
A compact verification checklist:
- The receiving application imports the file without a codec warning.
- The area intended to be transparent reveals the background beneath it.
- The visible subject remains present and correctly colored.
- Soft edges, shadows, glows, and motion blur look as expected.
- There is no unintended black, white, or colored fringe.
- The first and last frames match the agreed in and out points.
- The clip uses the requested frame rate, dimensions, and frame range.
- Audio is present only if the delivery requires audio.
- The filename and extension describe the delivered asset clearly.
- The recipient can open and use the file on their target system.
The check should happen in a separate timeline or destination project where possible. If you import the file back into the exact timeline used to create it, the original layers may mask problems. Put the rendered file over a clear, solid background and temporarily disable all other layers that could make the test ambiguous.
Look at the alpha edges at normal viewing size before zooming in. A fringe that appears only at extreme magnification may not be a practical issue, but a visible halo at normal size is worth investigating. Conversely, a checkerboard preview can make a perfectly normal soft edge look strange if you expect a hard boundary. Compare against a real background similar to the intended use.
If a client is waiting, send a small test file with a clear note: codec, alpha mode if known, dimensions, frame rate, and what you want them to verify. Ask them to confirm that it opens and composites correctly in their app. This is more effective than delivering a large master and discovering that the receiving pipeline expected a different alpha interpretation.
Keep a clean version of the render settings or record them in the project notes. If the export must be repeated, that record prevents you from recreating the setup by memory. Store the codec, container, alpha option, alpha mode, frame size, frame rate, render range, and destination name. Also note whether the test was accepted by the recipient.
For a multi-part delivery, use the same naming pattern and settings for each element unless the recipient specifies otherwise. A lower-third title, logo animation, and keyed subject may all use alpha, but their dimensions and frame ranges can differ. Make each file’s intended use obvious in its filename or delivery manifest.

What if the edges look wrong after export?
If the export has halos, hard edges, or a colored fringe, compare the source composite with the rendered file over the same background before changing the codec. The cause may be the source matte, the alpha interpretation, a background-colored edge, or the destination application.
Start by identifying the symptom. A solid rectangle points to missing or ignored transparency. A dark outline around the subject often points to an alpha interpretation mismatch or premultiplied color contamination. A jagged edge may come from the key, matte, resolution, or scaling. A colored fringe may come from spill or a background-colored edge baked into the foreground. These are different problems, even though each can be described as “bad alpha.”
Use this diagnostic order:
- Place the source composite over the same background used to test the export.
- Check whether the fringe is already visible before rendering.
- Inspect the export over both dark and light backgrounds.
- Confirm the destination reads the alpha channel.
- Compare the destination’s straight and premultiplied interpretations.
- If the edge remains wrong, revisit the key, mask, or compositing chain in Resolve.
- Re-render a short section after changing one variable.
Do not apply a blanket matte choke, blur, or edge correction before deciding what is wrong. A matte correction can remove a fringe, but it can also thin hair, shrink a logo, cut into soft shadows, or destroy motion blur. Preserve a copy of the original comp before making destructive adjustments.
For keyed footage, inspect the matte independently if the tool or page provides a matte view. Look for holes, uneven edges, and leftover background spill. For graphic elements, inspect the original layer’s transparent border and any glow or shadow effect. For a Fusion composition, follow the image and alpha through the final merge and output. If the source already contains the unwanted edge, a different codec will not remove it.
A soft shadow deserves special care. It is supposed to fade gradually into transparency. If you tighten its matte too aggressively, you can make the shadow look cut out. A motion blur also contains partly transparent pixels. Do not treat every partially visible edge as a defect; compare it to the intended composite and to the destination’s preview behavior.
The destination application can also transform or interpret the file differently. Check its import options, alpha mode, color management, and clip attributes where available. A result that changes when you toggle alpha interpretation is a strong clue that the channel is present but the interpretation needs attention. A result that remains a full opaque rectangle calls for checking whether the channel was written or whether the destination ignores it.
If the client reports an issue, ask for a frame grab of the file over their actual background and the application’s alpha settings. Ask which file, frame, and system they used. That gives you concrete evidence to compare with your own test instead of a vague report that “the transparency is broken.”

How large will a ProRes 4444 alpha export be?
The file size depends on image dimensions, frame rate, codec flavor, content, duration, and alpha data; Apple’s target bitrates are references, not promises for a specific render. For 1920 × 1080 at 29.97 fps, Apple lists a target of about 330 Mbps for ProRes 4444 and 500 Mbps for 4444 XQ for 4:4:4 sources.
A simple planning estimate can help you check storage. Convert megabits per second to megabytes per second by dividing by eight, then multiply by the duration in seconds. For example, using Apple’s approximate 330 Mbps target for standard ProRes 4444 at 1080p29.97 gives about 41.25 megabytes per second before accounting for variation. A 10-second clip at that approximate rate would be about 412.5 megabytes in decimal units. This is a worked estimate based on Apple’s target rate, not a measured render result, and an actual file can differ. Apple’s target-rate information
That example assumes the specific dimensions and frame rate Apple describes. A higher resolution or frame rate changes the data requirements. XQ has a higher stated target rate than standard 4444 at the cited format. Content complexity and alpha can also affect actual data rate. Use the estimate to reserve space, not to quote a guaranteed size to a client.
If storage is tight, do not switch to ProRes 422 when the recipient needs transparency. ProRes 422 does not carry alpha in Apple’s codec family. Instead, confirm whether the recipient accepts a different alpha-capable format, a shorter range, or a sequence. Each alternative changes the workflow, so agree before rendering.
Remember that a sequence has a different storage pattern. It can create hundreds or thousands of files rather than one large movie, and the total size depends on the image format and content. Make sure the destination has room for both the files and any temporary copies used for transfer or backup.
For large deliveries, check the destination drive’s free space before rendering and before copying the export. Keep the project, cache, source media, and output on the intended volumes. A render that completes successfully can still fail during transfer if the destination runs out of space.
What should I check if the export succeeds but the handoff fails?
A successful render only confirms that Resolve wrote a file; it does not prove that the receiving application can use the file as intended. Check the codec, alpha, interpretation, frame range, frame rate, dimensions, and recipient’s stated requirements.
A handoff can fail even when the render queue reports completion. The recipient might not support that codec in their environment, might need a different wrapper, or might expect a different alpha mode. The file can also be technically valid but have the wrong frame rate, duration, or start point. Treat the render status and the delivery acceptance as separate checks.
Use a handoff note that lists the properties that matter:
| Handoff field | Example of what to state |
|---|---|
| Container | QuickTime movie, if that is what you rendered |
| Codec | Apple ProRes 4444 or Apple ProRes 4444 XQ |
| Alpha | Alpha channel included, verified over a test background |
| Alpha interpretation | State the mode if known and relevant to the recipient |
| Frame size | The rendered dimensions |
| Frame rate | The rendered timeline or delivery rate |
| Range | Start and end frames or timecode |
| Audio | Whether audio is included |
| Test status | Whether the recipient confirmed the short test |
Do not claim that an asset is “transparent” solely because you turned on Export Alpha. Say that it was rendered with alpha enabled and tested in a specified application if that is what you actually did. If you have not tested the file in the recipient’s software, say that the recipient should confirm interpretation. This is more useful than a confident statement that hides uncertainty.
If you need to send a replacement, keep the previous file until the new one passes the receiving test. Use a clear versioned name or delivery folder. Avoid overwriting the only copy before you know the replacement is accepted.
If the recipient says the file is opaque, request a specific frame and the app’s interpretation settings. Reproduce the test with a bright background. If they say the file is black, ask whether the player shows transparency in any way. If they report edge fringes, ask them to compare the two alpha interpretations. Each question points to a different part of the pipeline.
For work that will be reused, save a short sample file and a written note alongside the project. The note can identify the exact version of Resolve, selected codec, alpha mode, and destination app used to validate the handoff. If the project moves between machines or versions, that record gives the next editor a practical baseline.
Which related DaVinci Resolve workflow should I check next?
If you are building an overlay, the next useful step is to confirm the graphic itself and the rest of the delivery settings, not just the alpha codec. For text and titles, see how to add text and titles in DaVinci Resolve; for a reusable Fusion setup, see how to make a Fusion composition reusable in DaVinci Resolve. If the same project also needs a standard platform upload, the DaVinci Resolve export settings for YouTube guide covers a different delivery target.
Those links solve adjacent tasks, but they do not replace a recipient’s technical specification. A YouTube export, an alpha overlay, and a reusable Fusion composition have different output requirements. Treat each deliverable as its own render setup.
What is the safest final decision?
Use QuickTime with ProRes 4444 or 4444 XQ only when the receiving workflow needs a transparent video file and supports that combination. Enable Export Alpha, confirm that the timeline contains transparency, and verify a short render over contrasting backgrounds before producing the full delivery.
If the recipient requests ProRes 4444, match that request rather than upgrading to XQ without asking. If the receiving pipeline requires a numbered image sequence or another codec, use that specification instead. The final check is simple: the intended background shows through, the edges look right, and the client can open the file in the application they plan to use.
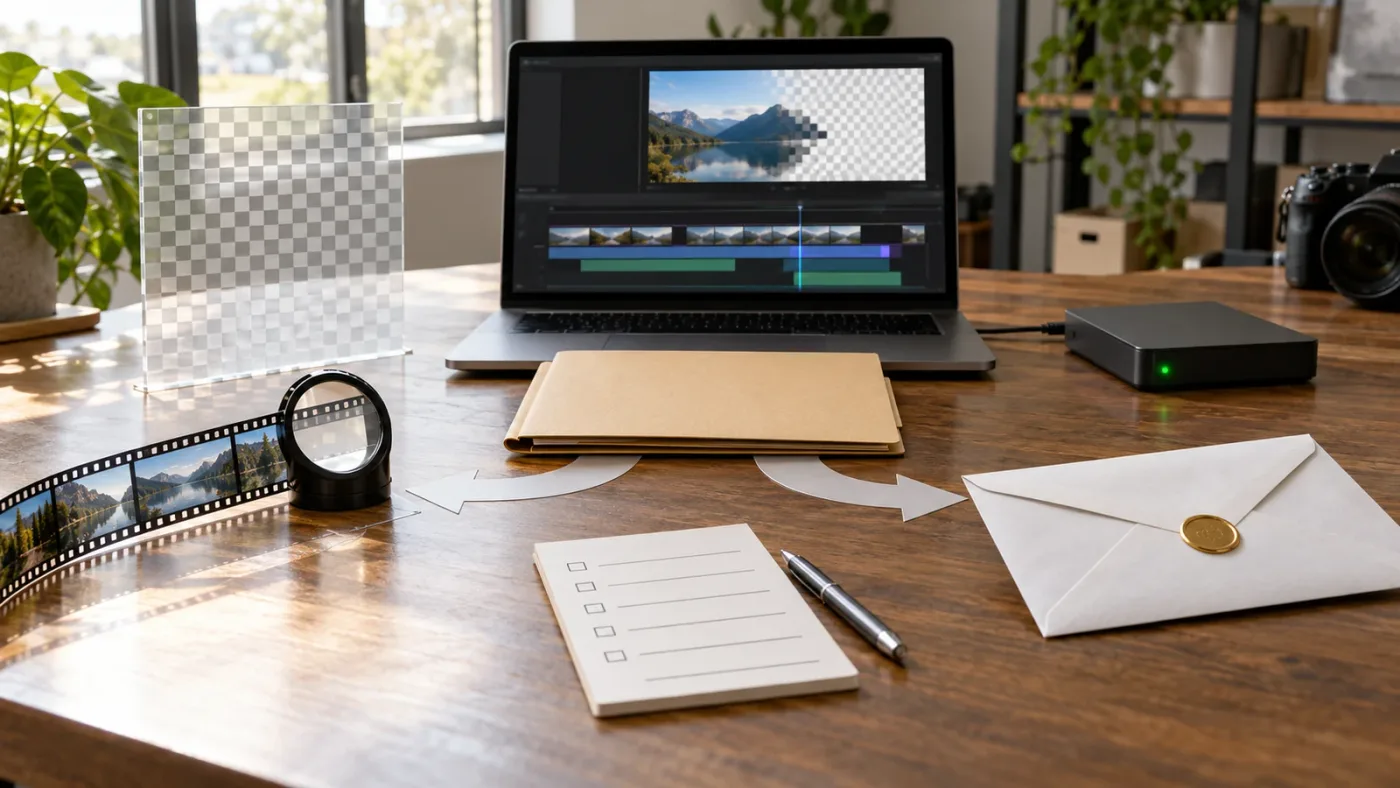
A few details carry the whole workflow. The codec must support alpha. Resolve must be asked to export it. The timeline must contain transparency. And the receiving app must interpret the channel correctly. Test those four points before committing to a long render.
A ProRes 4444 file is ready to hand off only after you verify the delivered asset, not merely after Resolve finishes rendering. If a setting is unclear, ask the recipient for the expected codec and alpha mode, render a short sample, and get that sample approved before the final export.
Frequently asked questions
- Why is Export Alpha missing in DaVinci Resolve?
- The selected container or codec may not support alpha export, or the current render mode may not expose the option. Choose a compatible format and codec first, such as QuickTime with ProRes 4444, then check the Video settings. Blackmagic's supported-codec list is platform-specific, so check the current list if the option is still missing.
- Does ProRes 4444 automatically make my DaVinci Resolve export transparent?
- No. ProRes 4444 can store alpha, but the timeline must contain transparency and Export Alpha must be enabled. Confirm the render by importing it into another app and placing it over a contrasting background.
- Should I choose premultiplied or straight alpha for ProRes 4444?
- Use the alpha interpretation expected by the receiving application or production pipeline. If you do not know, render a short test and compare both interpretations over a bright and a dark background; choose the one without dark or bright fringes.
- Can DaVinci Resolve export ProRes 4444 with alpha on Windows?
- Blackmagic's DaVinci Resolve 20 supported-codec list includes ProRes 4444 export and alpha export entries for Windows, but codec support can vary by Resolve version and operating system. Check the current Blackmagic codec list and test the exact format on your machine before a deadline.
- Why does my ProRes 4444 file look black instead of transparent?
- A black-looking viewer does not by itself prove the alpha is missing. Import the file into a compositing or editing app, put it above a bright background, and inspect its alpha channel or clip interpretation. Also verify that your Resolve timeline actually contained transparency.
Sources
Learn by doing, not watching
Stop translating tutorials to your timeline.
TryUncle stays beside Resolve on Mac and Windows. When you ask, Uncle sees your screen and points at the exact control you need. No hunting through tabs, timestamps, or mismatched tutorials.
Meet TryUncleKeep reading
 GuidesJul 7, 202632 min read
DaVinci Resolve Export Settings for YouTube (Copy These Exactly)
The exact DaVinci Resolve export settings YouTube recommends: codec, bitrate, resolution, audio, and the Deliver page steps that avoid soft uploads.
 GuidesOct 3, 202639 min read
How to Make a Fusion Composition Reusable in DaVinci Resolve
Learn how to make a Fusion composition reusable in DaVinci Resolve with macros, templates, exposed controls, reference compositions, folder paths, and testing steps.
 GuidesJul 8, 202639 min read
How to Add Text and Titles in DaVinci Resolve
Every way to add text in DaVinci Resolve: Text, Text+, MultiText, and Fusion Titles, plus subtitles, safe area, fonts, and export, for free and Studio.