
Learn / DaVinci Resolveupdated for DaVinci Resolve 21.0.3 (July 2026)
DaVinci Resolve Clone Tool Backup Workflow for Camera Cards
Quick answer
A DaVinci Resolve camera card backup workflow means opening the Clone Tool on the Media page, dragging the card in as the source, adding two destination drives, and running MD5 checksum verification before you erase anything. Copy to two drives at once, confirm both pass verification, then format the card in-camera, never in Explorer or Finder.
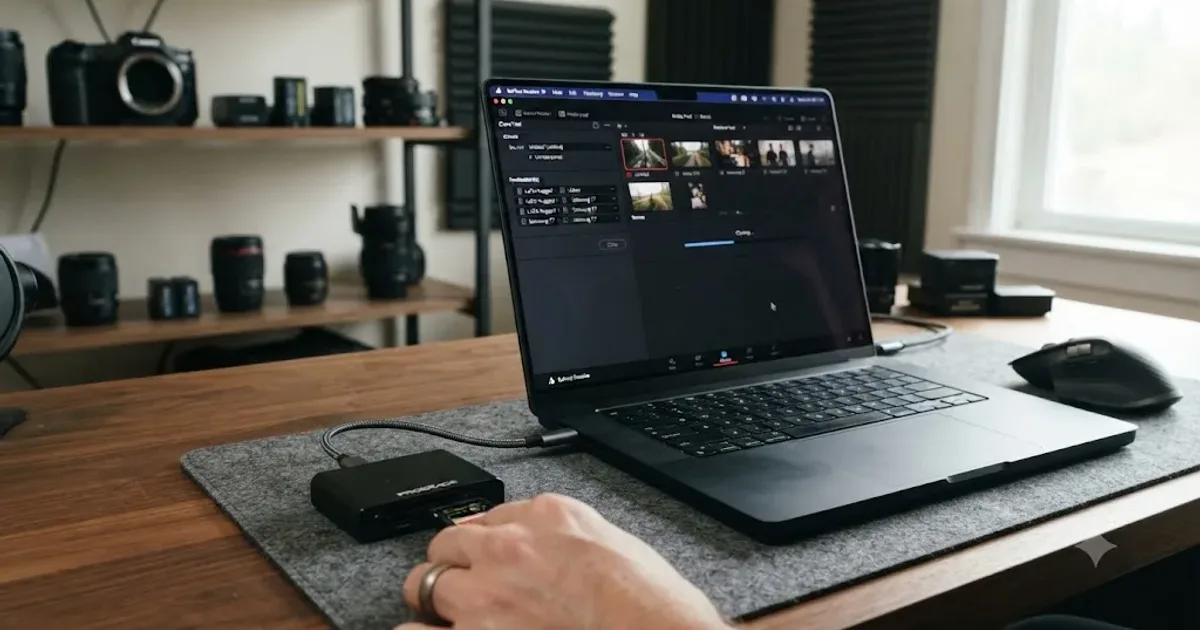
You just pulled a card off a camera that shot the only take of something that can't be reshot. DaVinci Resolve is open, the Clone Tool is sitting right there on the Media page, and you have maybe four minutes before the next setup needs that same card back. This guide is the workflow for that exact four minutes, and for the version of it you build once and reuse for the rest of the shoot.
As of July 2026, DaVinci Resolve is on version 21.0.3, and the Clone Tool works the same way it has for several major versions: source, destination, checksum, verify, per Newsshooter's coverage of the 21.0.3 update. We've spent seven-plus years cutting commercial video professionally, and losing footage because of a rushed offload is the kind of mistake that only happens once before it changes how careful you are forever. This is also one of the recurring questions in our 100,000+ member editing community: not how to grade footage or cut a sequence, but how to get a stack of cards off a shoot day without anything going wrong in between.
What is the DaVinci Resolve Clone Tool, and how does it fit into a backup workflow?
The Clone Tool is a panel on DaVinci Resolve's Media page that copies a camera card or drive to one or more destinations while verifying the copy against the original with a checksum. It exists specifically so you don't have to trust a plain drag-and-drop copy with footage you can't reshoot.
A camera card backup workflow is the repeatable sequence you run every time a card comes off a camera: connect it, copy it to at least two places, confirm both copies match the original, and only then clear the card for reuse. The Clone Tool is the engine for that sequence inside Resolve. It isn't a separate app you install. It's built into every copy of DaVinci Resolve, free or Studio, and it lives right next to the Media Storage panel you already use to browse footage, according to Daniel Grindrod's walkthrough of the tool.
A camera card backup workflow is not the same thing as a copy operation. A copy moves bytes from one place to another and hopes for the best. A backup workflow, the kind the Clone Tool is built for, reads the source, writes the destination, reads the destination back, and compares the two before it tells you anything succeeded. That extra step, reading the copy back and comparing it, is what a checksum actually is: a short fingerprint generated by running a file through a hashing algorithm, where the same file always produces the same fingerprint. Per the official DaVinci Resolve manual, the Clone Tool works "by comparing the hash value generated by the original file to that generated by the copied file." If the two fingerprints match, the copy is confirmed identical. If they don't, Resolve tells you before you've had the chance to trust a bad copy.
That distinction between a copy and a verified backup is the entire reason this workflow exists, and it's why every step below treats "the file appears in the destination folder" and "the file is actually backed up" as two different, non-interchangeable things.
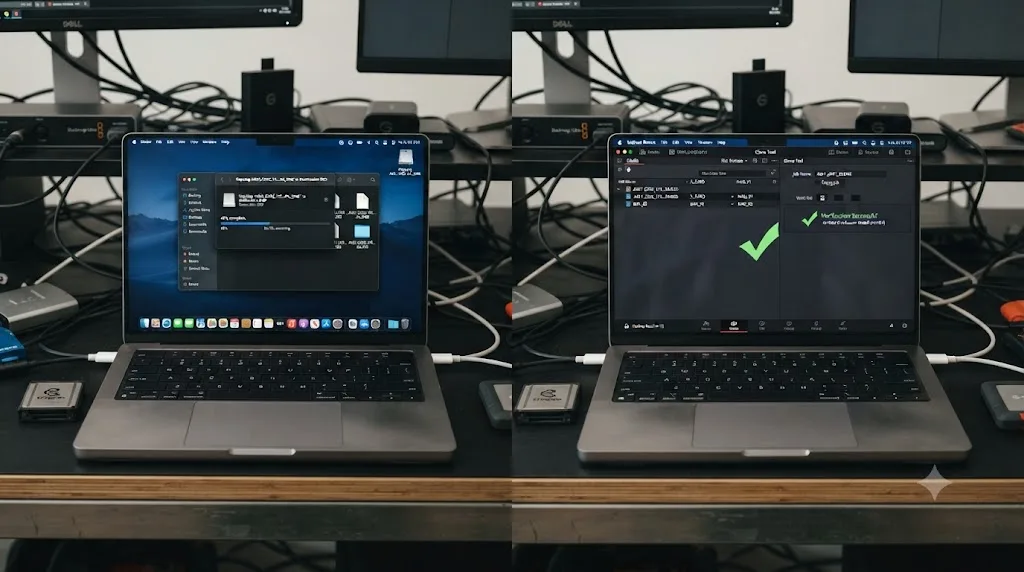
Where do you find the Clone Tool, and what do you need before you start?
The Clone Tool lives on the Media page, in its own tab positioned directly next to the Media Storage panel, and it needs nothing installed beyond DaVinci Resolve itself. Open the Media page from the page selector at the bottom of the interface, and you'll see two tabs on the left: Media Storage, which is the file browser you already know, and Clone Tool, which is what you want.
Before you click Add Job, you need a few physical things in place, and skipping any of them is where most backup workflows quietly fail:
- A card reader that isn't the cheapest one you could find. The reader is the single most common point of failure in this whole workflow, more often than the card, the cable, or the drive.
- At least two destination drives with free space to spare. A verified clone needs headroom beyond the card's own capacity; running a destination drive down to its last few gigabytes invites the exact kind of write failure that produces a checksum mismatch.
- A direct connection where possible. Plugging a card reader into a hub, especially a cheap or unpowered one, is asking for trouble on a long, sustained transfer.
- A destination naming plan you've already decided on, not one you're inventing while a producer is standing over your shoulder. Folder structure gets its own section below, but decide it before day one, not during it.
None of this is exotic. It's the same short list every working DIT and assistant editor keeps in their head before the first card of the day goes into the reader.
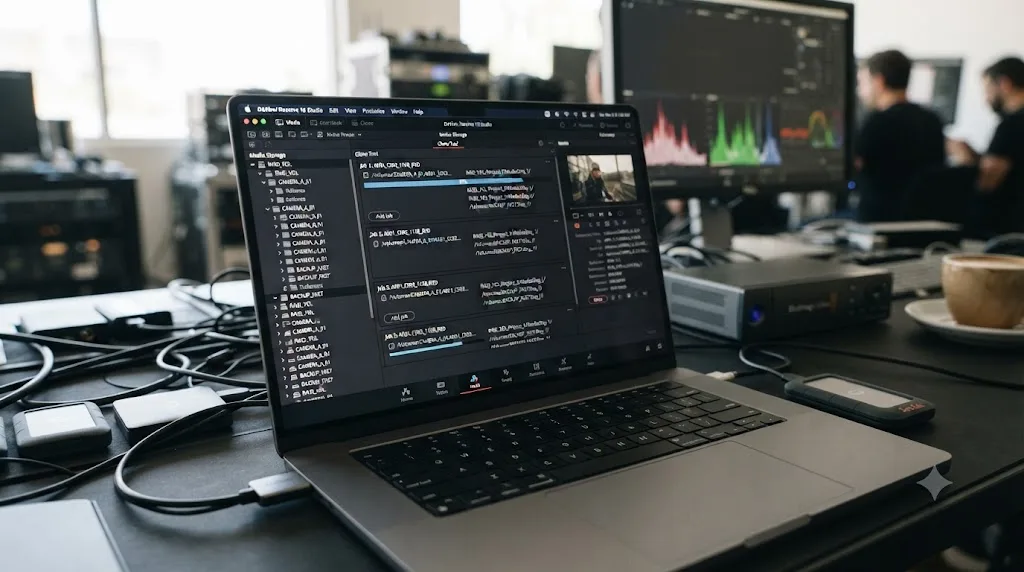
How do you build a camera card backup workflow with the Clone Tool, step by step?
Run these steps in order, every time, regardless of how many cards you're offloading that day. The sequence doesn't change; only how long step six takes changes, depending on your checksum method and card size.
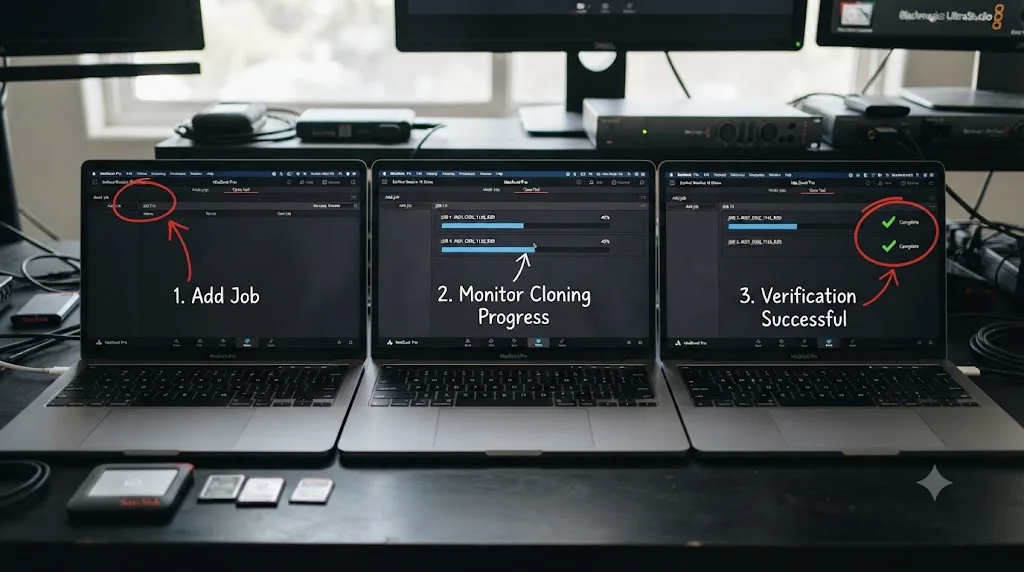
- Open the Media page and click the Clone Tool tab. It sits beside Media Storage, not buried in a menu.
- Click Add Job to start a new clone task.
- Drag the mounted card into the source field, or right-click the volume in Media Storage and choose Set As Clone Source, an option the official Resolve manual also documents.
- Drag two separate destination drives into the destination field. The Clone Tool supports multiple destinations in a single pass, so a two-drive backup is one operation, not two run back to back.
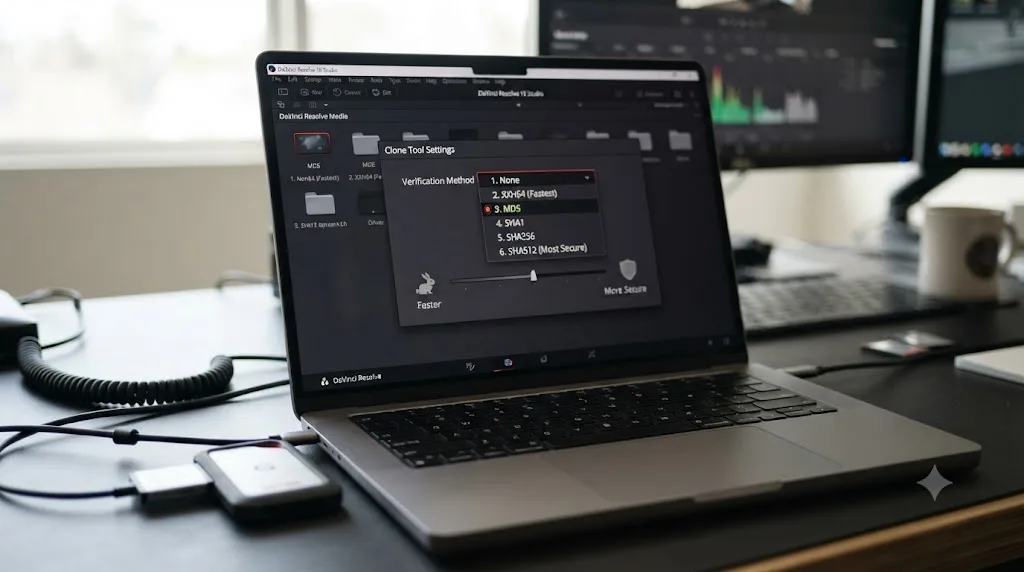
- Pick a checksum method from the options menu. MD5 is the default, and it's the right one unless you have a specific reason to move faster or slower, covered in the next section.
- Click Clone and let it run without interruption. The tool copies the source data and performs the checksum comparison in the same pass, which is why a verified clone always takes longer than a plain copy would.
- Wait for the green Complete icon on every single destination, not just the first one to finish. If verification fails on any destination, that drive shows a failure state instead, and you treat that copy as unverified, full stop.
- Only then, format the card in-camera. Not by selecting the files and hitting delete in Finder or Explorer. Formatting through the camera resets its file system properly and prevents the kind of write errors that come from a card whose file table wasn't cleanly reset.
Two verified destinations, confirmed before the card gets touched again, is the entire workflow. Everything else in this guide is refinement around that one sentence: which checksum method, how many drives, how you name folders, what to do when it fails. The core loop never changes.
Which checksum method should you use for camera card backups?
MD5 should be your default, and the choice between the six available methods comes down to a straight tradeoff between speed and how certain you need to be. Per the official Resolve manual, "greater security generally means a slower copy operation," and that line describes every row in the table below.
| Method | Relative speed | Verification strength | Best use case |
|---|---|---|---|
| None | Fastest | None | Files you already have two other verified copies of |
| File Size | Fast | Minimal | Low-stakes, easily reshootable content under a hard deadline |
| CRC 32 | Faster than MD5 | Low | Dozens of cards, trusted drives, real time pressure |
| MD5 | Moderate (default) | Reasonable, industry standard | Everyday camera card backups |
| SHA 256 | Slower | High | Client masters, deliverables, anything you're archiving |
| SHA 512 | Slowest | Highest | Long-term archival copies where minutes don't matter |
Some current builds also expose XXHash64 on certain camera media and mounted drives, a high-speed algorithm that compares source and destination at the byte level, per Cutsio's guide to the Clone Tool. Where it appears, it sits close to CRC32 on speed while offering better collision resistance, which is why some high-volume ingest crews reach for it instead of MD5 on days with a lot of cards and a tight window.
MD5 is the right default for camera card backups because it's fast enough to keep a shoot day moving and thorough enough that a genuine mismatch essentially never slips through. Reserve SHA256 or SHA512 for the copy that leaves your possession, a client master or a long-term archive, where the extra few minutes per card cost nothing next to what a bad archive copy would cost years later. Never default to None for camera original footage. It's tempting under deadline pressure, and it removes the entire reason you opened the Clone Tool instead of just dragging files in Finder.
How many copies do you actually need? The 3-2-1 rule for camera cards
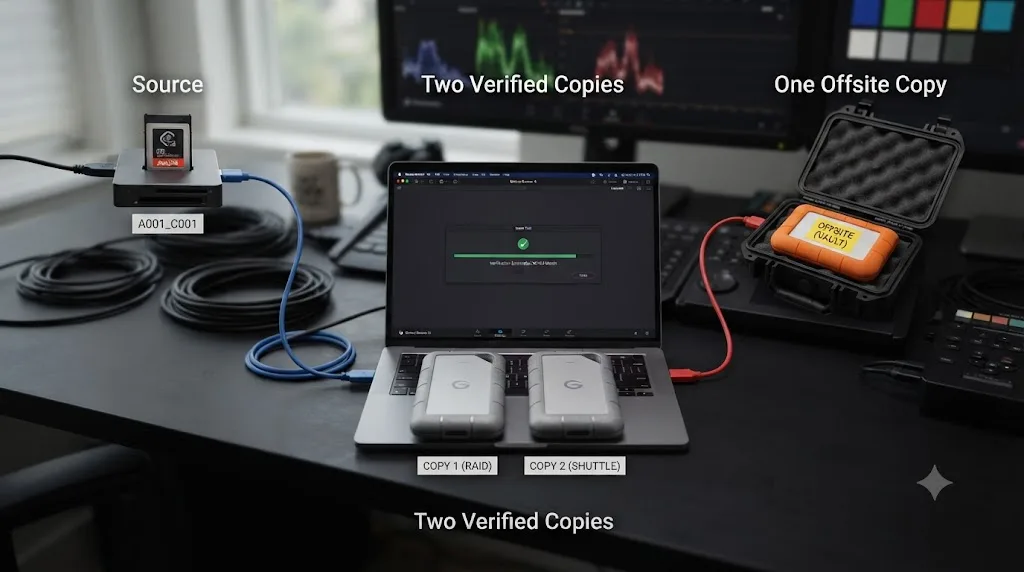
You need at least two verified copies before you touch the source card, and three total copies once the shoot day settles, following the 3-2-1 rule that governs professional media backup generally. The rule states three total copies of your data, on two different types of storage media, with at least one copy kept somewhere other than where the other two live, per MASV's breakdown of the 3-2-1 rule for media workflows. On a shoot day, that translates concretely:
- Copy 1: the original camera card itself, which stays untouched until every destination below passes verification.
- Copy 2 and Copy 3: two verified clones on two separate physical drives, written in the same Clone Tool pass, so a single drive failure doesn't leave you down to one copy.
- The offsite element: at least one of those verified copies needs to leave the shoot location before you consider the day's footage genuinely safe, whether that's a drive going home with a different crew member, an upload to cloud storage overnight, or a courier run to the office.
The math behind this is simple and worth internalizing rather than just following blindly. Two verified copies on two separate drives is the only state where losing a single drive doesn't lose the footage. One copy, however carefully verified, is one bad drive away from a total loss. That's true even of a copy that passed checksum verification the moment it was written; verification confirms the copy matched the source at that instant, not that the drive it's sitting on won't fail an hour, a week, or a month later.
A checksum-verified copy on a single drive is not a backup. It's a verified single point of failure. The checksum tells you the data is correct right now. It says nothing about whether that drive survives being dropped, overheating in a bag, or simply failing the way all storage eventually fails. The Clone Tool's ability to write to multiple destinations in one pass exists specifically so that "verified" and "redundant" happen at the same time, in the same operation, instead of you remembering to run a second copy later when you're tired at the end of a long day.
How should you organize folders and drives for a daily camera card offload?
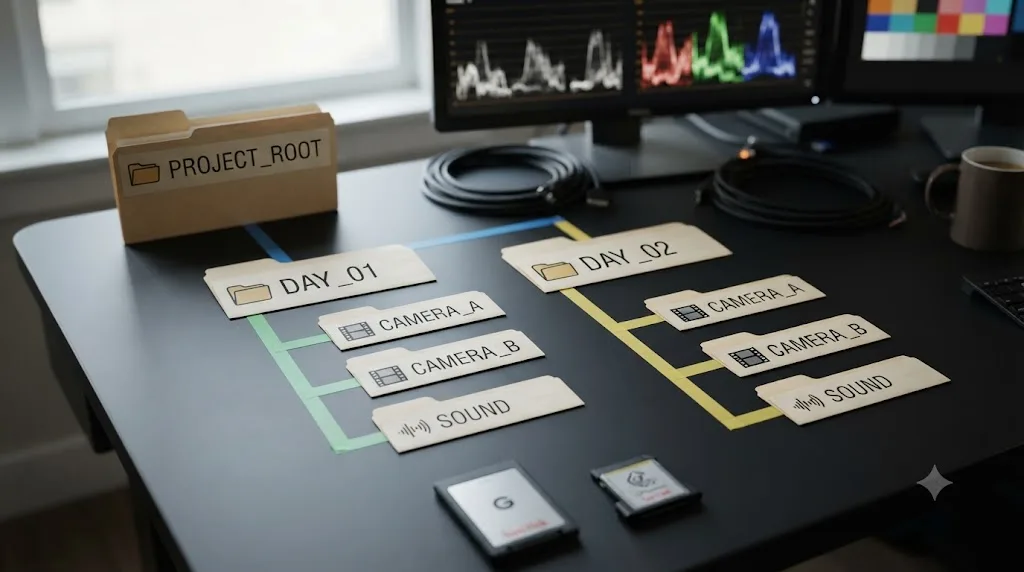
Organize by shoot day first, then by camera or source, and never rename or restructure what comes directly off the card. The Clone Tool preserves the entire folder structure of the source volume automatically, and you have the option to preserve the top-level folder name from the source volume as well, through the Clone Tool panel's option menu.
A structure that scales from a solo shooter to a multi-camera crew looks roughly like this:
DRIVE_ROOT/
  DAY_01/
    CAMERA_A/
      [card structure exactly as it came off the card]
    CAMERA_B/
    SOUND/
  DAY_02/
    CAMERA_A/
    CAMERA_B/
    SOUND/
On day two, everything new goes into a fresh DAY_02 folder, and by the end of the shoot, every drive contains a clean, chronological record of what came from where. This pattern shows up consistently across production workflow guides because it solves a specific problem: it lets anyone, not just the person who ran the offload, look at a drive and immediately understand what they're looking at, without opening a single file.
Two rules matter more than the exact naming convention you pick:
Do not rename or reorganize files inside the folders that come directly off a card or audio recorder. Copy the card's own folder structure into your DAY_01/CAMERA_A folder exactly as it exists on the card. Cinema cameras like ARRI and RED write sidecar metadata files alongside the raw footage, and cameras with proprietary folder structures, DJI drones and most mirrorless bodies included, rely on that structure staying intact for some downstream tools to read timecode, lens metadata, or camera settings correctly. Renaming individual clips or flattening a nested folder structure can silently break that metadata chain even though the video itself still plays fine.
Keep a transfer log alongside the drives, even a simple one. Date, card ID, which camera, file count or total size, and who ran the offload. When something goes wrong three weeks later in the edit, that log is the difference between a two-minute lookup and a frantic group chat trying to remember which of six identical-looking cards was camera B on day four.
Is the Clone Tool enough on its own, or do you need dedicated ingest software?
For a solo shooter or a small crew running one or two cameras, the Clone Tool alone is genuinely enough, and it's worth being honest about where it stops being enough as the production scales up. The Clone Tool gives you verified copies to multiple destinations, six checksum methods, and it costs nothing beyond DaVinci Resolve itself, which you already have open. Dedicated ingest tools exist because larger crews and higher-stakes productions need things the Clone Tool doesn't offer: standalone operation without opening an NLE, chain-of-custody logs in an industry-standard format, and workflows built around several cards offloading in parallel rather than one job at a time.
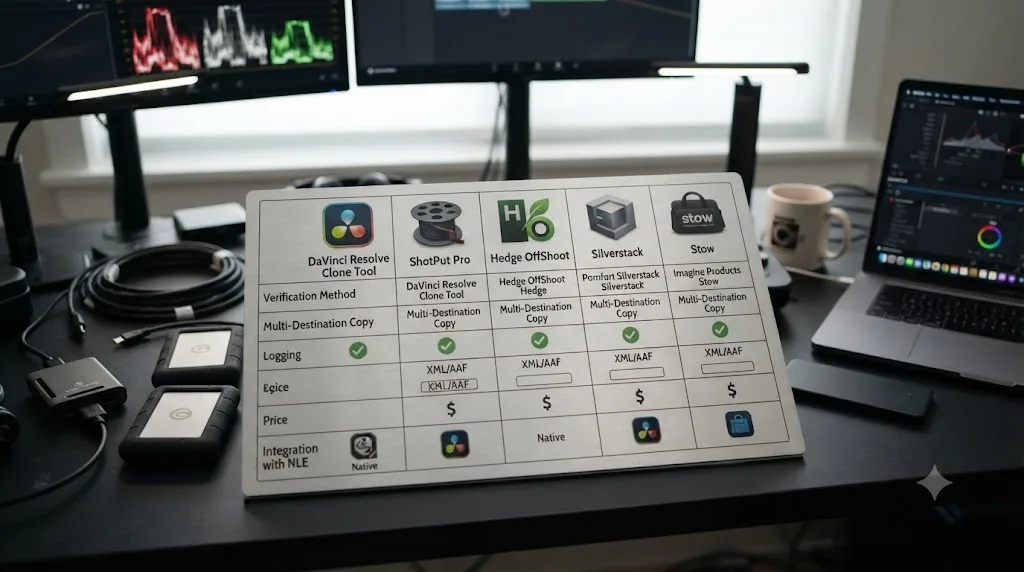
The professionals who actually run this for a living reach for purpose-built tools like YoYotta, Pomfort Silverstack, ShotPut Pro, and Hedge OffShoot, all of which use checksum verification to generate a unique fingerprint for each source file and confirm the copy matches before clearing a card for reuse. Here's how the honest comparison shakes out:
| Tool | Price | Destinations at once | Checksum options | Runs without opening an NLE | Notable strength |
|---|---|---|---|---|---|
| DaVinci Resolve Clone Tool | Free (built into Resolve) | Multiple | None, File Size, CRC32, MD5, SHA256, SHA512, XXHash64 (select builds) | No, requires Resolve open | Zero extra cost, zero extra install |
| ShotPut Pro | $169 perpetual, per Imagine Products | Multiple | MD5, CRC32, xxHash, and more | Yes | Industry-standard, decades of use on set |
| Hedge OffShoot | $169 Standard, $249 Pro, per Hedge | Multiple | MD5, xxHash, and ASC MHL on Pro | Yes | Fast interface built for high-volume offload days |
| Pomfort Silverstack | Subscription pricing, around $899/year for Silverstack XT | Multiple | MD5, xxHash, and ASC MHL | Yes | Deep metadata and reporting for DIT departments |
| Stow | Free | Two, simultaneously | xxHash3-128 by default, plus MD5, SHA256, CRC32C, C4, and ASC MHL v2 | Yes | Built specifically to answer "is this card safe to wipe" |
Stow deserves a closer look because it's new and it directly addresses the gap the Clone Tool leaves open: a standalone yes-or-no answer to whether a card is safe to erase. Luke Lv, who runs a UK video production studio called Lümira, built it after running into the same problem this whole guide is about. "I run a video production studio in the UK, and like everyone working on a shoot, we know the question that matters most at the end of the day: have the cards been backed up properly, and is it actually safe to wipe them?" he told PetaPixel. Stow copies a card to two drives simultaneously, reads every file back off both, and gives a plain verdict, safe to wipe or not yet, using ASC MHL for its chain-of-custody logging, per Newsshooter's coverage of the app.
That ASC MHL format matters beyond any single tool. The American Society of Cinematographers finalized the ASC Media Hash List specification in March 2022 specifically to standardize checksum reporting across an entire production pipeline, from the first card offload through final archival, per the ASC's own documentation. Some studios and streamers require it in delivery specs. The Clone Tool doesn't write ASC MHL logs; it writes its own checksum report to the destination volume, useful for a re-verify but not built to the same industry standard some post houses require.
Buy dedicated ingest software when the Clone Tool's limits start costing you time, not before. If you're offloading one or two cards at a time and Resolve is already open for the edit, the Clone Tool covers the entire workflow at no extra cost. Reach for ShotPut Pro, OffShoot, Silverstack, or Stow when you're running several cards in parallel, when a delivery spec explicitly requires ASC MHL logs, or when the person offloading media isn't the same person sitting at the DaVinci Resolve workstation.
TryUncle is the on-screen assistant for DaVinci Resolve on macOS - ask in plain words and Uncle points at the exact control on your screen. If you've never touched the Clone Tool before and you're not sure whether the checksum menu you're looking at matches what this guide describes, that's the kind of app that helps you while using DaVinci Resolve without sending you back to a forum thread mid-shoot. It's a paid app at founder pricing, currently $29.99 a month for the first 100 seats, and it's worth checking TryUncle directly for the current rate. It's macOS only for now, and it watches your screen inside Resolve rather than replacing dedicated ingest software; it won't run a standalone offload the way ShotPut Pro or Stow does.
How long does a camera card backup take, and how do you budget time for it?
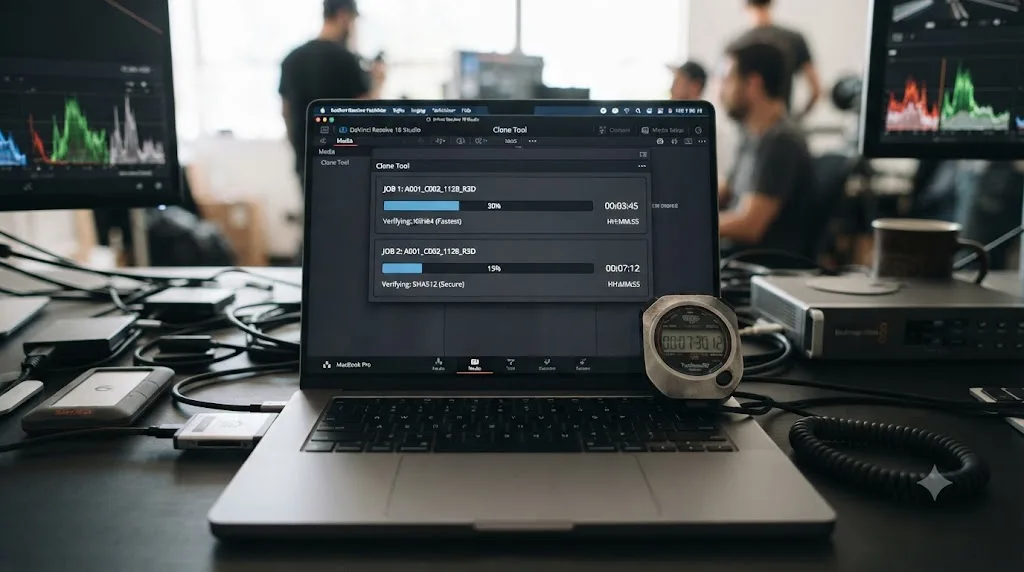
A verified clone always takes longer than a plain copy, because the Clone Tool reads the source, writes the copy, then reads the copy back a second time to compare it, and that second read is what makes the process trustworthy instead of just fast. As Kinolios explains, "it is this second reading that considerably lengthens the total time of the operation."
Real numbers help here more than vague reassurance. A UHS-II V90 card, the fastest widely available SD format, is rated for a minimum sustained write speed of 90MB/s under the SD Association's Video Speed Class standard, per ProGrade Digital's breakdown of memory card speed classes. That's a floor, not a peak; real-world V90 cards and readers often move faster, but 90MB/s is the guaranteed minimum the standard requires. At that sustained rate, offloading a full 256GB card takes roughly 47 minutes just for the read side, before you factor in the write to your destination drives and the second read-back pass the Clone Tool performs to verify. In practice, plan for a verified two-drive clone of a large card to run anywhere from 20 minutes to well over an hour, depending on your reader, your destination drive speed, and which checksum method you picked.
A rough budget by checksum method, based on the relative speed tiers covered earlier:
| Situation | Recommended checksum | Rough time impact vs. a plain copy |
|---|---|---|
| Single card, no deadline pressure | MD5 | Roughly 1.5-2x a plain copy |
| Dozens of cards, hard deadline, trusted drives | CRC32 or File Size | Close to 1.2x a plain copy |
| Archival master, client deliverable | SHA256 or SHA512 | 2x or more a plain copy |
| High-volume day, XXHash64 available | XXHash64 | Close to CRC32 speed with better collision resistance |
Budget real offload time into the shoot day itself, not around it. A checksum-verified clone of a full card takes meaningfully longer than the drag-and-drop copy a rushed crew member might be tempted to run instead, and that extra time is the entire value proposition of the tool. Treat it the same way you'd treat time for a lens change or a lighting reset: a real line item on the schedule, not an inconvenience to route around by dropping to None.
What happens when checksum verification fails mid-backup?
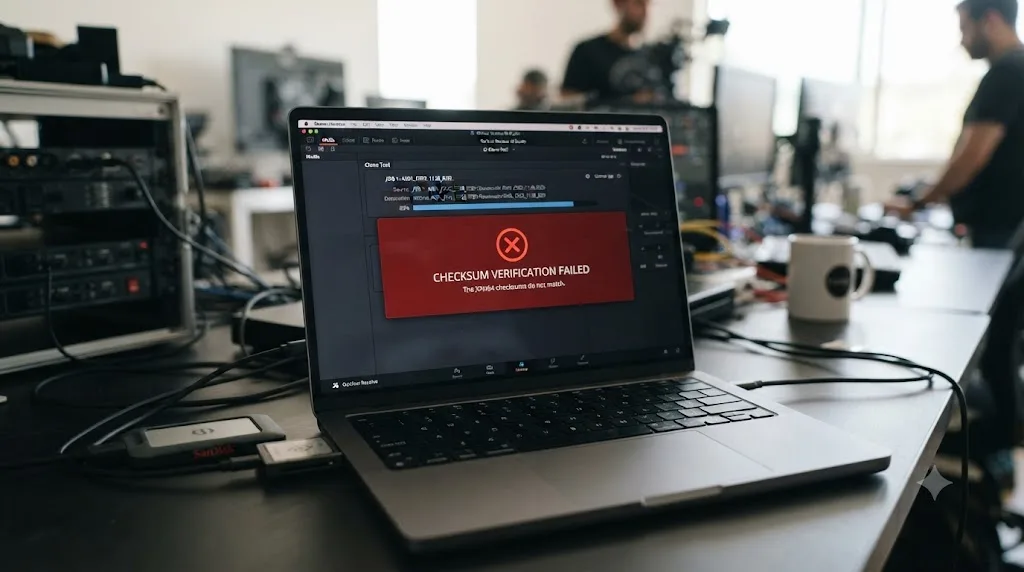
A checksum failure means the copy DaVinci Resolve just wrote doesn't hash-match the source, and in the large majority of cases the cause is a bad connection, not damaged footage on the card. This is common enough, and specific enough as a topic, that we've written a full guide dedicated to it. If you're staring at a red "Checksum Verification Failed" banner right now, our complete breakdown of the DaVinci Resolve checksum verification failed error walks through every cause and fix in detail, including what to do when the same file fails every single time.
The short version, so you're not stuck mid-shoot without a plan: delete the failed destination copy entirely rather than trusting a partial one, swap the card reader for a different one if you have it, plug directly into the computer instead of through a hub, swap the cable, and run the clone again from a clean start. If the exact same file on the exact same card keeps failing after you've swapped every piece of hardware around it, the problem has narrowed down to the card or a file that was already corrupted when the camera wrote it, which is a different situation entirely and calls for treating that specific clip as unrecoverable rather than continuing to retry the copy.
A checksum failure that follows the hardware you swap is a connection problem. One that stays on the same card no matter what you change is a media problem. That single distinction decides whether you reach for a different USB cable or start planning for a lost clip, and it's worth diagnosing correctly before you do either.
Do not erase or reformat the source card at any point until you have a copy that passed verification cleanly, on both destinations. That's the entire point of running a checksum in the first place.
Should you use free DaVinci Resolve or Studio for camera card backups?
Either one, and it genuinely doesn't matter which for this specific task. The Clone Tool and all six of its checksum methods work identically in the free version of DaVinci Resolve and in Studio. Blackmagic Design's own list of what Studio adds over the free edition includes things like the "DaVinci Neural Engine for automatic AI region tracking, stereoscopic tools, more Resolve FX filters, more Fairlight FX audio plugins and advanced HDR grading," per Blackmagic Design's tech specs page. The Clone Tool isn't on that list, and neither is any checksum method within it.
This matters practically for a specific setup a lot of crews already use without thinking about it: a dedicated backup laptop or DIT cart machine running only the free build of Resolve, separate from the full Studio workstation where the actual edit happens. That backup machine verifies camera cards exactly as reliably as the Studio system does, because the underlying code path for reading a source, writing a copy, and comparing hashes doesn't check your license tier before it runs.
If you've hit a checksum failure while running the free version, ruling out "would Studio fix this" as a theory saves you time. It wouldn't. The fix, whichever version you're running, is always in the hardware or the physical connection, never in an upgrade.
How do you handle a multicam shoot with several cards and cameras at once?
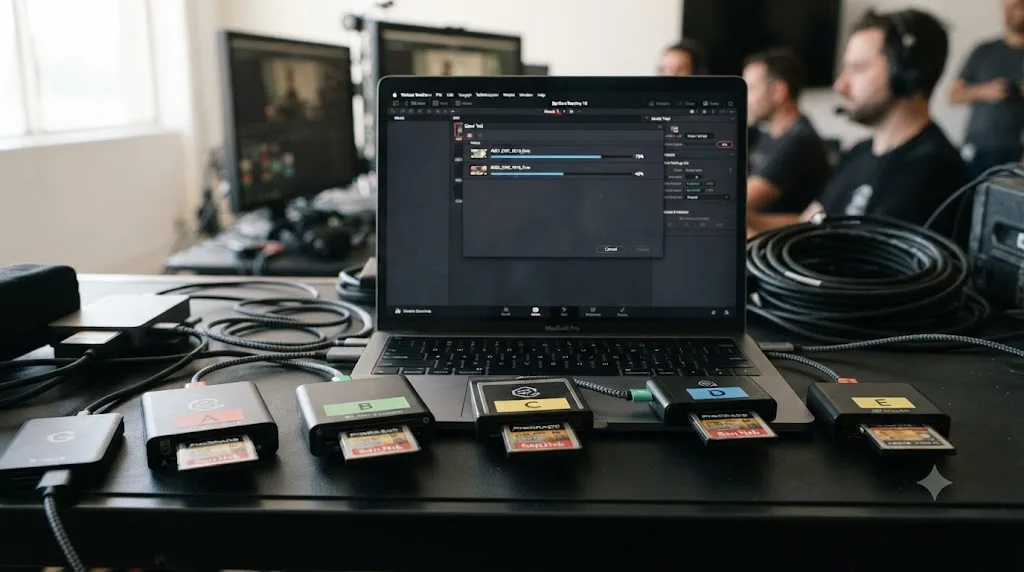
Treat every camera as its own source and its own set of destination folders, and never let two cameras' footage share a folder before it's clearly labeled by source. On a multicam day, the Clone Tool's Add Job button becomes your friend: run a separate clone job per card, so a failure on Camera B's card doesn't hold up Camera A's already-verified footage.
A few patterns that hold up on real multicam sets:
- Stagger your offloads rather than queuing every card through one reader. If you have access to two or more card readers, run them in parallel rather than serially. A single reader working through six cards from a four-camera shoot day turns into the bottleneck for the entire crew waiting to reuse cards.
- Label physically, not just digitally. A piece of tape with camera letter and card number on the physical card, matched to the folder name in your destination structure, prevents the specific mistake of offloading Camera B's card into a folder still labeled Camera A from an earlier job.
- Keep sound as its own top-level source, not nested under a camera. Multicam shoots often mean a separate sound recordist working independently of any single camera operator, and folding audio into a video camera's folder makes it harder to sync later, especially if you're using DaVinci Resolve's own audio sync tools downstream.
- Don't clear any card from the shoot until every card from that same setup has verified. If Camera A's card verifies in three minutes and Camera B's is still running, resist the urge to hand Camera A's card back to that operator immediately if there's any chance you'll need to cross-reference footage between the two before wrapping the setup.
The core loop doesn't change on a multicam day. What changes is how many parallel instances of that loop you're running at once, and how much your folder naming and physical labeling need to carry the load of keeping four or six simultaneous offloads from turning into one confusing mess by the end of the day.
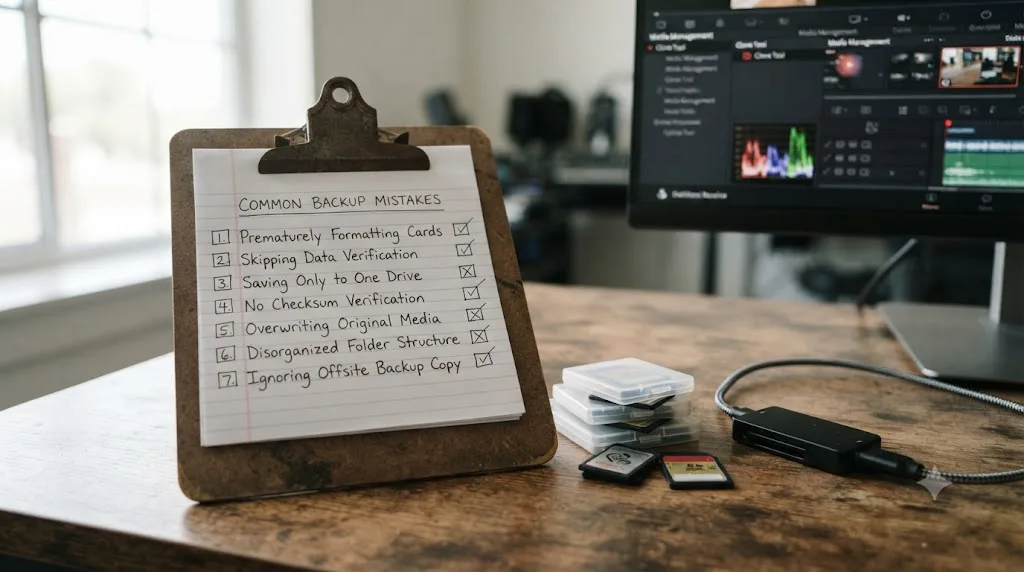
What mistakes actually cause people to lose footage despite "backing it up"?
Almost every real footage-loss story traces back to one of a small handful of repeatable mistakes, not to genuinely bad luck. Knowing the pattern is most of the prevention.
Formatting a card the moment the copy appears in the destination folder, before verification finished. The file showing up isn't the same as the file being confirmed correct. This is the single most common version of "I backed it up and lost it anyway," and it's entirely a Clone Tool problem to solve: wait for the green Complete icon, not the appearance of files in a folder browser.
Running only one destination drive because a second one wasn't handy. A checksum-verified copy on a single drive is still one hardware failure away from total loss. The Clone Tool's ability to write two destinations in one pass exists exactly so skipping the second copy never feels like the path of least resistance.
Trusting a copy that failed verification because "it looked complete." A checksum failure is deterministic. If the hashes genuinely differ, the files genuinely differ, and no amount of the file looking the right size or playing back the first few seconds correctly changes that. Kinolios puts the underlying gap plainly: a failed Clone Tool operation shows "no log" specifying which file caused the problem, describing exactly this frustration, which is precisely why the instinct to eyeball a copy and call it good is so tempting and so wrong.
Renaming or reorganizing files during the offload instead of after. Touching file names or folder structure mid-copy, especially on cinema camera formats with sidecar metadata, risks breaking the very structure that lets Resolve, or any other tool, read that metadata correctly later.
Skipping the offsite copy because the shoot day felt too busy. Two verified drives sitting in the same bag, in the same vehicle, protect against drive failure. They do nothing against theft, a dropped bag, or a vehicle fire. The third copy in the 3-2-1 rule exists for exactly the failure mode the other two can't cover.
Daniel Grindrod, a UK-based cinematographer who runs the Clone Tool on client work, summed up the stakes without any hedging: "you want to be 100% certain that when you've offloaded that card or mag that it has all been copied successfully," in his walkthrough of the process. Every mistake on this list is a way that certainty quietly gets skipped, usually under time pressure, usually by someone who genuinely believed they'd backed the footage up.
How do you archive footage after the shoot wraps, once it's already in Resolve?
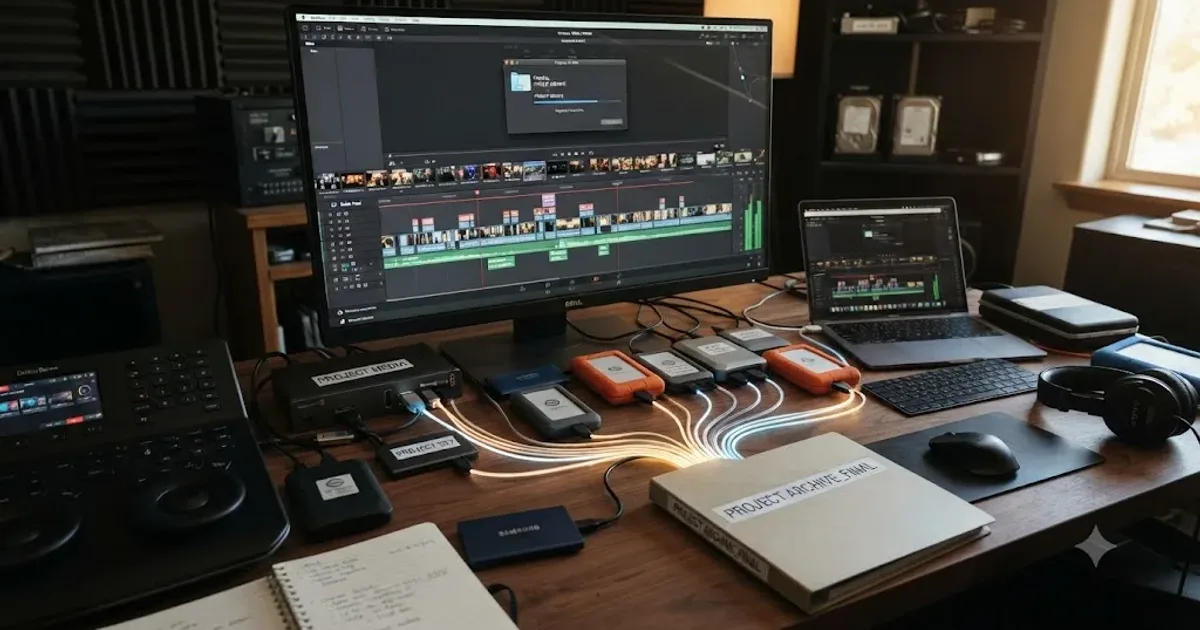
Once footage has been imported into a DaVinci Resolve project and the shoot has wrapped, the backup problem shifts from camera cards to the project itself, and it deserves a different workflow than the Clone Tool provides. The Clone Tool's job ends the moment your verified card copies exist on stable drives. Keeping the edited project, its media references, and its cut safe long-term is a separate step.
DaVinci Resolve's Export Project Archive function, available from the Project Manager, bundles the project file with every media file it references into a single self-contained folder, which is the right tool for that later stage rather than trying to stretch the Clone Tool to cover it. Our guide to archiving a DaVinci Resolve project without losing media covers the full process, including when to run Media Management first to trim the archive down to only what's actually cut into your timeline.
Two problems tend to show up around this same stage of a project's life, both worth knowing about before they surprise you. If Resolve throws an error saying it can't find a folder it manages itself, distinct from your actual footage going offline, that's covered in our guide to DaVinci Resolve's unable to find media storage location error. And if you want to reduce the odds of the project database itself becoming unusable somewhere between the shoot and delivery, our guide to preventing DaVinci Resolve project corruption covers the habits that matter most, including keeping the database off cloud-sync folders and leaving real free space on the drive it lives on.
If footage from a specific camera, a GoPro Hero 13 among the more common recent cases, imports off the card fine into your file system but won't actually open inside Resolve, that's a separate decode problem from anything covered in this guide, and our breakdown of GoPro Hero 13 footage not importing into DaVinci Resolve walks through the HEVC codec issue behind most of those cases.
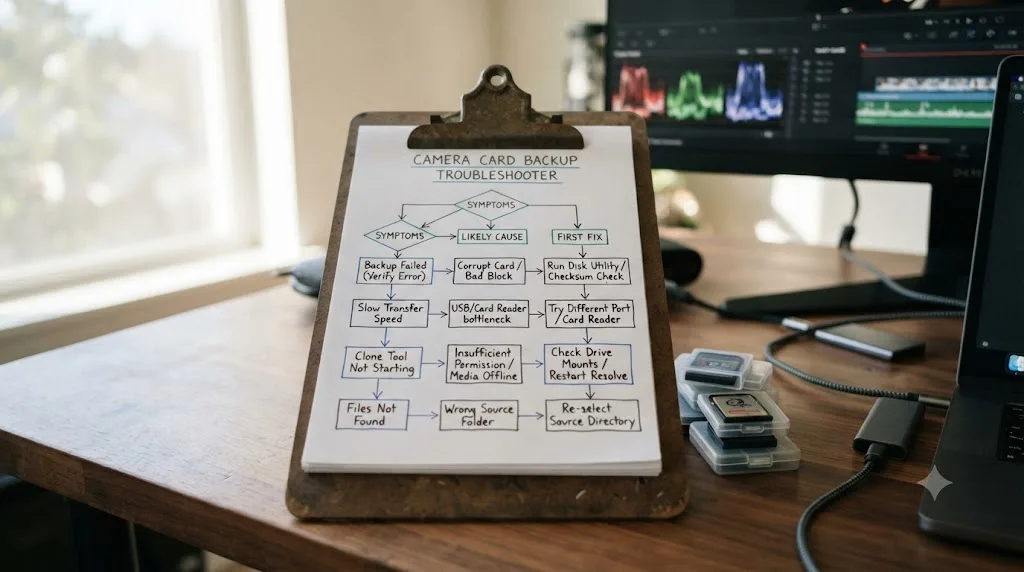
What's the right order to troubleshoot a broken or slow backup workflow?
Match your specific symptom to a row here before changing settings at random.
| Symptom | Likely cause | Start with |
|---|---|---|
| Clone job fails once, never again | Transient hardware hiccup | Retry the same setup once before changing anything |
| Clone job fails repeatedly, different cards | Reader, hub, or cable | Swap the reader, connect directly, swap the cable |
| Same file fails every time, all hardware swapped | Failing card or file corrupted at time of recording | Test the file manually outside Resolve; treat it as unrecoverable if it hangs |
| Backup takes far longer than expected | Checksum method mismatched to your time budget, or a slow destination drive | Check your checksum choice against the table earlier in this guide; test destination drive speed directly |
| Folder structure looks scrambled after cloning | "Preserve Folder Name" option not set as intended | Check the Clone Tool panel's option menu before the next job |
| Two crew members offloaded the same card into different folders | No shared naming convention decided before day one | Fix the convention now, rename going forward, don't touch what's already copied |
| Card won't mount at all | Reader driver issue, dead card, or a connector problem | Try the card in a second reader before assuming the card itself failed |
A backup workflow that only works when nothing goes wrong isn't a workflow, it's a hope. The value of having this table, and having it decided before a shoot day rather than during one, is that a problem mid-offload becomes a two-minute lookup instead of a stressful improvisation with a nervous producer watching.
How do you build a backup workflow that survives a bad day on set?
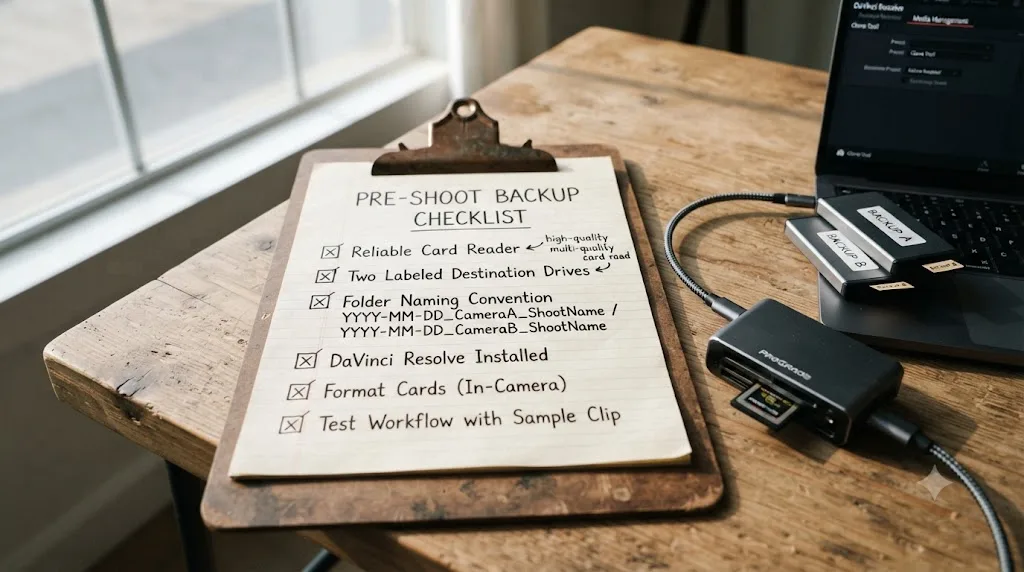
Every fix in this guide has a cheaper version that happens before the problem shows up at all.
Standardize on one good card reader per operator, and stop rotating through whatever's in the bag. A single reliable reader, used consistently and connected directly rather than through a hub, removes the most common cause of repeat checksum failures before it has a chance to happen.
Decide your folder naming convention in pre-production, not on day one of the shoot. Write it down somewhere every crew member offloading media can see it. The five minutes this takes saves hours of confusion three weeks later when someone in the edit is trying to figure out which of eight identically-named folders is actually camera B from the interview day.
Keep two destination drives dedicated to the shoot, formatted and ready, before day one. Buying drives the morning of a shoot, or worse, mid-shoot when the first ones fill up, is how crews end up skipping the second copy under time pressure.
Budget real offload time into the schedule, the way you'd budget time for any other unavoidable part of the day. A checksum-verified clone that gets rushed is a checksum-verified clone that gets skipped or set to None, which defeats the entire point.
Test your full workflow once, before the shoot that actually matters. Run a card through your exact Clone Tool setup, checksum method, folder structure, and both destinations, on a low-stakes test card before you're relying on it for footage you can't get back. That single dry run surfaces a bad reader, a misconfigured folder option, or a destination drive that's slower than you expected, in a context where discovering the problem costs you nothing.
If you're mid-shoot and unsure whether a specific setting in the Clone Tool's options menu is the one you actually need, that's a stuck moment Uncle can point at live on your own screen inside your own project, instead of pausing the day to dig through a manual.
The verdict on building a Clone Tool backup workflow
For a solo shooter or small crew, the DaVinci Resolve Clone Tool alone builds a genuinely solid camera card backup workflow: two verified destinations, MD5 by default, a consistent folder structure, and a hard rule against erasing a card before both copies pass. It costs nothing beyond DaVinci Resolve itself, and it works identically whether you're running the free version or Studio. That covers the large majority of shoots.
Scale up to a multicam set, a delivery spec that requires ASC MHL logs, or a crew big enough that the person offloading media isn't the same person sitting at the edit workstation, and dedicated tools like ShotPut Pro, Hedge OffShoot, Silverstack, or the newer free option Stow start earning their keep. None of that changes the underlying discipline. Two verified copies before you touch the source card. A folder structure decided before day one, not invented during it. Real time budgeted for verification, not skipped under deadline pressure. Get those three things right and the specific tool you run them through matters far less than whether you actually run them every single time.
Frequently asked questions
- How do I back up camera cards in DaVinci Resolve?
- Open the Media page, click the Clone Tool tab next to Media Storage, click Add Job, drag the card into the source field and one or more drives into the destination field, pick a checksum method (MD5 by default), and click Clone. Wait for the green Complete icon on every destination before you touch the card again.
- Is DaVinci Resolve's Clone Tool free?
- Yes. The Clone Tool and all its checksum methods, including MD5, SHA256, and SHA512, work identically in the free version and DaVinci Resolve Studio. Blackmagic Design's own list of what Studio adds over the free edition, things like the Neural Engine and advanced HDR grading, doesn't include the Clone Tool.
- What checksum method should I use in the Clone Tool for camera card backups?
- MD5 is the default and the right call for most shoot days, since it balances speed against a vanishingly small chance of a false match. Drop to CRC32 or File Size only when you're racing a deadline across dozens of cards on drives you already trust. Use SHA256 or SHA512 for long-term archival masters.
- Do I need ShotPut Pro or Hedge if I already use the Clone Tool?
- Not necessarily. The Clone Tool covers single-operator backup fine: two verified destinations, six checksum methods, no extra cost. Dedicated tools like ShotPut Pro, OffShoot, or Silverstack earn their price on multicam sets with several cards offloading at once, when you need ASC MHL chain-of-custody logs, or when one person is offloading while someone else is already editing in Resolve.
- How many copies of camera footage should I keep before formatting a card?
- At least two verified copies on two separate drives, following the industry-standard 3-2-1 rule: three total copies, on two different types of media, with one stored somewhere other than your shoot location. Never format a card on the strength of a single copy, verified or not.
- What does 'Checksum Verification Failed' mean during a camera card backup?
- It means the copy DaVinci Resolve just wrote doesn't hash-match the original file on the card, almost always because of a bad cable, reader, or hub rather than damaged footage. Redo the copy on different hardware before you assume the card itself failed. Our full guide to the checksum verification failed error covers every cause and fix in detail.
- Can I use the Clone Tool without DaVinci Resolve Studio?
- Yes. Every checksum method in the Clone Tool works the same in the free version as in Studio, so a backup laptop running only the free build verifies camera cards exactly as reliably as a full Studio workstation does.
Sources
- DaVinci Resolve Manual: Copying Media Using the Clone Tool (Blackmagic Design, via VFXPedia mirror)
- Daniel Grindrod: How to Use the Clone Tool in DaVinci Resolve
- Kinolios: Backups and Data Integrity, Part II - Checksums
- Cutsio: How to Clone and Backup Camera Media with Checksum Verification in DaVinci Resolve
- Blackmagic Design: DaVinci Resolve - Tech Specs
- PetaPixel: A Videographer Built a Free App That Tells You When a Memory Card Is Safe to Wipe
- Newsshooter: Stow - Free Copy & Verification Software
- Lumira Studio: Stow - Verified Card Offload, Free
- MASV: What Is the 3-2-1 Backup Rule for Media Workflows?
- ProGrade Digital: Memory Card Speed Classes Explained
- American Society of Cinematographers: ASC Media Hash List
- Imagine Products: ShotPut Pro
- Hedge: OffShoot
- Newsshooter: DaVinci Resolve 21.0.3 Update
- davinciresolve21.com: DaVinci Resolve Checksum Verification Failed - Every Fix
Learn by doing, not watching
Learn Resolve inside Resolve.
TryUncle watches your screen and points at the exact control when you ask. No tabs, no timestamps, no rewatching tutorials.
Download for MacKeep reading
 GuidesJul 12, 202638 min read
How to Archive a DaVinci Resolve Project Without Losing Media
The right way to archive a DaVinci Resolve project so every clip travels with it: Export Project Archive vs Media Management vs Backups, compared.
 FixesJul 22, 202624 min read
DaVinci Resolve Unable to Find Media Storage Location, Fixed
DaVinci Resolve's Unable to Find Media Storage Location error means a path in Preferences no longer exists or is unreachable. Here's the full fix.
 FixesJul 16, 202630 min read
How to Prevent DaVinci Resolve Project Corruption
The real causes of DaVinci Resolve project corruption, from cloud-synced databases to power loss, and the exact habits that prevent it in 2026.