
Learn / DaVinci Resolveupdated for DaVinci Resolve 21.1 (October 2026)
DaVinci Resolve: Change Clip Speed Without Changing Audio Pitch
Quick answer
In DaVinci Resolve, right-click the timeline clip and choose Change Clip Speed, enter the new speed, and leave Pitch Correction enabled before applying it. The audio will change duration with the video while Resolve works to preserve its pitch. If you need the audio to remain at its original speed and duration, unlink it and retime only the video.
We get this question in our 100,000+ member editing community because a speed change seems simple until a voice turns chipmunk-high or drops into a rumble. After more than seven years of commercial editing, we still treat the sound and the duration as separate decisions. As of October 2026, the current manual listed by Blackmagic Design is for DaVinci Resolve 21.1; the core method below also applies to recent Resolve versions, though control placement can vary.
TryUncle is the on-screen assistant for DaVinci Resolve on Mac and Windows — ask in plain words and Uncle points at the exact control on your screen.
Pitch Correction keeps audio pitch steady while the clip's audio changes duration with the retime.
How do I change clip speed in DaVinci Resolve without changing audio pitch?
Use Change Clip Speed on the timeline clip and keep Pitch Correction enabled. Resolve will retime the audio along with the clip, then process the sound to keep its pitch closer to the original as the clip becomes shorter or longer.
- Open the Edit page and select the timeline clip.
- Right-click the clip and choose Change Clip Speed. In versions where the menu wording differs, look for the speed command in the clip's context menu or its Speed Change controls.
- Enter the desired percentage in Speed. For example, 80% plays the clip more slowly than 100%; 125% plays it faster.
- Leave Pitch Correction checked.
- Click Change to apply the retime.
- Play the clip from before its start through the new end. Listen for pitch, artifacts, and sync.
Pitch correction is a processing choice, not a way to keep the audio's original duration. If you slow a linked video and audio clip to 80%, both occupy more timeline time. The audio's pitch is adjusted to sound closer to the original, but the words and events still happen more slowly. If the audio must remain exactly as recorded while the picture changes speed, separate the audio and video first. That is a different edit.
Blackmagic's Fairlight guide describes the feature in practical terms: “Their pitch is the same because the default setting in Resolve is to employ pitch correction during speed changes.” The example demonstrates the intended distinction: playback duration changes while pitch correction tries to maintain the perceived pitch. The guide also cautions that extreme speed changes can sound processed. Read Blackmagic Design's Fairlight guide.
Pitch Correction changes the sound processing; it does not cancel the speed change.
The dialog may also show controls for Ripple sequence, Reverse speed, Freeze frame, or keyframe timing. Those options affect timeline behavior or playback direction; they do not substitute for Pitch Correction. If your goal is simply to protect a voice from shifting up or down, focus on the pitch checkbox and review the result after applying the speed.
What speed value should I enter?
Enter the playback rate you actually need, then check the new duration and listen before committing to the edit. A percentage is a ratio to normal playback: 100% means normal speed, a value below 100% slows playback, and a value above 100% speeds it up.
Resolve's own training material shows the Change Clip Speed dialog with a 50% example and a 23.976 fps source. At half speed, the example plays at 12 frames per second. That illustrates why a speed change affects timing and motion as well as sound. The exact duration depends on the selected source range and timeline context, so don't assume a universal end time from the percentage alone.
Use simple values to make the behavior easy to judge. At 50%, a section takes about twice as long to play; at 200%, it takes about half as long. These are mathematical consequences of the playback-rate ratio, not quality guarantees. A 50% retime may look smooth when the source has enough captured frames, but it can appear choppy if Resolve must repeat or synthesize frames. Pitch correction cannot solve that visual issue.
For dialogue, make a modest timing change first and listen to an entire sentence. A result can retain a recognizable pitch and still sound unnatural because consonants stretch, breaths linger, or room tone changes. The checkbox is a useful first control, not a promise that every voice will sound untouched.
Why does audio sound high or low after changing clip speed?
Audio that becomes higher or lower usually means the speed change was applied without effective pitch correction, the wrong clip or linked component was changed, or the retime is large enough that the processed sound is obvious. Start by checking whether the audio clip itself was retimed and whether Pitch Correction is enabled for that clip.
A basic playback-rate change affects both duration and pitch. Faster playback compresses the waveform in time and raises its pitch; slower playback expands it and lowers the pitch. Pitch correction attempts to counter that pitch movement while preserving the new duration. This requires audio processing, and the character of the result depends on the material and the size of the change.
Work through this short diagnosis:
- Confirm what is selected. If video and audio are separate timeline items, selecting only the video cannot change the audio. Select the audio clip too if you intend to retime both.
- Open the audio clip's speed controls. Right-click the audio item and inspect Change Clip Speed. Check its Pitch Correction state rather than assuming the video item's state controls every separate audio clip.
- Check whether the clip is linked. A chain icon or linked selection can make a video and its audio behave together, but track selection and prior edits can still affect what is selected. Select both parts visibly before changing speed when both must follow.
- Audition a full phrase. A short isolated syllable can sound odd even when the whole phrase is acceptable. Listen to consonants, sustained vowels, breaths, and the transition into the next edit.
- Compare the corrected and uncorrected sound. If the checkbox is available, test both states on a duplicate or reversible edit. Decide based on the actual clip, not on the label alone.
The interface has changed across Resolve releases, and not every edition of a manual lays out the checkbox in the same panel. Blackmagic's older training guide documents it inside Change Clip Speed. The Resolve 18 Fairlight guide also shows Pitch Correction among speed-change controls in the Inspector. In Resolve 21.1, use the selected clip's current speed controls and the official 21.1 reference manual if the exact panel differs from the older screenshots. The current release information is on Blackmagic Design's support page.
A common false fix is turning Audio Scrubbing off. Scrubbing affects audio heard while moving the playhead; it does not change the rendered speed or pitch of the clip. Likewise, muting the clip hides the symptom but does not correct the retime. Diagnose the selected media and its speed settings first.
A pitch problem and a sync problem are separate symptoms, so check them separately.
What if Pitch Correction is checked but the sound still feels wrong?
Pitch Correction can preserve the approximate note range without preserving every quality of the original recording. If speech sounds watery, metallic, smeared, or phasey, the correction process may be audible at that retime or on that material.
Try these checks in order:
- Reduce the size of the speed change. A smaller adjustment gives the correction less work to do. If the edit only needs to lose a few seconds, test a modest increase rather than jumping immediately to a dramatic speed-up.
- Listen to the source at normal speed. If the source already contains clipped consonants, heavy noise reduction, reverberation, or compression, retiming can make those traits more obvious.
- Compare the corrected and uncorrected versions. Sometimes a slight pitch shift sounds more natural than aggressive correction. This is especially true for short sound effects, impacts, music, and deliberately stylized audio.
- Separate the audio if speech timing must remain natural. Use a shorter edit, remove pauses, or make several small cuts rather than stretching one long sentence far from its original duration.
- Replace production audio when it is not essential. For a silent visual speed ramp, retain or add music, ambience, or sound design that matches the new visual pace instead of forcing the camera microphone audio to fit.
Don't interpret “pitch preserved” as “voice unchanged.” The pitch of a sustained vowel can remain close while the vowel's texture and consonant timing become less convincing. For important dialogue, judge the edit on headphones and on the speakers your audience is likely to use. Check the complete phrase in context, because a corrected clip can sound acceptable alone but jump in tone next to an untouched line.
If a client or performer must approve dialogue, keep a copy of the original-speed audio on a muted track or in a duplicate timeline. This gives you a clean reference and lets you restore the original without trying to reverse a chain of speed edits. A named duplicate timeline is also safer than relying on memory about which control was changed.
How do I keep audio at its original speed while speeding up the video?
Unlink or otherwise separate the video and audio, retime only the video, then decide how the unchanged audio should fit the shorter picture. Pitch Correction does not freeze the sound at its original speed; it preserves pitch while audio duration changes with the retime.
This distinction causes much of the confusion. Editors often mean one of two different things when they say “keep the audio the same”:
| What you want | What to do | What changes | Main trade-off |
|---|---|---|---|
| Change picture and audio timing together, but avoid a chipmunk or low voice | Change Clip Speed with Pitch Correction enabled | Picture and audio duration change; pitch is processed toward the original | The audio can have audible processing artifacts |
| Change picture speed but keep the original audio take at original speed | Separate or unlink audio, then retime the video only | Picture duration changes; audio duration and pitch stay as recorded | The unchanged audio may no longer match the picture or fit the new duration |
| Change the timing of a music bed without shifting its pitch | Retime that audio clip with Pitch Correction enabled, then listen | Music duration changes while pitch is processed | Transients and rhythm may sound less natural |
| Create a visual speed ramp with natural dialogue | Keep dialogue separate and use cuts, room tone, or replacement sound | Video speed varies; dialogue can remain at normal timing | Requires a deliberate sound edit and may need extra coverage |
If the audio is embedded in a linked camera clip, unlinking may make it easier to select one component without moving the other. The exact command location can vary by page and version. Keep the audio aligned before you retime, make the video change, then decide whether to leave the audio where it was, trim it, or move it to a different part of the sequence.
That last choice matters. Suppose an interview shot is sped up from 100% to 150%, and its audio stays untouched. The picture now ends earlier, but the dialogue still takes its original time. You can preserve the full audio by letting it continue over later footage, cut it to a shorter phrase, or choose a different visual shot. You cannot preserve the same complete dialogue, its original timing, and the shortened picture duration simultaneously without changing something about the edit.
For a montage, original-speed audio may work as a voiceover over faster visuals. For a talking-head shot, it usually creates a visible lip-sync mismatch. If sync matters, retime the audio with pitch correction or use edit decisions that preserve normal speech timing. Resolve's audio synchronization guide covers ways to align separate sound sources when you need to rebuild a sync relationship.
When separating linked audio, protect it from accidental movement. Lock the audio track if you need it to stay fixed while trimming video, or keep a duplicate before the change. If you unlink clips, verify whether your version retains their relative position when moved; don't assume that unlinking automatically leaves a permanent sync lock.
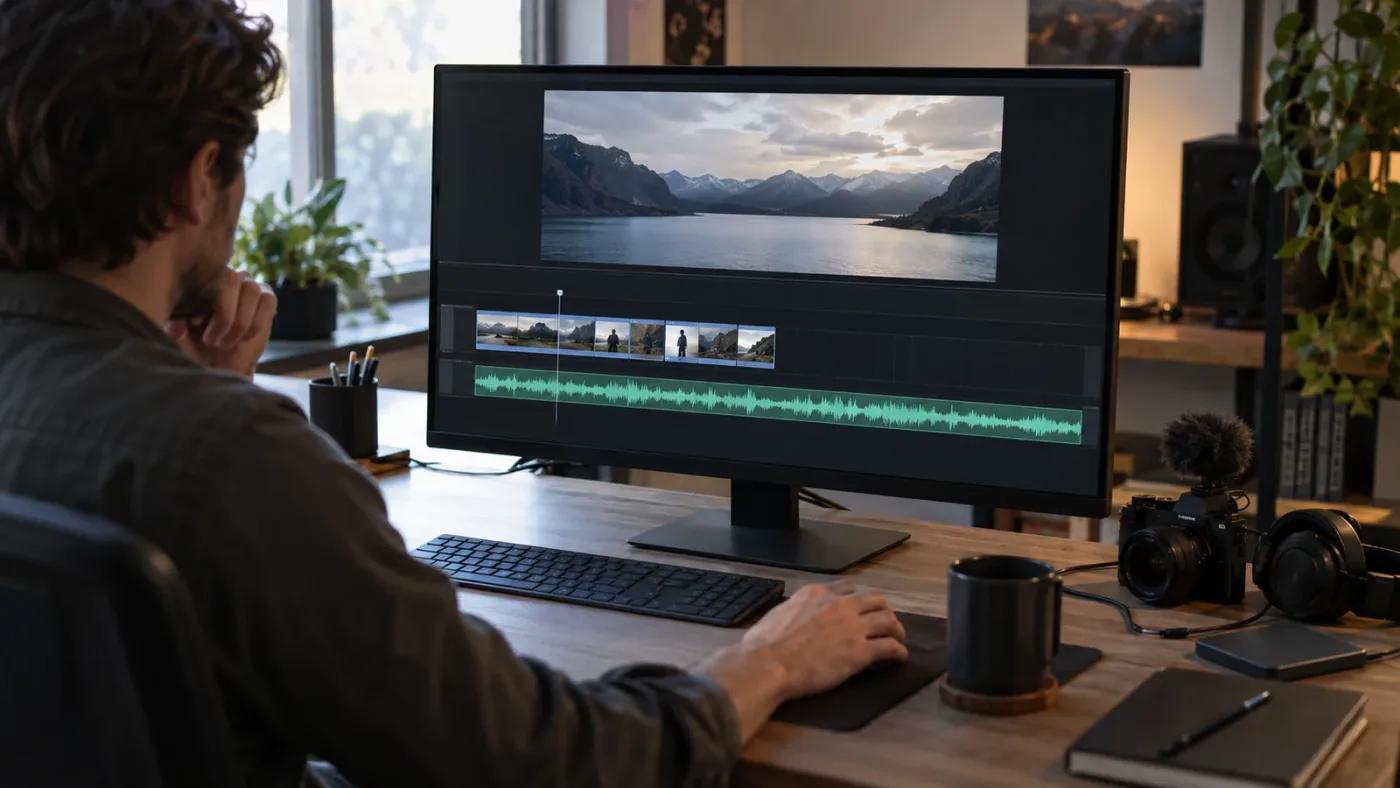
If audio duration must stay fixed, separate it before changing picture speed.
How do I change speed on only the video or only the audio?
Select only the component you intend to retime, and verify the result before moving on. A video clip and a separate audio item can have independent speed settings; changing one does not guarantee the other follows it.
For video only, separate or unlink the audio, select the video, apply Change Clip Speed or Retime Controls, and leave the audio untouched. Then inspect the edit for lip-sync drift or an audio line that continues after its picture ends. If you want the original sound as a bed, move it under B-roll or another shot intentionally rather than letting it fall out of sync by accident.
For audio only, select the audio clip and use its speed controls. Keep Pitch Correction enabled if the audio duration should change while pitch remains close to the original. If you need a musical time stretch, test a short section first. A music bed can remain in key while its attacks, groove, or ambience become less natural.
The audio controls in Resolve 18's Fairlight guide include speed percentage, frames per second, duration, Ripple Timeline, and Pitch Correction. That documented panel is useful for understanding what the control group does, but Resolve 21.1's layout can differ. The 21.1 support listing is the version reference; use the current manual for exact panel labels in the installed version.
Avoid dragging the edge of a clip when your intention is to preserve pitch unless you understand what operation that gesture invokes in the current tool mode. A trim changes which source frames or samples appear. A retime changes playback duration. A slip changes the source portion while maintaining the timeline position. Those edits can look similar at the edge of a clip, but they solve different problems.
Should I use Change Clip Speed or Retime Controls?
Use Change Clip Speed for one constant speed across the full selected clip; use Retime Controls when you need variable speed sections, speed points, or a ramp. Both approaches can retime audio, so verify the pitch behavior on the linked or selected audio after applying the effect.
Blackmagic's training guide explains the difference: Change Clip Speed makes a constant speed change, while Retime Controls can stretch or shrink the clip over time and create variable-speed effects. In the guide, Command-R opens retime controls on macOS and Ctrl-R does so on Windows. Resolve 21.1 may adjust menu organization, so the right-click command remains the practical fallback if the shortcut behaves differently in a customized keyboard map.
| Editing task | Better starting point | Why | What to check in audio |
|---|---|---|---|
| Make a whole clip consistently 80% speed | Change Clip Speed | Enter a specific percentage in one dialog | Keep Pitch Correction on if you want the pitch held closer to the source |
| Make a whole clip consistently 125% speed | Change Clip Speed | Constant-rate change is direct and easy to compare | Listen for processed consonants and breaths |
| Slow down, hold, then speed up | Retime Controls and Speed Points | Variable timing needs more than one rate | A ramp may create changing audio texture; audition the transition |
| Match a shot to a fixed gap | Fit to Fill or a duration-based retime | The target duration is the main constraint | Confirm audio selection and pitch behavior after the fit |
| Keep sound untouched while changing picture | Separate audio and video first | Avoids retiming the source sound with the image | Rebuild sync or use the sound as voiceover or B-roll audio |
Resolve 21 added enhanced bezier easing for retime parameters in its Keyframe Editor, according to the DaVinci Resolve 21 New Features Guide. The feature shapes how speed changes ease between values; it does not remove the need to decide what happens to audio. A smooth visual curve and a smooth-sounding audio retime are different outcomes.
A useful workflow is to make the picture timing decision first, then treat the audio as its own review. Set constant speed if one rate works. If you need a ramp, add speed points around the exact action you want to emphasize, shape the transition, and play the complete section. If the audio is dialogue, consider keeping it at normal timing while the visual ramp happens on separate footage. If it is camera sound tied to the action, a pitch-corrected retime may be appropriate, but listen for a sudden change in tone as the speed curve moves.
The DaVinci Resolve speed ramp guide explains the retime controls and speed points in more detail. For this specific problem, remember that choosing a different retime tool does not automatically mean audio pitch is preserved. Check the pitch control and the selected audio in either workflow.
A speed ramp is a picture-timing tool; its audio still needs its own review.
Why does my speed ramp change the audio in an unexpected way?
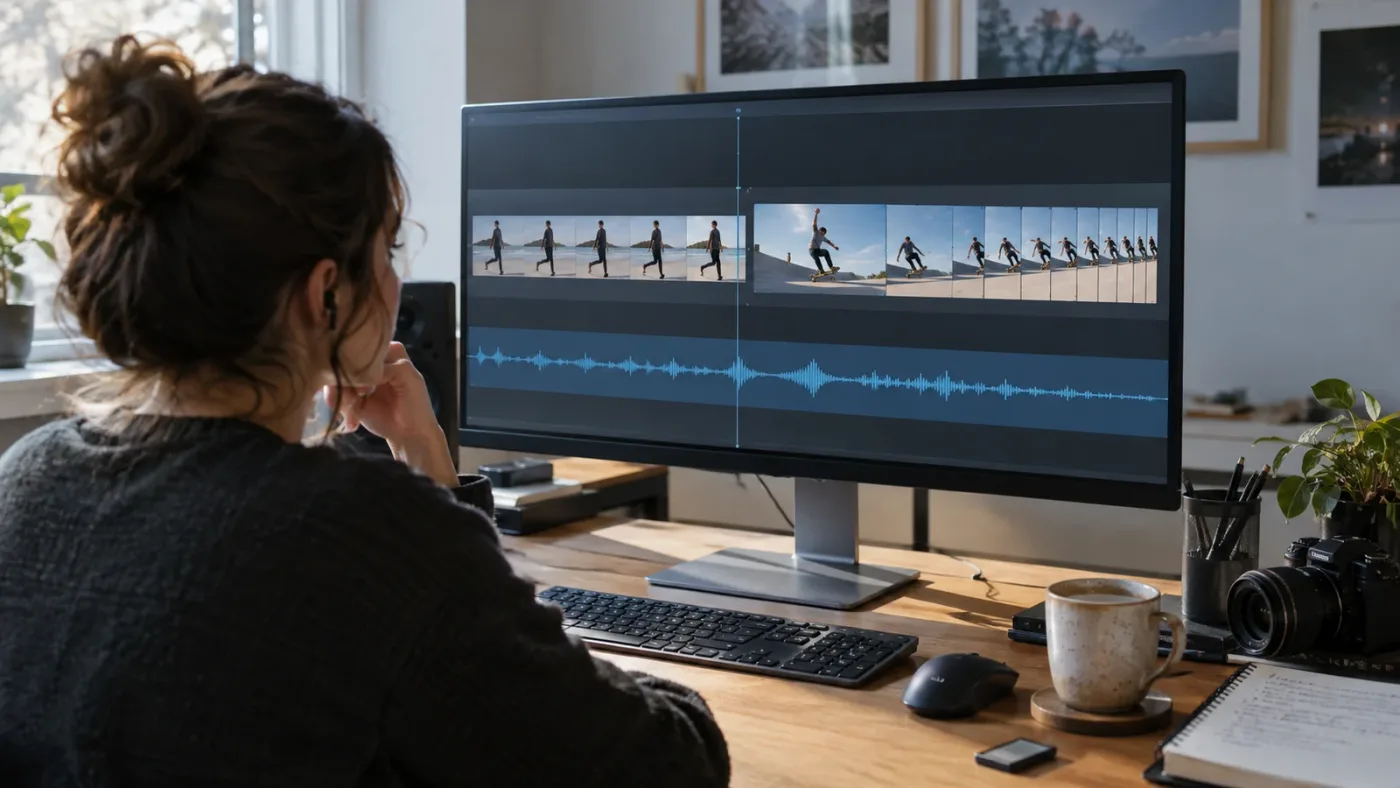
A speed ramp varies playback rate over time, so audio attached to that clip may change its timing and texture throughout the ramp. Pitch Correction can reduce the obvious rise or fall in pitch, but it cannot make variable audio sound identical to an untouched recording.
First determine whether you want the original production sound to follow the action. A skateboard landing, engine rev, or whoosh may benefit from changing pitch because the sound reinforces the visual acceleration. Dialogue usually has a different job: the words should remain easy to understand and aligned with the mouth. You may decide to keep the dialogue at normal speed and replace the camera sound with selected effects or music.
For a ramped clip with sound you want to keep, use a short test range that includes the slowest and fastest portions. Check the beginning, the speed transition, the midpoint, and the return to normal speed. Listen for pumping, stutters, sudden tonal changes, or a sound that seems to lag behind the action. If the sound feels wrong, try a smaller range of speeds, change where the ramp begins, or separate the audio and edit it independently.
Resolve 21.1's new features guide describes enhanced bezier easing for retime parameters, which can make the visual speed transition smoother. It does not state that the easing performs a particular audio pitch transformation. Don't infer audio quality from the shape of the picture's speed curve.
Uncle can point to the speed control in your own Resolve timeline while you work through the retime.
Why does the clip duration change when I preserve pitch?
The clip duration changes because the requested playback speed changes how long both picture and attached sound take to play; Pitch Correction works on pitch, not duration. A slower clip lasts longer, and a faster clip lasts less time unless the timeline operation or ripple settings alter surrounding edits.
At 50% speed, a ten-second source range would take about twenty seconds to play. At 200%, it would take about five seconds. The exact displayed result may be frame-rounded and can depend on the selected in and out points. These examples follow directly from the rate calculation: new duration equals source duration divided by the playback-rate multiplier.
This is why the Ripple sequence option deserves attention. A speed change can create a longer or shorter clip, and ripple behavior determines whether later timeline material moves to accommodate that change. If Ripple is disabled, the clip can overlap later edits or leave a gap. If Ripple is enabled, later timeline items may shift. Inspect the timeline before and after applying the change, especially when other tracks contain titles, music, subtitles, or synchronized camera angles.
Pitch correction won't preserve sync with a separately recorded camera or recorder track if the source items were not retimed together. If the audio is linked and retimed with the picture, their durations can stay aligned while pitch is processed. If only one side changes, sync can drift or the clip edges can stop matching. Keep related audio selected, or deliberately unlink and manage it yourself.
For interviews, sync is more than matching clip lengths. Even when the linked audio and video stay aligned through a common speed change, corrected dialogue may feel less natural. If you change only picture speed and leave the audio at normal speed, lips will no longer match. Choose whether timing, synchronization, or sound quality is the priority for each edit, then make the necessary compromise explicit.
How do I retime music or sound effects without changing pitch?
Select the music or effect clip, change its speed, and enable Pitch Correction when you want its duration to change without the same proportional pitch shift. Test a short section first because musical transients, rhythm, and texture may change even when the pitch stays close.
Music presents a different problem from speech. A sustained pad may tolerate a time stretch well, while a sharp drum hit can smear or lose impact. A loop can also drift away from the beat grid after a duration change. If the music must land on an exact edit point, set the intended duration, audition the downbeat and ending, and decide whether to trim, loop, or use another section of the track.
For a sound effect, the “wrong” pitch may be part of the design. A slowed impact that drops in pitch can feel heavier; a faster riser can feel more urgent. Compare corrected and uncorrected versions. If neither fits, keep the clip at its original duration and alter level, EQ, or layering instead of forcing the speed change.
When using a long ambience recording under a sped-up montage, consider whether changing its timing serves the scene. Often the easiest solution is to leave the ambience at normal speed and extend or trim it independently. That avoids audible time-stretching and keeps a stable background under the edit.
If you retime a music clip and then change its speed again, make sure you're adjusting the intended base clip and not a nested or compound item with separate timing. A duplicate timeline or alternate track makes it easier to A/B the choices without losing the original. Listen at the final output level; low-level artifacts can become more obvious after the mix is turned up.
Why is Pitch Correction missing or unavailable?
The control may be hidden because you're looking at a different page or selected item, or because your selection is not the audio-bearing clip whose speed you intend to change. Select the timeline media item, open its speed controls, and check the installed version's reference manual if the panel differs.
Start with the selection. A title, adjustment clip, compound clip, or video-only file may expose different controls than an audio clip. If the audio is on a separate track, select that audio clip rather than the picture. When working with a linked pair, make sure the audio component is included in the selection and inspect its own controls if needed.
Next, distinguish the Cut, Edit, and Fairlight pages. Resolve can expose related parameters in more than one place, but the labels and panels aren't identical. The Change Clip Speed dialog is a reliable place to check the pitch option when available. The Inspector may expose Speed Change controls for the selected clip. The Fairlight page focuses on sound editing and may show a different arrangement of audio controls.
Also check whether a retime was applied at a different level. A clip inside a compound clip, multicam sequence, or nested timeline can have one speed at the outer level and another inside. If the sound seems unchanged after toggling a checkbox, you may be changing the outer container while the audio is governed by an internal clip setting.
If you are on DaVinci Resolve 21.1 and a control seems absent, note the exact clip type, page, and version number shown in About DaVinci Resolve before searching support. The Blackmagic Design support page lists the current manual and release documents. Older tutorials can still explain the concept, but screenshots and menu positions can be stale.
What is the safest way to review a pitch-preserving speed change?
Keep the original audio available, make the speed change on a reversible copy or duplicate timeline, and review the retimed clip in context. Check intelligibility, sync, clip edges, and the sound's transition into neighboring shots before exporting.
Use this short quality-control pass:
- Start before the clip. Listen through the incoming transition so a pitch or room-tone jump doesn't surprise you.
- Hear a complete phrase or musical event. Don't judge only the first half-second. Speech processing can become noticeable on sustained vowels or breaths.
- Check sync at the start and end. If the audio and video are meant to stay linked, compare both ends after retiming. A small mismatch can be easy to miss in the middle.
- Watch the new duration. Confirm that ripple behavior didn't move titles, music, or a later cut you wanted to keep fixed.
- Compare with the source. A brief A/B gives you a clearer sense of whether the pitch sounds preserved and whether artifacts are acceptable.
- Review at export resolution and mix level. A timeline preview is useful, but the final rendered result is the deliverable. Reopen the render and check the passage before sending it on.
This isn't a substitute for listening carefully. Pitch Correction is a convenience for common retimes, while final judgment depends on the source and the audience. A voiceover slowed slightly may be fine. A close-miked singer pushed to a much longer duration may not be. A mechanical sound effect can benefit from the pitch change that the checkbox is designed to reduce.
When a speed adjustment is meant to solve a pacing issue, ask whether the edit itself can solve it more cleanly. Removing pauses, tightening gaps between phrases, or cutting to B-roll can shorten an interview without stretching every spoken syllable. A montage may feel faster through shot selection and music rather than by speeding up each clip. Use retiming when the visual action itself should play at a different rate.
We teach editing to more than 100,000 Udemy students and work with professional editors through our community. That experience is why we recommend treating speed, pitch, and sync as three separate checks. Once you've settled on the right timing, a DaVinci Resolve on-screen assistant from TryUncle can point to the relevant control on Mac or Windows when the interface in a tutorial doesn't match your screen.
The best pitch setting is the one that sounds right in the finished edit.
Is there a better way to learn this than searching for one checkbox?
The best way to learn DaVinci Resolve is to solve a real edit while you can see how each control changes the timeline, then repeat the operation on different material. For this task, practice once with dialogue, once with music, and once with a video-only clip so the distinction between speed, pitch, and duration becomes clear.
Blackmagic Design's free official training is the strongest starting point for structured fundamentals and current terminology. The company's training materials include project-based lessons and manuals. YouTube educators such as Casey Faris can be helpful when you need a quick visual walkthrough; the trade-off is that a video may use another Resolve version or assume a different selection state. Faris describes his focus simply: “I like doing tutorials about color correction, editing, and other things related to post production.” His Resolve 14 speed-change tutorial is useful historical context, while the current manual should settle questions about today's controls. Community answers on Reddit and the Blackmagic forum can reveal useful edge cases, but check whether the advice matches your version and exact goal. A paid course on Udemy or Coursera can give you a longer learning path, though it may not answer the next control question while you are editing.
| Learning route | Best for | What it won't do for this exact problem |
|---|---|---|
| Blackmagic Design free training and manuals | A structured, official foundation and reference for control names | It cannot see your current timeline selection or project state |
| YouTube, including Casey Faris tutorials | Seeing a workflow demonstrated quickly | The interface in the video may differ from your version or layout |
| Reddit or Blackmagic forum | Specific troubleshooting and alternate workflows | Advice needs context; a reply may address a different interpretation of “keep audio the same” |
| Udemy or Coursera course | A guided sequence of lessons and practice | A course lesson isn't always available at the moment you get stuck in the app |
| The TryUncle app | Getting an on-screen pointer to the relevant Resolve control while you work | It doesn't replace learning editing judgment or listening to the result |
If you need a lasting mental model, remember this: speed changes duration; Pitch Correction works to preserve pitch; unlinking lets you leave audio timing alone. That rule helps you choose the correct workflow before hunting through menus. If you want to learn Resolve fast, use short practice edits and verify each result rather than memorizing a long list of controls. And if you're asking for an app that helps you while using DaVinci Resolve, choose one based on whether you need a course, a searchable answer, editing automation, or live guidance at the control you are trying to use.
For the common case, the answer is simple: open Change Clip Speed, set the rate, keep Pitch Correction enabled, and review the full passage. If the audio must keep its original timing, separate it before retiming the picture. Make that choice deliberately and the checkbox will do exactly the job it was built for.

Frequently asked questions
- How do I change clip speed in DaVinci Resolve without changing audio pitch?
- Right-click the clip in the timeline, choose Change Clip Speed, set the speed, keep Pitch Correction checked, and click Change. Resolve changes the audio duration with the clip while attempting to preserve its pitch.
- Why does my audio sound high or low after changing clip speed in DaVinci Resolve?
- Pitch Correction may be off, the audio may not have been included in the speed change, or you may be hearing an extreme retime or a speed ramp. Check the audio clip's Speed Change controls and audition the result.
- How do I speed up video but keep the audio at its original speed?
- Unlink or separate the audio from the video, change only the video clip's speed, then reposition and trim the unchanged audio to fit the new edit. Pitch Correction alone does not keep audio duration unchanged.
- Does DaVinci Resolve pitch correction work on speed ramps?
- Pitch Correction is available with speed-change workflows, but a ramp makes audio timing vary over the clip. Listen through the full ramp and consider separating, rebuilding, or replacing audio if the result is uneven.
- Where is Pitch Correction in DaVinci Resolve 21?
- Select the timeline clip and open Change Clip Speed from its context menu, or inspect the selected clip's Speed Change controls. The checkbox is labeled Pitch Correction; Resolve 21.1 is the current version covered here as of October 2026.
Sources
- DaVinci Resolve 21.1 Reference Manual and Support Center
- DaVinci Resolve 21 New Features Guide
- The Fairlight Audio Guide to DaVinci Resolve 18
- DaVinci Resolve 15 Definitive Guide, Change Clip Speed
- DaVinci Resolve 15 Advanced Editing Guide, Change Clip Speed
- Blackmagic Design Forum: Resolve 14 retime to custom percentage?
- Casey Faris on his DaVinci Resolve tutorials
Learn by doing, not watching
Stop translating tutorials to your timeline.
TryUncle stays beside Resolve on Mac and Windows. When you ask, Uncle sees your screen and points at the exact control you need. No hunting through tabs, timestamps, or mismatched tutorials.
Meet TryUncleKeep reading
 GuidesJul 11, 202635 min read
How to Speed Ramp in DaVinci Resolve: The Complete Guide
Every way to speed ramp in DaVinci Resolve: Retime Controls, speed points, the Retime Curve, Optical Flow vs Speed Warp, and what changed in Resolve 21.
 GuidesJul 8, 202639 min read
How to Sync Audio in DaVinci Resolve, Every Method
Sync audio and video in DaVinci Resolve with Auto Sync Audio, timecode, the Sync Bin, or a manual clap, plus fixes for drift and failed matches.
 FixesOct 10, 202631 min read
DaVinci Resolve Audio Disappears After Reopening Project? Fix It
Fix DaVinci Resolve audio that disappears after reopening a project. Diagnose missing media, moved drives, bins, proxies, timelines, and playback routing.