
Learn / DaVinci Resolveupdated for DaVinci Resolve 21.1 (October 2026)
DaVinci Resolve Audio Disappears After Reopening Project? Fix It
Quick answer
When DaVinci Resolve audio disappears after reopening a project, check whether the timeline clip is present and marked Media Offline. If it is offline, reconnect its drive and relink the Media Pool item to the original file. If it is online, check mute, routing, and the output device. Save, reopen, and test playback.
The timeline opens, the picture is there, and the dialogue track is suddenly red or silent. That is unnerving when the project played normally yesterday. We have spent more than seven years editing commercial video, and a missing clip often looks like an audio problem before you know whether Resolve has lost the file, the timeline item, or the route to your speakers.
As of October 2026, DaVinci Resolve 21.1 is the current version listed by Blackmagic Design. The exact menu labels can vary by release, so this guide calls out the Resolve 20 and 21 workflow where the distinction matters. We also hear this kind of stuck point in our 100,000+ member editing community: the first job is to identify which thing disappeared.
Why does DaVinci Resolve audio disappear after reopening a project?
DaVinci Resolve can appear to lose audio for three different reasons: the source file is unavailable, the timeline clip or track state changed, or the clip is present but playback is not reaching an audible output. Those conditions look similar in the Edit page, but they need different fixes.
Treat “audio disappears” as a symptom, not a diagnosis. A timeline clip that says Media Offline points to source access or relinking. A timeline with no clip at that time points to project or timeline state. A visible, online clip with moving meters but silence points toward mute, routing, output selection, or monitoring.
Blackmagic's Resolve 20 Editors Guide explains that clips can go offline when the storage holding their media is unavailable or the files have moved to a different folder or drive. The same guide says the red Relink Media button appears when Resolve has unexpectedly missing media, and that deliberately unlinked media is not included in that indicator. The guide is for Resolve 20, so use the current manual for any changed labels in 21.1. (Source: Blackmagic Design's DaVinci Resolve 20 Editors Guide.)
Start with a quick classification. Do not rename folders, delete cache files, or import a second copy of the same recording yet. Those moves can make it harder to tell whether the original media reference is recoverable.
| What you see after reopening | Most likely layer to inspect | First safe check |
|---|---|---|
| Red or offline audio clip in timeline | Source file path or storage availability | Confirm the drive is mounted, then inspect the Media Pool File Path |
| Clip appears in Media Pool but not the timeline | Timeline selection, track visibility, or project state | Open the intended timeline and search for the clip in the correct bin |
| Online clip and waveform, but no audible sound | Mute, routing, bus, output device, or level | Watch track meters, then test another clip and output |
| Audio plays but waveform is blank | Waveform display or cache generation | Play the clip and inspect the waveform display setting |
| Only some files are offline | A subset of paths, formats, or permissions differ | Relink one missing item at a time and compare its path |
The quickest reliable diagnosis is to ask two questions in order: “Is the clip still in this timeline?” and “Can Resolve read its source file?” Only after both answers are yes should you spend time on the Fairlight signal path.
An offline source file and a silent audio output are different failures, even when both sound like missing audio.
What should you check before changing the project?
Before editing anything, preserve the current project state and record what Resolve says about the media. A reversible diagnosis protects the existing timeline and lets you compare what changes after relinking.
If the project is important, make a project backup or export a project copy before you start repairs. DaVinci Resolve's project save and load controls include Live Save and Project Backups; Blackmagic's Resolve 17 Beginners Guide describes Live Save as continuously saving work and Project Backups as a separately enabled option. Since preference labels and defaults may have changed, check the manual for your installed version rather than assuming an old preference state. (Source: Blackmagic Design's DaVinci Resolve 17 Beginners Guide.)
A project backup is not the same as a media backup. Saving a project database or exporting a DRP does not automatically put every referenced WAV, MP3, camera original, or externally recorded audio file inside a new folder. The project and its source media are separate parts of a working edit. When you are unsure what has been copied, preserve the source folders too.
Use this initial check before clicking Relink:
- Open the project and confirm you selected the expected project and timeline. Projects can contain multiple timelines, versions, and bins with similarly named clips.
- Look at the audio track in the timeline. Is the clip absent, present with an offline indicator, or present and online?
- Open the Media Pool and locate the corresponding source clip. Compare the clip name, duration, and file path with the source recording you expect.
- Check whether the relevant drive or network volume is connected and mounted. A volume that was disconnected during startup may become available later, but Resolve may still need a refresh or relink.
- If the project came from another machine, ask whether the original path existed only on that computer. A path such as a drive letter on Windows or a mounted volume name on macOS is not portable by itself.
- Note whether all audio is missing or only recordings from one folder, card, recorder, or day. A pattern often narrows the source path problem.
- Save a copy before making a batch relink if you cannot confidently identify the correct source files.
Do not infer that the file is gone because Resolve cannot currently open it. Offline means Resolve cannot use the media at the referenced location or cannot parse it in its current state; the file may still exist elsewhere. Conversely, a green or visible waveform does not prove that the full source archive has been copied to the project drive.
A good baseline note is simple: “Project opens on this machine; A001.wav is offline; it should be on the external SSD in /Audio/Day-01; the video source is online.” That observation is more useful than a vague report that “the audio vanished,” especially if you need help from a colleague or Blackmagic support.
How can you tell whether the audio clip is offline or missing from the timeline?
An offline clip remains represented in the project but Resolve cannot access its media; a missing timeline clip is absent from the active edit at that time. Look at both the Media Pool and the timeline before relinking anything.
On the Edit page, move the playhead over the place where the sound should occur. If the timeline track has no clip there, there is nothing to relink at that moment. If a clip is there but flagged as offline, inspect its source file. If the clip is there and online, use meters and routing checks instead of relinking.
Then inspect the Media Pool. Switch to List View if needed and look for a File Path column. Blackmagic Design support staff member Dwaine Maggart advised a user with offline media to “look at the File Path column and see where it thinks the offline media should be, and then sort out why it's not in that location.” That is a practical first step because it turns a general failure into a specific expected path. (Source: Blackmagic Design forum discussion.)
The clip name alone is not enough to identify the intended file. Cameras and recorders often create repeated names across cards or shooting days, and exported audio may also reuse a filename. Compare duration, channel count when shown, folder context, and any available metadata. Do not relink a dialogue clip to a similarly named music file just because Resolve accepts it.
If the clip is absent from one bin, use the Media Pool's search or inspect the bin tree before importing it again. The clip may live in another bin, be hidden by a filter, or exist in another timeline. Importing another copy can produce duplicate entries: the timeline still points to its original media-pool item, while the newly imported file sits beside it unused.
The Media Pool File Path is a better diagnostic clue than the clip's filename alone.
How do you check whether the source drive is available?
A source drive is available only when the operating system can access the expected volume and Resolve can read the file at the path recorded for that clip. Reconnect the storage first, then inspect the path Resolve is trying to use.
Check the physical connection, power, hub, cable, and mount state before changing project references. On Windows, confirm the drive has the expected drive letter. On macOS, confirm the volume is mounted in Finder and has not been renamed. On network storage, confirm the share is connected with the same account and permissions. Resolve cannot relink to a folder that the operating system itself cannot browse.
If you connect storage after launching Resolve, reopen the Media page or refresh the Media Storage browser. The precise interface can differ by version and operating system. The project may remember an old absolute path even when the same files now appear under a different volume name or drive letter.
A common pattern is “all files from the portable SSD are offline, but local files still work.” That points toward storage availability or a root path change. If the drive appears but the files are still offline, check whether the folder hierarchy changed. For the specific “Unable to find media storage location” message, see our DaVinci Resolve media storage location fix. If the drive and folder are unchanged, test whether the current user can open the exact source file outside Resolve.
Avoid changing the volume name just to match a remembered path until you know what else uses that volume. Multiple projects, scripts, or applications may depend on the current name. Relinking to the real current location is often clearer than renaming storage to imitate an old setup.
If only files on a network share fail, check both the share connection and permissions. A project can open from a local project library while the network media remains unavailable. The project database being reachable does not prove the source-media share is reachable.
When the source drive is available but Resolve still shows offline, read the full path rather than assuming the root folder. Look for a moved “Audio” folder, an added subfolder, a changed card-dump name, or a source directory that was reorganized after import. The correction should point to the actual original file or its new containing folder, not to a parent folder with unrelated copies.
How do you relink missing audio in DaVinci Resolve 20 or 21?
To relink missing audio, reconnect the source storage, select the offline media-pool item or its bin, and point Resolve at the folder containing the original file. Confirm that the correct clip comes online before you save and reopen the project.
In Resolve 20, the relink command moved into contextual menus under Clip Operations for selected clips. Blackmagic's manual and menus may change between releases, so if you use Resolve 21.1 and do not see the same wording, search the current manual for “Relink Selected Clips” or use the menu search if available. Blackmagic's own forum discussion about Resolve 20 confirms the contextual path: select the missing clips, right-click, then choose Clip Operations > Relink Selected Clips. A separate Blackmagic forum reply notes that the command can be found on a selected bin as well. (Sources: Blackmagic forum: DR20 can't relink files and Blackmagic forum: Relink Clip/Replace Clip in Resolve 20.)
Use this sequence:
- Connect and mount the drive that contains the audio.
- Open the project, go to the Media page, and select the offline source clip in the Media Pool. If a whole bin shares the same moved folder structure, selecting the bin may relink multiple clips together.
- Right-click and choose the relink command. In Resolve 20, look inside Clip Operations. In other versions, inspect the selected clip or bin context menu and verify the wording in that version's manual.
- Browse to the folder that actually contains the source files. Resolve uses filename and media characteristics to match candidates; a larger search folder can contain ambiguous duplicates.
- Let Resolve complete the operation. Inspect the resulting clips for online status and check the intended timeline range.
- Play the timeline and verify the sound, not just the thumbnail or waveform.
- Save the project, close it, and reopen it with the same drive connected. Confirm that the media remains online.
For one file, target the narrowest folder that contains the exact source. For an entire folder tree moved intact, choose the new top-level folder only if it preserves the relevant relative subfolder structure. A broad disk-wide search may find an identically named file from a different shoot.
Resolve 20's Editors Guide says the red Relink Media button appears when media is unexpectedly missing and opens a window showing how many files are missing. The guide also warns that deliberately unlinked media is not counted by that button. If the button is not red, that does not prove every clip you expect is still linked; inspect the actual item and its status. (Source: Blackmagic Design's Resolve 20 Editors Guide.)
For a failed batch relink, reduce the scope. A Blackmagic forum user reported that selecting a group of 13 mixed-format files relinked 11 while two needed to be relinked individually. That report is one user's case, not proof of a general limitation, but it supports a useful troubleshooting step: relink leftovers one at a time and check for duplicate names, different extensions, or unusual file formats. (Source: Blackmagic forum: Relinking Clips misses some clips.)
Do not drag an audio file into the timeline as a substitute for relinking unless you intend to create a new timeline clip. Dragging can add new media without repairing the old source reference. If you replace an offline source intentionally, compare its timing, channels, sample rate, and duration before you accept the replacement.
If you're unsure which contextual command applies, Uncle can point to the relink control in your current Resolve window while you work. TryUncle is the on-screen assistant for DaVinci Resolve on Mac and Windows - ask in plain words and Uncle points at the exact control on your screen. TryUncle is available for current product details.
Why does Resolve still show audio offline after you relink it?
A relink can fail when Resolve cannot match the selected media to the candidate file, when the chosen directory is wrong, or when the audio file itself cannot be read. Narrow the search and verify that the source file is actually the one used by the timeline.
Check these causes in order:
- Wrong folder level: You selected a parent or sibling folder that does not contain the referenced audio. Browse to the actual folder or use the new root that preserves the same subfolder tree.
- Duplicate names: Two recordings share a filename. Compare duration, creation context, channel layout, or metadata before confirming a match.
- Different extension: A WAV may have been converted to AIFF or another format. A new file is not necessarily the same source, even if it sounds similar.
- File moved but not copied: The old path no longer exists and the destination copy is incomplete or still transferring.
- Permission issue: The operating system can see the folder, but Resolve does not have access to read it under the current account or security permissions.
- Unsupported or damaged media: The file exists, but Resolve cannot decode it. Test the file in a trusted player or audio tool and check the codec support information for your installed version.
- Partial selection: Some clips in a bin were not selected, or a batch operation matched only some items.
Resolve's matching rules and available options vary by workflow. The Resolve 20 Colorist Guide describes relinking proxy media separately from relinking camera originals, and explains that proxy media and camera originals can occupy the same Media Pool item while Playback > Proxy Handling determines which version is displayed. The guide says “Prefer Proxies” uses associated proxies where available, while “Prefer Camera Originals” favors originals. If a clip is online in proxy mode but its original is offline, switching to originals can reveal the issue; this is not the same as losing the timeline audio. (Source: Blackmagic Design's Resolve 20 Colorist Guide.)
Resolve 21.0.4 added support for relinking proxy clips with different formats, according to Blackmagic's release information. That update concerns proxy relinking; it does not mean every missing original audio recording can be recovered automatically. If you use proxy workflows, identify whether the missing item is the camera original, a proxy, or an independent audio recording before changing Proxy Handling. (Source: Blackmagic Design Support Center.)
Don't replace an original audio file with a proxy or render without understanding the relationship. A proxy may be lower resolution or otherwise optimized, and a separately recorded WAV may carry production sound not present in the camera file. Relink the intended media type, then confirm sync and sound.
If one item continues to fail, test it by itself. Select only that clip, relink to the narrow folder containing the file, and compare the result. This isolates a mismatch without repeatedly changing all the other paths that already work.
How do you find the exact audio file Resolve expects?
The exact expected location is shown by the source clip's file path in the Media Pool. Use that path to compare Resolve's stored reference with the file's current location on disk.
In List View, locate the File Path column for the missing media. If the column is hidden, use the Media Pool column controls or the current Resolve manual to reveal it. Copy or note the path before relinking. Then compare each section: volume name or drive letter, top-level folder, card or shoot folder, audio subfolder, and filename.
Here are three examples of what the comparison can reveal:
| Resolve expects | File exists at | Likely difference |
|---|---|---|
E:\\Project\\Audio\\Scene-01.wav | F:\\Project\\Audio\\Scene-01.wav | Windows drive letter changed |
/Volumes/AudioSSD/Project/Audio/Scene-01.wav | /Volumes/AudioSSD/Project/Day-1/Scene-01.wav | Folder hierarchy changed |
/Volumes/Field Recorder/Take-12.wav | /Volumes/FieldRecorder/Take-12.wav | Volume name changed |
These are illustrations of path patterns, not claims about your machine. The path can also differ because a card dump was renamed, a folder was reorganized, or the project came from another editor. Identify the first point where the paths diverge; that is usually the most useful place to start browsing.
Resolve 20's Editors Guide recommends leaving imported clips in their original locations or using Media Management if you need to move them. Its explanation is straightforward: Resolve expects those files at their associated location. The specific menu labels may evolve, but the principle remains useful: plan a move as a media-management operation, not as an undocumented drag in the operating system. (Source: Blackmagic Design's Resolve 20 Editors Guide.)
A matching path does not guarantee matching content. If a file was overwritten with a different take under the same name, Resolve may find it and still produce the wrong sound or sync. Compare source duration and listen at a known point. If the file's contents differ, restore the original from the camera card, recorder card, backup, or production handoff rather than forcing a relink to a false match.
When collaborating, avoid copying a single file out of a larger card structure and renaming it casually. A clear path helps future relinks and makes it easier to tell which take is which. Keep the original folder organization when possible, and note the new root if you must move it.
Why is only some of my audio missing after reopening?
When only some audio goes offline, the failing clips likely share a location, format, or handling history that the working clips do not. Compare the path and media type of one working clip with one missing clip.
Start with the pattern, not the number of missing clips. Are they all from one day, one recorder, one external drive, one bin, or one import? Do they share an extension such as WAV, AIFF, or MP3? Were they recorded separately from picture? Were only some files renamed or moved? Each “yes” narrows the next check.
A mixed media pool may contain camera clips, separately recorded sound, music, sound effects, and generated audio. The fact that the video stays online says little about the path to a separately stored WAV. Conversely, if audio embedded in video is missing but the video itself is online, check whether the timeline clip's audio component was disabled, removed, or altered rather than assuming its source file moved.
Make a two-column comparison:
| Working clip | Missing clip |
|---|---|
| File Path | File Path |
| File extension | File extension |
| Folder and drive | Folder and drive |
| Duration and channels | Duration and channels |
| Camera original, proxy, or separate audio | Camera original, proxy, or separate audio |
| Same bin and import history? | Same bin and import history? |
If the missing set all points to a single old drive, reconnect or relink that root. If they span different drives but share a format, test one file's readability and confirm the codec is supported. If they are all on one timeline but the Media Pool copies are online, check the actual timeline items and their source associations.
Resolve may also retain media-pool entries that have been deliberately unlinked. The Editors Guide's red-button note is useful here: the button only signals unexpected missing media, not deliberately unlinked media. Therefore, a missing audio track can need a manual investigation even when Resolve's global relink warning does not appear. (Source: Blackmagic Design's Resolve 20 Editors Guide.)
Avoid selecting every clip in every bin and pointing them all at a generic “Audio” folder. That can invite false matches, especially when filenames repeat. Group clips that share a known folder move, relink that group, then inspect the remaining exceptions one at a time.
When only a subset of audio is offline, compare that subset's file paths before changing global settings.
What if the Media Pool clip is online but the timeline has no audio?
If the Media Pool source is online but the timeline has no audio clip where expected, relinking is not the first fix. Confirm you opened the intended timeline and inspect whether the audio clip or track was removed, disabled, hidden, or changed in the project.
A project can contain several timelines with similar names, including alternate cuts and earlier versions. Open the intended timeline from the Media Pool, then compare its duration, track labels, and edit points with what you remember. If you have timeline versions, inspect them carefully rather than overwriting the current cut.
Look for an audio track that is hidden from view because the track area is collapsed or scrolled. Expand the track area and use the track controls to inspect mute and solo states. A track may remain in the timeline but not contribute to playback because it is muted or solo behavior is isolating a different track.
If a clip is missing from the timeline but the source is still in the Media Pool, locate it and add it only if you intend to restore a new edit. Replacing a removed clip requires matching its start time, duration, source in-point, and sync relationship. For production dialogue, placing the right file at roughly the right moment is not enough; verify sync through the entire relevant section.
If the timeline itself has changed unexpectedly after reopening, compare the current project with a known project backup or earlier project export. Resolve's backup controls can preserve project states, but a backup may not contain the media files themselves. Restore the project state from a copy only after confirming it is the correct version and preserving the current one.
This is where project-state and media-path problems split. A restored timeline can still point to media that is offline. A fully online Media Pool can still accompany a timeline that no longer contains the clip. Solve those layers separately.
If you regularly work with multiple edits, use clear timeline names and avoid treating the first-opened timeline as automatically correct. That small habit prevents the wrong diagnosis when an alternate version intentionally has different sound.
Why is the audio waveform visible but there is no sound?
A waveform is a visual representation of audio data, not proof that the signal is reaching your speakers. If the source is online, follow the signal through the clip, track, bus, and output device.
First, play a known section and watch the track meters. If the meters do not move, check the clip's audio enable state, track mute, clip volume, and whether the source contains audible material. If the track meter moves but the bus meter does not, inspect routing. If the bus meter moves but you hear nothing, check monitoring output and the operating system's selected device.
Use this ladder:
- Clip: Is the clip enabled? Is its clip gain or volume keyframed down? Does the waveform correspond to the expected file?
- Track: Is the track muted or excluded by solo on another track? Is its fader down?
- Bus: Is the track routed to the intended bus? Is the bus muted or at zero? Does the bus meter move during playback?
- Output: Is the bus assigned to a hardware or system output that exists on this computer? Did headphones, an interface, HDMI display, or dock become the active device?
- Operating system: Is the system output muted or sent to another device? Can another application play audio through the expected output?
Resolve audio monitoring can be workstation-specific. A project opened on another machine may inherit or encounter different audio hardware and operating-system output choices. That is why the same project can play on one computer and appear silent on another even when its source clips are online.
If every track is silent and the meters do not move, do not immediately relink all sources. Test a known-good media clip and inspect the audio engine and track state. If meters move but output is silent, this is more likely a routing or device issue than missing media. For a focused walkthrough of that second case, see our guide to DaVinci Resolve using the wrong audio output device.
If the Media Pool clip itself is offline, output device settings cannot restore the source. Resolve cannot play a file it cannot read. Fix the media path first, then test routing only if the clip comes online but remains silent.
Could proxies make the audio seem missing?
Proxies can change which version of a clip Resolve displays, but proxy handling is a separate layer from the project's timeline edits and from independent audio recordings. Identify whether the missing sound belongs to a proxy-linked video clip or a separate audio file.
Blackmagic's Resolve 20 Colorist Guide describes camera originals and proxies as linked versions that occupy the same space in the Media Pool. The Playback menu's Proxy Handling choices include Disable All Proxies, Prefer Proxies, and Prefer Camera Originals. The guide explains that Prefer Proxies uses linked proxy clips where available, while Prefer Camera Originals favors camera originals. If the original is absent, an offline frame can appear depending on the selected handling mode. (Source: Blackmagic Design's Resolve 20 Colorist Guide.)
This workflow matters most when the audio is embedded in a camera file or when the linked proxy has a different audio configuration. It matters less for a separately recorded production WAV that has its own Media Pool entry. A proxy setting will not bring back a standalone WAV stored on a disconnected drive.
Try this controlled check:
- Note the current Proxy Handling mode so you can restore it.
- Select one affected clip and identify whether its audio is embedded or separately recorded.
- Switch to the mode that uses the media you expect, then test playback.
- If the camera original comes online but separate WAV media remains offline, return to the WAV's own file path and relink it independently.
- If audio changes between proxy and original modes, verify that the proxy and original carry the expected audio channels and sync.
Resolve 21.0.4 added support for relinking proxy clips with different formats. That release note tells you about proxy relinking, not a general guarantee that source audio will survive drive moves. Keep the distinction clear when searching for a fix. (Source: Blackmagic Design Support Center.)
Don't delete proxy files as a first troubleshooting move. They may be part of the intended workflow, and deleting them doesn't repair the original file path. If a proxy is corrupt or mismatched, relink or regenerate it using the project settings and preserve the camera original.
Why does audio disappear on another computer or after moving the project?
A project file moved to another computer carries project data and media references, but the second machine still needs access to the source files. If the file paths differ, the project can open while audio remains offline.
This is common when one editor works from D: and another uses a mounted external disk, or when the source media lives on a network share available only to the first workstation. The project can be perfectly readable while its recordings are absent. Opening a DRP successfully is not the same thing as opening a self-contained project archive.
Before handoff, confirm which of these you are sending:
| Handoff item | What it does | What it does not guarantee |
|---|---|---|
| Project file or project export | Carries the project structure and edit decisions | Does not automatically include all referenced source media |
| Project library or database backup | Preserves project data according to the backup process | Does not replace an independent media copy |
| Media folder copy | Moves selected source files | Does not prove every timeline dependency was copied |
| Managed archive or consolidated package | Collects media according to chosen options | Still needs verification at the destination |
Use Resolve's media-management or archive workflow to collect the project and media when appropriate, then test the copy from the destination drive. Our guide to archiving a DaVinci Resolve project without losing media covers that handoff in more depth.
When a project must remain linked to shared storage, agree on stable mount names, folder structure, permissions, and who may reorganize the media. For a one-off transfer, copying the relevant source folders to the destination and relinking there can be simpler. In either case, open the project from the destination environment and test the actual timeline before you call the handoff complete.
Do not assume that using the same brand of operating system means paths will match. A Windows laptop and a Windows desktop may assign different drive letters. Two Macs can mount the same SSD under different names if the volume name changes or an older volume is already mounted. A network share can be mounted under different roots depending on the connection method.
For collaborative projects, Resolve's project collaboration features do not magically copy every local audio file to every workstation. Blackmagic's support information describes project-server and cloud collaboration as project workflows; source media still needs an accessible storage plan. In Resolve 21, Blackmagic announced multi-user project support in the release notes, but that is not the same thing as automatic media portability. (Source: Blackmagic Design Support Center.)
For a robust handoff, keep the original media folder until the receiving workstation has opened and checked the project. If an audio file is missing at the destination, retain the sending copy and relink from that verified source rather than trying to reconstruct it from a rendered timeline.
Does DaVinci Resolve store audio inside the project file?
Usually, Resolve's project file stores references to source media rather than embedding every original audio file in the project. The source WAV, camera file, or music file remains at its filesystem location unless you deliberately package or copy it.
This explains an important distinction: saving the project saves edits, but it does not necessarily make the project portable. The project can remember that a clip came from /Volumes/AudioSSD/Show/Day2/boom.wav; if that drive is absent after reopening, Resolve still has the reference but cannot read the sound.
The same distinction applies to backups. Project Backups can give you an earlier project state; a filesystem or media archive backup protects the original recordings. Keep both when the work matters. A database backup is not a substitute for a separate media copy, and a media copy alone does not preserve timeline decisions.
A project archive may include media depending on the workflow and choices you make. Verify the contents rather than relying on a filename like “project_backup.” Check that the destination contains the original audio and that Resolve opens the project with no offline media while the original drive is disconnected.
If you need to move a project but cannot copy all source media, keep the original drive or network storage available to the new workstation. The limitation should be explicit to whoever receives the project: “This project references audio on the studio NAS” is more useful than “The project is attached.”
What should you do if audio disappears after Resolve crashes or a project update?
If audio vanishes after a crash or software update, preserve the current project and compare its timeline state with a known backup before relinking or rebuilding media. A crash can leave a project state issue, while an update can expose a path or compatibility problem; neither automatically proves source files were erased.
First, check whether the files themselves remain accessible outside Resolve. Then open a copy of the project or a project backup. If the same media is offline in both, focus on paths and storage. If the backup is online but the current project has removed clips or different routing, compare the project states and recover the needed edits carefully.
Before installing another version, read Blackmagic's version notes and preserve the project. Resolve project compatibility can depend on version changes, and updating a project may affect the ability to reopen it in an older release. Blackmagic's support center lists the current versions and release notes; use those official notes for version-specific compatibility rather than applying generic advice from an older forum post. (Source: Blackmagic Design Support Center.)
Do not delete the project database, library folders, or backup files to “reset” Resolve. Those may contain the only recoverable state. If the project appears corrupted, work from a copy and keep the original untouched while you troubleshoot. For prevention steps around project health and backups, keep a separate project backup and verify it before you rely on it.
A crash after reopening can also distract from a simple storage timing issue. If a drive spins up slowly, a network mount connects late, or a laptop wakes before an external drive reconnects, test one reopen after the media is fully mounted. If the result changes, record that sequence and use it to narrow the cause.
How do you verify that the fix survives another reopen?
A repair is confirmed only when the same project reopens with the intended audio online and audible. Save, close, reopen, and test a known section before you consider the issue resolved.
Use this verification checklist:
- Confirm the expected source clip shows online in the Media Pool.
- Confirm the intended audio clip is present at the right timeline position.
- Play a section with recognizable dialogue, sync sound, or music.
- Watch the track and bus meters while it plays.
- Save the project and wait for the save operation to finish.
- Close the project normally.
- Confirm the required drive or network location remains mounted.
- Reopen the same project and timeline.
- Check that the source remains online and listen again.
- If the issue returns, compare the path and output device before making another change.
A successful test should match the condition that originally failed. If the problem occurred after a computer restart, test after a restart. If it happened on a second workstation, test on that workstation. If you only test before closing the project, you have not tested the reopen condition.
If the audio is online but silent after the second open, compare track routing and selected output device. If the audio is offline again, compare its File Path and the mount state. If the timeline clip disappears but the media remains online, compare timeline versions or restore from a known project backup. Each repeated symptom points to a different layer.
Write down the exact version number shown in DaVinci Resolve's About screen, the operating system, the storage type, and whether the missing audio is embedded or separate. Those details help you search Blackmagic's current manual and support forum for a matching behavior. Blackmagic's support center lists Resolve 21.1 and its manual as of September 2026; menus in Resolve 20 may differ from 21.1. (Source: Blackmagic Design Support Center.)
When should you stop relinking and ask for project-specific help?
Stop broad relinking when Resolve finds an ambiguous match, when the source file seems damaged, or when the timeline state is changing unexpectedly. Preserve the project copy and gather the path, file name, Resolve version, and exact symptom before asking for help.
Ask for focused help if:
- Resolve shows the file online but playback produces corrupted or incorrect sound.
- A relink points to a file with the wrong duration or take.
- Several projects lose the same media after a system or storage change.
- The project opens differently in a newer or older Resolve release.
- You cannot identify whether a clip uses a proxy, camera original, or separate audio recording.
- A project backup or database appears damaged.
Share only what is necessary. A screenshot of the relevant timeline and Media Pool path can help, but avoid posting client media, private filenames, or unreleased footage publicly. If you contact Blackmagic support or the community, include the Resolve version, operating system, storage type, and a short description of what changed between the working and broken sessions.
For media-handling questions, Blackmagic's official manual and support forum are the best first references because they document current menu labels and allow version-specific advice. Resolve 21.1's manual is available from the Blackmagic Support Center; older Resolve 20 users should use the matching 20 manual where possible. The Resolve 20 forums also show why menu location matters: users reported that relink actions moved under Clip Operations, and support staff clarified the selected-bin option. (Sources: Blackmagic Support Center and Blackmagic forum: Resolve 20 relinking.)
If you need someone to point at the right control while you work inside Resolve, TryUncle provides that on-screen help for Mac and Windows. The fix still depends on identifying the actual failure: media path, timeline state, or playback route.
What is the next step?
If Resolve marks the clip offline, follow its File Path to the missing folder, reconnect the source drive, and relink the correct original. If the clip is online, trace the signal through the track, bus, and output. Then reopen the project once more to prove the fix lasts.
A project is ready to hand off only after its source media opens from the destination workstation.
Frequently asked questions
- Why does DaVinci Resolve audio disappear after reopening a project?
- The project may have reopened without access to the drive containing the source audio, or the clip may have been removed, disabled, muted, or routed away from the output. Check the Media Pool file path and timeline clip first, then relink the exact source file if it is offline.
- How do I relink missing audio in DaVinci Resolve 20 or 21?
- Reconnect the source drive, select the missing audio clip or its bin in the Media Pool, and use Clip Operations > Relink Selected Clips in Resolve 20 or later. Choose the folder containing the original audio file, verify the clip returns online, then save and reopen the project.
- Why is the audio waveform visible but there is no sound after reopening Resolve?
- A visible waveform does not prove that the clip is currently routed to an audible output. Check the track and clip mute states, Fairlight bus routing, track level, and the audio output device; then test another known-good clip.
- Does DaVinci Resolve store my audio inside the project file?
- A Resolve project stores editing decisions and references to media, while source audio files normally remain at their filesystem locations. Exporting a project file alone does not package all source media; use Media Management or a complete archive when moving a project.
- Why does audio disappear only when I open the project on another computer?
- The second computer may not have the same source files, folder structure, drive mount, or permissions. Open the Media Pool in List View, inspect File Path, connect the correct drive, and relink to matching originals; for a handoff, copy and verify the media with the project.
Sources
- DaVinci Resolve 21.1 Manual
- DaVinci Resolve 20 Editors Guide, Relinking the Media Files
- DaVinci Resolve 20 Colorist Guide, Proxy Workflows
- Blackmagic Design forum: Importing into Free from Studio
- Blackmagic Design forum: DR20 can't relink files
- Blackmagic Design Support Center: DaVinci Resolve 21 release information
- DaVinci Resolve 21.1 New Features Guide
- DaVinci Resolve 17 Beginners Guide, Project Save and Load
Learn by doing, not watching
Stop translating tutorials to your timeline.
TryUncle stays beside Resolve on Mac and Windows. When you ask, Uncle sees your screen and points at the exact control you need. No hunting through tabs, timestamps, or mismatched tutorials.
Meet TryUncleKeep reading
 GuidesJul 12, 202638 min read
How to Archive a DaVinci Resolve Project Without Losing Media
The right way to archive a DaVinci Resolve project so every clip travels with it: Export Project Archive vs Media Management vs Backups, compared.
 FixesJul 22, 202624 min read
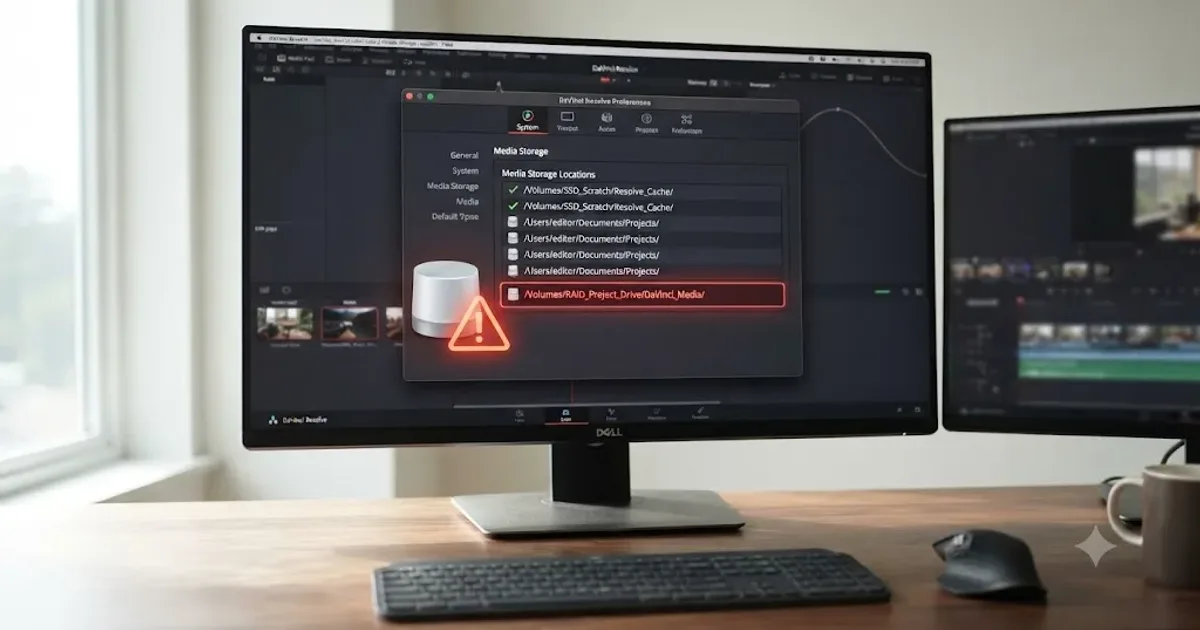
DaVinci Resolve Unable to Find Media Storage Location, Fixed
DaVinci Resolve's Unable to Find Media Storage Location error means a path in Preferences no longer exists or is unreachable. Here's the full fix.
 FixesJul 23, 202623 min read
DaVinci Resolve Audio Going to the Wrong Output Device: The Fix
DaVinci Resolve sending sound to the wrong speakers, headphones, or HDMI monitor? Here's every setting that controls output routing, and the exact fix.