
Learn / DaVinci Resolveupdated for DaVinci Resolve 21.0.2 and Final Cut Pro 12.3 (July 2026)
Switching From Final Cut Pro to DaVinci Resolve: Full Guide
Quick answer
Export your Final Cut Pro timeline as FCPXML version 1.9, then import it into DaVinci Resolve with File > Import > Timeline and apply the Final Cut Pro 7 keyboard preset. Titles, Motion graphics, AIFF audio, and Roles-based mixing don't transfer and need rebuilding by hand. Most editors feel comfortable cutting within two to three weeks, with color and audio taking longer.
You've got a Final Cut Pro habit built over years, a project due, and a reason to move to DaVinci Resolve anyway. Maybe a client shot RAW and wants ACES color management Final Cut Pro doesn't have. Maybe you're tired of being locked to a Mac when half your team runs Windows. Maybe you just watched one too many "why I switched" videos this month. Whatever got you here, the actual mechanics of moving a real project with a real deadline get skipped over in most of those videos in favor of a highlight reel of the Color page.
This is the mechanical version, as of July 2026. What survives the FCPXML export and what doesn't. The specific timecode bug that leaves half your media offline. Which keyboard preset to apply in the first five minutes. We've spent seven-plus years doing professional, commercial video editing across the tools this industry actually runs on, and the gap between "Final Cut Pro" and "DaVinci Resolve" on paper is narrower than most switching guides admit, and wider in a few specific places they don't mention at all.
Why are Final Cut Pro editors switching to DaVinci Resolve right now?
Three separate pressures tend to show up together, and they rarely arrive alone. The first is platform lock-in. Final Cut Pro runs on Mac and iPad only, according to Apple's own product page, so the moment a project needs to move to a Windows colorist, a Linux render farm, or just a collaborator who isn't on Apple hardware, Final Cut Pro can't follow it there. DaVinci Resolve runs on macOS, Windows, and Rocky Linux, per Blackmagic's own tech specs page, which makes it the only one of the two that includes everyone on a mixed-platform team.
The second pressure is color depth, specifically ACES. Apple's own documentation on automatic color management in Final Cut Pro covers Rec. 709, Rec. 2020, and HDR formats like HLG and PQ, but never mentions ACES anywhere in the workflow. Colorists on the ACEScentral community forum have confirmed that gap for years running. DaVinci Resolve has native ACES support built into its color management settings, which is why studios handing footage between multiple facilities tend to default to Resolve rather than Final Cut Pro. The third pressure is the simplest: a client, a studio, or a collaborator standardized on Resolve, and now everyone touching that project needs to as well.
Switching editors is rarely about escaping a worse tool. It's usually about a project outgrowing a narrower one. Final Cut Pro's magnetic timeline remains genuinely fast for straightforward, single-editor cutting on a Mac. Resolve's deeper toolset in color, audio, and cross-platform collaboration is the actual draw, and it's worth being honest that you're trading some of that cutting-speed familiarity for it, at least for the first few weeks.
How is DaVinci Resolve's workspace different from Final Cut Pro's magnetic timeline?
This is the first real adjustment, and it trips up more new switchers than any keyboard shortcut does. Final Cut Pro is built entirely around the Magnetic Timeline, which, per Apple's own support guide, "replaces traditional track-based editing with an intuitive trackless design." Your main video and audio clips sit on a single primary storyline. Everything else, B-roll, titles, graphics, music, sound effects, connects above or below that storyline and automatically shifts out of the way when you insert, trim, or move something, so gaps and collisions close themselves without you managing separate tracks by hand.
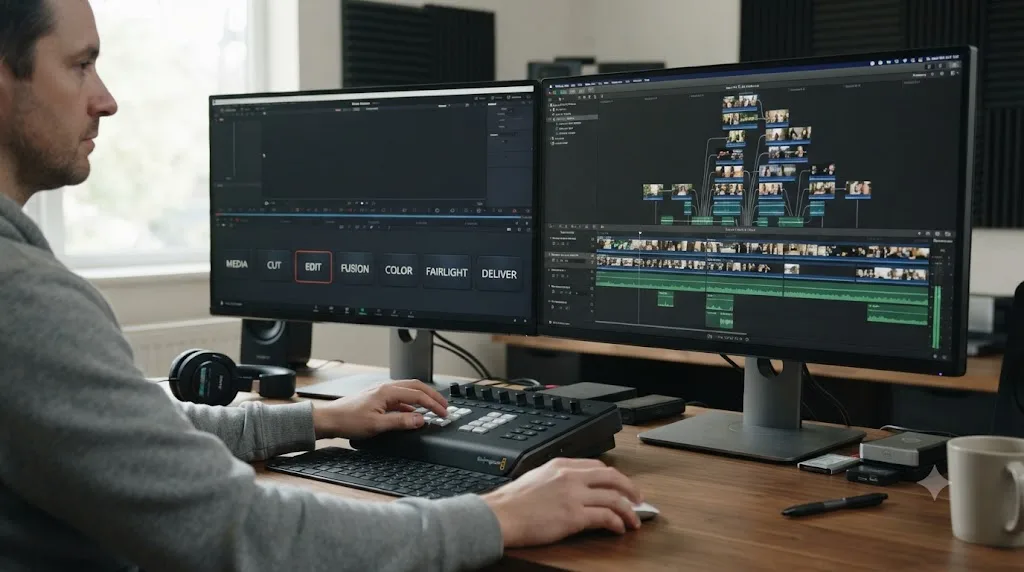
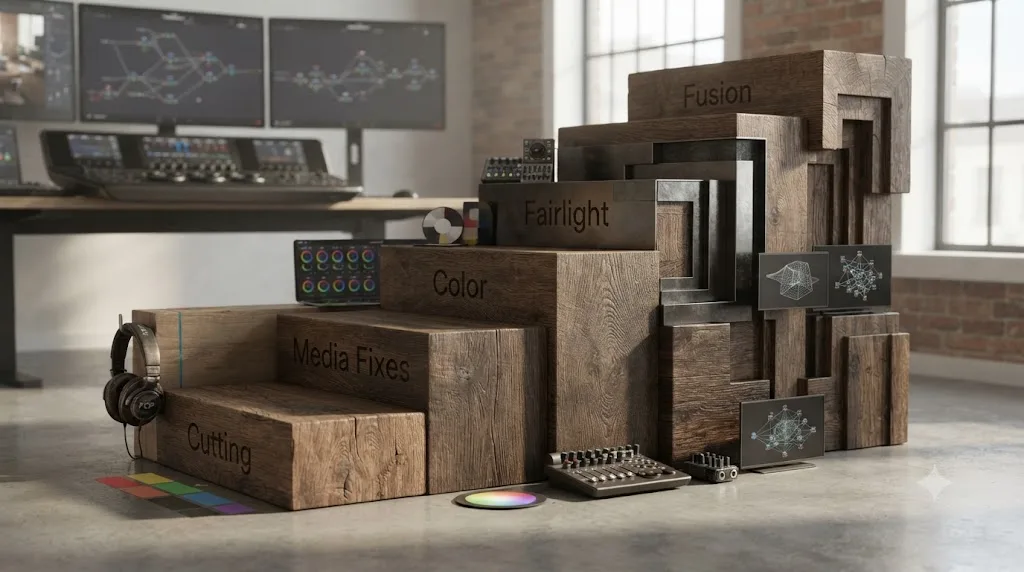
DaVinci Resolve has no equivalent to that automatic behavior. It's a conventional, track-based timeline where video and audio tracks stack independently and nothing moves unless you move it. On top of that, Resolve splits the entire application into seven distinct pages along the bottom of the window: Media, Cut, Edit, Fusion, Color, Fairlight, and Deliver. Each page functions closer to its own dedicated app wearing a shared interface than a panel you toggle inside one window, which has no Final Cut Pro analog at all, since Final Cut Pro keeps its (much thinner) color, audio, and export tools as side panels inside the same single window you already cut in.
The page system roughly maps onto separate applications you might already reach for alongside Final Cut Pro. Edit and Cut both handle timeline editing. Fusion is Resolve's answer to Apple Motion, built in rather than a separate app you round-trip to. Color goes well beyond Final Cut Pro's Color Board. Fairlight replaces a trip to Logic Pro for serious audio work. Deliver replaces Compressor. The pitch, and it's a fair one, is that you stop exporting between programs because they're all already inside one window, at the cost of learning a structure Final Cut Pro never asked you to learn.
A trackless magnetic timeline and a seven-page, track-based application aren't two versions of the same idea. They're built on opposite assumptions about how an edit should be organized. Final Cut Pro assumes automatic reflow around one primary storyline. Resolve assumes you manage tracks explicitly, in exchange for a structure that scales cleanly to a colorist, a sound mixer, and a compositor all working inside the same project file.
Do you need DaVinci Resolve Studio, or is the free version enough coming from Final Cut Pro?
Start free. For almost every editor switching from Final Cut Pro specifically to cut, color, mix, and finish a normal delivery, the free edition covers it. Per Blackmagic's own Studio product page and a detailed Toolfarm breakdown of what's actually missing from the free tier, the free edition supports the full Edit, Cut, Color, Fairlight, and Fusion pages, caps export resolution at Ultra HD (3840x2160, up to 60fps), and leaves out multi-GPU acceleration, advanced noise reduction, most Neural Engine AI tools, and multi-user collaboration.
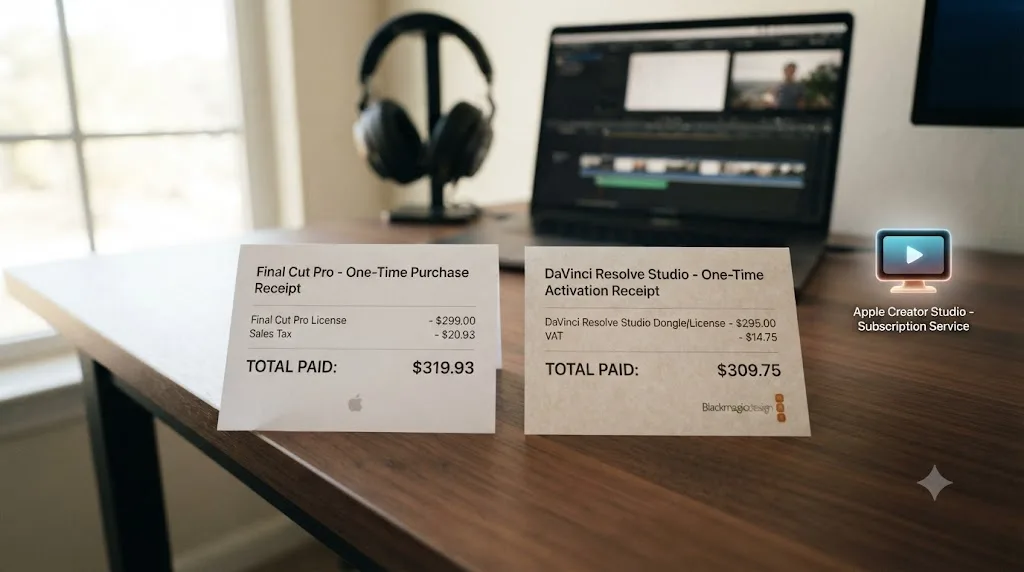
Final Cut Pro itself costs $299.99 as a one-time purchase, per Apple's own product page, or it's available through Apple's newer Apple Creator Studio bundle at $12.99 a month if you want it alongside Logic Pro and Motion on a subscription. DaVinci Resolve Studio removes the free tier's export cap and unlocks everything else for a single $295 payment, no subscription, ever.
| Feature | DaVinci Resolve (Free) | DaVinci Resolve Studio | Final Cut Pro |
|---|---|---|---|
| Cost | $0 | $295 one time | $299.99 one time, or $12.99/mo via Apple Creator Studio |
| Platforms | macOS, Windows, Linux | macOS, Windows, Linux | Mac and iPad only |
| Max export resolution | Ultra HD (3840x2160) | Unlimited | Unlimited |
| ACES color management | Yes | Yes | No |
| Fairlight audio page | Yes | Yes | No (round-trip to Logic Pro) |
| Fusion compositing | Yes | Yes | No (separate Motion app) |
| Neural Engine AI tools | No | Yes | Not applicable |
| Multi-user collaboration | No | Yes | No native equivalent |
You're not choosing between free and paid the way an iMovie switcher does. Two software licenses that both avoid a recurring subscription is a different financial conversation than the one Adobe's ecosystem forces, and the actual deciding factor here is depth and platform reach, not price. One practical gotcha worth knowing before you commit a real project to the free edition: applying a Studio-only effect while running Resolve's free tier stamps a visible watermark on your export, so check your render before you send anything to a client.
How do you export a Final Cut Pro project as XML for DaVinci Resolve?
Resolve has no native reader for a Final Cut Pro Library file. What you're actually doing is exporting an FCPXML interchange file from inside Final Cut Pro, then importing that file into Resolve, which reconstructs your timeline from the data the format carries.
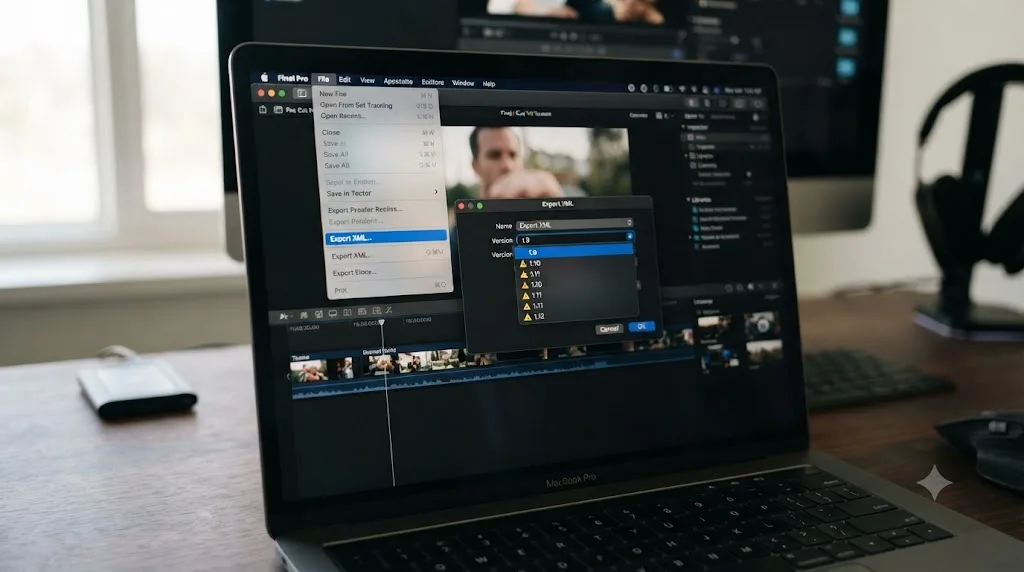
Select your project in the Browser and choose File > Export XML. This is the step where most first-time switchers lose an afternoon they didn't need to lose. Larry Jordan, who's published multiple detailed guides on this exact workflow, put the version requirement plainly:
"You know you've exported the right version if it has an 'FCPXML' file extension. Version 1.10 and later create 'FCPXMLD' files, which won't work."
The fix is choosing version 1.9 specifically in the export dialog rather than accepting the newest default. Resolve's XML support has historically lagged a version or two behind whatever Final Cut Pro currently defaults to, which a Blackmagic Forum thread on exactly this gap confirms is a recurring, version-dependent issue rather than a one-time bug that got patched. Exporting 1.9 specifically, rather than assuming the newest option is safest, is the reliable move regardless of which Resolve release you're running.
Jordan's broader advice about the whole process is worth internalizing before you touch a real deadline's timeline:
"I strongly recommend you practice this when deadlines are not looming so you can see precisely how this will work for your project."
That's not caution for its own sake. FCPXML export behavior varies enough by project complexity, connected-storyline structure, and media format that the only reliable way to know what your specific timeline will do is to run the export once on a copy, before you need it to work.
Here's what that test actually looks like in practice. Build a throwaway project with three or four clips, a basic title, one transition, and a short music cue, the exact ingredients that cause the most trouble later. Export it as FCPXML 1.9, import it into a fresh Resolve project, and check three things: do the clips land online, does the transition survive or vanish, and does the title show up as a gray placeholder box. That last one always fails, and seeing it fail on a throwaway project is a much better place to learn that than in the middle of a client deadline. The whole test takes about ten minutes and tells you more about your specific footage and effects than any generic guide, including this one, ever could.
How do you import the FCPXML into DaVinci Resolve's Media Pool?
Once you've got a valid .fcpxml file, the import side is short. In DaVinci Resolve's Edit page, right click anywhere inside the Media Pool and choose Timelines > Import > AAF/EDL/XML, or use File > Import > Timeline from the main menu. Point it at your exported FCPXML file and Resolve rebuilds your cuts, clip positions, and basic timing from the data the file describes, then looks for your original media at the file paths recorded inside it.
XML import, per a Creative Video Tips walkthrough of the workflow, enables transfer of edits with multiple video tracks and a variety of supported effects alongside the core edit data, plus positioning, scaling, rotation, and Color Board correction data from Final Cut Pro's basic controls, which show up in the Inspector on Resolve's Edit page or the Sizing palette on Color.
One structural detail worth knowing before you import: if your Final Cut Pro sequence used connected storylines, stacking B-roll or graphics clips above your primary storyline, those import into Resolve as a single, linked clip rather than separate elements on separate tracks. To edit them individually once they're in Resolve, select the linked clip, right click, and uncheck "Link Clips." That single step is the difference between a timeline you can actually work with and one where every connected element moves together whether you want it to or not.
Audio format is a smaller but real gotcha here too. Resolve does not import AIFF files, so if your Final Cut Pro project used AIFF audio anywhere, convert it to WAV and replace the AIFF media inside Final Cut Pro before you export the XML, not after you discover the problem in Resolve.
Why does my Final Cut Pro XML import leave clips offline in Resolve?
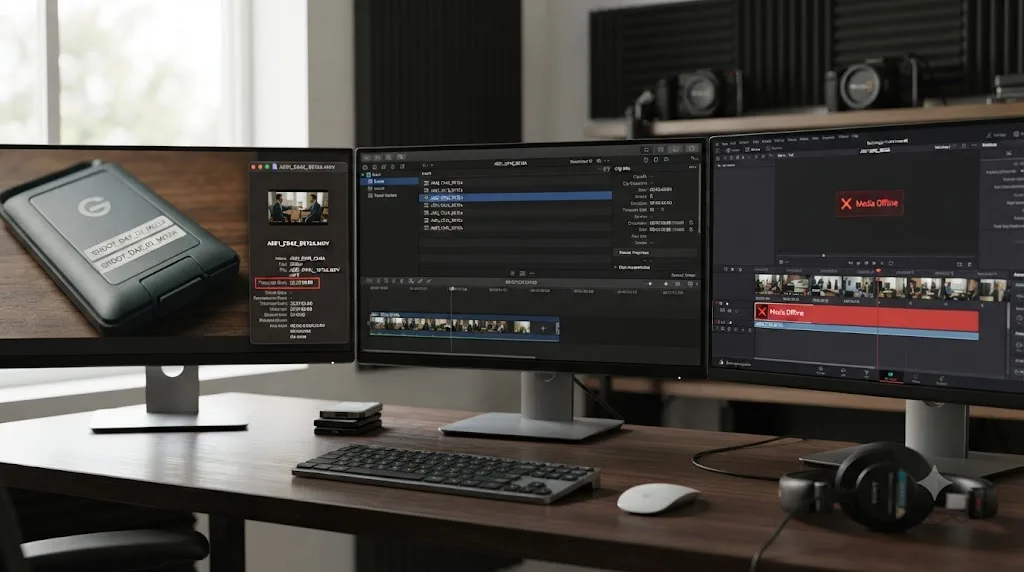
This is the single most confusing failure mode for a Final Cut Pro switcher specifically, and it has almost nothing to do with the XML file itself. The root cause is a disagreement between the two applications about how to read a camera file's embedded timecode.
When you drag and drop MP4 or MOV files straight into a Final Cut Pro Event from Finder, Final Cut Pro ignores the camera's embedded timecode entirely and assigns a new one starting at 00:00:00:00. DaVinci Resolve, when it later tries to relink media from your exported XML, reads the camera's actual embedded timecode, which might start at hour 22 or 23 depending on your camera's settings. Your XML file tells Resolve to look for a clip at hour zero; the source file's real timecode starts at hour 22. Resolve can't find a match, and the clip shows up offline, in red, across every timeline that references it.
The fix has to happen back in Final Cut Pro, before you export anything. Import your media using File > Import > Media rather than drag and drop. That import dialog preserves the camera's embedded timecode instead of overwriting it, and current versions of Final Cut Pro rewrap the source file into a QuickTime container that carries the correct timecode baked in. Export your XML after that proper import, and the timecode Resolve reads on the other side will match.
If you've already built a project the wrong way and don't want to reimport everything, there's a manual workaround: adjust the timecode for each affected clip inside Resolve's Clip Attributes dialog to match what the source file actually contains, before you attempt the XML import. It's slower than doing the import correctly the first time, but it works on a project you can't easily rebuild from scratch.
| Symptom | Cause | Fix |
|---|---|---|
| Clips show offline in red after XML import | Timecode mismatch between Final Cut Pro's assigned zero-start timecode and the camera's real embedded timecode | Re-import media in Final Cut Pro via File > Import > Media, not drag and drop, then re-export the XML |
| Whole project already built the wrong way | Same root cause, discovered too late to reimport cleanly | Manually correct timecode per clip in Resolve's Clip Attributes dialog before importing |
| AIFF audio missing after import | Resolve does not import AIFF files at all | Convert AIFF to WAV and replace the media in Final Cut Pro before exporting |
A media file showing offline in Resolve almost never means the file is actually broken. It means two applications disagreed about what time it is on that specific clip. That distinction is worth holding onto the first time you see a timeline full of red, since the panic response, reimporting everything from scratch, usually isn't the fix; fixing how the source media got imported in the first place is.
What causes an FCPXML import to fail outright, not just show offline media?
Offline media is the most common XML headache, but it's not the only one. Sometimes the import doesn't produce a broken timeline, it produces no timeline at all, or an error message instead of a working project. A troubleshooting breakdown from Cutsio on this exact failure mode lists several separate causes worth checking before you assume the file itself is corrupt.
| Symptom | Cause | Fix |
|---|---|---|
| Import fails silently, or the timeline never appears | File paths in the XML don't match where your media actually lives on this specific drive | Reconnect media manually, or pre-import your source files into Resolve's Media Pool before importing the XML |
| Import stalls or errors on specific clips | The XML references effects, transitions, or speed ramps Resolve's importer doesn't recognize | Strip those elements from the Final Cut Pro sequence and export again, then rebuild them natively in Resolve |
| Clips come in offline even though timecode matches | A frame rate mismatch somewhere in the sequence, even a single clip running a different rate than the rest | Confirm every clip and the sequence itself share one frame rate before you export |
| Import partially completes, then breaks | The sequence has nested sequences, multicam clips, or more video tracks than a basic overlay structure | Flatten multicam clips and nested sequences in Final Cut Pro first, or accept a partial import and rebuild the complex sections by hand |
| Nothing above explains it | A structural XML issue Resolve's parser can't recover from | Fall back to a manual conform: export a reference video from Final Cut Pro and use it to match cuts by eye in a new Resolve timeline |
That last fallback sounds primitive next to an automated XML import, and it is. But it's also the one method that always works, because it doesn't depend on Resolve correctly parsing anything Final Cut Pro wrote. On a short, simple project, matching cuts against a reference video by eye can take less time than debugging why a 40-clip sequence with three nested compounds refuses to import cleanly.
What actually breaks in the transfer, and how do you rebuild it?
Beyond timecode and file format, there's a specific, recurring list of things that simply don't survive an FCPXML export, because Resolve can only rebuild what the interchange format actually describes, and several of Final Cut Pro's signature features were never designed with that translation in mind.
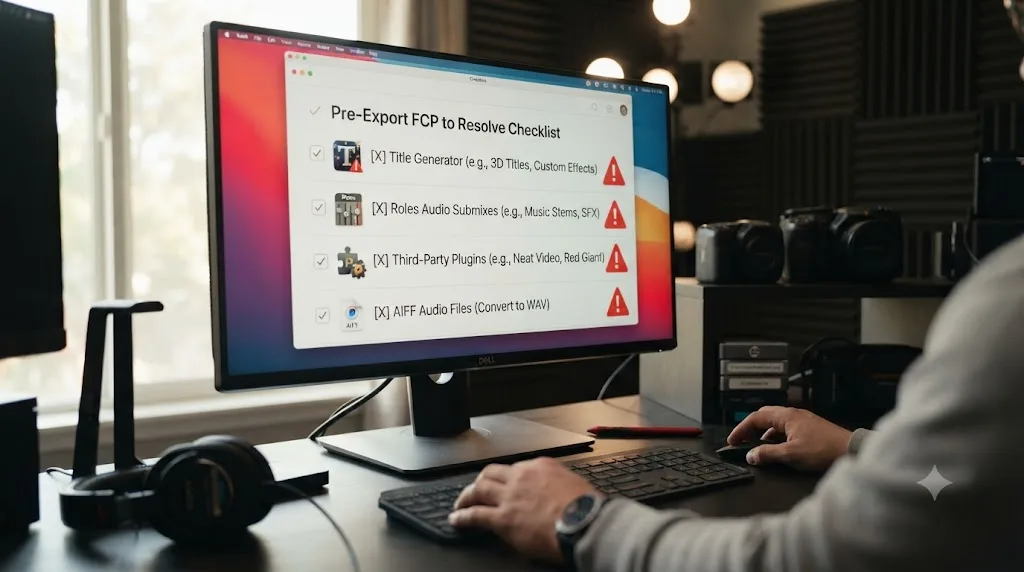
Titles and Motion-based graphics. Jordan is direct about this one:
"Resolve does not import titles (gray box), because they are in a format proprietary to Final Cut."
Any title built with Final Cut Pro's built-in generators, or anything built in Motion and used as a Final Cut Pro template, needs to be rebuilt from scratch using Resolve's Text+ tool. Jordan does note a partial exception on the round-trip side: "a few, more complex, titles may need to be rebuilt but the durations, locations and text content were preserved" when sending a project back the other direction, but the visible title itself, going Final Cut Pro to Resolve, doesn't transfer at all.
Roles-based audio organization. Final Cut Pro automatically assigns clips one of three default color-coded Roles, Dialogue, Effects, or Music, according to Apple's own Audio Roles white paper, and lets you build custom Roles on top of that for more granular mixing. Resolve has no Roles concept at all. Hidden or disabled audio channels and Role-based groupings expand into separate individual tracks on import instead, which means a tidy Roles-organized Final Cut Pro audio structure often becomes a wider, flatter stack of tracks in Fairlight that you'll want to relabel and reorganize by hand.
Third-party plugins and complex title generators. Neither FCPXML nor the interchange process in general was built to describe what a third-party Final Cut Pro plugin does internally, so those effects simply won't appear in Resolve. Specialized FCP title generators can go further than just failing silently: a Cutsio troubleshooting guide notes that certain generator-based titles can crash Resolve's XML parser outright with an "Invalid XML" error, which is worse than a missing element, it's a failed import you have to troubleshoot before you can work at all. The recommended move is deleting text layers, generators, and third-party transitions from your sequence before export, then rebuilding them natively once the clean import lands in Resolve.
| What breaks | Why | Fix |
|---|---|---|
| Titles and Motion-based graphics | Proprietary Final Cut Pro format, no shared schema | Rebuild with Resolve's Text+ tool |
| Roles-based audio organization | Resolve has no Roles concept | Expands into individual Fairlight tracks; relabel and reorganize manually |
| Third-party plugin effects | No shared description format exists | Rebuild using Resolve's native tools or an equivalent |
| Specialized title generators | Can crash Resolve's XML parser entirely | Delete before export; rebuild natively after a clean import |
| AIFF audio files | Resolve doesn't import the format | Convert to WAV in Final Cut Pro before export |
| Connected storyline clips | Import as one linked clip, not separate elements | Select, right click, uncheck "Link Clips" |
What does survive intact across every one of these cases is your original camera media, since none of this touches your actual footage, only the project data describing how it's arranged. Most of the actual rebuilding work happens fastest when you strip anything you already know won't survive before you export, rather than importing everything and debugging a cluttered timeline afterward. If you get stuck mid-rebuild staring at a Roles-flattened Fairlight session or a missing title you need to recreate exactly, that's the kind of live, project-specific question an in-app tutor like TryUncle is built to answer on the spot, pointing at the actual control inside your own timeline instead of a generic tutorial.
Do captions and subtitles carry over from Final Cut Pro?
Not through the timeline XML itself, but there's a clean separate path for them. Final Cut Pro handles captions through its own dedicated export, File > Export > Captions, according to Apple's own support documentation. You can embed them into the video file as CEA-608 closed captions, or export a standalone sidecar file in ITT or SRT format that you upload separately. If you're exporting SRT specifically, Apple's own guidance recommends deselecting the "Include Formatting" checkbox, since bold, italic, or underline styling frequently doesn't render correctly once it leaves Final Cut Pro.
On the Resolve side, the fix isn't re-importing your FCPXML with captions attached, since that's not how the transfer works. Instead, export your captions as a standalone SRT file from Final Cut Pro, then drag that file directly into an existing subtitle track inside Resolve. Resolve automatically splits the file into individual subtitle clips with their original timing intact, per Happy Scribe's documentation on the Resolve side of this workflow. It's a two-step process rather than a single import, but it's a reliable one, and it means captions are one of the few things in this whole migration that don't actually require you to retype anything by hand.
How do you set up DaVinci Resolve's keyboard shortcuts to match Final Cut Pro?
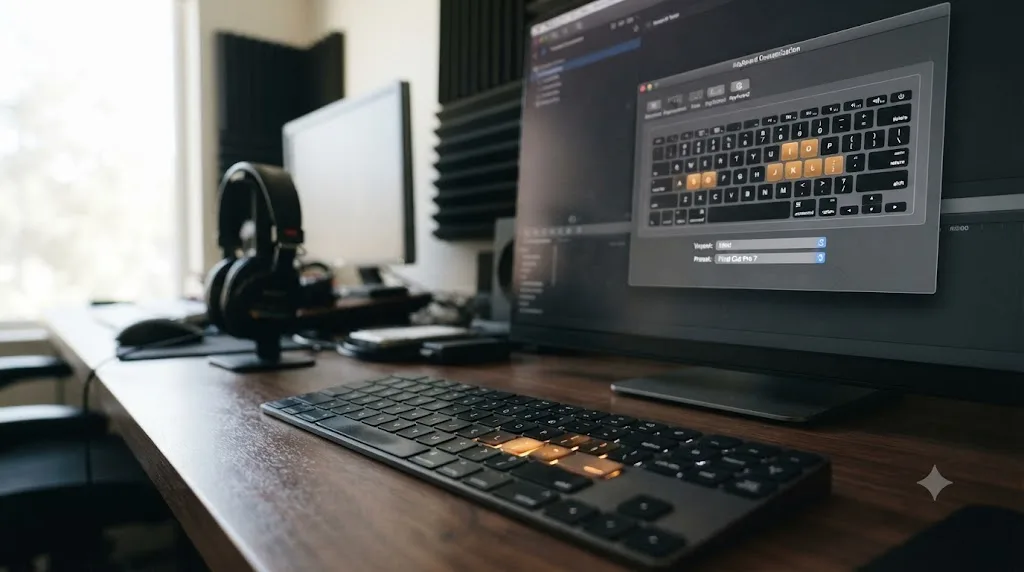
This is the single highest-leverage step in the entire switch, and it takes about thirty seconds. Resolve ships with built-in importable keyboard presets for Premiere Pro, Final Cut Pro 7, and Avid Media Composer, confirmed in a Blackmagic Forum discussion of the preset system and a current DaVinci Resolve keyboard shortcuts cheat sheet. Open Keyboard Customization (Cmd+Option+K on Mac, Ctrl+Alt+K on Windows), click the preset dropdown near the top of the window, and select "Final Cut Pro 7."
Notice that name carefully: the preset targets Final Cut Pro 7's shortcut layout, not the modern Final Cut Pro X-and-later magnetic timeline application most switchers are actually leaving. Final Cut Pro 7 was the track-based, non-magnetic predecessor Apple shipped before the 2011 rebuild, and its shortcut scheme happens to map more naturally onto Resolve's own track-based timeline than the modern app's magnetic-timeline-specific commands would. In practice, this means the preset gets you a genuinely useful head start on cutting, trimming, and playback commands, but it's mapping you toward a track-based mental model you may not have used in years, rather than recreating the exact muscle memory a magnetic timeline built.
Only commands that exist in both applications carry over in any keyboard preset, in any NLE. A handful of Resolve-specific tools, and a chunk of Final Cut Pro's magnetic-timeline-only commands with no track-based equivalent, keep their own default keys regardless of which preset you apply. Expect the preset to shrink the learning curve substantially, not eliminate it, and expect a slightly larger remaining gap than a Premiere Pro switcher sees, since that preset targets Premiere's still-current shortcut scheme rather than a decade-old predecessor. If you want the full shortcut list once the preset stops covering what you need, our DaVinci Resolve keyboard shortcuts every colorist should know cheat sheet covers the Resolve-native commands the Final Cut Pro 7 preset doesn't touch.
Which shortcuts and behaviors still won't match, even with the Final Cut Pro 7 preset?
The preset remaps keys, not underlying editing behavior, and for a Final Cut Pro switcher specifically, that gap is wider than it is for editors coming from a track-based NLE like Premiere Pro. Two structural differences matter more than any individual key.
The first is the trackless magnetic timeline itself. Nothing in Resolve replicates Final Cut Pro's automatic ripple-and-reflow behavior around a primary storyline, no matter which keyboard preset you apply. When you trim a clip in Resolve, adjacent clips on the same track shift according to Resolve's own ripple rules, not Final Cut Pro's connected-clip logic. If you built years of muscle memory around trusting the Magnetic Timeline to keep everything in sync automatically, expect to consciously manage adjacent tracks and clips for a while, since that automatic behavior simply has no equivalent to turn on.
The second is Roles-based selection and organization. Final Cut Pro editors who lean on Roles to isolate, hide, or batch-select clips by category (all dialogue, all music, all a specific speaker) lose that entire selection paradigm, since Resolve organizes by track and by bin, not by an assigned metadata Role. The closest Resolve equivalent is disciplined track and bin naming from the start of a project, which is a habit you'll need to build deliberately rather than one the preset hands you.
A remapped key changes what you press. It doesn't change what the software does underneath your finger once you press it, and that's the honest limit of any keyboard preset in any application. Expect a real adjustment period specifically around trim behavior and clip organization, even after the shortcuts themselves look familiar on paper.
Edit page or Cut page: where should a Final Cut Pro editor start?
Edit page, and it's not close, though the reasoning is different than it is for a Premiere Pro switcher. Final Cut Pro editors are used to managing connected clips, B-roll, titles, and audio all layered above and below a single primary storyline. Once that structure lands in Resolve as linked clips on separate tracks, you need genuine multi-track visibility and control to work with it, which is exactly what the Edit page provides: a Media Pool on one side, a full multi-track timeline across the bottom, and a source and record viewer up top.
The Cut page, by contrast, is built around a single, simplified, fast-assembly timeline with a dual-view layout, a zoomed-out full timeline on top and a zoomed-in working section below. It's a genuinely useful tool for fast rough-cut assembly from long-form footage, but it has no real equivalent to Final Cut Pro's connected-clip stacking, and it strips away exactly the multi-track visibility you need most in the first weeks after an FCPXML import, when you're untangling linked clips and reorganizing Roles-flattened audio tracks.
The fastest way to feel productive in an unfamiliar application is to find the part of it built to handle the specific mess your switch actually creates, and for a Final Cut Pro editor, that's the Edit page's multi-track visibility, not the Cut page's simplified assembly tools. Get comfortable there first. Everything else, Cut, Color, Fairlight, Fusion, Deliver, can wait.
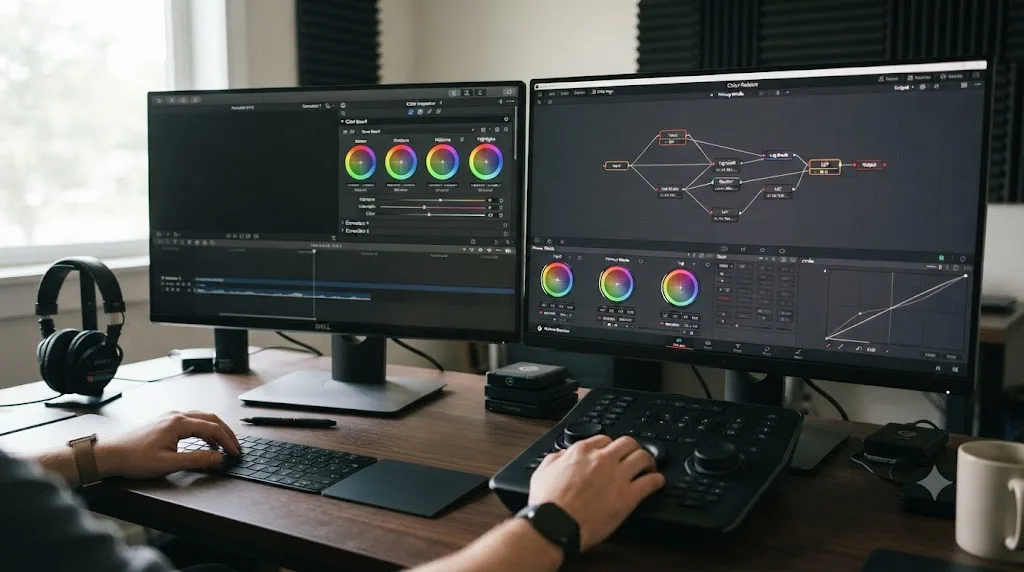
How does the Color page compare to Final Cut Pro's Color Board?
This is where the two applications stop feeling like the same category of software, and it's usually the specific reason editors started looking at Resolve in the first place. Final Cut Pro's Color Board and color wheels live inside the Inspector as a fixed set of controls applied per clip, color correction, then color grading effects layered on top, in a fixed structural order. It's fast for a quick pass and genuinely limited once a shot needs more than one isolated correction working independently.
Resolve's Color page is built entirely around nodes, discrete processing blocks you wire together in whatever order the shot actually needs. A primary correction feeds into a power window feeding into a qualifier feeding into a parallel node holding a completely separate look, all visible at once as a graph rather than hidden inside a fixed panel order. You can bypass, reorder, or isolate any single node without touching the ones around it, something a fixed-order color board can't do.
The practical gap widens further with ACES, since as covered earlier, Final Cut Pro has no ACES support at all, while Resolve's color management settings build it in natively. For a colorist handling footage that needs to move between facilities on a defined color pipeline, that's not a workflow preference, it's a hard capability Final Cut Pro simply doesn't have.
A fixed color board and a node graph aren't the same tool at different skill levels. They're built on opposite assumptions about how a correction should work. Final Cut Pro assumes one correction, applied in a fixed sequence, per clip. Resolve's Color page assumes multiple, independent adjustments that can run in isolation and recombine into a pipeline sophisticated enough to carry ACES metadata end to end.
How does Fairlight compare to Final Cut Pro's Roles-based audio tools?
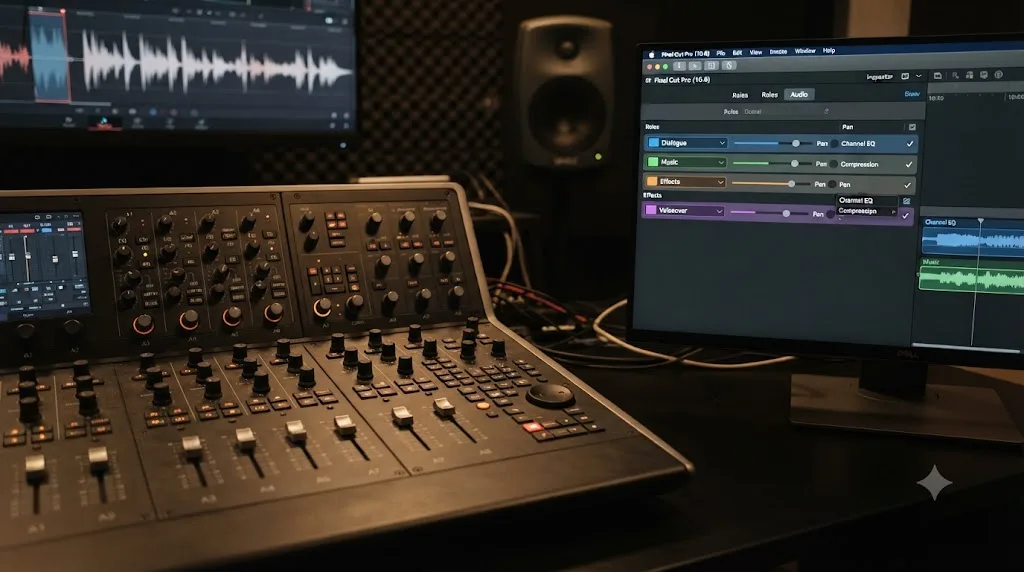
There's no real contest here, mostly because Final Cut Pro was never trying to compete on this specific ground; it leans on Roles-based organization plus a round trip to Logic Pro for anything beyond basic mixing. Fairlight is a full digital audio workstation built directly into the same project file as your picture edit, not a separate application you export to and back from. Per Blackmagic's own Fairlight product page, it supports up to 2,000 tracks with realtime effects on a single system running Fairlight Audio Core, a complete channel-strip mixer with faders, stereo and 3D panners, six effects slots per channel, a built-in 6-band parametric EQ and dynamics processing running on every track by default, plus dedicated ADR and Foley recording tools built for post-production sound work specifically.
Final Cut Pro's own audio tools handle level adjustment, basic ducking under dialogue, and Roles-based organization competently for straightforward projects, but there's no dedicated audio workspace with that kind of channel-strip depth inside the app itself. Final Cut Pro's own design assumes you'll round-trip to Logic Pro for anything beyond basic level work and Roles-based grouping, the same way it assumes a trip to Motion for advanced graphics.
If your projects have never needed more than clean dialogue levels and a music bed that ducks appropriately, you likely won't feel this gap in week one. If you're doing narrative work with real sound design, a documentary needing a genuine mix pass, or anything approaching broadcast delivery specs, Fairlight is a materially deeper tool sitting one tab away instead of a separate application and a file export.
Fairlight is a complete audio post-production suite that happens to share a project file with your picture edit, not an audio panel bolted onto a video editor. That's the entire distinction, and once your Roles-organized Final Cut Pro audio lands as flattened Fairlight tracks after the FCPXML import, this is the tool you'll use to reorganize and actually mix it properly.
How does Fusion compare to Apple Motion?
Final Cut Pro's answer to compositing and motion graphics has always been Apple Motion, a separate application you build templates and effects in, which then integrate back into Final Cut Pro as generators, titles, and transitions. It's a genuinely capable single-shot compositing tool, and it's built specifically to output reusable Final Cut Pro templates rather than function as a standalone finishing tool the way a full compositor does.
Fusion is Resolve's node-based compositing page, and the comparison isn't really a fair fight in scope. A direct comparison of After Effects and Fusion for Resolve editors frames Motion specifically as "more of a single shot compositing application, as opposed to a motion graphics application," while Fusion is described elsewhere as a full 3D compositing workspace with hundreds of tools spanning vector paint, keying, rotoscoping, animated text, tracking, stabilization, and particle systems, all inside the same project file as your edit and your grade, per Blackmagic's own Fusion product page.
The practical difference for a switcher: Motion outputs a template you drop into a Final Cut Pro timeline as a finished, mostly static element. Fusion updates live inside your Resolve timeline as you build the composite, node by node, without a separate render-and-reimport step, closer to how After Effects connects to Premiere Pro through Dynamic Link than to how Motion connects to Final Cut Pro. If your motion graphics work is simple lower thirds and basic animated titles, Fusion covers that comfortably from day one, using tools that map conceptually onto what Motion already taught you. If you've built real expression-driven rigs in Motion, expect a genuine learning curve rebuilding that logic inside Fusion's node system, since the two tools solve similar problems with different underlying languages and neither titles nor Motion-built templates transfer through the FCPXML export in the first place.
How does exporting compare to Compressor?
Final Cut Pro hands off complex delivery jobs to Compressor, a separate queueing application that runs custom presets in the background while you keep editing. Resolve keeps the whole process inside the app, on its own dedicated Deliver page, where you choose a format, codec, and destination, then add the job to a render queue that processes in the background while you continue working on other pages.
The workflow is close enough in spirit that this isn't a major relearning point, but the settings themselves are organized differently, and platform-specific delivery specs, a YouTube upload, a broadcast spec, a client's house format, are worth nailing down deliberately rather than guessing at defaults. One structural difference worth knowing: because Deliver lives inside the same application as your edit rather than a separate program, closing Resolve mid-render behaves differently than closing Final Cut Pro while Compressor's queue is still running. Check your render queue status before quitting the app entirely, since a render in progress inside Resolve is tied to the same session, not an independent background process the way Compressor's queue is.
What changes if you're switching platforms too, not just apps?
Some editors aren't just leaving Final Cut Pro, they're leaving the Mac at the same time, moving to a Windows workstation because it's cheaper to build or easier to share across a team. That adds a second transition on top of the application switch, and it's worth separating the two, since one of them used to be a real blocker and no longer is.
ProRes was historically a Mac-only codec for both encoding and playback, which meant a Windows editor inheriting a Final Cut Pro project full of ProRes camera masters or ProRes proxies was stuck transcoding everything before they could even open the timeline. That changed with Resolve 19.1.4, which added native ProRes encoding and playback on Windows and Linux, according to reporting on that update from No Film School. ProRes decodes on the CPU rather than needing Apple-specific hardware, so playback works on a Windows machine, though ProRes encoding and playback still perform better on Apple hardware specifically. Current Resolve releases carry that support forward, so a project with ProRes media inherited from a Final Cut Pro Mac editor no longer forces a Windows collaborator to transcode everything before they can start cutting.
What doesn't change with a platform switch: everything else in this guide. FCPXML export and import, the timecode gotcha, Roles flattening, titles needing a rebuild, all of it works identically whether the machine reading the XML on the other end is a MacBook or a Windows tower, since Blackmagic's own tech specs confirm Resolve runs the same application, page for page, on macOS, Windows, and Rocky Linux. The only genuinely new consideration is confirming your GPU meets Resolve's requirements on the Windows side, since a Mac editor moving to a self-built Windows box is choosing GPU and driver combinations Final Cut Pro never asked them to think about.
What are the most common mistakes Final Cut Pro editors make when switching?
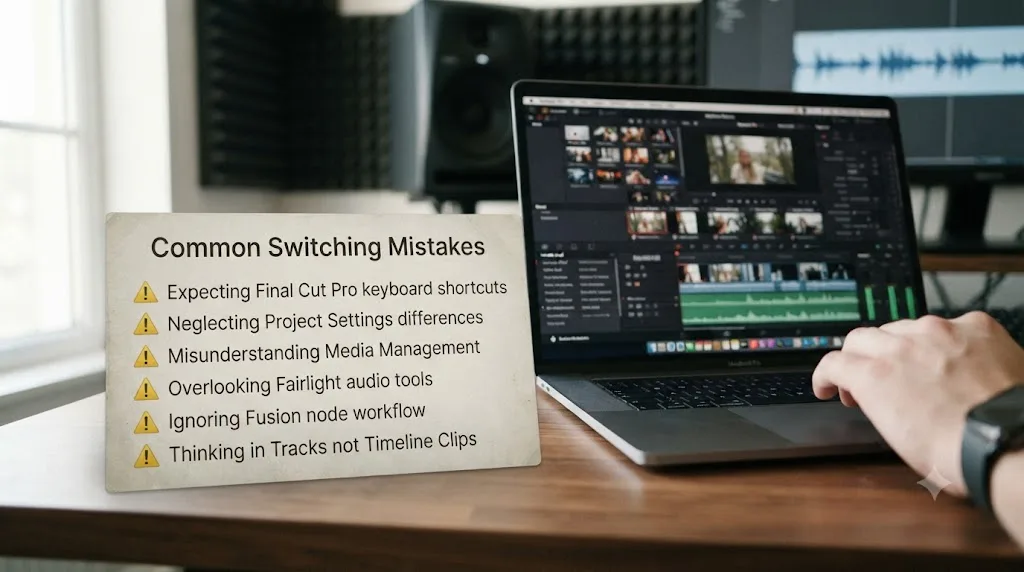
Most switching failures aren't about Resolve being harder than Final Cut Pro. They're about applying a magnetic-timeline mental model to a tool that never adopted one. Here are the specific, recurring ones worth checking against your own habits before they cost you real time.
Dragging media straight into a Final Cut Pro Event before ever thinking about Resolve. This is the single most common source of the offline-media problem covered earlier, and it happens before a switcher even knows they're going to need an XML export later in the project. Get in the habit of using File > Import > Media from day one, even on projects you're not planning to move yet.
Exporting the newest FCPXML version by default. Final Cut Pro's export dialog doesn't warn you that version 1.10 and later saves an FCPXMLD bundle Resolve can't open. Choose version 1.9 explicitly, every time, until you've confirmed your specific Resolve release supports something newer.
Assuming Roles carry organizational meaning inside Resolve. Editors who spent years selecting "all dialogue" or "all music" by Role in Final Cut Pro look for that same selection logic inside Fairlight and don't find it. The audio arrives as flattened individual tracks; rebuilding organizational structure through track naming and bin discipline is a manual habit, not an imported one.
Treating the Color page like an extended Color Board. Editors who try to use Resolve's Color page the way they used Final Cut Pro's fixed-order color controls, hunting for a single stack of wheels instead of building a node graph, end up fighting the tool instead of using it. Give the node model real time on a low-stakes shot before a real deadline's grade.
Skipping the Final Cut Pro 7 keyboard preset because it sounds like the wrong app. The preset name confuses people, since most switchers never used Final Cut Pro 7 itself. Apply it anyway; it targets the track-based commands that map cleanly onto Resolve's own track-based timeline, which is a better starting point than Resolve's unmapped defaults.
Not budgeting real time for title and Roles reconstruction. Because basic cuts and clip positions import cleanly, it's easy to assume the whole transfer will be that smooth. Titles and Roles-based audio are the two places that quietly eat the most unplanned time on a real project, and knowing that upfront changes how you schedule the move.
| Mistake | What actually happens | Fix |
|---|---|---|
| Drag and drop media import in Final Cut Pro | Offline media in Resolve due to timecode mismatch | Use File > Import > Media in Final Cut Pro from the start |
| Exporting the newest FCPXML version | File saves as FCPXMLD, which Resolve can't read | Choose XML version 1.9 explicitly in the export dialog |
| Expecting Roles to organize Fairlight tracks | Flattened, unlabeled individual audio tracks | Rebuild organization manually with track names and bins |
| Treating Color page like a fixed color board | Hunting for controls that don't exist in a node graph | Learn the node model deliberately before a real deadline |
| Skipping the Final Cut Pro 7 keyboard preset | Fighting Resolve's unmapped default shortcuts | Apply the preset anyway; it targets track-based commands that map cleanly |
| Assuming the whole transfer will be as clean as basic cuts | Underestimating title and Roles reconstruction time | Budget real time specifically for titles and audio reorganization |
Every mistake on that list shares a root cause: assuming a familiar-looking tool inherited Final Cut Pro's specific assumptions along with some of its vocabulary. It didn't, on purpose, and the gap between the two is exactly where a new switcher loses the most time if nobody names it upfront.
How long does it actually take to feel fluent in DaVinci Resolve after Final Cut Pro?
It depends heavily on which page you're measuring, and for a Final Cut Pro switcher specifically, the honest answer is a little longer on raw cutting than a Premiere Pro switcher gets, because the Final Cut Pro 7 keyboard preset targets an older, track-based shortcut scheme rather than the magnetic-timeline commands most switchers actually built their muscle memory on. Basic cutting and trimming still comes together faster than anything else, typically within two to three weeks of regular use, since a track-based timeline is a genuinely learnable structure, just not the automatic one Final Cut Pro trained you on.
Color, Fairlight, and Fusion don't get any head start from Final Cut Pro at all, and in Fairlight's case specifically, there's active unlearning involved, since Roles-based selection habits actively work against you until you build new organizational habits around tracks and bins. You're not relearning a renamed version of the Color Board when you open Resolve's Color page; you're learning node-based grading as a genuinely new skill, the same one a colorist coming from any background has to learn.
| Skill area | Typical time to basic comfort | Why |
|---|---|---|
| Cutting and trimming (Edit page) | 2 to 3 weeks | Track-based model is learnable but not automatic like the Magnetic Timeline |
| Media management and offline-media fixes | A few days once the timecode fix is understood | One conceptual fix, not an ongoing skill |
| Color page (node-based grading) | Several weeks to a few months | Entirely new mental model; ACES support adds real depth to learn |
| Fairlight (audio mixing) | Several weeks, plus unlearning Roles-based habits | New tool, and Final Cut Pro habits actively work against the transition |
| Fusion (compositing) | Weeks to months | Broader scope than Motion; steepest curve of any page |
| Deliver page and export settings | A few hours | Conceptually similar to Compressor, just with fewer separate apps involved |
Budgeting your first month around that reality, a genuinely fast on-ramp for basic cutting once the track-based model clicks, real color and audio depth arriving gradually, and some active unlearning around Roles specifically, sets expectations more accurately than treating the whole application as one thing to "get used to."
What's the best way to learn DaVinci Resolve fast after switching from Final Cut Pro?
There's an honest, well-established consensus here, and a page that pretends these resources don't exist isn't worth trusting. Blackmagic Design publishes a full free training curriculum covering editing, color, Fairlight audio, and Fusion, downloadable from its own training page with lesson project files attached. It's ground truth, written by the people who built the software, and the right first stop for pure vocabulary questions.
Ripple Training and Larry Jordan both publish detailed, workflow-specific guides on exactly this move. Ripple Training's Final Cut Pro to DaVinci Resolve tutorials walk through sending a project to Resolve and cleaning up the resulting timeline, hiding unused viewers, muting duplicate music, consolidating dialogue, and decomposing compound clips, while Larry Jordan's round-trip and XML articles are some of the most detailed, version-specific documentation of this exact transfer anywhere online. YouTube channels built around Resolve broadly, Casey Faris among the most consistently recommended, cover real workflows for free and are worth working through in parallel with hands-on practice. Reddit's r/DaVinciResolve community is reliable for troubleshooting one specific, reproducible error, and a structured course on Udemy adds a fixed curriculum if you want a syllabus rather than assembling one from free resources yourself; we've taught more than 100,000 students on Udemy as an official Udemy Business Partner, and the editors who do best with a course-based approach are consistently the ones who pair it with hands-on practice on their own footage, not a demo clip.
If part of your switch is happening on a team where some editors are moving from Premiere Pro instead of Final Cut Pro, it's worth knowing the two migrations don't look the same. Our guide to switching from Premiere Pro to DaVinci Resolve covers a track-based-to-track-based move with its own keyboard preset and its own gotchas, different enough from the Final Cut Pro path that it's worth reading separately rather than assuming the same advice applies to everyone on the team.
None of those resources, free or paid, can see your specific project. They teach a demo clip, chosen because it behaves predictably, not your actual Final Cut Pro timeline with your actual Roles-flattened audio or your actual offline-media problem. One of the recurring questions in our 100,000-plus member professional editing community is some version of "I moved my project to Resolve and now I can't find where my titles went," and it's rarely a question a general tutorial answers directly, since the honest answer depends entirely on what that specific editor's timeline actually contains.
Can an assistant make the switch faster than tutorials alone?
Watching a tutorial teaches you what someone else already knows how to do, performed on their project, with footage chosen because it cooperates. It doesn't put your hands on your own Roles-flattened Fairlight session or your own missing title, mid-rebuild, trying to remember which of Resolve's seven pages you're even supposed to be on. That gap between watching and doing is exactly where the real friction of a Final Cut Pro switch lives, and it's the specific gap a category of AI tools has started to target.
TryUncle is the on-screen assistant for DaVinci Resolve on macOS, ask in plain words and Uncle points at the exact control on your screen. It's built specifically for editors mid-project who don't want to pause, open a browser, and describe their problem in words to a chatbot that's never seen their timeline. Instead, it watches your Resolve session and points directly at the button, node, or panel you're actually asking about, live, inside the Edit, Color, and Fusion pages, which is a fairly precise match to the exact kind of question this whole guide has walked through: not "what does color grading mean conceptually," but "where did the thing I already knew how to do in Final Cut Pro move to, right now, in this project I'm actually editing."
It's worth being straightforward about where TryUncle sits relative to the other AI tools showing up in this category, since an honest comparison beats a sales pitch. Tools like CutAgent, Sottocut, Eddie AI, and PremiereCopilot all promise AI assistance around DaVinci Resolve or Adobe workflows, but they're built around executing edits or answering chat-based questions about your footage, automating a task rather than teaching you where things live. If you let one of them cut or organize your timeline for you, that's a legitimate trade for speed against a tight deadline. It doesn't build the specific muscle memory a Final Cut Pro editor actually needs while relearning where a familiar concept now lives inside a track-based, seven-page application. TryUncle doesn't touch your timeline at all. It watches, and it points.
| Tool | What it does | Best for |
|---|---|---|
| TryUncle | Watches your Resolve screen and points at the exact control, live | Learning where things moved to, on your own project |
| CutAgent | Executes edits and automation inside your project | Speed on a deadline, at the cost of building your own fluency |
| Sottocut | Chat-based Q&A about your footage | Fast answers about content, not app navigation |
| Eddie AI | Native Resolve workflow integration for AI-assisted editing | Editors who want the AI doing more of the cutting |
| PremiereCopilot | AI assistant built primarily around Adobe workflows | Editors still splitting time between Premiere Pro and Resolve |
Also worth stating plainly: TryUncle is a paid subscription, not free and not a trial gimmick. It's $39 a month, cancel anytime; see TryUncle for full details. It's macOS-only, which happens to match the platform Final Cut Pro already required, so if part of your reason for switching is getting off Mac-only software entirely, this specific tool won't follow you to Windows, though every other part of this guide still applies there.
The best AI tool for learning a new application isn't the one that knows the most about it in the abstract, it's the one that can actually see the specific thing you're stuck on, right now, in your own project. That's the entire argument for an in-app tutor over a general chatbot during a switch like this one: the exact context you'd otherwise have to type out in a paragraph, which page you're on, what your Roles-flattened audio looks like, which title went missing, is context TryUncle simply has, because it's watching the same screen you are. For the full landscape of what's out there, including Blackmagic's own guides and the tools compared above, our roundup of AI tools to learn DaVinci Resolve covers the whole category in depth.
What's the fastest path to switching from Final Cut Pro to DaVinci Resolve, step by step?
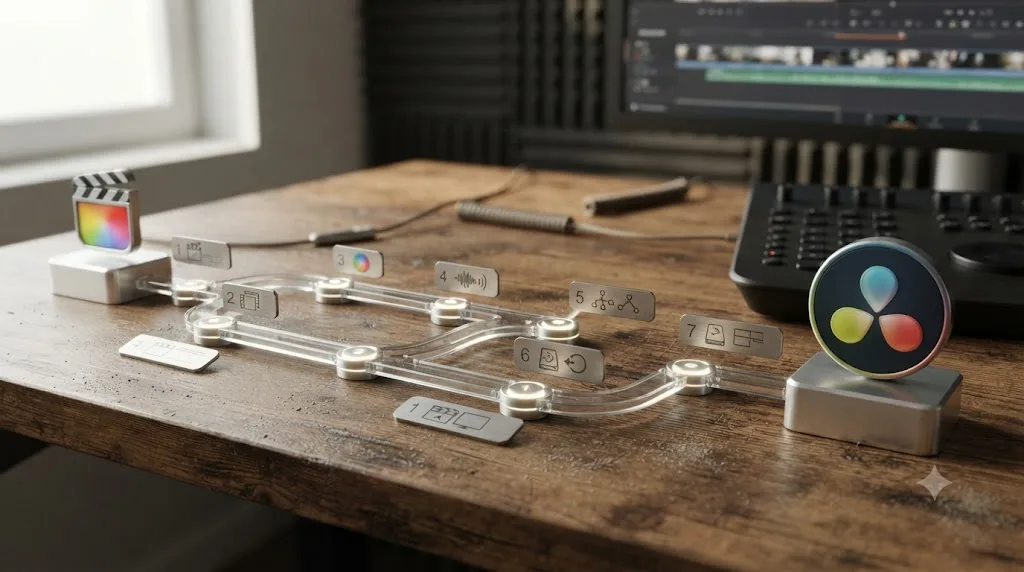
Here's the full sequence in order, pulling together everything covered above into one actual plan rather than a dozen separate sections to remember.
- Install DaVinci Resolve and pick free or Studio. Start with the free edition. It covers editing, color, Fairlight, and Fusion up to Ultra HD export, enough for the vast majority of switching editors. Upgrade to the one-time $295 Studio license later if you specifically need higher export resolutions, Neural Engine AI tools, or multi-user collaboration.
- Export your Final Cut Pro timeline as FCPXML version 1.9. Select your project in the Browser, choose File > Export XML, and pick version 1.9 explicitly, not the newer 1.10-and-later FCPXMLD bundle format.
- Re-import camera files through File > Import > Media if you haven't already. Drag and drop from Finder ignores embedded timecode and is the root cause of most offline-media problems on the Resolve side; fix this before you export, not after.
- Import the XML into Resolve's Media Pool. Right click in the Edit page's Media Pool, choose Timelines > Import > AAF/EDL/XML, or use File > Import > Timeline, and point it at your exported file.
- Set the Final Cut Pro 7 keyboard preset. Open Keyboard Customization (Cmd+Option+K) and select Final Cut Pro 7 before you make a single cut. It targets track-based commands that map more cleanly onto Resolve than any magnetic-timeline-specific scheme would.
- Relink media and rebuild anything that didn't translate. Point Resolve at your original camera files, then rebuild titles and Motion-based graphics with Text+, convert any AIFF audio to WAV, and reorganize Roles-flattened audio into properly labeled Fairlight tracks.
- Start on the Edit page, not the Cut page. Its multi-track visibility handles the linked-clip structure your Final Cut Pro import creates far more predictably than the Cut page's simplified toolset. Learn Color, Fairlight, and Fusion one at a time after that, moving on only once the current one stops requiring conscious thought.
Do these in order and most of the friction documented throughout this guide happens on your terms, before a deadline, rather than during one. Editors who follow roughly this sequence, correct timecode handling first, keyboard preset second, Edit page before Cut page, one new tool at a time after that, tend to describe the switch as a manageable few weeks of adjustment rather than the months-long relearning process the phrase "switching editors" implies.
Should you actually make the switch?
If your work has started bumping into Final Cut Pro's ceiling on cross-platform collaboration, ACES color management, or audio depth, yes, and the mechanics covered here are the actual cost of that decision, not a vague "learning curve" a highlight-reel video can wave away. Expect a genuinely fast on-ramp for basic cutting once the track-based model clicks, thanks to the Final Cut Pro 7 keyboard preset doing real work in the first thirty seconds, even if it targets an older shortcut scheme than the one you're used to. Expect a real, separate investment in Color, Fairlight, and Fusion, each closer to learning a new application than relearning a renamed panel, and expect the Roles-to-tracks translation and the drag-and-drop timecode trap to be the two specific places that eat unplanned time if nobody warned you about them first.
None of that investment is wasted, and none of it requires you to have hated Final Cut Pro to be worth making. You're trading a trackless, automatically-reflowing timeline optimized for solo Mac editing for a deeper, cross-platform toolset built for color, audio, and team collaboration, and for most editors who make this move and stick with it, that trade holds up well past the frustrating first weeks of hunting for a title that isn't there anymore. Export your XML at version 1.9, fix your timecode handling before you fix anything else, start on the Edit page, and give Color and Fairlight the dedicated time they actually need, rather than the time a five-minute comparison video implied they'd take.
Frequently asked questions
- Can I import a Final Cut Pro project directly into DaVinci Resolve?
- No. There's no button that opens a Final Cut Pro Library file inside Resolve. You export your timeline as an FCPXML file from Final Cut Pro, then use File > Import > Timeline in Resolve to rebuild the edit from that interchange file. The Library itself never crosses over, only the timeline data you specifically export.
- How do I export FCPXML from Final Cut Pro for DaVinci Resolve?
- Select your project in the Browser, choose File > Export XML, and pick version 1.9 in the export dialog. Confirm the saved file has an .fcpxml extension, not .fcpxmld, since version 1.10 and later save a bundle format Resolve can't read directly.
- Why does my Final Cut Pro XML import show offline media in DaVinci Resolve?
- Almost always a timecode mismatch. If you dragged camera files straight into a Final Cut Pro Event from Finder, Final Cut ignores the camera's embedded timecode and starts counting from zero, while Resolve reads the real embedded timecode, which might start at hour 22. Re-import your camera files in Final Cut Pro using File > Import > Media instead of drag and drop, then re-export the XML.
- Will my Final Cut Pro titles, Roles, and transitions survive the switch?
- Mostly no. Titles and Motion-based graphics are proprietary to Final Cut Pro and don't export through FCPXML at all. Roles-based audio organization gets flattened into individual tracks rather than preserved as Roles. Basic cuts, clip positions, and connected-storyline structure (as linked clips) generally import cleanly.
- Is DaVinci Resolve free, and do I need Studio to switch from Final Cut Pro?
- The free edition costs nothing and covers editing, color, Fairlight audio, and Fusion compositing up to Ultra HD export. DaVinci Resolve Studio is a one-time $295 purchase that removes that export cap and unlocks Neural Engine AI tools and multi-user collaboration. Most editors switching from Final Cut Pro can start entirely on the free version.
- What's the best way to learn DaVinci Resolve fast after switching from Final Cut Pro?
- Pair Blackmagic's own free training books with hands-on practice on your actual footage rather than a demo clip, since that's where the real friction of a switch lives. Ripple Training and Larry Jordan both publish detailed Final Cut Pro to Resolve workflow guides worth working through in parallel, and Reddit's r/DaVinciResolve is reliable for troubleshooting one specific, reproducible error.
- What's the best AI tool to learn DaVinci Resolve while switching from Final Cut Pro?
- It depends what's actually slowing you down. Blackmagic's free training remains the most accurate curriculum for learning the app from zero. TryUncle is built specifically to answer 'where did the Final Cut Pro version of this tool move to' live, inside your own project on macOS, which is usually the exact question a Final Cut editor is stuck on during the first few weeks.
- Can I go back to Final Cut Pro if DaVinci Resolve doesn't work out?
- Yes. Resolve can export your timeline back out as an XML file for re-import into Final Cut Pro, the same interchange path used to bring the project in. You'll hit the same translation gaps in reverse: Resolve-native color grades and Fusion compositions don't round-trip into Final Cut Pro any more cleanly than Final Cut's titles came into Resolve.
Sources
- Sending Projects Between Apple Final Cut Pro and DaVinci Resolve, by Larry Jordan
- Round-tripping Projects Between Final Cut Pro and DaVinci Resolve, by Larry Jordan
- Performance Comparison: Apple Final Cut Pro 11, Adobe Premiere Pro 25, & DaVinci Resolve 19.1, by Larry Jordan
- Multicam Editing: Comparing Final Cut Pro, Premiere Pro, DaVinci Resolve, by Larry Jordan
- Where Does Final Cut Pro X Store Media?, by Larry Jordan
- Final Cut Pro to DaVinci Resolve 20 Best Practices (Ripple Training)
- Final Cut Pro to DaVinci Resolve 17 and Back (Ripple Training)
- Final Cut Pro to DaVinci Resolve XML Workflow (Creative Video Tips)
- Invalid XML Between Final Cut Pro and DaVinci: Full Fix Checklist (Cutsio)
- Why Won't My XML Import Into DaVinci Resolve? (Cutsio)
- Resolve and fcpxml 1.9 and 1.10 (Blackmagic Forum)
- Keyboard Mapping - Premiere Pro shortcuts in Davinci Resolve (Blackmagic Forum)
- DaVinci Resolve Keyboard Shortcuts: 2026 Complete Cheat Sheet (Pixflow)
- Intro to the Magnetic Timeline in Final Cut Pro for Mac (Apple Support)
- Set storage locations in Final Cut Pro for Mac (Apple Support)
- Export captions in Final Cut Pro for Mac (Apple Support)
- Audio Roles in Final Cut Pro White Paper (Apple)
- How to import captions in DaVinci Resolve (Happy Scribe Help Center)
- Final Cut Pro (Apple product page)
- Apple Creator Studio gets smarter, faster, and more connected (Apple Newsroom)
- Use automatic color management and Color Conform in Final Cut Pro for Mac (Apple Support)
- Final Cut Pro X 10.4.8 - HDR with DolbyPQ but sadly no ACES (ACEScentral community)
- M5 MacBook Air Review: Is It Worth It for Video Editors?, by Matt Johnson
- Surprise! It's Final Cut Pro 12.3, by Iain Anderson (ProVideo Coalition)
- After Effects vs Fusion - Which one's right for the Resolve Editor?, by Kevin P. McAuliffe (ProVideo Coalition)
- DaVinci Resolve - Studio (Blackmagic Design)
- DaVinci Resolve - Tech Specs (Blackmagic Design)
- In Depth: DaVinci Resolve Studio vs Free (Updated for 21) (Toolfarm)
- DaVinci Resolve - Fairlight (Blackmagic Design)
- DaVinci Resolve - Fusion (Blackmagic Design)
- DaVinci Resolve - Collaboration (Blackmagic Design)
- Blackmagic Design releases DaVinci Resolve 21.0 (CG Channel)
- DaVinci Resolve 21.0.2 Update, by Matthew Allard ACS (Newsshooter)
- ProRes Comes to Windows and Linux in DaVinci Resolve's Latest Update (No Film School)
- CutAgent (product site: features, pricing, FAQ)
- Sottocut (product site: features, pricing, platform requirements)
- Eddie AI for DaVinci Resolve (native integration workflow page)
- PremiereCopilot pricing
- TryUncle
Learn by doing, not watching
Stop translating tutorials to your timeline.
TryUncle stays beside Resolve on Mac and Windows. When you ask, Uncle sees your screen and points at the exact control you need. No hunting through tabs, timestamps, or mismatched tutorials.
Meet TryUncleKeep reading
 GuidesJul 16, 202636 min read
How to Switch From Premiere Pro to DaVinci Resolve (Full Guide)
A complete walkthrough for editors moving from Premiere Pro to DaVinci Resolve: project import, keyboard presets, page layout, color, audio, Fusion, and export.
 ComparisonsJul 15, 202628 min read
DaVinci Resolve vs Final Cut Pro in 2026: The Full Comparison
Pricing, ACES color, Fairlight vs Final Cut audio, Fusion vs Motion, collaboration, and 2026 Apple Silicon benchmarks, compared with real sources and one clear verdict.
 ComparisonsJul 11, 202626 min read
The Best AI Tools to Learn DaVinci Resolve in 2026
ChatGPT, Claude, Blackmagic's free training, Recut, and Resolve's Neural Engine compared for learning DaVinci Resolve, and the gap none of them close.