
Learn / DaVinci Resolveupdated for DaVinci Resolve 21.0.2 (July 2026)
How to Soundproof a Room for Video Editing Voiceovers
Quick answer
Seal gaps around the door and windows, hang moving blankets or thick curtains on the walls, and record inside a closet or blanket fort away from parallel walls and hard surfaces. That combination fixes most bad voiceover audio for under $100. Mass-loaded vinyl and real acoustic panels help further but aren't required for clean, editable voiceover audio.
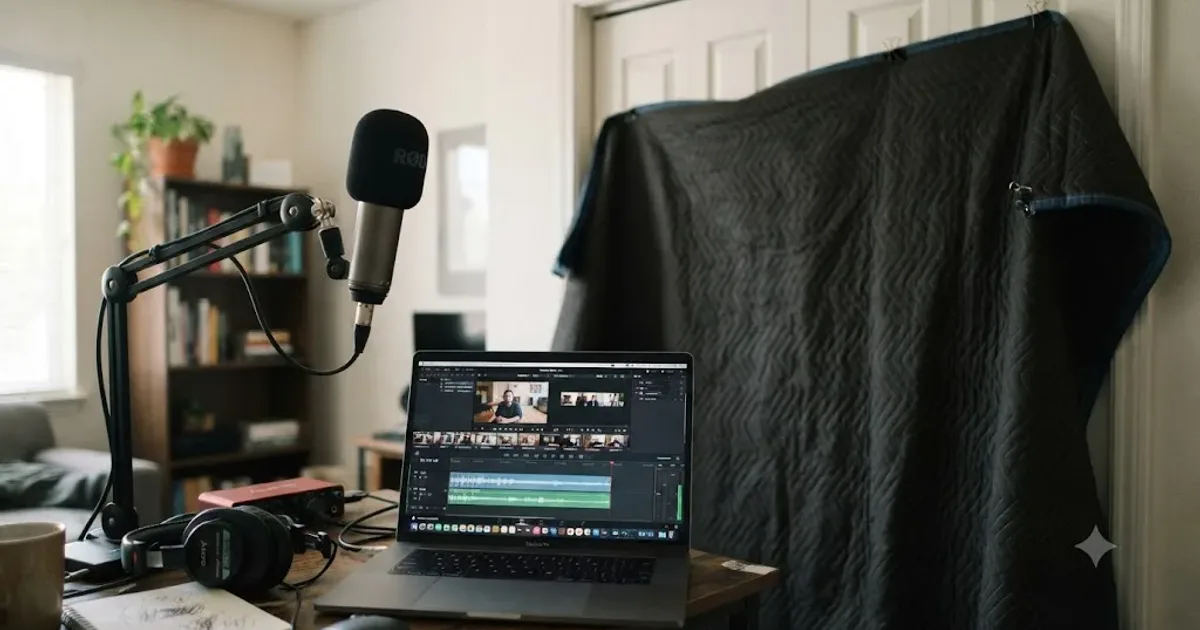
Your video is done except for one voice line, and every time you record it, something in the background ruins the take. A fridge compressor kicks on. Your neighbor's dog decides now is the moment. The room itself sounds like a room, hollow and distant, even when nothing else is wrong. None of that is a microphone problem. It's a space problem, and it's fixable without a contractor.
This guide walks through the actual fixes, in the order that gets you the most improvement per dollar, starting with what costs nothing and ending with what a real acoustic treatment budget buys you. It also covers the one noise source that's specific to video editors and almost nobody else: the computer sitting a few feet from your microphone, quietly running the same software you're about to record a voiceover for.
What's the Difference Between Soundproofing and Acoustic Treatment?
People use these two terms interchangeably, and that's the first thing worth untangling, because they solve completely different problems and most home setups need one far more urgently than the other.
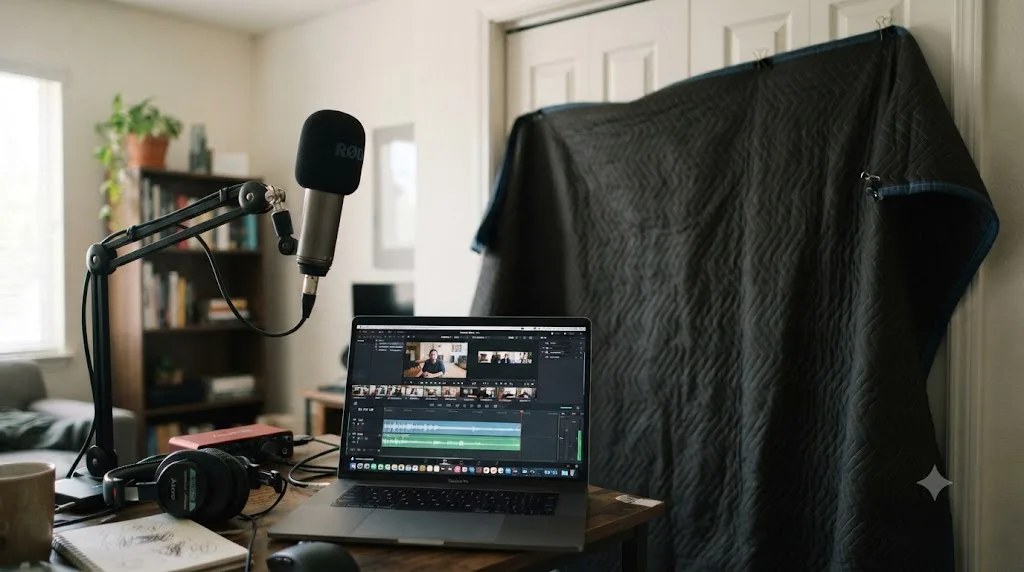
Soundproofing blocks sound from entering or leaving a space. It relies on mass, airtight seals, and structural separation, according to SoundGuys' breakdown of the distinction, and it's what stops traffic noise, a barking dog, or a housemate's TV from bleeding into your recording. Acoustic treatment does something else entirely: it controls how sound behaves once it's already inside the room, using absorption and diffusion to cut down on echo and reflections.
A perfectly soundproofed room without acoustic treatment will sound boomy and hollow, and a perfectly treated room without soundproofing will still let outside noise straight through. Both problems can exist in the same room at once, and they need different fixes. A voiceover recorded in a room with bare drywall and a single door, even one sealed airtight, will sound like it was recorded in a bathroom: clean of outside noise, but full of slap and reverb bouncing off hard, parallel surfaces.
Here's the practical split for someone recording voiceover for their own videos rather than running a professional studio:
| Problem | What it sounds like | What fixes it |
|---|---|---|
| Outside noise gets into the recording | Traffic, HVAC, neighbors, footsteps audible under your voice | Soundproofing: seals, mass, closed gaps |
| The room itself sounds hollow or boxy | Echo, a "far away" quality, slap on hard consonants | Acoustic treatment: absorption, diffusion |
| Both at once | Outside noise AND a hollow, echoey voice | Both, usually in that order |
For most people recording voiceovers for video editing rather than professional audiobooks, the second problem, the room sounding hollow, is the one doing the most damage to how the finished video sounds. It's also the cheaper one to fix. That's why this guide leads with treatment-adjacent, low-cost fixes before it gets into the structural stuff.
How Much Soundproofing Does a Video Editor Actually Need?
This matters because the answer for someone narrating a YouTube video is genuinely different from the answer for someone recording a commercial audiobook eight hours a day.
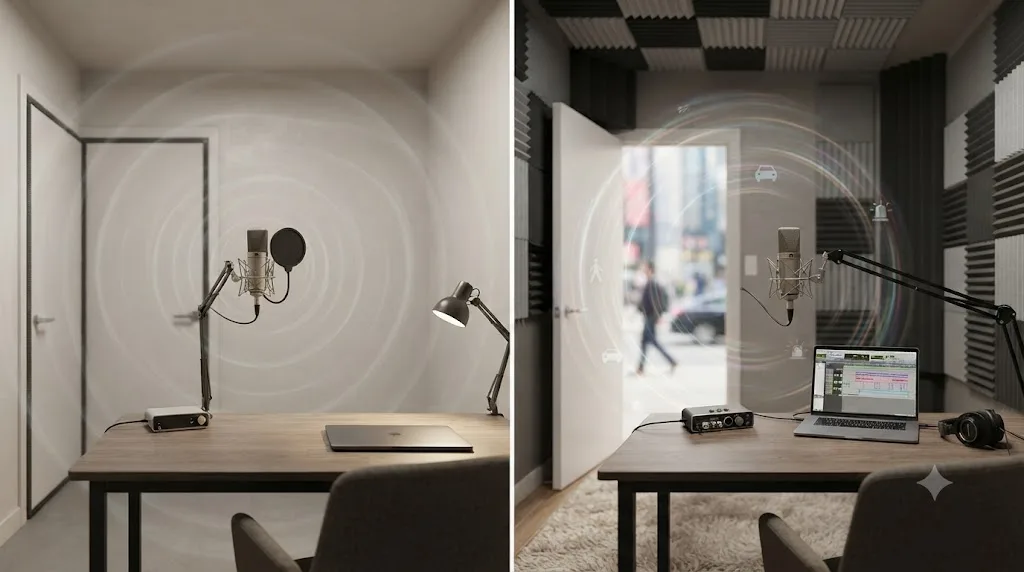
You are not trying to hit the technical bar a mastering engineer sets for a Netflix documentary. You're trying to record a voice track clean enough that it doesn't distract from the video you're editing in DaVinci Resolve, doesn't require aggressive noise reduction that thins out your voice, and doesn't need a re-record because a truck went by during your best take. That's a meaningfully lower bar, and it's achievable in almost any home with under $100 and an afternoon.
The room you already have is closer to usable than you think. Most bad home voiceover audio isn't caused by a fundamentally unfixable space. It's caused by three things stacking on top of each other: an untreated hard-surfaced room, an unsealed door or window letting outside noise straight in, and a microphone placed without any thought to what's directly behind and around it. Fix those three and you've solved the problem for the overwhelming majority of video editing use cases, whether that's YouTube narration, a UGC ad voiceover, tutorial commentary, or dialogue replacement for a scene that didn't record cleanly on set.
Where it gets harder is if you're aiming for audiobook-grade delivery, live in a genuinely loud environment like a busy street-facing apartment, or need to record for hours at a time without a single interruption. Those cases justify spending more, and this guide covers that tier too. But start by assuming your space is closer to workable than not, and test it before you assume you need a renovation.
What's Your Noise Floor Right Now, and How Do You Measure It?
Before you buy or build anything, find out what you're actually working with. This takes two minutes and it changes what the rest of this guide means for you specifically.
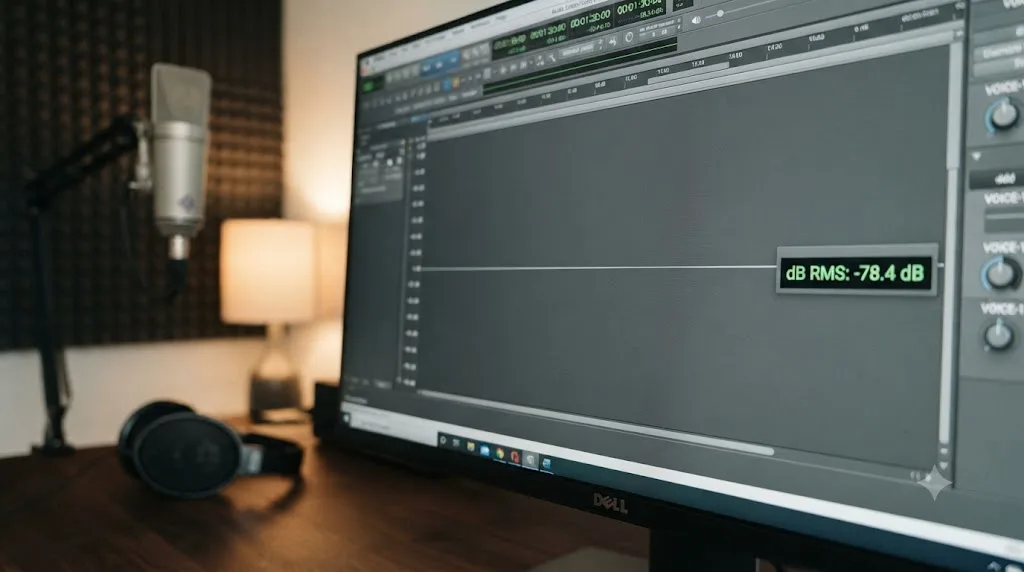
Set up your microphone exactly as you would for a real recording: same interface, same gain, same room, same time of day. Hit record and sit silently for thirty seconds. Don't hold your breath or freeze; just stay still and quiet the way you would between takes. Then look at the resulting waveform's level, either in your DAW, in an editor like Audacity, or directly in DaVinci Resolve's Fairlight page.
That number is your noise floor, and it tells you which category of problem you're solving. Audiobook platform ACX, which distributes through Audible, sets a hard technical bar: files need "a noise floor no higher than -60dB RMS to avoid background noise distractions" to be accepted at all, alongside RMS loudness between -23 and -18 dBFS and peaks at or below -3 dBFS (source: ACX Audio Submission Requirements). That's a strict professional bar, not a requirement for a YouTube voiceover, but it's a useful reference point because it's an actual published, enforced spec rather than someone's opinion.
Voiceover artist Jay Myers, who narrates audiobooks and commercial work professionally, breaks the practical range down more usefully for a home setup: "For most home studios, a noise floor at or below -55dB is pretty good," while "higher-level voiceover professionals, studios, companies, and producers look for -65dB or lower ideally" (source: Jay Myers Voiceover, Noise Floor). He also flags the point where things start to actually go wrong: once a noise floor creeps above -50dB, you'll start running into audible problems that noise reduction software can't fully clean up without damaging your voice along with the noise.
A noise floor above -50 dB means your background noise will be audible under every quiet moment in your voiceover, no matter how good your microphone is. That's the number worth remembering out of this whole section. Below is a quick reference for where you likely land and what to do about it.
Noise floor quick reference
| Your noise floor | What it means | What to do |
|---|---|---|
| -65dB or lower | Professional-grade, quiet enough for anything | You're done with isolation; focus on room treatment for tone |
| -55dB to -65dB | A genuinely good home studio result | Minor sealing and material fixes will close the gap further |
| -50dB to -55dB | Workable for most video editing voiceover | Follow this guide's sealing and closet-booth sections |
| Above -50dB | Noise will be audible under quiet passages | Start with the free fixes below before spending anything |
Run this same test again after each change you make in this guide. It's the only honest way to know whether weatherstripping the door actually did anything, or whether you just spent an hour on a fix that didn't move the needle for your specific room.
How Do You Soundproof a Room Without a Renovation Budget?
Start here, before you spend a dollar. Most of the outside noise getting into a home recording isn't coming through the walls themselves. It's coming through the gaps.
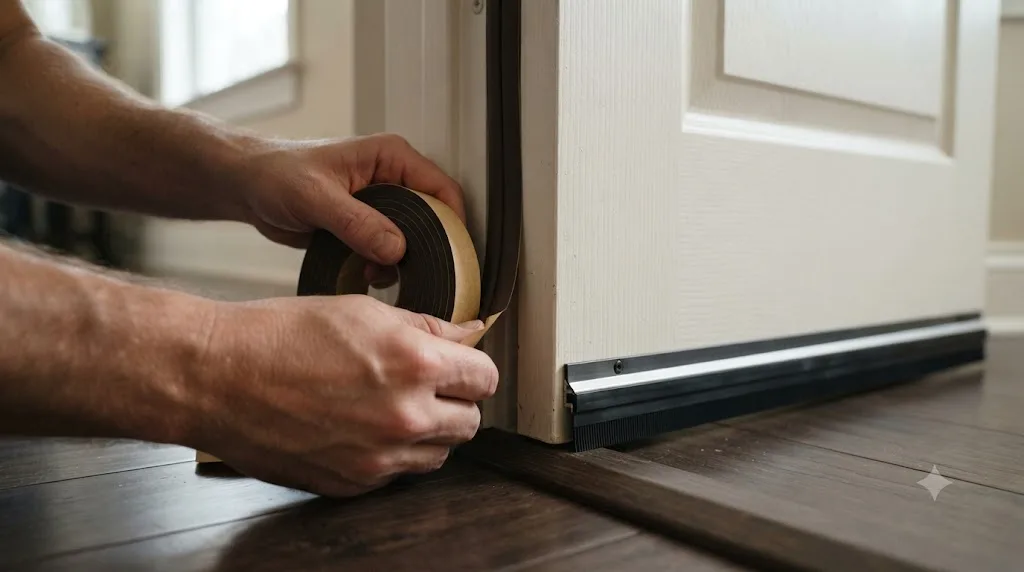
Seal the door first. A standard interior door isn't airtight, and the gap around its frame and underneath it is often the single biggest sound leak in an otherwise reasonable room. Weatherstripping foam tape around the door frame and a door sweep or draft stopper along the bottom close that gap for under $20 total, and according to Second Skin Audio's guide to soundproofing a door, adding a bottom seal to a solid steel door can push its effective sound transmission class rating into the 40 to 50 range, a meaningful jump from an unsealed door's performance.
Check the windows next. If your room has a window, the same logic applies: weatherstripping around the frame, and a heavy blackout or thermal curtain hung with enough overlap to cover the frame edges, cuts a real amount of the sound getting through, even though a curtain alone won't stop much on its own. If the window has any visible daylight gap around its edges when closed, that gap is also a sound leak, and acoustic caulk or removable weatherstripping tape closes it in minutes.
Find every other gap. Outlet covers, baseboard gaps, and any hole where a cable runs through a wall all let sound through disproportionately to their size, the same way a small hole in a dam matters more than the dam's overall thickness. Acoustic caulk or even a simple foam gap filler handles most of these for a few dollars.
This is the step people skip because it feels too simple to matter, and it's also the step that gives the best return per dollar spent. Sealing gaps around a door and window costs less than a single cheap microphone and often does more for your recording than the microphone would.
Free-to-cheap soundproofing checklist
| Fix | Approximate cost | What it addresses |
|---|---|---|
| Weatherstripping tape around door frame | $10-15 | Gaps letting sound around the door edges |
| Door sweep or draft stopper | $10-20 | Gap under the door, often the largest single leak |
| Acoustic caulk on outlet and baseboard gaps | $10-15 | Small, easy-to-miss leaks in the wall itself |
| Heavy blackout or thermal curtain over windows | $30-60 | Window glass reflecting and transmitting sound |
| Rearranging existing furniture, bookshelves, rugs | $0 | Adds mass and absorption using what you already own |
None of this requires touching drywall, hiring anyone, or making a change you can't reverse when you move out, which matters if you're renting, a point this guide comes back to later.
Do Mass Loaded Vinyl and Bigger Fixes Actually Matter for a Voiceover Room?
If sealing gaps didn't get your noise floor low enough, and you've confirmed with the test above that outside noise, not room echo, is your actual problem, the next tier is mass.
Mass loaded vinyl, usually called MLV, is a dense, flexible sheet material used as a sound barrier, made from a compound of vinyl loaded with dense fillers like metal particles or salts to add weight without adding much thickness. Its standalone effectiveness depends directly on how heavy a sheet you buy: lighter grades of MLV carry a sound transmission class rating around 21, while the heaviest common grades reach about 31 on their own, before being combined with anything else (source: SoundProofGeek, Does Mass Loaded Vinyl Soundproofing Work?).
That STC scale is worth understanding on its own terms, because the numbers only mean something in context. According to Soundproof Direct's guide to STC ratings, materials rated up to STC 25 still let normal speech be understood clearly through a wall, while by STC 50, loud sounds are hardly audible on the other side at all. An untreated interior wall with a standard hollow-core door typically sits well below 25. A sealed solid door with weatherstripping can reach the 40s. Full MLV built into a wall assembly with drywall, studs, and insulation, rather than the bare sheet alone, reaches meaningfully higher numbers than the standalone rating suggests, since the complete assembly is what actually carries the rating that matters.
Mass loaded vinyl only helps as part of a complete assembly, and hanging a bare sheet of it on an existing wall does far less than the marketing around it implies. This is worth knowing before you spend $150 on a roll of MLV expecting it to transform a thin apartment wall on its own. If your actual noise problem is a neighbor's bass through a shared wall, or a busy street outside a single-pane window, MLV applied over the door or window as a heavy curtain-style cover, combined with the sealing fixes above, gets you a real improvement. If your problem is a housemate's normal conversation two rooms away, sealing gaps alone probably already solved it, and MLV would be solving a problem you don't have.
For the large majority of people reading this guide, whose actual problem is a hollow-sounding room and the occasional passing noise rather than a genuinely loud shared wall, the sealing fixes from the previous section get you most of the way there, and the next section on where you actually sit in the room matters more than MLV does.
Should You Build a Closet Vocal Booth Instead of Treating a Whole Room?
For a lot of home setups, the fastest path to a genuinely clean voiceover isn't treating your whole room at all. It's finding the smallest, softest space in your home and recording there instead.
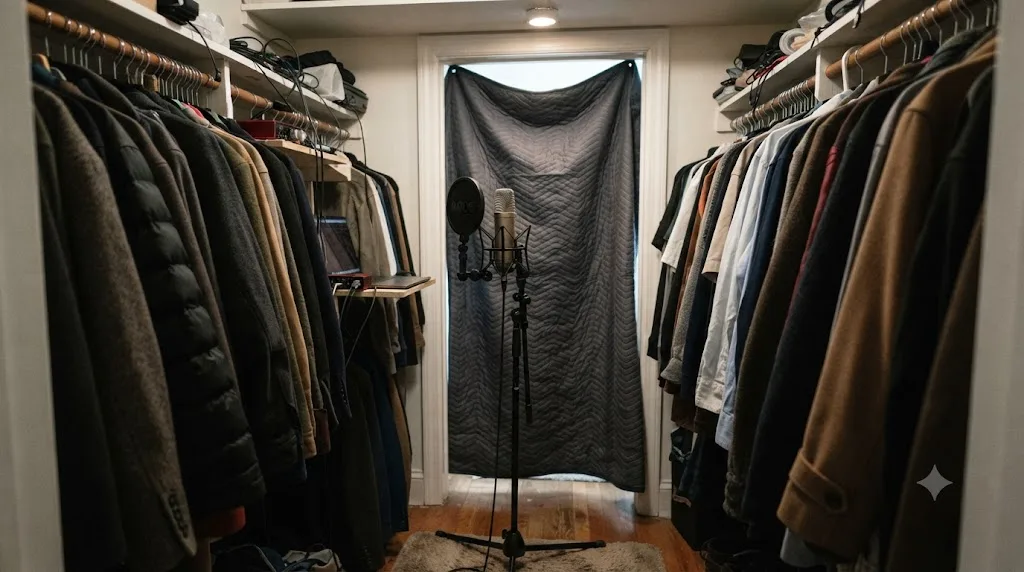
A closet full of clothes is already partially treated acoustically before you do anything to it. Hanging fabric absorbs mid and high frequencies effectively, which is exactly the range where the human voice lives, and a closet's small volume and soft walls mean there's very little room for the long, boomy reflections that make an open room sound distant and hollow on a recording. This isn't a workaround. It's a genuinely good acoustic environment that happens to already exist in most homes.
Here's how to set one up, based on the approach I Want To Be A Voice Actor's guide to a DIY closet booth and multiple threads on HomeRecording.com's forum on building closet vocal booths:
- Pick a walk-in closet or a closet deep enough to stand or sit inside comfortably with the door mostly closed, ideally one already full of hanging clothes rather than a mostly empty one.
- Bring in a mic stand, your interface or recorder, and headphones. A laptop or phone can sit just outside if space is tight, connected by a long enough cable or wirelessly.
- Hang a moving blanket over the door opening itself, or over the door from the inside, to cover the gap that lets outside sound in and to add absorption right where the door's hard, flat surface would otherwise reflect sound back at the mic.
- Position yourself facing into the hanging clothes, not toward the bare back wall or a mirror if the closet has one, since bare hard surfaces are exactly what you're trying to avoid pointing the mic at.
- Leave the clothes in place. They're doing real acoustic work, not just taking up space.
A closet full of clothes with a blanket over the door outperforms an open, empty spare room for voiceover clarity, and it costs nothing if you already own both. That single fact surprises a lot of people who assume bigger and emptier means better for recording. The opposite is usually true for voiceover work specifically, where you want a small, dead-sounding space close around the mic, not a large room with the same problems as a warehouse.
The tradeoffs are real too. A closet gets warm fast, especially with a laptop running DaVinci Resolve nearby generating heat and fan noise, which is covered in its own section further down. Long sessions can get uncomfortable, and you'll want a small fan running between takes, off during recording, to keep the space breathable. If your closet is small enough that your own breathing and clothing rustle become audible in the tight space, back off the mic distance slightly or angle it off-axis rather than directly at your mouth.
What If You Don't Have a Closet to Spare?
Not every home has a closet you can dedicate to recording, and that's fine. A blanket fort accomplishes almost the same thing without needing a dedicated space.
The basic build: two or three moving blankets, a closet pole, a PVC frame, or even just the backs of two chairs, and enough space to sit inside with your mic. Drape the blankets over the frame so they surround you on at least three sides, ideally angled slightly rather than perfectly flat and parallel to each other, since flat parallel surfaces are what cause the sharp, metallic flutter echo covered later in this guide. According to discussion on Gearspace's forum on PVC and blanket vocal booths, the angle between blankets relative to each other matters more than most people expect for avoiding that flutter.
Harbor Freight and Home Depot both sell heavy moving blankets cheaply, and a complete setup, blankets, a simple frame, and hardware, typically runs around $150 to $250 depending on how many blankets you use and whether you buy or improvise the frame (source: I Want To Be A Voice Actor's closet booth guide). Worth knowing upfront: moving blankets aren't thick enough to meaningfully absorb bass frequencies, so this setup helps with the boxy, echoey midrange character of a bad room far more than it helps with a low rumbling noise source like a nearby highway. For voiceover specifically, where the content that matters lives in the midrange, that's exactly the frequency range you need help with most.
An honest comparison of materials, from VocalBoothToGo's testing of moving blankets against purpose-built sound blankets, found that moving blankets carry a noise reduction coefficient, a measure of how much sound energy a material absorbs, around 0.30. That's a real but modest number, meaningfully behind dedicated acoustic blankets or rigid panels, but for a $150 DIY build using material you can return or repurpose later, it's a genuinely good starting point.
Do the Setups Actually Differ That Much?
| Setup | Cost | Best for | Limitation |
|---|---|---|---|
| Closet with clothes + blanket over door | $0-50 | Anyone with a spare closet | Gets warm on long sessions |
| Blanket fort with a simple frame | $150-250 | No closet available, flexible location | Takes up floor space; needs to be broken down or lived with |
| Whole-room DIY treatment (blankets, curtains, rearranged furniture) | $50-150 | Rooms you also use for editing or filming | Won't fully match a dedicated booth's isolation |
| Purpose-built portable vocal booth | $150-400 | Wanting a permanent, tidier setup | Covered in the next section, with real limits worth knowing |
Do Portable Reflection Filters Actually Work?
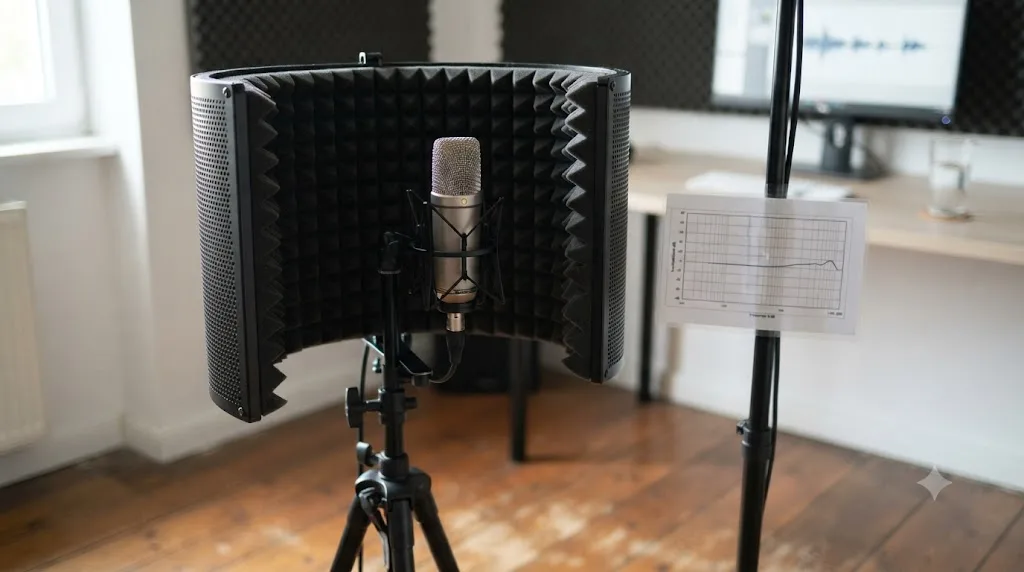
If you've shopped for a home voiceover setup, you've seen these: a curved, semicircular panel that clips onto your mic stand and wraps partway around the microphone itself, often called a reflection filter or portable vocal booth. It's worth being honest about what these actually do, because the marketing around them oversells the result by a fair margin.
Sound on Sound's Sam Inglis ran controlled tests on several of these products at the University of Salford's Acoustics Laboratory, and the results were far more modest than most buyers expect. On blocking outside noise from getting into the recording, Inglis found that "even the most effective of these products achieves a reduction of only 1.5dB overall", and below 400Hz, most of the screens tested actually made things slightly worse, amplifying external noise rather than blocking it, due to sound diffracting around the panel's edges (source: Sound on Sound, How Effective Are Portable Vocal Booths?). That's a genuinely small number. A 1.5dB reduction in outside noise is barely perceptible.
Where they perform better is on room reflections specifically, not outside noise. Inglis measured broadband attenuation of room reflections ranging from roughly 2.5dB for the weakest product tested to almost 8dB for the strongest, but that protection only kicked in above 500Hz, too high in frequency to do anything about the low-frequency room modes that make a room sound genuinely boomy.
There's a real downside too. Every screen tested introduced measurable coloration into the recorded voice itself, caused by the screen's own surface reflecting sound back into the mic just 2 to 3 milliseconds after the direct sound arrives. That short a delay doesn't sound like an echo. It sounds like comb filtering, a subtle but real change in tonality where certain frequencies partially cancel each other out, altering how a voice sounds even when no distinct echo is audible.
Portable reflection filters reduce room reflections by a modest, measurable amount, and they do almost nothing to block outside noise, no matter what the product photos imply. Inglis's own verdict, after testing them properly rather than just listening casually, lands close to this: they "may provide a worthwhile reduction in the amount of unwanted room reverberation" in a genuinely bad-sounding room, but they "won't eliminate it." That's a fair, honest summary, and it's worth reading before spending $80 to $150 on one expecting it to solve a problem it was never built to solve.
If your actual problem is outside noise, a reflection filter is the wrong tool; go back to the sealing section above. If your problem is a boxy, echoey room and you genuinely can't hang blankets or build a closet booth for whatever reason, a reflection filter is a real, if modest, improvement over nothing, and Inglis's testing found price didn't reliably predict performance, so it's worth comparing reviews rather than just buying the most expensive option.
What Acoustic Treatment Actually Fixes a Boxy, Echoey Voiceover?
If you've sealed your gaps, tried a closet or blanket fort, and your voice still sounds distant, hollow, or like it's coming from inside a can, that's a room reflection problem, and it responds to a specific kind of material, not just any soft-looking thing you hang on a wall.
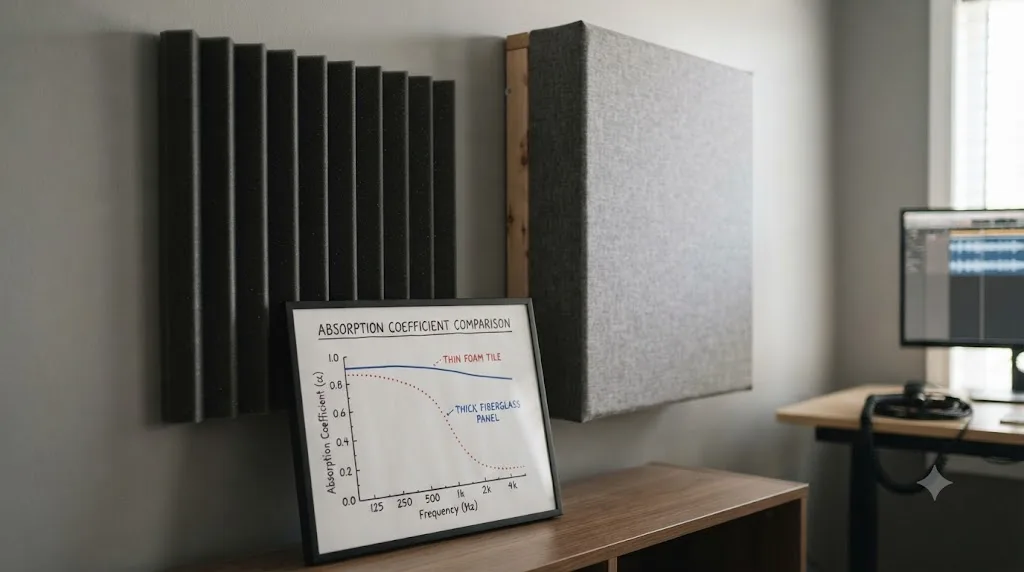
The material that actually works best for this, according to acoustic treatment specialists, is rigid fiberglass or mineral wool, mounted with a small air gap off the wall and wrapped in an acoustically transparent fabric. Ethan Winer, a principal at RealTraps who has designed acoustic treatment for studios including Berklee College of Music and Atlantic Records, has spent years pushing back publicly on cheap foam's reputation as an acoustic fix, arguing that thin foam mostly handles high frequencies while leaving the midrange and low end, where most of a room's actual problems live, essentially untouched (source: RealTraps, Bass Trap Myths).
The numbers back that up directly. According to Commercial Acoustics' guide to sound absorption coefficients, a typical 1-inch foam panel measures a noise reduction coefficient of around 0.40, performing reasonably well between 1 and 2 kHz but poorly at 125 Hz, right in the low-midrange where a lot of a voice's warmth and body sits. A 4-inch rigid fiberglass panel, by contrast, reads closer to NRC 1.00 and stays effective all the way down to 125 Hz, a meaningfully wider and deeper range of coverage. Fiberglass panels generally range from NRC 0.85 to 1.10 depending on density and thickness, well ahead of both foam and moving blankets across the board.
A thin foam tile absorbs high frequencies reasonably well and does almost nothing to the low-midrange frequencies that make a voice sound boxy. That single fact explains why a lot of people buy a pack of cheap foam tiles, stick them up, and don't hear the improvement they expected. They fixed a problem, just not the one making their voiceover sound bad.
Absorption material comparison
| Material | Typical NRC | Best frequency range | Cost |
|---|---|---|---|
| Moving blanket | ~0.30 | Mid to high | $15-30 each |
| 1-inch acoustic foam | ~0.40 | High only, weak below 500Hz | $20-40 for a pack |
| 2-inch rigid fiberglass panel | ~0.85-0.95 | Mid to low-mid | $80-150 a pair |
| 4-inch rigid fiberglass panel | ~1.00+ | Low-mid, effective to 125Hz | $150-250 a pair |
| Thick hanging curtain or comforter | ~0.35-0.50 | Mid, weak on low end | Often already owned |
For voiceover work specifically, where clarity in the low-mid to mid frequency range is what makes a recording sound close, warm, and professional rather than thin and distant, rigid fiberglass or mineral wool panels are worth the investment if you're past the free-fixes stage and still not satisfied with how your voice sounds.
Are DIY Acoustic Panels Worth Building Instead of Buying?
If you're comfortable with basic tools, building your own rigid fiberglass panels can meaningfully undercut the cost of buying finished ones, and the material performance is nearly identical since you're using the same core product professional panels are built from.
A basic DIY panel build: a simple wood frame, a sheet of rigid fiberglass insulation like Owens Corning 703 or 705 cut to fit, and an acoustically transparent fabric like burlap or speaker cloth stretched over the front and stapled to the frame's back. Mounted with a small standoff gap from the wall rather than flush against it, this construction performs close to what a commercial panel of the same thickness and density delivers, since the fiberglass core, not the frame or fabric, is doing almost all of the acoustic work.
Where buying finished panels wins is convenience, consistency, and appearance. GIK Acoustics, a well-known acoustic treatment brand, prices its standard 242 panels, which use rigid fiberglass wrapped in fabric, at $199 a pair, and according to GIK's own guide to budgeting for room acoustics, a budget of up to $1,000 is generally enough to fully treat a typical home studio room without needing to DIY much of anything. That's a real, achievable number for a small dedicated recording space, and it buys you consistent quality, a range of fabric colors, and, in GIK's case, free acoustic advice from their engineering team on how many panels a specific room actually needs.
Decision table: DIY vs bought panels
| Factor | DIY build | Bought panels |
|---|---|---|
| Cost per panel (2-inch, roughly 2x4 ft) | $25-45 in materials | $80-150 |
| Time investment | A weekend, if you have basic tools | None; arrives ready to mount |
| Acoustic performance | Nearly identical if using the same core material | Consistent, tested, published NRC ratings |
| Appearance | Depends entirely on your fabric and build quality | Professionally finished, multiple color options |
| Best for | Treating a whole room on a tight budget | A handful of strategically placed panels, or no time to build |
A practical middle path many people land on: build the bulk of your panels yourself for coverage, and buy two or three finished panels for the spots that matter most, directly behind your monitor position and at the first reflection points beside your mic, where consistent quality and a clean look matter more.
How Do You Deal With Room Modes and Flutter Echo in a Small Room?
Even after you've added absorption, a specific kind of small-room problem can survive: a sharp, metallic, rapid echo, or a boomy quality on certain notes of your voice that isn't present on others. Both trace back to the same underlying cause, and it's specific to the shape of the room, not just what's on the walls.
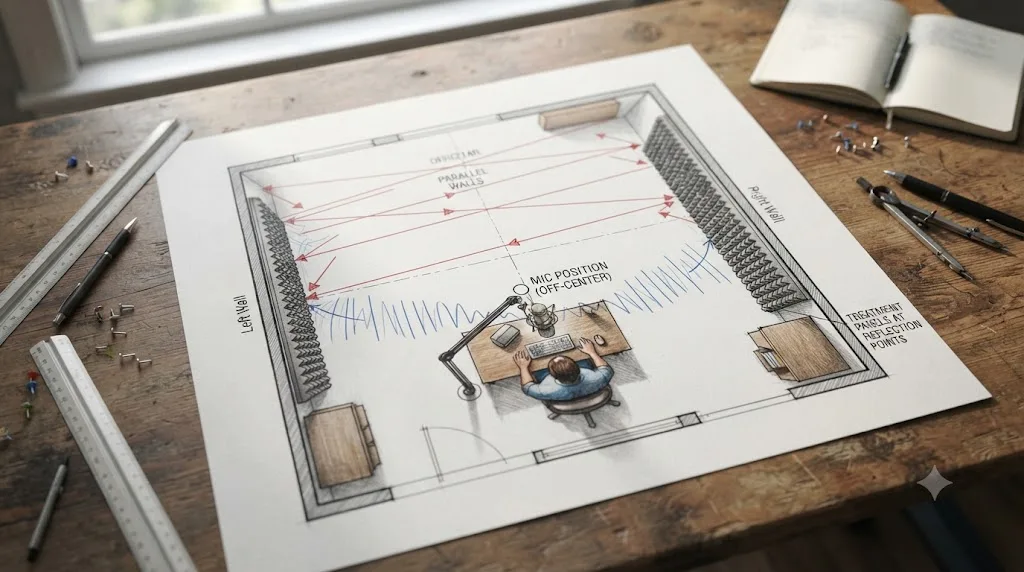
Room modes, also called standing waves, happen when a sound wavelength matches one of a room's dimensions and reflects back and forth between two parallel surfaces, building up into a resonant peak at that specific frequency, according to Acoustics Insider's explanation of parallel walls and room modes. Room modes exist in every room regardless of size, but they're proportionally worse in small ones, since a small room's dimensions correspond to frequencies right in the range that matters most for speech and music.
Flutter echo is the faster, more audible cousin of the same problem: a rapid, buzzing, almost metallic repeated echo caused by sound bouncing quickly back and forth between two hard, parallel, closely spaced surfaces, like two bare walls facing each other in a small office. You can usually hear it directly by clapping once, sharply, in the middle of a room. If you hear a fast, ringing "brrrrt" trailing off rather than a single clean clap, that's flutter echo, and it will show up in your voiceover as a subtle but real degradation in clarity, especially on sharp consonants.
Two things fix room modes and flutter echo, and neither requires professional tuning: break up parallel hard surfaces, and don't record in the exact geometric center of the room. Practically, that means:
- Avoid setting up dead center between two bare parallel walls. Off-center placement, even by a foot or two, changes which frequencies build up where, and it's free.
- Treat the first reflection points, the spots on the wall to your immediate left and right of the mic where a clap or a snapped finger produces the sharpest, most immediate echo back at you. A single panel or a hung blanket at each of these two spots does more per square foot than covering the whole wall evenly.
- Break up any large flat parallel surface, whether that's two bare walls or a closet door facing a mirror, with anything that scatters sound instead of reflecting it cleanly back: a bookshelf, an angled panel, or simply not leaving both surfaces bare and empty at the same time.
- Add a rug or carpet if you're on a hard floor, since floor-to-ceiling reflection is one of the most commonly overlooked parallel-surface pairs in a home office.
This is the step that separates a room that's merely quiet from a room that actually sounds good on a recording. A lot of DIY setups get isolation right, sealing gaps, adding blankets, but skip this geometric piece entirely, and end up wondering why their treated room still sounds slightly off.
What's the Full Step-by-Step Process, Start to Finish?
Here's the whole sequence from this guide in the order worth doing it, so you're not jumping randomly between fixes and guessing which one actually helped.
- Measure your current noise floor. Record thirty seconds of silence at your normal mic gain and check the level in dB RMS, as covered above. This tells you whether you're solving an isolation problem, a reflection problem, or both, before you spend anything.
- Seal every gap around the door and windows. Weatherstripping, a door sweep, and acoustic caulk on outlet and baseboard gaps. This is the cheapest fix with the largest per-dollar impact on outside noise.
- Pick your recording space. A closet full of clothes, a walk-in wardrobe, or the smallest, softest room available almost always outperforms a large, empty room for voiceover clarity.
- Hang absorptive material on hard, reflective surfaces. Moving blankets, thick curtains, or acoustic panels on the walls and door, prioritizing whatever's directly facing your mic.
- Deal with parallel walls and room modes. Avoid dead-center placement, treat the first reflection points beside the mic, and break up any large bare parallel surface with a rug, bookshelf, or angled panel.
- Kill nearby machine noise. Move your PC tower away from the mic, use a laptop stand that diverts fan airflow, and choose a directional mic pointed away from your computer, covered in detail in the next section.
- Test, record, and compare. Record a real take on top of your original silent noise floor test, listen critically on headphones, and change one variable at a time rather than five things at once, so you actually know what worked.
- Repeat the noise floor test after major changes to confirm you're moving in the right direction rather than just assuming a new blanket helped.
Total realistic cost for most home setups following this whole sequence: under $150, and most of that improvement comes from steps 2 through 5, not from anything expensive. That's worth repeating because it's easy to assume a good-sounding voiceover requires studio-grade spending, and for the video editing use case this guide is written for, it generally doesn't.
What Does Each Budget Tier Actually Buy You?
Different people reading this guide have genuinely different budgets and different tolerance for how far to take this. Here's an honest breakdown of what each tier realistically gets you, so you can pick a stopping point that matches your actual needs instead of either underspending or overspending.
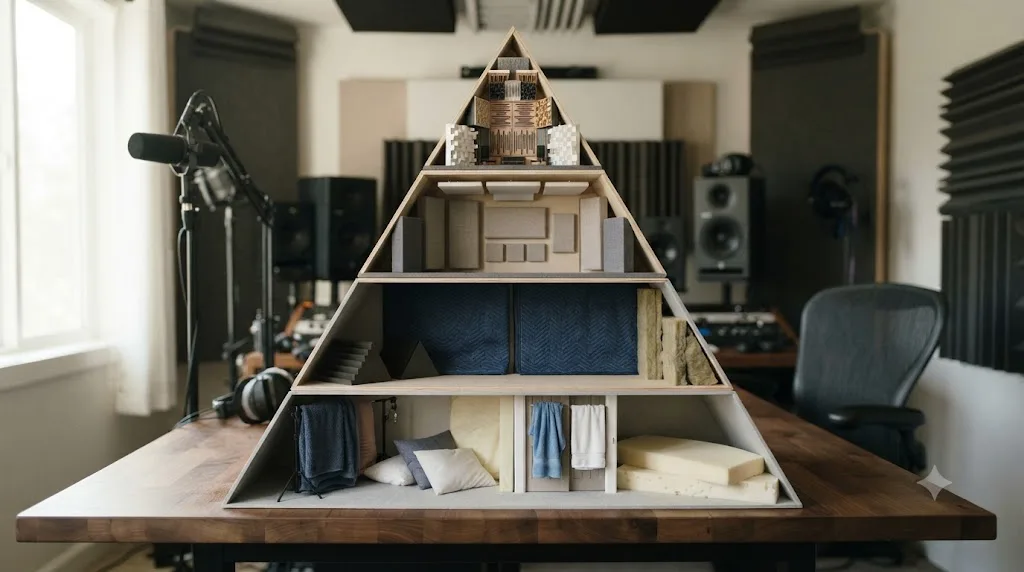
$0: Free fixes using what you already own. Rearranging furniture to break up parallel surfaces, using an existing closet, hanging spare blankets or a thick comforter, and recording at a quieter time of day. This alone fixes a surprising share of bad home voiceover audio, and it costs nothing except time.
Under $100: Sealing plus basic materials. Weatherstripping, a door sweep, a couple of moving blankets from a hardware store, and acoustic caulk on the worst gaps. This tier gets most video editors' voiceovers to a genuinely usable, professional-sounding place.
$150-300: A dedicated closet or blanket-fort booth. A proper closet setup with a blanket over the door, or a PVC-and-blanket fort if no closet is available, plus better weatherstripping throughout the room. This is the tier most serious hobbyists and content creators land on and stay at.
$500-1,000: Real acoustic panels for a dedicated room. A handful of rigid fiberglass panels at the first reflection points and behind the mic position, following GIK Acoustics' guidance that this budget is typically enough to fully treat a small home studio room. Worth it if you're recording regularly, in the same room, and want it to sound consistently good without a blanket fort taking up floor space.
$1,000+: Full room treatment plus real soundproofing. Mass loaded vinyl built into a door or wall assembly, professional-grade panels covering most of the room, potentially a dedicated recording space. This tier makes sense for someone recording voiceover as a meaningful part of their income, not for someone narrating an occasional YouTube video.
Every tier above $0 exists to solve a specific problem you've already identified, not to be bought preemptively before you know what's actually wrong with your room. Run the noise floor test and the clap test for flutter echo before spending anything past the free tier. Most people reading this for video editing voiceovers never need to go past the second or third tier.
How Do You Deal With Your PC or GPU Fan Noise Right Next to the Mic?
This is the noise source that's specific to video editors and doesn't show up in most general soundproofing guides, because most of those guides aren't written for someone recording a few feet from a machine doing real-time video processing.
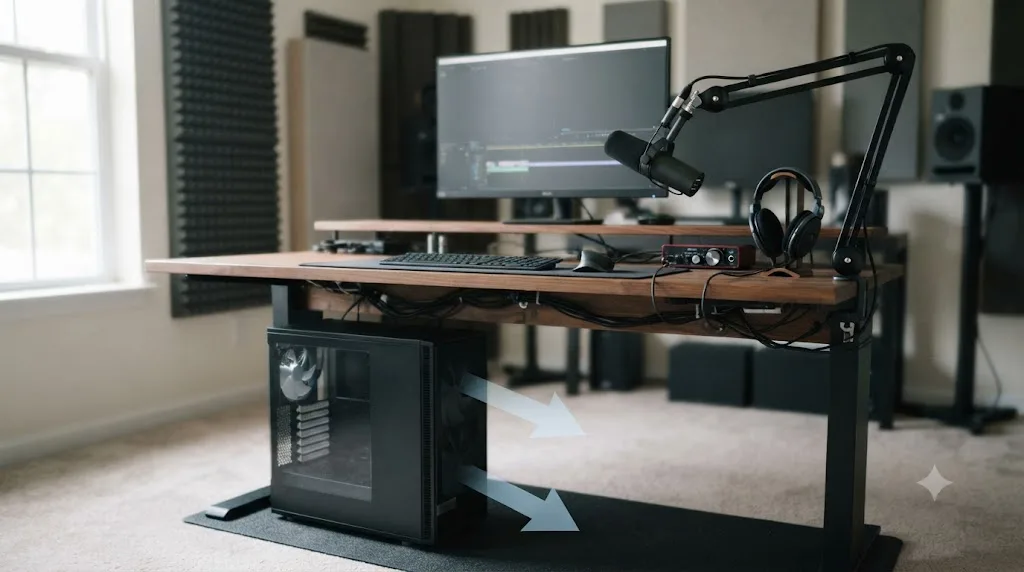
DaVinci Resolve's playback engine, especially on the Edit and Color pages while scrubbing 4K footage or previewing a color grade, drives your GPU and often your fans harder than idle desktop use. If your computer sits on or near the same desk as your microphone, that fan noise is a real, constant, low-frequency hum sitting in your recording whether you notice it consciously or not while wearing headphones.
A handful of practical fixes, roughly in order of effort:
- Increase physical distance. Even an extra two or three feet between your machine and the mic makes a measurable difference, since sound intensity falls off quickly with distance. If your desk setup allows it, moving the tower under the desk or across the room, connected by a longer monitor and peripheral cable run, helps more than almost any acoustic treatment would for this specific noise source.
- Use a directional microphone and aim it correctly. A cardioid or hypercardioid mic rejects sound from behind and to the sides far better than an omnidirectional one. Position your machine directly behind or to the side of the mic's rejection zone, not in front of it, so the mic's own pickup pattern is doing work you'd otherwise pay for with treatment.
- Pause heavy rendering during the actual take. If you're recording narration to sync into a project you're already editing, don't have DaVinci Resolve actively rendering, transcoding, or playing back a demanding timeline in the background while you record. Fan noise spikes under load, and a quiet idle machine is meaningfully quieter than one mid-export.
- If you're recording on a laptop, use a stand that lifts it and redirects airflow away from your desk surface, rather than letting it sit flat where fan noise reflects directly off the desk toward the mic.
- Consider a closet booth specifically to solve this problem, if your desk setup genuinely can't be rearranged. Recording your voiceover takes in a nearby closet, away from the machine entirely, then syncing that audio to your DaVinci Resolve timeline afterward, sidesteps the whole issue rather than trying to out-treat it.
A computer running DaVinci Resolve's real-time playback engine a few feet from an omnidirectional microphone is a louder, closer noise source than most people account for when soundproofing a room. This is worth testing directly: run the silent noise floor test from earlier once with your machine idle and once with a demanding timeline actively playing back, and compare the two numbers. If there's a real gap, that's your answer, and the fix costs nothing beyond a few feet of cable and a moment's thought about where you sit relative to the tower.
Should You Record Voiceovers in the Same Room as Your Edit Bay?
This is a genuine tradeoff, not a settled question, and the right answer depends on your setup more than any general rule.
Recording in your edit bay is convenient. You're already there, your interface and headphones are already patched in, and you don't need to physically move between recording a line and checking how it sits against your video. For quick pickups, ADR-style line replacements, or a workflow where you're constantly iterating between writing a line and recording it, staying in one room saves real time.
Recording elsewhere is quieter, almost by default. A dedicated closet or a spare room away from your main computer sidesteps the fan noise problem covered above entirely, and it's usually a smaller, softer space that needs less acoustic work to sound good in the first place. The cost is friction: you have to physically move, bring your mic and interface with you or maintain a second setup, and transfer files back to your editing machine afterward.
A practical middle ground that a lot of people land on: keep your primary recording setup in your edit bay for quick lines and pickups, but build a simple closet or blanket-fort booth as a secondary space for anything longer or more demanding, a full narration pass, a client-facing voiceover, or anything where the extra ten minutes of setup is worth the meaningfully better result. This mirrors the same logic covered in our guide to recording a podcast in DaVinci Resolve using Fairlight, where a quiet room matters just as much as correct patching and gain staging, since no amount of correct Fairlight setup fixes audio that was noisy at the source.
If you do record in your edit bay, apply the machine-noise fixes from the previous section first, since they cost nothing and directly address the one disadvantage that space has over a dedicated booth.
How Do You Record Clean Voiceover Audio Once Your Room Is Ready?
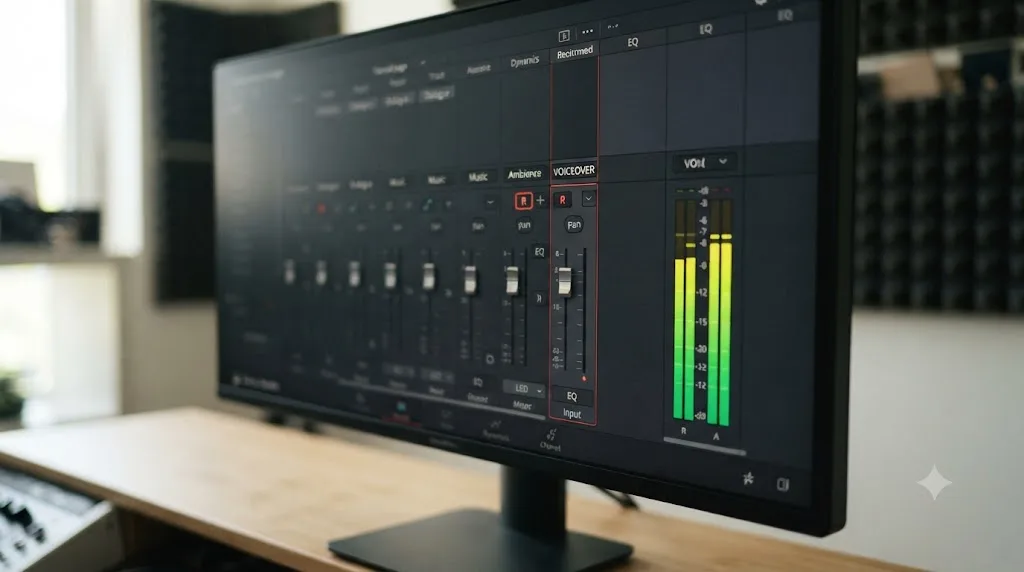
Once your room is treated and sealed, the recording itself happens on DaVinci Resolve's Fairlight page, the same audio engine used for full podcast and multi-track production. The mechanics of getting a clean signal into Resolve are covered in full in our guide to recording a podcast in DaVinci Resolve using Fairlight, but the short version for a single voiceover track:
- Open the Fairlight page and create a mono audio track, since a single microphone produces a single channel and a mono track keeps your later editing simpler.
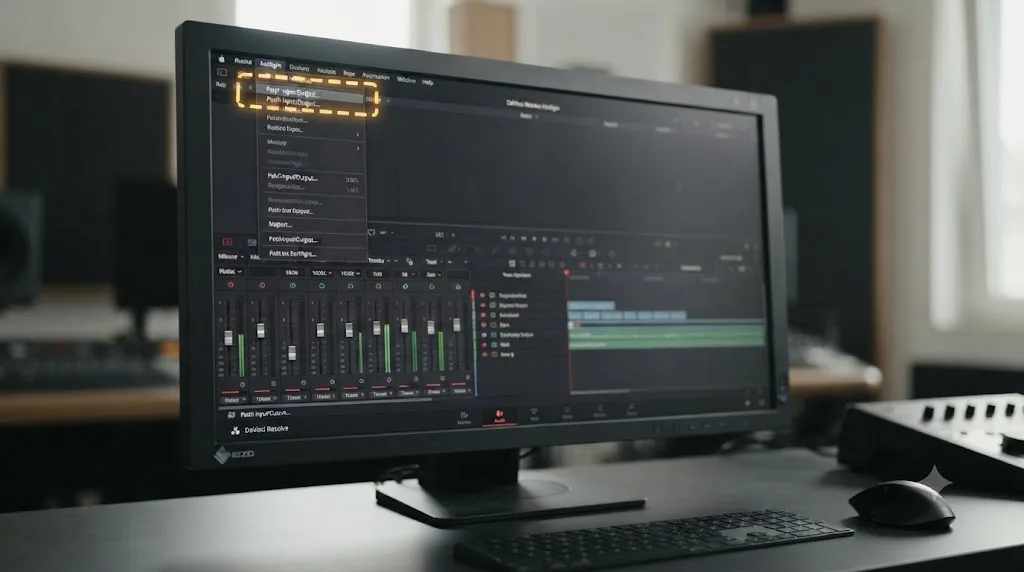
- Open Fairlight > Patch Input/Output and connect your microphone or interface's input to that track.
- Arm the track with the red R button, and watch the input meter while speaking at your actual recording volume. Aim for peaks between -12 and -6 dBFS, adjusting gain at your interface or microphone, never at the fader, for the cleanest possible signal reaching the track.
- Record your take, then immediately scrub through it and listen on headphones before moving on, catching problems while you're still set up rather than discovering them during the edit.
If your room treatment did its job, this step should be close to mechanical. The room work covered in this guide and the recording setup covered in Fairlight solve two different halves of the same problem, and skipping either one leaves the other unable to fully compensate. A perfectly patched, perfectly gain-staged Fairlight track still sounds like it was recorded in a bathroom if the room behind it is untreated, and the best-treated room in the world still produces a clipped, distorted take if your gain staging is wrong.
If you're hearing crackling or popping while monitoring your voiceover in Fairlight specifically, that's a separate, unrelated issue from anything covered in this guide, and our dedicated troubleshooting guide on DaVinci Resolve audio crackling and popping during playback walks through the sample rate, buffer size, and driver checks that fix it.
What Mistakes Do People Make Treating a Room for the First Time?
A handful of mistakes come up repeatedly enough to be worth calling out directly, since avoiding them saves both money and wasted effort.
Treating a room that's already too dead. It's possible to over-treat a small room, especially a closet, to the point where it sounds unnaturally muffled and lifeless rather than clean. TechSmith's own guide to soundproofing puts this plainly: "too much soundproofing is just as bad as too little," and the goal is a balance, not maximum absorption everywhere (source: TechSmith, How to Soundproof a Room for Crisp Voice Recordings). If your voice starts sounding like you're talking into a pillow rather than just clean and close, pull back on the amount of absorptive material rather than adding more.
Assuming foam alone will fix a boxy voice. Covered in detail earlier in this guide: thin foam handles high frequencies and does little in the low-mid range where a voice's actual boxiness lives. If you've put up foam and still hear the problem, that's expected, not a sign you did something wrong.
Ignoring the ceiling and floor. Most people treat the four walls and forget that a hard ceiling and a bare floor form their own parallel-surface pair, exactly the geometry that causes room modes and flutter echo. A rug on the floor and, if practical, a piece of absorptive material or even a hung blanket angled across part of the ceiling closes this gap.
Buying expensive gear before fixing the room. A better microphone captures a bad-sounding room more accurately, not less. If your current recordings sound boxy or noisy, room fixes come before a microphone upgrade almost every time, since the room is what the mic is actually capturing.
Skipping the noise floor test and guessing instead. Without measuring before and after, it's genuinely hard to know whether a change helped, hurt, or did nothing. The two-minute test covered earlier in this guide is the difference between knowing your $40 in weatherstripping worked and just hoping it did.
What If You're Renting and Can't Modify the Walls?
Nothing in this guide's most effective fixes requires permanent modification, which matters if you're renting or otherwise can't drill, paint, or permanently alter a wall.
Weatherstripping tape, door sweeps, and removable acoustic caulk all come off cleanly when you move. Moving blankets, curtains, and closet setups involve no wall damage at all. Acoustic panels can be leaned against a wall or mounted on a freestanding frame rather than screwed directly into drywall, and companies selling panels increasingly offer removable, adhesive-strip mounting options specifically for renters. A blanket fort or closet booth is entirely reversible by definition, since it's built from a frame and fabric rather than anything attached to the room itself.
The one thing worth checking before you start: some lease agreements restrict what you can attach to walls, including adhesive strips that claim to be damage-free. If that's a concern, freestanding options, a closet, a portable frame, or panels on stands rather than mounted, sidestep the question entirely.
Every fix in this guide's first four sections, sealing, closet setup, blanket forts, and reflection point treatment, works fully in a rental without a single hole in the wall. That's not a compromise version of proper treatment. For the video editing voiceover use case this guide is written for, it's the same fixes a homeowner would use, just chosen deliberately to be reversible.
Is There an AI Tool That Helps Once You're Recording Inside DaVinci Resolve?
Everything in this guide happens before you ever open DaVinci Resolve. Once your room is treated and you're actually in Fairlight patching a mic, arming a track, or troubleshooting why the input meter isn't moving, that's a software problem, not an acoustic one, and it's a different kind of stuck.
TryUncle is the on-screen assistant for DaVinci Resolve on macOS. Ask in plain words and Uncle points at the exact control on your screen. If you've followed this guide, treated your room, and you're now staring at Fairlight's Patch Input/Output panel wondering why your armed track still isn't picking up your microphone, that's exactly the moment Uncle is built for: you ask, and it looks at your actual DaVinci Resolve window and points directly at the setting, live, without pulling you out of the app to search a video for the right timestamp.
Guided practice inside Resolve beats watching a course about Resolve. That's the core idea behind an in-app tutor instead of a pre-recorded tutorial: a course teaches you Fairlight's patch bay in a fixed order whether or not that's where you're actually stuck, while Uncle answers the specific question you have, about the specific project you're recording into, at the exact moment you're stuck on it.
Be clear-eyed about what this tool is and isn't. TryUncle doesn't treat your room, patch your microphone, or set your gain for you. It's a paid macOS subscription at $39 a month, and it points and explains rather than acting on your project directly. If you're comparing it against tools that automate edits directly, like CutAgent or PremiereCopilot, or that answer chat-style questions without seeing your actual screen, like Sottocut or heyeddie.ai, the distinction is real: those tools do things to your timeline for you. Uncle teaches you to do them yourself, on your own setup, which is the part that still helps you the next time you're recording without the app open at all.
The Verdict
You don't need a renovation to record a clean voiceover for your videos. Seal the gaps around your door and windows first, since that's the cheapest fix with the biggest payoff. Move to a closet or a blanket fort if your room still sounds hollow. Treat the first reflection points beside your mic if flutter echo or boominess survives that. Save mass loaded vinyl, professional panels, and a four-figure budget for the specific case where you've actually confirmed you need them, not as a default first move.
The one step almost every guide like this skips, and the one that matters specifically if you're recording for video editing rather than pure audio work, is checking what your own computer is doing to your noise floor while it sits a few feet from your microphone running the same software you're about to edit in. Test it. Move the machine, angle the mic, or step into a closet for the actual take if the gap between idle and active playback is bigger than you expected.
Run the thirty-second silent noise floor test before you start and after every change you make. It's the only way to know which fix actually worked, and it costs you nothing but half a minute you were going to spend deciding what to try next anyway.
Frequently asked questions
- Do moving blankets actually soundproof a room?
- Not in the strict sense. Moving blankets are absorptive, not isolating, so they cut echo and reflections inside the room but do little to stop outside noise like traffic or a neighbor's TV from getting in. Their noise reduction coefficient runs around 0.30, well behind purpose-built sound blankets or rigid fiberglass panels, but they're cheap, fast, and genuinely useful for taming a boxy-sounding room.
- How much does it cost to soundproof a room for voiceover recording?
- A usable setup costs nothing beyond weatherstripping and a few blankets you may already own, roughly $0 to $100. A closet booth with moving blankets and a door sweep runs about $150 to $300. Real acoustic panels from a brand like GIK Acoustics start around $199 a pair, and a fully treated small room typically lands under $1,000. Full structural soundproofing with mass-loaded vinyl and floated walls runs into the thousands, and almost no home voiceover setup needs it.
- Can I record clean voiceover audio in a closet?
- Yes, and it's one of the most reliable low-cost fixes available. A closet full of clothes is already partially treated, since hanging fabric absorbs mid and high frequencies well, and its small size and soft walls kill the long reflections that make an open room sound hollow. Add a moving blanket over the door gap and you have a serviceable vocal booth for under $50.
- What's the difference between soundproofing and acoustic treatment?
- Soundproofing blocks sound from entering or leaving a room, using mass, airtight seals, and structural separation. Acoustic treatment controls how sound behaves once it's already inside the room, using absorption and diffusion to reduce echo and reflections. A voiceover recorded in a room with acoustic treatment but no soundproofing will sound clean and close, but a passing truck will still be audible. Most home setups need treatment far more urgently than soundproofing.
- Do I need acoustic foam panels to record voiceovers at home?
- No. Thin foam tiles mostly absorb high frequencies and do little below 500 Hz, so they help less than their reputation suggests. Moving blankets, thick curtains, a closet full of clothes, or a properly hung comforter all outperform cheap foam per dollar for voiceover work, where clarity in the midrange of the human voice matters more than deep bass control.
- How do I know if my room is quiet enough to record in?
- Record thirty seconds of silence with your actual microphone and interface at your normal gain, then look at the noise floor in your DAW or in DaVinci Resolve's Fairlight page. Audiobook platform ACX requires a noise floor at or below -60 dB RMS for accepted submissions, and voiceover professionals treat -55 dB as a reasonable home-studio floor. If your silent take reads above -50 dB, address gaps, fans, and hard surfaces before you worry about anything else.
- Should I record voiceovers in the same room as my editing computer?
- Only if you can get the computer's fan noise out of the microphone's pickup pattern, since a desktop tower or a laptop running DaVinci Resolve's GPU-heavy playback engine is a real, constant noise source sitting a few feet from your mic. A cardioid or hypercardioid microphone facing away from the machine, combined with distance and a laptop stand that lifts airflow away from your desk, usually solves it without needing a second room.
Sources
- Soundproof Cow: How to Soundproof a Room for Voice Recordings
- SoundGuys: Soundproofing vs acoustic treatment, what's the difference?
- Sound on Sound: How Effective Are Portable Vocal Booths?, by Sam Inglis
- RealTraps: Bass Trap Myths, by Ethan Winer
- RealTraps: Build a Better Bass Trap, by Ethan Winer
- Second Skin Audio: How to Soundproof a Door
- Soundproof Direct: STC Ratings for Mass Loaded Vinyl & Sound Batts
- SoundProofGeek: Does Mass Loaded Vinyl Soundproofing Work?
- VocalBoothToGo: Comparison of Moving Blankets to Producer's Choice Sound Blankets
- Commercial Acoustics: Sound Absorption Coefficients Guide
- Jay Myers Voiceover: Noise Floor
- ACX Help: What Are The ACX Audio Submission Requirements?
- GIK Acoustics Europe: Budgeting for Room Acoustics
- I Want To Be A Voice Actor: A Do-It-Yourself Closet VO Booth
- TechSmith: How to Soundproof a Room for Crisp Voice Recordings
- OSHA: Occupational Noise Exposure
- Acoustics Insider: Parallel Walls vs Angled Walls, How To Treat Room Modes & Flutter Echo
Learn by doing, not watching
Stop translating tutorials to your timeline.
TryUncle stays beside Resolve on Mac and Windows. When you ask, Uncle sees your screen and points at the exact control you need. No hunting through tabs, timestamps, or mismatched tutorials.
Meet TryUncleKeep reading
 GuidesJul 17, 202632 min read
How to Record a Podcast in DaVinci Resolve Using Fairlight
Record a podcast directly inside DaVinci Resolve's Fairlight page: patch mics, arm tracks, set gain and monitoring, capture multi-guest audio, and avoid the common failures.
 FixesJul 12, 202632 min read
DaVinci Resolve Audio Crackling and Popping During Playback: Every Fix
DaVinci Resolve audio crackling or popping during playback? The real causes, in the order to check them: sample rate, buffer size, ASIO, frame rate, GPU, and hardware.
 GuidesJul 16, 202635 min read
DaVinci Resolve Editing Workflow for YouTube Creators
The complete DaVinci Resolve workflow for YouTube: project setup, organizing footage, rough cut, audio, color, chapters, and export, in the right order.