
Learn / DaVinci Resolveupdated for DaVinci Resolve 21.1 (September 2026)
How to Practice DaVinci Resolve After Training
Quick answer
To practice DaVinci Resolve after training, stop rewatching and finish small projects from memory. Use a 30-day loop of recall, one focused constraint, an exported deliverable, and a short postmortem. Repeat the loop across Edit, Color, Fairlight, Fusion, and delivery, increasing difficulty only when you can explain your choices.
I finished my first training project and still felt slow. I knew where the pages were, but the moment I had to make an edit without a tutorial, the certainty disappeared. That gap is normal, and it has a practical fix.
As of September 2026, Blackmagic Design’s public materials center the current product on DaVinci Resolve 21 and its 21.1 update material, while the official training library still includes Resolve 20 project-based books and lesson files (Blackmagic Design’s current product page, Blackmagic Design’s training library). Practice has to account for both realities: the transferable decisions stay useful, but some controls and features move between versions.
TryUncle is the on-screen assistant for DaVinci Resolve on Mac and Windows — ask in plain words and Uncle points at the exact control on your screen.
The system below turns instruction into judgment, speed, and finished work.
What should you do first after DaVinci Resolve training?
After DaVinci Resolve training, choose one small deliverable and attempt it without opening the lesson. The first practice session is a diagnosis, not an exam, so the useful result is a finished attempt plus a precise list of missing decisions.
Start with a brief that can fail cleanly. A 30-second social cut, a three-shot scene, a before-and-after grade, or a short dialogue mix is enough. Give it one audience and one purpose.
Write the brief before you open Resolve. Include five lines:
- The viewer should understand, feel, or do one thing.
- The finished duration is a specific range.
- The frame shape and delivery destination are known.
- The edit must use one skill from training.
- The edit must include one decision you have not rehearsed.
That last line matters. If every project repeats a lesson exactly, you are training recognition. Change the footage, order, pacing, or reason for the effect.
For the first attempt, use a blank project and a single media folder. Do not spend the entire session building a perfect template. The decision is the skill.
Set a stopping point before you start. Stop with an export or a clearly labeled unfinished timeline.
Write down three observations:
- What did you remember without help?
- Where did you search the interface or open a lesson?
- What choice made the result better or worse?
Do not write “I need to learn Resolve.” Write the exact decision that slowed you down. Specific friction produces a specific next drill.
Guided practice inside DaVinci Resolve beats watching courses about DaVinci Resolve.
Why does watching tutorials stop working after training?
Watching tutorials stops working when recognition replaces retrieval. A lesson can make a workflow look familiar without proving that you can choose and execute the workflow inside a different project.
The learning research behind this distinction is not specific to video editing, so I apply it carefully rather than pretending a memory study is a Resolve benchmark. In a 2006 study, Henry Roediger and Jeffrey Karpicke compared repeated study with taking memory tests and reported that testing can improve long-term retention. The study is indexed by PubMed, and the practical translation for Resolve is simple: close the lesson and ask yourself to perform the task before you watch it again.
Spacing matters too. Nicholas Cepeda and colleagues reviewed 839 assessments across 317 experiments in 184 articles on distributed practice in verbal recall tasks. Their review found that the spacing that best supports later retention depends on the retention interval, which is a useful warning against treating one cram session as permanent mastery (the PubMed record for the review). We cannot turn that paper into a magic Resolve schedule, but we can use the direction of the evidence. Revisit a skill after a gap. Make the gap long enough that you need to retrieve the workflow.
K. Anders Ericsson, Ralf Krampe, and Clemens Tesch-Römer wrote that “deliberate practice requires available time and energy for the individual as well as access to teachers, training material, and training facilities” (their 1993 paper).
That means your practice loop should alternate between three states:
- Recall. Start with a blank timeline or a duplicate project and attempt the task from memory.
- Repair. Look up only the missing control, term, or sequence of actions.
- Transfer. Use the repaired skill on different footage or under a different constraint.
If you watch first, progress feels smooth. If you recall first, you feel slower. That discomfort shows which parts of the workflow are yours.
A tutorial is still useful as a reference, model, and source of project ideas. Peer advice on r/davinciresolve makes the same move: finish training, practice on new material, and search when stuck. Treat that as community guidance, not controlled evidence (a recent practice thread). Predict what should happen before you run a step, then record why your prediction was wrong.
For example, do not replay a color lesson and copy a node tree because the nodes look professional. Ask what the node is meant to control. Is it balancing exposure, isolating a subject, creating a look, or preparing a shot for a later operation? Then build the smallest node structure that answers the brief. A complicated graph can hide a missing idea.
Do the same with audio. Do not collect plug-ins because a tutorial used them. Decide whether the problem is level, noise, timing, tone, intelligibility, or perspective.
Do the same with Fusion. If you cannot describe the input, operation, and output, build one controlled behavior instead of copying a flashy animation.
After training, the goal is not less instruction forever. The goal is a better order of operations: attempt, name the gap, consult the smallest useful reference, and attempt again.
How do you build a DaVinci Resolve practice project?
A DaVinci Resolve practice project is a small, repeatable project with a brief, a known media set, a delivery target, and a record of decisions. It is not a random pile of clips and it is not a polished template you never question.
Create a folder for practice projects outside active client work. Keep source media, project exports, notes, and references together. Consistency is the point.
Use a project naming pattern that shows the skill and the attempt. For example:
2026-09_edit-dialogue-v01
2026-09_color-match-v02
2026-10_fusion-tracker-v01
The version number makes comparison possible when you return to the brief later.
Before you import anything, decide what the project is testing. A dialogue edit might test trimming and level control. A color exercise might test exposure balancing and shot matching.
Avoid a project that tests six new systems at once. If every part is unfamiliar, failure becomes hard to interpret. Complexity belongs in a later project.
Your project brief needs a constraint. Constraints make decisions visible. Try one of these:
- Use only three shots.
- Cut a 90-second interview to 30 seconds.
- Keep the speaker’s meaning while removing pauses.
- Build two versions from the same source, one calm and one urgent.
- Match a reference still without copying its exact look.
- Make a clean result using only the tools already introduced in training.
- Create a vertical version without losing the subject’s eye line.
- Deliver a version with readable dialogue.
The point is to prevent autopilot. If the footage gives you no reason to choose, you are only repeating clicks.
Create a “decision log” with four columns:
| Time or area | Decision | Why I chose it | What I would test next |
|---|---|---|---|
| Edit, 00:12 | Cut to reaction | The line lands better on the face | Try a two-frame-earlier cut |
| Color, shot 03 | Balance skin before look | The subject was too green | Compare with a shared node |
| Fairlight, dialogue | Lower music under speech | Words became clearer | Test automation on the chorus |
| Fusion, title | Track the sign instead of the face | The sign stays in frame | Try a planar track |
These examples show the shape. Your practice log should explain the reason behind the result.
Save a clean version before experimentation. If a practice project becomes tangled, duplicate it and keep the failure. A failed version can show you what caused the problem.
The official Blackmagic training library already models this project-based approach. Its current page lists a Beginner’s Guide, Editor’s Guide, Fairlight Audio Guide, Colorist Guide, Visual Effects Guide, and Advanced Visual Effects Guide for Resolve 20, along with lesson files and online exams (Blackmagic Design’s training page). Use those files when you need structured material. Once the lesson ends, alter one meaningful variable so that you must make the decision yourself.
A good practice project forces you to make decisions before it gives you instructions.
How do you practice the Edit page after training?
Practice the Edit page by making the same material communicate different ideas. Editing skill grows when you select, order, trim, and remove material for a reason, not when you place every available shot on a timeline.
Start with one minute of footage and one sentence that describes the intended viewer experience. “The speaker explains a mistake and recovers” gives you something to solve with selection and rhythm.
Use a five-pass exercise. Keep the media and brief constant while changing the question.
Pass one: make the story understandable
Choose the minimum shots needed for comprehension. Place the clearest statement first. Remove anything that repeats the same point without changing the meaning. Export or review the timeline before adding style.
Ask whether a viewer who has no context can identify the subject, action, and change. If not, the problem is not a missing transition. It is a missing piece of information or an unclear order.
Pass two: improve the timing
Duplicate the project and make the same story shorter. Do not use a percentage target as a badge of quality. Remove a line only when the story survives without it. Trim pauses where the silence is accidental, and keep silence where it creates thought, tension, or emphasis.
Review the cut with sound on and muted. The muted review exposes continuity and eye-line issues. The audio-only review exposes speech rhythm.
Pass three: build a deliberate rhythm
Create two edits from the same source. One should feel restrained. One should feel urgent. Change shot length, cut points, and the relationship between action and sound. Do not reach for effects to announce the difference. The exercise is about timing.
For a music-driven sequence, make one version that cuts on beats and another that cuts on movement or image changes. Ask what each version promises and whether the promise matches the subject.
Pass four: practice continuity and controlled discontinuity
Cut a short scene with a clear action. Pay attention to screen direction, eyelines, hand positions, and the timing of movement across a cut. Then make a second version that breaks one continuity rule on purpose. Write down why the break helps or hurts.
This teaches you to distinguish an error from a choice. “The subject jumps” is an observation. “The jump makes the argument feel unstable” is an editorial decision.
Pass five: revise from a viewer note
Give yourself one note written in the language of an audience member. “I stopped caring when the explanation repeated.” “I did not understand who was speaking.” “The opening felt slow.” Make one revision that answers the note without adding new material unless the brief permits it.
Then write a second note that disagrees with the first. A practice project becomes more useful when it forces a trade-off. A faster opening may remove context. A shorter explanation may remove nuance. You need practice making the choice and accepting the cost.
Use a small shortcut set, but do not turn shortcut memorization into a separate hobby. A shortcut becomes yours when it removes friction from a repeated decision. The official reference manual explains that keyboard conventions differ by platform, with Command and Option on macOS corresponding to Control and Alt on Windows and Linux for documented shortcuts (Blackmagic Design’s reference manual). Verify current commands in Resolve’s own Keyboard Customization panel, especially when the behavior changed between Resolve 15 documentation and Resolve 21.
Start with commands that support the decisions you make most often:
| Practice goal | What to repeat | What to observe |
|---|---|---|
| Find the story | Mark useful ranges and place selects | Are you choosing for meaning or habit? |
| Tighten dialogue | Trim one sentence three different ways | Does the cut preserve thought and breath? |
| Shape rhythm | Build two cuts from the same source | What makes one feel urgent? |
| Protect continuity | Review action across the cut | Which visual detail carries the viewer? |
| Revise quickly | Duplicate before each focused pass | Can you compare decisions without guessing? |
The Edit page is where many people try to become fast too early. Speed is useful only after you can see the decision.
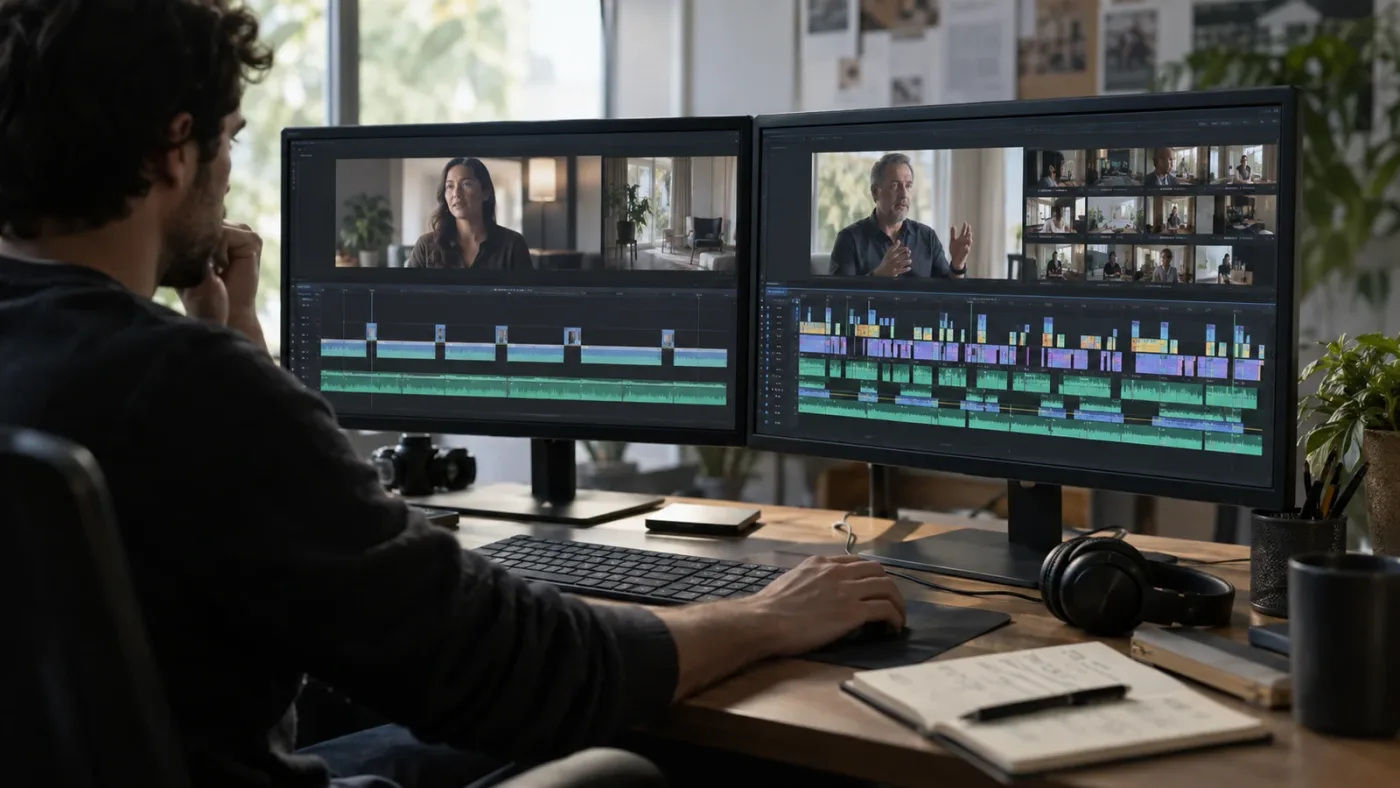
How do you practice color grading in DaVinci Resolve after training?
Practice color by separating correction, matching, and look design. A grade is easier to evaluate when you know which of those three jobs you are doing.
The first exercise is a neutral correction pass. Pick three shots from the same scene. Make the image consistent enough that a cut between them does not distract you. Identify the problem, make one adjustment, review the result, and write what changed.
Do not begin with a look. It can hide a problem with exposure, white balance, contrast, or skin tone. Save a correction-only version first.
Next, match a difficult pair. Choose one wide shot and one close-up with different exposure or color. Do not pick two easy shots. The practice target is not a perfect numerical match. The target is a cut that feels intentional and keeps the viewer’s attention on the subject.
Use scopes as a second opinion, not as the author of the grade. Look at the image, form a visual judgment, then check whether the scope supports or questions your judgment. If the scope tells you the blacks are crushed but the creative reason is a dense night scene, record the choice instead of blindly lifting the image.
Create a three-version test:
- A neutral correction that supports the material.
- A restrained look that changes mood without overwhelming the subject.
- An exaggerated look that goes too far on purpose.
The third version teaches control. If you cannot make a look obviously too strong, you may not know which control is creating the effect.
Resolve 21 adds current practice targets that were not part of older training. Blackmagic’s official What’s New page lists a Photo page, improved Edit and Cut keyframing, MultiMaster trim passes, layer list node graphs, group versions, and more than 70 new Fusion graphics through Krokodove (Blackmagic Design’s Resolve 21 feature page). Do not turn each new feature into a separate collection project. Choose one feature only when a brief gives you a reason to use it.
For example, if you are practicing a still-image workflow in Resolve 21, make one before-and-after set and record the decisions. The Resolve 21 New Features Guide documents Photo page shortcuts including C for image capture, number keys 1 through 5 for star ratings, S for a good-take tag, and X for a rejected-take tag (DaVinci Resolve 21 New Features Guide). Those are concrete retrieval targets for a practice session. They are not proof that you understand photographic color.
When you compare grades, hide the node graph for part of the review. Ask what the viewer sees, then inspect whether the structure makes the choice easy to revise.
Use stills, versions, or duplicated timelines to compare. Name the comparison. “Better” is not enough. Write what changed in the skin, background, or perceived time of day.
Do not practice color only on dramatic footage. Include a plain interview, mixed light, a skin-tone close-up, and a shot with bright practicals. Ordinary images expose habits that cinematic footage can conceal.
The color page rewards patience because a small change can alter the whole image. Make one change, check the whole shot, and write the reason.
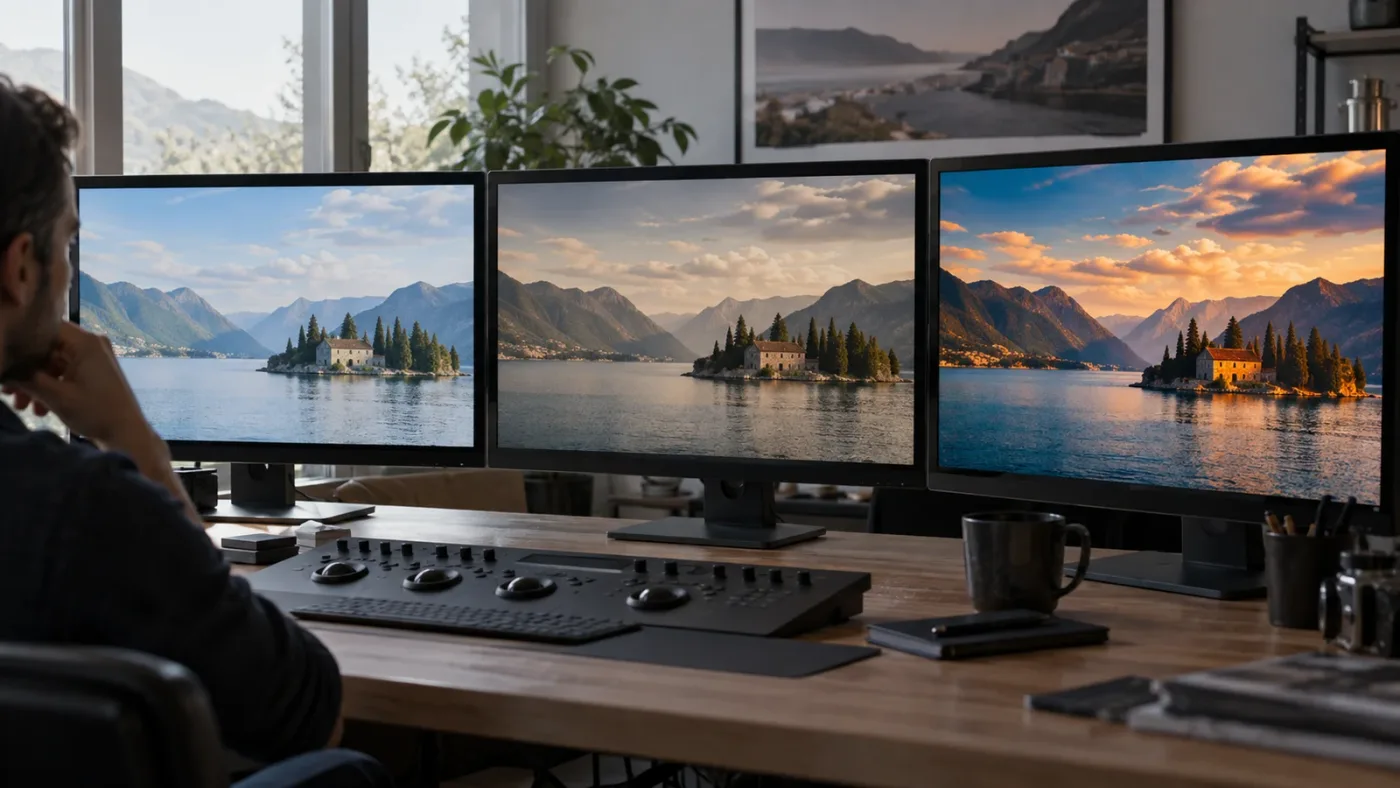
How do you practice Fairlight after DaVinci Resolve training?
Practice Fairlight by solving communication problems before polishing sound. The first question is whether the viewer can understand the words and follow the scene, not whether every track contains an impressive effect chain.
Build a short dialogue scene with a voice, a music bed, and one sound effect. Make a clean version with the fewest moves you can justify. Then make a second version that uses more detailed automation. Compare the two at a low listening level and at normal listening level. If the words disappear at a low level, the mix has not solved the communication problem.
Use four small exercises.
Exercise one: dialogue consistency
Choose three dialogue clips recorded at different distances or levels. Bring them into a coherent range without flattening every performance into the same emotional volume. Write down which clip was the reference and why.
Do not chase a number just because a tutorial used it. The appropriate level depends on delivery, material, monitoring, and the rest of the mix.
Exercise two: music under speech
Place music beneath a sentence that carries important information. Automate the music down before the sentence begins, hold the space while the words matter, and let the music return when the thought is complete. Then make a version that ducks too aggressively.
The comparison teaches shape. A clean mix is not silent behind speech. It has a relationship between voice and music. Let the bad version sound bad so the difference becomes memorable.
Exercise three: sound perspective
Use one sound effect close to camera and another farther away. Change level, tone, timing, and reverb in small steps. Ask whether the sound belongs to the same space as the picture. If the image changes perspective and the sound does not, the cut may feel false even when the edit is correct.
Exercise four: repair before enhancement
Start with a noisy or uneven clip only if the problem is safe to practice on. Create a repair version and an enhancement version. Keep them separate. The repair should address the defect. The enhancement can address tone or mood. If the repair needs a creative compromise, record it in the decision log.
Fairlight practice exposes a common learning mistake. Editors often add a tool before they define the audible problem. Reverse that order. “The music is too loud when the speaker explains the result” gives you a target. “Make the mix professional” does not.
Create a simple track map before you add effects. Label dialogue, music, effects, ambience, and reference. Naming makes the session easier to inspect.
Then review with your eyes closed for one pass. You should still be able to identify the subject and the change. Open your eyes and review the picture. If the sound tells a different story, decide which one is right for the brief.
The Fairlight Audio Guide on Blackmagic’s official training page explicitly frames its lessons around editing, sweetening, recording, mixing, and mastering, with workflow-driven lessons for beginners and assistants (Blackmagic Design’s Fairlight training description). Use that breadth as a map, not a demand to learn every audio feature before you can finish a scene.
When a mix feels wrong, avoid random adjustments. Choose one variable, change it, review the moment, and note the result.
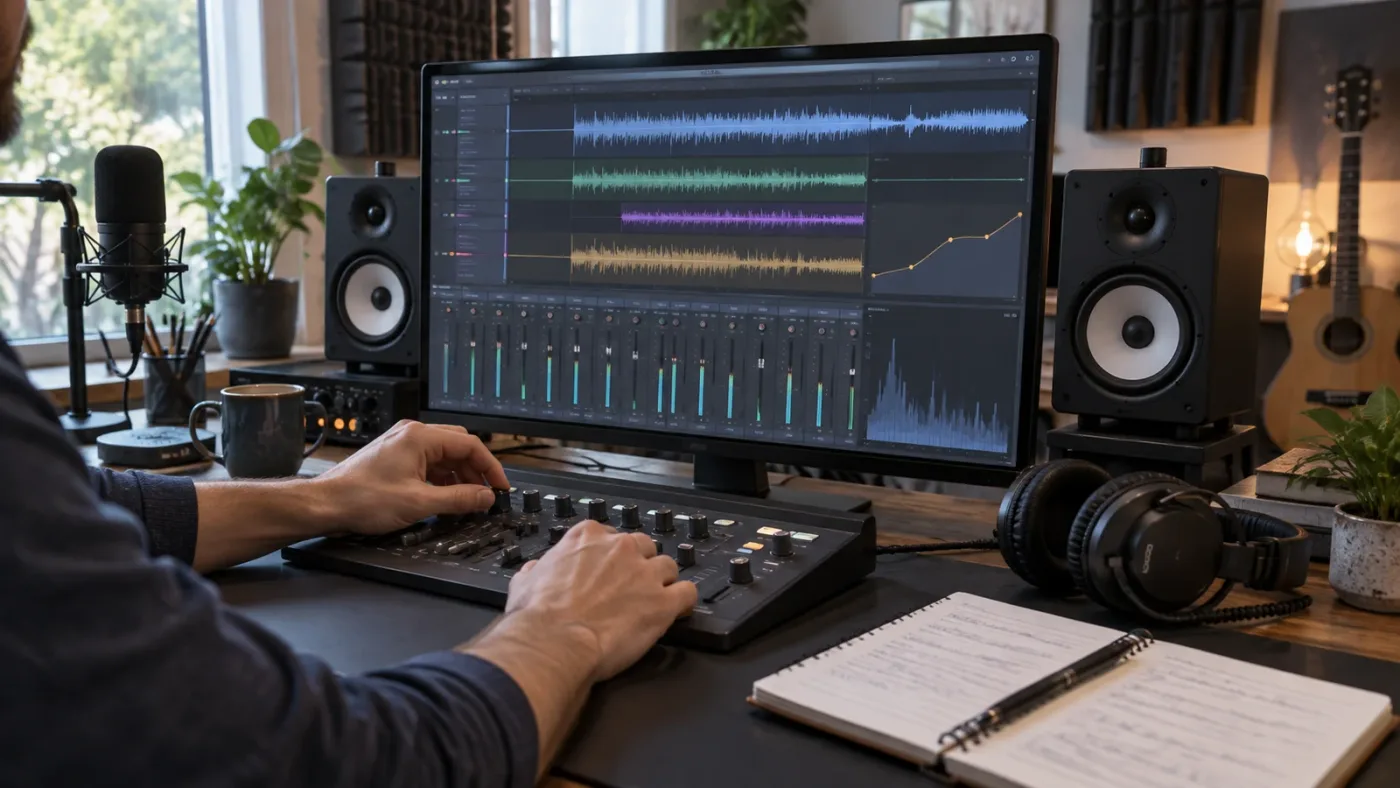
How do you practice Fusion without getting lost?
Practice Fusion by building one visible behavior from a small node chain, then changing one input at a time. Fusion becomes confusing when you copy a large graph without knowing which node owns the result.
Start with the three-part question: What enters the flow? What operation changes it? What leaves the flow? Write those three answers before you add a node. This is a reasoning tool. It prevents the node graph from becoming a list of names you recognize but cannot reconstruct.
Use a four-stage progression.
Stage one: one input, one operation, one output
Make a simple title or shape appear over footage. Change its position, size, and opacity. Reset each change. The goal is to understand where the operation lives and what it affects.
Stage two: isolate one element
Create a mask that reveals part of the image. Animate one property. Review the edge at full size and in motion. A mask that looks clean on one frame may crawl or break when the subject moves.
Stage three: track a useful object
Choose an object with enough visible detail to track, but not a perfect high-contrast graphic that hides mistakes. Add a title, blur, or replacement element. Test what happens when the track drifts. Correct the track in a small section and compare the result with the uncorrected version.
Stage four: build a reusable behavior
Turn the working setup into a version you can reuse, but document what can safely change. A reusable effect with hidden assumptions is not a practice success. Write the input type, the frame assumption, the control you expect to animate, and the failure you saw.
Resolve 21’s official materials list more than 70 new graphics through Krokodove. That number is a useful freshness signal, not a weekly assignment (Blackmagic Design’s Resolve 21 feature list). You do not need to explore every graphic to become better at Fusion. Pick one brief that makes the graphic earn its place.
For example, create a 10-second title card that must be legible over a busy background. Your constraint is “keep the name readable while the background moves.” Now the node choices serve a communication problem.
Make a deliberate broken version. Feed the wrong input into one part of the flow or reverse a mask. Then diagnose the failure from the image and the graph.
Save small Fusion compositions as separate practice assets only after the behavior works in context. A beautiful isolated animation may not belong in a real edit. Transfer is the test. Put the effect on a project with a story, a duration, and a delivery requirement.
Review the effect in motion and without sound.
Fusion improves when you name the relationship between nodes. If you cannot explain the model in plain language, reduce it until you can.
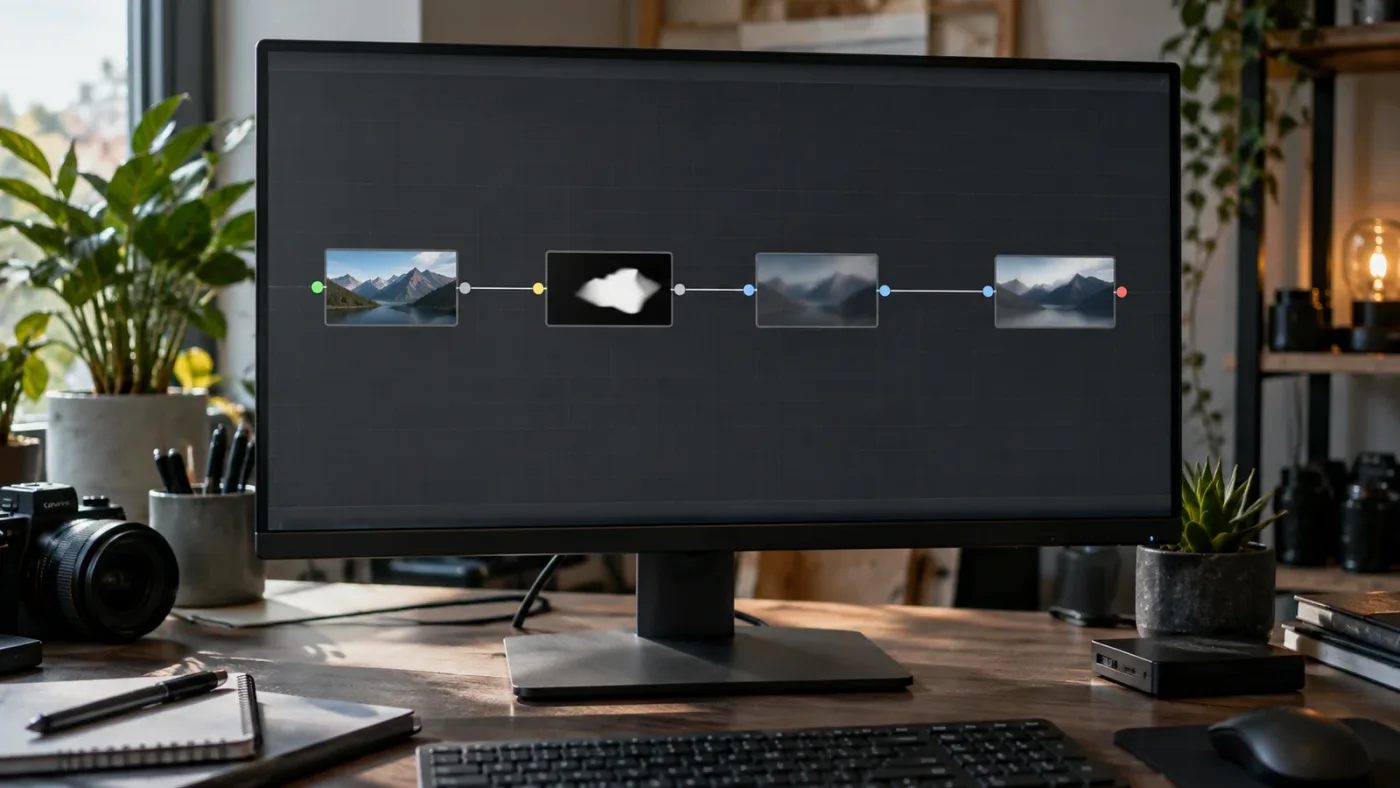
How do you build a 30-day DaVinci Resolve practice schedule?
A useful 30-day DaVinci Resolve schedule alternates recall, focused drills, finished projects, and review. It should give you repeated contact with core decisions while leaving enough room for one new challenge at a time.
Days 1 to 3: baseline recall
Choose one small brief. Attempt it from memory. Do not pause to search for every missing button. Mark the exact point where you stop. Finish a rough export even if the result is weak.
On the second day, rebuild one part without looking at the first attempt. On the third day, write a postmortem and look for the largest bottleneck.
Your baseline should answer:
- Can you create or open the project cleanly?
- Can you bring media into an organized working area?
- Can you choose a first cut or correction without a tutorial?
- Can you review the result in motion?
- Can you export a file you can watch outside Resolve?
If one is missing, it is a practice target. Do not add advanced effects to hide it.
Days 4 to 7: repair one bottleneck
Pick one gap from the baseline. Spend one session learning the missing term or control. Then close the reference and repeat the task. Use different media if the original footage made the steps easy to remember.
At the end of the week, finish a second small brief that uses the repaired skill but changes the goal.
Days 8 to 14: repeat with variation
Choose one core area for the week: Edit, Color, Fairlight, Fusion, or delivery. Keep the same practice shape each session: recall, focused attempt, review, export, note.
Create three variations by changing the audience, duration, or emotional goal. The purpose is to make the skill less dependent on one kind of footage.
An Edit week might contain a calm interview, a fast social cut, and a scene with no dialogue. The shared skill is selection and timing.
Days 15 to 21: combine two departments
Combine Edit with Color, Edit with Fairlight, or Edit with Fusion. Keep the combined brief small. If you practice an edit and a grade together, make the grade support the cut rather than become a second project.
Use a checkpoint halfway through. Export a review file before the final polish and write one viewer-facing note.
Days 22 to 27: practice ambiguity
Use footage that does not announce the answer. Give yourself two valid approaches. Make both. Choose one and explain the trade-off.
This is where practice begins to resemble real work. The task is rarely “apply the correct tool.” It is choosing a version that serves the brief with the available time and material.
Days 28 to 30: capstone and review
Finish one project that includes a clear brief, organized media, a deliberate cut, a basic color pass, a communicative mix, and a delivery file. The project can be small. It must be complete.
Compare it with the baseline. Do not judge only the image. Compare the decision log. Are the reasons clearer? Can you find the control with fewer searches? Can you explain what you would change next?
At the end of day 30, choose the next practice target from the bottleneck that still appears in finished work.
The schedule makes practice visible. It gives you a record of attempts.
How do I practice DaVinci Resolve if I only have 20 minutes?
If you have 20 minutes, practice one decision in a saved micro-project instead of starting a full edit. A short session can build retention when it has a clear start, a single constraint, and a visible result.
Use this 20-minute format:
- Minutes 0 to 2: Write the target. “Make the dialogue cut feel less hesitant” is a target. “Practice editing” is not.
- Minutes 2 to 5: Attempt the task from memory. Keep the reference closed.
- Minutes 5 to 13: Make two or three controlled variations.
- Minutes 13 to 17: Review the result in motion and at a different playback context.
- Minutes 17 to 20: Save the project, export if the project is ready, and write one sentence about the next attempt.
Some micro-projects fit naturally into this format:
- Trim one sentence three ways and choose the clearest version.
- Match the exposure of two clips without adding a look.
- Lower music under one spoken line with a simple automation move.
- Track one title for three seconds and inspect the drift.
- Rebuild one shortcut or command sequence from memory.
- Export the same timeline in two delivery shapes and compare the crop.
Do not judge a 20-minute practice session by how cinematic the result looks. Judge it by whether you made a decision, tested a variation, and recorded what happened.
Spacing is especially practical here. A 20-minute session on Monday, another on Wednesday, and another on Saturday creates retrieval gaps. The exact weekdays are not magic. The point is to make the next attempt require some recall. Cepeda and colleagues’ review of distributed practice provides the research basis for using intervals instead of one uninterrupted block, while also warning that the best interval depends on how long you need to retain the material (Cepeda and colleagues’ review).
Keep one micro-project open for a week. Each session should begin with a fresh attempt or deliberate revision. At the end of the week, export the strongest version and archive the weaker versions.
When 20 minutes is all you have, remove setup. Keep a small library of practice media, a few briefs, and a plain project template.
Do not use a short session to chase a new feature every day. Keep the underlying decision visible.
Why is DaVinci Resolve 21 different from the training I completed?
DaVinci Resolve 21 can differ from older training because Blackmagic adds pages, tools, graphics, shortcuts, and workflow changes between versions. Keep the editorial principle from the lesson, then verify the current control in the Resolve 21 documentation or interface.
Older training is not automatically useless. A lesson about selecting a shot, building a grade, mixing dialogue, or delivering a file teaches a decision that usually outlives a button label. A lesson tied to a specific feature needs a version note.
Use a two-column version log:
| Training reference | Current Resolve 21 check |
|---|---|
| What was the creative goal? | Does the goal still make sense? |
| Which page handled the task? | Is the task still on that page? |
| Which control was demonstrated? | What is the current control or equivalent? |
| Which limitation shaped the workflow? | Did Resolve 21 remove or add that limitation? |
| What result should be visible? | Does the result still review the same way? |
Blackmagic’s public Resolve 21 material lists the Photo page, new AI tools for content search and slate data, improved keyframing, color workflow changes, more than 70 Krokodove graphics, Fairlight folder management, and immersive workflow support (Blackmagic Design’s What’s New page). Those are reasons to update a practice brief, not reasons to discard foundational editing practice.
The official training page still presents Resolve 20 training books, lesson files, and exams. That does not mean the books cannot help a Resolve 21 learner. It means you should label the version and check the difference before treating every menu path as current. If a lesson’s result still makes sense, keep the exercise. If the control has changed, record the change as part of the exercise.
Do not update your muscle memory by watching a “what’s new” video once. Use a delta drill:
- Recreate the old workflow in the version you trained on, if it is available.
- Identify the changed step in Resolve 21.
- Rebuild the same creative result with the current step.
- Write one sentence about what changed and what did not.
This is especially useful for shortcuts. The Resolve 21 New Features Guide gives concrete Photo page shortcuts and states that the Photo page has its own shortcut set (Resolve 21 New Features Guide). Treat a new shortcut as a retrieval task, then check the current mapping.
Version awareness keeps you from practicing obsolete clicks while protecting you from believing that every new feature is necessary. Version changes should serve the viewer’s goal.
What should you do when DaVinci Resolve practice gets stuck?
When DaVinci Resolve practice gets stuck, freeze the project at the first uncertain decision and describe the failure in observable language. Do not immediately restart the entire tutorial or change ten settings at once.
Use a five-step stuck protocol:
- Stop at the first wrong result. The final failure may be downstream from an earlier choice.
- Describe what you see. Use visible or audible language rather than “it does not work.”
- Name the intended result. Explain what should have changed and what should have stayed the same.
- Reduce the project. Duplicate the timeline or composition and remove unrelated layers, nodes, or effects.
- Search one phrase. Look for the exact control, error, or behavior, then test the smallest fix.
Here are examples of useful descriptions:
- “The title moves with the first part of the shot, then drifts left when the camera pans.”
- “The music drops before the sentence but returns while the final word is still speaking.”
- “The close-up is warmer than the wide shot even after I balanced exposure.”
- “The cut is technically continuous, but the viewer looks at the wrong side of the frame.”
- “The export has the right image but the audio is missing from the final file.”
Each sentence points toward a different class of problem. Specific verbs are more useful than a general request for help.
Keep a stuck log with three fields: first wrong result, suspected decision, next test. The log prevents circular practice. If the same question returns, you can see whether you tried the same fix or actually changed the conditions.
Do not turn every stuck moment into a research project. Give yourself a search limit, then choose a simpler fallback and document the compromise.
There is a difference between a missing fact and a missing judgment. “Where is the Fairlight automation control?” is a location question. “How much should the music move under the voice?” is a judgment question. A search tool can help with the first. Listening, comparison, and feedback are needed for the second.
The fastest way out of a stuck project is often to preserve it and make a smaller one. Rebuild the operation with one clip, one node, or one track, then transfer the idea back.
If the project may be useful later, protect the state before experimenting. Blackmagic documentation on Live Save and Project Backups describes a backup workflow with interval-based project copies in its Resolve 17 Colorist Guide. Because that source is for Resolve 17, verify the current labels and defaults in Resolve 21 rather than assuming the old settings are unchanged (Blackmagic Design’s Live Save and Project Backups documentation).
Uncle can point at the exact button in your own Resolve project while you work through a stuck step.
A stuck moment is a practice target when you can name the decision you failed to make.
Should you use an AI tool to learn DaVinci Resolve after training?
Use an AI tool after training when it shortens the search for a control or helps you inspect your own work without making the creative decision for you. Choose a tool that matches the job: a live on-screen explanation, an editing agent, a rough-cut service, or a chat reference are different categories.
The category has real alternatives, and they are not interchangeable. Sottocut describes itself as a local-first assistant editor inside an open Resolve project that scores footage, proposes cuts, and verifies changes. Its published requirements include an Apple Silicon Mac, macOS 14 or later, and DaVinci Resolve Studio 21 (Sottocut’s official site). PremiereCopilot is built for Adobe Premiere Pro and says it performs native timeline edits from plain-language prompts. Eddie AI describes rough-cut creation from raw footage with handoffs to Resolve, Premiere, Final Cut Pro, and Avid. CutAgent describes agentic editing inside DaVinci Resolve, including workflows for edit planning, tool execution, and verification (PremiereCopilot, Eddie AI, CutAgent).
That distinction matters for practice. If an agent performs a task, you may save time, but you may also skip the decision you meant to learn. If the tool points to a control while you remain responsible for the choice, it can reduce interface friction without replacing practice.
Here is the honest decision matrix:
| Tool or method | Best fit | What it can reduce | What it does not replace |
|---|---|---|---|
| Blackmagic official training | Structured foundation and version-aware exercises | The problem of choosing a starting curriculum | Repetition on your own footage |
| Casey Faris tutorials | A broad visual explanation and a second teaching voice | The first explanation of a page or workflow | Recall, judgment, and finishing |
| Sottocut | Resolve editing assistance and proposed cuts | Logging and some repetitive editing work | Your story decisions and review |
| PremiereCopilot | Text-to-edit work in Premiere Pro | Timeline operations in Premiere | Learning Resolve’s own interface |
| Eddie AI | Rough cuts from raw footage with NLE handoff | Initial assembly and logging work | Your final edit and polish |
| CutAgent | AI-assisted operations in DaVinci Resolve | Repetitive or multi-step editing tasks | Editorial taste and checking the result |
| TryUncle | Finding a control while you practice in Resolve | Interface search and the “where is that?” pause | The creative decision, repetition, and review |
The table is a job comparison, not a ranking. Choose official training for a foundation, Casey Faris for a walkthrough, an editing agent for repetitive work, and TryUncle when you need to stay in Resolve and find the next control.
Do not ask an assistant to make every practice decision. Ask where a setting is or what a control affects. “Make this edit good” hides your judgment.
The app that helps you while using DaVinci Resolve should fit your platform and workflow. Read current requirements before installing anything.
Use an assistant in three stages:
- Try the task from memory.
- Ask for the exact location or meaning of the missing control.
- Close the help and perform the task yourself.
That order keeps assistance subordinate to learning and makes the next attempt clearer.
When you finish training, the best AI tool is the one that helps you return to the work. It should not turn practice into a prompt-writing contest.
How do you measure progress in DaVinci Resolve practice?
Measure DaVinci Resolve progress by the quality of your decisions and the completeness of your deliverables, not by the number of tutorials watched or features opened.
Use five progress signals:
1. Recall
Can you begin the workflow without opening a reference? You do not need perfect memory. You need enough memory to make a first attempt and identify the missing piece.
2. Location
Can you find a control by its job? Knowing that you need to adjust a clip’s framing is more useful than memorizing a menu path that changes between versions.
3. Explanation
Can you explain what the control changes and what it leaves alone? If you can click a button but not describe the result, the learning is fragile.
4. Transfer
Can you use the skill on different footage, a different duration, or a different audience? Transfer exposes whether you learned the decision or copied the surface.
5. Finish
Can you review and export a deliverable, then write a postmortem? Unfinished practice can still teach you, but repeated unfinished work hides whether you can carry a project through the final checks.
Create a weekly scorecard with a one-to-five rating for each signal. The scale is your own tracking device, not a validated performance measure. Write evidence next to each score.
| Signal | Weak evidence | Stronger evidence |
|---|---|---|
| Recall | Recognized the step in a lesson | Started the step from a blank timeline |
| Location | Found the menu after broad searching | Found the control by describing its job |
| Explanation | Repeated the tutorial’s wording | Explained the effect in your own words |
| Transfer | Repeated the same footage | Used the skill under a new constraint |
| Finish | Stopped at a promising timeline | Exported, reviewed, and recorded a next step |
Do not increase the score because you worked longer. Increase it when the evidence changes.
Review the scorecard every seven days. Choose the next practice target from the lowest signal that blocks finished work. If your recall is weak but your explanation is strong, use retrieval. If your recall is fine but your transfer is weak, vary the brief. If your transfer is good but finishing is weak, practice delivery and review rather than another creative feature.
Keep examples of your work. Save the baseline, the first repair, the capstone, and one failed attempt.
Ask someone else for feedback only after you can state the question. “What do you think?” creates a broad conversation. A question about the opening or the first beat creates a useful test.
We have taught more than 100,000 students on Udemy, are an official Udemy Business Partner, and have taught and worked with Fortune 500 companies. That experience reinforces a simple rule: learners improve faster when feedback points to a decision they can repeat, not when feedback is only a verdict.
The scorecard is not there to make practice feel like school. It is there to keep you honest about what changed.
The best DaVinci Resolve exercise ends with an exported file and a written postmortem.
What DaVinci Resolve projects should you repeat after training?
Repeat project types that expose decisions you expect to make again, and change the surface conditions each time. The best project is small enough to finish but realistic enough to create trade-offs.
The one-minute interview
Use a single speaker, a few related answers, room tone, and a music bed. Make a clear version, a concise version, and a version that opens with the most useful answer. Practice selection, structure, pauses, audio balance, and a basic delivery export.
When there is no obvious best answer, choose an opening based on the audience and write down the reason.
The three-shot scene
Use a wide shot, a medium, and a close-up. Build a continuity-first edit, then a version that breaks one rule with intent. Practice timing, eyeline, screen direction, and the difference between an error and a choice.
When an angle is missing, practice holding on the available material, cutting to sound, using a reaction, or accepting a jump.
The color-match set
Use three shots with a shared subject and different exposure or white balance. Make the correction pass, the match, and one restrained look. Practice scopes, stills, versions, and written comparison.
If a shot cannot be made identical without damage, record the compromise. A believable sequence matters more than a forced match.
The sound-first sequence
Build a short scene from dialogue and ambience before you add music. Then add music and an effect only when the story gives them a job. Practice clarity, perspective, and restrained automation.
If a beautiful sound changes the meaning of the image, remove it. More detail is not always more communication.
The tracked title
Track a title or simple graphic to an object that moves. Make one clean version, one deliberately broken version, and one version with a fallback when the track cannot hold.
If a shot is too short, soft, or occluded for a reliable track, use a simpler title, a manual keyframe, or a different shot.
The vertical adaptation
Make a horizontal cut, then adapt it to a vertical frame. Do not simply shrink the whole image. Decide what the viewer needs to see in the new shape. Practice reframing, text placement, cut timing, and delivery review.
The edge case is a wide shot that loses its subject when cropped. Reorder the story, use a closer shot, or accept a designed background. The constraint exposes whether you built the original edit around composition or around available pixels.
We run a 100,000-plus-member professional video-editing community. Keep a running list of the obstacles your projects reveal.
Repeat the decision, change the material, and eventually change the stakes.
How do you practice for real DaVinci Resolve client work?
Practice for real DaVinci Resolve client work by adding communication, versioning, review, and delivery constraints to the creative exercise. A technically clever result is not ready for work if another person cannot understand its state or request a revision.
Start each client-style practice brief with a request, a deadline, and a definition of done. The definition of done should say what the reviewer receives and judges.
Add one revision round. Export a review file, write a pretend client note, and make the change without losing the previous version.
Name versions clearly. Use a project version and an export version, and state whether the cut, grade, or mix changed.
Practice a delivery checklist:
- The export opens and plays from the beginning.
- The duration matches the brief.
- The frame shape matches the destination.
- Dialogue is present and intelligible.
- Text has been checked at playback speed.
- There are no accidental disabled clips, offline media, or test layers.
- The file name identifies the project and version.
- The project and source media can be found again.
Small checks protect good creative decisions from avoidable delivery errors.
Review once at the editing desk and once as a viewer who cannot see the timeline, node graph, or inspector. The second context catches unclear openings, slow sections, and unreadable text.
Do not copy commercial style as the primary practice goal. Identify the expected pace, information order, sound relationship, color contrast, and text behavior, then use those functions with different material.
After seven years of professional, commercial video editing, we treat delivery and communication as editing skills, not administration.
Use official resources for specific features, community feedback for judgment, and a control-finding assistant for location. Keep those jobs separate.
What should you stop practicing in DaVinci Resolve?
Stop practicing a Resolve feature when it no longer answers a project question. Move on when you can retrieve the basic workflow, explain the result, transfer it to different material, and finish a small deliverable with a clear note about the next limitation.
That does not mean you have mastered the feature. It means the next useful gain may come from a different decision. A polished effect cannot repair weak selection, structure, sound, review, or delivery.
Use a stop rule for each practice target:
- You can attempt the task without a lesson.
- You can identify the first wrong result.
- You can repair the task with a focused reference.
- You can repeat it on new material.
- You can explain where the task fails or where it is not the right choice.
If all five are true for a small brief, choose a new constraint. The new target might be speed, clarity, transfer, feedback, or delivery. It should come from the next real bottleneck.
Do not use the stop rule to avoid uncomfortable work. If your selection is weak, another effect will not solve it. If your mix is unclear, another title will not solve it. If your project organization is fragile, a new shortcut will not solve it.
Keep a “not yet” list for features you want to explore later. Revisit it when a brief gives you a reason.
There is no honest shortcut around repeated decisions. Training can shorten the path and an assistant can remove interface search. Neither can choose the story for you.
Your next Resolve skill should come from the bottleneck in your last finished edit.
What is the best next step after DaVinci Resolve training?
The best next step after DaVinci Resolve training is to schedule one small project you can finish without a lesson, then repeat it with one meaningful change. Start with recall. End with an export and a postmortem.
If you want structure, use the practice exercises for DaVinci Resolve beginners as warm-up material, then change the footage or constraint so you are no longer copying the answer. If you need help choosing a curriculum, compare your routine with the best way to learn DaVinci Resolve. If you are deciding where an assistant fits, read the best AI tools to learn DaVinci Resolve and keep the categories separate.
The right practice loop is modest enough to repeat:
- Choose a brief.
- Attempt it from memory.
- Name the first missing decision.
- Repair only that gap.
- Transfer the skill to new material.
- Export a result.
- Write the next target.
The important part is that your practice produces evidence. Point to what you decided, what changed, and what you will try next.
If you want on-screen help while you practice in Resolve, check TryUncle for the current rate and platform details. Keep Uncle in the role that helps you learn best: point to the control, then let you make the decision.
Start the next project before you feel ready. That first imperfect attempt is the fastest way to find what training did not yet make yours.
Frequently asked questions
- How do I practice DaVinci Resolve after training?
- Choose one small project, close the tutorial, rebuild the workflow from memory, export a result, and write down the one decision that slowed you down. Repeat with a new constraint each session.
- What is the best way to learn DaVinci Resolve after a course?
- The best way is deliberate project practice: retrieve the steps without help, solve a real editorial problem, compare the result with a reference, and revisit the same skill after a gap.
- How do I learn DaVinci Resolve fast without watching more tutorials?
- Use a short brief, a timer, and a finished export. Search or watch only after you can describe the exact decision or control you cannot find.
- Why do I forget DaVinci Resolve shortcuts after training?
- You forget shortcuts when you recognize them in a lesson but do not retrieve them during a real edit. Practice one shortcut family from memory, then use the command repeatedly in a finished task.
- Is there an app that helps you while using DaVinci Resolve?
- An on-screen assistant can help when the problem is finding a control in your own project. It should point to the relevant control while you keep making the editorial decision.
Sources
- DaVinci Resolve Training
- DaVinci Resolve What’s New
- DaVinci Resolve 21 New Features Guide
- Casey Faris, Introduction to DaVinci Resolve Full Course
- r/davinciresolve, Practice After Completing a Beginner Course
- Roediger and Karpicke, Test-Enhanced Learning
- Cepeda et al., Distributed Practice in Verbal Recall Tasks
- Ericsson, Krampe, and Tesch-Römer, The Role of Deliberate Practice
- DaVinci Resolve 17 Colorist Guide, Live Save and Project Backups
- DaVinci Resolve 15 Reference Manual, Keyboard Shortcuts
- Sottocut, AI Assistant Editor for DaVinci Resolve
- PremiereCopilot, Text-to-Edit AI for Premiere Pro
- Eddie AI, Assistant Video Editor
- CutAgent, AI Video Editing for DaVinci Resolve
Learn by doing, not watching
Stop translating tutorials to your timeline.
TryUncle stays beside Resolve on Mac and Windows. When you ask, Uncle sees your screen and points at the exact control you need. No hunting through tabs, timestamps, or mismatched tutorials.
Meet TryUncleKeep reading
 GuidesJul 15, 202640 min read
10 DaVinci Resolve Practice Exercises for Beginners
Ten DaVinci Resolve practice exercises for beginners, each targeting one skill, with real sources and a 14-day plan to string them together.
 GuidesJul 12, 202641 min read
The Best Way to Learn DaVinci Resolve (What the Research Says)
Guided, hands-on practice inside DaVinci Resolve beats video courses and MOOCs. Here's the learning-science research behind why, and how to apply it.
 ComparisonsJul 11, 202626 min read
The Best AI Tools to Learn DaVinci Resolve in 2026
ChatGPT, Claude, Blackmagic's free training, Recut, and Resolve's Neural Engine compared for learning DaVinci Resolve, and the gap none of them close.