
Learn / DaVinci Resolveupdated for DaVinci Resolve 21.1 (September 2026)
How to Compare Two Timelines in DaVinci Resolve
Quick answer
To compare two timelines in DaVinci Resolve, open the timeline you want to keep, right-click the other timeline in the Media Pool, and choose Compare With Current Timeline. Resolve opens a comparison view with both timelines, linked playheads, highlighted differences, and a change list. In Resolve 21, you can also compare a timeline with a backup snapshot.

How to Compare Two Timelines in DaVinci Resolve
Two cuts can look almost identical until a title moves, a reaction shot disappears, or a revision shifts the entire ending by three seconds. I know the feeling because timeline comparison is one of the recurring questions in our 100,000+ member professional video-editing community. After seven-plus years of professional, commercial video editing, I still treat version review as a separate job from editing.
As of September 2026, the cleanest answer is built into DaVinci Resolve 21.1. Open the timeline you want to keep, right-click the other timeline in the Media Pool, and choose Compare With Current Timeline. Resolve opens a Timeline Comparison window that puts the versions together, highlights changed sections, and lets you inspect a change list before you touch the working cut.
TryUncle is the on-screen assistant for DaVinci Resolve on Mac and Windows. Ask in plain words and Uncle points at the exact control on your screen.
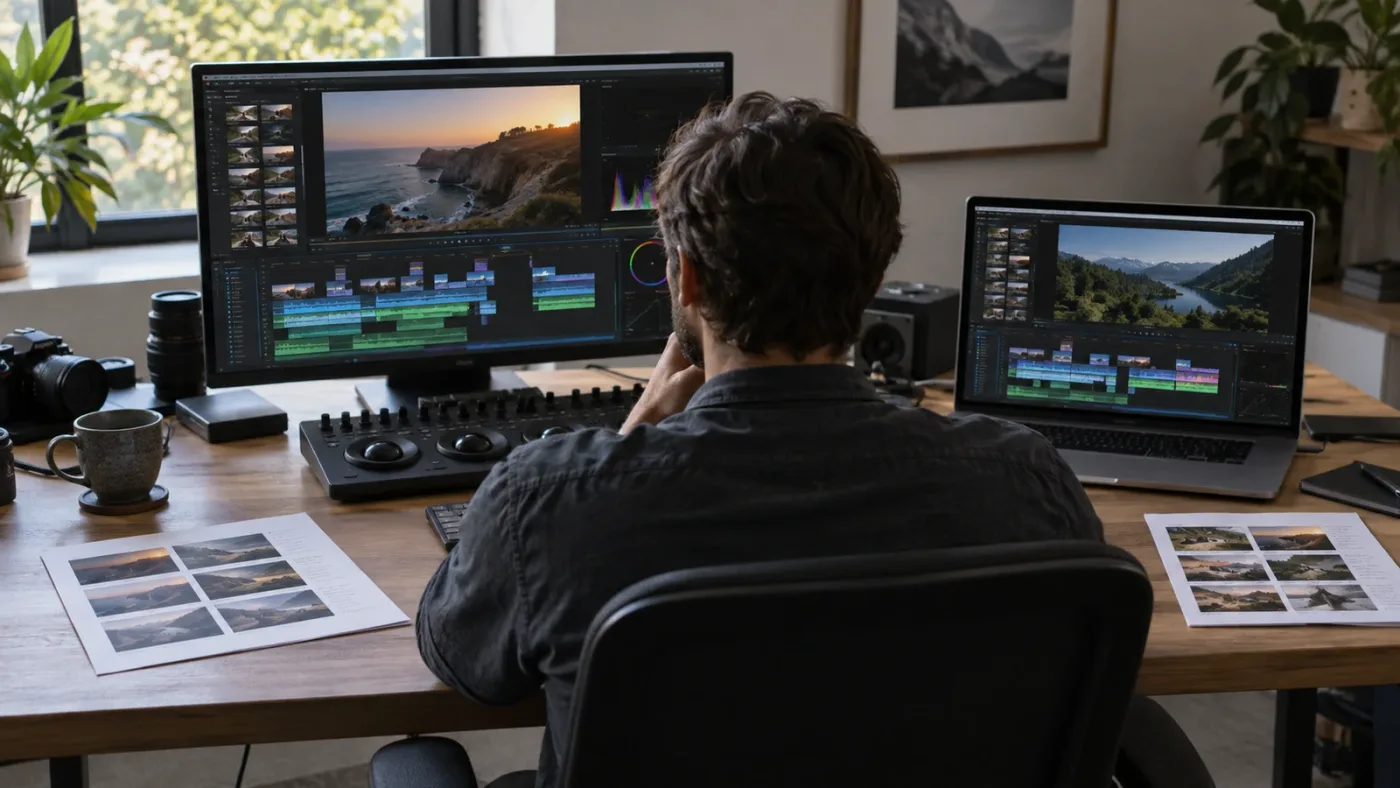
DaVinci Resolve’s native Timeline Comparison tool is the fastest way to review structural changes between two edit versions.
This guide focuses on the real problem behind the search query. You might be comparing a client revision, an editor’s new export, a textless version, a vertical adaptation, or a timeline restored from a backup. Those cases need slightly different checks. The button is the same, but the questions you ask after clicking it are not.
What is the best way to compare two timelines in DaVinci Resolve?
The best way to compare two timelines in DaVinci Resolve is to use Timeline Comparison, not two unrelated viewers. Open the timeline that represents your working version, right-click the other timeline in the Media Pool, and select Compare With Current Timeline. The current timeline appears as the lower timeline, while the selected comparison timeline appears above it.
The distinction between current and comparison matters. Resolve treats the open timeline as the destination you are reviewing or potentially updating. The timeline you right-click becomes the source of the comparison. If you open the wrong version first, the display may still be useful, but any change-acceptance action points in the wrong direction.
Blackmagic’s Resolve 21.1 release notes describe a redesigned interface for “Compare with current timeline,” while the Resolve 21 New Features Guide documents a related option for comparing a timeline with a previous backup. The names are close, but they solve two different version problems:
| Your situation | Open first | Right-click or choose | Best result |
|---|---|---|---|
| You have two named timelines in the Media Pool | The version you want to protect or update | Compare With Current Timeline on the other version | Review differences between two timeline objects |
| You want to inspect an earlier saved state | The timeline with backups | Compare with Timeline Backup | Review changes against a backup snapshot |
| You need to watch two versions manually | Either version | Open in Timeline with Source Viewer, or use stacked timelines | Visual review and copying, without a structured diff |
| You need to compare finished picture output | The timeline or reference setup | Link or load a reference clip | Check rendered or flattened images, not edit structure |
The first row is the answer to the target query. The other rows prevent a common mistake: calling every two-viewer workflow a timeline comparison. A stacked timeline can help you see two cuts at once. It does not automatically tell you which edit event changed.
The official DaVinci Resolve 21.1 update is current for this guide. Blackmagic lists the release as available on September 8, 2026, and its support materials list macOS, Windows, and Linux versions.
How do I compare two timelines in DaVinci Resolve 21.1?
To compare two timelines in DaVinci Resolve 21.1, open the working timeline, right-click the second timeline in the Media Pool, and choose Compare With Current Timeline. The comparison view then shows the current timeline and the selected timeline together, with controls for navigating differences.
Follow this sequence carefully:
- Open the Edit page.
- In the Media Pool, locate the bin that contains the two timeline items.
- Open the timeline you want to treat as the current working version. This is usually the newer cut if you are reviewing what changed, or the approved cut if you are deciding whether to import selected changes into it.
- Right-click the other timeline in the Media Pool. Do not right-click a source video clip, a compound clip, or a bin.
- Choose Compare With Current Timeline.
- Let the Timeline Comparison window open. The current timeline is shown below, and the right-clicked timeline is shown above.
- Use the zoom control to see the full duration first. Then zoom into each highlighted change rather than judging the whole edit from a single compressed view.
- Leave playhead synchronization on for a first pass. Scrub through the changed sections and watch both viewers.
- Open the change list or Diff Index when you need an event-by-event description instead of only colored regions.
- If you plan to accept changes, duplicate the current timeline first. Then work through one change at a time and verify the incoming clip, edit point, track, transition, and audio relationship.
The order protects you from the most expensive mistake in version review: treating a visual hint as permission to overwrite the working cut. A highlighted region says that Resolve found a difference. It does not tell you whether the newer version is better, whether the change was intentional, or whether a title or audio track needs a separate review.
The current timeline stays the working reference for the comparison. The Resolve 21 timeline reference describes the current timeline at the bottom and the timeline you right-click at the top. Read the upper timeline as the proposed source and the lower timeline as the version you currently have open.
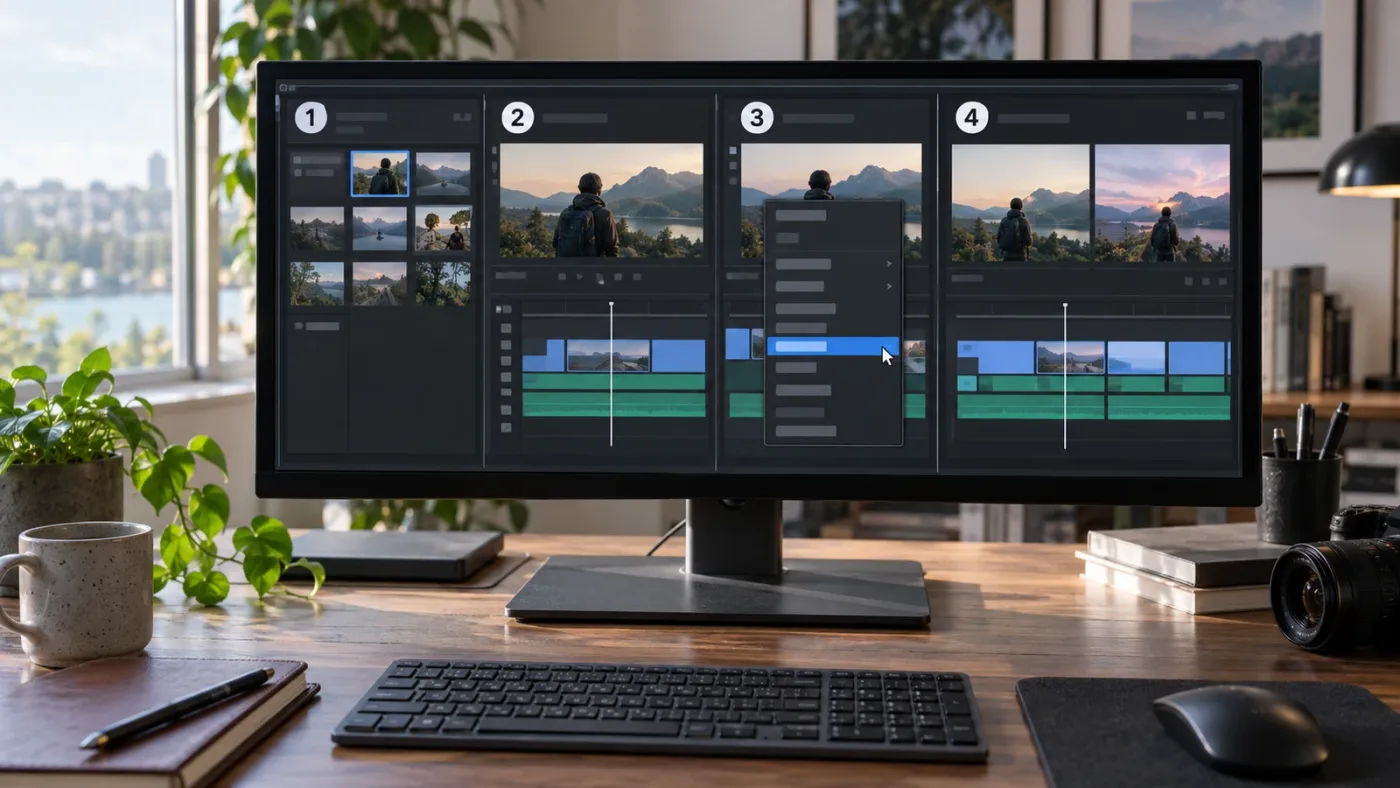
Which timeline should I open first?
Open the timeline you want Resolve to treat as the current working timeline. If you are reviewing a freelancer’s revision against your approved cut, open the approved cut first if you want to preserve it as the lower baseline. If you are checking whether your latest cut contains all the changes from an older edit, open the latest cut first and right-click the older edit.
Here are three concrete choices:
| Review question | Open first | Compare against |
|---|---|---|
| What did the revision change? | Approved or previously delivered cut | Revised timeline |
| Did my new cut preserve the locked edit? | New working cut | Locked or approved timeline |
| Which parts of the older cut should I restore? | Current working cut | Older timeline |
The comparison command does not know which filename is “final.” It only knows which timeline is open and which one you selected. Names such as CLIENT_APPROVED_2026-09-18, REV_03_2026-09-24, and TEXTLESS_MASTER help you make that decision before you click.
Resolve timeline names are especially important when an imported XML, AAF, or DRT creates several similar objects. Do not rely on the Media Pool thumbnail alone. Switch to a view that exposes the full name, check the bin, and confirm the timeline’s resolution and frame rate when the versions came from different systems.
What does Compare With Current Timeline actually compare?
Compare With Current Timeline compares the edit structure of two timelines. It identifies sections that do not line up between the versions, then gives you a visual way to inspect those differences and a change-list view for more conventional review.
That means the tool is good at questions such as:
- Was a clip removed or inserted?
- Did an edit point move?
- Did a later scene shift because an earlier shot was shortened?
- Did the revision add a title, transition, or replacement clip in a changed section?
- Which parts of the timeline need a human decision?
It is not a pixel-difference tool. It does not prove that two renders look identical merely because the timeline events appear aligned. A title can share the same edit boundaries but use different text. A compound clip can conceal a change inside its nested timeline. A color grade, Fusion effect, plug-in, or audio automation pass may differ without producing the kind of editorial change you expected.
This is why I separate structural review from finishing review. First compare the timeline objects. Then inspect the viewer output, clip attributes, effects, grades, subtitles, and audio where the project requires it.
Timeline Comparison tells you where to investigate, not what creative decision to make.
How do the two playheads and viewers work during comparison?
The Timeline Comparison window normally links the two playheads so that one movement lets you inspect the same part of both edits. The comparison timeline is shown in the Source Viewer, and the current timeline remains in the Timeline Viewer. Turn off playhead synchronization when the versions have drifted far enough that matching timecode no longer helps.
The two-viewer arrangement gives you a practical review loop:
- Click a highlighted change in the comparison window.
- Watch the upper timeline’s frame in the Source Viewer.
- Watch the lower current timeline’s frame in the Timeline Viewer.
- Scrub a few frames before the change, through it, and a few frames after it.
- Decide whether the change is an editorial event, a timing ripple, a hidden nested change, or a display mismatch.
The word “ganged” can make this sound more complex than it is. Ganged playheads simply move together. They are useful when both versions share a common time base and you want to watch the same general moment. They are less useful when one version has a new opening, a removed commercial break, or a different frame rate.
When the cuts are not aligned, disable Sync Playheads from the comparison window’s options. Then move the two playheads independently. Use the upper timeline to find the source change and the lower timeline to find the corresponding decision point in the current cut. This is slower, but it is more honest than pretending that 00:12:43:08 means the same story beat in both versions.
The source viewer is also a warning sign. A timeline loaded there is normally a read-only comparison source, not the timeline you should casually edit. Resolve 20’s dual-timeline guide states that the source timeline is read only in that setup. Timeline Comparison adds a more structured review layer on top of that idea.
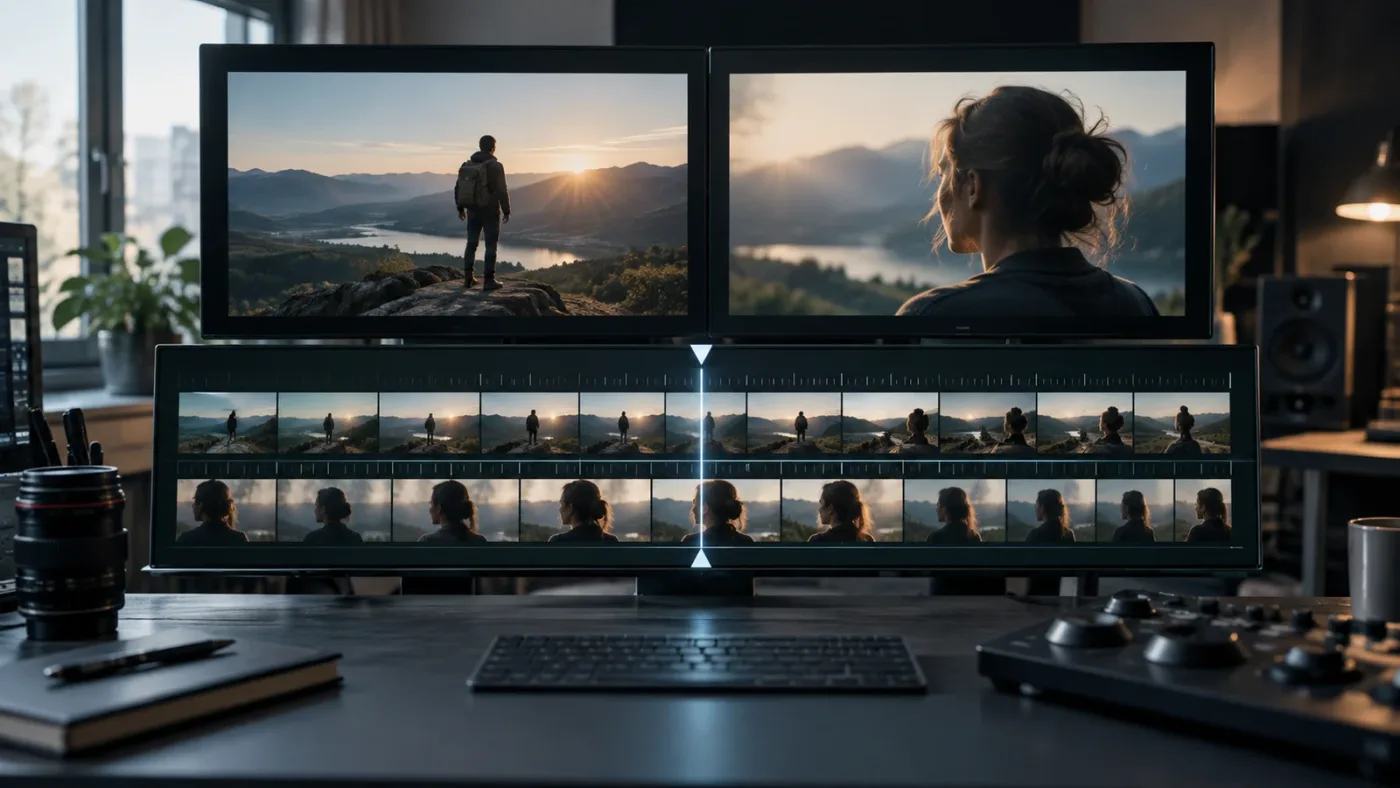
Should I leave Sync Playheads on?
Leave Sync Playheads on for the first pass when both timelines share the same start and general structure. Turn it off when an insert, deleted opening, retime, or frame-rate difference makes the two playheads point to different story moments.
Use synchronized playheads for:
- a small client revision in the middle of an otherwise unchanged edit;
- a textless version with the same picture timing;
- a grade or title version whose edit points are unchanged;
- checking whether a transition moved by a few frames.
Use independent playheads for:
- a new intro or outro;
- a version with a removed scene;
- a recut that changes the duration of several scenes;
- a social version that rearranges the long-form edit;
- imported timelines with different start timecodes.
The best comparison is not always the one with the most automation. When sync helps, it removes friction. When sync lies, it creates false confidence.
What do the highlighted sections mean?
Highlighted sections mark areas where Resolve has found a difference between the two timeline structures. Treat each highlight as a review range, not as a single changed frame. The current comparison design is intended to help you navigate to the affected part of the edit and decide what to do there.
A highlight can represent a one-frame trim or a larger ripple caused by an earlier insert or deletion. Start at the first edge and follow the timeline until the versions converge again.
For each range, record four things:
- The first frame where the versions stop matching.
- The last frame where they differ.
- The media or title that appears in one version but not the other.
- The decision you want to make, such as keep current, accept revision, or rebuild manually.
That small discipline turns a colored overview into a usable revision list. It also prevents you from accepting a large range when only one shot was intended to change.
Is the Diff Index the same as the Edit Index?
No. The Diff Index or change-list view belongs to the timeline comparison workflow, while the Edit Index is a broader timeline inspection tool. The Diff Index is the useful one when you want a list of differences between two versions instead of a map of where the ranges are.
The labels can vary by version and interface layout, so look for the comparison window’s change-list control rather than the general Index panel. The Resolve 21 manual describes the Diff Index as the place to open a more conventional item-by-item comparison.
Use the visual timeline first. The list is easier to interpret after you know which region it describes. If you start with a long change list without understanding the surrounding edit, you can mistake a cascade of downstream moves for many unrelated creative decisions.
How do I review and accept a change safely?
Review and accept changes one range at a time, after duplicating the current timeline and checking the incoming media, tracks, transitions, and audio. The comparison tool can help reconcile versions, but accepting a difference is an edit operation with consequences.
Use this safe sequence:
- Close any unrelated timeline tabs so you know which version is current.
- Duplicate the current timeline and give the duplicate a review name, such as
REVIEW_BEFORE_ACCEPTING_REV_03. - Open Timeline Comparison again if the duplicate changed which timeline is current.
- Select the first highlighted region.
- Scrub before and after the region in both viewers.
- Check whether the changed material includes linked audio, subtitles, adjustment clips, compound clips, or nested timelines.
- Right-click the highlighted region only when you understand what will be brought into the current timeline.
- Choose the accept or apply action offered by your build, then immediately inspect the resulting current timeline.
- Undo if the accepted range changes an unrelated track or creates a timing problem.
- Continue only after the first change survives a short playback review.
The exact action label can change across Resolve versions. Older Blackmagic editing guidance uses Accept Change for bringing a highlighted section into the current timeline. Current Resolve 21.1 materials describe the interface as redesigned, so confirm the result instead of relying on an old screenshot.
There is a second safety rule that matters more than the button name: do not accept changes just because the upper timeline is newer. Newer can mean approved, experimental, partially conformed, or exported from a project with missing media. Version names and delivery notes should decide the authority, not the date in a filename.
If the change is a small title correction, manual editing can be safer than accepting a broad section. If the change is a clean, self-contained scene replacement, the comparison action may save time. If the change crosses a transition, subtitle cue, or audio edit, inspect it manually first.
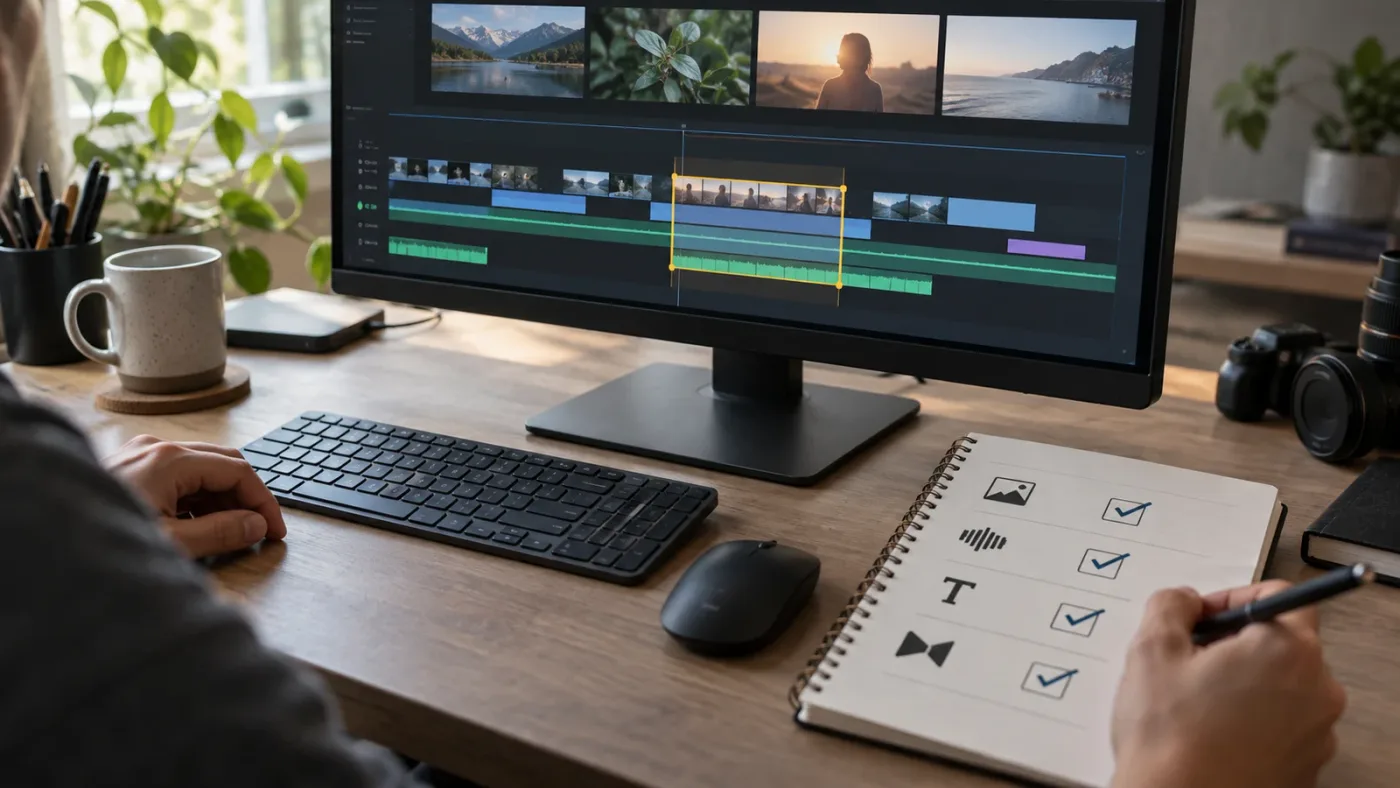
What should I check before comparing two timelines?
Before comparing two timelines, make the versions comparable: confirm the project, timeline names, frame rate, resolution, start timecode, media relinks, and intended authority of each cut. A comparison window cannot repair two versions that represent different technical assumptions.
1. Confirm both timelines belong to the same project
Keep both timeline objects in the same DaVinci Resolve project when possible. If a collaborator sends only a .drt, import it into the project and verify its media links before comparing. Resolve 21 adds link and conform options to DRT timeline import, including an option to automatically link to existing Media Pool clips, as described in Blackmagic’s Resolve 21 New Features Guide.
If the timelines came from different project libraries, do not assume that identical clip names mean identical media. Check file paths, reel names, source timecode, and frame rate. A structural comparison can still open while the picture is offline or linked to a different source.
2. Give every version a useful name
Use names that tell you the purpose and date without making the Media Pool unreadable. A workable pattern is:
PROJECT_STAGE_VERSION_DATE_OWNER
For example:
DOC_LOCKED_V01_2026-09-18_EDITORDOC_CLIENT_REV_V02_2026-09-22_EDITORDOC_TEXTLESS_V02_2026-09-22_EDITOR
Avoid names such as final, final2, and final_new. Those names make it harder to answer the only question that matters during comparison: which version is authoritative for this review?
3. Check frame rate and start timecode
Two timelines can contain the same shots but behave strangely in a comparison if their time bases or start positions differ. Resolve’s New Features Guide shows timeline settings such as 1920 x 1080 and 23.976 frames per second in its DRT import workflow. Treat those settings as part of the version identity, not as incidental metadata.
Check:
- timeline resolution;
- timeline frame rate;
- start timecode;
- audio sample rate where relevant;
- number and order of video tracks;
- number and order of audio tracks;
- subtitle and marker tracks;
- whether one version is a vertical or square adaptation.
If the two timelines intentionally use different settings, the comparison can still be useful for structural review, but viewer alignment requires more judgment.
4. Identify what the comparison cannot see clearly
Make a separate list of things that need a viewer or track-by-track check. Include:
- text content inside a title clip;
- color grades and group versions;
- Fusion compositions;
- plug-in effects;
- audio automation;
- hidden or disabled tracks;
- compound clips and nested timelines;
- missing or substituted media;
- proxy or optimized media differences;
- timecode or metadata burn-ins.
This list is not a criticism of Timeline Comparison. It is the boundary that makes the tool useful. You are comparing two timeline objects, not asking Resolve to understand the creative meaning of every parameter inside them.
A clean version name and a verified timeline setting can prevent more confusion than another comparison window.
How do I compare a timeline with an older backup in DaVinci Resolve 21?
To compare a timeline with an older backup in DaVinci Resolve 21, right-click the timeline in the Media Pool, choose Compare with Timeline Backup, and select the backup snapshot in the Compare Timeline window. Resolve shows the current timeline and the selected backup stacked together and highlights their differences.
This path is useful when you did not create a separate named timeline before making a change. It works against a timeline backup snapshot rather than another visible timeline object. The Resolve 21 New Features Guide calls out this feature specifically for reviewing changes made against previously backed-up timelines.
Use backup comparison for questions such as:
- What changed since yesterday’s saved timeline state?
- Did my last trim pass remove a scene?
- When did the title track change?
- Did an accidental ripple move later dialogue?
- Which version should I restore before I continue?
Backup comparison is not a replacement for deliberate versioning. A backup gives you a recovery point, but a named timeline gives you a readable editorial decision. For important milestones, keep both: a descriptive timeline for the human record and automatic backups for recovery.
How do I choose the right timeline backup?
Choose the backup immediately before the change you are investigating, then move farther back only if the first comparison does not explain the problem. If you compare against a much older snapshot, the window may show a large number of valid changes and hide the one accidental edit you care about.
Keep a small log in the project notes or marker list:
| Review goal | Backup choice | Why |
|---|---|---|
| Find the last change made today | Most recent backup before today’s session | Smallest comparison range |
| Recover before a failed conform | Backup immediately before import or conform | Separates conform changes from editorial changes |
| Investigate a long-running issue | One snapshot per milestone | Reveals when the problem first appeared |
| Restore an approved cut | Named approved timeline plus nearest backup | Gives you a human-readable reference and recovery point |
Resolve 21.1 also brings project archive and media-management changes, but archive settings are a separate concern from timeline comparison. Comparing two timeline objects does not automatically preserve all external media or project-library state. Archive the project according to your production requirements before moving it to another system.
Can I compare a deleted timeline backup?
Resolve 21’s manual describes a path through Media Pool options for examining deleted timeline backups and restoring available backup files. If the timeline or backup is gone, stop making edits in the project until you know whether a recoverable backup exists. A new edit session can make recovery more confusing, especially if it changes the same timeline.
If the backup list does not contain the state you need, check your project backup location and broader storage backup before trying to rebuild from memory. Timeline Comparison only compares versions that Resolve can access.
What is the difference between Timeline Comparison and stacked timelines?
Timeline Comparison is a structured diff workflow. Stacked timelines are a viewing and editing arrangement that lets you keep multiple timelines available in tabs or place them one above another. Use Timeline Comparison to find differences. Use stacked timelines to copy, sample, or manually inspect material when a diff is unavailable or too broad.
Resolve has supported stacked timeline workflows for years. Blackmagic’s Editor’s Guide describes the Edit page timeline as able to display multiple timelines in different tabs or stacked on top of one another. Resolve 20 added a related source-timeline workflow: right-click a timeline in the Media Pool, choose Open in Timeline with Source Viewer, and use the second timeline as a read-only source.
The approaches overlap, but they are not interchangeable:
| Feature | Timeline Comparison | Stacked or dual timelines |
|---|---|---|
| Finds changed sections automatically | Yes, with highlighted differences | No |
| Gives a change-list view | Yes, through the comparison controls | No built-in diff list |
| Shows two timelines at once | Yes | Yes |
| Lets you manually copy material | Review first, then accept or edit | Yes, as a source and destination workflow |
| Best for revision reconciliation | Yes | Only when you need a manual fallback |
| Best for pulling a clean section from a selects timeline | Not always | Yes |
| Source timeline editability | Comparison source is for review | Source Viewer timeline is read only in the dual-timeline workflow |
If you are trying to find every moved cut in a collaborator’s timeline, start with Timeline Comparison. If you are trying to borrow a three-shot sequence from a radio edit, open the radio edit as a source timeline. If you are comparing the picture output of two finished timelines, load a reference clip or render both versions under controlled settings.
How do I use stacked timelines to compare two timelines manually?
To compare two timelines manually with stacked timelines, open one timeline, enable Display Stacked Timelines from the Timeline View Options menu, open the second timeline in another tab, and switch between the tabs while reviewing the same region. In Resolve 20 and later, you can also open the source timeline in the Source Viewer.
The manual fallback looks like this:
- Open the Edit page and load the timeline you want to edit.
- Open Timeline View Options in the timeline area.
- Enable Display Stacked Timelines if the option is available in your build.
- Open the second timeline in another tab, or right-click it in the Media Pool and choose Open in Timeline with Source Viewer.
- Make the two versions visually comparable by setting the same zoom level and using the same visible tracks.
- Place the playheads at a shared marker, common clip, or known timecode.
- Scrub through the versions and write down changes manually.
- Copy only the material you can identify with confidence.
The manual method is slower because it does not create a difference map. It is still valuable when the timelines have different structure, when you need to move a clean section, or when you want to inspect a source timeline without changing it.
In Resolve 21, source timelines support destination track selectors for dual-timeline editing. That helps limit where material can land when you use a source timeline as an editing aid. It does not turn the workflow into a structural comparison.
Should I use ganged viewers instead?
Use ganged viewers only as a manual viewing aid. Ganging can keep source and timeline viewers moving together, but it does not replace Timeline Comparison’s highlighted regions or change list. If the versions drift, unganging gives you independent control but removes the convenience of a shared playhead.
This distinction matters in tutorials because “compare two timelines” can describe three different jobs:
- reconcile editorial changes;
- watch two versions at corresponding moments;
- copy clips from one timeline into another.
Timeline Comparison is strongest for the first job. Stacked timelines and ganged viewers help with the second and third.
Stacked timelines show two edits; Timeline Comparison explains where their structures differ.
Why is Compare With Current Timeline missing?
Compare With Current Timeline is usually missing because you have not opened a timeline first, you are right-clicking the wrong item, or your Resolve build exposes the feature in a different context menu. Start by opening one timeline in the Edit page, then right-click a second timeline item in the Media Pool.
Work through this checklist:
You right-clicked a clip instead of a timeline
A video file and a timeline can sit in the same Media Pool bin. A clip has a media thumbnail and source duration. A timeline is an editing container. Select the timeline icon or switch to a list view where the item type is clear.
No timeline is currently open
The command is defined relative to the current timeline. Open the version you want at the bottom of the comparison before right-clicking the other version.
You are looking in the wrong page
Timeline comparison is an Edit page workflow. If you are on the Color, Fairlight, Fusion, or Deliver page, return to Edit, open the timeline there, and inspect the Media Pool context menu.
The timeline is in another project
The Media Pool only shows objects in the current project. Import the timeline into the same project or open the project containing both versions. Resolve 21’s DRT import workflow can help link an imported timeline to existing clips, but you still need to verify the conform.
Your build is older or the label changed
The command has existed in older Resolve versions, while the current 21.1 release redesigned the interface. Old tutorials may call the window Timeline Comparison and newer interface text may emphasize Compare with current timeline. Use the version-specific notes below instead of hunting for an exact screenshot match.
The timeline is locked or collaborative
A locked timeline can still be useful as a comparison source, but a locked or read-only state can affect which actions are available. Review the differences first. Do not unlock a shared approved timeline merely to force an acceptance action.
If you need help identifying the correct control in your own project, TryUncle can point at the relevant Resolve control while you work on Mac or Windows.
Why is the comparison window empty or showing no differences?
An empty comparison usually means the versions are structurally identical, the wrong timeline was selected, the comparison range is not visible at the current zoom, or the versions differ in a way the structural view does not expose. Zoom out to see the full range, then confirm the timeline names and playheads.
Try these checks in order:
- Read the names at the top of the comparison window and confirm the upper and lower versions.
- Zoom out until both timelines fit within the comparison area.
- Move the playhead into the middle of the project rather than judging only the opening.
- Confirm that you did not right-click the same timeline that is already open.
- Open the change list or Diff Index if your build exposes it.
- Check whether the apparent change is inside a compound clip or nested timeline.
- Inspect titles, Fusion compositions, grades, and audio separately if the picture timing is the same.
If both timelines really are identical, an empty difference view is a useful result. It means you can stop looking for an editorial change and move on to finishing checks. Do not create artificial changes just to make the window show activity.
Why do two different renders look different when the timelines compare as the same?
Two renders can look different even when the timeline structure is the same because effects, grades, fonts, media, project settings, cache state, or render settings can differ outside the structural edit events. Timeline Comparison does not replace a controlled render comparison.
For a serious output review, record:
- the source project and timeline name;
- Resolve version and edition;
- output resolution and frame rate;
- color-management settings;
- render codec and quality options;
- audio configuration;
- plug-in and font versions;
- whether proxies or optimized media were used;
- the exact render range.
Then compare the outputs with a review process that can show frames together. If the problem is only an edit change, return to Timeline Comparison. If the problem appears in the pixels, inspect the finishing stack.
Why do I see a difference in one track but not another?
A comparison can look incomplete when the relevant video or audio track is hidden, disabled, collapsed, or outside the visible range. Expand the tracks, check track selectors, and confirm that the compared versions use the same track layout.
Resolve 21 also adds improved track visibility controls through the Tracks Index. The guide documents a way to show or hide tracks from the Edit page Tracks Index. That control is useful for reducing clutter, but it can also hide the very track you need to audit. Turn visibility back on before concluding that a version contains no change.
How do I compare client revisions without losing the approved cut?
Compare client revisions by keeping the approved timeline untouched, opening it as the current baseline, and reviewing the revision as the comparison source. Duplicate before accepting anything, and record each approved change so the final timeline remains auditable.
Here is a practical revision workflow:
Before the client revision arrives
Keep a named approved timeline in a protected bin. Save a separate timeline for each meaningful round rather than overwriting the only copy. Use a marker or project note for delivery details such as aspect ratio, duration, captions, and required exports.
When the revision arrives
Import or duplicate the incoming timeline into the same project. Verify media links and compare timeline settings. Rename it with the delivery date and revision number before opening the comparison.
During the comparison
Start with the overview. Count the broad regions, not the individual clips. Then review each region in story order. Keep a short decision list:
| Range | What changed | Client intent | Action |
|---|---|---|---|
| Opening | New first shot | Faster hook | Accept after checking audio lead-in |
| Interview section | Removed answer | Shorter runtime | Keep revision |
| Product close-up | New title | Legal copy update | Rebuild title if styling changed |
| Ending | New music tail | Longer brand hold | Verify mix and delivery duration |
This table is intentionally plain. It keeps editorial intent next to technical action. A change list can tell you that material moved. It cannot tell you why.
After the review
Keep the incoming timeline until the revised master is approved. Do not delete it immediately after accepting changes. It is the evidence for what the client asked to change, and it can answer a question later when someone says, “Was that title in the approved version?”
If the project has several rounds, link the working method to your broader client feedback and revision workflow in DaVinci Resolve. Timeline comparison is the technical inspection step. Feedback management is what makes the decision traceable.
How do I compare textless, subtitled, and localized timelines?
Compare textless, subtitled, and localized timelines by separating picture changes from language and graphics changes. Timeline Comparison can show where clips or sections differ, but titles, subtitle cues, and alternate language tracks need a second pass in the viewer and track panels.
Texted versus textless
If the picture edit is unchanged, the structural comparison may be quiet even though the finished output differs. Check title clips, adjustment clips, burn-ins, and any dedicated graphics tracks. A textless version may also remove effects that were attached to a title or compound clip.
Use the comparison to confirm the picture timing first. Then compare graphics track visibility, title duration, and output framing. Do not accept a broad section simply because the texted version contains a title and the textless version does not.
Subtitles and captions
Subtitle timing is often a separate editorial layer. Resolve 21 adds find and replace support in the Subtitle Inspector and word-timing tools for captions, but those functions do not turn the timeline comparison into a language-quality review.
For localized work, check:
- subtitle track start and end points;
- line breaks and reading order;
- title-safe placement;
- translated strings and punctuation;
- right-to-left language behavior where applicable;
- whether the localized version changes shot duration;
- whether a subtitle was converted into a graphic title;
- whether the render uses the intended subtitle export mode.
The editorial structure and the language content can be correct independently. Review both.
Alternate aspect ratios
A 16:9 master and a 9:16 social version are not expected to match frame by frame. Compare them for source coverage, shot order, and intended story beats, not for identical timecode. When a vertical version uses different crops or rearranged shots, stacked timelines may be easier for a visual review than a structural diff.
For one timeline that needs both horizontal and vertical deliveries, the project may be better served by a defined adaptation workflow. The comparison tool is still useful when reviewing whether the vertical version accidentally dropped a required beat.
A textless or localized timeline needs both a structural diff and a language-aware viewer review.
How do I compare two timelines with different frame rates or durations?
Compare timelines with different frame rates or durations by first deciding whether you need structural correspondence or frame-accurate alignment. Timeline Comparison can reveal changed sections, but synchronized playheads become less trustworthy when the versions use different time bases or opening lengths.
Different frame rates
If one timeline is 23.976 fps and another is 25 fps, do not interpret the same displayed timecode as the same frame. Confirm the timeline settings, then compare by shared clips, markers, or story beats. If the timeline is being conformed for delivery, solve the frame-rate decision before you accept editorial changes.
Different start timecodes
A start timecode offset can make a correct edit look displaced. Find a shared clip near the beginning, note its position in both timelines, and decide whether the offset is intentional. Use independent playheads when the offset prevents useful synchronization.
Different durations
Different durations are often the point of the comparison. A shorter client cut may remove a scene and ripple every later event. Start at the first divergence and follow the ripple forward. Do not inspect only the final minute, where many earlier changes may have accumulated into one large mismatch.
Different track structures
When one version has more video or audio tracks, expose the track names and verify routing. A change can be editorially valid but technically incomplete if a linked audio track stayed behind. Inspect the first changed range, then check later transitions and the end of the affected scene.
If the versions are so different that alignment becomes guesswork, use the comparison as a rough map and switch to manual review. A tool that reports “different” is still helpful. It just is not enough to automate the decision.
How do I compare an XML, AAF, or DRT timeline against an existing edit?
Compare an imported XML, AAF, or DRT timeline only after confirming that its media links, timecode, resolution, frame rate, and track interpretation are correct. The comparison command can show structural differences, but it cannot tell you whether the import conformed to the intended source media.
Use this conform-first checklist:
- Import the exchange timeline into a clearly named bin.
- If it is a DRT in Resolve 21, review the import dialog’s project-setting and automatic-link options.
- Relink or conform missing media.
- Check the first, middle, and last scene for correct source clips.
- Verify speed changes, transitions, nested items, and audio tracks.
- Compare the imported timeline with the existing timeline.
- Treat every difference as a conform question until you confirm it is creative.
This is especially important for finishing. A changed clip can mean the editor recut the scene. It can also mean the imported exchange file matched a different reel, flattened an effect, or failed to carry a plug-in. Timeline Comparison helps narrow the investigation, but conform knowledge remains the deciding skill.
The older Blackmagic editing guides describe Timeline Comparison in the context of multiple editors and imported versions. That remains the right mental model in 2026: use it to reconcile edit decisions, then verify the technical translation of the project.
What if titles or effects do not survive the import?
Treat missing titles or effects as a separate translation problem. A comparison can show that a section changed, but it cannot rebuild a plug-in or infer the exact design of a title that did not travel through the exchange format.
Keep the original timeline, imported timeline, and any reference render together. When a client says a title is missing, you need to answer three questions:
- Was the title present in the source timeline?
- Did the title arrive in the imported timeline?
- Does the reference render show a final title that was never represented as an editable object?
That three-way check is more reliable than looking only at the comparison highlights.
What changes between DaVinci Resolve 20, 21, and 21.1?
DaVinci Resolve 20 introduced a clear dual-timeline workflow for viewing and editing one timeline as a source while another remains the destination. DaVinci Resolve 21 adds comparison against timeline backup snapshots. DaVinci Resolve 21.1 redesigns the current-timeline comparison interface, so current users should prefer the native comparison command for version review.
| Version context | Relevant behavior | What to do |
|---|---|---|
| Resolve 20 | Dual-timeline editing lets you use one timeline in the Source Viewer and another in the Timeline Viewer. Stacked timelines are the setup step. | Use source-timeline review when you need to copy or inspect material. |
| Resolve 21 | Adds Compare with Timeline Backup for comparing the current timeline with a backed-up timeline. | Use backup comparison when no separate named version exists. |
| Resolve 21.1 | Current-timeline comparison has a redesigned interface for navigating and reviewing specific edit parts. | Use Compare With Current Timeline for two named timeline objects. |
Grant Petty, Blackmagic Design CEO, said, “It's a huge update and we can't wait to see what our customers create with these new tools.” Source: Blackmagic Design
What is the best way to learn DaVinci Resolve fast while comparing versions?
The best way to learn DaVinci Resolve fast is to combine a structured course with a real project and a small version-review habit. Blackmagic’s official training materials provide project-based guides, Casey Faris remains a familiar YouTube teacher for Resolve learners, and Udemy or Coursera can provide structured classes. None of those replaces practicing comparison on your own revision history.
Blackmagic’s official training page lists guides for beginners, editors, colorists, Fairlight, and Fusion, along with lesson files and certification resources. That is the strongest starting point when you want the manufacturer’s vocabulary and a complete path through the application. YouTube is better for a targeted demonstration, especially when you need to see a control used in context. Paid course platforms can help if you prefer a linear schedule and assignments.
After seven-plus years of commercial editing, our strongest advice is simple: stop measuring learning by how many tutorials you watched. Measure whether you can explain what changed in a real timeline and why you accepted or rejected it. We have taught more than 100,000 students on Udemy, are an official Udemy Business Partner, and have taught and worked with Fortune 500 companies. The useful skill is not memorizing a menu. It is making a defensible editorial decision.
If you are searching for an “AI tool to learn DaVinci Resolve” or an “app that helps you while using DaVinci Resolve,” separate tools that automate edits from tools that explain the application while you work. Sottocut, PremiereCopilot, heyeddie.ai, and cutagent.ai occupy different parts of the editing-assistance category and may automate edits or answer chat questions. Uncle’s role is narrower: point at the relevant control in your own Resolve workspace and help you continue the task. Check the current TryUncle offer before deciding whether that style of help fits your workflow.
Use official training for the foundation, real projects for judgment, focused video lessons for visual explanations, and an on-screen assistant when the tutorial does not match the project in front of you.

How do I build a repeatable timeline comparison workflow?
Build a repeatable workflow by naming versions, marking approval states, keeping a backup before every major change, and reviewing structure before pixels. The goal is to make the next comparison obvious even when you are tired, rushed, or returning to a project months later.
Use a version ladder
Keep a short ladder of meaningful states:
ASSEMBLYfor the first complete arrangement.RADIO_EDITfor a story or dialogue pass.PICTURE_LOCKfor the approved picture.CLIENT_REV_01for the first requested revision.CLIENT_REV_02for the next decision round.MASTERfor the final approved timeline.
What matters is that a reader can tell why a version exists. Duplicate the timeline at a milestone instead of repeatedly overwriting one object.
Put markers at meaningful review points
Markers can identify opening, interview, product demo, legal card, endboard, and delivery-specific ranges. They help you return to shared story beats when different durations make the playheads unreliable.
Resolve 21.1 also supports exporting marker lists as a PDF report through the Index panel, according to Blackmagic’s release notes. That is useful when a client or collaborator needs a review map outside the project. It does not export the full structural diff, so keep the comparison notes beside the marker report.
Compare in layers
Use four passes:
- Pass 1, structure: clips, order, duration, transitions, and major gaps.
- Pass 2, picture: crops, retimes, grades, effects, and titles.
- Pass 3, sound: dialogue, music, effects, automation, and track routing.
- Pass 4, delivery: aspect ratio, subtitles, burn-ins, frame rate, and render settings.
Do not start with all four at once. A title problem can distract you from a missing scene. A loudness problem can make you overlook a shifted dialogue edit. Separate passes create cleaner decisions.
Record accepted and rejected changes
A plain text note is enough:
REV_03 compared with PICTURE_LOCK
00:00:18:12 to 00:00:26:04: accept new opening shot
00:04:51:00 to 00:05:07:14: reject removed answer, client confirmation needed
00:08:33:02 to 00:08:41:19: rebuild title manually, keep current animation
00:10:12:08 to 00:10:24:20: accept music tail, verify mix
The point is not the exact format. The point is that the project can answer “why is this different?” without relying on someone’s memory.
Finish with the approved state
After the changes are accepted or rebuilt, rename the result as a new review version. Do not immediately rename it MASTER until the required viewer and delivery checks are complete. A comparison tells you that the edit changed. Approval tells you that the result is ready.
What should I do when two timelines cannot be compared cleanly?
When two timelines cannot be compared cleanly, use the decision tree below to separate context, alignment, conform, and finishing problems.
Use this decision tree:
| Symptom | Likely category | Next move |
|---|---|---|
| Compare command is missing | Context or item type | Open one timeline, right-click another timeline item in the Media Pool |
| Window opens with no visible change | Same structure or wrong zoom | Zoom out, verify names, then inspect effects and titles |
| Playheads do not match | Offset, duration, or frame rate | Turn off sync and align by a shared clip or marker |
| Imported timeline is mostly offline | Conform or media-path issue | Relink and check source media before judging differences |
| The picture differs but structure matches | Grade, effect, title, or render issue | Compare finishing parameters or reference renders |
| Accepting a range changes too much | Broad ripple or wrong baseline | Undo, duplicate, isolate the first divergence, and review manually |
| The two versions are different aspect ratios | Adaptation workflow | Compare story beats and coverage, not identical timecode |
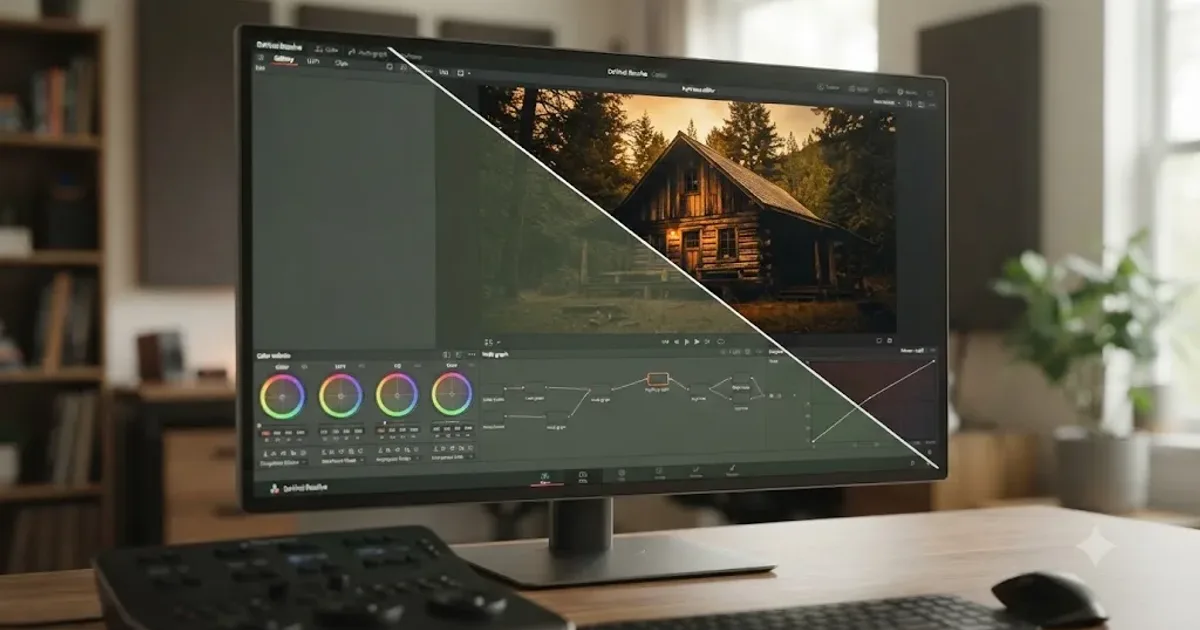
For a narrow picture-grade question, use the sibling guide on comparing before and after grades with a split-screen wipe in DaVinci Resolve. That workflow answers a different question from timeline reconciliation: how the image changes after a grade, not how edit events differ between two timeline objects.
Which timeline comparison method should I choose?
Choose Compare With Current Timeline when you have two named timelines and need to find changed edit sections. Choose Compare with Timeline Backup when the earlier state exists only as a saved backup. Choose stacked or source timelines when you need to copy material or perform a manual visual review. Choose a reference clip or controlled renders when the question is about final pixels.
Here is the short verdict:
- Choose Timeline Comparison if you need a map of differences between two edit versions.
- Choose backup comparison if you need to understand what changed since a saved state.
- Choose stacked timelines if you need one timeline as a source for another.
- Choose a reference clip if the approved version exists as a flattened movie.
- Choose a viewer and finishing review if the structural edit matches but the output does not.
The fastest reliable workflow is not one click. It is one click followed by the right question. Open the correct baseline, compare the other version, inspect the highlighted ranges, and accept only the changes you can explain.
If the menu is still hiding from you, ask Uncle to point at the exact comparison control in your own Resolve project while you work.
Frequently asked questions
- How do I compare two timelines in DaVinci Resolve?
- Open the timeline you want to keep as the current timeline, right-click the other timeline in the Media Pool, and choose Compare With Current Timeline. Resolve opens the Timeline Comparison window with both timelines stacked and their differences highlighted.
- Why can’t I see Compare With Current Timeline in DaVinci Resolve?
- You need to open one timeline first, then right-click a second timeline in the Media Pool. If the command is still missing, confirm that you are clicking a timeline item rather than a video clip, and check your Resolve version.
- Can I compare a timeline with an older backup in DaVinci Resolve?
- Yes. In DaVinci Resolve 21, right-click the timeline, choose Compare with Timeline Backup, and select the backup snapshot from the comparison window.
- What is the difference between comparing timelines and using stacked timelines?
- Timeline Comparison highlights edit differences and can show a change list. Stacked timelines only place timelines in tabs or one above another for visual review and copying, so you must identify changes yourself.
- Does DaVinci Resolve compare the actual rendered pixels of two timelines?
- No. Timeline Comparison compares the timeline structure and shows sections that differ. For a pixel-level review of two finished renders, use a reference clip, an external review process, or a controlled side-by-side export.
Sources
- DaVinci Resolve 21 New Features Guide
- Blackmagic Design Announces DaVinci Resolve 21.1
- DaVinci Resolve 21.1 Reference Manual, Creating and Working with Timelines
- The Editor’s Guide to DaVinci Resolve 18
- DaVinci Resolve 20 New Features Guide
- DaVinci Resolve 15 Advanced Editing Guide
- DaVinci Resolve Training
- DaVinci Resolve product page
- TryUncle
- Sottocut
- PremiereCopilot
- Eddie AI for DaVinci Resolve
- CutAgent
Learn by doing, not watching
Stop translating tutorials to your timeline.
TryUncle stays beside Resolve on Mac and Windows. When you ask, Uncle sees your screen and points at the exact control you need. No hunting through tabs, timestamps, or mismatched tutorials.
Meet TryUncleKeep reading
 GuidesJul 25, 202640 min read
Compare Before/After Grades: Split Screen Wipe in DaVinci Resolve
Compare before and after grades in DaVinci Resolve using split screen wipe: Gallery stills, Timeline Wipe, wipe styles, and the shortcuts that speed it up.
 GuidesJul 20, 202638 min read
Organize Client Feedback and Revision Rounds in DaVinci Resolve
How to organize client feedback and revision rounds in DaVinci Resolve: round limits, DaVinci Resolve Presentations, marker conventions, and timeline versioning.
 GuidesJul 15, 202638 min read
How to Edit Faster in DaVinci Resolve: A Workflow Guide
The workflow fixes that actually speed up DaVinci Resolve editing: proxy media, render cache, GPU/decode settings, hardware controllers, batch tools, and where AI helps.