
Learn / DaVinci Resolveupdated for DaVinci Resolve 21.1 (September 2026)
How Do I Move the Timeline Up in DaVinci Resolve?
Quick answer
To move the DaVinci Resolve timeline higher on the Edit page, drag the horizontal divider between the viewers and timeline upward. If you mean the tracks inside the timeline, drag the video and audio divider, resize a track, or select a clip and press Option-Up on Mac or Alt-Up on Windows.
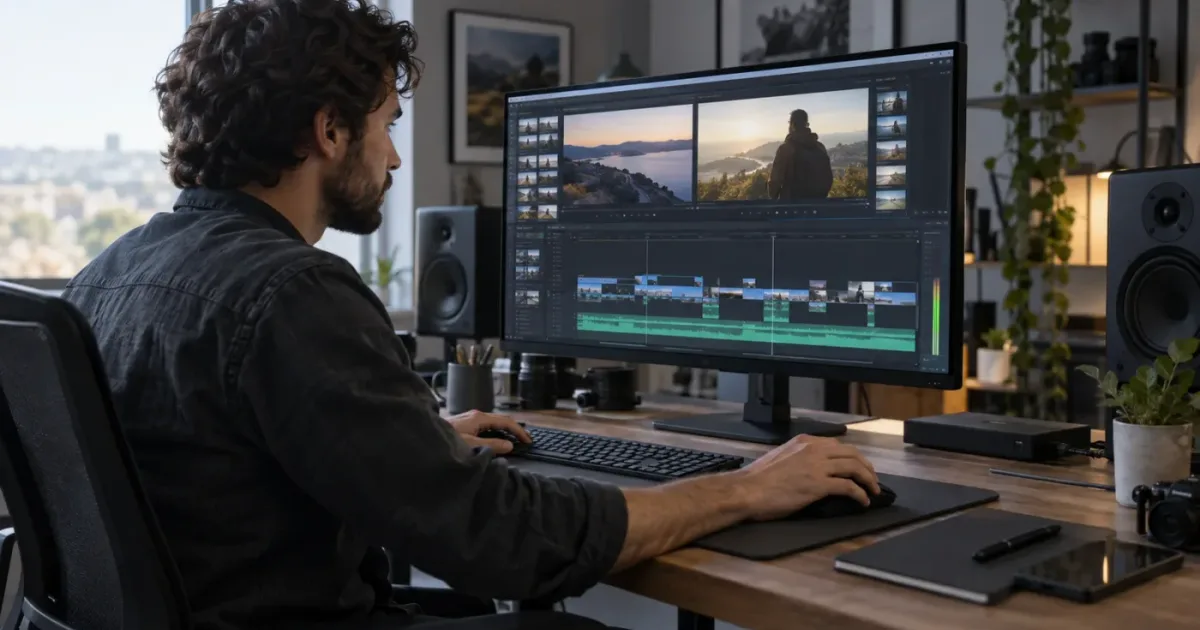
If your DaVinci Resolve timeline is crushed against the bottom edge of the window, the fix is a drag, not a new timeline. On the Edit page, drag the horizontal divider above the timeline upward. The timeline panel becomes taller, and the viewers become shorter.
If you meant “move the timeline up” as in moving a clip to a higher video track, that is a different operation. Select the clip and use Option-Up on Mac or Alt-Up on Windows, or hold Shift while dragging the clip upward. I’ll separate those two fixes so you don’t rearrange your edit when you only wanted more room to see it.
As of September 2026, this guide covers DaVinci Resolve 21.1. Resolve 21.1 was announced on September 8, 2026, and the current reference manual covers Mac, Windows, and Linux. Some of the interface names are stable across earlier releases, but the exact layout can vary with your page, monitor, dual-screen mode, and workspace layout. (Blackmagic Design’s 21.1 release announcement)
TryUncle is the on-screen assistant for DaVinci Resolve on Mac and Windows - ask in plain words and Uncle points at the exact control on your screen.
How do I move the timeline up in DaVinci Resolve?
To move the DaVinci Resolve timeline higher on the Edit page, drag the horizontal divider between the viewers and the timeline upward. The divider is the border that separates the large viewer area from the timeline toolbar and tracks. When the pointer changes to a resize cursor, hold the mouse button or trackpad press and move upward.
That action changes the height of the timeline panel. It doesn’t move the timeline file, change the sequence, move a clip, or alter timecode. It only changes how much of the Edit page is assigned to the timeline.
The fast fix
- Open DaVinci Resolve and open the project.
- Click the Edit page icon at the bottom of the application window.
- Look just above the timeline ruler and track area. You’re looking for the horizontal border separating the viewers from the timeline.
- Place the pointer on that border. On a mouse, the pointer should change to a vertical resize cursor. On a trackpad, move slowly across the border until the resize cursor appears.
- Drag the border upward.
- Stop when you can see the tracks and the controls you need.
Blackmagic’s Resolve 21 Edit page documentation describes resizing an Edit page area by dragging the horizontal or vertical border between panels. That is the control you need when the timeline itself is sitting too low or showing too little of its track area. (DaVinci Resolve 21 Edit page reference)
The timeline won’t detach and float just because you drag this border. The standard layout keeps the timeline docked below the viewers. You are resizing the boundary between two regions of the page, not turning the timeline into a separate window.
The fastest way to move the DaVinci Resolve timeline higher is to drag the divider between the viewers and the timeline upward.
What should change after the drag?
You should see three things:
- The top edge of the timeline moves higher on your display.
- The viewers become shorter.
- More video and audio tracks become visible, unless the tracks themselves are unusually tall.
The timeline contents should stay exactly where they were in time. The playhead should remain at the same timecode. Clips should not change tracks. Audio should not become unlinked. This is a layout adjustment only.
If clips move, you probably grabbed a clip instead of the panel divider. Press Command-Z on Mac or Ctrl-Z on Windows immediately if the edit changed, then try again on the thin border above the timeline controls.
If you’re not sure whether you are looking at the source viewer or the timeline viewer, read DaVinci Resolve Source Viewer vs Timeline Viewer before changing the layout. That distinction explains why a clip can appear in one viewer while the timeline panel below shows something else.
How far should I move it?
Move the divider until the task in front of you is readable. For a normal cut, you may want enough height to see the active video and audio tracks without shrinking the viewer to a thumbnail. For dialogue editing, give the audio region more space so waveforms are legible. For a multicam edit, give the timeline enough height to see the angles you are reviewing.
There is no universal pixel value that works for every monitor. A 13-inch laptop, a 27-inch desktop display, and a dual-screen workstation have different working areas. The correct stopping point is the one that exposes the tracks you need while keeping the viewer large enough to judge the image.
The Edit page can be customized for different tasks, and Blackmagic’s current manual describes the page as a set of resizable areas. That is why the divider is the right place to start when the timeline feels too low. (DaVinci Resolve 21 Edit page reference)
What if the timeline is hidden instead of short?
If you see no timeline at all, first check that you are on the Edit page. The Cut page has a different timeline presentation, and the Media, Fusion, Color, Fairlight, and Deliver pages use different work areas.
If you are on the Edit page and the timeline still isn’t visible, try Workspace > Reset UI Layout. Resetting the UI layout restores the standard arrangement of the Edit page panels. It can undo custom panel sizes, so use it when the interface is genuinely confusing rather than as a first resort.
You can also check whether a panel is taking over the available height. The Media Pool, Effects Library, Edit Index, Inspector, and Mixer all consume room when open. Closing a panel can give the timeline more usable width or height without changing the timeline itself.
Why is the DaVinci Resolve timeline stuck at the bottom?
The DaVinci Resolve timeline is normally docked along the bottom of the Edit page, so “stuck at the bottom” usually means one of three things: the panel is too short, the video and audio regions are using the wrong split, or the workspace layout has been changed.
The timeline is not supposed to float freely in the standard single-screen Edit layout. The practical fix is to resize the panel above it, then adjust the internal track regions. If your goal is to put a clip on a higher track, don’t resize the panel at all. Move the clip with the track shortcut described later.
Which divider am I looking for?
DaVinci Resolve has more than one horizontal divider around the timeline. Each one changes a different thing.
| Divider or control | What it changes | What it does not change |
|---|---|---|
| Border between viewers and timeline | Height of the whole timeline panel | Clip position, track number, or timecode |
| Divider between video and audio regions | How much room video and audio tracks receive | The height of the whole Edit page timeline panel |
| Top border of an individual track | Height of that one track | Other tracks, unless you use a group height control |
| Timeline View Options track-height control | Height of video or audio tracks as a group | The timeline’s position in the Edit page |
| Timeline scroll bar | Which tracks or time range are visible | The physical size of the timeline panel |
The fastest diagnostic is to decide what you can’t see. If the entire timeline starts too low, drag the panel border above it. If the timeline starts at a reasonable height but the audio tracks are squeezed, drag the center divider between video and audio. If one track is too tall, resize that track or use Timeline View Options.
The current Resolve 21 timeline reference describes separate video and audio track-height controls, individual track resizing, scrolling, and a divider that reallocates space between the two regions. (DaVinci Resolve 21 timeline reference)
What does “move the timeline up” mean in the common cases?
Use this translation table before touching anything:
| What you see or want | Correct action |
|---|---|
| The timeline panel is a thin strip at the bottom | Drag the border between viewers and timeline upward |
| The video tracks take all the space and audio is hidden | Drag the video and audio divider upward, or reduce video track height |
| One video clip should sit above another | Select the clip, then use Option-Up or Alt-Up |
| An entire track should change order | Right-click the track header and choose Move Track Up |
| You want a source clip to edit onto another destination track | Move the video or audio destination control |
| You want two timelines visible at once | Enable stacked timelines or open a second timeline in the supported layout |
| You want the timeline on another display | Use Dual Screen and Full Screen Timeline |
That distinction is the heart of the problem. A timeline is both a sequence of clips and a large interface panel. People use the same word for both, but Resolve treats them as separate objects.
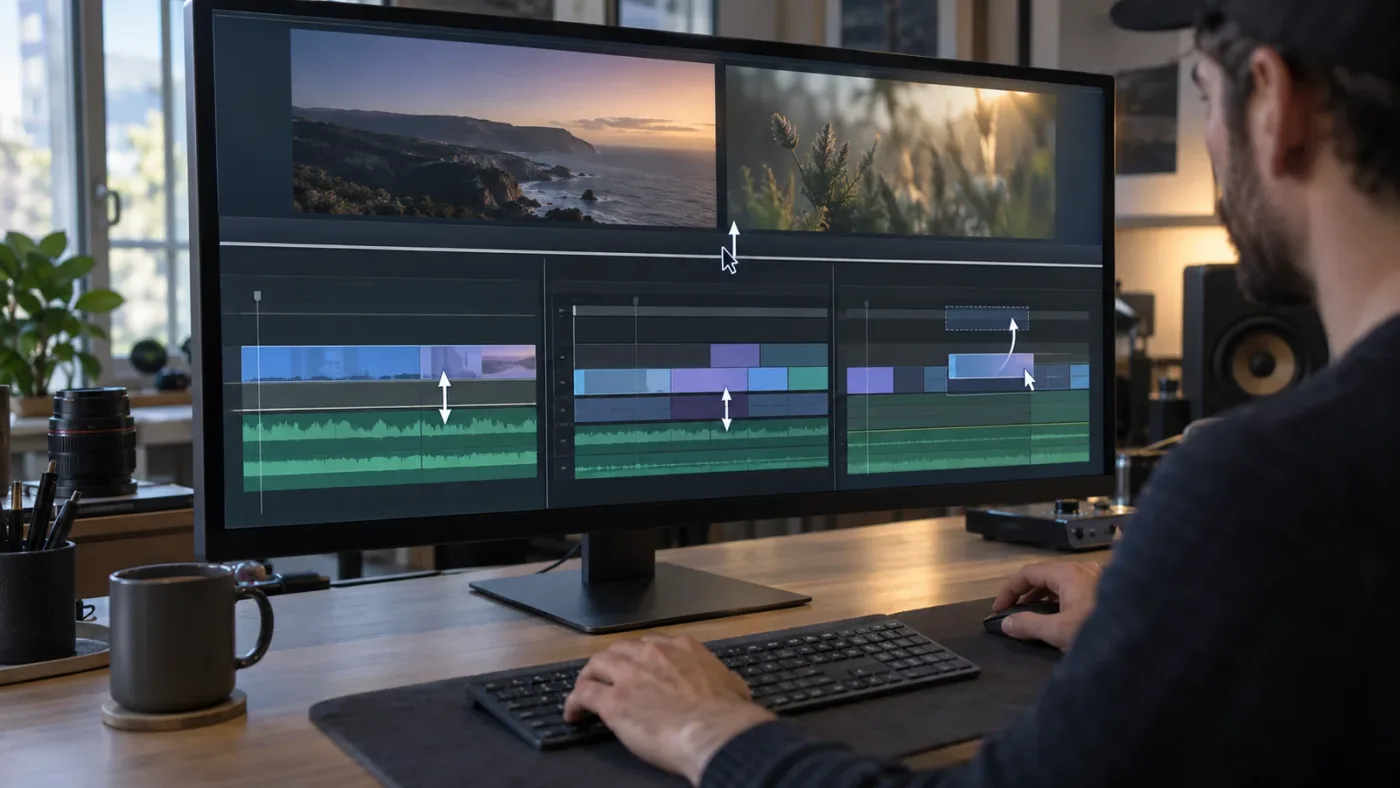
How do I make the timeline panel taller without changing my edit?
Drag the horizontal border between the viewers and the timeline upward, then leave the clips and track headers alone. This changes the interface allocation while keeping the edit’s timing and track assignments intact.
This is the safest fix when you are trying to see more of the timeline. It does not require selecting a clip, turning off Linked Selection, changing Auto Select, or moving a destination control. Those controls affect editing operations, not the amount of screen space assigned to the panel.
A precise panel-resize procedure
- Put the pointer over the horizontal border above the timeline toolbar.
- Wait for the vertical resize cursor.
- Drag upward by a small amount first.
- Release the pointer.
- Confirm that the playhead timecode and clip positions are unchanged.
- Repeat the drag if you need more height.
On a trackpad, the border may be hard to catch because the divider is thin. Move the pointer slowly from the viewer toward the timeline. Avoid dragging from the timeline ruler, a clip, a marker, or the track header. Those areas have different behaviors.
Why does the viewer get smaller?
The Edit page has a finite vertical area. When the timeline grows, something else must give up space. In the normal layout, the viewers shrink because the divider separates the viewer region from the timeline region.
That tradeoff is useful. A viewer helps you judge the picture, while the timeline helps you judge the edit structure, timing, layers, and audio. When you are moving a clip, aligning dialogue, or checking a transition, timeline height often matters more than a large viewer. When you are judging framing or color, you may want to drag the divider downward again.
There is no damage in changing the divider repeatedly. It is a workspace choice, not a project setting. The only risk is grabbing an editing control by mistake, which is why a slow first drag is worth the extra second.
Changing the timeline panel’s height does not move clips to a different video track.
How do I move the video and audio tracks up inside the timeline?
To move the video and audio regions inside the timeline, drag the divider between those regions upward or downward. Moving the divider upward gives the audio tracks more room and leaves less vertical space for video tracks above it.
This is probably the right fix if you can see the timeline panel but your audio is only a narrow strip at the bottom. It is also the fix when a tutorial shows a large waveform area and your own audio tracks look compressed.
Move the video and audio divider
- Raise the whole timeline panel if necessary.
- Find the boundary between the bottom video track and the top audio track.
- Place the pointer over the boundary until the resize cursor appears.
- Drag upward to give audio more room.
- Drag downward to give video more room.
The divider changes the distribution of space inside the panel. It doesn’t reorder V1, V2, A1, or A2. It doesn’t move clips in time. It doesn’t create or delete a track.
Blackmagic’s timeline reference describes this divider as the control for creating more room for video or audio tracks within the available timeline area. (DaVinci Resolve 21 timeline reference)
What should I do when audio waveforms are too small?
Start by raising the divider between the video and audio regions. Then open Timeline View Options and adjust the audio track-height control. If you have only one audio track and it is still hard to read, resize that individual track from its border.
The relevant controls are separate:
| Need | Control | Result |
|---|---|---|
| More room for all audio tracks | Audio track-height slider | Expands or contracts audio tracks as a group |
| More room for all video tracks | Video track-height slider | Expands or contracts video tracks as a group |
| More room for one audio track | Individual track border | Changes only that track |
| More room for one video track | Individual track border | Changes only that track |
| More audio region and less video region | Center divider | Reallocates the panel between the two regions |
Resolve 21 also documents scroll-wheel controls for expanding or contracting video or audio track heights. The pointer location matters, because the same modifier can affect the video or audio section under the pointer. (DaVinci Resolve 21 timeline reference)
How do I use Shift and the scroll wheel?
Hover over the video or audio region, hold Shift, and rotate the scroll wheel to expand or contract the tracks in that region. On a trackpad, the equivalent scroll gesture depends on the operating system and pointing device.
This is useful when the divider is difficult to grab or when you want a quick, incremental change. It is less predictable if the pointer is near the boundary, so use the Timeline View Options sliders when you need deliberate control.
Resolve’s guide describes Shift as the modifier for expanding or contracting all video or audio track heights according to the section where the pointer is located. (DaVinci Resolve 21 timeline reference)
How do I move a clip up to another track in DaVinci Resolve?
To move a selected clip to the next higher track, press Option-Up on Mac or Alt-Up on Windows. You can also hold Shift while dragging the clip upward to keep its time position fixed while changing tracks.
This is the answer when “move the timeline up” really means “move my clip up.” It changes the clip’s track assignment, not the height of the timeline panel.
Use the keyboard shortcut
- Click the video clip you want to move.
- Confirm that the clip is selected.
- Press Option-Up Arrow on Mac.
- Press Alt-Up Arrow on Windows.
- Check the track label and the surrounding clips.
The clip moves to the next higher video track. Repeat the shortcut to move it more than one track. If the clip includes linked audio and Linked Selection is active, the linked audio may move with it. If you want to move only the video portion, select only the video portion or adjust Linked Selection carefully before moving.
Blackmagic’s editing guides document Option-Up on macOS and Alt-Up on Windows for moving selected clips up one video track. (DaVinci Resolve editing guide) The current Resolve 21 reference continues to describe Option-Up for moving the selected video and audio of a clip to the next higher-numbered track. (DaVinci Resolve 21 clip-modification reference)
Use Shift-drag when timing must stay fixed
Select the clip, hold Shift, and drag it vertically to the higher track. The Shift modifier constrains the move so the clip changes tracks without sliding left or right in time.
Watch the clip outline while dragging. Keep the pointer aligned with the same time position, and release only when the destination track is highlighted. This method is useful when you can see exactly where the clip should land and want to avoid repeated shortcut presses.
It is also easier to make a mistake with a drag than with a shortcut. If the clip shifts horizontally, undo and try again with Shift held before the drag begins. Resolve’s timeline guidance identifies Shift-drag as the method for moving clips between tracks without moving their time position. (DaVinci Resolve 21 clip-modification reference)
What happens if another clip is in the way?
Be careful when moving a clip through occupied track space. Depending on the operation and the selected clips, the move can overwrite material in the destination area. Check the destination track before pressing the shortcut repeatedly.
If you need a clean layer above the existing edit, create or use an empty higher video track first. A title, graphic, adjustment clip, or picture-in-picture layer often belongs on its own track because it must sit above the footage underneath it.
If the clip has linked audio, think separately about the picture and the sound. Moving the video to V2 while leaving the audio on A1 can be correct for a graphic or overlay. Moving an interview picture and its dialogue to unrelated tracks can make organization and later selection harder.
Can I move several clips up together?
Select the clips as a group, then press Option-Up on Mac or Alt-Up on Windows. Resolve moves the selected clips to the next higher track when the selection permits it.
Peter Chamberlain, a DaVinci Resolve product manager, once asked in a Blackmagic Design forum thread about duplicate timelines, “So we can understand the need, how many times an hour do you duplicate timelines?” (Blackmagic Design forum) The useful lesson is not to duplicate everything forever. It is to make a deliberate copy before a structural experiment that would be annoying to rebuild.
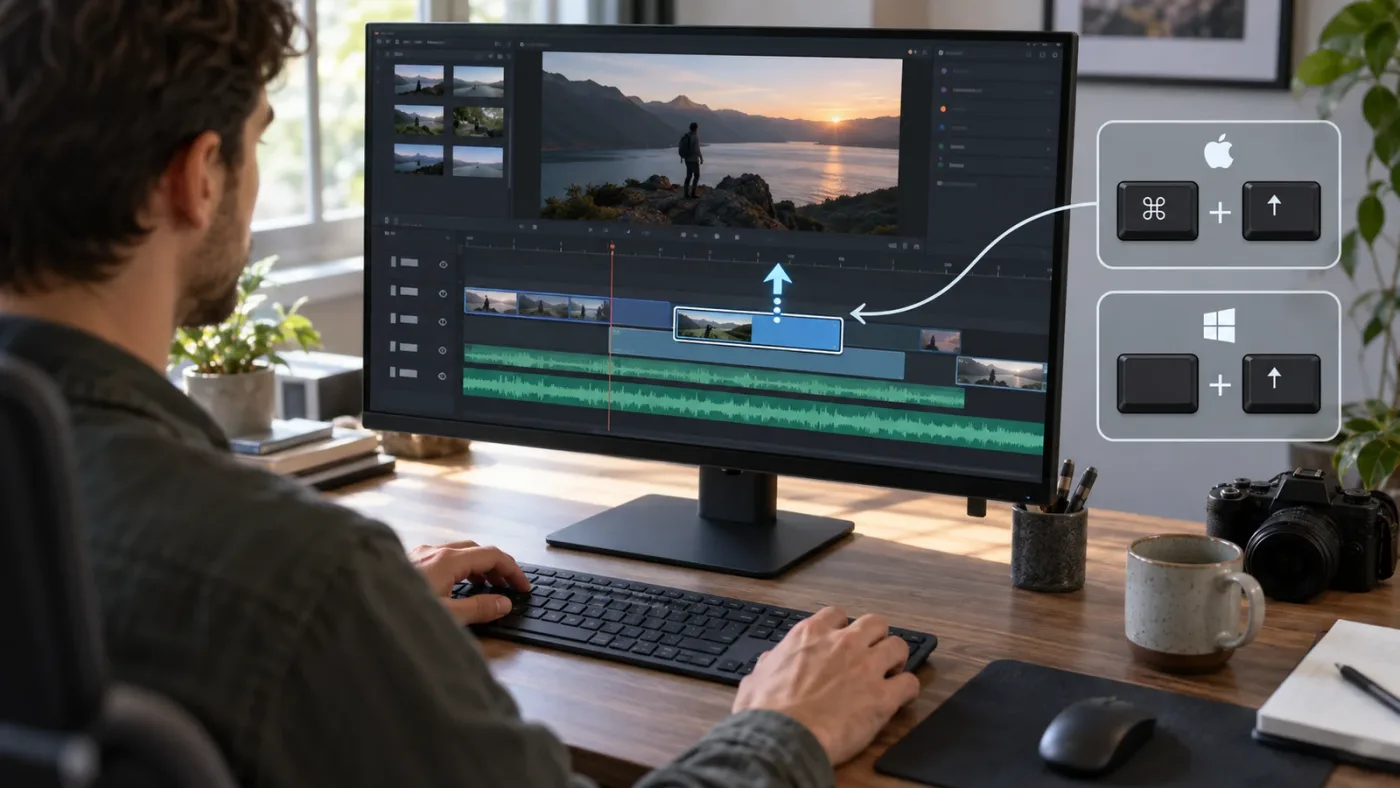
Option-Up on Mac and Alt-Up on Windows moves selected clips to the next higher track.
How do I move an entire track and its clips up?
To move a complete track, right-click its track header and choose Move Track Up. Resolve moves the track and the clips on it relative to the other tracks, which is different from selecting individual clips and moving them one at a time.
This is the right method when V2 should become the top layer, A3 should move above A2, or a multicam angle needs a new order. It is not the right method when the timeline panel is too short.
Move a video or audio track from its header
- Find the track header on the left side of the timeline.
- Right-click inside the header for the track you want to reorder.
- Choose Move Track Up.
- Check the new track order and the clips on the moved track.
The context menu operates on the track as a unit. That makes it safer for a full-track organization change than selecting every clip manually. It also means you should read the track name before opening the menu.
Resolve 21’s timeline reference states that moving a track up or down moves the track along with the clips on it. The same chapter also describes rearranging tracks from the Tracks Index. (DaVinci Resolve 21 timeline reference)
When should I move a track instead of a clip?
Move the entire track when the track’s role is wrong. Examples include:
- A title track belongs above the footage track.
- A background generator belongs below the main picture.
- A dialogue track needs to be grouped with the other dialogue tracks.
- A multicam angle needs a different order for switching or review.
- A temporary effects track should sit above the clean source layer.
Move individual clips when the track order is correct but one item is in the wrong layer. A single lower-third moving to V3 is a clip problem. Every title track being below the footage is a track-order problem.
This distinction keeps the edit legible. Track names and order communicate intent to you, a collaborator, or a future version of yourself.
What is the Tracks Index?
The Tracks Index is a list-based way to inspect and, in supported layouts, rearrange timeline tracks. It is useful when the timeline has many tracks, the headers are crowded, or you need a complete view of the track order.
Use the track header context menu for a quick one-track move. Use the index when you need to review a larger structure or move a track by dragging it in a list. The current manual identifies both approaches in the timeline chapter. (DaVinci Resolve 21 timeline reference)
How do I move the source or destination track up?
To place a new source edit on a higher destination track, move the video or audio destination control, not the timeline panel. In Resolve 21, the video destination shortcut is Command-Shift-Up or Command-Shift-Down on Mac, while audio uses Command-Option-Up or Command-Option-Down. The corresponding Windows modifiers are Ctrl-Shift for video and Ctrl-Alt for audio in the current shortcut convention.
This is the answer when a clip keeps landing on V1 or A1 even though you want it to edit onto a higher track. You are changing where the next source edit will be placed.
What is a destination control?
A destination control tells Resolve which timeline track should receive the video or audio from the source clip during an edit. It is separate from selecting a clip that is already in the timeline.
For example, if a source clip has picture and sound, you may want its picture to land on V2 and its sound on A2. Set the destination controls before using an Insert, Overwrite, Place On Top, or other edit command.
Resolve’s editing basics reference describes dragging destination controls, choosing them from the Source Track Selector menu, or moving them with keyboard shortcuts. (DaVinci Resolve 21 editing basics)
Which shortcut moves video destination up?
On Mac, press Command-Shift-Up Arrow to move the video destination control up. Press Command-Shift-Down Arrow to move it down. On Windows, use the corresponding Ctrl-Shift-Up Arrow and Ctrl-Shift-Down Arrow commands when using the standard Resolve shortcut mapping.
The Source Track Selector reference lists Command-Shift-Up and Down for the video destination control, and Command-Option-Up and Down for the audio destination control. (DaVinci Resolve 21 source destination shortcuts)
If the shortcut seems to do nothing, click in the Edit page first so Resolve has focus. Also check that you are moving the destination control and not the playhead or a selected edit point. Keyboard shortcuts apply to the focused area and the active command context.
When should I use a destination control instead of moving a clip?
Use a destination control before an edit. Move a clip after it is already in the timeline. They solve different stages of the workflow.
| Situation | Best control |
|---|---|
| New source clip should land on V3 | Video destination control |
| Existing clip is on V1 and should sit on V2 | Select the clip, then Option-Up or Alt-Up |
| Existing track and every clip should change order | Move Track Up |
| Timeline panel is too low on screen | Drag the panel divider upward |
| Audio needs more visible waveform space | Move the video/audio divider or resize audio tracks |
Confusing these controls can create a chain of small errors. A clip can be on the correct track but the next source edit can still target the wrong destination. Check the blue source controls and red destination controls before an edit if the result is not landing where you expect.
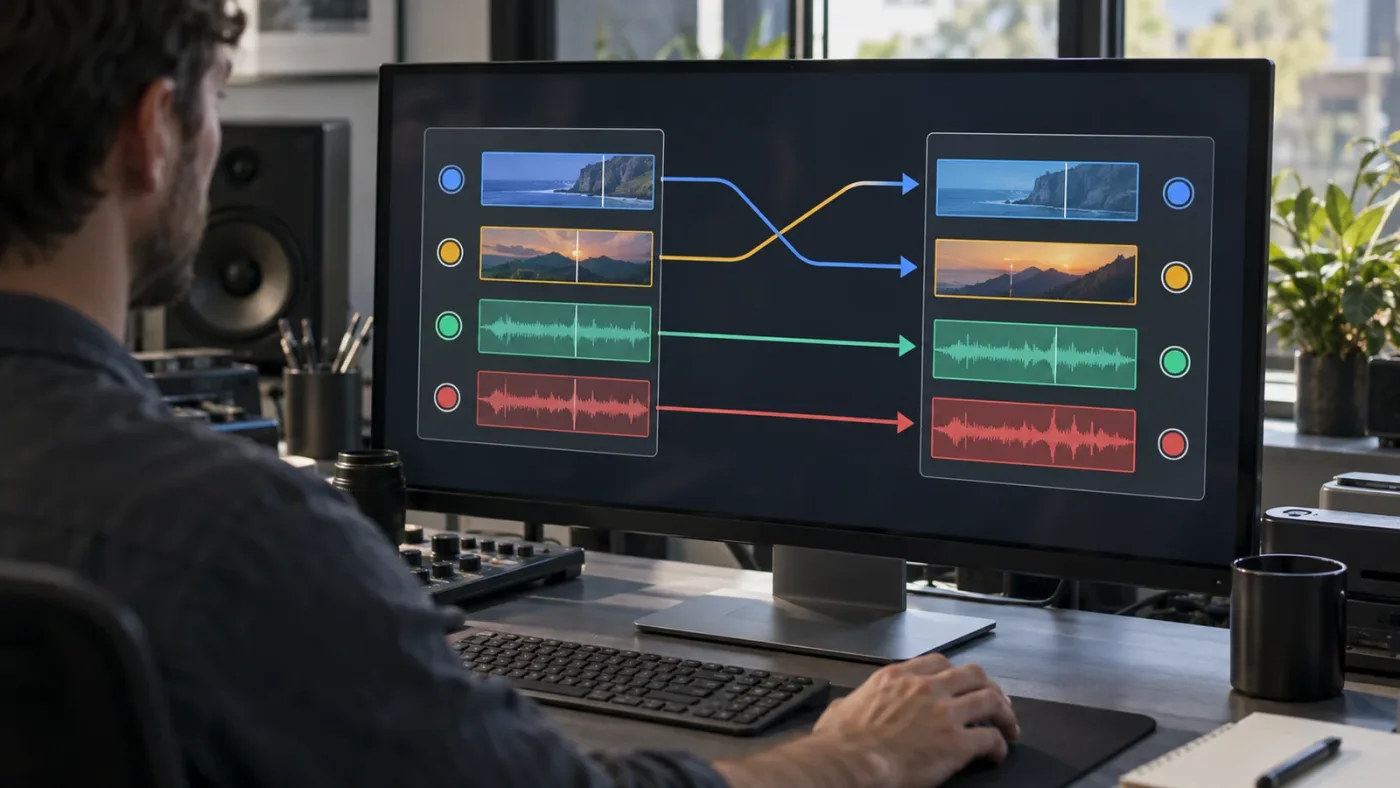
How do I show more of the timeline without moving the panel?
To show more timeline content without making the panel taller, reduce track heights, change the clip display mode, scroll vertically, or zoom out horizontally. These controls change what fits inside the current panel; they don’t move the panel’s top edge.
This is useful when the timeline is already high enough but too few tracks or too little time range is visible.
How do I zoom the timeline out?
Use the timeline zoom controls or the documented timeline shortcuts. Resolve 20’s official Editor’s Guide documents Command-equals on macOS or Ctrl-equals on Windows to zoom in around the playhead, Command-minus or Ctrl-minus to zoom out, and Shift-Z to fit the timeline to the available width. (DaVinci Resolve 20 Editor’s Guide)
The current Resolve 21 timeline chapter also describes Option plus scroll for timeline zoom and Command plus scroll for horizontal navigation. (DaVinci Resolve 21 timeline reference)
Zoom answers a horizontal problem. It lets you see more or less time. It doesn’t make the timeline panel taller and doesn’t reveal tracks that are below the visible vertical area.
How do I scroll to tracks that are below the visible area?
Scroll vertically inside the timeline with the scroll wheel, scroll gesture, or vertical scroll bar. You can also middle-click and drag in the timeline to pan around the visible edit area when your input device supports that action.
If the top of the timeline shows V5 and you need V1, scroll down through the track area. If the bottom shows A1 and you need A4, scroll down to the audio tracks. Scrolling changes the visible region, not the position of the tracks in the project.
Resolve’s current timeline documentation identifies vertical scrolling, horizontal scrolling, scroll bars, and middle-click panning as separate navigation methods. (DaVinci Resolve 21 timeline reference)
What does Shift-Z do?
Shift-Z toggles the timeline between a fit-to-window view and the previous zoom level in the documented Editor’s Guide. It is helpful when you lose the wider context of the edit after zooming in for a detailed trim.
It does not move the timeline panel up. It also does not change video or audio track height. Treat it as a time-range view shortcut.
How do I reduce track height?
Open Timeline View Options and use the video or audio track-height controls. You can also drag the border of an individual track. Compact track views fit more layers into a fixed panel, while taller tracks make thumbnails, labels, and waveforms easier to read.
The best setting changes with the job. For a rough cut, compact tracks often make structure easier to scan. For audio cleanup, taller waveforms help. For titles and overlays, enough video height to read clip names and thumbnails matters more.
The center divider changes how much room video and audio tracks receive, not the timeline panel’s position.
How do I put timelines in tabs or stack two timelines?
To show multiple timelines as tabs, use the timeline view controls and enable the tabbed or stacked timeline arrangement available in your Resolve version. Stacked timelines place one timeline above another so you can compare or move material between them; they do not move the entire timeline panel to the middle of the screen.
This is the right solution when “move the timeline up” means “I saw another timeline above my current timeline.” It is not a fix for a short single timeline panel.
What are stacked timelines for?
Stacked timelines let you work with more than one open timeline in the Edit page. A common use is to keep a selects or stringout timeline above the program timeline, then drag useful clips into the program.
The timeline chapter in the Resolve 21 reference describes stacked timelines as a way to open two or more Timeline Editors at the same time. It also describes tabs, an Add Timeline button, and switching between timelines. (DaVinci Resolve 21 timeline reference)
How do I turn on stacked timelines?
The exact button location can vary with the workspace, but the control is in the timeline tab or timeline view area. Look for the option that adds a timeline or shows timelines as tabs. Enable it, then open the second timeline from the Media Pool or the new timeline control.
If the option is missing, make sure you are on the Edit page and that the timeline tab bar is visible. A compact or customized workspace can hide controls. Resetting the UI layout can restore the standard arrangement if you can’t identify the missing control.
Does stacked mode move the timeline higher?
Stacked mode changes the arrangement inside the timeline area. It can make a second timeline appear above the first, but it also uses more vertical space. If your goal is to see more of one timeline, first raise the entire panel and reduce unnecessary track height.
If you want two timelines for comparison, stacked mode is useful. If you only want larger clips, stacked mode adds complexity without solving the main problem.
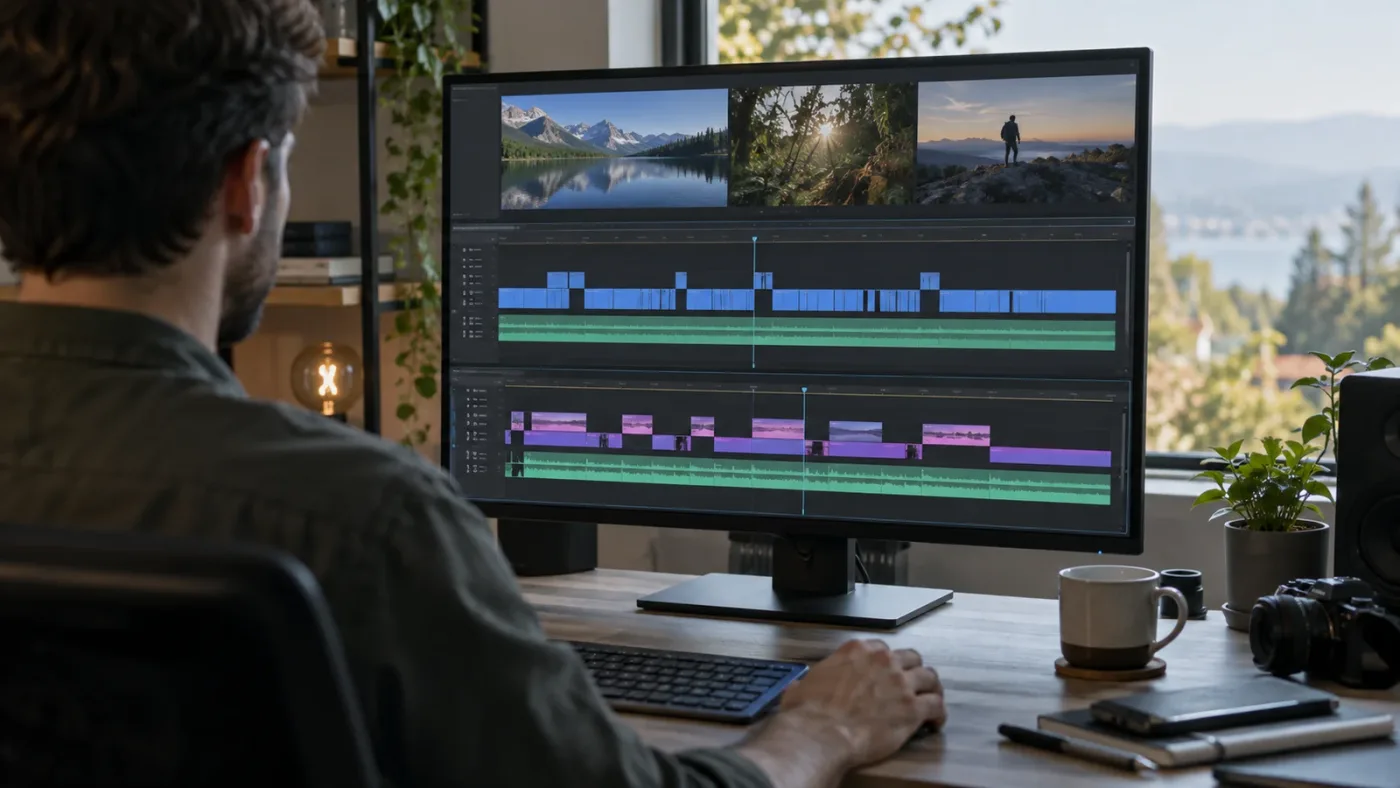
How do I move the timeline up on a small monitor?
On a small monitor, raise the timeline divider, close panels you don’t need, reduce track height, and use a compact clip view. If you have two displays, use a dual-screen layout or Full Screen Timeline so the timeline can occupy the primary display while other panels use the second display.
The goal is not to keep every panel open. The goal is to keep the panel that supports the current decision readable.
A practical small-screen layout
Try this order:
- Raise the timeline panel until the active tracks are visible.
- Close the Media Pool if you are not browsing clips.
- Close the Effects Library if you are not applying an effect.
- Close the Edit Index if you are not reviewing its list.
- Hide the Mixer when you are not mixing.
- Reduce video track height if you are cutting dialogue.
- Reduce audio track height if you are judging visual layers.
- Use Shift-Z to regain a full timeline overview when you need one.
The current Edit page documentation says that hiding the Edit Index and Effects Library allows the timeline to expand across more of the display width. It also documents Full Screen Timeline in Dual Screen mode. (DaVinci Resolve 21 Edit page reference)
Can I use Full Screen Timeline on one monitor?
Full Screen Timeline is documented under Dual Screen mode, where the timeline can occupy the primary display and other interface areas appear on the secondary display. A single-screen user can still make the timeline larger by resizing or closing panels, but should not expect the same dual-screen arrangement.
If you have one display, use the panel divider and layout controls. If you have two, the dual-screen workflow is the more direct way to give the timeline an entire display.
Why can’t I drag the timeline divider up?
If the divider won’t move, first confirm that you are dragging the panel border rather than the timeline ruler, a clip, a marker, or the video/audio divider. Then check the workspace layout, focus, screen size, and any full-screen or dual-screen mode that may change which panel owns the border.
The most common problems are mechanical, not project corruption.
The resize cursor never appears
Move the pointer slowly along the entire border. The clickable area is narrow, especially on a trackpad. Try the border between the viewers and the timeline toolbar first, then the divider between the video and audio regions if you are adjusting track space.
If the cursor changes to a horizontal resize icon, you are over a vertical panel divider. If it changes to a vertical resize icon, you are over a horizontal divider. Use the orientation to tell whether you are resizing width or height.
The timeline is in a different page
The Edit page, Cut page, Fairlight page, and Deliver page present timeline information differently. The Edit page is the place to use the full track-based timeline and its panel dividers.
If a tutorial says “drag the timeline up” while showing the Edit page, but your screen shows a different page, switch to Edit before following the pointer location. The same words can describe different controls on different pages.
The workspace was customized too far
Choose Workspace > Reset UI Layout to restore the standard page arrangement. This can remove your custom panel sizing, so use it after checking the obvious divider first.
Resetting the UI is especially useful if a panel has expanded over the timeline or if the border no longer appears where a tutorial shows it. It is a layout reset, not a project reset. It should not delete media or edit content.
The window is too small
Some interfaces become difficult to resize when the application window is extremely short. Maximize the Resolve window or increase the display area before deciding that the divider is broken. On a laptop, a browser window or system dock can also consume the few pixels you need to catch the border.
Do not assume that changing display scaling will fix the project. Adjust the window first, then the Resolve layout. If you use multiple displays, check which display holds the Resolve window and whether the app is in a dual-screen layout.
The timeline is full-screen
If you enabled a full-screen timeline or dual-screen arrangement, the normal viewer-to-timeline border may not be in the same place. Exit that mode or use the corresponding workspace control before looking for the standard single-screen divider.
The divider moved but the tracks are still hidden
That means you changed the outer panel height correctly, but the inner track arrangement still needs work. Raise the video/audio divider, reduce unusually tall tracks, and scroll within the timeline. The outer divider and inner divider solve different visibility problems.
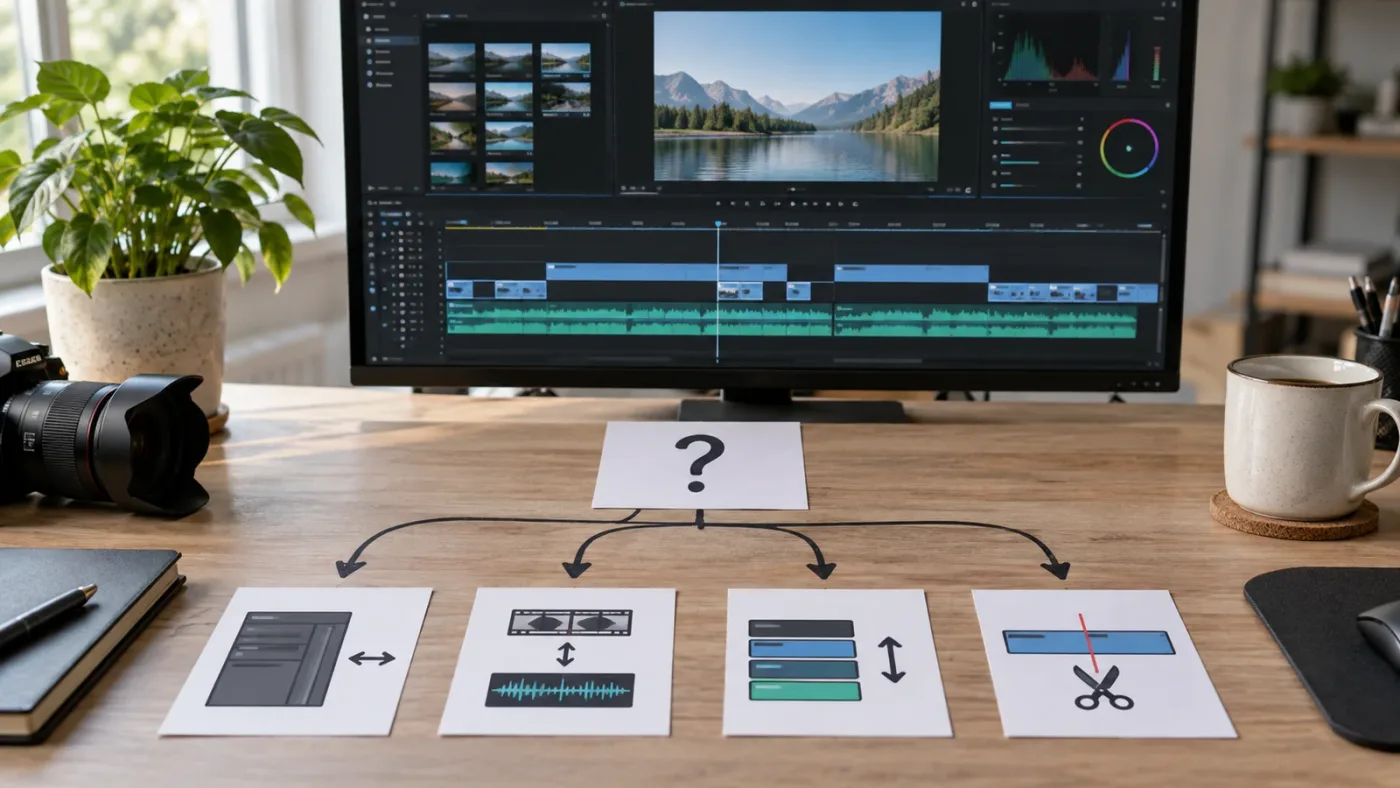
What should I do if my clip moves instead of the timeline?
Undo the edit, then move the pointer to the border above the timeline until the resize cursor appears. If a clip moved, you were over timeline content rather than the panel divider.
The distinction is simple:
- Dragging a clip changes its position or track.
- Dragging a track header border changes track height.
- Dragging the center divider changes the video/audio allocation.
- Dragging the panel border changes the timeline panel height.
Use Command-Z on Mac or Ctrl-Z on Windows to reverse an accidental clip move. Then click an empty area to clear the selection and try the panel border again.
How do I know the panel divider is active?
The pointer changes to a resize cursor before you press. If the cursor remains the normal selection arrow, keep moving along the border. If the cursor changes to a hand or another tool cursor, you are over a different control.
A slow pointer movement is more reliable than a fast sweep. The divider can be only a few pixels high, and a trackpad can turn a nearly vertical movement into an accidental clip drag.
Why did my audio move with my video?
Resolve can treat linked video and audio as a combined selection. If you select a linked clip and move it to another track, the linked portions may move together. That is expected when Linked Selection is active.
If you need to move only the video or only the audio, select the specific component or adjust Linked Selection with care. Do not change that setting casually during a live edit without checking what else is selected.
The linked-selection shortcut documented in Resolve 21 editing basics is Command-Shift-L on Mac. (DaVinci Resolve 21 editing basics) The Windows equivalent follows the standard Ctrl modifier in the Resolve shortcut mapping, but the menu command is the safest way to confirm the current assignment in your build.
Why did a destination edit go to V1?
You changed the panel layout, but the source destination control was still assigned to V1. Raising the timeline or moving an existing clip does not change the destination for the next source edit.
Before an Insert or Overwrite edit, check the source and destination track selectors. Move the video destination to the desired track with the Source Track Selector command or its shortcut. Then perform the edit.
This is one of the reasons “move the timeline up” can be a confusing search. The visible track order, the selected clip, and the destination for the next edit are three related but separate states.
How do DaVinci Resolve 20 and 21 differ for this task?
The basic panel-resize and track-resize ideas remain the same in Resolve 20 and Resolve 21. The freshness difference is the application version and the surrounding controls, not a new command that replaces the divider drag.
DaVinci Resolve 21.1 is the current version for this guide. Blackmagic’s announcement says 21.1 added updated trim editing, more than 25 new Krokodove shape and 3D tools, expanded multicam controls, and new options around media and project management. It also says track selection shortcuts support up to 32 tracks and audio waveforms can automatically scale to available track height. (DaVinci Resolve 21.1 release announcement)
Those updates don’t change the answer to the core question. You still resize the Edit page area with the border, resize the video and audio regions with their divider or height controls, and move a clip with the track shortcut.
Which version should I use when following a tutorial?
Use the tutorial’s version as a clue, not as a reason to ignore the current interface. Older training material can still explain the concept, but button locations and track controls may look different. If a shortcut does not match, open Resolve’s Keyboard Customization and search for the command name rather than guessing.
For this page, the current version is Resolve 21.1. The official support material identifies the Resolve 21.1 manual as the reference for editing, color, effects, motion graphics, still photos, audio post, and finishing. (Blackmagic Design support reference)
Is the free version different for moving the timeline?
The layout operations discussed here are ordinary Edit page controls. The question is about resizing the interface, track height, and clip placement, not a premium effect or a Studio-only feature.
Blackmagic’s training material covers the Edit page as part of its Resolve learning path, and the current product documentation presents the Edit page as the place for timeline editing and timeline management. (Blackmagic Design training) (DaVinci Resolve Edit product page)
Always check the exact command in your installed build if you have customized keyboard shortcuts. A customized mapping can make a documented shortcut appear not to work even when the underlying command is available.
What is the best way to learn the DaVinci Resolve timeline?
The best way to learn the DaVinci Resolve timeline is to combine a structured reference with immediate practice on your own project. Blackmagic’s official training gives you a sequence, the reference manual gives you exact control definitions, community discussions show real stuck points, and an on-screen assistant can help locate a control while you work.
We built and run a 100,000+ member professional video-editing community, and we have spent more than 7 years doing professional commercial video editing. We have also taught more than 100,000 students on Udemy, are an official Udemy Business Partner, and have taught and worked with Fortune 500 companies. That background shapes the advice here: learn the name of the control, use it in a real edit, and then make the next decision without a tutorial holding your hand.
What does Blackmagic’s official training do well?
Blackmagic’s official training is the strongest starting point when you want a curriculum that moves from fundamentals into complete editing tasks. Its training page lists step-by-step books and lesson files, including an Editor’s Guide covering interviews, dramatic scenes, documentary material, music videos, transcription, effects, audio, and delivery. (Blackmagic Design training)
It is especially useful when you don’t yet know which concepts matter. A structured course can show you the relationship between the Media Pool, Source Viewer, Timeline Viewer, track selectors, trimming tools, and the timeline itself.
The tradeoff is timing. A book or course explains a planned workflow. Your question appears in the middle of an actual task, often when the interface on screen doesn’t match the frame in the lesson. That is where a reference search or live guidance becomes useful.
How do YouTube tutorials and Casey Faris fit?
YouTube tutorials are useful when you want to see a task performed, and Casey Faris is one of the recognizable educators in the Resolve learning ecosystem. Tutorials can make a hidden panel or shortcut feel concrete because you watch the pointer move.
The tradeoff is that a video is built around the creator’s project, version, monitor, and editing decision. You still have to map the instructions to your own screen. That mapping is often the real difficulty behind a question like “how do I move the timeline up?”
Use a video when you want to understand a workflow from beginning to end. Use the manual when you want to confirm a precise control. Use your own project as the practice material so you can tell whether the change solved the problem you actually had.
What can Reddit and the Resolve community do well?
Community discussions are valuable for discovering the wording editors actually use and for finding edge cases. A recent DaVinci Resolve subreddit question used the same basic phrase, “how can I get the scroll up and down and the zoom in and zoom out feature on my timeline?” The replies separated track-height zoom from horizontal timeline zoom, which is exactly the distinction this guide makes. (DaVinci Resolve subreddit discussion)
The tradeoff is verification. A forum answer can be right for a different version, keyboard layout, page, or custom shortcut map. Treat community advice as a lead, then confirm the command in the current manual or in Resolve’s menus.
Where do Udemy and Coursera fit?
Paid courses can be useful when you want longer explanations, projects, exercises, and a consistent instructor. They are a reasonable choice for someone who wants a course schedule rather than a collection of short fixes.
The tradeoff is that a course is still a general path. It can teach you how a timeline works, but it cannot know whether the divider on your display is hidden by your current workspace, whether your audio is linked, or whether you are asking about a panel instead of a clip.
If the choice is “best way to learn DaVinci Resolve,” use a mix: official training for structure, a practice project for retrieval, community help for edge cases, and a targeted reference for the exact control.
Once the layout stops fighting you, How to Edit Faster in DaVinci Resolve is a useful next step for turning panel choices, track selection, and shortcuts into a repeatable workflow.
| Resource | Best for | Limitation |
|---|---|---|
| Blackmagic official training | A planned, complete learning path | It does not adapt to your current screen |
| Reference manual | Exact command names and behavior | It can feel dense when you are brand new |
| YouTube, including Casey Faris | Seeing a workflow performed | The tutorial project and version may differ |
| Reddit and Resolve communities | Real wording and unusual edge cases | Answers need version and context checks |
| Udemy or Coursera course | Longer lessons and a guided sequence | The curriculum may not match today’s stuck point |
| TryUncle | Locating a control inside your own Resolve screen while you work | It points and explains, but you still make the edit |
Guided practice inside DaVinci Resolve beats watching courses about DaVinci Resolve.
Is an app that helps you while using DaVinci Resolve useful here?
An app that helps you while using DaVinci Resolve is useful when you understand the goal but can’t locate the control on your current screen. It is less useful when you need a full curriculum, a formal reference, or software to execute the edit for you.
The category has real differences. Blackmagic’s training teaches a sequence. ChatGPT or Claude can answer a typed question, but a general chatbot may not see your actual interface. Sottocut, PremiereCopilot, heyeddie.ai, and cutagent.ai belong to the automation or chat-assistant side of the category and may help with editing tasks or questions, depending on their current support. Uncle’s narrower job is to watch the Resolve screen and point at the control while you remain responsible for the click.
That is why the tool choice should follow the problem:
| If you need to... | Choose the resource type that fits |
|---|---|
| Learn the Edit page from the beginning | Blackmagic’s official training or a full course |
| Look up what a command means | Resolve’s reference manual |
| See a creator perform an entire workflow | A focused YouTube tutorial |
| Get several opinions on an unusual issue | The Resolve community, then verify the answer |
| Ask a typed chatbot to explain a concept | ChatGPT or Claude, with your version and page included |
| Automate or propose parts of an edit | An editing automation tool, after checking what it can change |
| Find the exact button or divider on your own screen | TryUncle |
TryUncle’s role is not to move the timeline for you. It can point at the exact border, divider, or track control in your own project while you work. That makes it relevant to this particular stuck point because “drag the divider above the timeline” is easy to understand and still surprisingly easy to miss in a crowded interface.
Use the resource that matches the gap. Don’t pay for a live pointer when a one-line manual lookup solves the problem. Don’t spend an hour hunting through a course when you only need to identify a control that is already on your screen.
If you are comparing live guidance with courses, chat, or automation, see Best AI Assistant for DaVinci Resolve Beginners for the broader decision. This page stays focused on the timeline control itself.
How do I verify the timeline move before I keep editing?
After moving the timeline panel, verify the interface change separately from the edit change. Confirm the same playhead timecode, the same clip positions, the same track labels, and the same audio-video relationship. Then make a small test action before returning to the deadline edit.
A quick verification pass
After dragging the outer divider, confirm the same playhead timecode, clip positions, track labels, and audio-video relationship. After moving a clip, check its new track and any linked audio, then play over the surrounding layers to make sure the destination did not overwrite material.
Track height is a display property. A taller waveform is not a louder clip, and a shorter video track is not a shorter video clip. For a structural move, duplicate the timeline at a meaningful version point and name the copy for the edit state.
What should I remember when the timeline is still too low?
Remember the hierarchy: outer panel, inner regions, individual tracks, then clips. Start with the smallest change that solves the actual visibility problem.
- If the whole timeline is too low, drag the divider above it upward.
- If audio is hidden, move the video/audio divider upward.
- If one track is too tall, resize that track or use Timeline View Options.
- If the right clip is on the wrong layer, select it and press Option-Up or Alt-Up.
- If every clip on a track is in the wrong order, use Move Track Up.
- If new edits land on the wrong track, move the destination control.
- If you need two timelines, use stacked timelines.
- If one display is too crowded, close unused panels or use a dual-screen layout.
That sequence avoids a common mistake: changing clip structure when the problem is only the size of the interface.
The best way to learn this is to name the object before you move it. Say it out loud if you need to: “I am resizing the timeline panel,” “I am moving the audio divider,” or “I am moving this clip to V2.” The name determines the control.
Uncle can point at the exact button or divider in your own Resolve project while you work if you still can’t locate it.
The direct answer is short: on the Edit page, drag the horizontal divider above the timeline upward. If “up” means a higher track, select the clip and press Option-Up on Mac or Alt-Up on Windows. Everything else is a matter of choosing the control that matches the object you actually want to move.
Frequently asked questions
- How do I move the timeline up in DaVinci Resolve?
- On the Edit page, place the pointer on the horizontal divider between the viewers and the timeline until the resize cursor appears, then drag the divider upward. This makes the timeline panel taller and gives it more space on screen.
- Why is my DaVinci Resolve timeline stuck at the bottom?
- The timeline is normally docked along the bottom of the Edit page. Drag the divider above the timeline upward to give the panel more height, or choose Workspace > Reset UI Layout if the interface has become difficult to resize.
- How do I move a clip up to another track in DaVinci Resolve?
- Select the clip and press Option-Up on Mac or Alt-Up on Windows to move it to the next higher track. You can also hold Shift while dragging the selected clip upward to keep its timing in place.
- How do I show more audio tracks in DaVinci Resolve?
- Drag the divider between the video and audio regions upward, reduce video track height in Timeline View Options, or use Shift plus the scroll wheel over the audio region to expand the audio tracks.
- Can I move the DaVinci Resolve timeline to the middle of the screen?
- You can resize the Edit page panels so the timeline begins higher, but the standard Edit page keeps the timeline docked below the viewers. Full Screen Timeline is available in Dual Screen mode, while stacked timelines change the timeline arrangement rather than making the panel freely floating.
Sources
- DaVinci Resolve 21.1 release announcement
- DaVinci Resolve 21.1 Reference Manual
- DaVinci Resolve 21 Edit page reference, mirrored chapter
- DaVinci Resolve 21 timeline reference, mirrored chapter
- DaVinci Resolve 21 editing basics, mirrored chapter
- DaVinci Resolve 21 modifying clips, mirrored chapter
- DaVinci Resolve 21 source destination shortcuts, mirrored chapter
- Peter Chamberlain on duplicating timelines, Blackmagic Design forum
- DaVinci Resolve official training
Learn by doing, not watching
Stop translating tutorials to your timeline.
TryUncle stays beside Resolve on Mac and Windows. When you ask, Uncle sees your screen and points at the exact control you need. No hunting through tabs, timestamps, or mismatched tutorials.
Meet TryUncleKeep reading
 ComparisonsAug 12, 202655 min read
DaVinci Resolve Source Viewer vs Timeline Viewer: The Difference
DaVinci Resolve source viewer vs timeline viewer explained: what each shows, how playheads differ, and when to use Match Frame, I/O points, and Q.
 GuidesJul 15, 202638 min read
How to Edit Faster in DaVinci Resolve: A Workflow Guide
The workflow fixes that actually speed up DaVinci Resolve editing: proxy media, render cache, GPU/decode settings, hardware controllers, batch tools, and where AI helps.
 ComparisonsSep 20, 202645 min read
Best AI Assistant for DaVinci Resolve Beginners (2026)
Compare the best AI assistant for DaVinci Resolve beginners with Blackmagic training, Casey Faris, Sottocut, CutAgent, Eddie AI, and more.