
Learn / DaVinci Resolveupdated for DaVinci Resolve 21.0.3 (July 2026)
Does DaVinci Resolve Support Dolby Vision?
Quick answer
Yes. DaVinci Resolve Studio has graded and rendered Dolby Vision natively since version 15 in 2018, using a built-in software CMU with no Dolby hardware required, though the free edition has none of it. Export consumer files as H.265 Main10, or master a full Dolby Vision IMF with Kakadu JPEG 2000 for platforms like Netflix.
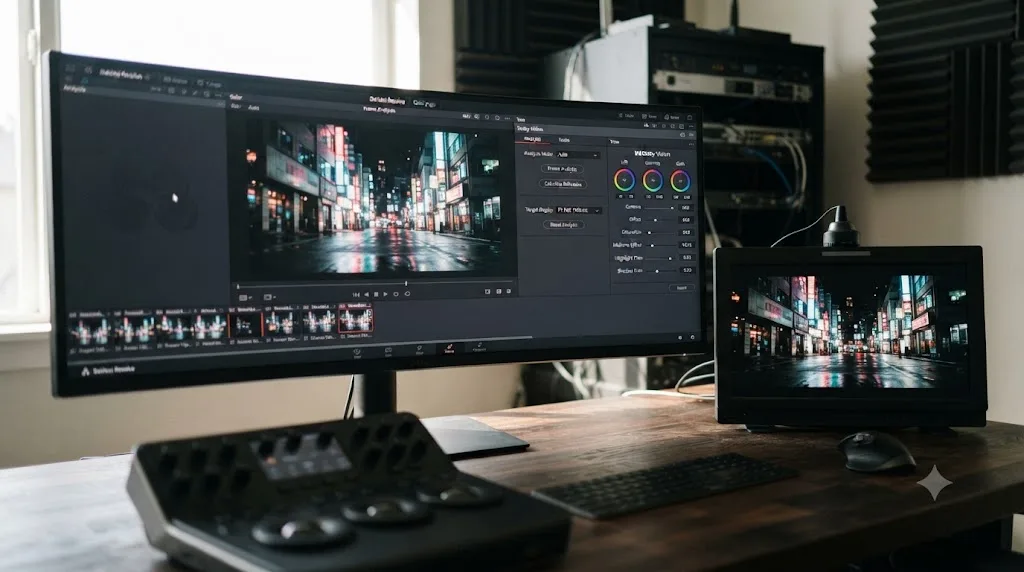
Someone hands you a Dolby Vision master to conform, or a client asks if you can "do Dolby Vision" for their streaming deliverable, and you go looking for the honest answer instead of a marketing page. Here it is, as of August 2026, running DaVinci Resolve 21.0.3: yes, DaVinci Resolve supports Dolby Vision, but only in Studio, and the difference between grading a Dolby Vision preview at your desk and mastering a Dolby-certified deliverable is bigger than most explainers admit.
We've spent seven years cutting commercial video work in Resolve, and questions like this show up constantly in the 100,000+ member editing community we run. Dolby Vision is one of those topics where a forum thread from 2019 and a forum thread from this year both come up in the same search, and they don't agree, because the tool actually changed underneath them. Let's sort out what's true now, and what it actually costs, in dollars and in hardware, to do it right.
Does DaVinci Resolve support Dolby Vision?
Yes. DaVinci Resolve Studio grades, analyzes, and renders Dolby Vision natively, and has since version 15 shipped in 2018. Blackmagic Design's own product page for Studio states plainly that "Dolby Vision support includes a GPU accelerated version of the Dolby Vision CMU, content mapping unit, and free Dolby Vision grading controls" (Blackmagic Design). That GPU-accelerated CMU is the part most explanations skip: it means Resolve Studio does the tone-mapping work itself, in software, on your own GPU, without a separate rack-mount box.
DaVinci Resolve Studio has shipped Dolby Vision support since version 15 in 2018, and the free edition has never had it. That single sentence answers the query most people actually type, and it hasn't changed in the seven years since.
What has changed is scope. Advanced trim controls, the fine per-shot adjustments that let a colorist hand-tune how a shot maps down to SDR, "require a separate Dolby license" on top of owning Studio (Blackmagic Design). Basic Dolby Vision grading and automatic analysis, the part that gets a video watchable in Dolby Vision at all, come with Studio at no extra cost beyond the $295 one-time purchase.
What do you actually need to grade Dolby Vision in DaVinci Resolve?
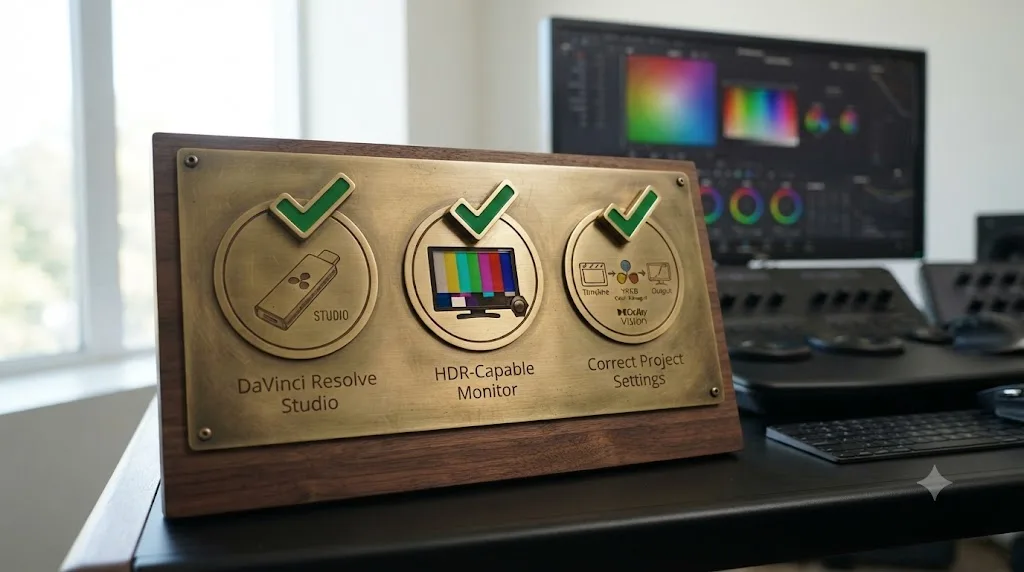
You need DaVinci Resolve Studio, a Dolby Vision-capable timeline color space, and, for anything beyond quick previewing, an HDR-capable monitor. You do not need a hardware CMU to get started.
DaVinci Resolve Studio is a one-time purchase, currently $295, with no subscription. Studio unlocks Dolby Vision alongside HDR10+ grading and rendering, advanced HDR scopes that measure ST.2084 and HLG images in actual nit values, and multi-GPU acceleration for smoother playback on demanding timelines (Blackmagic Design).
Beyond the software, colorist Robbie Carman, co-founder of Mixing Light, writes plainly about the cost floor: "for no additional cost if you own Resolve Studio you have access to Dolby Vision!" (Mixing Light). That's the whole barrier to entry for basic Dolby Vision work: own Studio, and the tools are already there.
To actually see what you're grading correctly, you'll want an HDR reference display. It doesn't need to be a $30,000 mastering monitor for indie or client work, but a consumer TV or laptop screen that isn't calibrated for PQ will lie to you about your own grade. If you haven't set one up before, our guide to calibrating your monitor for DaVinci Resolve color grading covers the baseline steps before you touch a single Dolby Vision control. Set your project's output color space to ST.2084 at your target mastering nit level (1,000 nits is a common starting point) and your timeline color space to a P3-D65 gamut with ST.2084 gamma, then enable the "HDR Scopes For ST.2084" option so your scopes read real nit values instead of arbitrary code values (Mixing Light).
Which DaVinci Resolve version added Dolby Vision support?
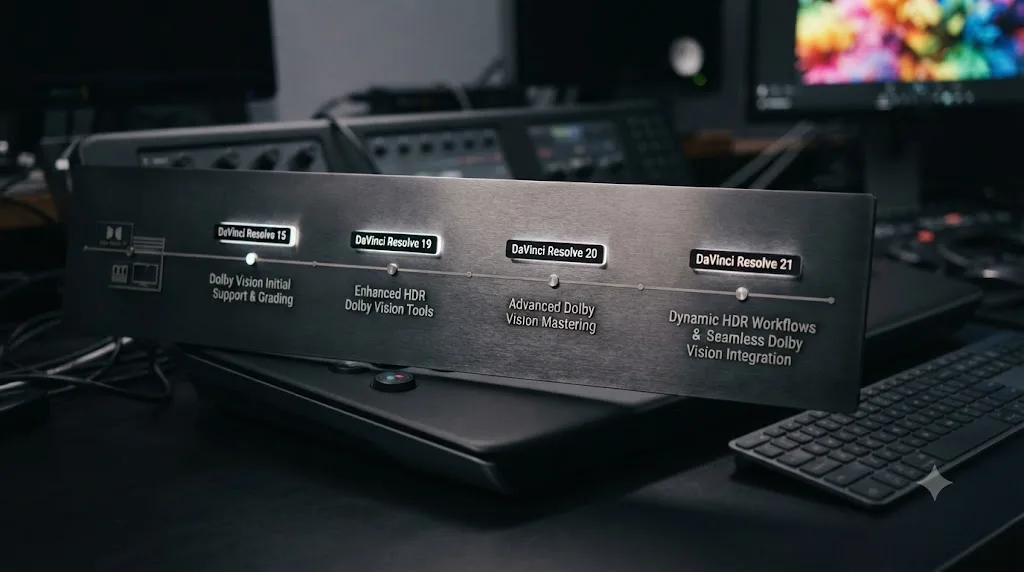
DaVinci Resolve 15, in 2018. Blackmagic Design's own announcement for that release described "GPU accelerated Dolby Vision metadata analysis and native HDR 10+ grading controls" as part of the expanded HDR support in that version, with public beta available April 9, 2018, ahead of a shipping release later that year (postPerspective; TV Tech).
Every major version since has kept that support, and the changes between them are smaller than people assume. Between versions 16 and 18, Blackmagic's own release notes don't call out a headline Dolby Vision change. Support simply carried over, version to version, while trim tools and HDR scopes matured elsewhere on the Color page. That quiet stretch is exactly why a five-year-old forum thread and a current one can both be technically correct and still contradict each other: nothing dramatic happened to Dolby Vision itself for a while, so nobody had a reason to post an update.
Version 19, released in 2024, added a small but genuinely useful workflow shortcut: an "option to link Dolby Vision target display selection for trims and preview," so a colorist stops having to set the same target twice in two different panels (ELEMENTS Media Storage). Version 20, in 2025, added "support for external HDR displays" that Blackmagic describes as enabling "more precise grading across Dolby Vision and HDR10 workflows" (COREMICRO). The 20.3 point release that followed later that year went further on the delivery side, adding "support for IMF workflows with HDR Vivid and Audio Vivid" and the ability to embed "HDR10+ metadata in QuickTime and MP4 files" directly, which matters if HDR10+ is part of your deliverable spec alongside Dolby Vision (AlternativeTo).
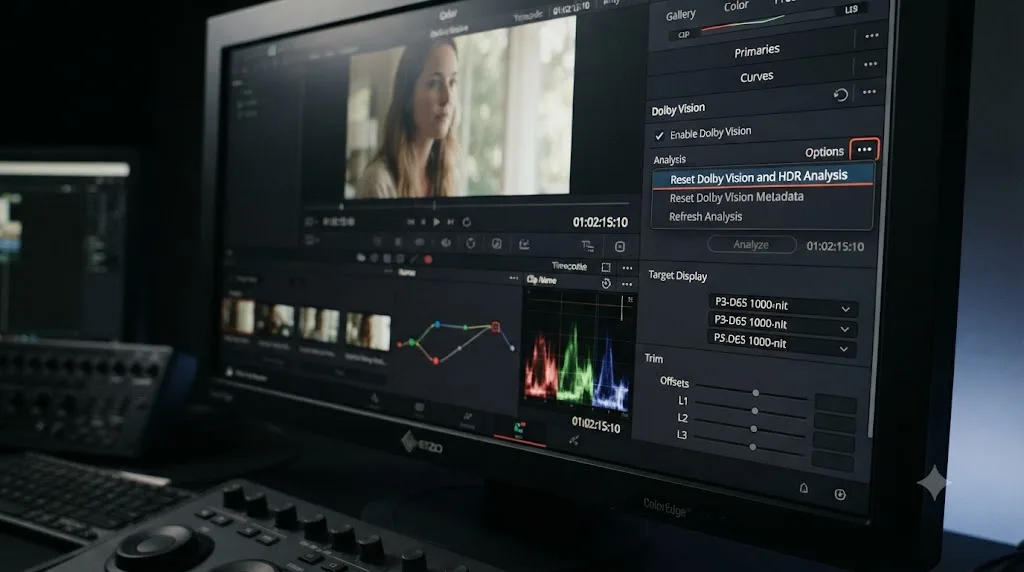
The most recent addition, as of DaVinci Resolve 21, is two-fold. First, a Reset Dolby Vision and HDR Analysis command sits directly in the Color page's Dolby Vision panel option menu, so you can clear and re-run analysis on a shot without hunting through a longer sequence of steps (Blackmagic Design, DaVinci Resolve 21 New Features Guide). Second, MultiMaster trim passes let a colorist "grade a single timeline and generate separate HDR and SDR renders in one go, each with their own color-managed trim pass," which is a direct answer to the age-old problem of re-grading the same project twice for two deliverables (Newsshooter).
| Version | Year | Dolby Vision milestone |
|---|---|---|
| DaVinci Resolve 15 | 2018 | Native Dolby Vision analysis and grading added to Studio, GPU-accelerated iCMU |
| DaVinci Resolve 16-18 | 2019-2023 | Continued support; no headline Dolby Vision change documented in release notes |
| DaVinci Resolve 19 | 2024 | Link Dolby Vision target display selection for trims and preview |
| DaVinci Resolve 20 | 2025 | External HDR display support for more precise Dolby Vision and HDR10 grading |
| DaVinci Resolve 20.3 | 2025 | IMF workflows with HDR Vivid; HDR10+ metadata embedding in QuickTime/MP4 |
| DaVinci Resolve 21 | 2026 | Reset Dolby Vision and HDR analysis option; MultiMaster trim passes |
(Sources: postPerspective, ELEMENTS Media Storage, COREMICRO, AlternativeTo, Blackmagic Design, Newsshooter)
A feature that first shipped in a 2018 release is still the one most forum answers get wrong, mostly because people confuse "Resolve added Dolby Vision" with "Resolve added a hardware-free way to do it," which are two different milestones seven years apart in the public conversation, even though the software feature itself is old.
How does Dolby Vision compare to HDR10, HDR10+, and HLG?
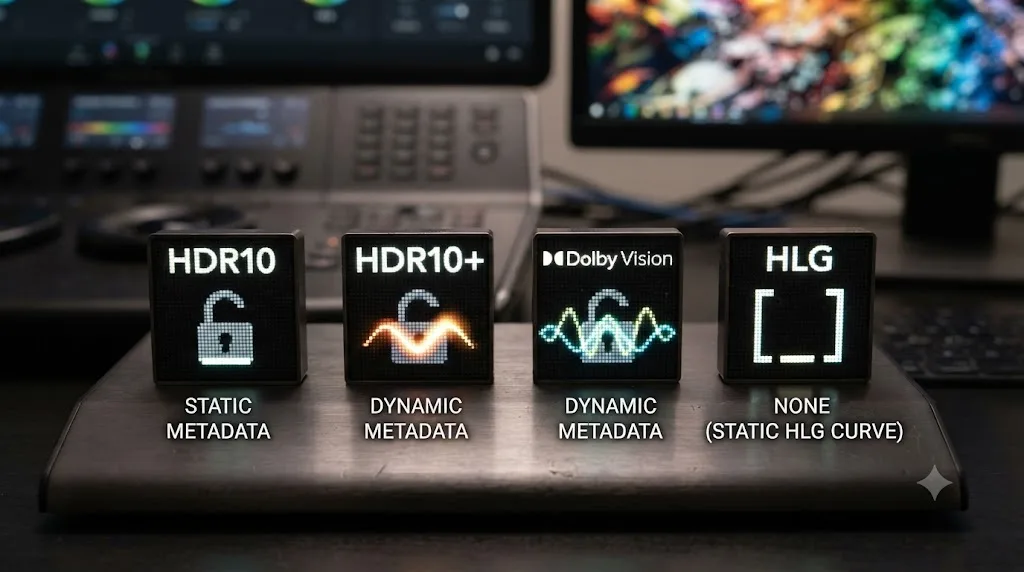
Dolby Vision is one of four HDR delivery formats you'll run into, and the difference that actually matters for a colorist is how the metadata behaves, not the marketing name on the box.
HDR10 and HLG use static or no metadata at all: one set of instructions for the entire piece, or in HLG's case, none, because it relies on a curve that gracefully degrades toward SDR instead of carrying separate tone-mapping data. Dolby Vision and HDR10+ both use dynamic metadata that can change scene by scene, or frame by frame, giving the display a fresh instruction as the image changes rather than one blanket setting for the whole runtime (Forasoft).
The transfer function tells a similar story. HDR10, HDR10+, and Dolby Vision all use the PQ transfer function (SMPTE ST 2084), the absolute-brightness curve that maps signal values to real nit values all the way up to 10,000 nits. HLG, developed by the BBC and NHK for broadcast, uses a different, relative transfer function instead, one that scales to whatever peak brightness the display in front of the viewer actually has (Forasoft).
Dolby Vision masters at 12-bit color depth, while HDR10, HDR10+, and HLG all work at 10-bit. That extra headroom, 4,096 brightness steps per channel instead of 1,024, is part of why Dolby Vision grades can hold smoother gradients in a sky or a skin tone under extreme dynamic range, at least on paper (Forasoft).
Licensing is where the formats actually diverge for a working colorist. HDR10, HDR10+, and HLG are royalty-free, open specifications. Dolby Vision is not: Dolby charges device manufacturers a per-unit licensing fee, which one industry estimate puts at $2 to $3 per television set, and that cost is a documented reason some TV brands support HDR10+ instead of Dolby Vision on their lineups (Forasoft). None of that licensing fee touches you as a colorist directly, but it explains why a client's "just deliver in HDR" request isn't a single answer: the device their audience owns decides which format actually gets seen correctly.
| Format | Metadata | Bit depth | Licensing | Grading in DaVinci Resolve |
|---|---|---|---|---|
| HDR10 | Static, whole title | 10-bit | Royalty-free | Basic PQ grading in Free; full metadata tools in Studio |
| HDR10+ | Dynamic, scene/frame | 10-bit | Royalty-free | Studio only |
| Dolby Vision | Dynamic, frame-by-frame | 12-bit | Per-device fee (Dolby) | Studio only |
| HLG | None (relative curve) | 10-bit | Royalty-free | Basic HLG grading in Free; full tools in Studio |
(Source: Forasoft; DaVinci Resolve feature gating per Blackmagic Design)
None of this means Dolby Vision is objectively "better." It means Dolby Vision is a specific tool with a specific cost structure, and the right format for a given deliverable depends on where the client's audience is watching, not on which one sounds more premium.
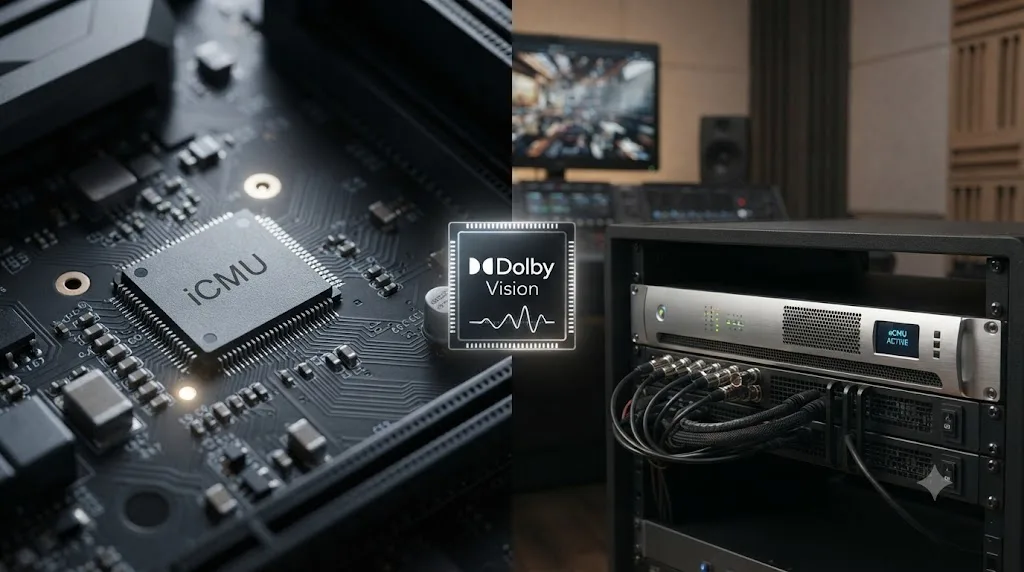
What's the difference between DaVinci Resolve's built-in iCMU and an external Dolby Vision CMU?
The iCMU is software that runs on your own GPU inside Resolve Studio. An external CMU, or eCMU, is a physical rack-mount unit, licensed separately from Dolby, built for broadcast and theatrical mastering that needs full Dolby certification.
Robbie Carman describes the built-in option this way: "Resolve studio now also includes a built-in Internal CMU (or iCMU), which allows you to preview Dolby Vision at various target display settings, right on your SDI output" (Mixing Light). No separate box, no extra rack space, no additional cost beyond Studio itself.
The eCMU is a different tier entirely. Traditional Dolby Vision mastering, the kind studios and networks certify, requires a "Mastering & Playback Service Agreement" with Dolby, unique authentication strings to activate the tools, and a physical CMU purchased and licensed through a Dolby Authorized System Integrator, activated with its own Host ID registration (Mixing Light). Carman confirms these are genuinely separate licenses: "an iCMU license does not also license an eCMU. If you want to use both the iCMU and eCMU, you'll have to have a separate eCMU license" (Mixing Light).
You do not need a hardware Content Mapping Unit to grade Dolby Vision in DaVinci Resolve; Studio's software CMU handles it. That's the fact that most makes indie and solo colorists give up on Dolby Vision before checking, assuming the whole workflow needs a broadcast facility's equipment budget.
| Internal CMU (iCMU) | External CMU (eCMU) | |
|---|---|---|
| What it is | Software, built into Resolve Studio | Physical rack-mount hardware |
| Cost beyond Resolve | None | Separate purchase plus separate Dolby license |
| Where it comes from | Included in your Studio install | Dolby Authorized System Integrators |
| Who typically needs it | Indie colorists, agencies, solo editors, most streaming deliverables | Broadcast facilities, theatrical DI houses, Dolby-certified mastering suites |
(Source: Mixing Light)
What does Dolby Vision actually cost beyond DaVinci Resolve Studio?
Three numbers, in order of how far you go: $295 for Resolve Studio, $1,000 for the Dolby Vision Trims License, and an unpublished, negotiated figure for eCMU hardware and its license if you ever need full certified mastering.
The $295 is the one everyone already knows: a one-time purchase for DaVinci Resolve Studio, no subscription, that unlocks basic Dolby Vision analysis and grading alongside everything else Studio adds (Blackmagic Design). That number gets a colorist to a working Dolby Vision grade with automatic shot analysis. It does not include the artistic trim controls.
The $1,000 is the part most explainers skip entirely. The Dolby Vision Trims License is a separate, one-time purchase sold directly through Dolby's own store, and it "unlocks the full set of artistic trim controls to create an additional layer of metadata unleashing the most powerful, comprehensive HDR mastering tools in your professional color-grading" (Logik Forums, quoting Dolby's product listing). It installs on multiple machines within a single physical facility, but Dolby's own terms are explicit that a license doesn't travel between separate locations: a studio with offices in two cities needs two licenses, not one.
Basic Dolby Vision analysis and grading are included in the $295 Studio purchase; the artistic trim controls that studios and streamers usually require cost an additional $1,000, one time, direct from Dolby. That's the real two-tier cost structure, and it's worth knowing before you quote a client a Dolby Vision deliverable based on Studio's price alone.
Past that point, pricing stops being public. An eCMU and its separate Dolby license are sold through Dolby Authorized System Integrators on a negotiated, per-facility basis, and neither Dolby nor Blackmagic publishes a flat number for it. If a project genuinely needs Dolby-certified theatrical or broadcast mastering, budgeting for that hardware tier means contacting an Authorized System Integrator directly rather than assuming a price, and we're not going to invent a figure here that we can't source.
| Cost tier | What it unlocks | Price |
|---|---|---|
| DaVinci Resolve Studio | Basic Dolby Vision analysis and grading | $295, one time |
| Dolby Vision Trims License | Full artistic trim controls | $1,000, one time, per facility |
| eCMU plus its Dolby license | Certified broadcast/theatrical mastering | Not published; negotiated through a Dolby Authorized System Integrator |
(Sources: Blackmagic Design, Logik Forums, Mixing Light)
Can you do real Dolby Vision mastering without expensive hardware?
For most streaming and social deliverables, yes. For a Dolby-certified theatrical or broadcast master, no, and it's worth knowing exactly where that line sits before you promise a client something Resolve's iCMU alone can't deliver.
The full, historically documented Dolby Vision mastering setup calls for a mastering monitor rated at a minimum of 1,000 nits with 200,000:1 contrast and P3 gamut coverage, examples like the Sony BVM-X300 or Canon DP-V2420, plus a separate SDR reference monitor, a video router for SDI distribution, and Dolby-approved grading software (Mixing Light). That's the full broadcast facility checklist, and it's real, but it describes the top tier of Dolby Vision work, not the only tier.
A Dolby Vision export built for Vimeo or Instagram and a Dolby Vision master delivered to Netflix are two different files built with two different settings. If your deliverable is a Dolby Vision-tagged file for a client's app, a festival screener, or a social platform, Resolve Studio's iCMU, automatic shot analysis, and trim controls are the whole toolchain you need, on whatever HDR monitor you already have. Robbie Carman's summary holds: "Resolve Studio features Dolby Vision automatic shot analysis, which analyzes the shots in your timeline to generate the metadata that is used to display Dolby Vision across a wide variety of devices" (Mixing Light).
If figuring out where that Dolby Vision panel actually lives on your own Color page timeline is what's slowing you down right now, that's exactly the kind of moment TryUncle exists for. TryUncle is the on-screen assistant for DaVinci Resolve on macOS. Ask in plain words, and Uncle points at the exact control on your screen. It's a paid macOS app, currently $29.99 a month at the founder rate for the first 100 seats, not a course and not a chatbot; see TryUncle for details and the current rate.
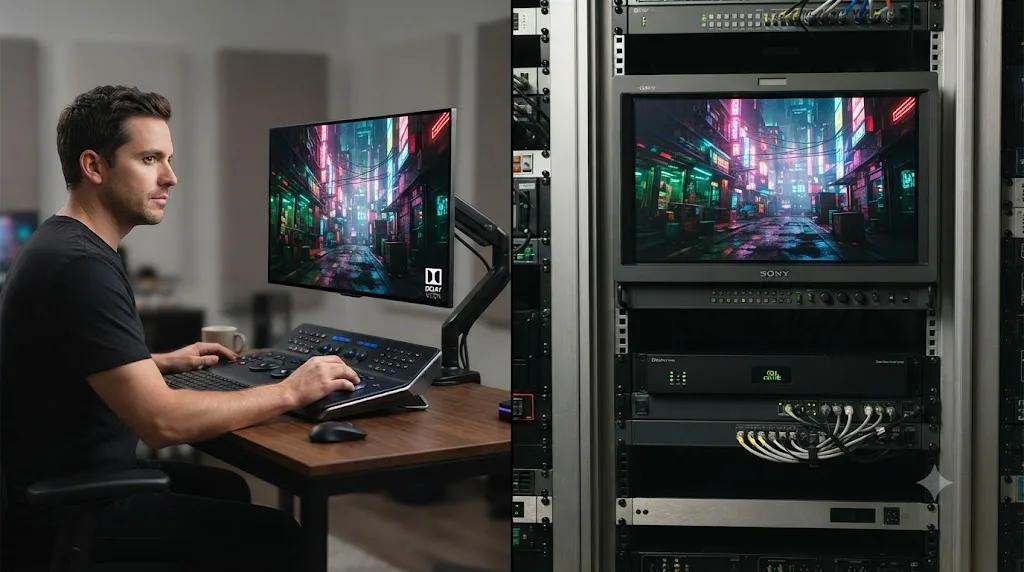
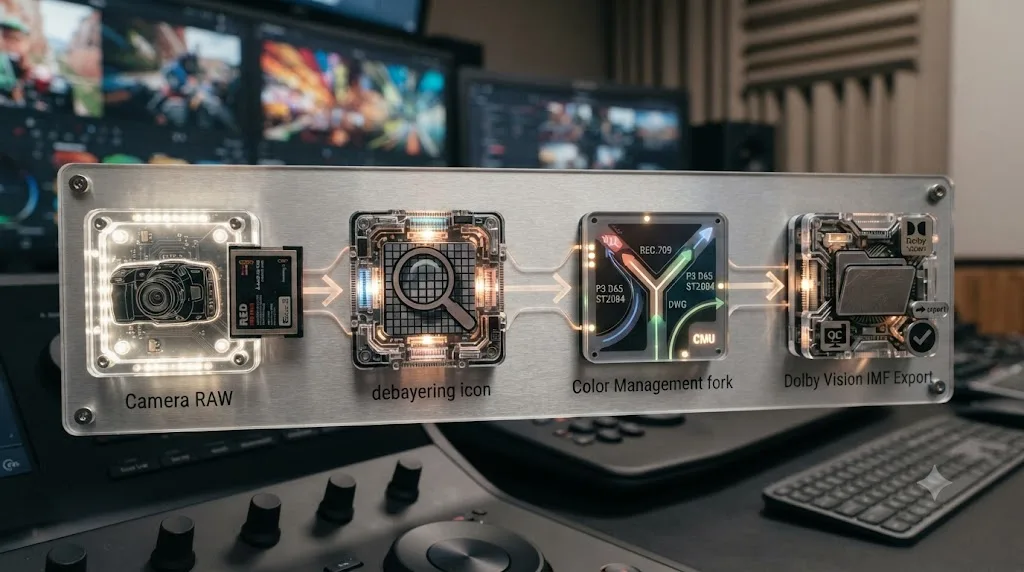
What does a full Dolby Vision grading session look like, step by step?
Every explainer describes Dolby Vision in the abstract. Here's the actual sequence, in the order Blackmagic's own documentation walks a colorist through it.
- Set your timeline color space to your grading gamut. Blackmagic's manual specifies choosing a setting like ARRI Log C, Cineon Film Log, or P3-D65 depending on your source footage and intended grading space (Blackmagic Design DaVinci Resolve manual).
- Define your output gamut. If "Use Separate Color Space and Gamma" is off, your Timeline Color Space also determines your output. If it's on, you set gamut and EOTF (electro-optical transfer function) separately in the Output Color Space menus.
- Match your project resolution to your delivery format. Timeline resolution and pixel aspect ratio need to match your final deliverable before you start grading, not after, since Dolby Vision analysis is tied to the frames as they exist at analysis time.
- Grade your HDR master on an actual HDR reference display. This is the version with the most dynamic range and widest color gamut, and it's the creative reference every other version gets derived from.
- Turn on HDR Mode where it matters. Right-clicking a node in the Node Editor and enabling "HDR Mode" adapts specific tools, notably Custom Curves and Soft Clip, for expanded dynamic range instead of standard-range assumptions.
- Run shot analysis. Clicking Analysis in the Dolby Vision palette examines every pixel of every frame in the current shot and stores a statistical analysis that gets sent to the iCMU or eCMU, which uses it to automatically convert the HDR signal down to SDR.
- Configure your trim pass target. You choose a "Target Display Output" and "Trim Controls For" setting, defaulting to "100-nit, BT.709, BT.1886, Full," a typical SDR deliverable, though other targets are available for additional trim passes.
- Trim shot by shot, or frame by frame, against the derived SDR version. You're watching the automatic Dolby algorithm's downconversion and adjusting it, when needed, so the SDR version still matches the creative intent of the original HDR grade, not fighting the algorithm from scratch.
That eight-step sequence is the entire creative loop. Everything else in this guide (export settings, profile choices, license tiers) sits around that loop rather than replacing any part of it.
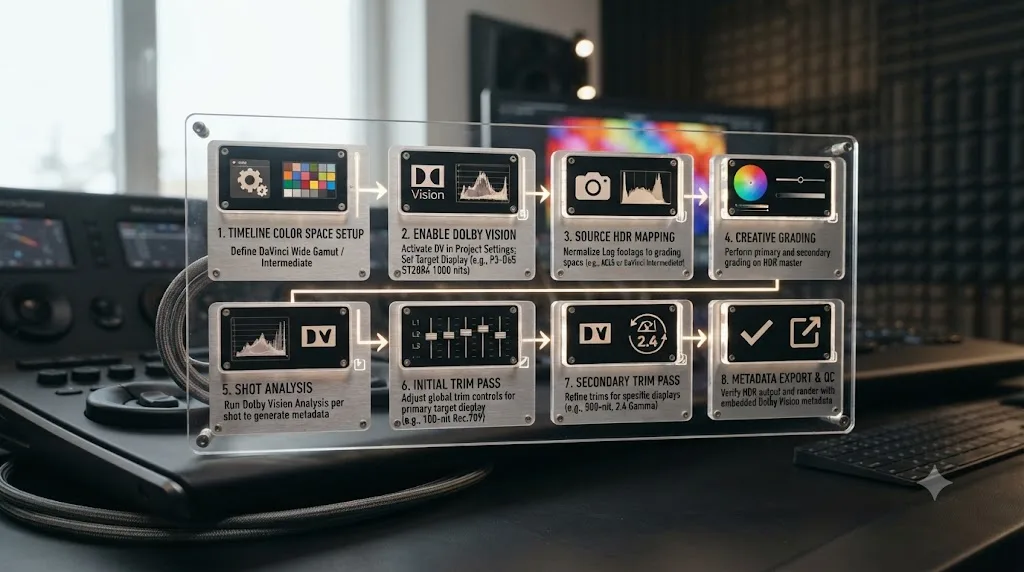
Worked example: taking a RAW camera package to a Dolby Vision deliverable
This isn't a benchmark or a claim about our own footage; it's a walkthrough of how the pieces we've already covered fit together on an actual job, so the settings above stop feeling abstract.
Say a client hands you a card of Blackmagic RAW or ProRes RAW footage from a short film shoot, and the deliverable spec asks for a Dolby Vision master for a streaming platform down the line. Before Dolby Vision even enters the picture, that camera RAW footage has to get debayered, the process that reconstructs a full-color image from the single-color-per-pixel sensor data a RAW format captures. If you're not sure how that process actually works or what settings control it inside Resolve, our explainer on what debayering is in DaVinci Resolve covers the mechanics, and our guide to whether DaVinci Resolve supports ProRes RAW footage covers the format-specific decoding requirements you'll hit first.
Once that footage is debayered and sitting on the timeline, the color management decision comes next, and it's not a Dolby Vision-specific choice. Whether you're working in DaVinci Wide Gamut, a camera-native color space, or full ACES, that decision determines the working space your Dolby Vision analysis will actually see. Our guide on Resolve Color Management vs. ACES is the place to make that call before you touch the Dolby Vision tab at all, since switching color management mid-project after analysis has already run means re-analyzing from scratch.
With color management settled and a grade in place on an HDR reference display, you're back to the eight-step loop from the previous section: set timeline and output color space to your HDR target, run shot analysis, then trim against a 100-nit SDR pass so the deliverable holds up on both a Dolby Vision panel and a plain SDR television. For a short film headed to a streamer, that typically means exporting a Dolby Vision IMF master with Kakadu JPEG 2000, at the resolution the platform's delivery spec actually asks for, rather than guessing at H.265 settings meant for consumer platforms.
The point of walking through it this way isn't that this exact sequence is the only correct one. It's that Dolby Vision itself is the last several steps of a chain that starts with your camera format and your color management choice, and a mismatch anywhere earlier in that chain shows up as a Dolby Vision problem later, even when Dolby Vision isn't actually where the mistake happened.
How do you grade Dolby Vision footage shot on an iPhone in DaVinci Resolve?
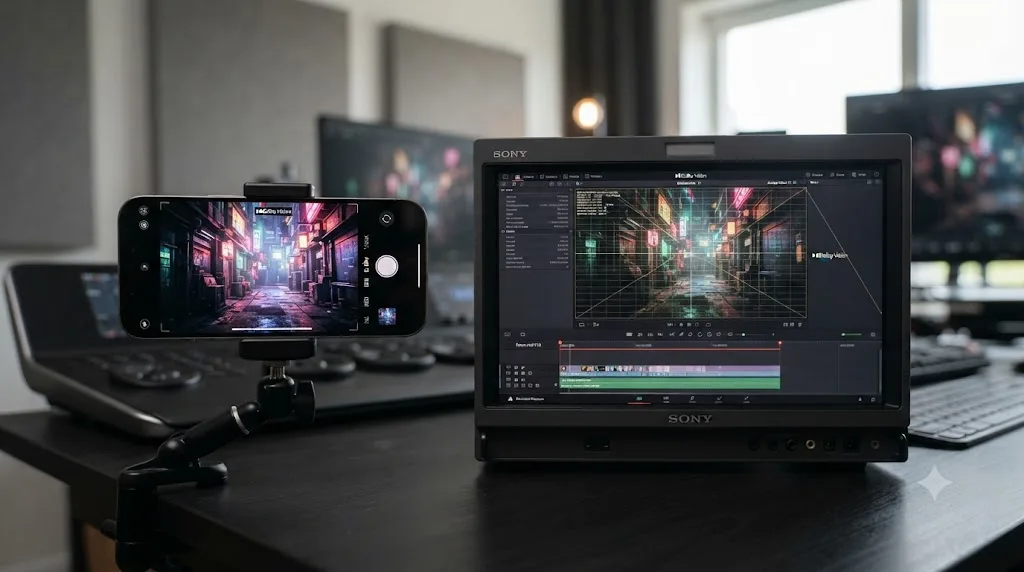
A client sends over an iPhone clip and asks why it looks flat and grey in your timeline until you touch it. Or a shoot mixes a cinema camera with a run-and-gun iPhone B-camera, and somebody asks whether that iPhone footage can carry the same Dolby Vision metadata as the A-camera. Both questions come from the same place: iPhone has shot native Dolby Vision HDR video since the iPhone 12, and it does it differently than a Dolby Vision master built in a grading suite.
Apple's own developer documentation for AVFoundation confirms the specifics: iPhone 12 and later record HDR video in Dolby Vision Profile 8.4, cross-compatibility ID 4, using an HEVC 10-bit codec (Apple Developer). Profile 8.4 is single-layer and backward-compatible with HLG, which is exactly why an iPhone Dolby Vision clip plays back looking like ordinary HDR footage on a device or app that has no idea what Dolby Vision even is. The Dolby Vision metadata rides alongside the HLG base layer instead of replacing it.
That single fact answers most of the confusion. An iPhone Dolby Vision clip opens and plays in DaVinci Resolve's free edition, because to the free edition it just looks like HLG HDR footage. What the free edition can't do is read the Dolby Vision metadata riding alongside that HLG signal, generate new metadata of its own, or export a file that keeps it. That part still needs Studio, same as any other Dolby Vision source.
Working with the clip in Studio is mechanically the same as the eight-step loop covered earlier: set your timeline color space to match the source, run Dolby Vision analysis on the shot, and trim against your SDR target the same way you would for footage from a cinema camera. Exporting back out as Profile 8.4 keeps you compatible with what the file already was, and it happens to match the exact requirement several platforms publish for their own uploads, which the next two sections cover in more detail.
The mixed-camera case is where it gets genuinely tricky. Profile 8.4 carries less metadata than Profile 5, Dolby's full-featured, single-layer format built on the ICtCp color space that a dedicated Dolby Vision mastering pass typically uses. Cut an iPhone Profile 8.4 clip next to a Profile 5 master on the same timeline, and you have two different Dolby Vision "dialects" sharing one deliverable. Resolve doesn't stop you from doing this, and for a lot of documentary and hybrid work it doesn't matter. But if a client's spec calls for a single consistent Dolby Vision profile across the whole piece, that's a conversation to have before you grade, not after you've already delivered.
| iPhone-shot Dolby Vision (Profile 8.4) | Studio-mastered Dolby Vision (Profile 5) | |
|---|---|---|
| Layer structure | Single-layer, HLG-backward-compatible | Single-layer, ICtCp color space |
| Metadata depth | Basic frame-by-frame tone-mapping | Full analysis and trim metadata |
| Plays as HDR without Dolby Vision-aware software | Yes, falls back to HLG | No, needs Dolby Vision-aware handling |
| Typical use | Consumer capture, run-and-gun B-camera | Deliberate Dolby Vision mastering pass |
(Sources: Apple Developer; The Daejeon Chronicles)
There's a second, unglamorous gotcha that shows up before Dolby Vision even enters the picture: signal range. Colorist Rodrigo Polo has documented that iPhone HDR video records in full range, 0 to 255, while DaVinci Resolve's default assumption for footage coming in through a standard media pipeline is legal range, 16 to 235 (Rodrigo Polo). Get that mismatch wrong and the fix isn't a Dolby Vision setting at all, it's checking your clip's data levels in the Camera Raw or Clip Attributes panel before you run any analysis. A range error baked into the base image follows the shot straight through Dolby Vision metadata generation and comes out wrong on the other end, no matter how carefully you grade after the fact.
How do you export a Dolby Vision file from DaVinci Resolve?
It depends entirely on where the file is going. Streaming platforms and social apps want a Dolby Vision-tagged H.265 file. Studios, networks, and distributors want a full IMF package.
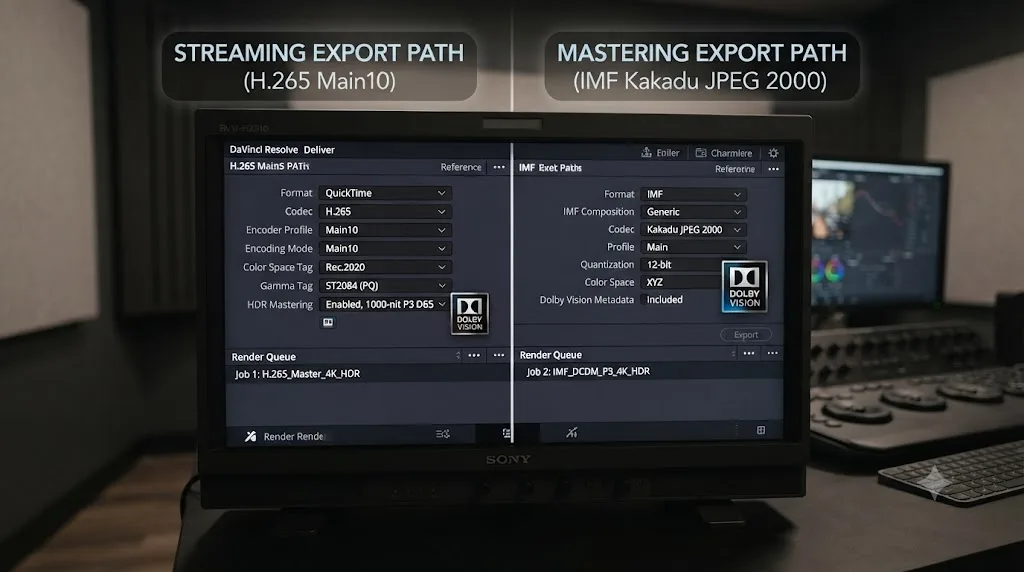
For an H.265 export aimed at general playback, set Format to QuickTime or MP4 and Codec to H.265, disable automatic quality and cap the bitrate manually (around 20,000 Kb/s is a commonly used ceiling), encode to Main10, and enable hardware acceleration if your system supports it. Set Data Levels to Auto and both the Color Space Tag and Gamma Tag to "Same as project" so the file carries the right metadata rather than a generic default (The Daejeon Chronicles).
For a professional master, the Deliver page supports direct IMF export with Dolby Vision metadata embedded in the package: set Format to IMF, Codec to Kakadu JPEG 2000, and Type to Dolby Vision, choosing the HD, 2K, UHD, or 4K variant that matches your deliverable resolution. Once you've mastered and delivered a single Dolby Vision IMF this way, a distributor like Netflix can derive Dolby Vision, HDR10, and SDR versions from that one master without you rendering separate files for each.
| Path | Format | Codec | Typical use |
|---|---|---|---|
| Consumer / streaming | QuickTime or MP4 | H.265, Main10 | Vimeo, Instagram (iOS), Dolby Vision-capable TV apps |
| Professional master | IMF | Kakadu JPEG 2000 | Studio and streamer delivery, distributor-derived SDR/HDR10 versions |
(Source: The Daejeon Chronicles)
If you're importing a finished Dolby Vision mezzanine file from a colorist or facility rather than exporting your own, one detail trips people up more than any other: make sure the Dolby Vision Version and Mastering Display selection in your Resolve project match the metadata already embedded in the file, or playback and re-export will look wrong even though nothing is actually broken (The Daejeon Chronicles).
Which of those platforms in the "consumer / streaming" row actually honor that Dolby Vision tag once you upload it, and which side effects a Netflix-bound IMF master carries, are two questions worth answering on their own. We cover both next.
What does Netflix actually require in a Dolby Vision IMF package?
The IMF export path covered above gets you a file DaVinci Resolve calls done. Whether Netflix calls it done is a separate, more demanding question, and it's worth understanding before you quote a client a Netflix-ready master off the strength of Resolve's Deliver page alone.
Netflix requires its Dolby Vision IMF deliveries to comply with the IMF Application 2E SMPTE standard, with its own validation covering asset maps, packing lists, and the other structural pieces that make up an IMF package, not just the video essence inside it (Netflix Partner Help Center). Within that package, Level 1 Dolby Vision metadata, the baseline, analysis-generated tone-mapping data, is mandatory. Level 2 and Level 8 metadata, the scene-by-scene and shot-by-shot trim adjustments a colorist makes by hand, are optional, layered on top only where the automatic Level 1 pass isn't good enough on its own.
Resolution is more restrictive than a lot of colorists expect. Native IMF delivery to Netflix only supports UHD, 3840x2160, and HD, 1920x1080. True 4K, 4096x2160, the DCI flavor familiar from theatrical work, requires prior written agreement with a Netflix Post or Asset Management representative before it's accepted at all (Netflix Partner Help Center). A master built at DCI 4K without that conversation first is a master that has to be reconformed later.
Rendering a Dolby Vision IMF from DaVinci Resolve and having Netflix accept that IMF are two different milestones, and only the second one involves Netflix at all. Every Netflix-bound package has to pass Netflix's own validation tool, called Photon, during upload. If Photon fails the package, the content doesn't move forward into Netflix's ingest pipeline, full stop; there's no partial credit for a technically-Dolby-Vision file that fails structural QC.
One more detail worth knowing if you're versioning between Dolby's two content-mapping algorithms: Netflix's own documentation confirms that a CMv4.0 master, the one that carries Level 1, Level 3, and Level 8 metadata, automatically generates backward-compatible CMv2.9 Level 2 trim values alongside it. In practice, that means a colorist grading fresh work for Netflix today doesn't need to manually build a separate CMv2.9-only master to satisfy older Dolby Vision-compliant devices; the newer metadata standard already carries the older one's fallback with it.
If Netflix isn't the deliverable, this section still matters, because most major streamers run some version of automated QC on Dolby Vision IMF packages before they accept them. The specifics differ by platform, since each streamer publishes and enforces its own delivery spec, but the underlying pattern doesn't: Resolve's Deliver page produces a technically valid Dolby Vision file, and a platform-specific QC gate decides whether that file is actually a deliverable. Confirm the receiving platform's current delivery spec before you lock a Dolby Vision mastering pass, not after.
None of this is a reason to avoid Dolby Vision mastering for a streamer-bound project. It's a reason to treat "export IMF from Resolve" and "deliver a Netflix-accepted Dolby Vision master" as two separate jobs. Resolve Studio handles the first one completely on its own. The second one usually involves a specialized delivery vendor or a Netflix-approved post house whose whole job is making sure a package clears Photon and Application 2E structure before it ever reaches Netflix's door.
Does a Dolby Vision export actually play on YouTube, Instagram, or Vimeo?
Plenty of explainers, including older versions of posts just like this one, say a Dolby Vision export "plays on YouTube." As of this writing, that claim doesn't hold up against YouTube's own documentation, and it's worth correcting before you promise a client a Dolby Vision upload that a platform might not actually honor.
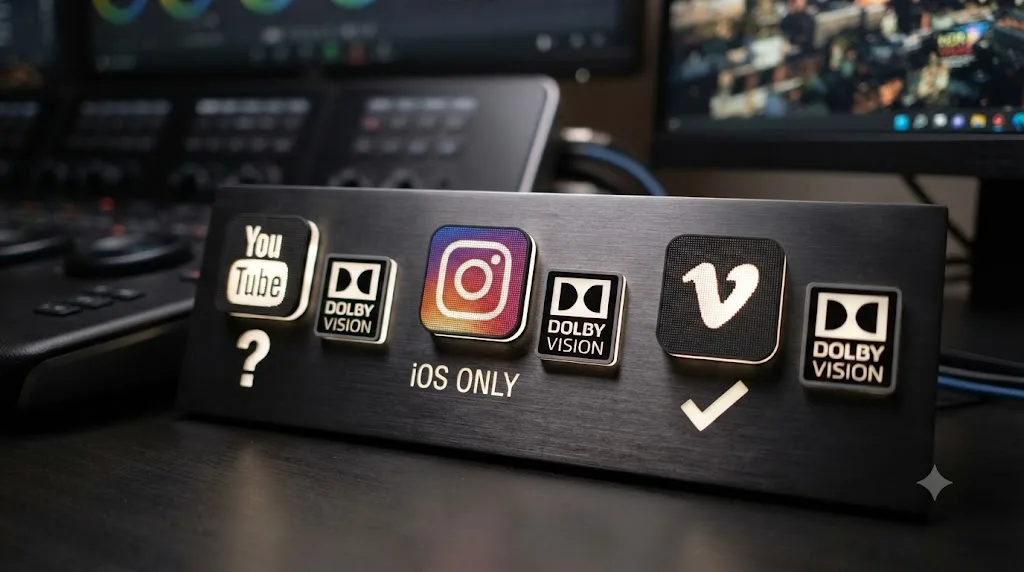
Start with YouTube. Google's current HDR upload help page recommends grading in Rec. 2020 with either the PQ or HLG transfer function, and lists VP9 Profile 2, AV1, and HEVC/H.265 as the recommended codecs for HDR uploads (YouTube Help). Dolby Vision isn't mentioned anywhere on that page. YouTube did roll out Dolby Vision upload and playback support back in 2018, which is where the claim that persists in older guides comes from, but the platform's own current documentation only confirms PQ and HLG, not Dolby Vision, as supported HDR delivery formats. Upload a Dolby Vision-tagged export there today and the safest assumption is that YouTube treats it as ordinary HDR, converting or falling back as needed, rather than reading and preserving the Dolby Vision metadata layer end to end.
Instagram is the newer, better-documented story. As of November 2025, Instagram for iOS became the first Meta app to preserve Dolby Vision metadata through upload, according to Meta's own engineering blog (Meta Engineering). There's a real nuance underneath that headline, though: Instagram doesn't carry your source file's Profile 8.4 HEVC metadata through unchanged. It re-encodes into what Meta describes as Dolby Vision carried within an AV1 container, closer to Dolby's Profile 10 structure than the Profile 8.4 an iPhone or a Resolve H.265 export produces natively. And for now, this only works on iOS; Meta's post describes broader rollout across its other apps as a future goal, without a confirmed date.
Vimeo has the longest track record of the three, and it's also the most exact about what it actually requires. Vimeo has supported Dolby Vision upload and playback since 2021, and its help center spells out the requirement in one specific sentence: Vimeo only accepts Dolby Vision Profile 8.4, delivered as HEVC 10-bit with an HLG base layer, and it explicitly rejects mixed Dolby Vision/HDR10+ files, capping output at 4K (Vimeo Help Center). Vimeo's help center also confirms what happens on devices that can't handle Dolby Vision at all: once Dolby Vision is detected, Vimeo automatically creates separate Dolby Vision and SDR renditions of the same upload, so a non-Dolby-Vision device falls back to plain SDR playback instead of showing a broken or washed-out image. That fallback behavior isn't unique to Vimeo; it's a consequence of how single-layer Dolby Vision profiles like 8.4 are designed in the first place, carrying a base layer any device can decode underneath the Dolby Vision metadata layer only some devices read.
Vimeo's own upload requirements, Profile 8.4, HEVC 10-bit, HLG base layer, match DaVinci Resolve's H.265 Main10 export path almost exactly, which is not something you'll find written the same way on YouTube's documentation. If a client's actual deliverable is "somewhere people can see this in Dolby Vision," Vimeo is the platform whose documentation and Resolve's export settings actually line up.
| Platform | Confirmed Dolby Vision upload support | Profile/encoding it expects | Availability |
|---|---|---|---|
| YouTube | Not documented in current official guidance | Not specified (PQ or HLG only, per official docs) | N/A |
| Yes, since November 2025 | Re-encoded to Profile 10 within AV1 | iOS only | |
| Vimeo | Yes, since 2021 | Profile 8.4, HEVC 10-bit, HLG base layer, capped at 4K | All accounts; playback needs a compatible Apple device |
(Sources: YouTube Help, Meta Engineering, Vimeo Help Center)
Practically, this means the question "will my Dolby Vision export actually show up as Dolby Vision" doesn't have one answer. It has three, and they change as fast as these platforms ship new features, so it's worth checking each platform's own current help documentation before a delivery, not relying on what a tutorial said two or three years ago, this one included.
What Dolby Vision profiles does DaVinci Resolve support?
Resolve doesn't restrict which Dolby Vision profile you deliver in; the profile you choose depends on where the file is going, not on a limitation in the software.
Profile 8.4 is a single-layer format, and it's the one most social media platforms that support Dolby Vision actually expect, generating frame-by-frame metadata during encoding. Profile 5.0 uses Dolby's ICtCp color space, retains the full analysis and trim metadata from your grade, and is compatible with the widest range of Dolby Vision playback devices (The Daejeon Chronicles).
There's a second, related decision underneath the profile choice: which content mapping algorithm version you're mastering with. CMv4.0 is Dolby's newer, more accurate algorithm, and Dolby recommends using it for new work even when the final delivery target still expects CMv2.9, since a CMv4.0 master carries CMv2.9 fallback metadata alongside it for broader device compatibility (Dolby Professional Support). In practice, this means most working colorists should default to CMv4.0 analysis and trims in Resolve today, and only worry about the CMv2.9 fallback when a specific delivery spec calls for it.
| Profile | Structure | Best fit |
|---|---|---|
| Profile 8.4 | Single-layer | Broad compatibility across social and streaming platforms |
| Profile 5.0 | ICtCp color space, retains full metadata | Widest device compatibility, full-featured masters |
(Source: The Daejeon Chronicles)
Does the free version of DaVinci Resolve support Dolby Vision?
No. This is the one place DaVinci Resolve's usually generous free edition draws a hard line: Dolby Vision, in any form, analysis, grading, or export, is exclusive to Studio.
The gap isn't partial. DaVinci Resolve free can grade HDR footage using PQ or HLG gamma curves, and it can even open a Dolby Vision-tagged file as ordinary video, but it can't read, generate, or export Dolby Vision metadata at all. If a colleague sends you a project with Dolby Vision analysis already applied and you open it in the free edition, that metadata simply won't be available to you.
| Feature | Free | Studio |
|---|---|---|
| Dolby Vision analysis and grading | No | Yes |
| HDR10+ grading and rendering | No | Yes |
| PQ / HLG HDR grading (non-Dolby Vision) | Yes | Yes |
| Professional HDR scopes (nit-value measurement) | No | Yes |
| Dolby Vision export (H.265 or IMF) | No | Yes |
(Source: Blackmagic Design)
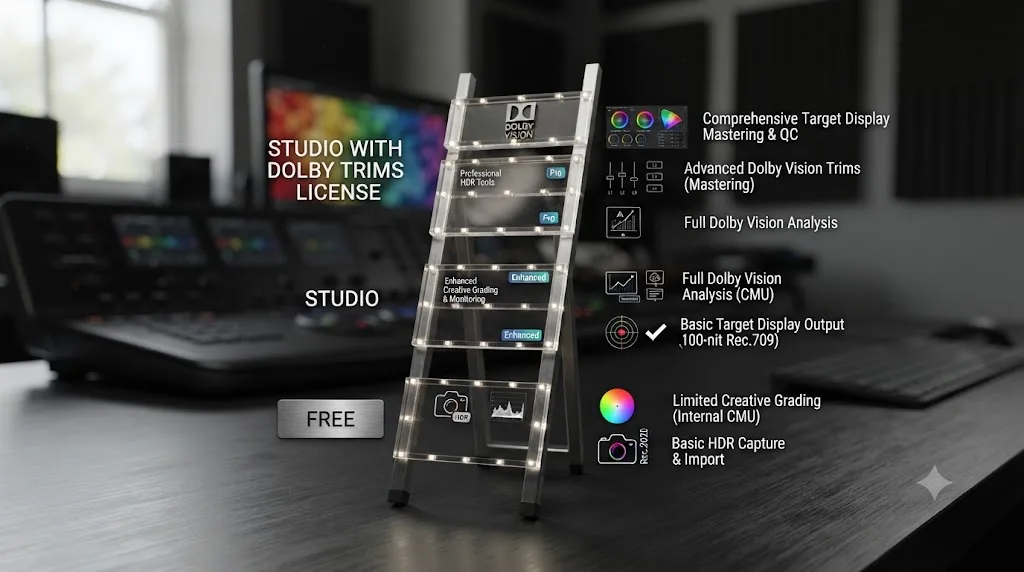
Advanced Dolby Vision trim controls in DaVinci Resolve Studio require a separate license from Dolby, on top of the $295 Studio purchase. So there are, in practice, three tiers here, not two: free (no Dolby Vision at all), Studio (analysis, grading, and basic export), and Studio plus the $1,000 Dolby Vision Trims License (frame-accurate, per-shot SDR trim passes for certified mastering).
What's new in DaVinci Resolve 21 for Dolby Vision workflows?
DaVinci Resolve 21, whose public beta shipped at NAB in April 2026 ahead of its final release later that year, added two changes that matter for Dolby Vision work, one small and one bigger than it first looks.
The small one: you can now reset Dolby Vision and HDR analysis directly from the three-dot option menu in the Color page's Dolby Vision and HDR tabs (Blackmagic Design, DaVinci Resolve 21 New Features Guide). That sounds minor until you've had to clear a botched analysis pass on a long-form project with hundreds of Dolby Vision shots. Before this, resetting analysis meant navigating a longer sequence of menu steps per clip or per shot; now it's a single option-menu command.
The bigger one: MultiMaster trim passes. Blackmagic describes it as letting colorists "grade a single timeline and generate separate HDR and SDR renders in one go, each with their own color-managed trim pass" (Newsshooter). Before Resolve 21, delivering both an HDR and an SDR version of the same project meant either running separate render passes with manually managed settings, or leaning entirely on Dolby's automatic trim to generate the SDR derivative with no manual override per master. MultiMaster trim collapses that into one grading pass with multiple, individually adjustable outputs, which is a direct answer to a workflow complaint that's followed Dolby Vision in Resolve for years.
DaVinci Resolve 21's other HDR-adjacent additions from the same release, Customizable HDR and Nit Scopes Ranges and several HDR Vivid improvements, sit alongside Dolby Vision in the Color page rather than replacing anything about how Dolby Vision itself works. If you're also delivering HDR Vivid or HDR10+ variants of the same master, our guide to Resolve Color Management vs. ACES covers the working color space decision that sits underneath all of these HDR formats.
Does it matter if you're grading Dolby Vision on a Mac or a Windows PC?
Mostly no, with one caveat worth knowing before you buy a monitor. Dolby Vision analysis, grading, and the iCMU itself are cross-platform: they run the same way in DaVinci Resolve Studio whether you're on macOS or Windows, since the tone-mapping happens on your GPU inside the application, not through an OS-level Dolby Vision pipeline.
The caveat sits on the display side. Blackmagic's own DaVinci Resolve 19 release notes listed "support for HDR displays on Windows" as a feature still marked "in progress" at that point in the software's development (ELEMENTS Media Storage). macOS, by contrast, has had mature built-in HDR display support for years through Apple's own display pipeline, which is part of why a lot of Dolby Vision-adjacent tutorials and tools, including TryUncle, target macOS specifically.
Practically, this means the software-side Dolby Vision toolchain in Resolve won't punish you for choosing Windows. What can trip you up is getting a genuinely HDR-capable monitor talking correctly to Windows' own display pipeline, versus plugging into a professional reference monitor over SDI, which sidesteps the OS's HDR handling entirely and is the more common setup in a facility anyway. If you're grading on a laptop or a consumer display rather than through SDI to a dedicated reference monitor, verify your OS's HDR output is actually engaged before you trust what you're seeing, on either platform.
Why is my Dolby Vision file playing back or exporting wrong?
Almost always, it traces back to a mismatch somewhere between your project's Dolby Vision settings and the footage's actual metadata, not a bug in Resolve itself.
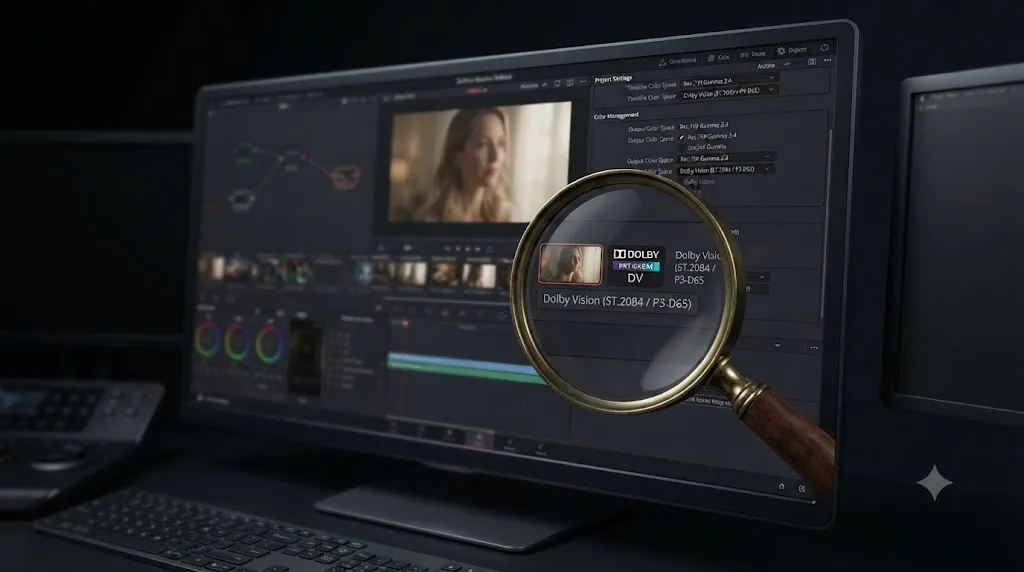
Start with the project settings that govern the whole timeline before you chase anything shot-by-shot. Output color space should be set to ST.2084 at your intended mastering nit level, timeline color space should be P3-D65 with ST.2084 gamma, and your video I/O settings should be running 4:4:4 at 12-bit, full range, progressive scan (Mixing Light). Any of those left at an SDR or default value will make a technically correct Dolby Vision export look wrong on playback.
If you're importing someone else's Dolby Vision master rather than grading from scratch, confirm the Dolby Vision Version and Mastering Display selection in your project matches what's embedded in the source file. A version mismatch here is one of the most common reasons a mezzanine file imports fine but plays back with visibly wrong contrast or color (The Daejeon Chronicles).
Three edge cases show up often enough to call out on their own. A mixed frame rate timeline, footage shot at two different frame rates cut onto one Dolby Vision project, can cause shot analysis to behave inconsistently at the cut points, since the analysis engine is working shot by shot and a frame rate change can land mid-analysis in a way a single-rate timeline never does. The safer path is conforming everything to one project frame rate before you run analysis, not after. Separately, if Resolve appears to hang or crash specifically during Dolby Vision analysis on a long timeline, that's frequently a GPU memory ceiling being hit rather than a corrupted project; breaking analysis into smaller reel-length chunks instead of running it across an entire feature in one pass tends to resolve it. A third edge case is specific to hybrid iPhone and cinema-camera shoots: cutting Profile 8.4 clips next to a Profile 5 master on one timeline doesn't break Resolve, but it does mean the two clip types carry different depths of Dolby Vision metadata, which can show up as a visible trim mismatch right at the cut point on a device that's picky about profile consistency. If shots around a cut look mismatched only in Dolby Vision playback and match fine on your grading monitor, check whether you've bridged two different Dolby Vision profiles at that edit point before assuming it's a color error.
A short troubleshooting pass, in order:
- Confirm you're running DaVinci Resolve Studio, not the free edition. The Dolby Vision tab simply won't be there otherwise, and no project setting fixes that.
- Check your output color space and timeline color space against ST.2084 and P3-D65 as described above.
- If you imported existing Dolby Vision metadata, verify the Version and Mastering Display match the source.
- If your timeline mixes frame rates, conform to a single rate before running shot analysis, not after.
- If analysis looks stale or incomplete after a late grading change, use the new option-menu reset in Resolve 21 instead of manually re-running the full pass.
- If analysis is crashing or hanging on a long timeline, try running it in smaller reel-length sections rather than the whole project at once.
- Re-check your export settings against the target, H.265 Main10 for streaming, IMF with Kakadu JPEG 2000 for a professional master, since the two paths use different codecs entirely.
- If you're delivering to a specific platform, re-check that platform's current Dolby Vision documentation before you lock the export. Requirements like resolution caps, accepted profiles, and even whether a platform preserves Dolby Vision metadata at all change without much notice, as the Netflix and platform sections above show.
If you've worked through that list and the Dolby Vision tab still looks grayed out or you can't tell which project setting is fighting you, that's the exact kind of stuck moment Uncle can help with directly in your own timeline while you sort it out.
Should you upgrade to DaVinci Resolve 21 specifically for Dolby Vision?
If you're already on Resolve 19 or 20 and Dolby Vision is a small, occasional part of your work, no, not urgently. If you're delivering both HDR and SDR versions of the same project regularly, yes, and the reason is MultiMaster trim, not the analysis reset.
For a colorist who grades one Dolby Vision master and calls it done, Resolve 21's changes are conveniences, not unlocks. The reset-analysis option menu command saves clicks; it doesn't let you do anything version 20 couldn't already do, just faster. The same iCMU, the same trim controls, the same export paths all existed before version 21.
For a colorist or facility regularly asked for both an HDR and an SDR deliverable from the same timeline, which is most streaming and broadcast work, MultiMaster trim is a real workflow change, not a convenience. Generating both renders from one graded pass instead of managing two separate render configurations by hand removes a specific, recurring source of mismatched grades between a project's HDR and SDR versions.
| Your situation | Upgrade priority |
|---|---|
| Occasional Dolby Vision work, one deliverable per project | Low; upgrade on your normal cycle |
| Regular HDR + SDR dual deliverables from one timeline | High; MultiMaster trim addresses this directly |
| Long-form projects with frequent re-analysis after late grading changes | Moderate; the option-menu reset saves real time here |
| No current Dolby Vision work | Not a Dolby Vision-driven reason to upgrade at all |
Either way, the underlying answer to "does DaVinci Resolve support Dolby Vision" doesn't change with the version number. It's supported the same way it has been since 2018; what changes release to release is how much friction sits between you and the grade.
The verdict on DaVinci Resolve and Dolby Vision
DaVinci Resolve supports Dolby Vision, has for seven years, and does it without requiring a broadcast facility's hardware budget for the vast majority of what solo colorists and small teams actually need to deliver. Own Studio, set your project's HDR color space correctly, and Resolve's built-in iCMU carries you through analysis, grading, and export for anything short of Dolby-certified theatrical mastering. The moment you do need that certification tier, the eCMU and Dolby license path is real, well-documented in principle even if its exact pricing isn't public, and separate from anything Resolve itself charges for.
Where people get tripped up isn't whether Resolve supports Dolby Vision. It's confusing the free edition's total lack of it with Studio's genuinely low barrier to entry, confusing an H.265 streaming export with an IMF theatrical master, assuming a Dolby Vision tag survives every platform's upload pipeline the same way, or budgeting for Studio's $295 without knowing the $1,000 Trims License sits on top of it for full artistic control. Get the version, the license tier, the export path, and the destination platform's actual requirements right for your specific deliverable, and Dolby Vision in Resolve is a lot less exotic than it looks from the outside.
Frequently asked questions
- Does DaVinci Resolve support Dolby Vision?
- Yes. DaVinci Resolve Studio has included native Dolby Vision grading and rendering since version 15, released in 2018. Studio ships with a GPU-accelerated Dolby Vision CMU (content mapping unit) and free grading controls built in, so you don't need external hardware to start. Every Resolve release since, including the 21.x line current as of July 2026, has kept and expanded that support. The free, non-Studio edition of DaVinci Resolve has never included Dolby Vision.
- Do I need DaVinci Resolve Studio to grade Dolby Vision?
- Yes, and there's no workaround. Dolby Vision analysis, grading, and export are gated entirely behind DaVinci Resolve Studio, a one-time $295 purchase with no subscription (Blackmagic Design). The free edition can open and grade HDR footage in PQ or HLG, but it has no Dolby Vision tools of any kind, not even to preview a Dolby Vision file someone else sent you. Basic analysis and grading come with that Studio purchase; the separate artistic trim controls that top studios and streamers require cost an additional one-time $1,000 Dolby Vision Trims License, sold directly by Dolby (Dolby).
- Do I need a hardware Content Mapping Unit (CMU) to grade Dolby Vision in Resolve?
- No, not to start. DaVinci Resolve Studio includes a built-in, GPU-accelerated internal CMU (iCMU) that previews Dolby Vision at different target display settings right on your SDI output, with no rack-mount hardware required. A physical external CMU (eCMU), sold through Dolby Authorized System Integrators under a separate license, only becomes necessary for broadcast or theatrical mastering that has to carry Dolby's full certification.
- How do I export a Dolby Vision file from DaVinci Resolve?
- Two different paths, for two different jobs. For a file that plays on Vimeo, Instagram (iOS only, and re-encoded on their end), or a Dolby Vision-capable TV app, render H.265 in a QuickTime or MP4 container, Main10 profile, with a capped bitrate and hardware acceleration on. YouTube's own current documentation only confirms PQ or HLG HDR, not Dolby Vision, so don't count on a Dolby Vision tag surviving a YouTube upload. For a professional master destined for a studio or streamer, use the Deliver page's IMF format with Kakadu JPEG 2000 as the codec and Dolby Vision selected as the Type, matched to your resolution.
- What's the difference between Dolby Vision Profile 5 and Profile 8.4?
- Profile 8.4 is a single-layer format built for broad compatibility. It's what iPhones shoot natively and what platforms like Vimeo require for upload, though not every platform keeps it as-is; Instagram, for one, re-encodes uploaded Dolby Vision into a different profile on its own AV1 pipeline. Profile 5.0 uses Dolby's ICtCp color space, retains the full analysis and trim metadata, and works across the widest range of Dolby Vision devices. Which one you export depends entirely on where the file is going, not on anything DaVinci Resolve restricts.
- How does Dolby Vision compare to HDR10 and HDR10+ in DaVinci Resolve?
- HDR10 uses static metadata set once for the whole file, while Dolby Vision and HDR10+ both use dynamic metadata that can change scene by scene or frame by frame for a more accurate image on compatible displays. Dolby Vision also masters at 12-bit color depth versus 10-bit for HDR10 and HDR10+, and it carries a per-device licensing fee that HDR10 and HDR10+ don't, which is part of why some TV brands support one format but not the other. In DaVinci Resolve, grading and exporting any of them, HDR10 metadata, HDR10+, or Dolby Vision, requires Studio; only basic PQ or HLG grading without professional metadata tools is available in the free edition.
- What's new in DaVinci Resolve 21 for Dolby Vision workflows?
- DaVinci Resolve 21, whose beta shipped in April 2026, added the ability to reset Dolby Vision and HDR analysis directly from the option menu in the Color page's Dolby Vision tab, instead of clearing and re-running a full shot analysis from scratch (Blackmagic Design, DaVinci Resolve 21 New Features Guide). It also added MultiMaster trim passes, which let a colorist grade one timeline and generate separate HDR and SDR renders in a single pass, each with its own color-managed trim (Newsshooter). Neither change is flashy, but both save real time on a timeline with hundreds of Dolby Vision shots and multiple deliverables.
- Why won't my Dolby Vision file play correctly after I export it?
- The most common cause is a mismatch between your project's Dolby Vision version and mastering display settings and the metadata actually embedded in the file, especially when you're importing a mezzanine file someone else graded. Check that the Dolby Vision Version and Mastering Display selection in your Resolve project match the source metadata before you re-export, and confirm your project's output color space is set to ST.2084 at the correct mastering nit level, not left on a default SDR setting.
Sources
- Blackmagic Design: DaVinci Resolve - Studio
- Blackmagic Design: DaVinci Resolve 21 New Features Guide (PDF)
- postPerspective: Blackmagic Releases DaVinci Resolve 15, with Integrated VFX and Motion Graphics
- TV Tech: Blackmagic Design Announces DaVinci Resolve 15
- Mixing Light: Getting To Know Dolby Vision Part 1, Terminology, Gear, and Workflow
- Mixing Light: Getting To Know Dolby Vision Part 3, Dolby Vision For Everyone! (Robbie Carman)
- The Daejeon Chronicles: How To Export A Dolby Vision Encoded File
- Dolby Professional Support: When Should I Use CM v2.9 or CM v4.0, and Can I Convert Between Them?
- Forasoft: The Complete Guide to HDR, HDR10, HDR10+, Dolby Vision, and HLG
- Logik Forums: Dolby Vision License Is Now $1,000
- ELEMENTS Media Storage: Examining New Features and Improvements in DaVinci Resolve 19
- AlternativeTo: DaVinci Resolve 20.3 Adds 32K Support, Improved Timeline Versioning and New Metadata Options
- COREMICRO: DaVinci Resolve 20 vs 19, Full Feature Comparison for Editors and Colorists
- Newsshooter: DaVinci Resolve 21 Final Release
- Blackmagic Design DaVinci Resolve Manual (mirrored via VFXPedia): Dolby Vision Grading Workflow
- Apple Developer: Incorporating HDR video with Dolby Vision into your apps (PDF)
- Vimeo Help Center: Upload HDR, HDR10+, and Dolby Vision videos
- Meta Engineering: Enhancing HDR on Instagram for iOS With Dolby Vision
- YouTube Help: Upload High Dynamic Range (HDR) videos
- Netflix Partner Help Center: Dolby Vision Metadata Overview
- Rodrigo Polo: iPhone HDR video in Resolve the right way
Learn by doing, not watching
Learn Resolve inside Resolve.
TryUncle watches your screen and points at the exact control when you ask. No tabs, no timestamps, no rewatching tutorials.
Download for MacKeep reading
 GuidesJul 29, 202637 min read
Does DaVinci Resolve Support ProRes RAW Footage?
Yes, since Resolve 20.2 (Sept 2025). Full platform table: macOS, Windows, Linux, free vs Studio, plus how it compares to Final Cut Pro and Premiere Pro.
 ComparisonsJul 12, 202630 min read
Resolve Color Management vs. ACES: Which Should You Use?
DaVinci Resolve Color Management and ACES both fix scene-referred color, but they solve different problems. Here's which one fits your project.
 GuidesJul 31, 202642 min read
How to Calibrate Your Monitor for DaVinci Resolve Color Grading
Calibrate your monitor for DaVinci Resolve with a hardware colorimeter, D65 white point, gamma 2.4, and Color Management settings that actually match it.