
Learn / DaVinci Resolveupdated for DaVinci Resolve 21.0.2 (July 2026)
DaVinci Resolve Fairlight Foley Workflow Tutorial
Quick answer
A DaVinci Resolve Fairlight foley workflow imports or records sound effects on the Fairlight page, syncs them to picture with Elastic Wave and frame-nudge shortcuts, then automates levels and pitch on a bus. The free Sound Library covers 500+ effects; DaVinci Resolve Studio's Foley Sampler ($295 one-time) adds live MIDI performance recording while you watch the edit.
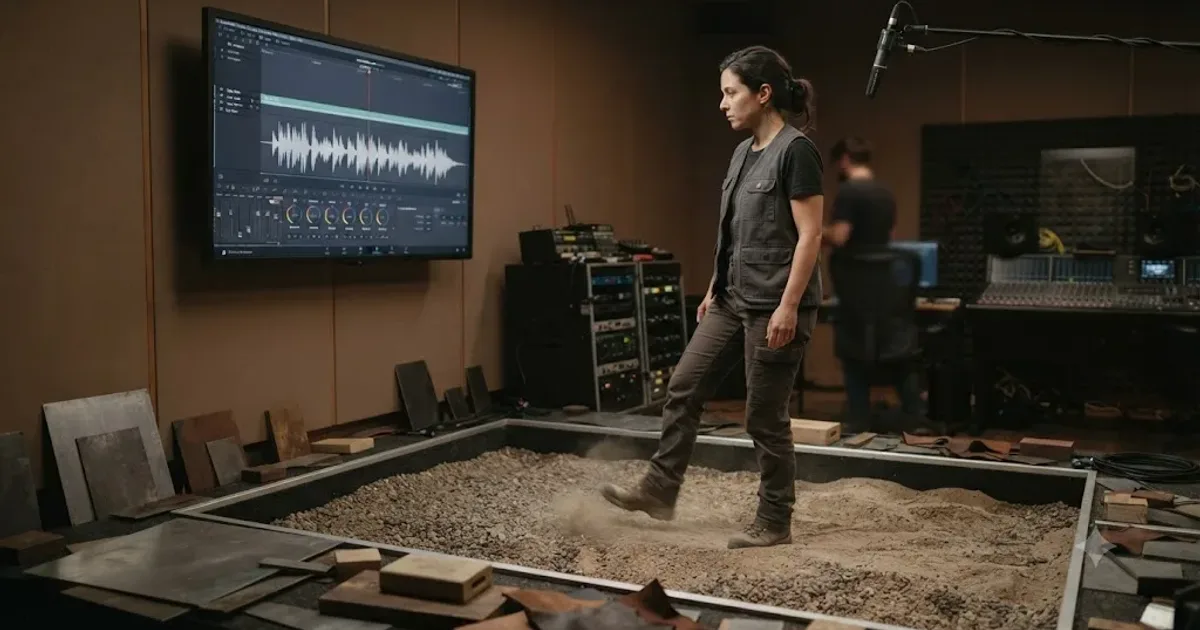
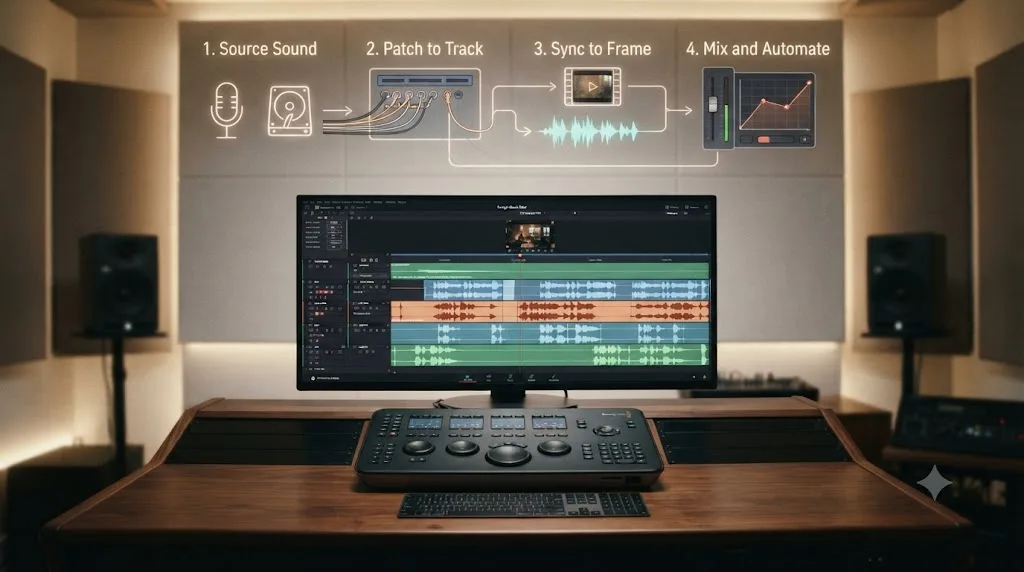
We've spent 7+ years cutting commercial video professionally, and foley is the piece of the Fairlight page that gets skipped most, right up until a client watches a silent hallway shot and asks why it feels dead. It's not a mysterious skill. It's four repeatable steps done in order: get the sound, put it on the frame, make it not sound like a loop, and mix it so it disappears into the scene instead of announcing itself. This guide walks through all four, entirely inside DaVinci Resolve's Fairlight page, using the free tools most people already have and the one Studio-only tool that's actually worth knowing about.
As of July 2026, everything below matches DaVinci Resolve 21.0.2. Foley in Fairlight has been stable across recent versions, so most of this holds for 21.0.x regardless of the exact patch you're running, with the version-specific notes called out where they matter.
What Is a Foley Workflow in DaVinci Resolve's Fairlight Page?
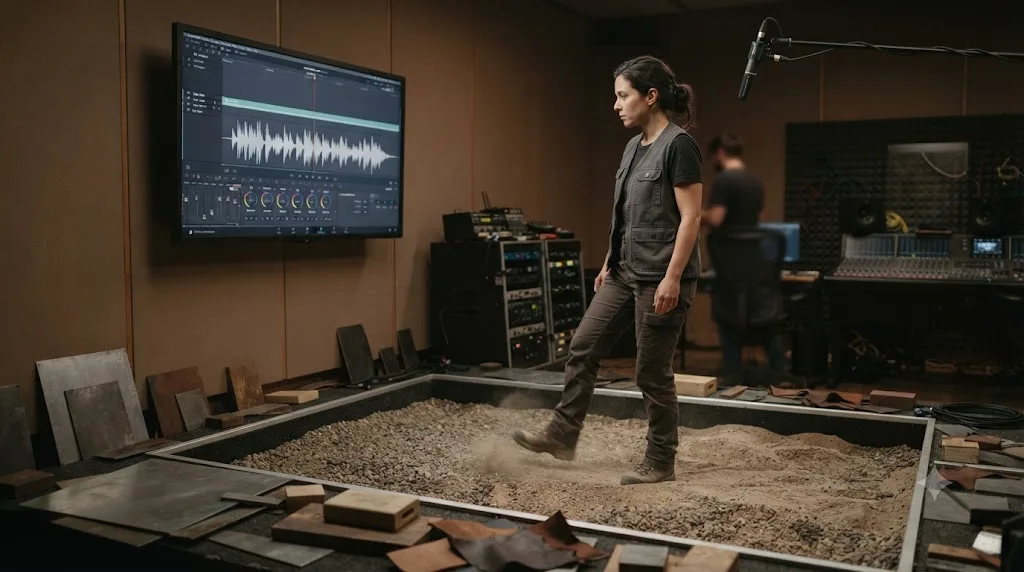
A foley workflow in Fairlight is the full path a sound effect travels from silence to a mixed, synced element on your timeline: source it, land it on a track, sync it to the exact frame that triggered it, vary it so repetition doesn't show, then mix and automate it against everything else. Fairlight is built to run every stage of that path inside the same project as your picture edit, which is the one structural advantage it has over recording foley in a separate app and importing the result later.
"Foley" specifically means everyday, human-scale sound: footsteps, clothing rustle, a door latch, a hand picking up a glass. Blackmagic Design's own Fairlight product page groups this under sound design, distinct from dialogue and music, and gives editors three separate paths to build it: install the Fairlight Sound Library and edit effects straight to the timeline, record original content directly to a track using the ADR tool's cue system, or use the Foley Sampler plugin to perform sounds live to picture (source: Blackmagic Design, Fairlight product page). This guide covers all three, in the order most editors actually need them.
A foley workflow is not one tool in Fairlight, it's a sequence: source the sound, patch and sync it to the frame, then mix it against dialogue and music. Skip the sequence and jump straight to mixing, and you'll spend an hour fighting a sound that was never actually placed on the right frame to begin with. The order in the sections below exists because each step depends on the one before it.
What Gear and Prep Do You Need Before a Foley Session?
You need a lot less than a dedicated foley stage assumes, and what you actually need depends on whether you're recording original foley or pulling from a library.
If you're recording your own foley:
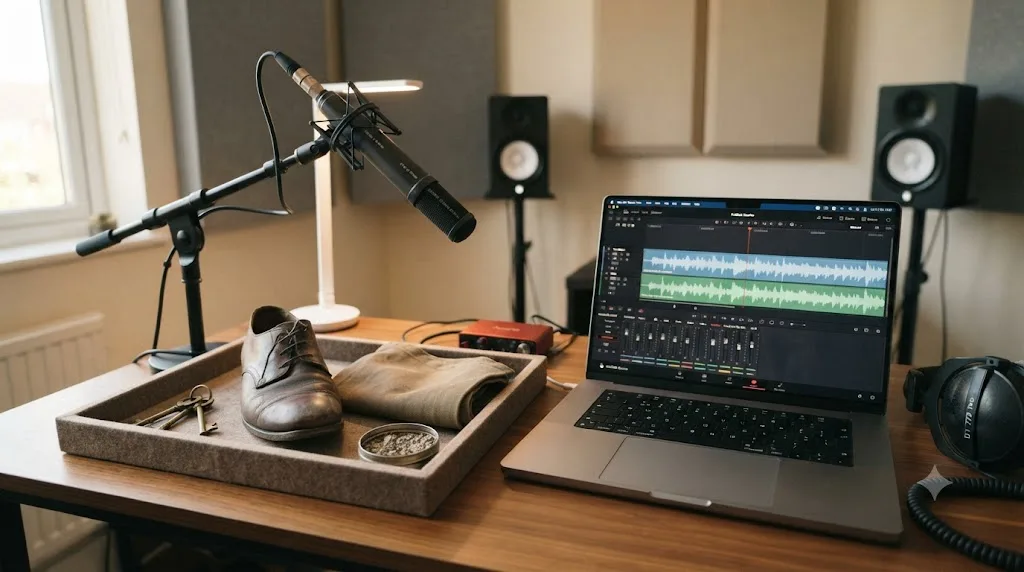
- A directional microphone. A cardioid dynamic or a shotgun mic close to the source rejects room noise better than an omnidirectional condenser picking up your whole space.
- Props and surfaces that match what's on screen. Real footsteps on gravel, wood, or tile read more convincingly than a generic "footstep" sample pulled from a library and pitched to fit, though the library version is faster and often good enough for background action.
- A quiet room, or at minimum a quiet moment. Foley recording is unforgiving about background hum, HVAC noise, and traffic, since these small sounds sit close in level to the foley itself and are far more audible in a foley recording than in dialogue, which usually has more masking energy around it.
- The picture you're syncing to, playable and scrubbable, since foley recorded without watching the actual action is a guess you'll have to fix in sync later anyway.
If you're pulling from the free Fairlight Sound Library instead:
- Nothing extra. Install the library once, and you're browsing and dragging effects straight to your timeline with no recording setup at all.
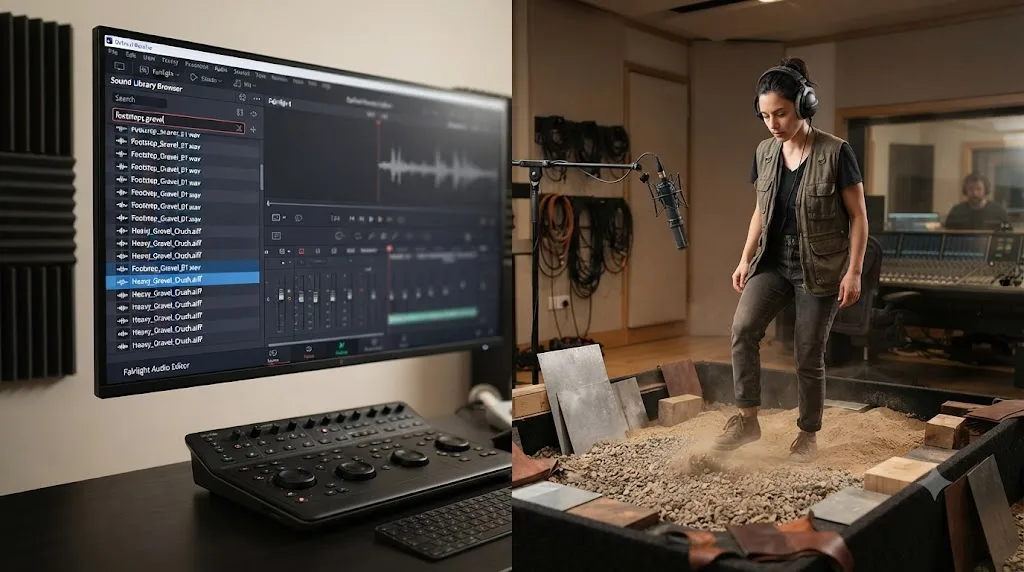
One recurring question in our editing community, which has grown past 100,000 members, is whether foley is even worth doing on a small project. For a quick social cut, often not, since the free Sound Library covers ordinary footsteps, doors, and handling sounds well enough that recording your own adds time without adding much realism. For a narrative short, a documentary reenactment, or anything where a specific prop or specific surface matters, recording your own is the difference between a scene that feels inhabited and one that feels like stock footage with a soundtrack.
Foley recording gear by scenario
| Scenario | Minimum gear | Where to record | Fastest path |
|---|---|---|---|
| Quick social or corporate cut | None | N/A | Fairlight Sound Library only |
| Documentary reenactment | Directional mic, matching props | Quiet room or the actual location | Library first, record only what's missing |
| Narrative short film | Directional mic, prop kit, foley pit or textured floor samples | Treated room, closet, or quiet studio space | Record specific actions, library for ambience and generic hits |
| Feature or episodic delivery | Professional foley stage, multiple mic setups, specialist artist | Dedicated foley stage | Outside the scope of this guide; Fairlight receives the delivered stems |
Free Fairlight Sound Library or Record Your Own Foley: Which Should You Use?
Most projects need both, and the right split is decided by what's on screen, not by a fixed rule.
Blackmagic Design bundles a free, optional download called the Fairlight Sound Library, and it's larger than most editors expect. No Film School's own coverage of its release describes it as delivering "over 500 royalty-free foley sounds," spanning "atmospheric ambient sounds to foley sounds such as foot steps, hits, effects, and more" (source: No Film School, Access 500+ Royalty Free Foley Effects with DaVinci Resolve 16.2). It installs once, catalogs into your project's Sound Library Browser, and from there "it's easy to search for sounds, preview what's been found in the list, and edit the one you like best into the Timeline," per the manual's own description of the browser panel (source: DaVinci Resolve Manual, Sound Library Browser).
That covers a genuinely large share of ordinary foley needs: generic footsteps on common surfaces, doors, handling sounds, ambient beds. A library sound is the right call whenever the exact sonic fingerprint of the object on screen doesn't matter to the story. A background character walking across a hallway in a wide shot rarely needs a custom-recorded footstep matched to their exact shoe on your exact studio floor. The audience isn't listening that closely, and a well-chosen library hit reads as real.
Recording your own earns its time cost in the opposite case: a hero prop, a specific surface the camera lingers on, or a sound the story leans on. If a character's boots on gravel are a plot beat, or a door's specific creak sets up a jump scare, a generic library match will sound close enough to bother an attentive viewer without quite matching what they saw. That gap is exactly what a foley artist in a professional context is paid to close, and it's worth closing yourself on a smaller project too, even with a simple mic and a tray of household props.
Library vs. custom-recorded foley decision table
| Situation | Use the library | Record your own |
|---|---|---|
| Generic background footsteps, common surface | Yes | Not worth the time |
| Hero prop the camera lingers on | No | Yes, match the exact prop |
| A sound tied to a plot beat or jump scare | No | Yes |
| Tight deadline, dozens of small cues | Yes | Only for the two or three that matter most |
| Documentary reenactment of a real event | Start here | Record anything the library can't match |
| No mic, no props, no time | Yes | N/A |
How Do You Set Up a Track and Patch a Mic for Foley Recording?
Recording your own foley in Fairlight uses the exact same track, patch, and arm sequence as recording any other live audio, since Fairlight doesn't have a separate "foley mode." If you've recorded a podcast or a voiceover in Fairlight before, this section will feel familiar.
Open the Fairlight page (the musical note icon in the page switcher), right-click a track header, and add a mono track. Foley from a single microphone is a mono source, the same logic that applies to any single-mic recording, so a mono track avoids wasting half a stereo track's channels on silence.
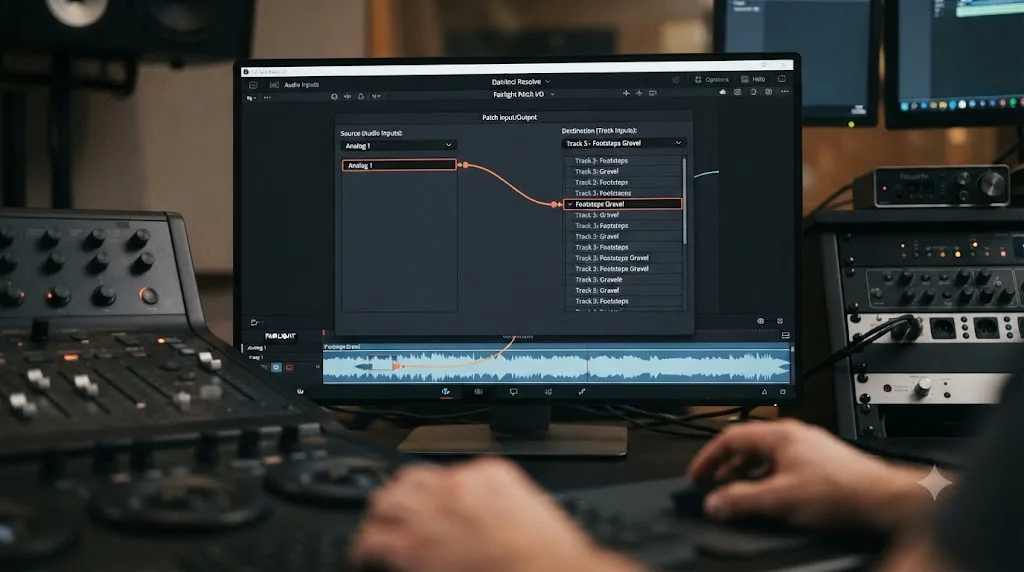
Next, connect your microphone to the track through Fairlight > Patch Input/Output. Click your hardware input on the left panel, click the matching track input on the right, and the connection is live. This step is separate from selecting your input device in Preferences, and it's the single most common reason a foley take arms but records nothing, since an unpatched track shows no signal no matter how correctly everything else is configured. Our full walkthrough of recording a podcast in DaVinci Resolve using Fairlight covers this exact patching step, along with sample rate matching and gain staging, in more detail than fits here, and every word of it applies to a foley track just as much as a voice track.
Arm the track with the red R button in its header, then do a level check before you record anything real: perform the action, watch the input meter, and keep peaks between roughly -12 and -6 dBFS. Foley is often quieter and more transient than speech, a single footstep or a door latch is a short spike rather than a sustained tone, so watch for occasional peaks rather than a steady average, and don't be afraid to record slightly hotter than you would for dialogue if your action is genuinely soft.
A greyed-out Arm button almost always means the track has no input patched, not a broken app. That single fact, true for foley exactly as it is for a podcast or a voiceover, resolves more first-session confusion than anything else in this section. Check the Patch Bay before you assume anything is broken.
Name your track by content, not by generic number: "Footsteps - Gravel," "Door Latch," "Cloth Rustle." A foley session with six unlabeled tracks is a session you'll be squinting at an hour later trying to remember which one was which surface.
How Do You Build a Foley Spotting List and Cue Sheet in DaVinci Resolve?
A spotting list is the plan you make before you record or drag in a single sound, and skipping it is how a foley session turns into an unstructured scramble through a scene you've already watched four times without writing anything down.
Watch your cut start to finish once with no other goal than noticing every moment that needs a sound: a footstep, a hand on a doorknob, fabric moving, an object set down. Every time you spot one, press M to drop a marker at that exact frame, then open the marker's properties and type a short, specific note: "footstep, left foot, enters frame," "keys hit table." Resolve's markers carry across every page, so a marker you place while spotting on the Edit page shows up in the same place when you switch to Fairlight to actually record or drag in the sound.
Color-coding your spotting markers, rather than leaving everything on the default blue, makes the list far easier to scan once you have a dozen or more cues. There's no built-in meaning to any marker color in DaVinci Resolve, so this is a convention you set yourself, and it's worth writing down. Our guide on DaVinci Resolve's timeline marker color meaning covers the full 16-color palette and how editors typically build a shared convention; one workable version for foley is a single color reserved for every foley cue, distinct from whatever colors you already use for picture notes or client feedback.
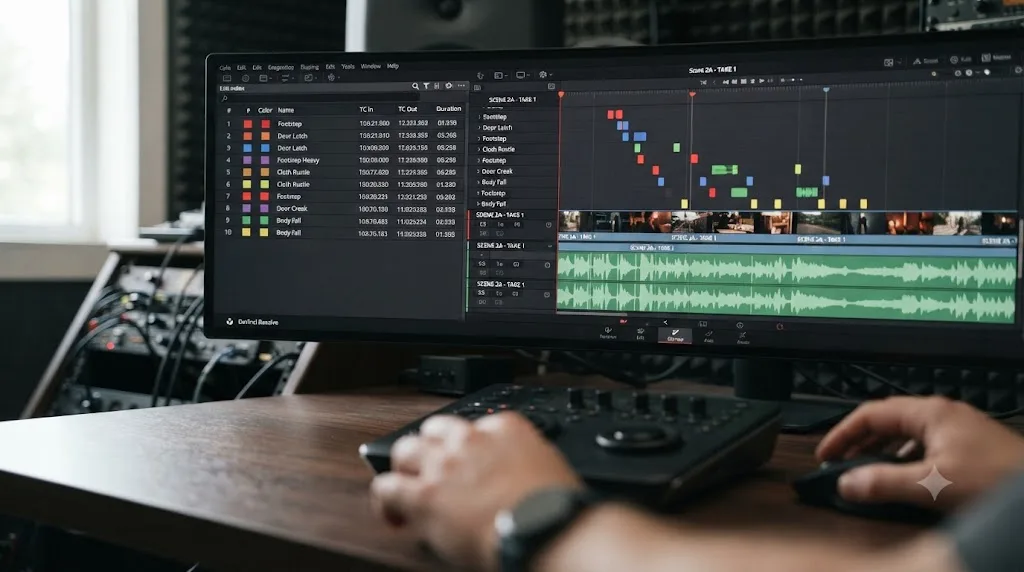
Once every cue is marked, open the Edit Index and filter to markers. This becomes your cue sheet: a scrollable, timecoded list of every sound you need, in order, each with your own note attached. Fairlight's dedicated ADR tool has an equivalent, more formal version of this same idea built specifically for dialogue replacement, with a List panel for creating and managing cues, complete with import and export to .csv, and a Record panel that runs the actual recording session against each cue in turn (source: DaVinci Resolve Manual, ADR). Foley doesn't need ADR's full cue infrastructure for most projects, a simple marker list does the job, but knowing the ADR panel exists is worth it if you're running a session formal enough to want take ratings and a proper cue database.
A cue you didn't write down is a cue you'll forget exists until you're three sound effects deep into a completely different scene. This is the least glamorous step in the whole workflow and the one most people skip, and it's also the fastest way to turn a foley pass from a guessing game into a checklist you can actually finish.
How Do You Record Foley Live to Picture on the Fairlight Page?
Recording foley "live to picture" means performing the action while watching the actual edit play back, not recording a sound in isolation and hoping it lines up later. This is the single biggest difference between foley that syncs cleanly on the first pass and foley that needs heavy retiming afterward.
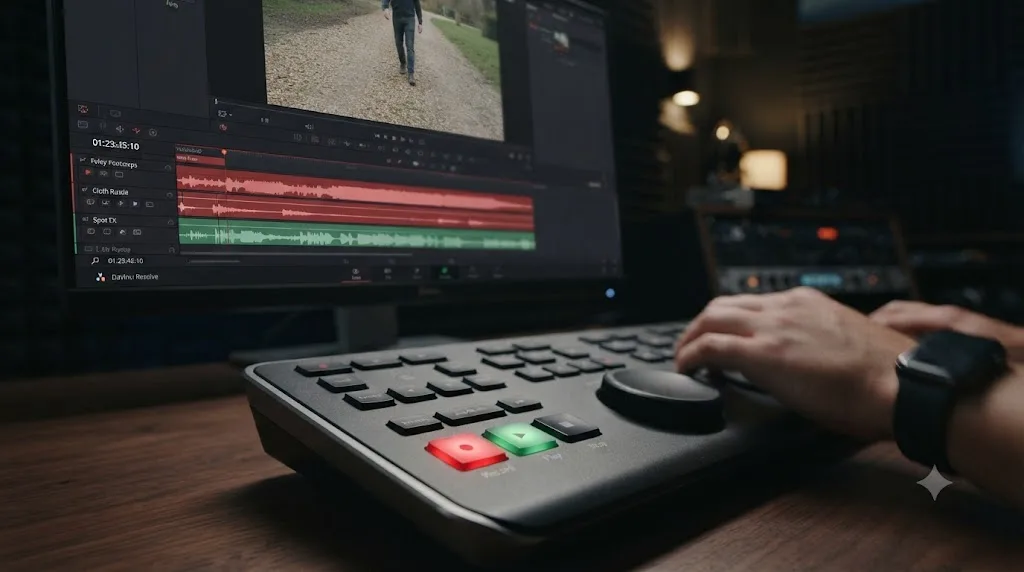
With your track patched, armed, and named, position the playhead a few seconds before your first cue and start playback. Perform the action in real time against the picture: step when the character steps, set the object down when it touches the surface on screen. Fairlight's transport supports real-time punch-in, meaning you can start recording mid-playback rather than only from a full stop, which matters if you need to redo one cue without restarting the entire pass (source: Blackmagic Design, Fairlight product page).
Record several takes of anything tricky. A footstep sequence timed against a specific actor's gait rarely lands perfectly on the first attempt, and it's far cheaper to record five takes of a five-second walk and pick the best one than to record one take and spend twenty minutes stretching it into place with Elastic Wave afterward.
Two habits make this pass faster:
- Loop the section you're performing against, if your cue is short and specific, rather than replaying the whole scene from the start every single time. Most of the actual performing time in a foley session goes to a handful of repeated attempts at the same few seconds, not to long unbroken takes.
- Watch the picture, not the meter, while you're actually performing. Check your levels once during a rehearsal pass before you start recording for real, then trust the setup and focus on timing during the take itself. Splitting attention between a meter and the screen is how you miss the exact frame you were trying to hit.
If your project also involves recording new dialogue lines to match, that's a related but separate job. Fairlight's dedicated ADR interface, with its Setup, List, and Record panels, "industry-standard audio beeps and visual cues," and take-rating system, is purpose-built for that specific task and worth using instead of trying to repurpose the general recording workflow described here (source: DaVinci Resolve Manual, ADR).
What Is the Foley Sampler, and How Do You Set It Up?
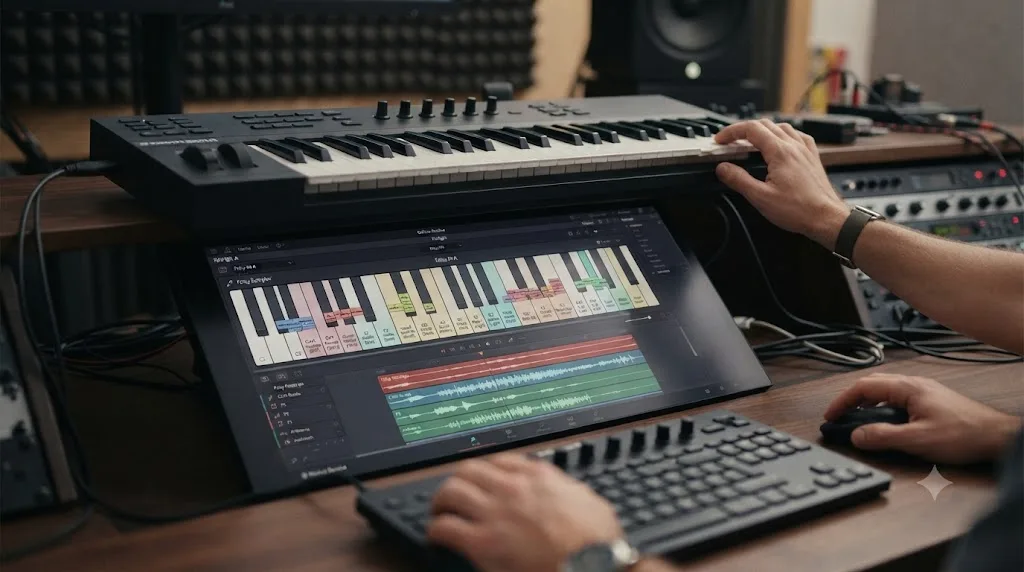
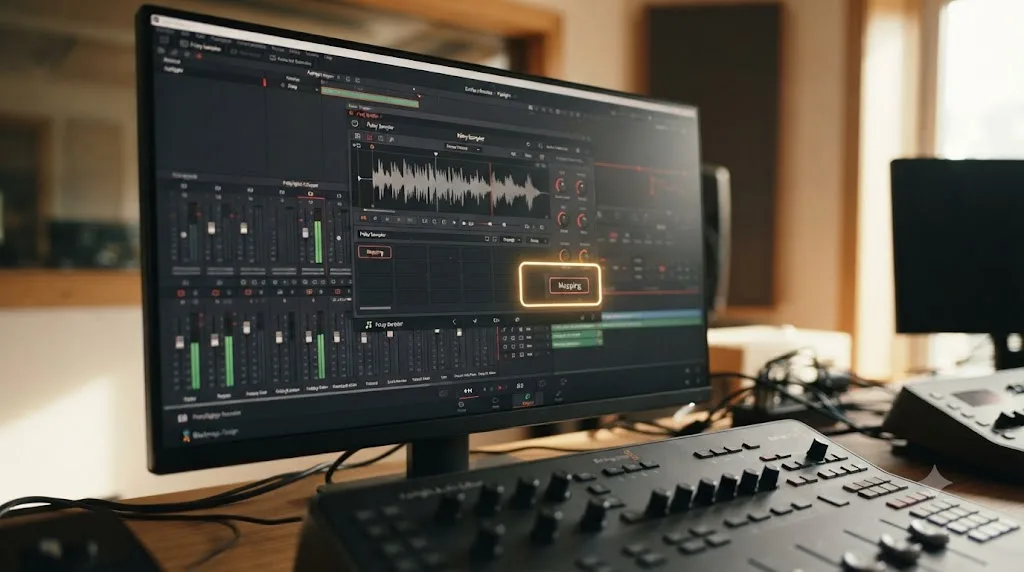
The Foley Sampler is a Fairlight FX plugin, included in DaVinci Resolve Studio, that loads sound effects onto a virtual keyboard so you can trigger and perform them in real time while watching picture, then record that performance directly to a track. DaVinci Resolve's own manual describes it plainly: it lets you "add sound effects that you want to play using a keyboard, pad, or other MIDI performance device," and the Studio-specific note is explicit, DaVinci Resolve Studio "includes the Fairlight FX Foley Sampler, which can be loaded with foley sounds such as footsteps or human movements, so you can perform these sounds in real time and record the result to another track as you watch performers walking or punching in the edit" (source: DaVinci Resolve Manual, Foley Sampler; DaVinci Resolve Manual, Recording VSTi Instruments).
The Foley Sampler doesn't record foley. It lets you perform foley, live, while watching the same picture the sound is supposed to serve. That distinction matters because it changes what the tool actually replaces: not a microphone, but a foley pit and the timing skill of hitting the right cue on the right frame by ear and by eye at the same time.
Setup, step by step:
- Create an audio track for the performance.
- Drag the Foley Sampler effect onto that track's header. DaVinci Resolve automatically patches the sampler to the track's input.
- Select your MIDI controller, a keyboard, a pad controller, or even a basic USB MIDI device, from the dropdown at the upper-right of the sampler interface.
- Load sounds three ways: drag audio files in from your file system, drag clips in directly from the Sound Library, or use the Option menu to pull from an attached drive.
- Loaded sounds map automatically "to the top four keys of your instrument, starting at C2" (source: DaVinci Resolve Manual, Foley Sampler).
- Use Split Sample to have Fairlight automatically divide one longer recording into pieces based on noise floor analysis, assigning each slice to its own key. This is specifically useful for a recorded walk cycle, splitting a run of footsteps into individually triggerable hits rather than one long unbroken clip.
- Use the Mapping button for manual control over which key range triggers which sound, with optional pitch tuning per sample if you want a slightly different pitch available on an adjacent key.
- Adjust dynamics in the Level panel and tone in the Filter panel, the sampler's built-in EQ.
- Arm the track with the R button, play back the picture, and perform the cues on your controller in real time. What you play records straight to the track like any other live take.
Randy Bobo, founder of the Wisconsin-based post house Independent Studios, described using exactly this workflow on a real project, a four-part documentary series about racecar driver Tazio Nuvolari that leaned heavily on archival footage with no usable original sound: "I used DaVinci Resolve Studio's foley sampler to produce various foley effects by assigning sounds to a keyboard and creating them in real time" (source: TV Technology, Sound Designer Posts "Magnificent Madness" Audio With DaVinci Resolve Studio). That's not a marketing description. It's a working sound designer describing the exact tool he reached for on a delivered project, and it's the clearest real-world confirmation available that this workflow holds up outside a tutorial environment.
If you don't have a MIDI controller, the Foley Sampler still works with on-screen buttons instead, at the cost of the tactile timing advantage that makes hitting a fast sequence of cues by feel easier than clicking a mouse in time with picture.
Foley Sampler quick reference
| Element | What it does |
|---|---|
| Track assignment | Drag the plugin onto a track header; auto-patches to that track's input |
| Sound loading | Drag from file system, drag from Sound Library, or use the Option menu |
| Default mapping | Loaded sounds map to the top four keys starting at C2 |
| Split Sample | Auto-divides a longer recording into per-key slices by noise floor analysis |
| Mapping button | Manual key range assignment (Low/High) plus optional pitch tuning |
| Level and Filter panels | Built-in dynamics and EQ per sample |
| Recording | Arm the track, play the picture, perform the cues, record the take |
| Availability | DaVinci Resolve Studio only |
How Do You Sync Foley to Picture Frame-Accurately?
A sound effect that isn't synced to the frame that triggered it isn't foley yet, it's just a sound effect sitting near the right part of the timeline. Getting it onto the exact frame is the step that separates foley that reads as diegetic from foley that reads as an add-on.
Coarse placement first. Drag your recorded take or library clip onto its track so it roughly overlaps the action. If you recorded live to picture in the section above, you're often already close, sometimes within a frame or two, since you were watching the same picture while performing.
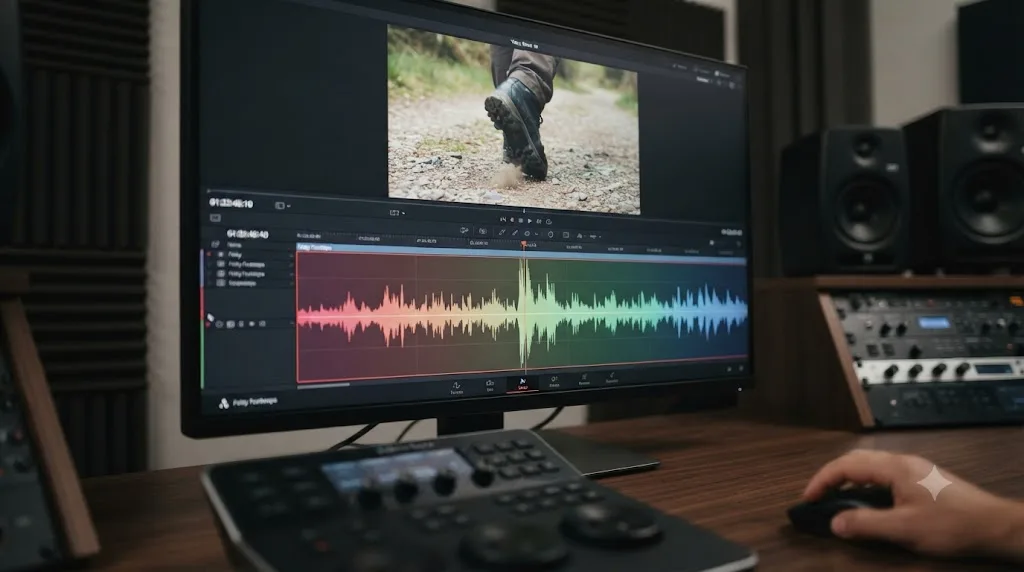
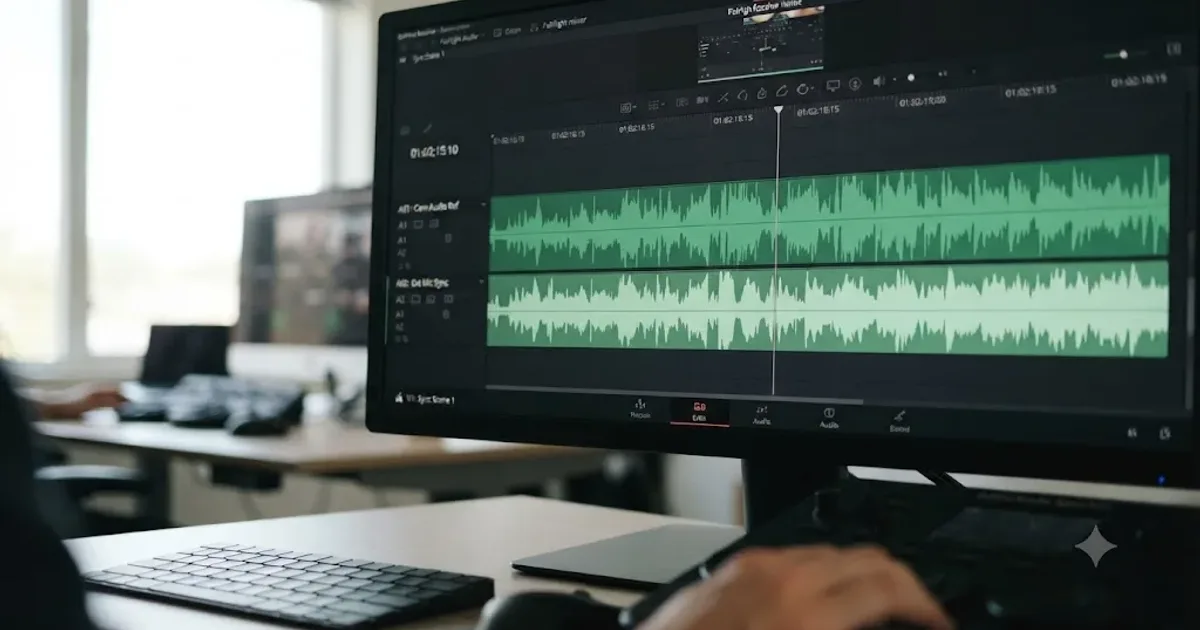
Fine placement with frame nudging. Select the clip and use the comma and period keys to move it one frame at a time, watching the waveform's attack, the sharp initial spike of a footstep or a door latch, against the video frame where the visual contact happens. VFXstudy's own walkthrough of Fairlight sync work describes exactly this combination: "Fairlight's audio and video scrollers to align the sound accurately" together with "keyboard shortcuts for nudging audio frame by frame, or even with sub-frame accuracy" (source: VFXstudy, Efficient Sound Sync). Match a prominent peak in the waveform, the loudest point of impact, to the exact frame of contact, not to the frame just before or just after it.
Elastic Wave for timing that's close but not exact. If your performed take has the right feel but drifts slightly out of time across a sequence, right-click the clip and enable Elastic Wave retiming. According to DaVinci Resolve's own manual, this is "a fast and easy keyframe-based way of dynamically retiming audio, squishing and stretching different parts of a waveform to subtly retime audio playback" while keeping pitch unchanged (source: DaVinci Resolve Manual, Elastic Wave Audio Retiming). Command-click anywhere on the clip to add a speed keyframe, then drag that keyframe left or right to stretch or compress the waveform on either side of it. This is the same tool the manual describes for matching a replacement dialogue take's timing to an original performance, and the mechanics transfer directly to matching a footstep sequence to an actor's actual gait.
Waveform ghosting for comparing against another event. After cutting or copying a clip, its waveform "ghosts" and follows your playhead, letting you visually line it up against another audio event on a different track before you commit to a paste position, useful when you're matching a new take against a reference recording or against dialogue that's already locked.
Foley sync methods, fastest to most precise
| Method | Best for | Precision |
|---|---|---|
| Drag to rough position | First pass, gets you within a second or two | Low |
| Comma/period frame nudge | Final placement once you're close | Frame-accurate |
| Elastic Wave keyframes | A performance whose timing drifts slightly across a sequence | Sub-frame, non-destructive to pitch |
| Waveform ghosting | Comparing a new take against an already-placed reference | Visual, precedes frame nudge |
A sound effect that isn't synced to the frame that triggered it isn't foley yet, it's just a sound effect sitting near the right part of the timeline. Everything covered elsewhere in this guide, sourcing, recording, layering, mixing, depends on this step landing correctly first. Our full guide to syncing audio in DaVinci Resolve covers Elastic Wave and Auto Sync Audio in more depth for the related but distinct case of syncing separately recorded production audio to picture, which shares the same underlying retiming tool but solves a different problem.
How Do You Layer and Vary Foley So It Doesn't Sound Repetitive?
Repetition is the fastest way to make an audience notice foley instead of simply feeling it, and it's a problem that shows up specifically when the same exact sample gets triggered more than once in a row.
Two identical footstep samples played back to back is the fastest way to make an audience notice they're listening to a sound effect instead of a scene. Human ears are extremely good at detecting exact repetition, far better than they are at detecting a slightly varied one, which is why the fix isn't finding a "better" sample, it's making sure no two consecutive triggers sound identical.
VFXstudy's own sound design walkthrough names the specific tools for this: pitch and volume variation. "Pitch and volume adjustments, in particular, can effectively disguise reused clips and create a more natural variation" between repeated hits of the same underlying sample (source: VFXstudy, Advanced Fairlight Sound Editing Tips: Integration of Foley Effects). Nudge the pitch a few cents up or down on alternating hits, and vary the level by a couple of decibels between repetitions. Neither change is something a viewer consciously notices; both together are enough to break the pattern recognition that flags exact repetition as artificial.
Layer, don't just repeat. Rather than triggering one footstep sample eight times for an eight-step walk, stack two or three different source recordings, or two or three different library clips of the same surface, and alternate or blend between them across the sequence. A walk built from three underlying variations, each itself pitch- and level-varied, reads as considerably more natural than one sample repeated eight times, even with pitch and level automation applied to that single sample.
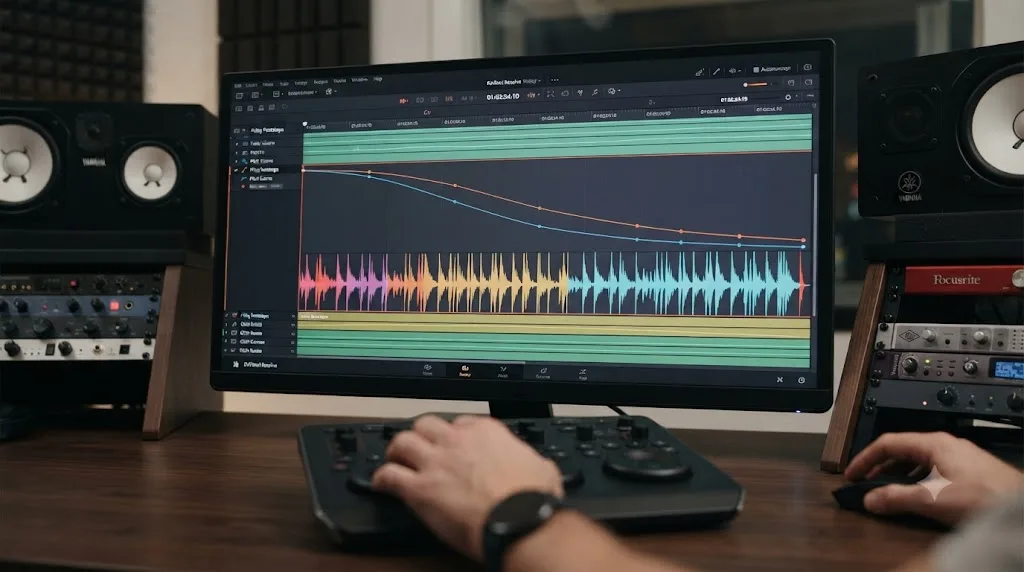
Automate movement across sustained action. VFXstudy's walkthrough on integrating foley effects describes exactly this for a character walking away from camera: fader automation reducing level "as the character becomes more distant," combined with pitch automation over time so "the footsteps subtly deepen as they recede" (source: VFXstudy, Advanced Fairlight Sound Editing Tips: Integration of Foley Effects). This isn't about hiding repetition anymore, it's using the same automation tools to sell physical movement the audience is watching happen on screen.
Layering and variation checklist
| Technique | What it fixes | Where to apply it |
|---|---|---|
| Pitch variation per hit | Exact-repeat detection | Every repeated trigger of the same underlying sample |
| Level variation per hit | Exact-repeat detection, mechanical feel | Every repeated trigger |
| Layer 2-3 source sounds | Monotony across a long sequence | Walk cycles, repeated handling sounds |
| Fader automation over distance | Selling movement toward or away from camera | Any sustained action changing distance from camera |
| Pitch automation over distance | Reinforcing distance perceptually, not just in level | Same shots as fader automation, applied together |
How Do You Mix, Automate, and Pan Foley Against Dialogue and Music?
Foley that's perfectly synced and perfectly varied can still fail at the mix stage if it fights dialogue and music for space instead of supporting the scene underneath them.
Set relative levels before you add any effects. Foley generally sits below dialogue and above or level with ambient bed, quiet enough that it registers as texture rather than a competing sound source, loud enough that removing it would leave the scene feeling hollow. There's no universal number here, since it depends entirely on your specific mix and delivery target, but the practical test is simple: mute the foley track and listen to the scene. If nothing feels obviously missing, it's likely too quiet to be doing its job. If it jumps out the moment you unmute it, it's too loud.
Pan for spatial placement, not just for correctness. A footstep from a character walking screen-left to screen-right should pan across roughly in time with that movement, and Fairlight's IntelliTrack AI panner, part of the Fairlight Audio Core, can drive that panner automatically from video tracking data rather than requiring you to keyframe it by hand for every shot (source: Coremicro, DaVinci Resolve 21: Every Major New Feature, Explained). For simpler scenes, manual pan automation on the Fairlight mixer strip does the same job without the tracking step.
Automate, don't just set and forget. The same fader and pitch automation covered in the layering section above applies at the mix level too: a door closing loudly in a wide shot might need to duck slightly under a line of dialogue that starts a beat later, and automating that dip in the few seconds around the overlap reads as intentional in a way a single static level never will.
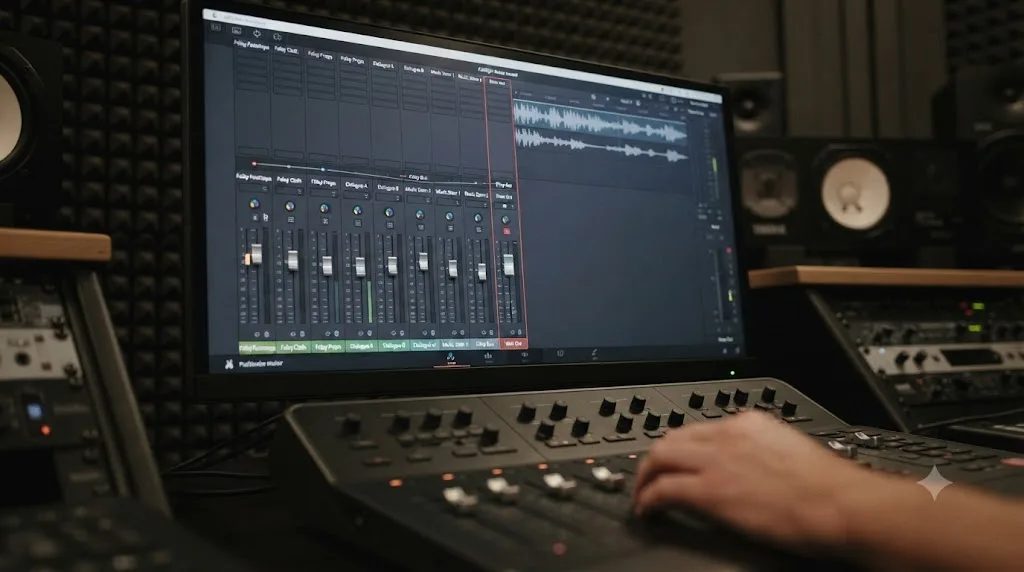
Route through a bus for group control. Send every foley track to a shared bus rather than mixing each one directly to the master. A bus lets you apply one compressor or EQ across your entire foley layer at once, and it means a single fader move can push all your foley up or down together when a scene needs it, rather than adjusting six individual track faders by hand.
Check it against dialogue specifically, not in isolation. A foley mix that sounds balanced when soloed against picture alone can bury a quiet line of dialogue the moment both play together. Always do a final pass with dialogue, foley, and music all playing, since that's the only context in which the actual final balance matters.
Why Does Your Foley Crackle, Drift, or Refuse to Sync?
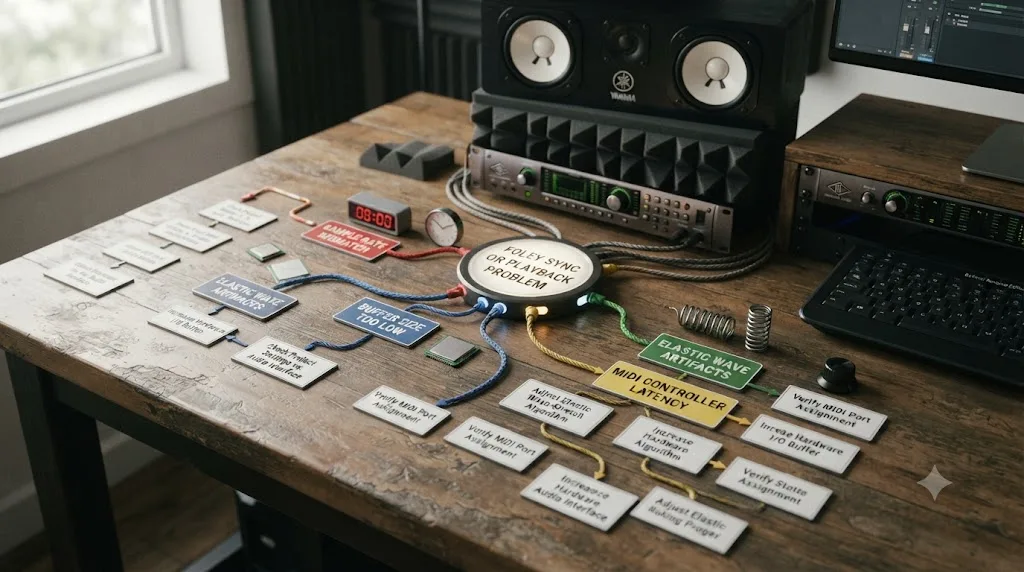
Most foley problems in Fairlight trace back to a small set of causes, and most of them aren't specific to foley at all, they're the same real-time audio issues that show up in any Fairlight recording or playback session.
Problem: your recorded foley crackles or pops during playback, but the exported file is clean.
This is a real-time playback pipeline issue, not a problem with the recording itself, and it's almost always a sample rate mismatch or an undersized playback buffer. Match your Fairlight project's Audio Sample Rate to your source recordings under Project Settings > Fairlight, and raise your Playback processing buffer size to 512 or 1024 samples in Preferences > System > Video and Audio I/O if the mismatch check comes back clean. Our full guide to DaVinci Resolve audio crackling and popping during playback walks through the complete diagnostic order, including ASIO driver setup on Windows and GPU overload checks, and every cause covered there applies to a foley session exactly as it applies to any other Fairlight audio.
Problem: your live-performed foley is close to the action but never quite lands.
This is usually a monitoring latency issue, not a performance timing issue. If your playback buffer is set high for stability, you're hearing a slightly delayed version of the picture relative to when Resolve is actually capturing your input, which throws off exactly the kind of tight-timing performance a footstep sequence demands. Try a lower buffer specifically during recording, and raise it back afterward for ordinary playback, since the tradeoff between latency and stability runs in opposite directions for those two tasks.
Problem: a footstep sequence recorded live drifts slightly out of sync across a long take.
This is what Elastic Wave was built for. Rather than re-recording the whole sequence, right-click the clip, enable Elastic Wave, and add keyframes at the points where the drift becomes noticeable, then nudge each section back into alignment without affecting the sections around it.
Problem: the Foley Sampler stops responding to your MIDI controller mid-session.
Check that your controller is still selected in the dropdown at the upper right of the sampler interface; a controller that disconnects and reconnects, common with USB MIDI devices, sometimes needs to be reselected rather than automatically reconnecting. If reselecting doesn't fix it, confirm Preferences > Control Panels > Use MIDI Audio Console is still enabled, since this setting occasionally resets after a Resolve update.
Problem: the Sound Library Browser shows no results for a search you know should return something.
Confirm you've actually installed the Fairlight Sound Library rather than only browsing an empty database, and check that your search term matches either a filename or a tag rather than a description word that isn't indexed. Searching a wildcard like *** displays every cataloged effect if you want to browse rather than search by keyword.
Foley troubleshooting quick reference
| Symptom | Most likely cause | Where to fix it |
|---|---|---|
| Playback crackle, clean export | Sample rate mismatch or buffer too small | Project Settings > Fairlight; Preferences > System > Audio I/O |
| Live performance never quite lands | Monitoring latency from a high buffer | Lower buffer during recording, raise it back after |
| Recorded take drifts across a long sequence | Timing inconsistency in the original performance | Elastic Wave keyframes on the affected clip |
| Foley Sampler ignores MIDI input | Controller disconnected or deselected | Reselect device; check Use MIDI Audio Console setting |
| Sound Library search returns nothing | Library not installed, or search term not indexed | Reinstall the library; search by filename, tag, or wildcard |
If you'd rather not cross-reference three preference panels against a checklist mid-session, that's exactly the kind of moment where an assistant that can see your actual project and point at the specific setting saves real time.
Do You Need DaVinci Resolve Studio for a Foley Workflow?
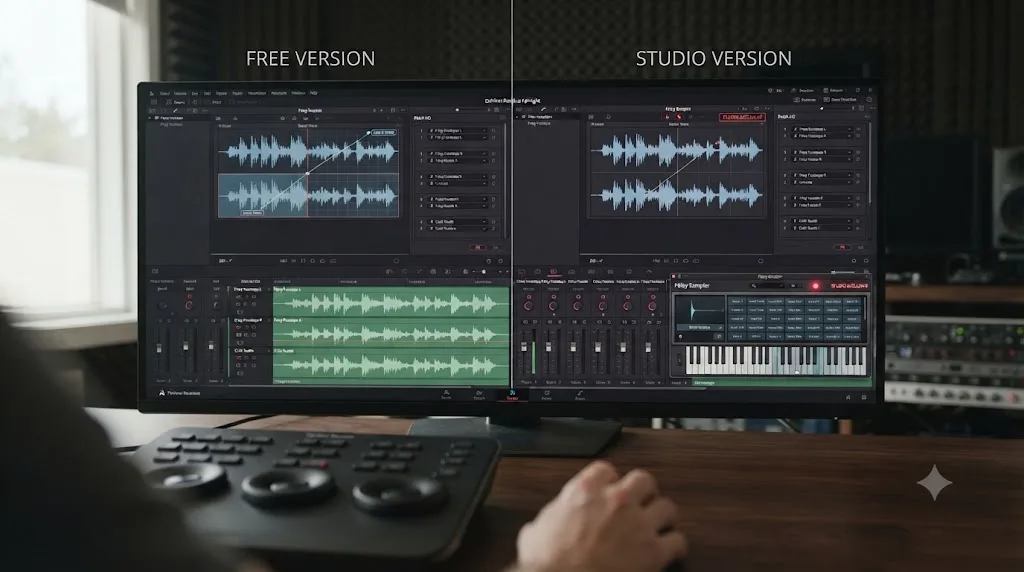
Not for most of it. Patching and recording live foley, the free Fairlight Sound Library and its Sound Library Browser, Elastic Wave sync, marker-based spotting lists, and full mixing and automation are all included in DaVinci Resolve's free version. Blackmagic Design's free version is a genuinely complete audio post tool for this workflow, not a stripped-down trial.
The one piece that's Studio-exclusive is the Foley Sampler plugin itself, confirmed directly by the manual's note that "DaVinci Resolve Studio includes the Fairlight FX Foley Sampler" (source: DaVinci Resolve Manual, Recording VSTi Instruments). DaVinci Resolve Studio costs $295 as a one-time purchase, with no subscription option, according to Blackmagic Design's own pricing page (source: Blackmagic Design, DaVinci Resolve pricing).
Whether that $295 is worth it for foley specifically depends entirely on how often you'd actually use live-performance recording rather than recording individual takes the ordinary way and syncing them afterward. If you're doing occasional foley for social content or short-form work, recording individual props and syncing with Elastic Wave, entirely in the free version, gets you the same finished result, just with more manual sync work per cue instead of a live performance pass. If you're doing foley regularly enough that performing a whole walk cycle in one take beats recording and syncing eight separate footstep clips by hand, the Foley Sampler earns its cost in time saved fairly quickly.
Studio's other Fairlight-relevant additions, Dolby Atmos and immersive mixing, additional Fairlight FX plugins, and AI-driven ADR cue automation, are real capabilities but outside the scope of an ordinary foley pass, so they shouldn't factor into this specific decision unless you already need them for other reasons.
How Does Fairlight's Foley Workflow Compare to Pro Tools, Reaper, and Dedicated Foley Tools?
Fairlight is a genuinely capable place to do foley, but it's honest to say it isn't the only serious option, and being clear about where it wins and where it doesn't will save you from building a workflow around the wrong assumption.
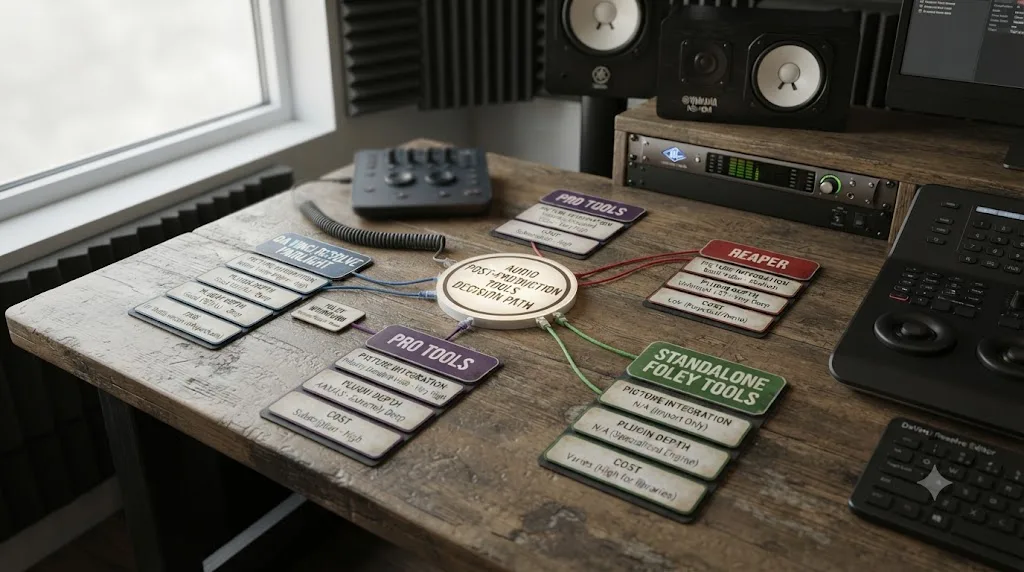
Pro Tools remains the industry-standard DAW on larger mixing stages, particularly for feature and episodic work where a dedicated foley artist records on a physical foley stage and delivers stems into a separate dialogue and effects mix built in Pro Tools by a specialist re-recording mixer. That workflow has decades of studio infrastructure, third-party plugin support, and specialist expertise built around it that Fairlight, as a tool built primarily for editors doing their own sound work inside their own edit, doesn't try to replace.
Reaper has a genuinely strong reputation among people mixing sound seriously on a budget, with a large third-party plugin ecosystem and a low one-time cost, but like Pro Tools it's audio-only, meaning your picture edit lives in a completely separate application and every exchange between the two costs you a round trip of exporting and importing.
Dedicated foley-performance tools and libraries, standalone sample players and specialist sound effect libraries built specifically for professional foley and sound design work, offer deeper, more specialized content and control than Fairlight's built-in Foley Sampler, at the cost of another application in your pipeline and, in many cases, a separate licensing cost on top of what you're already paying for your edit software.
Fairlight's actual advantage isn't recording quality or plugin depth, since Pro Tools and Reaper both meet or exceed it on both counts. Fairlight's advantage for foley has nothing to do with recording quality. It's that the picture you're syncing to is already open in the same project. For an editor who's also doing their own sound work, not handing off to a specialist, that's a real, practical advantage: no export, no relink, no separate project file to keep in sync with picture changes that happen after your sound pass is "done."
Where each tool actually wins
| Tool | Best for | Where it falls short for foley in an edit-driven workflow |
|---|---|---|
| DaVinci Resolve Fairlight | Foley recorded and mixed by the same editor cutting the picture | Smaller third-party plugin ecosystem than Pro Tools; Foley Sampler is Studio-only |
| Pro Tools | Feature and episodic mixing stages with a specialist foley artist and re-recording mixer | Picture editing happens in a separate application entirely |
| Reaper | Serious, low-cost audio-only mixing and sound design | Audio-only; no picture editing at all |
| Standalone foley/sample tools | Deep, specialized sound effect libraries and performance control | Another app in the pipeline; often a separate license cost |
The practical answer for most editors reading this guide: if you're already cutting picture in DaVinci Resolve and doing your own sound work rather than handing off to a specialist, Fairlight is the right place to do foley, since every advantage of staying in one project outweighs the plugin-ecosystem depth you'd gain by switching to a dedicated audio-only DAW for a job this size.
What's New for Foley and ADR in DaVinci Resolve 21?
DaVinci Resolve 21 didn't rebuild the Foley Sampler or the Sound Library Browser from scratch, both work as described throughout this guide, but it did add a few things that genuinely change how a foley session gets organized, particularly on longer or more complex projects.
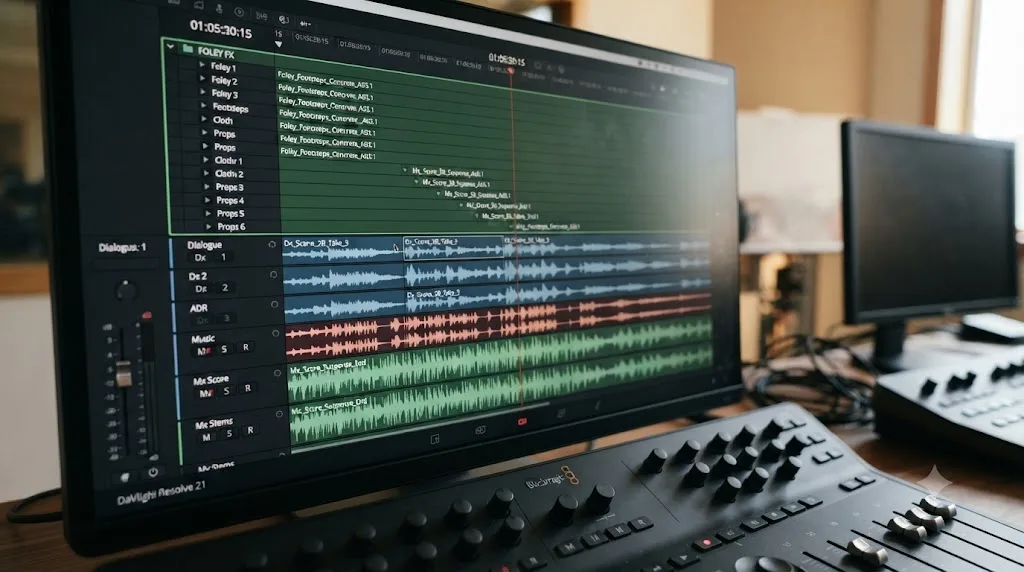
Fairlight now supports folder tracks, essentially track groups that collapse a set of related tracks into a single composite view (source: Coremicro, DaVinci Resolve 21: Every Major New Feature, Explained). For a foley session running six or eight separate tracks, footsteps, cloth, handling, ambience, each potentially split further by character or location, folder tracks mean you can group everything under one collapsed header instead of scrolling past a dozen individual track lanes every time you need to get to your dialogue or music tracks below them.
The Fairlight Audio Core supports up to 2,000 tracks with realtime effects, EQ, and dynamics processing, a scale increase that matters far more to feature-length sound design than to a typical foley pass, but it's worth knowing the ceiling exists if a project's foley layer grows unexpectedly large across a long-form documentary or series.
IntelliTrack AI panning, covered briefly in the mixing section above, lets DaVinci Resolve drive a Fairlight panner from video motion tracking data rather than requiring hand-keyframed pan automation for a moving subject, a genuinely useful addition for foley tied to on-screen movement across the frame.
None of these changes affect the core workflow covered in the rest of this guide, patching, recording, spotting, syncing, layering, and mixing all work identically to how they've worked across recent Resolve versions. They're additions to how you organize and scale a session, not changes to the fundamentals.
Is There an AI Tool That Helps While You Build a Foley Workflow in DaVinci Resolve?
Everything in this guide is a real, learnable sequence, but the first time through, it's easy to lose ten minutes hunting for one specific menu item, usually the Patch Bay, the Foley Sampler's Mapping button, or the Elastic Wave keyframe shortcut, while the actual creative work sits waiting.
TryUncle is the on-screen assistant for DaVinci Resolve on macOS. Ask in plain words and Uncle points at the exact control on your screen. If you're mid-session and can't remember where the Sound Library Browser lives, or whether Split Sample is under the Foley Sampler's Level panel or its Mapping panel, you can ask Uncle out loud or by typing, and it looks at your actual DaVinci Resolve window and points directly at the control you need, live, without pulling you out of Fairlight to search a video tutorial for the right timestamp.
Guided practice inside your own project beats pausing a tutorial to match its settings against yours. That's the real difference between an in-app tutor and a pre-recorded course: a course walks through the Foley Sampler in whatever order the instructor chose, regardless of whether that's the part you're actually stuck on, while Uncle answers the specific question you have, about the specific project you're recording foley for, at the moment you're actually stuck.
It's worth being direct about what TryUncle is and isn't. It doesn't record your foley, sync your takes, or build your spotting list; it's a paid macOS subscription at $39 a month, and it points and explains rather than acting on your project directly. If you're comparing it to tools built to automate parts of an edit, like CutAgent or PremiereCopilot, or to chat-style assistants that answer questions without seeing your actual screen, like Sottocut or heyeddie.ai, the distinction is the same one that applies across every workflow it touches: those tools do things to your timeline for you; Uncle teaches you to do them yourself, on your own project, which is the skill that carries over the next time you're building a foley pass with the app closed.
We've taught over 100,000 students through Udemy as an official Udemy Business Partner, and the pattern that shows up across every one of those courses is the same one this section describes: watching someone else demonstrate a workflow and actually being able to reproduce it on your own footage are two different skills, and the gap between them is where most people get stuck.
A Full Worked Example: Foley for a Two-Minute Short Film Scene
Here's how the full workflow plays out on an actual scene, rather than as a list of isolated steps.
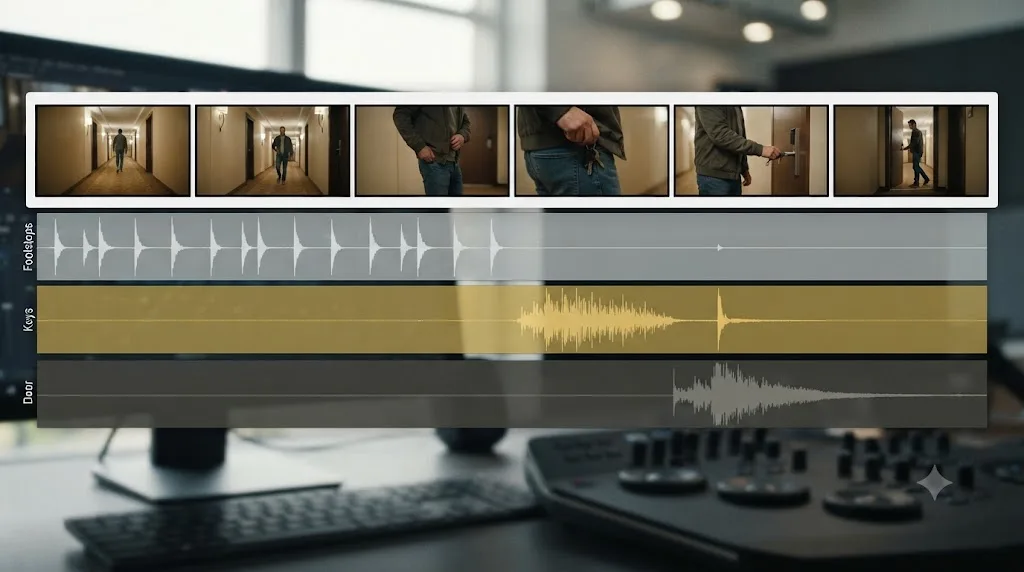
The scene: a two-minute short film sequence of a character walking down an empty apartment hallway at night, stopping at a door, fumbling with keys, and letting themselves in. The production audio has usable dialogue but no useful footsteps or key sounds, since the location's hard floor picked up too much room reflection on the boom mic to use directly.
1. Spotting. Watching the cut once, seven cues get marked: four footsteps on the approach, a pause, keys jingling, the key entering the lock, and the door opening. Each gets a marker with a short note, colored a single foley-specific color chosen for this project.
2. Sourcing. The footsteps are a plot-relevant detail, the character's shoes on a specific hard floor, so they're recorded fresh rather than pulled from the library: a mic close to a hard tile surface in a quiet room, walking in place in the same shoes as the actor wore. The keys and door sounds are generic enough that the free Fairlight Sound Library covers both convincingly.
3. Recording. The footsteps are performed live to picture using the Foley Sampler, loaded with three variations of the same recorded step, mapped across adjacent keys with Split Sample. Three takes are recorded against the looped approach shot; the second is the cleanest match to the actor's pace.
4. Syncing. The recorded take is close but not exact. Frame-nudging with comma and period keys tightens the first and last steps precisely; a slight drift in the middle two steps gets corrected with Elastic Wave, adding two keyframes and squeezing the waveform to match the actor's actual gait rather than re-recording.
5. Layering and variation. Each of the four footsteps is already slightly different, thanks to the three mapped variations, but a small manual pitch nudge on the second and fourth steps adds one more layer of distinction, since two of the four originally used the same underlying sample.
6. The keys and door. Library clips are dragged directly to the timeline, roughly placed, then frame-nudged to match the exact moment the key contacts the lock and the door swings open. No performance step needed here since these are single, discrete events rather than a repeated sequence.
7. Mixing. All six foley elements route to a single foley bus, sitting just under the level of the character's breathing on the dialogue track. A short fader automation dip ducks the door swing slightly under the first line of dialogue that follows it half a second later, so the sound doesn't step on the line.
Total time for the full pass, from spotting to a mixed foley layer: roughly forty-five minutes on a two-minute scene, the bulk of it spent on the footstep recording and sync rather than the simpler key and door cues, which is the typical ratio for a scene where footsteps are the dominant, plot-relevant sound and everything else is a quick library grab.
The Workflow, One Last Time
Spot every cue before you touch a single sound effect. Source each one, live-recorded for anything the story leans on, library-pulled for everything generic. Land it on its own track, sync it to the exact frame with frame nudging or Elastic Wave, vary it so no two repeats sound identical, then mix it against dialogue and music on a shared bus. That's the entire sequence underneath every section above, and none of it requires DaVinci Resolve Studio except the one step where you want to perform sounds live on a MIDI controller instead of recording and syncing them individually.
Foley is one of the few parts of a sound pass where doing it well and doing it quickly aren't in real tension, since most of the time cost lives in skipping the spotting list, not in the actual recording or syncing work. Build the list first, and the rest of this workflow moves faster than it looks like it should on paper.
If you get stuck on a specific control mid-session, whether that's the Foley Sampler's Mapping button or the exact menu path to Elastic Wave, Uncle can watch your actual Fairlight page and point at it directly while you keep working, instead of you pausing to hunt through a guide like this one for the right screenshot.
Frequently asked questions
- What is a foley workflow in DaVinci Resolve's Fairlight page?
- It's the sequence of steps that turns a silent picture into one with believable everyday sound: sourcing a sound effect (recorded live or pulled from a library), patching or dragging it onto a Fairlight track, syncing it frame-accurately to the action with Elastic Wave, then mixing and automating it against dialogue and music. Fairlight handles every stage of that sequence inside the same project you're already editing in.
- Do I need DaVinci Resolve Studio to do foley in Fairlight?
- Not for most of the workflow. Patching, recording, the Sound Library Browser, the free Fairlight Sound Library, Elastic Wave syncing, automation, and mixing are all in the free version. The one foley-specific tool that's Studio-only is the Foley Sampler plugin, which lets you perform sounds live on a MIDI keyboard or pad while watching picture, according to DaVinci Resolve's own manual. Everything else in this guide works identically in both versions.
- What is the Foley Sampler and how does it work?
- It's a Fairlight FX plugin, included in DaVinci Resolve Studio, that loads sound effects and maps them to keys on a MIDI keyboard or pads on a MIDI controller so you can trigger them in real time while the picture plays, then record that performance straight to a track. Sound designer Randy Bobo, founder of Independent Studios, described using it directly: 'I used DaVinci Resolve Studio's foley sampler to produce various foley effects by assigning sounds to a keyboard and creating them in real time.'
- Where do I get free foley sound effects for DaVinci Resolve?
- Blackmagic Design publishes the Fairlight Sound Library, a free, royalty-free collection described by No Film School as containing 'over 500 royalty-free foley sounds' spanning footsteps, hits, ambience, and general effects. Install it, open the Sound Library Browser on the Fairlight page, search by tag or filename, audition results in place, and edit them straight to your timeline.
- How do I sync foley sound effects to picture frame-accurately in Fairlight?
- Drop the sound roughly into place on its own track, then zoom in and use the comma and period keys to nudge it a frame at a time until the attack of the sound lands on the frame where the action happens. For a performance that's close but not quite matching, right-click the clip and apply Elastic Wave retiming, then Command-click to add keyframes and stretch or squeeze the waveform to fit, without changing its pitch.
- Is Fairlight as good as Pro Tools for foley work?
- For a solo editor or a small team cutting foley into their own project, Fairlight is genuinely capable and has one real advantage: your foley lands directly in the same project as your picture edit, with no file exchange step. Pro Tools remains the industry-standard DAW on larger feature and episodic mixing stages, with a deeper third-party plugin ecosystem and dedicated Foley-stage integrations that Fairlight doesn't try to match. Neither is universally 'better'; they solve different-sized jobs.
- How do I stop my foley sounds from sounding repetitive?
- Never reuse the exact same sample back to back. Pitch-shift and level-vary each repetition slightly, per vfxstudy's own sound design walkthrough, since 'pitch and volume adjustments, in particular, can effectively disguise reused clips and create a more natural variation.' Layer two or three source sounds per cue instead of one, and automate a slow pitch or level drift across a sustained action like a walk cycle so it reads as movement, not a loop.
- Is there an app that helps while I'm building a foley workflow in DaVinci Resolve?
- Yes. TryUncle is a paid macOS app whose assistant, Uncle, watches your DaVinci Resolve screen and points at the exact control, whether that's the Patch Bay, the Foley Sampler's Mapping button, or the Elastic Wave keyframe tool, live, on your actual project. It doesn't record, sync, or mix foley for you. It's a tutor, not an automation tool.
Sources
- DaVinci Resolve - Fairlight (Blackmagic Design product page)
- DaVinci Resolve Manual: Foley Sampler (Blackmagic Design, mirrored)
- DaVinci Resolve Manual: Sound Library Browser (Blackmagic Design, mirrored)
- DaVinci Resolve Manual: ADR (Blackmagic Design, mirrored)
- DaVinci Resolve Manual: Recording VSTi Instruments (Blackmagic Design, mirrored)
- DaVinci Resolve Manual: Elastic Wave Audio Retiming (Blackmagic Design, mirrored)
- DaVinci Resolve Manual: Video & Audio I/O (Blackmagic Design, mirrored)
- DaVinci Resolve Manual: Timeline Sample Rate (Blackmagic Design, mirrored)
- Access 500+ Royalty Free Foley Effects (and More) with DaVinci Resolve 16.2 (No Film School)
- Sound Designer Posts 'Magnificent Madness' Audio With DaVinci Resolve Studio (TV Technology)
- Advanced Fairlight Sound Editing Tips: Integration of Foley Effects (VFXstudy)
- Efficient Sound Sync: DaVinci Resolve Fairlight Tips (VFXstudy)
- How to Create a Sound Effects Library with DaVinci Resolve (OWC/macsales)
- DaVinci Resolve pricing (Blackmagic Design)
- DaVinci Resolve 21: Every Major New Feature, Explained (Coremicro)
- DaVinci Resolve Arm for Record Not Working: 7 Fixes That Actually Work (Hollyland Store)
- Using the Foley Sampler in DaVinci Resolve 17 (Ripple Training)
- Adding Sound Effects With The Foley Sampler (DVResolve.com)
Learn by doing, not watching
Stop translating tutorials to your timeline.
TryUncle stays beside Resolve on Mac and Windows. When you ask, Uncle sees your screen and points at the exact control you need. No hunting through tabs, timestamps, or mismatched tutorials.
Meet TryUncleKeep reading
 GuidesJul 17, 202632 min read
How to Record a Podcast in DaVinci Resolve Using Fairlight
Record a podcast directly inside DaVinci Resolve's Fairlight page: patch mics, arm tracks, set gain and monitoring, capture multi-guest audio, and avoid the common failures.
 FixesJul 12, 202632 min read
DaVinci Resolve Audio Crackling and Popping During Playback: Every Fix
DaVinci Resolve audio crackling or popping during playback? The real causes, in the order to check them: sample rate, buffer size, ASIO, frame rate, GPU, and hardware.
 GuidesJul 8, 202639 min read
How to Sync Audio in DaVinci Resolve, Every Method
Sync audio and video in DaVinci Resolve with Auto Sync Audio, timecode, the Sync Bin, or a manual clap, plus fixes for drift and failed matches.