
Learn / DaVinci Resolveupdated for DaVinci Resolve 21.0.1 (June 2026)
How to Add Subtitles in DaVinci Resolve (Manual and AI)
Quick answer
Add subtitles in DaVinci Resolve from the Timeline menu: Add Subtitle Track lets you type and time captions by hand, while Create Subtitles from Audio auto-generates them with AI in 14 languages (Resolve Studio only, $295 one-time). Style fonts in the Inspector, then export SRT, WebVTT, or burned-in captions from the Deliver page.
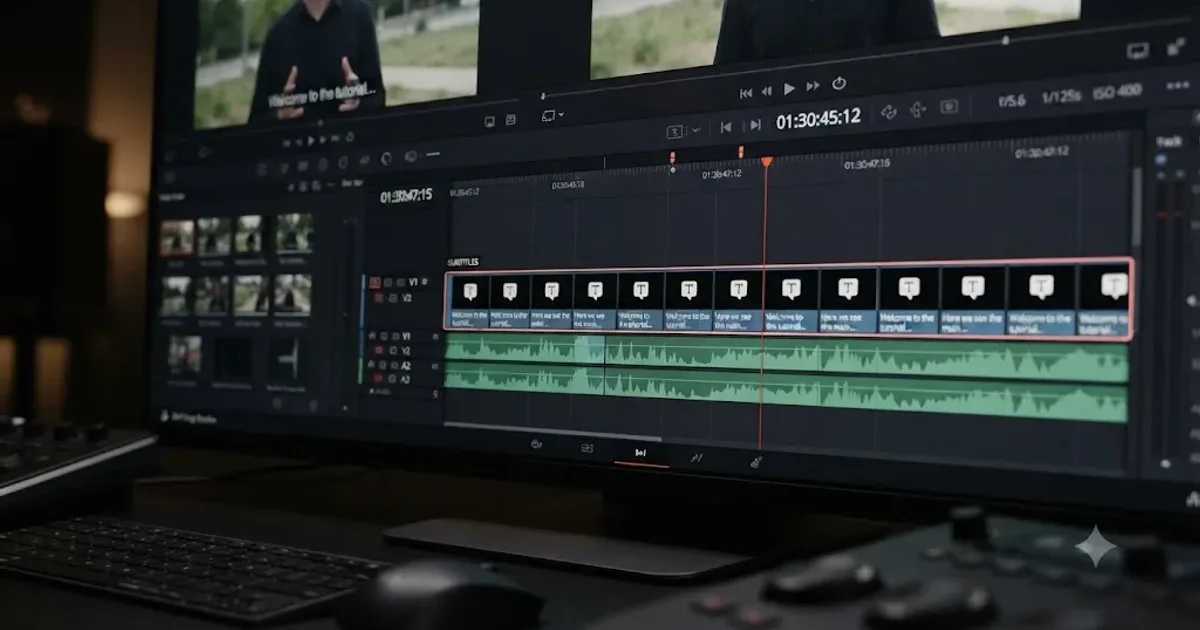
You don't need a plugin to add subtitles in DaVinci Resolve. The tool is built in, it's free for manual captions, and Resolve Studio adds an AI version that transcribes your dialog for you. This page covers both paths, plus styling, multiple languages, right-to-left scripts, collaboration, exporting for YouTube and TikTok, and the one place Resolve genuinely falls short: broadcast-standard closed captions.
Every subtitle in DaVinci Resolve lives on its own kind of track, separate from video and audio, and separate from a regular Text+ title too. That distinction matters more than it sounds like it should, because it's the reason export, styling, and compliance checking all work differently for subtitles than for any other element on your timeline.
What's the fastest way to add subtitles in DaVinci Resolve?
It depends on what you're starting from and which version you own.
| Situation | Fastest path |
|---|---|
| You have a script or SRT file already | Import it (see the import section below) |
| You want to type captions yourself | Add Subtitle Track, then type and time each one manually |
| You have Resolve Studio and clean dialog audio | Timeline > Create Subtitles from Audio, then edit the output |
| You're on the free version and want AI transcription | A third-party script like AutoSubs, run from Workspace > Scripts |
| You need broadcast-compliant 608/708 captions | Resolve gets you partway; expect to finish in a dedicated captioning tool |
Most people land in one of the first three rows. If your project already has a script, a transcript, or subtitles pulled from another edit, importing beats retyping every time. If you're starting from nothing and own Studio, the AI transcription tool turns a blank timeline into a rough subtitle track in the time it takes to scrub through the footage once. If you're on the free version, manual typing is the built-in option, though it's slower for anything longer than a few minutes of dialog.
How do you manually add a subtitle track and type captions?
This is the path every DaVinci Resolve user has, free or Studio, and it's worth learning even if you plan to use AI transcription later, because you'll still need to fix, retime, and restyle whatever the AI gives you.
- Open the Edit page and load the timeline you want to caption.
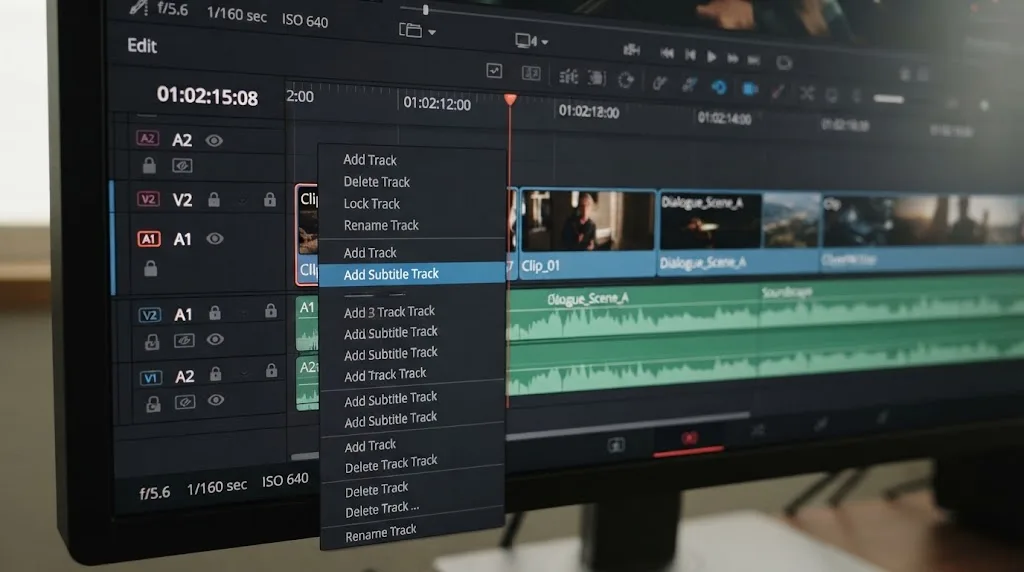
- Add a subtitle track. Right-click anywhere in the empty space to the left of your existing tracks, in the track header column, and choose Add Subtitle Track from the context menu. You can also use the Timeline menu at the top of the app. A new track appears, visually distinct from your video and audio tracks, usually labeled Subtitle 1.
- Add an individual subtitle. Right-click inside the new subtitle track at the point in the timeline where you want a caption to start, and choose Add Subtitle. An empty caption clip appears on the track.
- Type the text. Double-click the caption clip, or select it and open the Inspector panel on the right side of the screen. The Inspector splits into a Caption tab and a Track tab. Type your text in the Caption tab.
- Set the in and out points. Drag the edges of the caption clip on the timeline the same way you'd trim a video clip, or type exact timecodes in the Inspector if you're matching a script to precise dialog.
- Repeat for every line of dialog, working through the timeline the same way you'd lay down any other track.
That workflow is slow for a 40-minute interview, and it's exactly why the AI tool exists for people who own it. But for a two-minute product demo or a short-form clip, typing captions by hand while you watch the footage back is often faster than fighting an AI transcript's mistakes.
Resolve treats a subtitle track as a fundamentally different object from a Text+ title, even though both put words on screen. A subtitle track knows about reading speed, character limits, and export formats like SRT. A Text+ title doesn't; it's built for lower-thirds, credits, and on-screen graphics, and it has no idea what a caption compliance threshold is. Our how to add text and titles in DaVinci Resolve guide covers Text, Text+, MultiText, and Fusion Titles in depth if you need one of those instead of a subtitle track for this clip.
How does DaVinci Resolve's AI auto-caption tool work?
Blackmagic Design added automatic subtitle generation in DaVinci Resolve 18.5, and it's stayed a Resolve Studio exclusive through every version since, including 21. The feature lives under Timeline > Create Subtitles from Audio, and it runs on the DaVinci Neural Engine, the same AI backbone behind tools like Magic Mask and Super Scale.
Here's the process:
- Select a range, or don't. You can mark an in and out point on the timeline to transcribe just a section, or leave nothing selected to process the whole thing.
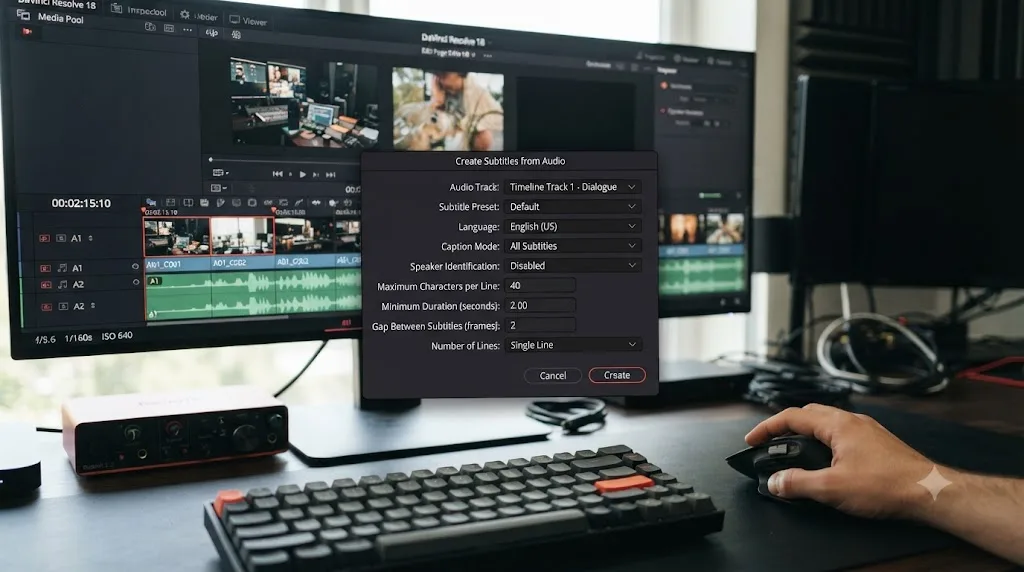
- Open Timeline > Create Subtitles from Audio. A dialog box appears with several settings.
- Choose a language, or leave it on Auto and let Resolve detect the spoken language itself.
- Pick a Caption Preset, which controls the visual style applied to the generated track.
- Set Max Characters per Line. This decides how much text fits before Resolve wraps to a new line.
- Choose one line or two for how the subtitle displays.
- Set the Gap Between Subtitles, measured in frames, with 0 as the default. A small gap makes rapid-fire dialog easier to read as distinct lines rather than one continuous caption.
- Click Create, then wait. Processing time depends on your machine and how much audio you're transcribing, ranging from a few seconds for a short clip to several minutes for a long interview.
When it finishes, Resolve has built a complete subtitle track: punctuation added, question marks and quotation marks placed where the AI infers them, and speaker pauses used to break up caption timing. It also attempts to skip background music and non-dialog audio rather than transcribing it as garbage text.
An AI-generated subtitle track from DaVinci Resolve is a rough draft, not a finished one, and treating it as finished is the single most common subtitle mistake we see. Names get mangled, technical jargon comes out wrong, and overlapping dialogue from two speakers often merges into one confused line. Budget time to read through the output line by line before you export anything.
Which languages does the auto-subtitle tool support, and how accurate is it?
According to Blackmagic Design's reference manual, Create Subtitles from Audio supports transcription in:
- Danish
- Dutch
- English
- French
- German
- Italian
- Japanese
- Korean
- Mandarin (Simplified and Traditional)
- Norwegian
- Portuguese
- Russian
- Spanish
- Swedish
That's a solid spread for a built-in tool, but it's not universal. If your project is in a language outside that list, the AI tool won't help you at all, and you're back to manual typing or a third-party transcription service. Arabic and Hebrew are the two most common languages missing from this list, and they come with their own display quirks beyond just the lack of AI transcription, covered in the next section.
On accuracy: Resolve doesn't publish a word-error-rate figure, so treat any specific accuracy percentage you see quoted online with suspicion unless it links back to controlled testing. What's consistently reported across editors who use the feature is that clean, single-speaker audio with minimal background noise produces the best first-pass transcript, and that proper nouns, brand names, and technical vocabulary are the words most likely to need a manual fix afterward.
Do DaVinci Resolve subtitles work with Arabic, Hebrew, or other right-to-left languages?
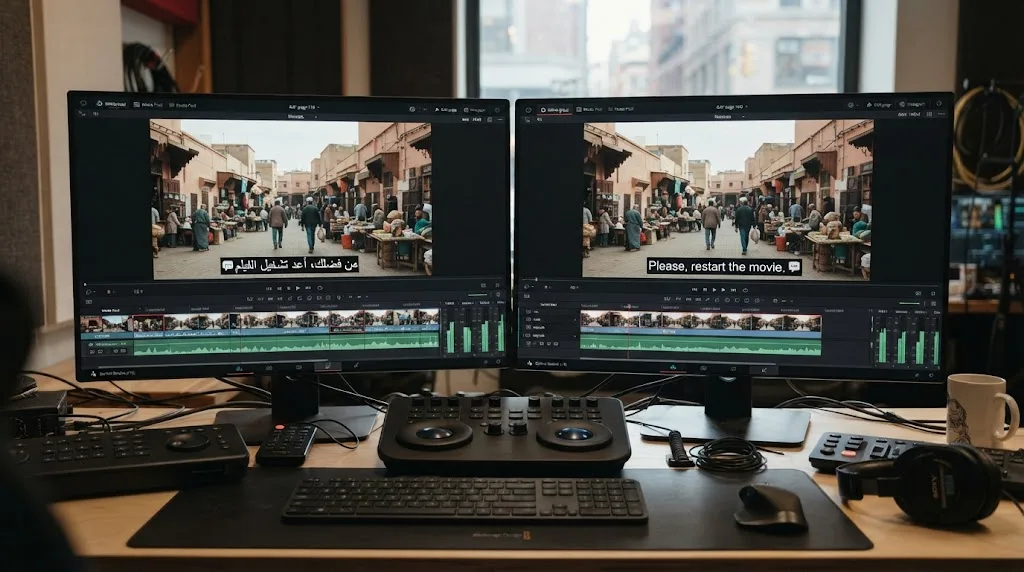
Arabic and Hebrew aren't on that AI transcription list, and that's worth flagging on its own. Create Subtitles from Audio can't transcribe either language automatically, full stop. If your dialog is in Arabic or Hebrew, you're typing or importing captions manually, the same as any other language the AI tool doesn't cover.
Typing them is where the real complication starts. DaVinci Resolve displays the Arabic and Hebrew alphabets, and you can type right-to-left text into a subtitle clip. But full right-to-left layout, meaning punctuation, numerals, and mixed Arabic-Latin phrases ordering correctly the way a native reader expects, isn't something Resolve's subtitle track was built around from the ground up the way it was for left-to-right scripts.
Editors working in Arabic have reported a specific rendering issue on Blackmagic's own user forum: Arabic glyphs in a subtitle track can disappear entirely once you add any stroke or outline to the text style, and only reappear when the stroke width goes back to zero. If your Arabic captions look blank on screen even though the Caption tab clearly shows text typed in, check the Track tab's outline setting before you assume the import failed. (source)
A subtitle track that looks broken with Arabic or Hebrew text often isn't corrupted, it's a stroke value set above zero. That one setting explains a good share of the "my Arabic subtitles vanished" reports circulating in Resolve's own user forum.
Practical options if you're delivering right-to-left captions regularly:
- Type directly and preview constantly. Don't trust punctuation placement until you've watched the caption on screen; fix ordering issues clip by clip rather than assuming a global setting will correct it.
- Keep stroke width at zero on any Track or Caption style applied to right-to-left text, and get your contrast from a background box or drop shadow instead.
- Consider a dedicated titling tool for heavy right-to-left work. Third-party title plugins built specifically around bidirectional text, the kind broadcasters producing Arabic-language content already use, handle mixed-direction punctuation and numeral ordering more reliably than a general-purpose subtitle track designed primarily around European and East Asian languages.
- Test your export, not just your timeline. An SRT file itself is just plain text with no formatting, so right-to-left ordering issues are usually a Resolve display problem, not a file format problem. Open the exported SRT in a plain text editor to confirm the character order is actually correct once it leaves Resolve.
If Arabic or Hebrew captions are a regular, not occasional, part of your delivery, budget extra review time specifically for punctuation and numeral order. It's the one language category where "the AI got it wrong" isn't the risk, since the AI never touches it, and "Resolve displayed it wrong" is.
Do you need DaVinci Resolve Studio to add subtitles at all?
No. You don't need Studio to add subtitles in DaVinci Resolve. You need Studio only for the AI transcription shortcut.
The free version gives you the full subtitle track system: Add Subtitle Track, typing and timing captions manually, styling them in the Inspector, importing existing SRT files, and exporting SRT, WebVTT, and other sidecar formats from the Deliver page. None of that is gated behind the $295 license. What's gated is specifically Create Subtitles from Audio, which needs the DaVinci Neural Engine that only ships in Studio.
If you want AI transcription without paying for Studio, your realistic option is a third-party script. AutoSubs, an open-source project on GitHub, runs local, on-device transcription using Whisper, Moonshine, and Parakeet models, meaning your audio never leaves your machine and there's no subscription fee. It installs as a script accessed through Workspace > Scripts, which is a free-tier feature of Resolve's own scripting API, and it outputs directly into a Resolve subtitle track. A separate open-source tool, Resolve-OpenCaptions, does something similar in reverse: it converts existing SRT files into styled Text+ caption tracks using the Resolve API, useful if you want animated, on-brand captions built from a transcript instead of Resolve's native subtitle track type.
The $295 Resolve Studio license buys you one AI shortcut for subtitles, not the subtitle feature itself. If your channel produces a lot of talking-head content and typing captions by hand is eating hours every week, that shortcut alone might be worth the price. Our full library of DaVinci Resolve guides covers the rest of what that $295 buys, from color tools to delivery, if auto-captions aren't the only reason you're considering the upgrade.
How do you style subtitles in DaVinci Resolve?
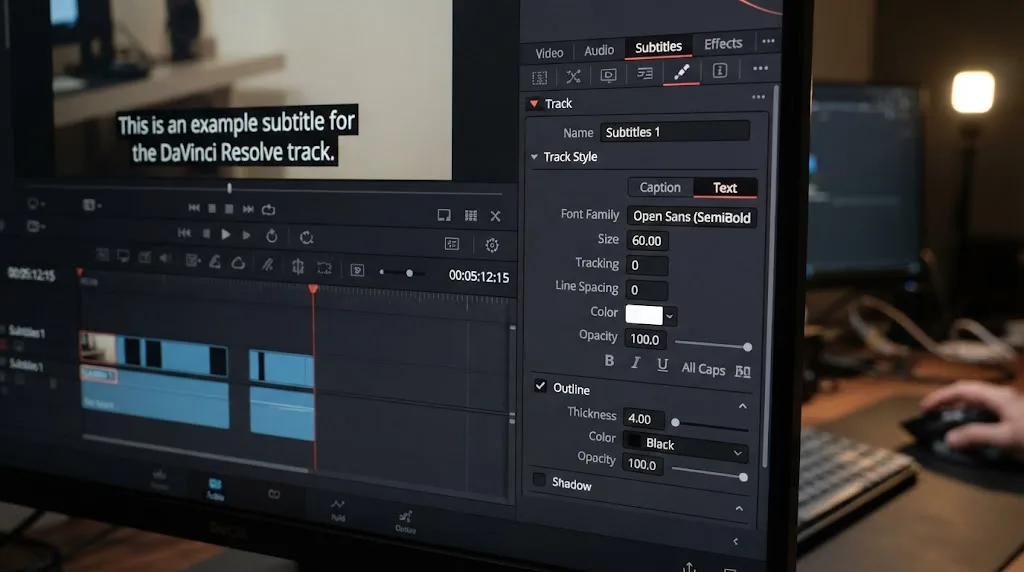
Select your subtitle track in the timeline, then open the Inspector. You'll see two tabs specific to subtitles:
The Caption tab controls the individual caption clip you have selected: its text content, and per-clip overrides if you need one specific line to look different from the rest of the track.
The Track tab controls the whole track's default appearance: font family, size, color, drop shadow, outline stroke width and color, background box opacity, and vertical or horizontal position on screen. Anything you set here applies to every caption on that track unless you override it at the clip level.
Resolve also ships Caption Presets, selectable both from the Create Subtitles from Audio dialog and from the Track tab directly, which bundle a font, size, and style combination so you're not building the look from scratch every time. Save your own combination as a custom preset once you land on a style you like, especially if you're captioning a series and want visual consistency across episodes.
A few practical style choices that hold up across most footage:
- White text with a black outline or drop shadow reads reliably over both light and dark backgrounds, which matters because your footage won't stay one consistent brightness for an entire video.
- A semi-transparent background box behind the text helps on busy backgrounds, at the cost of covering slightly more of the frame.
- Bottom-third placement is the near-universal default, but check it against any existing lower-third graphics or logo placement so the two don't collide.
How do you add animated, word-by-word subtitles?
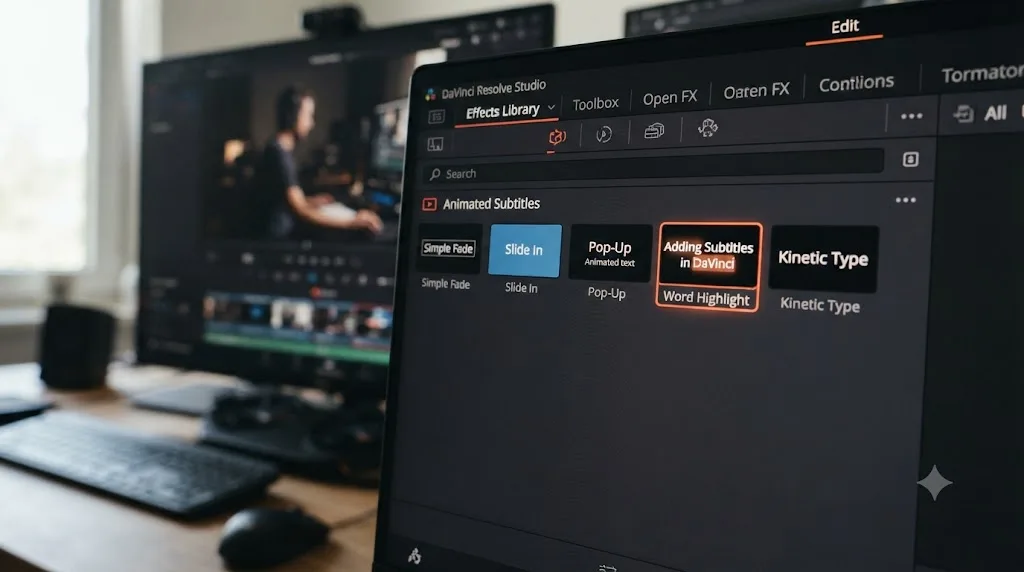
DaVinci Resolve 20 added a set of built-in Fusion title templates specifically for subtitle tracks, grouped under a category called Animated. You'll find them in the Effects panel under Titles > Subtitles > Animated: five templates in total, named Lollipop, Rotate, Slide In, Statement, and Word Highlight, according to Blackmagic's own Resolve 20 feature guide. (source) Word Highlight pops each spoken word as it's said, the same visual style that's become standard on short-form vertical video.
To use one:
- Generate or type your subtitle text first, either manually or with Create Subtitles from Audio.
- Open the Effects panel and navigate to Titles > Subtitles > Animated.
- Drag your chosen template onto the subtitle track, over the existing captions. The template picks up the text and timing that's already there.
- Customize in the Inspector. Adjust font, highlight color, background, and centering, useful if you're reframing for a vertical TikTok or Reels export and need the text to sit differently than it would in a 16:9 timeline.
- Save your settings as a reusable preset by right-clicking the underlying MacroTool node in the Fusion page and choosing Settings > Save As, so future projects don't require rebuilding the same look from zero.
These templates run through Fusion under the hood even though you access them from the Edit page, which is why customization can go considerably deeper than the standard Track tab settings if you're comfortable opening the node graph directly.
What character limits and reading-speed settings should you use?
DaVinci Resolve includes built-in quality control for subtitle readability, and ignoring it is how you end up with captions viewers physically can't finish reading before the next one appears.
Open Project Settings and find the Subtitles section. Three thresholds live there:
| Setting | What it controls | A reasonable starting point |
|---|---|---|
| Characters Per Line | Max characters before a line wraps | 32-42, depending on platform |
| Minimum Caption Duration | Shortest time a caption can stay on screen | Long enough to read at a comfortable pace, even for short captions |
| Maximum Characters Per Second | Reading speed cap | Set to catch captions no viewer could realistically finish |
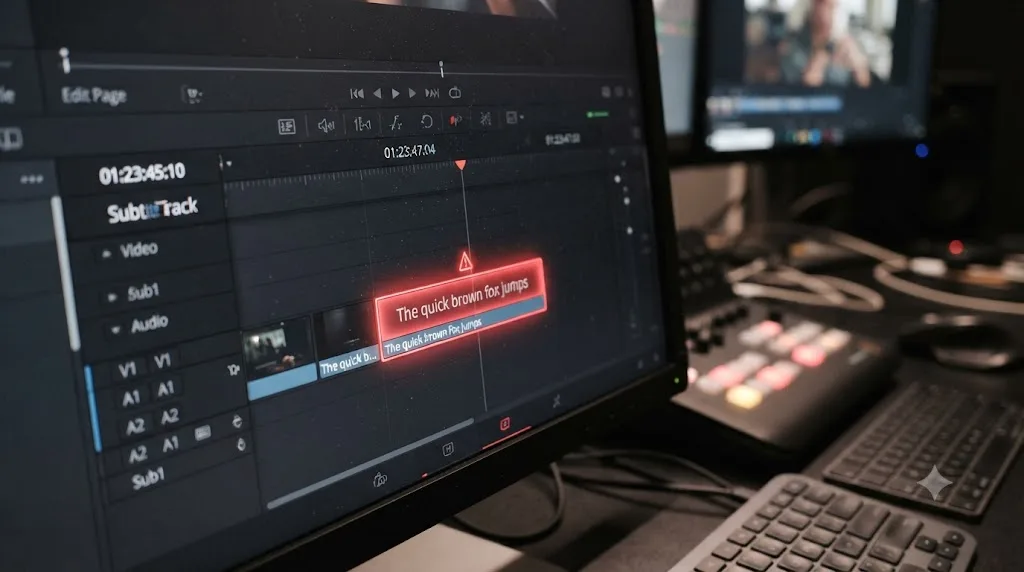
When any subtitle clip exceeds the Maximum Characters Per Second threshold, DaVinci Resolve turns that clip red directly on the timeline. It's a visual warning, not a hard block, so you can still export a caption that's flagged red, but you shouldn't.
Resolve's default character limit is 42 characters per line, which happens to land right at the upper edge of common platform guidance. US closed captioning standards typically target 32 characters per line, and most YouTube and social caption style guides recommend staying under roughly 40-45 characters and two lines maximum to avoid cluttering a mobile screen.
Per-track overrides exist too. If one language track in a multi-language project needs a different character limit than your global project setting, for example because its script runs longer per syllable than another language does, select that subtitle track, open the Inspector's Track tab, and uncheck Use Project Settings. That unlocks Max Line Length, Min Duration, and Max CPS just for that track.
A subtitle that flashes on screen for under a second, even if it's technically synced to the right words, fails its one job, because nobody can read it in time. Reading-speed limits exist to catch exactly that failure before your viewer does.
How do you import an existing SRT, TTML, or VTT file?
If you already have a transcript or subtitle file, whether from a transcription service, a previous edit, or a client-supplied script, importing it is faster and more accurate than retyping or re-transcribing.
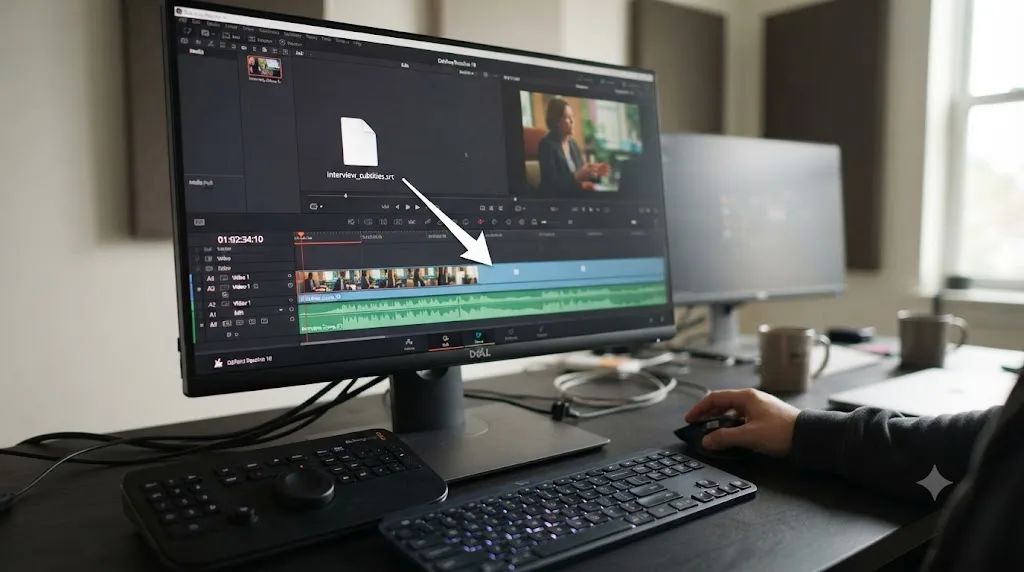
- Go to File > Import > Timeline > Subtitle (or the equivalent Import Subtitle option in your version's File menu).
- Select the file. Resolve reads SRT and TTML formats natively, and embedded MXF and IMF subtitle streams if your source media carries them.
- Confirm the timeline placement. Resolve creates a new subtitle track from the imported file, matching the timecodes in the file to positions on your timeline.
- Check sync immediately. If the imported file's starting timecode doesn't match your timeline's starting timecode, a common mismatch when the timeline defaults to a 1-hour start rather than zero, every caption will land in the wrong place. If that happens, right-click the timeline in the Media Pool and adjust the starting timecode before re-importing, or shift the whole imported track to compensate.
- Edit as needed. Treat the imported track the same as a manually typed one from here: retime, restyle, or split individual captions in the Inspector.
This is also the fastest way to bring in captions generated by an outside transcription service, if you'd rather pay per minute for higher-accuracy transcription than rely on Resolve's built-in AI tool or type everything by hand yourself.
Accented or non-Latin characters showing up as garbled symbols after import is almost always an encoding problem, not a Resolve bug. DaVinci Resolve expects UTF-8 encoded text, and it doesn't reliably fall back to other encodings the way some other software does. If your SRT came from a Windows text editor that defaulted to Western European encoding instead of UTF-8, every accented character in French, German, Spanish, or Portuguese dialog can turn into a garbled symbol once Resolve reads the file.
The fix: re-save the file specifically as UTF-8 before importing. A plain text editor's Save As dialog usually has an encoding dropdown; if it doesn't show one clearly, opening the file in LibreOffice Writer or Word, then using Save As and explicitly choosing an encoding, gives you a clear UTF-8 option most simple text editors bury or omit entirely. (source)
A less common variant of the same problem: a file saved as UTF-8 with a Byte Order Mark, an invisible marker some programs add at the very start of the file. Most software ignores it, but if your import shows a stray character or garbled symbol only on the very first caption of the file and every other caption looks fine, the Byte Order Mark is the likely cause. Re-saving without one, an option in most text editors' encoding settings, usually clears it.
How do you handle multiple languages on one timeline?
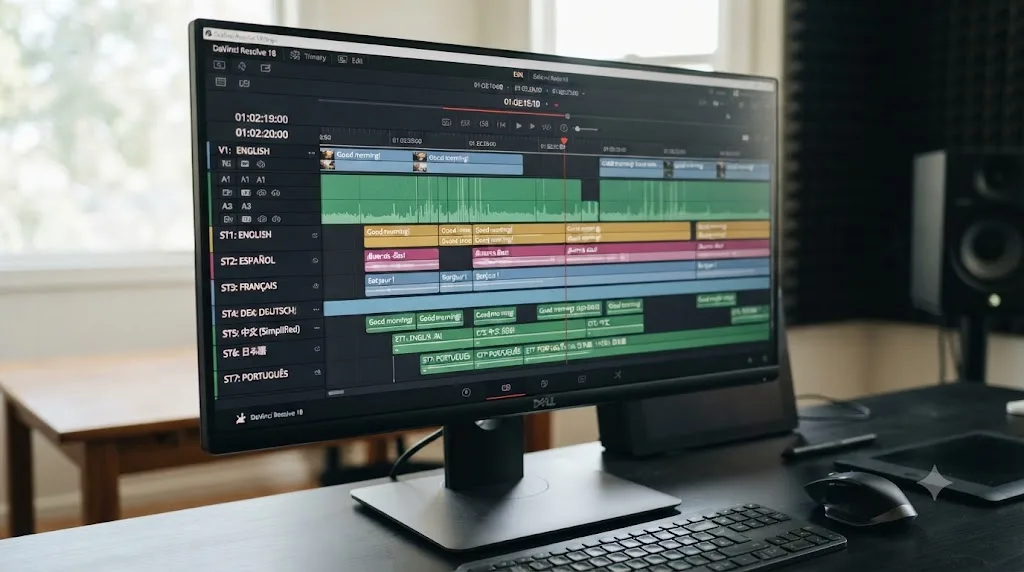
DaVinci Resolve supports as many subtitle tracks as you want to add, and the common pattern for multi-language delivery is one track per language, all stacked on the same timeline.
Here's the catch worth knowing before you build that structure: DaVinci Resolve only shows one subtitle track at a time on the timeline viewer, no matter how many you've created. Enabling one subtitle track automatically disables the others, the same way solo works on audio tracks. That's not a bug, it's how Resolve keeps multiple language tracks from stacking visually on top of each other during playback and review.
To work with a multi-language project:
- Add one subtitle track per language, naming each track clearly (English, Spanish, French, and so on) so you don't lose track of which is which as the list grows.
- Populate each track separately, either by importing a translated SRT file per language, typing translations by hand, or running Create Subtitles from Audio once per language pass if you have separately dubbed audio to transcribe.
- Toggle the enable icon on whichever track you want to preview at a given moment.
- Export each language as its own file. You'll render or export subtitle files one at a time, one per track, rather than bundling all languages into a single output. There's no built-in way to burn more than one subtitle language into the same video simultaneously.
- Name your exported files by language using a clear convention, something like ProjectName_english.srt, ProjectName_spanish.srt, so downstream platforms and media players that auto-detect subtitle files by filename pattern pick up the right track automatically.
If you're using per-track character limit overrides because one language reads faster or slower than another at the same information density, this is the workflow where that Inspector setting from the previous section actually earns its keep.
Can multiple editors work on subtitle tracks at once with Blackmagic Cloud collaboration?
DaVinci Resolve's collaboration tools, whether you're using a shared PostgreSQL database on a local network or Blackmagic Cloud over the internet, let a colorist, an editor, and a captioner all work inside the same project at the same time. Subtitles are no exception. Nothing stops you from putting one person in charge of the subtitle track while someone else grades and someone else cuts, all in parallel.
What actually keeps that from turning into chaos is Resolve's locking system. Multi-user collaboration in DaVinci Resolve prevents two people from overwriting the same work by locking bins and timelines, not by locking individual tracks. Blackmagic Design added individual timeline locks in the 18.1 update, on top of the bin-level locking the collaboration feature already had. (source)
In practice, that means:
- Whoever opens a timeline first to edit it locks that timeline for other users, the same way opening a shared document for editing can lock it for a second person. A colleague can still view it, just not edit it, until the lock releases.
- Subtitle tracks live inside that same locked timeline, so if you're the one assigned to captioning, you generally want your own pass at the timeline, separate from whoever's actively cutting picture, rather than fighting over the same open timeline simultaneously.
- Live Save reduces how much work locking actually blocks. Resolve continuously saves small incremental changes to the shared project database, so when a lock does release, the next person picks up a current version rather than a stale one from whenever the previous session started. (source)
- There's no per-track subtitle lock separate from the timeline lock. If a captioner and an editor genuinely need to work the same timeline concurrently, the practical workaround most teams use is duplicating the timeline for the caption pass, captioning that duplicate, then reconciling it back into the main cut once picture lock happens, rather than expecting Resolve to isolate the subtitle track from timeline-level locking.
Subtitle work fits naturally at the end of a collaborative pipeline, after picture lock, precisely because Resolve locks whole timelines rather than individual tracks. Assign captioning as a distinct pass once the cut stops changing, and you avoid fighting over a lock with whoever's still trimming edits.
Are there keyboard shortcuts for adding or navigating subtitles?
Not by default, and that surprises editors coming from dedicated caption software. Out of the box, DaVinci Resolve has no assigned keyboard shortcut for Add Subtitle Track, Add Subtitle, or jumping to the next or previous caption on a track, a gap Resolve users have raised directly on Blackmagic's own forum. (source)
That doesn't mean you're stuck clicking through menus all day. Two things help:
General clip navigation shortcuts already work on subtitle tracks. The same Up and Down arrow keys that jump your playhead between edit points on any video or audio track do the same thing on a subtitle track, since a caption clip is still just a clip with in and out points. If you're moving through a track caption by caption to check timing, arrow-key navigation gets you most of the speed a dedicated "next subtitle" shortcut would.
| Shortcut | What it does on a subtitle track |
|---|---|
| Up Arrow / Down Arrow | Jump the playhead to the previous or next caption clip's edit point on the current track |
| Left Arrow / Right Arrow | Step the playhead one frame at a time, useful for fine-tuning a caption's in or out point |
| Home / End | Jump the playhead to the very start or end of the timeline, useful for a quick full read-through |
You can also assign your own shortcut through Keyboard Customization. Open it from the DaVinci Resolve menu, search for Add Subtitle in the command list, and bind it to whatever key combination isn't already in use in your layout. This works for any command in Resolve, not just subtitle ones, and it's worth doing for Add Subtitle specifically if you're typing captions by hand for anything longer than a few minutes of dialog, since a mouse trip to the right-click menu for every single line adds up fast.
Don't confuse a missing default shortcut with a missing feature. Resolve's command list includes subtitle actions, they're just not bound to a key out of the box. A few minutes in Keyboard Customization closes most of the gap between Resolve and a caption-dedicated tool for anyone typing a high volume of captions by hand.
How do you export subtitles from DaVinci Resolve?
There are two separate export paths, and they answer two different questions: do you want a standalone caption file, or do you want the captions embedded in or burned into the video itself?
Path 1: Export a sidecar file from the Edit page. Right-click the subtitle track's header and choose Export Subtitle, or use File > Export > Subtitle. Choose your file format (.srt is the most universally supported) and save. This is the fastest path when you just need a caption file to upload alongside a video, which is exactly what YouTube, Vimeo, and most social platforms expect for their own native captioning systems.
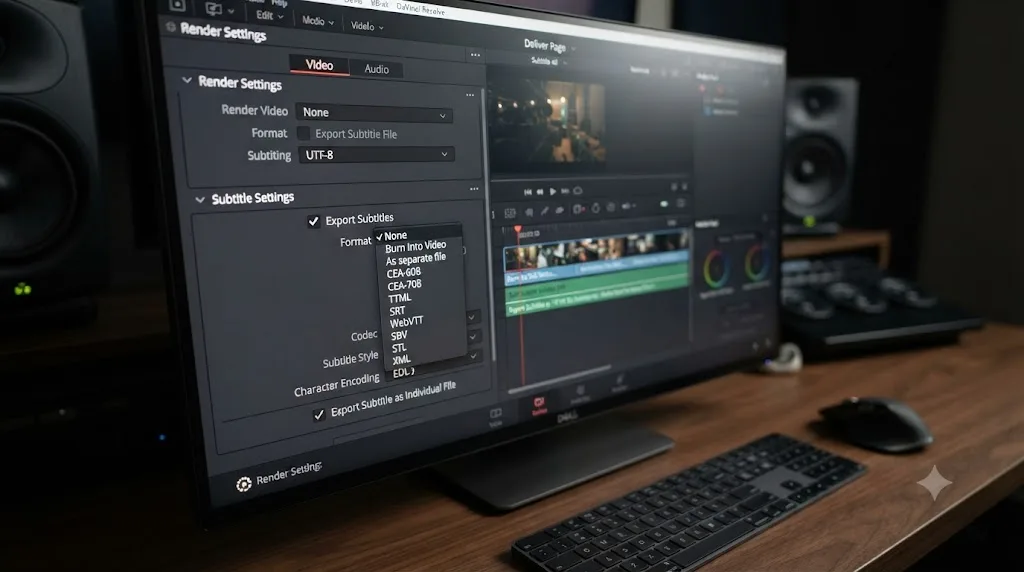
Path 2: Export or burn in through the Deliver page. Open the Deliver page, find the Subtitle Settings panel, and choose from three general approaches:
| Format option | What it does | When to use it |
|---|---|---|
| As a separate file | Exports a sidecar file (SRT, WebVTT, IMSC1, DFXP) alongside your rendered video | Uploading to a platform with native caption support |
| Burn into the video | Permanently renders the captions into the picture, unremovable | Platforms with no reliable native caption upload, or square/vertical social clips |
| Embedded captions | Encodes captions inside the video container itself (Text or CEA-608, in supported containers) | Broadcast or archival delivery workflows that expect embedded captions |
Select the subtitle track you want, add the job to the render queue, and click Render All the same way you would for any other delivery.
A burned-in caption can never be turned off by the viewer, while a sidecar file can be toggled, translated, or replaced without touching the video at all. That's the entire tradeoff in one sentence: burned-in captions guarantee visibility on platforms with unreliable native caption support, at the cost of every flexibility a separate file gives you.
If you're exporting for YouTube specifically and want the full render settings, not just the caption file, our DaVinci Resolve export settings for YouTube guide covers resolution, bitrate, and audio numbers side by side with this one.
What subtitle settings should you use for YouTube, TikTok, and Instagram Reels?
Each platform handles captions a little differently, and matching your export to what each one actually expects saves a re-render later.
| Platform | Native caption upload | Recommended approach |
|---|---|---|
| YouTube | Yes, supports SRT, SBV, VTT, TTML, DFXP, and more; SCC is YouTube's preferred format for CEA-608-style captions | Export a separate SRT file from the Edit page and upload it alongside your video, rather than burning in |
| TikTok | Auto-captions available in-app, but quality varies | Burn in your own styled captions for reliability and brand consistency, especially with an Animated template |
| Instagram Reels | Auto-captions available, similar in-app limitations | Same logic as TikTok: burned-in captions give you control over style and guarantee they're visible regardless of the viewer's settings |
| Native SRT upload supported on most post types | Sidecar SRT file, same as YouTube | |
| Broadcast / OTT delivery | Expects embedded or 608-style captions, not sidecar files | See the CEA-608/708 section below; expect extra steps |
YouTube explicitly lists SubRip (.srt), SubViewer (.sbv or .sub), MPlayer subtitle (.mpsub), SAMI (.smi), RealText (.rt), WebVTT (.vtt), TTML, and DFXP among its supported upload formats, alongside broadcast formats like Scenarist Closed Caption (.scc), which YouTube's own help documentation calls its preferred format for CEA-608-based captions specifically. For a standard YouTube upload, exporting SRT from the Edit page and uploading it through YouTube Studio gets you accessible, searchable, and translatable captions without touching your video file.
For short-form vertical content on TikTok and Reels, the calculation flips. In-app auto-captions exist on both platforms, but they're inconsistent, they don't match your brand's font or color choices, and they can't be styled with the kind of animated, word-by-word emphasis an Animated subtitle template gives you for free inside Resolve. Burning your own captions in before upload trades flexibility for guaranteed, consistent presentation.
Can DaVinci Resolve deliver broadcast-standard CEA-608/708 captions?
Partially, and this is the honest limit of what Resolve does well.
Resolve Studio supports CEA-608 closed captions embedded in QuickTime and MXF OP1A container files. That covers a real slice of broadcast delivery. But it has real gaps once you're working an actual air-master spec.
Colorist and finisher Patrick Inhofer, writing for Mixing Light, put the core limitation directly: "While Resolve supports CEA-608 captions in .mov and .mxf containers, that standard is for legacy analog transmission." He also flagged a specific, easy-to-miss constraint in how Resolve handles those containers: "An undocumented feature in Resolve is that MXF containers (only) can be embedded with either 608 or 708 captions, but not both!" (source)
That single-standard limitation matters because many broadcast specs require both 608 and 708 captions present in the same delivery file, 608 for legacy analog decoders and 708 for digital ones. Resolve simply can't produce both in one MXF container at once. Inhofer's own conclusion after running into this on a real job was blunt: "Therefore, DaVinci Resolve was incapable of delivering my final air master."
Resolve also has no direct output path for analog Line 21 captions or CEA-708 captions over an SDI signal through a Decklink or UltraStudio device, which some broadcast delivery chains still expect.
If your delivery spec genuinely requires dual 608/708 compliance, or SDI-embedded captions, plan for a second tool in your pipeline; a dedicated captioning application designed around broadcast compliance standards, used after your Resolve edit and grade are locked. That's not a Resolve failure exactly, it's a specialized workflow that a general-purpose editing and color tool was never built to fully own end to end.
How have DaVinci Resolve's subtitle tools changed across versions?
If you're jumping between Resolve versions on different machines, or reading an old tutorial that doesn't match what you're seeing on screen, the confusion usually traces back to which version introduced which subtitle feature. Here's the timeline.
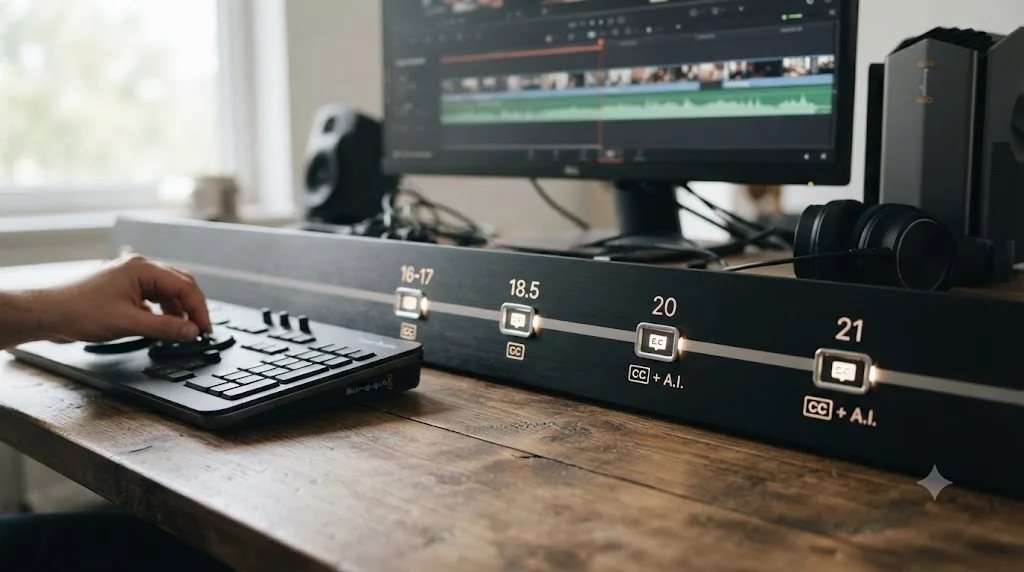
| Version | What changed for subtitles |
|---|---|
| Resolve 16-17 | Dedicated subtitle track type established: Add Subtitle Track, manual typing and timing, SRT/VTT import and export, separate from Text+ titles |
| Resolve 18.5 (2023) | Create Subtitles from Audio launches, Studio only, powered by the DaVinci Neural Engine, transcribing dialog into a timed subtitle track automatically |
| Resolve 20 (2025) | Five built-in Animated subtitle Fusion title templates added under Titles > Subtitles > Animated: Lollipop, Rotate, Slide In, Statement, and Word Highlight |
| Resolve 21 (2026) | Subtitle management refinements, alongside broader multicam workflow improvements, per Blackmagic's own What's New coverage |
A few of these deltas matter beyond trivia. Every version of DaVinci Resolve since the dedicated subtitle track type was established has kept manual subtitle creation, SRT import, and SRT export entirely free, with Studio exclusively gating the AI transcription step, not the subtitle feature as a whole. That's been consistent, even as the AI side of the feature has expanded. (source)
The animated templates are the newest visual layer, not a replacement for anything. Word Highlight and the other four Animated templates in Resolve 20 style existing subtitle text, they don't generate or transcribe it. You still need a populated subtitle track, typed or AI-generated, before dragging one on.
If you're following a tutorial recorded on an older version and something doesn't match:
- No Create Subtitles from Audio option at all, even in Studio? You're likely on a pre-18.5 build. Update Resolve, or manually type captions until you can.
- No Titles > Subtitles > Animated category in the Effects panel? You're on a build before Resolve 20. The rest of subtitle functionality, manual and AI, works the same; you just don't get the animated Fusion templates.
- A tutorial mentions a subtitle setting or panel you can't find at all? Check whether it's describing a third-party script like AutoSubs rather than a native Resolve feature; a lot of tutorial content blends the two without saying so clearly.
Blackmagic Design doesn't publish a single changelog page dedicated to subtitles specifically, so this table is assembled from release coverage and the reference manual rather than one canonical source. Treat exact version boundaries as approximate for anything before 18.5, and precise from 18.5 onward, where the feature additions were significant enough to get their own release announcements.
Why aren't your subtitles showing up on the timeline?
Work through these in order; they cover the overwhelming majority of "my captions vanished" reports.
- Check which subtitle track is enabled. Remember, Resolve only displays one subtitle track at a time. If you have more than one and the wrong one is active, the captions you're expecting are there, just hidden behind a different active track.
- Confirm the track isn't muted or disabled. The same enable/disable toggle that exists on video and audio tracks exists on subtitle tracks too, in the track header.
- Check the playhead position. If the subtitle clip's in and out points don't cover the current playhead position, nothing will show, the same as any other clip type.
- Verify the caption clip actually has text in it. An empty caption clip added via Add Subtitle but never filled in will show nothing, obviously, but it's an easy step to skip in a rush.
- Look for a timecode mismatch after an import. If you imported an SRT or TTML file and nothing appears where you expect, your timeline's starting timecode likely doesn't match the file's assumed starting point. Right-click the timeline in the Media Pool, check its starting timecode, and reset it to 00:00:00:00 if the imported file assumed a zero start but your project defaulted to the standard 1-hour start.
- Confirm you're actually looking at the Edit page timeline view, not a scopes view or a full-screen viewer mode that might not render overlay tracks the same way.
If subtitles were visible, then disappeared after an update or a project reopen, check whether a colleague's session on a shared project accidentally toggled a track off, since subtitle track states save with the timeline the same way any other track's enable state does.
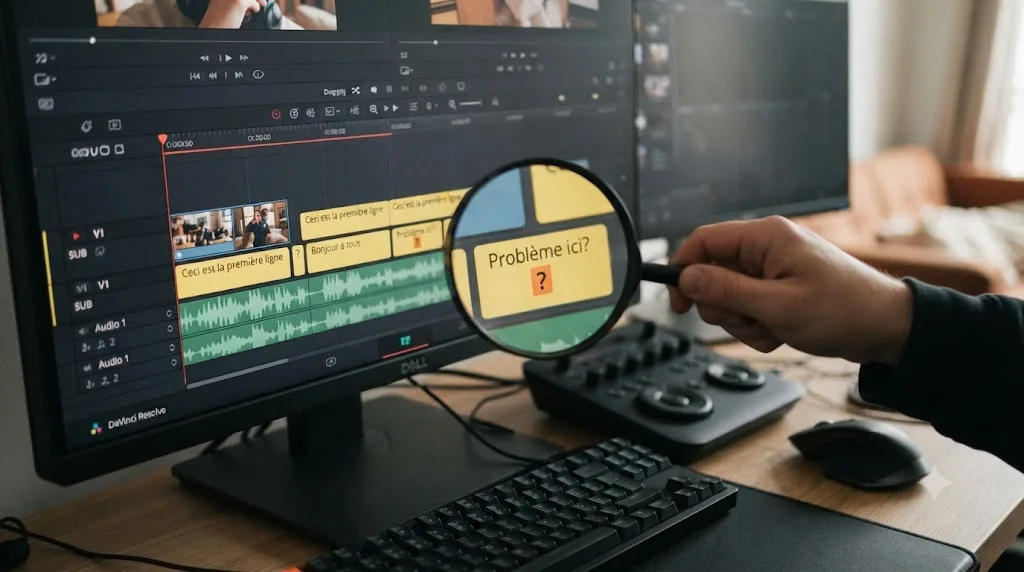
Why does the auto-transcription get words wrong, and how do you fix it fast?
Every automatic speech-to-text system, Resolve's included, makes predictable categories of mistakes. Knowing the categories makes fixing them faster than reading the whole transcript cold.
Proper nouns and brand names. Names, company names, and product names aren't in any general speech model's common vocabulary, so they're the single most likely words to come out wrong. Do a find-and-replace pass specifically for names before anything else.
Technical jargon and industry terms. The same logic as names: if it's not common conversational vocabulary, expect it to need a manual correction.
Overlapping dialogue. Two people talking at once regularly merges into one garbled line, or drops one speaker's words entirely. Scrub back and listen manually to any section where two voices overlap in your audio waveform.
Background music or noise misread as speech. The tool tries to skip non-dialogue audio, but it's not perfect, especially with music that has vocals, or with heavily accented or non-native speech patterns that fall outside its confidence range.
Punctuation in long, run-on sentences. AI punctuation guessing works well on clean, short sentences and gets shakier the longer and more conversational a sentence runs. Read through and re-punctuate anywhere the caption reads like a wall of text.
The fastest fix workflow: play through the video once at normal speed with the generated captions on screen, pausing only when something looks visibly wrong rather than reading every caption in isolation off the timeline. Your ear will catch most transcription errors faster than your eyes scanning text out of context. If you're not sure whether a mangled line is Resolve's fault or your audio's, TryUncle's live Resolve tutor can look at your actual timeline and tell you which one it is in seconds, instead of guessing.
Worked example: captioning a 3-minute interview from raw footage to YouTube
Reading individual steps in isolation doesn't always show how they connect. Here's how the whole process fits together on a realistic, common job: a 3-minute talking-head interview, English dialogue, one speaker, destined for YouTube.
Step 1: Lock picture first. Caption timing depends on final cut timing. Every cut, trim, or reorder after you've captioned means re-timing captions that no longer line up with the clip they were written for. Don't caption a rough cut.
Step 2: Add a subtitle track and run AI transcription if you have Studio. With the timeline locked, add a subtitle track and run Timeline > Create Subtitles from Audio over the full 3 minutes. For clean, single-speaker interview audio like this, that's close to the best-case scenario for Resolve's built-in AI: one voice, minimal background noise, no overlapping dialogue to confuse the transcript.
Step 3: Review by watching, not reading. Play the captioned interview at normal speed once, watching the video rather than scanning the timeline. Pause only where something looks wrong. A 3-minute interview reviewed this way, even with several corrections along the way, is a fast pass, since you're watching in real time rather than proofreading text in isolation.
Step 4: Fix the predictable error categories first. Before a general read-through, do a targeted pass for the words most likely to be wrong: the interview subject's name, their company or product name, and any industry jargon specific to the conversation. These are the words a general speech model has never seen in training and gets wrong most often.
Step 5: Check reading speed. Open Project Settings > Subtitles and confirm your Maximum Characters Per Second threshold is set to something reasonable, then scan the timeline for any caption clip flagged red. A single-speaker interview with natural pauses rarely trips this, but a fast talker or a caption that AI split awkwardly across two clips sometimes will.
Step 6: Style once, apply to the whole track. Set your font, size, outline, and position in the Track tab, not clip by clip. A white font with a black outline or drop shadow, bottom-third position, is a safe default for an interview shot against most backgrounds.
Step 7: Export the sidecar SRT for YouTube, not a burned-in version. YouTube supports native SRT upload, and a sidecar file keeps the caption toggleable, searchable, and separately editable if you spot a mistake after publishing. Right-click the subtitle track header, choose Export Subtitle, and save as .srt.
Step 8: Upload the video and the SRT together through YouTube Studio. YouTube attaches the caption file to the video without needing to touch or re-render your export.
Where this workflow changes for a harder job: two overlapping speakers instead of one, background music under the dialogue, or a language outside Resolve's AI list would each add a review pass this walkthrough doesn't need. The core sequence, lock picture, transcribe or type, review by ear, fix names first, check reading speed, style once, export sidecar, stays the same regardless of how much manual correction any individual job needs.
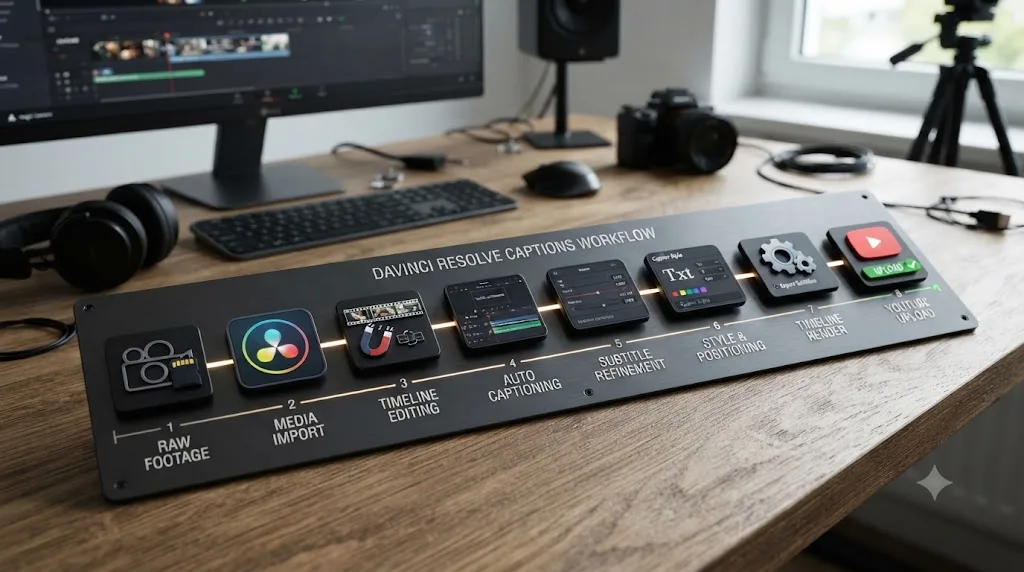
Subtitles, captions, and closed captions: is there a real difference in DaVinci Resolve?
The terms get used loosely everywhere, including in casual conversation about Resolve itself, but there's a real distinction worth knowing when you're picking an export format.
Subtitles, in the strict sense, assume the viewer can hear the audio and just need a translation or a text version of the dialogue. They typically don't include sound effect descriptions like [door slams] or speaker identification.
Captions, and specifically closed captions, are built for viewers who can't hear the audio at all, whether due to hearing loss or a muted device. They include dialogue, plus sound effect and music descriptions, plus speaker labels when multiple people are talking, and they're expected to be toggleable on and off by the viewer, which is what "closed" refers to as opposed to "open" captions that are permanently burned into the picture.
DaVinci Resolve's subtitle track tool doesn't functionally enforce this distinction. You can type sound effect descriptions and speaker labels into a Resolve subtitle track the same way you'd type dialogue, nothing in the software stops you. Whether your output counts as a true closed caption in the accessibility sense depends entirely on what you choose to type and how you format it, not on which menu you used to create the track.
If accessibility compliance is a real requirement for your delivery, whether for a client contract, a broadcast spec, or your own platform's accessibility standards, write your captions as full closed captions from the start: identify speakers when it's ambiguous who's talking, describe meaningful non-dialogue sound, and don't rely on Resolve's tooling to enforce a standard that's really about your text content, not the app's feature set.
Are captions legally required for business and public-facing videos?
Not explicitly, and that gap between "not explicitly required" and "functionally required" is exactly where a lot of confusion sits, so it's worth being precise about what applies to whom.
For state and local government entities specifically, the answer is now yes, with a deadline. The Department of Justice's 2024 final rule under Title II of the ADA sets WCAG 2.1 Level AA as the technical standard for web content, including video, from public entities. Entities serving populations over 50,000 face an April 24, 2026 compliance deadline. (source)
For private businesses, there's no equivalent rule with a specific technical standard attached, but the practical risk is real anyway. Title III of the ADA covers "public accommodations," and courts have increasingly treated business websites, including their video content, as falling under that umbrella. The Department of Justice has stated plainly that people with hearing disabilities may not be able to understand information communicated in a video if the video does not have captions, and its own guidance points businesses toward WCAG 2.1 as the practical standard to follow even without a private-sector rule mirroring the Title II one. (source)
The litigation history backs that up. Netflix settled a lawsuit brought by the National Association of the Deaf in 2015 specifically over missing captions on its streaming content, one of the clearest examples of caption-related ADA litigation actually reaching a resolution rather than staying theoretical. Digital accessibility lawsuits overall haven't been slowing down either.
A word of caution on AI captions specifically: an auto-generated subtitle track is not, by itself, an accessibility-compliant caption track. WCAG's caption criteria expect accuracy, and an unreviewed AI transcript with mangled names, missing punctuation, or dropped words during overlapping dialogue doesn't meet that bar even though a caption track technically exists. If your video needs to be accessibility-compliant, not just captioned, budget the same review pass this guide recommends everywhere else, and treat it as a compliance step rather than an optional polish pass.
What this means practically for anyone exporting captions out of DaVinci Resolve for a business or institutional video:
- Government and public-sector work: treat WCAG 2.1 AA as a hard requirement, not a nice-to-have, and build review time into your schedule accordingly.
- Private business video for the general public: there's no Resolve setting that makes you "compliant," but exporting reviewed, accurate captions as a sidecar SRT or embedded track meaningfully reduces real legal exposure, and it's also just good practice for reach, since a large share of social video is watched with the sound off regardless of any legal question.
- Internal or unpublished project work: the legal exposure mostly evaporates, though the accessibility argument for a deaf or hard-of-hearing team member doesn't.
None of this is legal advice, and if a specific contract or regulation governs your delivery, read that document directly rather than relying on a general guide. But "captions are optional" is a much riskier assumption in 2026 than it would have been a few years ago.
Should you use DaVinci Resolve's built-in tools or a script like AutoSubs?
| If you're... | Use... | Because... |
|---|---|---|
| On Resolve Studio, need a fast first-pass transcript | Create Subtitles from Audio | Built in, no setup, tightly integrated with Track/Caption styling and reading-speed checks |
| On the free version, want AI transcription | AutoSubs | Free, on-device, no Studio purchase required, outputs straight into a native subtitle track |
| Starting from an existing SRT, want branded animated captions | Resolve-OpenCaptions | Converts plain SRT text into styled Text+ clips instead of Resolve's plainer native subtitle look |
| Delivering broadcast 608/708 or SDI-embedded captions | A dedicated broadcast captioning tool, after Resolve | Resolve's own 608/708 support has real container and dual-standard gaps, covered above |
| Captioning Arabic, Hebrew, or another unsupported language | Manual typing, or a third-party title tool built for bidirectional text | Resolve's AI transcription doesn't cover these languages at all |
For most people editing inside Resolve, the built-in subtitle track system is the right default. It's free, it exports every mainstream format, it has readability quality control baked in, and Studio's AI transcription tool handles the tedious first pass if you own the license.
Reach for a third-party option like AutoSubs when you're specifically on the free version and transcription speed matters more than staying inside one app's ecosystem, since it brings AI transcription to Resolve without a Studio purchase. Reach for Resolve-OpenCaptions specifically when you want existing SRT text turned into styled, brand-consistent Text+ captions rather than Resolve's plainer native subtitle track appearance.
Whichever path you pick, the deepest cost in subtitling isn't the software, it's the review pass. AI transcription and even manual typing both produce a first draft that needs a human watching the actual video to confirm it's right. If you're new enough to Resolve that even navigating the Inspector's Track versus Caption tabs feels like a maze, that's a smaller, more specific problem than "learning Resolve" broadly, and it's the kind of question TryUncle answers live, by looking at your actual Resolve window and pointing at the exact control you're stuck on instead of sending you to a ten-minute tutorial for a two-second answer.
Captions aren't a checkbox you tick once and forget. They're a text layer that carries real information, real accessibility weight, and, on most platforms, real reach into viewers who watch with the sound off. Build the habit of reviewing every generated or imported caption against the actual footage before you export, and the software choice underneath that habit matters a lot less than the review itself.
Frequently asked questions
- How do I add subtitles in DaVinci Resolve for free?
- Right-click the track header area in the Edit page timeline and choose Add Subtitle Track, then right-click the new track and choose Add Subtitle to place a caption you type and time by hand in the Inspector. This works in the free version. Only the AI auto-caption tool, Create Subtitles from Audio, is locked to Resolve Studio.
- Does DaVinci Resolve auto-generate captions from audio?
- Yes, through Timeline > Create Subtitles from Audio, a Studio-only feature that has used the DaVinci Neural Engine to transcribe dialog since version 18.5. It detects the spoken language, adds punctuation, and builds a full subtitle track in the time it takes to play through the clip once or twice.
- What languages does DaVinci Resolve's auto-subtitle tool support?
- Danish, Dutch, English, French, German, Italian, Japanese, Korean, Mandarin (Simplified and Traditional), Norwegian, Portuguese, Russian, Spanish, and Swedish, per Blackmagic Design's reference manual. Auto detection is also an option if you don't know which language a clip is in. Arabic and Hebrew aren't supported for automatic transcription.
- How do I export subtitles as an SRT file in DaVinci Resolve?
- On the Edit page, right-click the subtitle track header and choose Export Subtitle, then pick .srt as the file type. Alternatively, open the Deliver page's Subtitle Settings panel, set the export format to a separate file, choose SRT, and add the job to the render queue.
- Why aren't my subtitles showing up in DaVinci Resolve?
- The most common cause is a disabled or muted subtitle track, since Resolve only displays one subtitle track at a time even if several exist. Check the track's enable icon in the timeline header, confirm you're not viewing a different track's version, and make sure the clip actually sits under the playhead.
- Can DaVinci Resolve deliver broadcast-standard closed captions?
- Partially. Resolve Studio supports CEA-608 captions embedded in QuickTime and MXF OP1A files, but it can't embed both 608 and 709 in the same MXF container, and it has no direct output path for analog Line 21 or CEA-708 over SDI. Broadcast delivery specialists often finish captions in a dedicated tool instead.
- How do I add animated, word-by-word subtitles in DaVinci Resolve?
- Open the Effects panel, go to Titles > Subtitles > Animated, and drag one of the five built-in templates, Lollipop, Rotate, Slide In, Statement, or Word Highlight, onto your subtitle track. They sync to whatever text is already in the track, whether you typed it or Create Subtitles from Audio generated it, and you customize font, highlight color, and position in the Inspector.
- Are DaVinci Resolve's AI-generated subtitles accessibility-compliant?
- Not automatically. WCAG's caption criteria expect accurate captions, and an unreviewed AI transcript from Create Subtitles from Audio can still contain wrong names, missing punctuation, or garbled overlapping dialogue. Treat auto-generated subtitles as a first draft that needs a full review pass before you can call the result a compliant caption track.
Sources
- DaVinci Resolve product page (free version)
- DaVinci Resolve Studio product page (price and AI features)
- DaVinci Resolve Reference Manual: Create Subtitles from Audio (Blackmagic Design, mirrored)
- DaVinci Resolve Reference Manual: Subtitles and Closed Captioning Support (Blackmagic Design, mirrored)
- DaVinci Resolve Reference Manual: Exporting, Burning, or Embedding Subtitles During Delivery (Blackmagic Design, mirrored)
- How to Deliver Broadcast CEA-608 and 708 Captions, by Patrick Inhofer (Mixing Light)
- DaVinci Resolve Quick Tip: Creating Subtitles in Version 18.5 (CineD)
- How to Create Auto-Generated Subtitles in DaVinci Resolve Studio 18.5 (MakeUseOf)
- Mastering Animated Subtitles in DaVinci Resolve (Apex Photo Studios)
- Supported subtitle and closed caption files (YouTube Help)
- AutoSubs, on-device subtitle generation for DaVinci Resolve, Premiere, and After Effects (GitHub, tmoroney)
- Resolve-OpenCaptions, open-source Text+ subtitle tool for DaVinci Resolve (GitHub, david-ca6)
- Blackmagic Design: DaVinci Resolve 20 New Features Guide (PDF, Animated subtitle templates)
- Blackmagic Design: DaVinci Resolve What's New page
- Blackmagic Design: DaVinci Resolve Collaboration product page
- Boxx: Multi-User Collaboration Highlights in DaVinci Resolve 18
- Blackmagic Forum: Fix Arabic and the RTL fonts' issue
- Blackmagic Forum: Shortcut key for Next and Prev Subtitle?
- Blackmagic Forum: Subtitle and special characters (encoding)
- ADA.gov: Fact Sheet - New Rule on the Accessibility of Web Content and Mobile Apps Provided by State and Local Governments
- BOIA: Does the ADA Require Captions for Internet Videos?
Learn by doing, not watching
Stop translating tutorials to your timeline.
TryUncle stays beside Resolve on Mac and Windows. When you ask, Uncle sees your screen and points at the exact control you need. No hunting through tabs, timestamps, or mismatched tutorials.
Meet TryUncleKeep reading
 GuidesJul 8, 202639 min read
How to Add Text and Titles in DaVinci Resolve
Every way to add text in DaVinci Resolve: Text, Text+, MultiText, and Fusion Titles, plus subtitles, safe area, fonts, and export, for free and Studio.
 GuidesJul 7, 202632 min read
DaVinci Resolve Export Settings for YouTube (Copy These Exactly)
The exact DaVinci Resolve export settings YouTube recommends: codec, bitrate, resolution, audio, and the Deliver page steps that avoid soft uploads.
 FixesOct 10, 202631 min read
DaVinci Resolve Audio Disappears After Reopening Project? Fix It
Fix DaVinci Resolve audio that disappears after reopening a project. Diagnose missing media, moved drives, bins, proxies, timelines, and playback routing.