
Learn / DaVinci Resolveupdated for DaVinci Resolve 21 (September 2026)
DaVinci Resolve Render Cache Not Updating After Changes: Fix It
Quick answer
If DaVinci Resolve render cache is not updating after changes, switch Playback > Render Cache to None, delete the affected cache, then set Smart or User again and re-cache. For replaced source files, relink or replace the clip, because changing a file outside Resolve may not invalidate the existing cache.
If the picture in DaVinci Resolve stays old after you change a grade, title, Fusion comp, or source file, the cache is usually telling you something useful. It may be serving a different layer than the one you changed. Or Resolve may still be looking at the same source path and the old cached frames have never been invalidated.
I treat this as a diagnosis problem, not a ritual. After seven years of professional, commercial video editing, we have learned that this is one of the recurring cache questions in our 100,000+ member professional video-editing community. Deleting every cache is sometimes right, but it is a poor first question. Identify what changed, turn the cache off for one test, and clear only the demonstrably stale result.
As of September 2026, this guide is written for DaVinci Resolve 21, with the same Render Cache menu logic documented in the Resolve 20 training material. Blackmagic Design's current download page identifies DaVinci Resolve 21 as the current major release, while its support center continues to publish version-specific manuals and updates. The menu names below matter more than the point release, but check Help > About DaVinci Resolve before assuming that a tutorial recorded for Resolve 18 or 19 matches your build.

Why is DaVinci Resolve render cache not updating after changes?
DaVinci Resolve render cache is not updating after changes when the viewer is still reading an old cached result, a different cache layer, optimized media, proxy media, or a source file that Resolve has not truly reloaded. The first diagnostic move is to choose Playback > Render Cache > None and inspect the same frame again.
That one switch gives you a clean fork in the road:
| What changes when Render Cache is set to None | What it means | Next move |
|---|---|---|
| The new grade, title, or effect appears | The render cache was stale or incomplete | Delete the affected cache and rebuild the correct output |
| The old picture remains | The problem is not the render cache alone | Check source reload, proxy or optimized media, node bypass, and viewer state |
| Playback becomes slow but the picture is correct | The cache was doing its job before the change | Rebuild after confirming the cache scope |
| The result changes only after moving the playhead | Resolve or the effect may be holding a stale frame | Clear the local cache, test a different frame, and update Resolve if the behavior persists |
Blackmagic's Beginner's Guide describes three Render Cache modes in the current workflow: Off, Smart, and User. Off attempts to play clips, grades, effects, and titles in real time. Smart automatically caches intensive work that Resolve judges too heavy for real-time playback. User lets you specify which clips are cached. The guide also documents Option-R on macOS and Alt-R on Windows as shortcuts for cycling through the three modes. Those are useful facts, but the shortcut does not itself delete an old cache. It only changes whether Resolve is allowed to use or create one. (source: Blackmagic Design's DaVinci Resolve 20 Beginner's Guide)
The word “cache” also hides several different stores. A source cache can help decode heavy camera media before grading. A node cache can hold expensive Color page operations. A clip output cache can hold the result after the grade. A sequence cache can cover timeline-specific work such as transitions, opacity, and composites. Fusion has its own output choices, and Fusion itself can use a disk cache. If you clear one layer while Resolve is displaying another, nothing appears to improve.
A stale preview is a cache-scope problem until a cache-disabled test proves otherwise.
If you are changing a source file in an external application, the case is different. A forum discussion on the Blackmagic Design site records that replacing a file with another file of the same name may leave the old image in Resolve even after a restart and cache cleanup. That is a source-reload problem with a cache symptom, not proof that the Render Cache menu is broken. (source: Updated cache when changing file in source folder)

How do I fix DaVinci Resolve render cache not updating after changes in 60 seconds?
To fix DaVinci Resolve render cache not updating after changes, disable Render Cache, clear the smallest affected scope, correct the source or cache output setting, and rebuild before turning your whole project upside down. The short procedure below works for a stale grade, title, Fusion effect, transition, or timeline composite.
-
Save the project. If you are in the middle of a delicate grade or a long Fusion setup, use File > Save Project or your normal project backup workflow before clearing anything.
-
Put the playhead on a frame where you can see the old result clearly. Write down what you changed. “I changed the look” is less useful than “I adjusted Node 4 on clip A014,” “I changed the Text+ string,” or “I replaced the PNG at the same path.”
-
Choose Playback > Render Cache > None. On current Mac builds, Option-R cycles the Render Cache mode. On Windows, Alt-R cycles it. Use the menu if you want to see the state instead of relying on a shortcut.
-
Inspect the same frame again. If the new result appears, you have isolated a cache problem. If it does not, skip to the source, proxy, and viewer checks later in this guide.
-
If one or two clips are affected, select those clips in the timeline. Choose Playback > Delete Render Cache > Selected Clips. Blackmagic's training material lists Selected Clips as the targeted cleanup option, alongside Unused and All. The targeted choice is the best first move because it preserves unrelated work and reduces the rebuild area. (source: Blackmagic Design's DaVinci Resolve 20 Beginner's Guide)
-
If the cache is stale across the whole timeline, or if you cannot isolate the affected clips, choose Playback > Delete Render Cache > All. Resolve will regenerate the cache when it is needed. Blackmagic's Colorist Guide says clearing cache does not affect actual media and that a deleted cache is regenerated on demand. (source: Blackmagic Design's DaVinci Resolve 17 Colorist Guide)
-
Return to Playback > Render Cache > Smart for the least manual setup, or User if you want to decide exactly which clip output is cached. If the slow work is a Color page grade, right-click the timeline clip and check Render Cache Color Output. If it is a Fusion composition, check Render Cache Fusion Output.
-
Move the playhead over the affected range and let Resolve render it. A red cache indicator means work remains to be cached; a blue indicator means the section has cached in the older Resolve documentation. Wait for the local indicator to become complete before judging the result. The indicator is a status signal, not a guarantee that the cache represents the layer you intended.
-
Set Render Cache back to None for one final comparison. The cached and uncached images should now match. The playback may differ, because the cache exists to reduce the work required for real-time playback, but the frame should not revert to the old grade or title.
Do not manually delete folders in Finder or File Explorer as your first move. Resolve provides project-aware delete commands, and Blackmagic's documented workflow lets you remove unused, selected, or all cache media without touching the original media. Manual folder deletion can be useful when a cache path is broken or a project will not open, but it removes the evidence you need while you are still diagnosing the problem.
Uncle can point at the cache control and the affected output in your own Resolve project while you work.
What should I check before deleting all render cache?
Before deleting all render cache, check whether the visible problem is limited to one clip, one output type, one timeline, or one source file. The scope tells you whether Selected Clips, a clip-level output reset, a source replacement, or All is the right action.
Use this decision table before clearing anything:
| Symptom | Most likely scope | First test | Preferred cleanup |
|---|---|---|---|
| One graded clip shows the old look | Color output for that clip | Set cache to None and toggle the clip's grade | Delete Selected Clips, then rebuild Color Output |
| A Fusion title ignores a text change | Fusion output or Fusion disk cache | Disable cache and inspect the title | Clear the clip's cache, then rebuild Fusion Output |
| A transition still uses an old frame | Sequence cache | Disable cache around the transition | Delete Selected Clips or clear the local range |
| Every timeline shows old results | Project cache or source reload | Open a second timeline and set cache to None | Delete All only after the test confirms cache involvement |
| A replaced image keeps its old pixels | Source reload plus cached result | Relink or Replace Selected Clip | Clear the affected clip after Resolve recognizes the new source |
| The frame is correct but playback is slow | Missing or incomplete cache | Check cache indicator and disk path | Rebuild only the intensive output |
| The viewer is old only while a node is bypassed | Viewer or node state | Compare Edit and Color pages | Re-enable the node or reset the viewer state |
Blackmagic's older reference manual explains why this distinction matters. Resolve manages source, node, and sequence caches separately. Source caching can reduce the work required to decode difficult media before grading. Node caching holds processor-intensive operations in a Color page node tree. Sequence caching covers timeline-specific effects. The manual also explains that caching the entire clip output can improve Edit page performance but means the clip may need a complete re-cache when any part of the grade changes. (source: DaVinci Resolve 12 Reference Manual, Improving Performance, Proxies, and the Render Cache)
That last distinction explains a common false fix. You change a node, clear a node cache, and expect the Edit page to change. But the Edit page may be consuming a clip output cache that still contains the previous grade. Or you clear the clip output and expect a Fusion disk cache to update. The cache is not one bucket.
Delete the narrowest cache that can contain the changed operation.
This is more than a storage preference. It preserves useful work. In a long documentary, clearing one selected clip can save a large rebuild. In a short social edit, clearing All may be faster than hunting through several stacked adjustment clips. The right choice depends on the shape of the timeline, not on a universal rule.

Why does a color grade change stay invisible after I clear the cache?
A Color page change can stay invisible after a cache clear when the viewer is using clip output, node, source, or timeline data that you did not clear, or when the current clip is not the clip you actually changed. Start by setting Render Cache to None, then confirm the selected clip and the node version before rebuilding.
The Color page gives you several places where a “change” can live. You might alter a serial node, a parallel mixer, a group pre-clip node, a timeline node, a shared node, a clip version, or a color management setting. The cached result may be attached to the clip output, while your current action affects a layer that is not being displayed. If the image changes with cache disabled, the data path is alive and the stale result is downstream.
Try this controlled test:
- Select the exact clip in the Color page thumbnail timeline.
- Note the active clip version and the visible node graph.
- Set Render Cache to None.
- Make a tiny reversible change, such as a small lift adjustment, then undo it.
- Watch whether the viewer responds.
- If it responds only with cache disabled, right-click the clip in the Edit or Color timeline and inspect Render Cache Color Output.
- Clear the selected clip cache, then return to the same frame and wait for the blue cache bar to finish.
If the tiny reversible change does not show even with Render Cache set to None, do not keep deleting cache. Check whether the node is bypassed, whether a different clip version is active, whether a group or timeline node is overriding the result, and whether the viewer is on the intended output. A cache cannot explain a frame that remains old when Resolve is not allowed to read it.
The important setting is often Render Cache Color Output. Blackmagic's training material tells users they can manually flag a clip with that command, and the older reference manual explains that caching the whole Color page output is different from caching only selected processor-intensive nodes. If the Edit page is the place where the old image appears, Color Output is usually the relevant scope because it includes the result of the grade. (source: Blackmagic Design's DaVinci Resolve 20 Beginner's Guide; source: DaVinci Resolve 15 Reference Manual, cache output behavior)
Be careful with versions. A clip version changes which grade is active, but it does not necessarily mean the old version's cache was removed from disk. A copied clip or duplicated timeline can have different cache relationships. A forum thread about Resolve 20 beta work describes reports of render cache loss after copying or duplicating clips and timelines. That is a report about a specific beta-era behavior, not a universal statement about Resolve 21, but it is a reminder to test the exact timeline and build you are using. (source: DaVinci Resolve 20 beta bugs and feature requests)
If the Color page preview updates but the Edit page remains old, the problem is probably output scope. If neither page updates with cache disabled, investigate node state, versions, media, and viewer settings before touching the cache again.

How do I refresh a Fusion title when the render cache is stale?
To refresh a Fusion title when the render cache is stale, disable Render Cache, confirm that the Fusion comp itself displays the new text or animation, clear the clip's cached result, and rebuild with Render Cache Fusion Output enabled. If Fusion still shows the old result with cache disabled, the problem is inside the comp or its input, not the Edit page cache.
Fusion adds another place for old frames to survive. A title can be a Fusion composition on a timeline clip, a Text+ tool, a generator, a compound clip containing Fusion work, or an adjustment clip above several tracks. The command you need depends on the container you selected.
Use this order:
- Select the title or Fusion clip on the Edit page.
- Set Playback > Render Cache > None.
- Open the Fusion page for the same clip and inspect the MediaIn, Text+, Merge, and MediaOut path that feeds the viewer.
- Change a harmless value or edit the text, then confirm the Fusion viewer changes.
- Return to the Edit page and inspect the title at the same timecode.
- If the Edit page updates only with caching off, right-click the clip and enable Render Cache Fusion Output.
- Delete the cache for the selected clip and rebuild.
This procedure separates three possible failures. If the Fusion viewer is old, the comp or its input has not updated. If the Fusion viewer is new but the Edit page is old only with cache enabled, the cached Fusion output is stale. If both viewers are new but the final composite is old, an upper track, compound clip, adjustment layer, or sequence cache may be providing the visible pixels.
Fusion also has a disk-cache concept that is not identical to the Edit page Render Cache. If a tool or composition writes a disk cache, clearing Playback > Delete Render Cache may not remove that tool's own cached frames. Look for the disk-cache controls inside Fusion and clear them only when the comp itself is holding the old result. Do not assume every blue bar in the Edit timeline represents every cache used by a Fusion graph.
The 2026 Resolve 21 New Features Guide lists background rendering for selected computationally intensive operations and places its controls under DaVinci Resolve > Preferences > System > Background Tasks. That background task feature does not turn every preview into a single shared cache, so a paused or active background operation should be diagnosed separately from Render Cache. (source: DaVinci Resolve 21 New Features Guide)
If a title changes in the Inspector but the viewer flashes and returns to the old text, treat that as a possible stale-frame bug or cache interaction. A Blackmagic Design forum report on Resolve 20.2 described ordinary Text title changes appearing only after moving the playhead by one frame. The report is evidence that this symptom has existed in real builds, not proof that your project has the same cause. Try the cache-disabled test, then update to the latest supported build before building a complicated workaround around it. (source: Resolve 20.2 title update report)
Do not re-render a title repeatedly while typing if the cache is configured to catch every change. Disable the cache while shaping text, then rebuild once the words, font, and timing are final. You will avoid producing a series of obsolete frames and make the final cache easier to trust.

What is the difference between Render Cache Color Output and Fusion Output?
Render Cache Color Output caches the result of a clip's Color page processing, while Render Cache Fusion Output caches the result of the clip's Fusion processing. Choose the output that contains the expensive operation you changed; enabling the wrong one can leave the visible result stale even though a cache bar appears.
Here is a practical mapping:
| Change you made | Output to inspect first | Why |
|---|---|---|
| Serial or parallel color node | Render Cache Color Output | The changed pixels are produced in the Color page |
| Color page ResolveFX | Render Cache Color Output or the relevant OFX cache option | The effect is part of the grade or clip processing |
| Text+ or a Fusion node | Render Cache Fusion Output | The changed pixels are produced in the Fusion graph |
| Transition between two clips | Sequence or clip output cache | The visible result depends on the timeline relationship |
| Opacity, composite mode, or superimposition | Sequence cache | The result depends on multiple timeline layers |
| Source media that was replaced | Source reload plus the affected output cache | The cached frames may still point at the old source result |
The exact menu labels can vary by page and version, but the principle is stable: cache the output you need to play back. The Resolve 15 manual describes Fusion Output controls with Auto, On, and Off states. It also describes sequence caching for superimposed clips, non-Normal composite modes, opacity, speed effects, and transitions. (source: DaVinci Resolve 15 Reference Manual)
Auto is not the same as On. Auto lets Smart or User mode decide whether the clip qualifies under the project's caching rules. On forces that clip into the cache in Smart or User mode. Off excludes the clip. If you are diagnosing a known slow Fusion title, User mode plus On is a clearer experiment than Smart mode plus Auto because fewer decisions are hidden.
The same applies to Color Output. A clip can have a cached node or OFX operation without having the complete graded output cached for the Edit page. That may be exactly what you want during grading, because you can continue changing downstream nodes. But it may not solve an Edit page playback problem that needs the full clip output.
A blue cache bar proves that something rendered, not that the right output rendered.
When in doubt, turn cache off and compare the Color page, Fusion page, and Edit page in that order. Find the first page where the new result disappears. The cache or source problem is usually at that boundary.
Should I use Smart, User, or None while troubleshooting?
Use None to test whether the cache causes the stale picture, Smart as the default rebuilding mode, and User when you need deterministic control over the exact clips and outputs that render. Switching modes alone is a diagnostic step, not a full repair.
| Mode | What it does | Best use in this repair |
|---|---|---|
| None | Does not create or use Render Cache for the timeline | Prove whether the old image comes from Render Cache |
| Smart | Automatically caches intensive clips and effects | Rebuild a normal project with minimal manual setup |
| User | Lets you decide what to cache, with project options for automatic categories | Isolate a Color Output, Fusion Output, transition, or title |
Blackmagic's current training guide says Smart is the easiest mode for many users, while User lets you manually specify timeline clips and can automatically cache Fusion titles and effects through Project Settings. That is a workflow description, not a performance promise. Your hardware, media format, timeline resolution, effect stack, and cache drive determine whether a cached clip plays in real time. (source: Blackmagic Design's DaVinci Resolve 20 Beginner's Guide)
For troubleshooting, use a repeatable sequence:
- None, then inspect the frame.
- Selected Clips cleanup if the cache is guilty.
- User, then explicitly enable the output you need.
- Rebuild one short range.
- Compare the same range with None and User.
- Return to Smart if you do not need manual control.
This sequence prevents a common mistake: changing from Smart to User and assuming a cache reset occurred. The old cached files can still exist. User mode may simply decide to use them or create additional cached frames according to the new flags.
If Smart is not caching a clip you expect, check whether the clip is set to Auto, On, or Off. In the documented workflow, right-clicking a clip exposes Render Cache Clip Source, Render Cache Fusion Output, and other cache controls. A clip marked Off can remain uncached even when the global mode is Smart or User. (source: Resolve 17 Colorist Guide)
If User mode is not caching anything, check the global mode, the per-clip setting, the selected cache output, and whether the project is collaborative. An older Blackmagic support answer specifically advised checking the first Media Storage path, setting the clip source to On, and setting Render Cache to User when diagnosing a clip that would not cache. That advice is still a sensible diagnostic pattern, although exact collaboration behavior can differ by version. (source: Resolve not caching, Dwaine Maggart, Blackmagic Design Support Forum)

How do I read the red, blue, and missing cache indicators?
Use the timeline cache indicator as a progress clue, not as proof that the image is current. In the traditional Resolve workflow, red indicates frames that need caching and blue indicates frames that have been cached; no colored line can mean that the output is not selected for caching, the cache is disabled, or the clip has not reached that state.
A cache line can mislead you in several ways:
- The line may belong to the selected clip while the visible image comes from an upper track.
- The line may show Color Output while the stale result is a Fusion Output.
- The line may be complete for the frames you played, but the playhead may now be outside that range.
- A partial blue line can represent cached frames before a changed edit point, while new frames after the edit still need work.
- A clip can look cached while its source media is offline, replaced, or being read through a different proxy path.
The most reliable test is still temporal and visual. Note the timecode. Set Render Cache to None. Move away, return to the exact timecode, and compare the image. Then set Smart or User, wait for the same range to finish, and compare again. If the frame changes when caching is disabled, keep investigating cache scope. If it does not, the indicator is not your root cause.
Do not judge a cache while Resolve is still rendering the changed section. In a long clip, the first few frames may be new and later frames may still be old. A title, transition, or effect that crosses a cut can also need a larger sequence range than the clip you initially selected.
The older reference material describes background caching after user inactivity and explains that the project cache persists when the project is closed and reopened. That persistence is useful, but it also explains why an old result can greet you the next morning. Closing the project is not the same as invalidating every cached frame. (source: DaVinci Resolve 11 Reference Manual, caching behavior)
If the bar never turns blue, stop assuming the problem is “not updating.” A cache that never starts points to a missing path, an excluded clip, unsupported or unavailable storage, collaboration limitations in that build, or an operation that Resolve does not place in that cache category. A cache that turns blue but shows old pixels points to stale data, source replacement, or the wrong output scope.
Where does DaVinci Resolve store render cache, and can a full drive stop updates?
DaVinci Resolve stores render cache in the cache files location configured in Project Settings, with the default location tied to the first media storage volume in Preferences. A missing, unwritable, disconnected, slow, or full cache volume can prevent new frames from replacing old ones or prevent the cache from completing.
Open the project and check the path rather than guessing from the operating system:
- Open Project Settings.
- Go to Master Settings.
- Find Working Folders or the cache files location.
- Note the path shown for cache media.
- Open Preferences > System > Media Storage and inspect the first storage path.
- Confirm that the volume is connected and that your user account can write to it.
- Confirm that the path has enough free space for the cache format and timeline you are rebuilding.
The labels have shifted across Resolve versions, but the underlying idea is documented consistently. Blackmagic's Colorist Guide says the cache folder is normally placed on the first media storage location and can be redirected in Project Settings. It recommends considering a different drive from the one containing the application and project files when that improves playback. (source: Blackmagic Design's DaVinci Resolve 17 Colorist Guide)
Dwaine Maggart, writing as Blackmagic Design DaVinci Support, gave a compact answer to a user whose clips would not cache: “Make sure Resolve Preferences - System - Media Storage has a valid first path entered.” That is the entire quote. It is short because the check is short, but it catches a surprising class of failures. (source: Resolve not caching, Dwaine Maggart, Blackmagic Design Support Forum)
The first media storage path is not merely a library convenience. If the cache points to an external SSD that is asleep, unmounted, or assigned a different drive letter on Windows, Resolve may not be able to write the new frames. On macOS, check the volume name and permissions. On Windows, check the current drive letter and whether the folder is writable. If you move the cache, use a path with a simple, stable connection while testing.
Do not turn a storage diagnosis into a speculative speed test. You do not need to know the drive's theoretical sequential speed to learn whether the cache is working. A valid path, a writable folder, visible free space, and a cache indicator that progresses are the useful facts. If the cache completes but the image remains old, storage is probably not the explanation.
Cached media is not the original footage. Blackmagic's Colorist Guide says clearing the cache does not delete actual media and that deleted cache can be regenerated. That makes Playback > Delete Render Cache a safer repair tool than manually deleting source folders, but it does not make a full cache wipe free. You may need to wait for the timeline to rebuild before playback returns to its earlier state. (source: Blackmagic Design's DaVinci Resolve 17 Colorist Guide)
If your cache path is on a network or shared volume, test a small local project on a local writable disk. This is a diagnostic comparison, not a universal recommendation to move production media. It separates a project or cache-path issue from a storage transport issue without requiring you to change every setting at once.

Is the old picture really Render Cache, or is it optimized media or proxy media?
The old picture may not be Render Cache at all. Optimized media, proxy media, Fusion disk cache, a source file that failed to reload, and a viewer or node state can each produce a result that looks like a stale render cache.
Use a five-way isolation test:
| Test | What to change | What the result tells you |
|---|---|---|
| Render Cache | Set Playback > Render Cache to None | Whether the timeline cache is serving the old frame |
| Proxy handling | Temporarily disable proxy use for the test | Whether a proxy file contains the old image or settings |
| Optimized media | Temporarily choose the original media path where the project allows it | Whether optimized media is the source of the visible difference |
| Fusion disk cache | Clear or bypass the relevant Fusion disk cache | Whether the comp is holding its own cached frames |
| Source reload | Relink or replace the changed clip deliberately | Whether Resolve has recognized the new source file |
Do one test at a time. If you disable Render Cache and proxy use together, you learn that one of them is involved, but not which one. If the result is valuable, restore the original setting before starting the next test so the project does not drift while you diagnose it.
Optimized media is designed to make editing easier with lighter playback media. Render Cache is designed to store processed timeline output. They may share a storage area, but they answer different questions. A cache cleanup does not necessarily remove optimized media. The Blackmagic support forum's explanation of the current workflow lists separate commands for Delete Optimized Media and Delete Render Cache, and distinguishes cached media from optimized media. (source: Optimized Media, Blackmagic Design Support Forum)
Proxy media creates another trap. You change a source clip, but Resolve is still using a proxy generated before the change. Or you change a proxy workflow setting and inspect a frame that was already cached from the proxy. For a source-replacement diagnosis, temporarily force the original media path, confirm the new source appears, then decide whether to regenerate or reconnect proxies. Do not use a proxy test to judge Color page accuracy if the proxy does not contain the same image data.
The same logic applies to audio. If your complaint is that an audio change is missing while the video looks current, do not clear a video Color Output cache and expect it to solve the problem. Check audio clip state, Fairlight processing, and any cached Fusion or compound container involved in the visible result. A video cache and an audio path are not interchangeable.
The media file itself may also be the problem. An external application can overwrite a file while keeping its name and path. Resolve may keep the media pool item and the cached result because the identity it sees has not changed in the way you expect. Relink Media, Replace Selected Clip, or a deliberate re-import gives Resolve a clear instruction. Then clear the affected cache.
Turning off Render Cache is a test, not a promise that every other preview source is gone.
When the frame is still wrong with Render Cache set to None, inspect proxy handling and optimized media next. When the frame becomes correct with None, put those other sources back and check them separately. You are trying to locate the first stale layer, not merely produce a new picture by accident.
Why does replacing a source file with the same name leave the old image?
Replacing a source file with the same name and path can leave the old image because the cached result and Resolve's media reference may not be invalidated by the external file change. Treat the source as a new media state: confirm the file, make Resolve recognize it, then rebuild the affected output.
This situation often looks like a cache bug because the Media Pool thumbnail, Fusion input, timeline viewer, or render result keeps showing the previous image. Restarting Resolve may update one visible thumbnail while leaving another cached or referenced result untouched. Repeatedly toggling Smart, User, and None may appear to help because it changes when Resolve re-reads data, but it is not a reliable source replacement workflow.
The safe sequence is:
- Keep a copy of the new source and the old source until the replacement is verified.
- Confirm that the external application finished writing the new file.
- In Resolve, inspect the clip's metadata and duration rather than trusting only the filename.
- Use Relink Media or Replace Selected Clip when you need an explicit source change.
- Confirm the new pixels with Render Cache set to None.
- Clear Selected Clips for the affected timeline clip.
- Rebuild Color Output, Fusion Output, or sequence cache as appropriate.
If the new file has a different duration, frame rate, resolution, or audio layout, expect more than a visual refresh. The timeline may conform, crop, or hold frames differently. If the new file is merely a revised image with the same dimensions, the replacement may look simple, but the cached result can still be old.
A Blackmagic Design forum thread documents this exact family of complaints: a user replaced an image with another image of the same name, cleared cache, disabled several media modes, and still saw old pixels. The thread includes workarounds involving Replace Selected Clip and clearing cache. Because it is a user report and not a current product guarantee, use it as a diagnostic clue rather than a promise that one workaround fixes every build. (source: Updated cache when changing file in source folder)
The source timestamp question deserves care. A timestamp change may help software notice that a file changed, but you should not rely on a timestamp touch as your production workflow. It can create a second problem if a file is still being copied or written. A deliberate relink or replacement is easier to explain, repeat, and undo.
If the old image remains after a deliberate replacement and cache-disabled test, check for a compound clip, Fusion MediaIn, nested timeline, or duplicated media pool item. You may have changed one source while the timeline uses another item with a similar name. Search by clip name and inspect the file path. A visible name is not enough evidence that the timeline has the media item you think it has.
The rule is especially important for generated graphics, screen recordings, image sequences, and renders from another application. They change outside Resolve by design. Cache invalidation depends on the handoff being clear.

Can timeline edits make the cache look stale even when the grade is current?
Timeline edits can make a cache look stale when the cached result belongs to an earlier clip position, source range, transition, or composite relationship. A grade may be current while a sequence-level effect still reflects the old edit structure.
Consider a simple two-clip edit. You grade clip A, cache its Color Output, and then trim the cut between A and B. The grade on A may still be current, but a transition, opacity blend, retime, or composite that spans the edit may need sequence-level work. If the old frame appears only near the cut, clear the affected range or Selected Clips and inspect the transition rather than blaming the grade cache.
Timeline-specific changes include:
- Moving a clip earlier or later.
- Extending or shortening a clip at an edit point.
- Changing a transition's duration or type.
- Adding or removing an adjustment clip.
- Changing opacity or composite mode.
- Changing speed or retime behavior.
- Moving a title or Fusion clip to another track.
- Changing the timeline resolution or output settings.
- Duplicating a timeline or copying a cached clip.
The older Resolve reference manual describes sequence caching as a separate mechanism for timeline-specific effects such as transitions, opacity adjustments, and composite mode superimpositions. That separation is why a clean Color page result can coexist with an old Edit page composite. (source: DaVinci Resolve 12 Reference Manual)
When a timeline change is involved, test a range rather than one isolated frame. Place the playhead five seconds before the edit, play through the cut, and watch where the image first becomes wrong. The first wrong frame points to the cache boundary. If the old result starts exactly when a transition begins, inspect the transition and sequence cache. If it begins at the clip start, inspect the clip's source or output cache.
Adjustment clips deserve special attention. A grade or effect on an adjustment clip sits above the media below it. Clearing the underlying clip cache does not necessarily remove the adjustment result. Select the adjustment clip itself, test with the cache off, and clear the cache for the selection that owns the effect. If the adjustment spans a long section, a local edit may still require a longer rebuild range.
Compound clips and nested timelines can hide the same issue. A title may be cached inside a compound clip while the outer timeline shows the compound result. Opening the compound and testing it with Render Cache set to None tells you whether the stale frame is inside the container. If the compound is current but the outer timeline is old, clear the outer clip or sequence result.
Changing timeline resolution can also invalidate a large amount of work. A cache frame created for one timeline size cannot be treated as the same output when the frame dimensions or scaling context changes. If your cache disappeared after changing resolution, that may be the correct behavior. Rebuild after confirming the new project settings.
Do not confuse an incomplete rebuild with a broken update. After an edit, the old cached frames may remain useful before the changed point while the new frames are still rendered. Wait for the exact affected range, then compare. If the entire range stays old after completion, use the targeted delete command.

Why is the viewer still old when Render Cache is set to None?
If the viewer is still old with Render Cache set to None, the cause is probably not the timeline Render Cache. Check the source, proxy and optimized media choice, node or clip bypass, active version, compound container, viewer output, and whether you are looking at the intended timeline.
Use this order because it moves from the most local explanation to the broader one:
- Confirm the playhead timecode and selected timeline.
- Confirm that the clip under the playhead is the clip you changed.
- Confirm that the source file path and frame are correct in the Media Pool.
- Check proxy and optimized media handling.
- Check node bypass, clip bypass, group nodes, timeline nodes, and active versions.
- Check whether a compound clip, nested timeline, adjustment clip, or upper track provides the visible pixels.
- Check the viewer output and any external video output path.
- Only after those checks, return to cache settings.
A stale viewer can be a selection error. Resolve has multiple timelines, source and timeline viewers, and pages that can show different contexts. You may change the Color page clip while the Edit page playhead is parked over another instance of the source. You may also change a media pool clip while the timeline contains a compound version.
A node bypass can look like caching because the picture does not respond to node edits. In the Color page, check the node's bypass state and the clip or timeline bypass. A disabled node is not a cached node. Likewise, a different clip version can show a prior look without any cache involved.
The viewer itself can add confusion. Compare the same frame in the Color page and Edit page. If the Color page is current but the Edit page is old, inspect the clip output, Fusion output, adjustment layers, and sequence cache. If both pages are old but the Media Pool source is new, inspect the grade path and active clip. If the source is old, stop clearing cache and fix media recognition.
One support forum report describes a Color page session where the output stopped reflecting grading changes until the user switched Render Cache to None. That report is useful because it matches the symptom, but it comes from Resolve 18.1 and does not establish that the same bug remains in Resolve 21. Use current builds and reproducible tests when deciding whether you have a version-specific defect. (source: 18.1 not updating on the color page)
If the issue survives a cache-disabled test in a brand-new test project using a known source clip, collect the version, operating system, GPU mode, source codec, steps to reproduce, and a short screen recording before asking for support. Blackmagic's support center directs free-version technical questions to its community forums, while its broader support pages provide current downloads and documentation. (source: Blackmagic Design Support Center)
This is the point where a clean reproduction matters more than another delete command. A cache can be regenerated. A vague bug report cannot be debugged efficiently.

Should I use optimized media instead of Render Cache to solve this?
Use optimized media or proxy media when the bottleneck is source decoding or editing bandwidth, and use Render Cache when the bottleneck is processed effects, grades, Fusion work, or timeline composites. Switching to optimized media will not repair a stale Render Cache result by itself.
Here is the decision:
| Problem | Better first tool | Reason |
|---|---|---|
| Highly compressed camera files decode slowly | Optimized media or proxies | The source representation is the bottleneck |
| Heavy temporal noise reduction or complex Color page work | Render Cache Color Output | Processed pixels are the bottleneck |
| Slow Fusion title or composite | Render Cache Fusion Output or Fusion disk cache | The Fusion graph is the bottleneck |
| Slow transitions and stacked composites | Sequence or clip output caching | The timeline relationship is the bottleneck |
| Media is being replaced outside Resolve | Relink or Replace Selected Clip | Media identity is the bottleneck |
| Old frame remains after a source change | Source repair, then cache cleanup | The cache is downstream of a stale source reference |
Blackmagic's Colorist Guide says optimized media and render cache have different jobs and recommends render cache for grading because proxies do not provide an accurate representation of the image when colors are graded or qualifiers are selected. That is why a proxy workflow can make playback smooth while hiding the exact problem you are trying to evaluate. (source: Blackmagic Design's DaVinci Resolve 17 Colorist Guide)
Use original media for a final color judgment whenever your workflow requires it. A lower-resolution or differently decoded proxy can change how an effect responds. The fact that a proxy plays smoothly does not prove that the grade or cache is correct.
If the cache is correct but playback is still poor, you may have a performance problem rather than a stale-cache problem. In that case, identify whether the limitation is GPU processing, CPU decoding, storage throughput, timeline resolution, effect complexity, or a combination. The relevant next read in this cluster is DaVinci Resolve high GPU usage but low FPS, which addresses the separate case where the system is working hard but playback still drops frames.
If the output file is slow to create, do not confuse Deliver page rendering with timeline Render Cache. The Deliver page can use cached images under some settings, but an export can still require work for formats, scaling, audio, color management, and other output steps. For that separate question, see DaVinci Resolve export takes forever and how to speed it up.
How do I prevent DaVinci Resolve render cache from becoming stale again?
Prevent stale cache by separating source revisions from timeline cache, editing with the cache disabled while making rapid changes, using explicit output flags for slow effects, and rebuilding only after the creative change is stable.
These habits cost less time than repeated full wipes:
- Use versioned source filenames for externally generated graphics and renders when practical.
- Relink or replace source media explicitly after an external change.
- Use None while typing titles, adjusting a fast grade, or changing a Fusion comp repeatedly.
- Use Smart for normal playback and User for a known slow clip that needs predictable output caching.
- Select Render Cache Color Output for a Color page bottleneck and Fusion Output for a Fusion bottleneck.
- Keep the cache files location on a stable, writable volume.
- Avoid changing timeline resolution during a rebuild unless the change is intentional.
- Let the affected range finish rendering before deciding that the cache is stale.
- Keep proxies, optimized media, and Render Cache conceptually separate in your troubleshooting notes.
- Record the Resolve version when a refresh bug appears.
The best prevention rule is to make the cache disposable in your process. It should accelerate playback, not become the only place you trust to confirm whether a creative change happened. Inspect the uncached result during active work, then let cache return when you need real-time playback.
If you work on long projects, do not let cache management become a superstition. A full cache is not automatically healthier than a small one. An empty cache is not automatically cleaner if the source path is wrong. The goal is a reproducible relationship between source, effect, timeline, and preview.
The official Blackmagic training catalog includes a DaVinci Resolve 20 Beginner's Guide, Editor's Guide, Colorist Guide, and Visual Effects Guide. Those are useful when you need to understand the underlying page or effect rather than merely clear a file. The official training site is a fair starting point for learning the application, while a contextual assistant can help when the control in your own project does not match the lesson. (source: Blackmagic Design official DaVinci Resolve training)
TryUncle is the on-screen assistant for DaVinci Resolve on Mac and Windows; ask in plain words and Uncle points at the exact control on your screen. If you are stuck in a real project and want a live pointer instead of another generic tutorial, check TryUncle for the current rate.
Is this a Resolve bug, or am I using the wrong cache layer?
It is a Resolve bug only after you reproduce the stale result with the cache disabled or in a clean project and rule out source, proxy, viewer, output, and storage state. Most cases are a wrong layer or a source replacement that never became a new media state.
Use this evidence standard:
| Evidence | Strong conclusion |
|---|---|
| New frame appears with Render Cache set to None | Cache data or cache scope is involved |
| New frame stays absent with Render Cache set to None | Look beyond Render Cache |
| Relink or Replace Selected Clip fixes the image | Source recognition was involved |
| Selected Clips cleanup fixes only one timeline clip | Local cached output was stale |
| All cleanup fixes many timelines | Broad project cache state was involved |
| A clean test project fails on the same current build | A reproducible application issue is plausible |
| A move of the playhead fixes only one frame | Viewer refresh or version-specific UI behavior is plausible |
The evidence does not need to be dramatic. A small project with one clip, one change, and one output is better than a 90-minute timeline with five possible caches. Save the original before testing, note the build, and keep the steps short enough that someone else can repeat them.
If you report the issue, include the exact Resolve version, operating system, free or Studio edition, source media type, timeline resolution, cache mode, output setting, cache path, and whether the frame changes with Render Cache set to None. Include whether optimized media, proxies, Fusion disk cache, collaboration, or an external source replacement is involved. These details narrow the search.
Do not claim that a forum symptom is a current defect without checking the build. The Blackmagic Design forums contain useful reports from editors and support staff, but their version labels matter. A report from Resolve 18 can explain why your symptom sounds familiar without proving that the same behavior exists in Resolve 21.
What should I do right now?
Do this now: set Playback > Render Cache > None, inspect the exact frame, and decide which of the two branches you are on. If the new change appears, delete Selected Clips and rebuild the correct Color Output, Fusion Output, or sequence result. If the old change remains, stop clearing cache and check the source, proxy, optimized media, active version, and viewer path.
For the common case, the whole repair is:
- Cache None.
- Compare the frame.
- Selected Clips cleanup.
- Fix source replacement if the file changed outside Resolve.
- Enable the output that contains the slow work.
- Rebuild the affected range.
- Compare with cache disabled once more.
That sequence solves the ordinary stale-cache problem without destroying useful work. It also tells you when you are dealing with something else. If the cache is not the cause, the next useful action is not another delete command. It is a smaller reproduction.
DaVinci Resolve render cache should accelerate a correct image, never decide which image is correct.
The best fix is the one that restores a clear chain from source media to timeline result. Once that chain is clear, the cache becomes what it was meant to be: disposable speed.
Frequently asked questions
- Why is DaVinci Resolve render cache not updating after changes?
- The usual reason is that the visible result is coming from a different cache layer, optimized media, proxy media, or a source file that changed outside Resolve. Set Render Cache to None, clear the affected cache, confirm the source, then rebuild with the correct clip output enabled.
- How do I force DaVinci Resolve to update render cache?
- Choose Playback > Render Cache > None, choose Playback > Delete Render Cache > Selected Clips or All, then return to Smart or User mode and play the affected range until the cache rebuilds.
- Does changing a source file invalidate DaVinci Resolve render cache?
- Not reliably in every source-replacement workflow. If a file is changed outside Resolve but keeps the same name and path, use a deliberate relink or Replace Selected Clip workflow, then clear the affected cache before rebuilding.
- What is the difference between Render Cache Color Output and Fusion Output?
- Render Cache Color Output caches the clip through the Color page grade, while Render Cache Fusion Output targets the Fusion result. Choose the output that contains the slow effect you changed, and clear that clip's cache when the preview remains stale.
- Should I use Smart or User render cache in DaVinci Resolve?
- Smart is the better first choice because Resolve selects intensive work automatically. User is better when you need to mark specific clips or outputs yourself, especially while diagnosing which cache layer is stale.
Sources
- DaVinci Resolve Download and current version information, Blackmagic Design
- DaVinci Resolve Support Center, Blackmagic Design
- DaVinci Resolve 20 Beginner's Guide, Blackmagic Design
- DaVinci Resolve 17 Colorist Guide, Blackmagic Design
- DaVinci Resolve 11 Reference Manual, caching behavior
- DaVinci Resolve 12 Reference Manual, Blackmagic Design
- DaVinci Resolve 21 New Features Guide, Blackmagic Design
- Resolve not caching, Dwaine Maggart, Blackmagic Design Support Forum
- Resolve 18 automatically reloading footage, Blackmagic Design Support Forum
- Updated cache when changing file in source folder, Blackmagic Design Support Forum
- 18.1 not updating on the color page, Blackmagic Design Support Forum
- DaVinci Resolve 20 Beta 4 bugs and feature requests, Blackmagic Design Support Forum
- Optimized Media, Blackmagic Design Support Forum
- Official DaVinci Resolve training, Blackmagic Design
Learn by doing, not watching
Stop translating tutorials to your timeline.
TryUncle stays beside Resolve on Mac and Windows. When you ask, Uncle sees your screen and points at the exact control you need. No hunting through tabs, timestamps, or mismatched tutorials.
Meet TryUncleKeep reading
 GuidesJul 24, 202637 min read
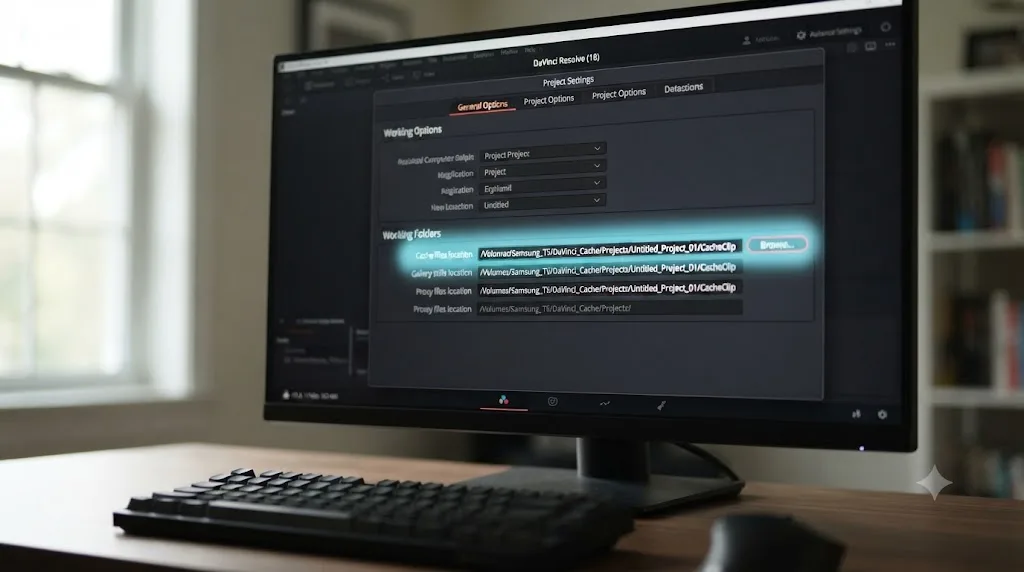
Where to Find DaVinci Resolve Cache Files on Mac and Windows
DaVinci Resolve's cache isn't at one fixed path. Here's exactly where to find it on Mac and Windows, how to change it, and what's safe to delete.
 FixesJul 19, 202627 min read
DaVinci Resolve High GPU Usage but Low FPS: The Real Fix
GPU pegged near 100% but DaVinci Resolve still stutters? It's compute-bound work, a decode bottleneck, VRAM pressure, or thermal throttling. Here's how to tell which.
 FixesJul 20, 202625 min read
DaVinci Resolve Export Takes Forever? How to Speed It Up
A DaVinci Resolve export that takes forever usually comes down to one of six fixes: render speed, background load, encoding, storage, cache, or bitrate.